Overview
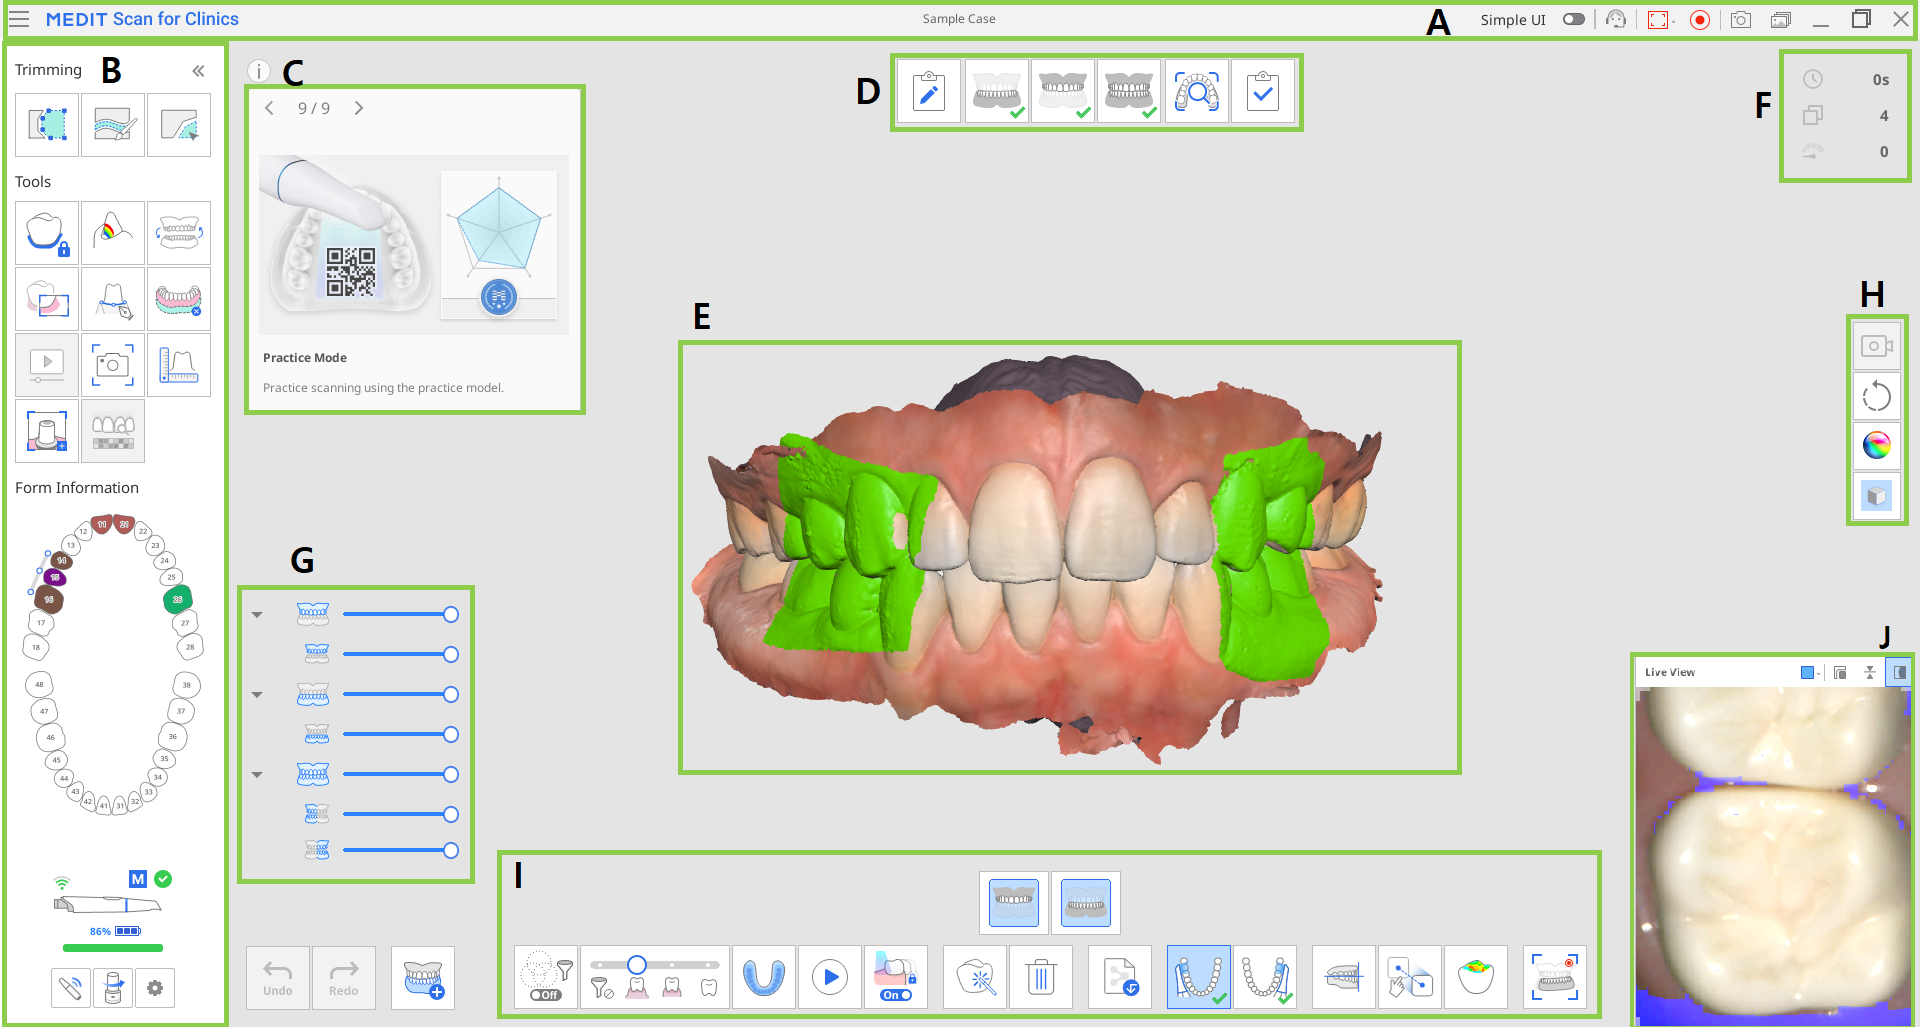
A | Title Bar |
B | Main Toolbar |
C | Information Box |
D | Stages (Workflow) |
E | Model View |
F | Scan Information |
G | Data Tree |
H | Side Toolbar |
I | Scan Stage Toolbar |
J | Live View |
🔎Note
The title bar may look different on macOS, and the image can appear in different sizes according to the screen resolution.
Title Bar
The title bar consists of the following options.
| Menu | Provide basic program functions such as Save, Settings, User Guide, and About. |
| Simple UI | A toggle button to switch to the simple user interface. |
| Submit Support Request | Land on a Medit Help Center page to submit a support request. |
| Select Video Record Area | Select which area of the screen to record the video. |
| Start/Stop Video Recording | Start or stop video capturing. |
| Screenshot | Capture the entire screen or only the 3D data display area of the scanning software. |
| Screen Capture Image Manager | Manage captured images. |


Clicking the "Menu" icon will show the following options:
| Save | Save all changes in the current case. |
| Settings | See options for environment settings, such as scan options. |
| User Guide | Open the user guide. |
| About | Provide detailed information about the software program, scanner, and company. |


Main Toolbar
Please refer to Main Toolbar Tools for information on how to use the tools in the Main Toolbar.
Form Information
Form Information registered from Medit Link provides an overview of the teeth that need treatment.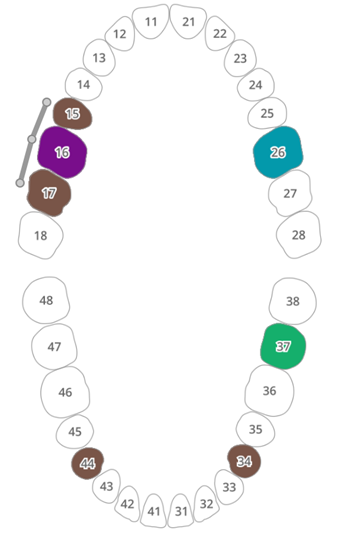
Info Box
Scanning and editing processes are accompanied by short explanations and visual aids to explain major functions and introduce the tools that can be useful at this stage.
For general scan stages, the information is displayed randomly to expose users to various functions.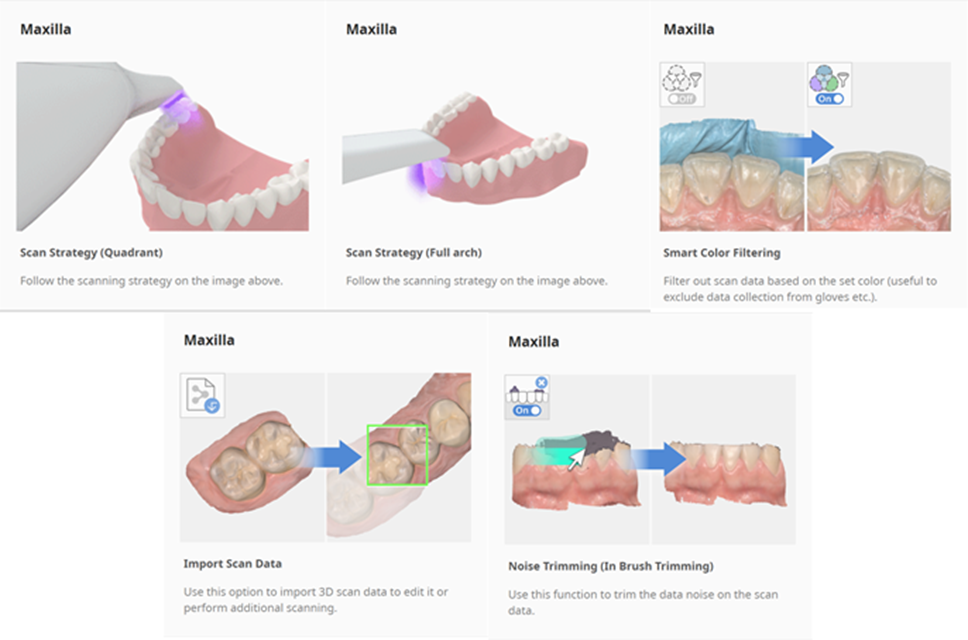
Scan Stages
Please refer to Stage Management for more information on how to set the scanning workflow.
Model View
The scan data corresponding to the selected stage in the case is shown in the 3D data display area. You can also view the data acquired in the area in real-time while scanning.
Scan Information
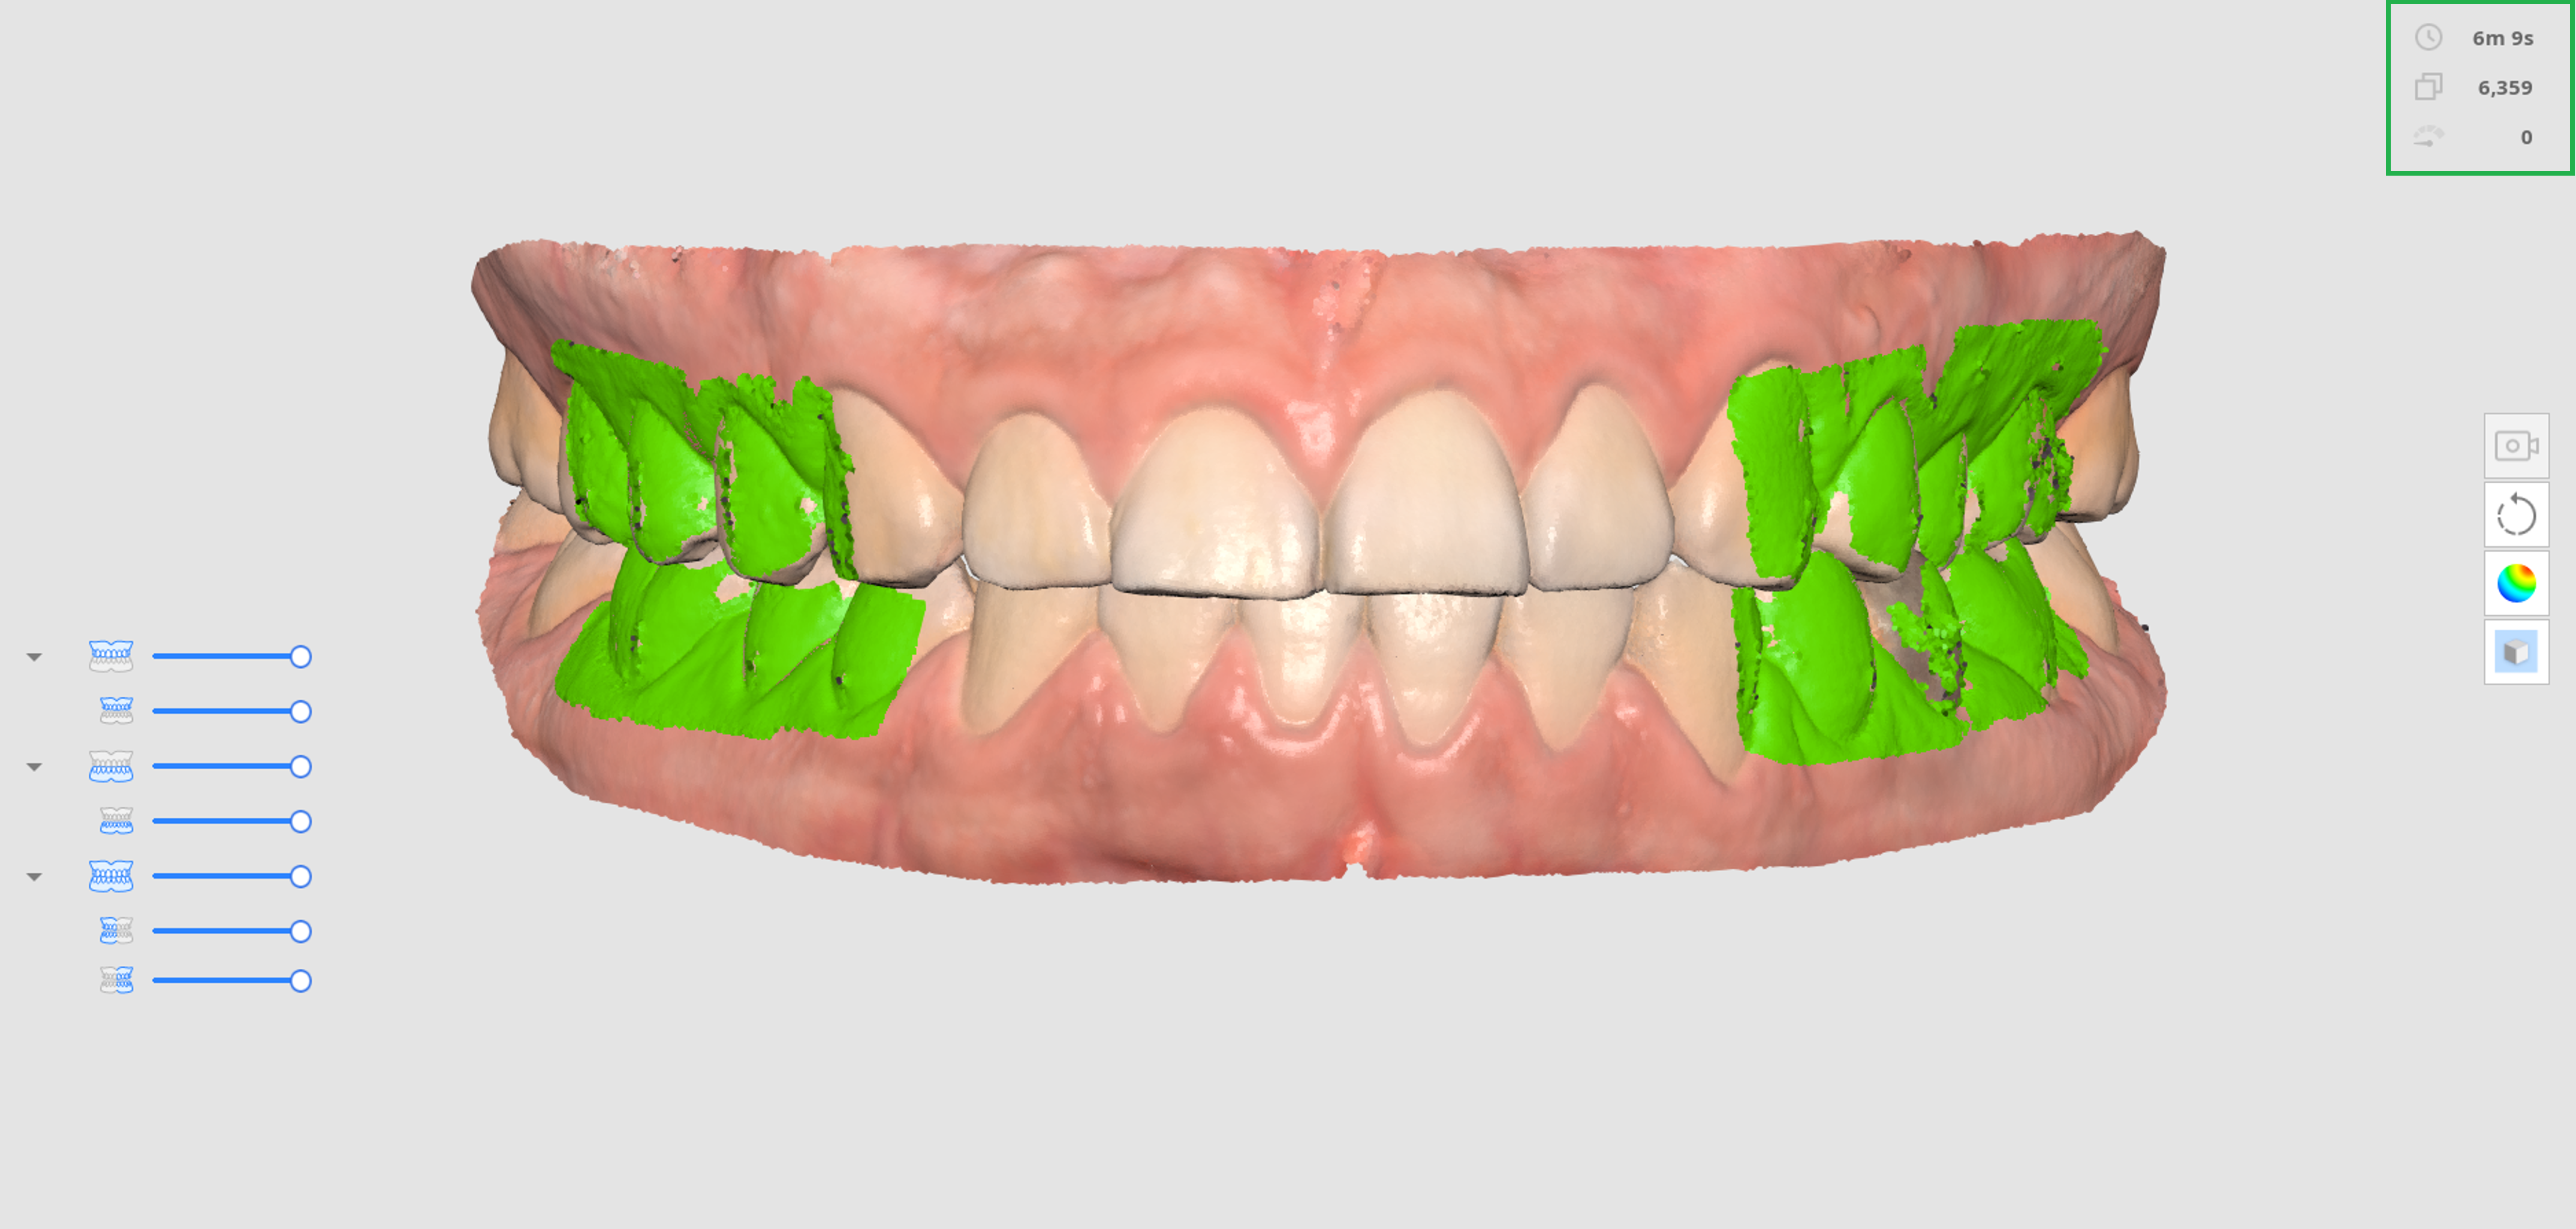
| Scan Time | Show the time taken to scan for each scan stage and all scan stages. |
| Number of Frames | Show the number of images taken during scanning for each scan stage and all scan stages. |
| Scan Speed | Show the current scan speed. |


Data Tree
The data tree at the overview stage allows controlling the data display options.
Right-click on the data tree to show the following options:
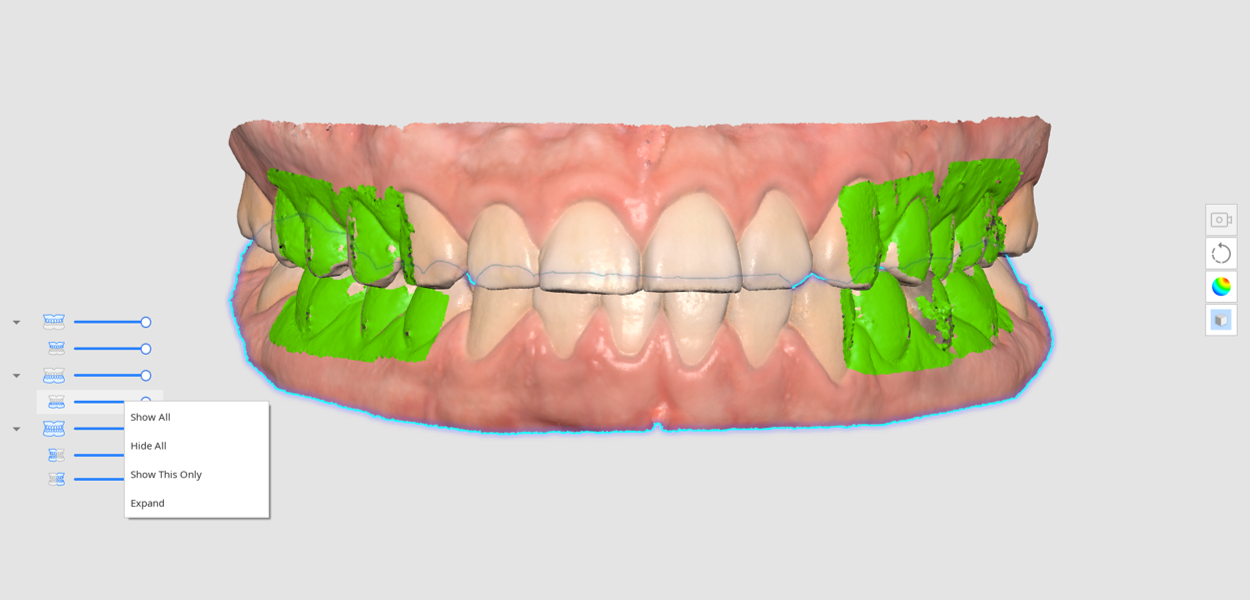
Show All
Hide All
Show This Only
Expand/Collapse
Use the slider to control the opacity of each data.
Hovering over the icon of each data will highlight the corresponding area. You can easily differentiate and examine the data you want to inspect.
Side Toolbar
Please refer to Side Toolbar Tools for more information about tools on the Side Toolbar.
Scan Stage Toolbar
Please refer to Scan Stage Tools for more information about using tools that appear at the bottom of the screen for each stage.
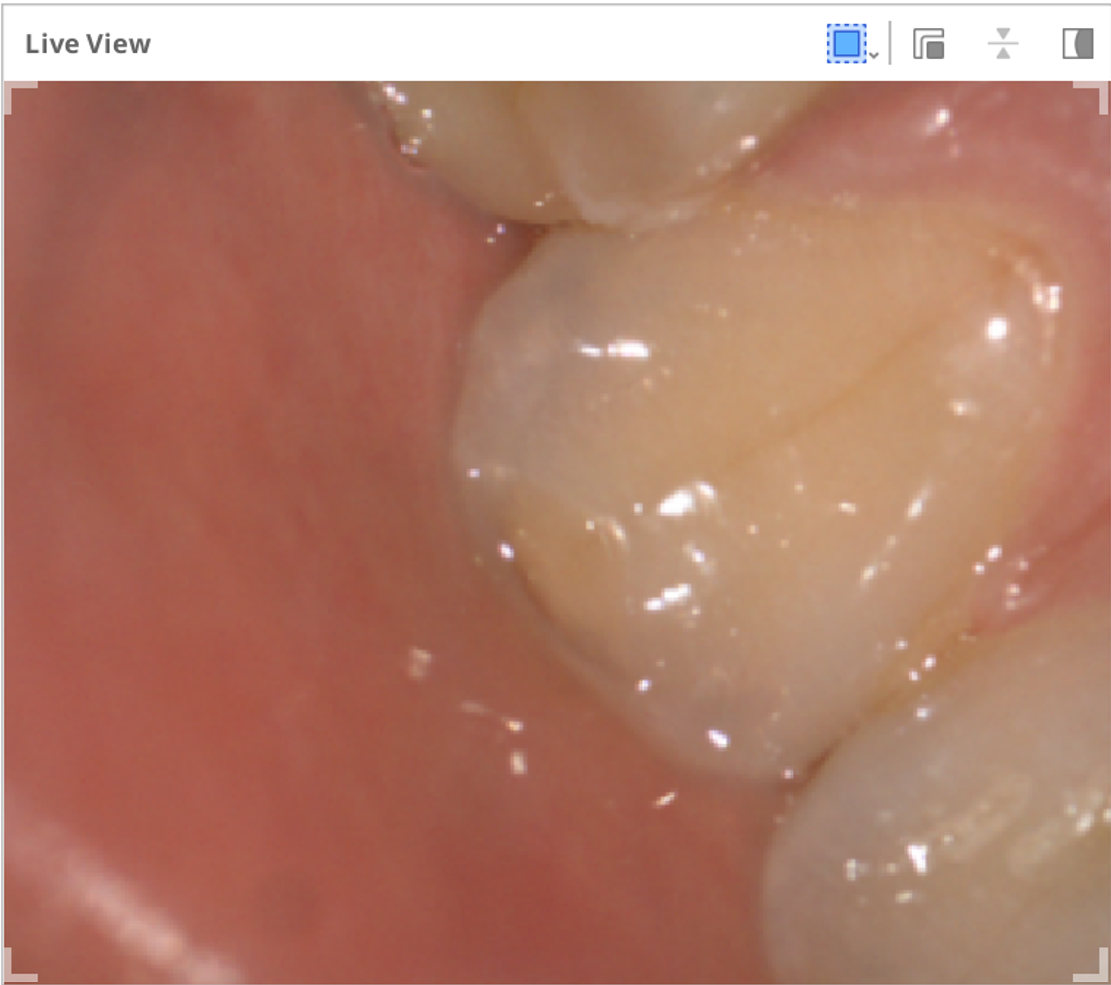
Live View
The Live View window displays the 2D image obtained from the scanner and provides useful tools.
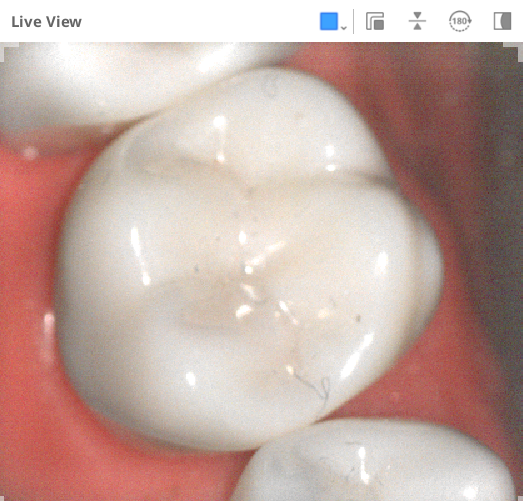
The following tools are provided on the title bar of the Live View window:
| Custom Scan Area | Adjust the area to acquire scan data. |
| Detach Live View Window | Detach the Live View window from the fixed position. |
| Reset Live View Window | Bring the Live View window to the default position and size. |
| Flip Image | Flip scan data upside down. |
| Rotate 180° | Rotate the scan data by 180 degrees to match the direction of the teeth data on the screen to your viewpoint of the patient's teeth. |
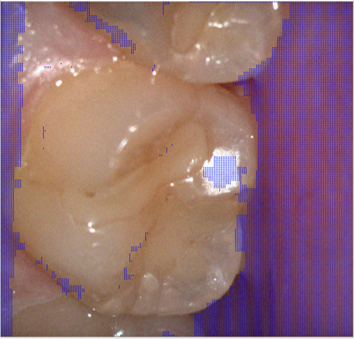
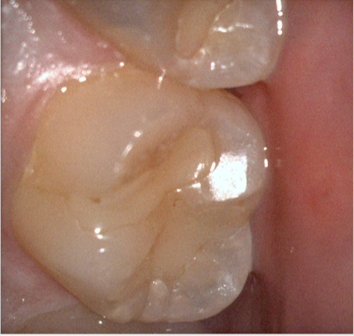
| Show/Hide Masking | Turn on or off the visibility of the unscannable area. |


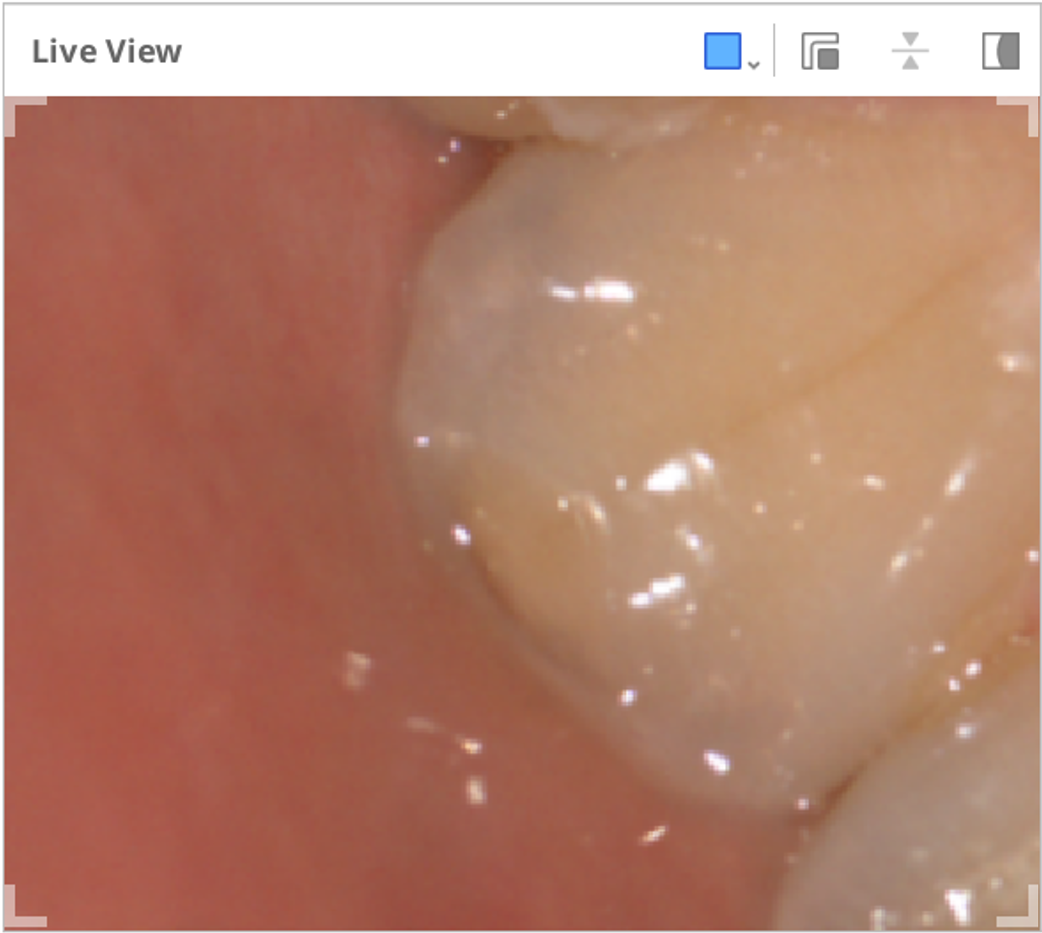
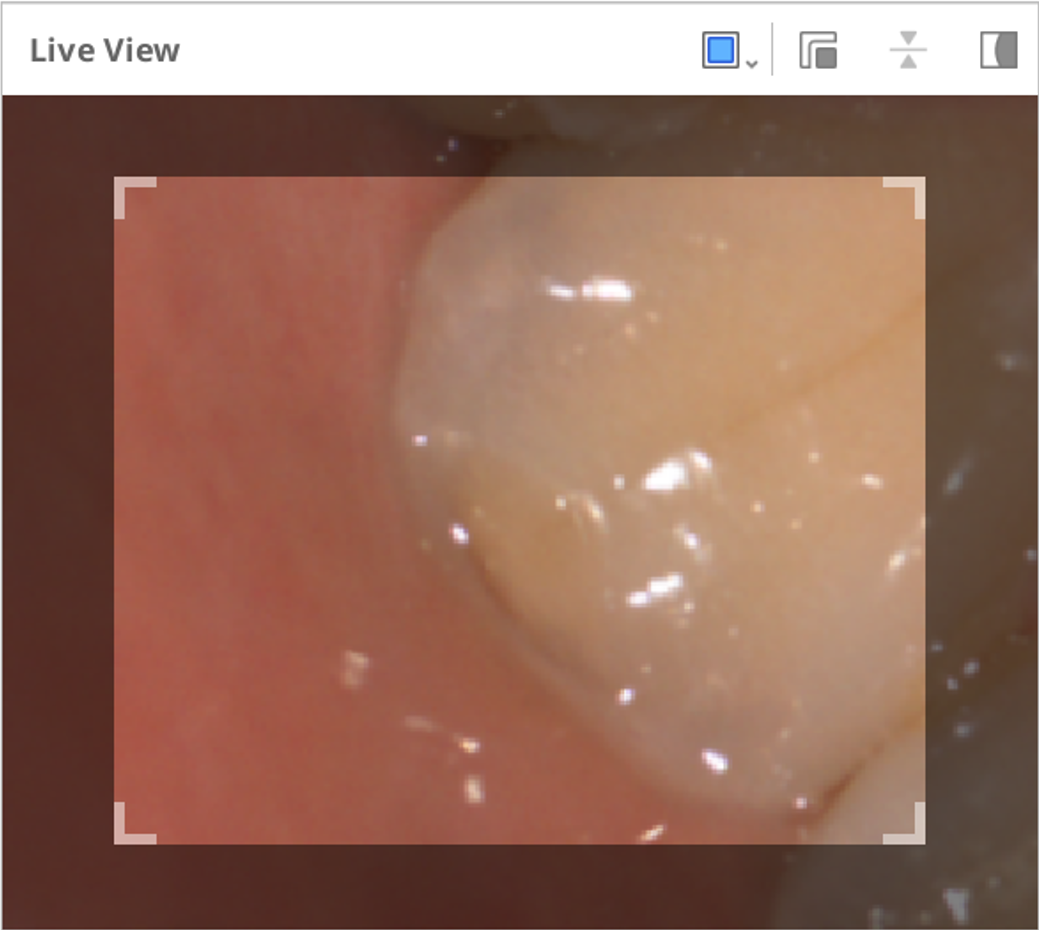
Clicking the "Custom Scan Area" icon shows the following options to set the Live View window size:
Large | Standard |
|---|---|
|
|
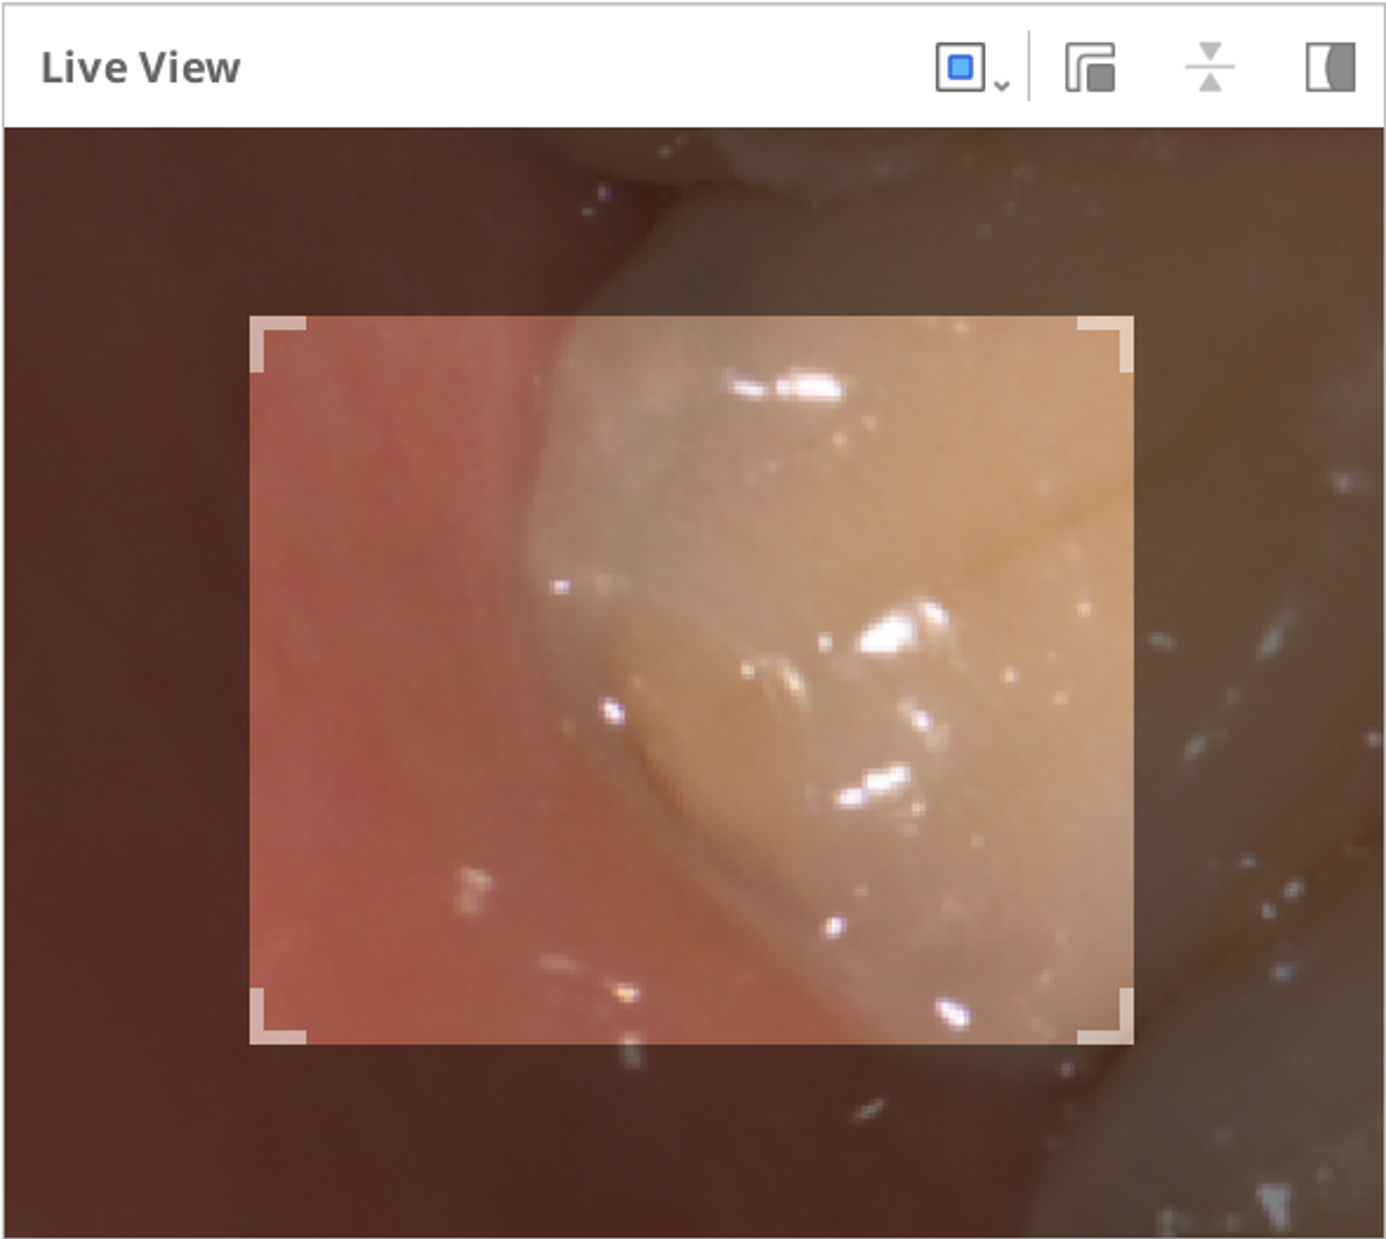
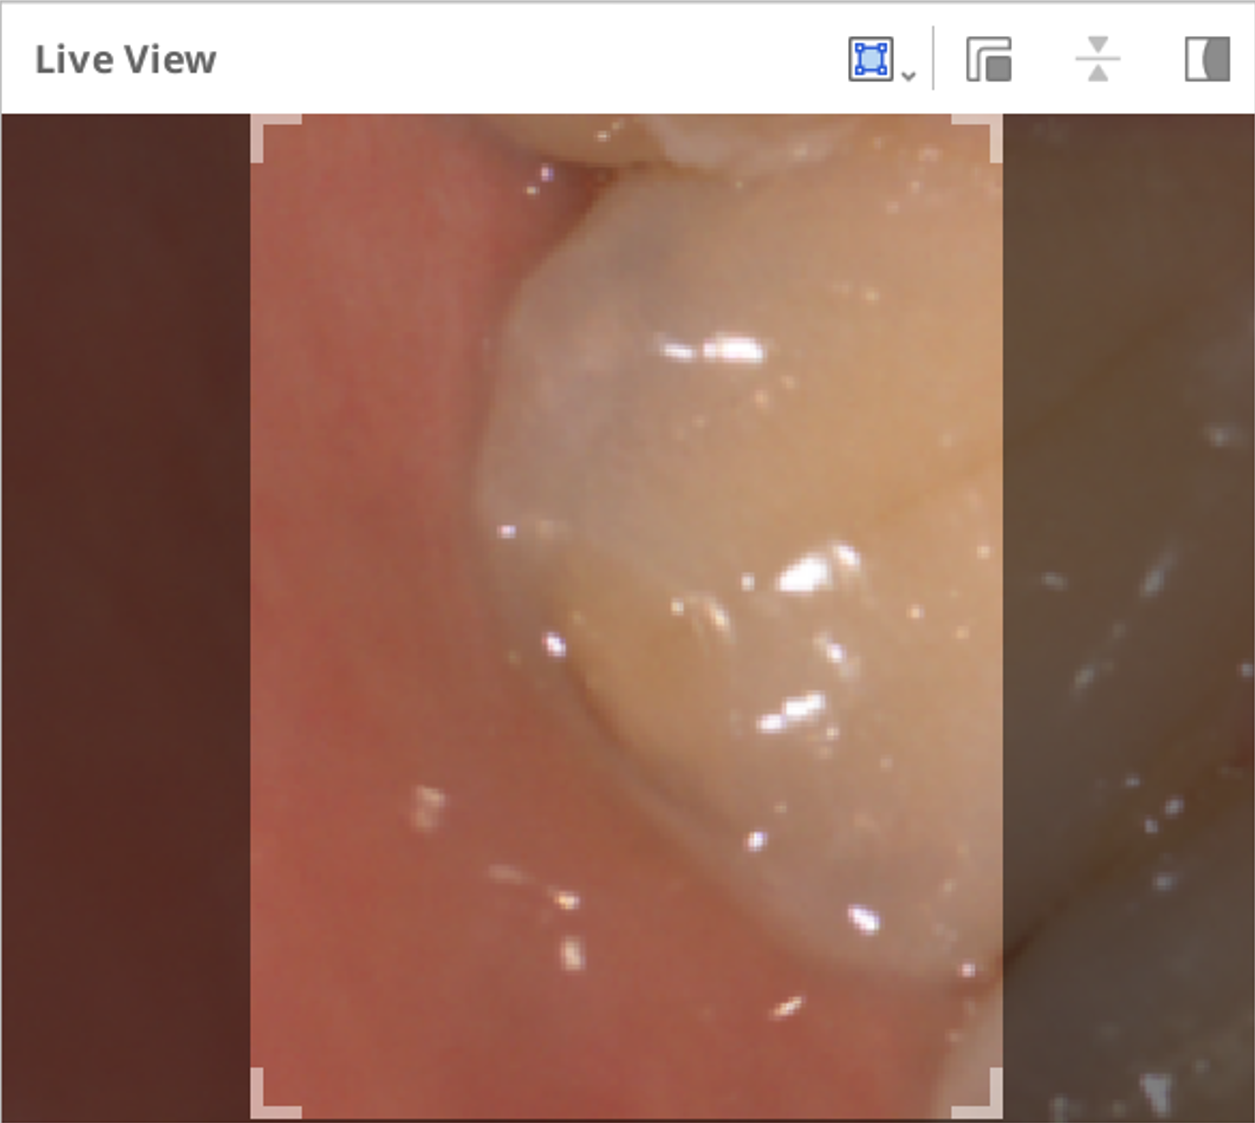
Small | Extra Small |
|
|
Custom | |
| |
🔎Note
The large size of the Live View window is available only on i900, i900 classic, i900 Mobility models.
Clicking the "Show/Hide Masking" icon will show or hide the unscannable area as follows:
Show Masking | Hide Masking |
|---|---|
|
|
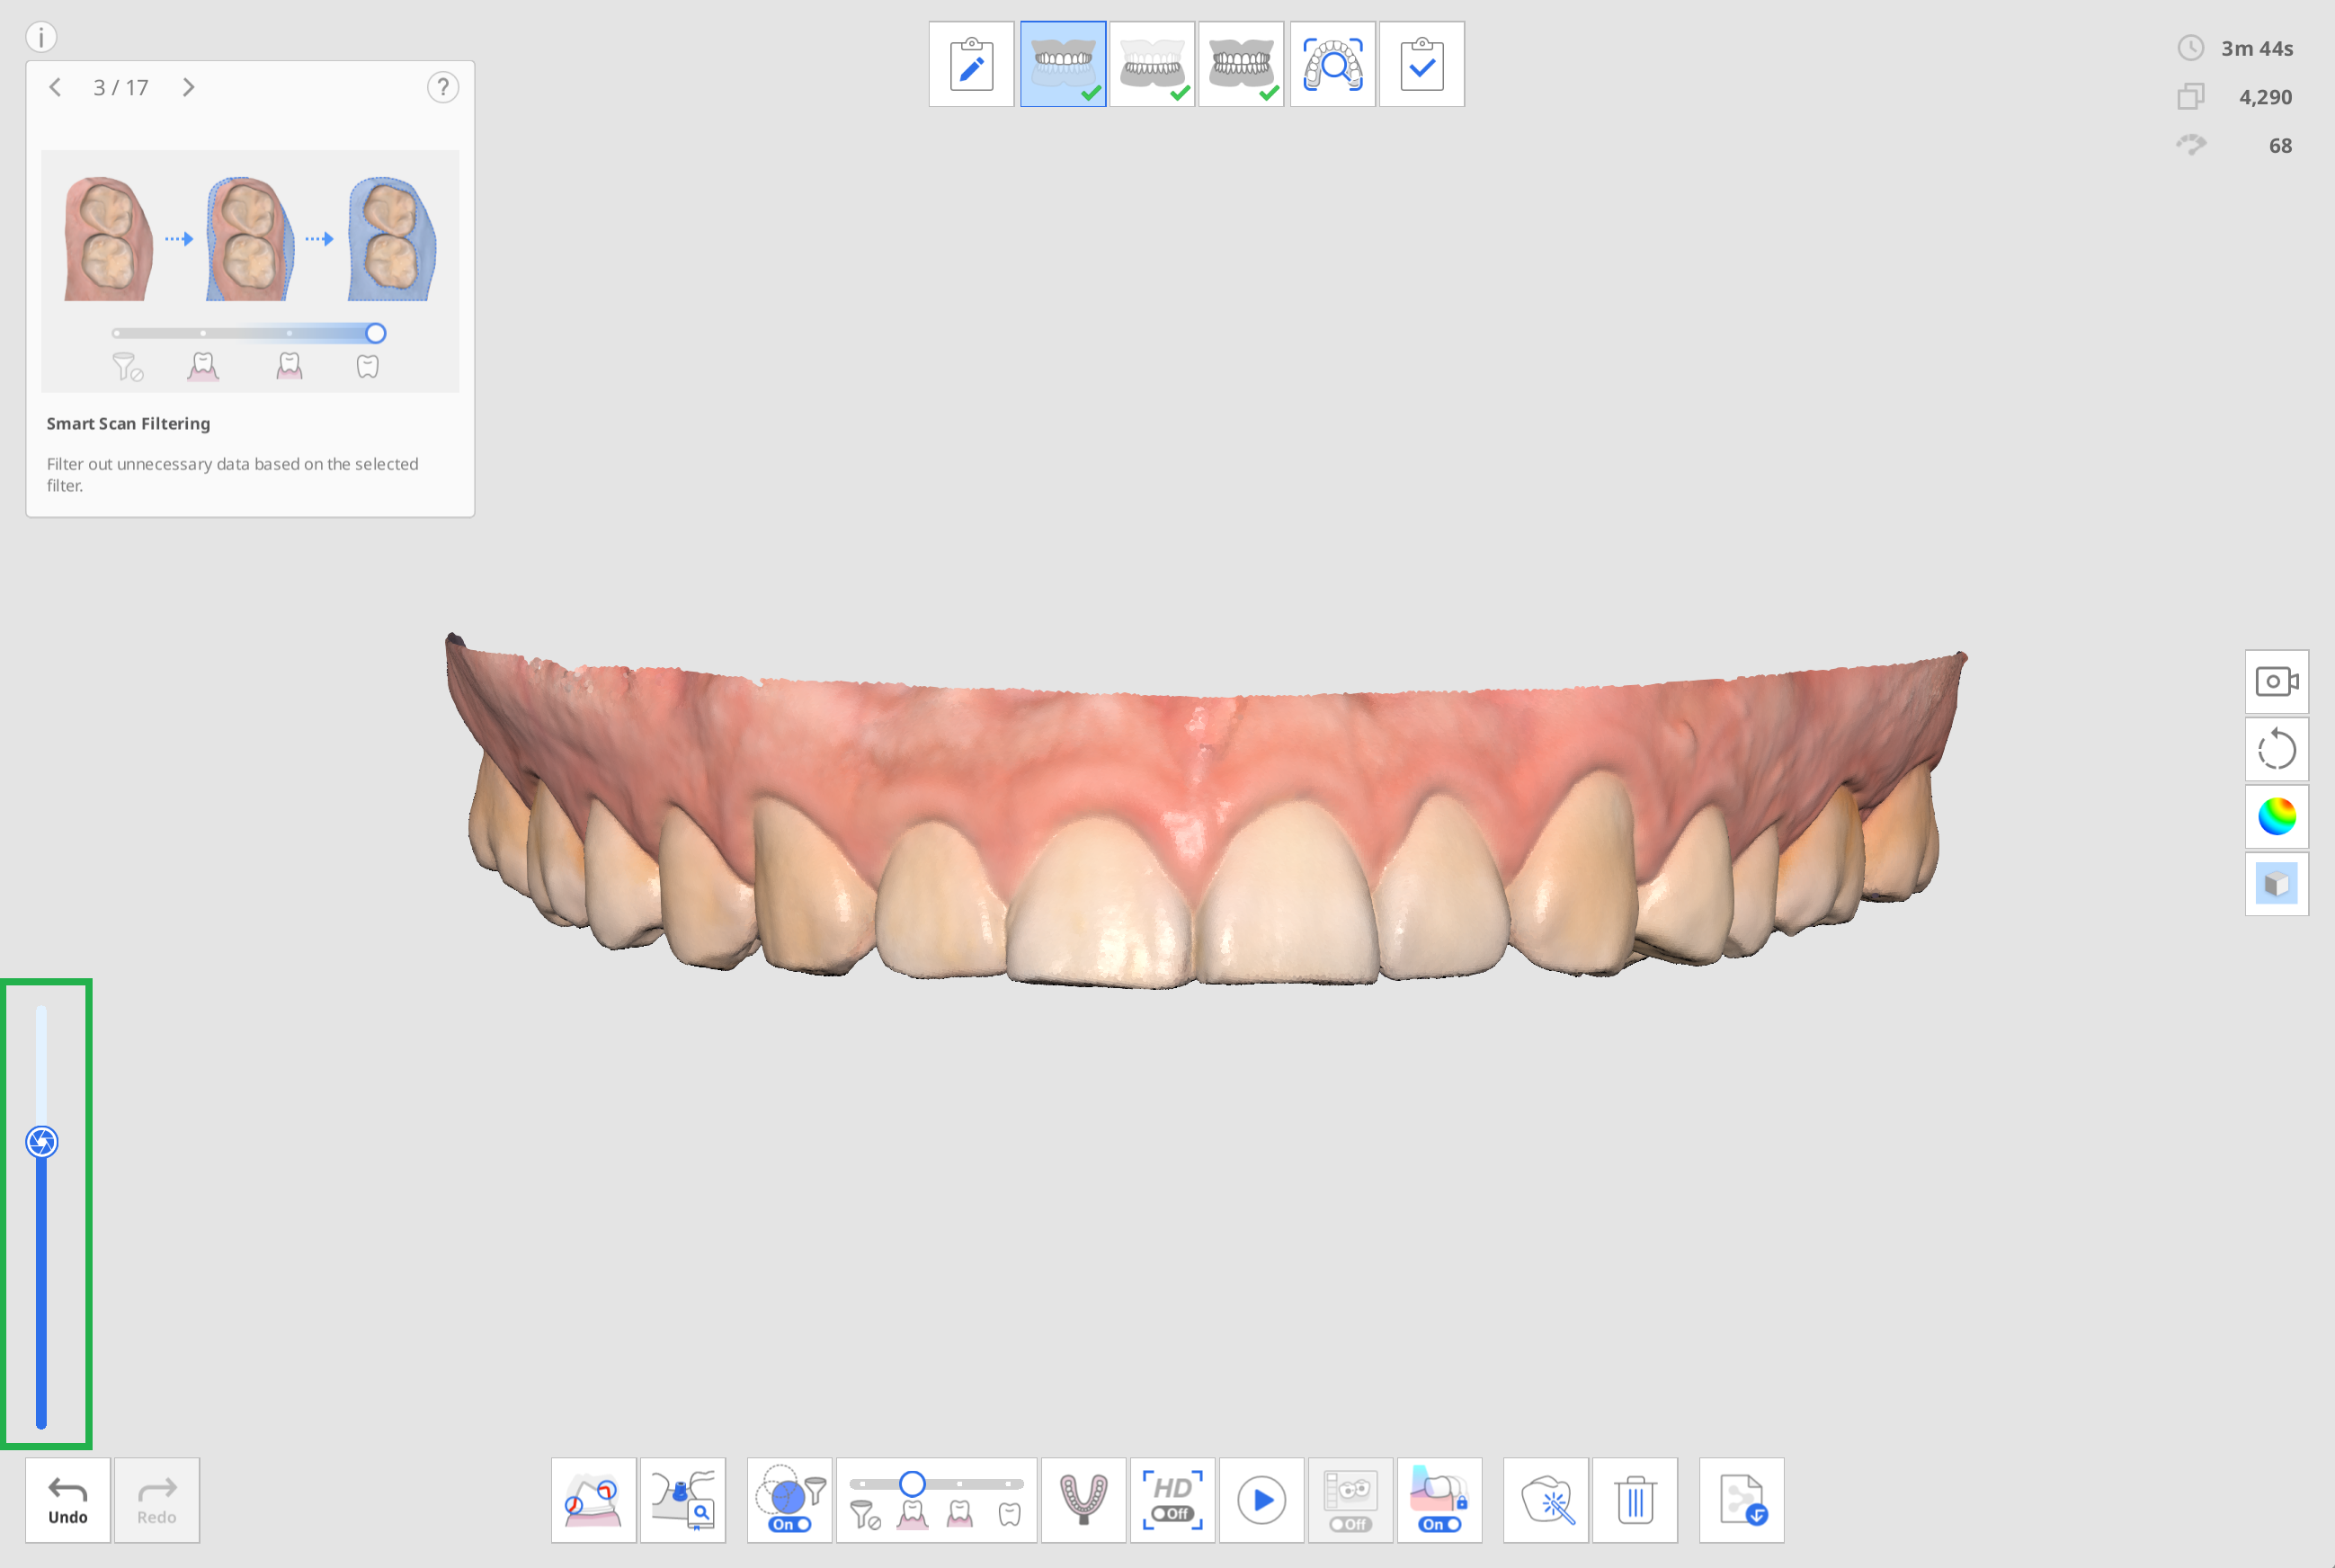
Scan Depth
The scan depth can be adjusted as follows according to the scanner type:
i500: 12mm - 21mm
i600, i700, i700 wireless: 12mm - 23mm
i900, i900 classic, i900 Mobility: 12mm - 30mm
A deeper scan depth can be applied to almost all general scanning works. A shallow scan depth is useful when filtering out noisy data, such as unnecessary soft tissues.