Preparing Data
Medit ClinicCAD lets users design restorations using both prepared and pre-op scan data. To use the app, data for at least one arch must be available.
Prepared data can be used to design any restoration, while pre-op data alone allows the design of only eggshell-type crowns and bridges.
If needed, the pre-op data can be imported together with the prepared one and used for reference when editing the restoration.
If the case has separate scan data for the maxilla/mandible and the abutment, the two will be automatically combined. After running the app, the combined data will be available in the Assign Data window. The new file will have either of these titles: Maxilla with Abutment or Mandible with Abutment.
If the case has dynamic occlusion data captured in Medit Scan for Clinics, it will be automatically imported into the app. It can be used for reference when adapting and adjusting the restoration.
Additional scan data needed for reference during the design process can be imported into the program at any time using the “Import Additional Data” option in the Side Toolbar.
The user must gather all the data for the project under the same case before running the app. There are two ways to add data to a Medit Link case.
1. Complete all necessary scans in Medit Scan for Clinics or Labs, and all acquired data will be automatically saved to the case.
🔎Tip
Use the "Solid" option when scanning data in Medit Scan for Labs.
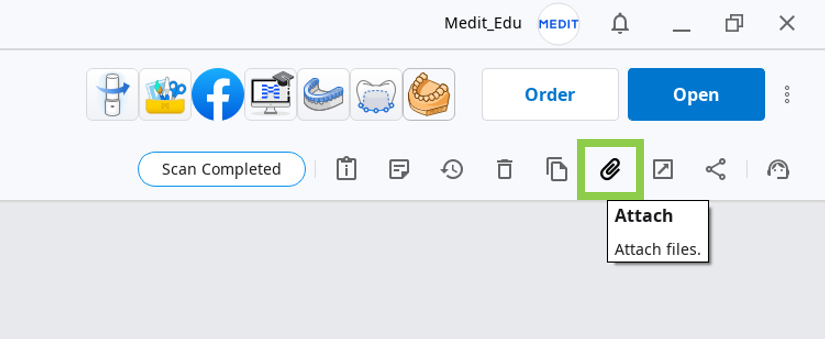
2. Load data from a local folder using the "Attach" feature in the Case Detail window.
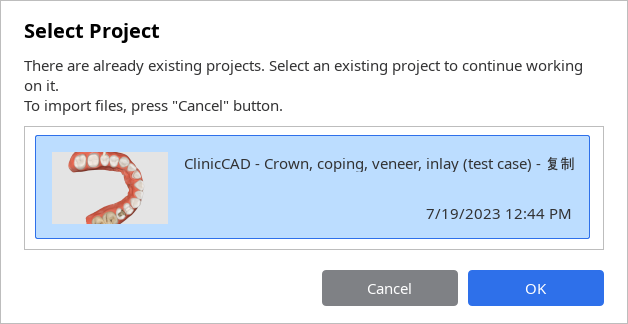
Users can also continue working on previously saved projects if the program is opened from the same case again.
🔎Note
Projects that were created in Medit Temporaries are not supported by Medit ClinicCAD.
⚠️Attention
Medit ClinicCAD doesn’t modify or interpret the original 3D data for medical use; the software only provides the anatomical geometries to create virtual models of the restorations.
3D Data Control
Users can control the 3D data using a mouse alone or both mouse and keyboard.
3D data control using a mouse
Zoom | Scroll the mouse wheel. |
|
Zoom Focus | Double-click on the data. |
|
Zoom Fit | Double-click on the background. |
|
Rotate | Right-click and drag. |
|
Pan | Hold both buttons (or wheel) and drag. |
|


3D data control using a mouse and keyboard
Windows | macOS | |
|---|---|---|
Zoom |
|
|
Rotate |
|
|
Pan |
|
|
.png)
.png)
.png)
.png)
.png)
.png)
Saving Data
There are several ways to save the project data.
1. "Complete" button in the final step
⚠️Paid Feature
Saving and exporting the completed restoration design as an STL file is a paid feature. Pricing may vary based on your scanner ownership status and location.
For more details about payment, please visit the Medit Help Center or click here.
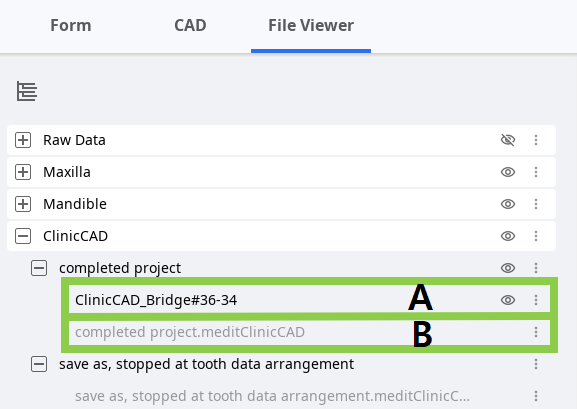
The "Complete" button can be used after the restoration design is finished. It creates two files in the Medit Link case: the project file(B) and the restoration design file(A). The latter can be further used for printing or milling the restoration.
🔎Tip: Complete Button Options
This feature is available only in the final step. The gear icon next to the "Complete" button provides additional options for how the project can be saved:
Choose "Include Construction File" if a construction info file is needed for milling or CAM software.
Choose "Export to PC" to automatically export created data to a designated folder on a computer.
2. "Save" or "Save As" options in Menu
These two options in the program menu help users manage the project file by creating a new one or updating an existing one.
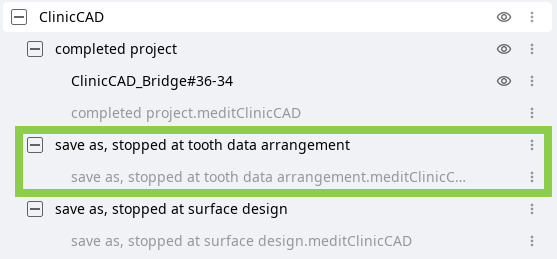
The project file is generated every time you run the app and can be used across all Medit software. It records work progress, allowing users to temporarily stop and save an unfinished project to resume later.
The "Save As" option is used to save an unfinished project or save the current project under a new name, while the "Save" option allows the overwriting of the project file for the currently opened project.
🔎Note
Users are also prompted to save changes in the project file when they terminate the program. .png)
Library Management
Teeth libraries are provided when designing restorations based on the scan data of already prepared teeth (Prepared Data Module). There are 6 default libraries, but users can expand the list of available libraries via Library Management.
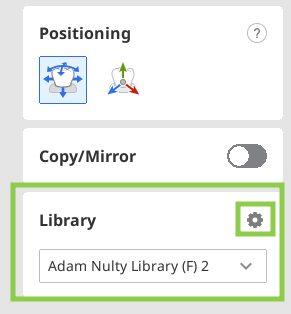
The Libraries Management feature provides tools for managing the list of available libraries and editing library data. To use this feature, click the gear icon in the Library toolbox.
🔎Note
The library list can be expanded to a maximum of 50 libraries. The complete list of libraries is stored locally, so if logged in on a different computer, only the default libraries will be available.
🔎Tip
If teeth data was exported as a library from Medit Ortho Simulation, it will be automatically added to the list of libraries upon launching Medit ClinicCAD.
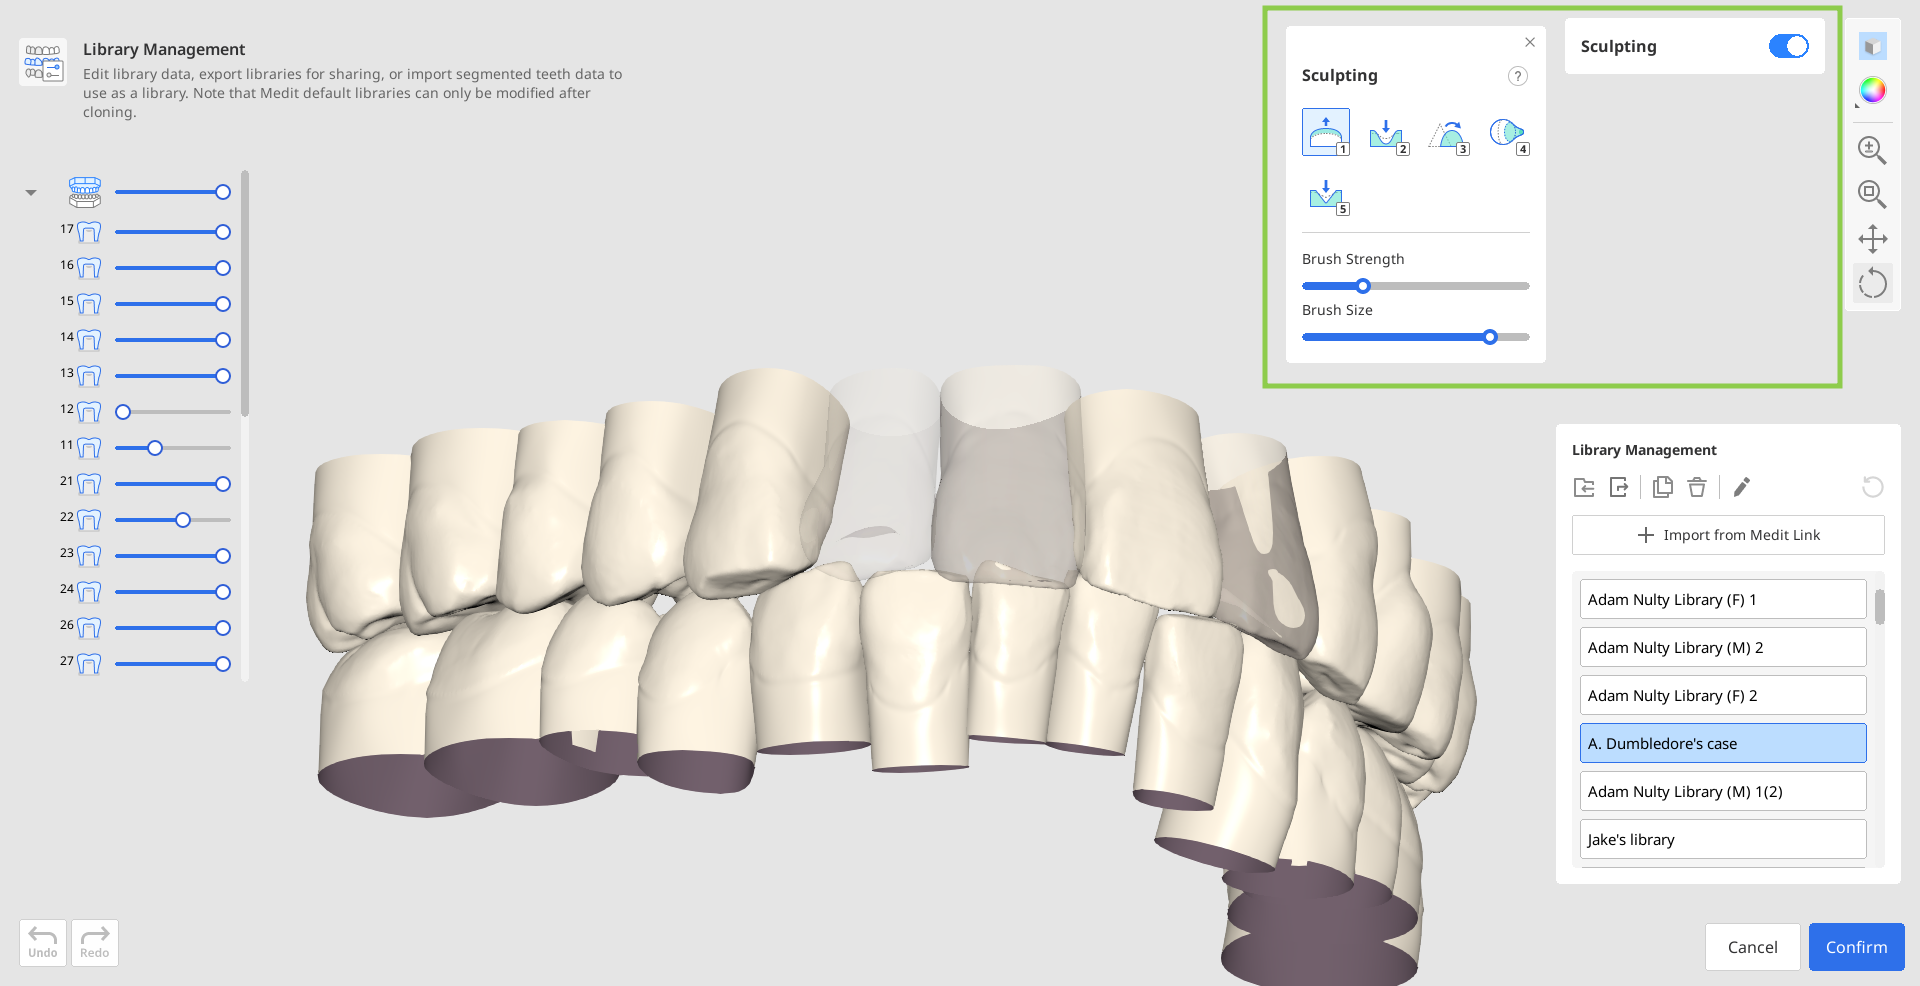
How to manage libraries list
Users can add, delete, export, and modify libraries in the list using the tools provided in the management widget on the right. The default libraries can be modified only after cloning.

| Import from PC | Import the teeth library stored on your computer.
|
| Export | Export the teeth library to the local PC or Medit Link. |
| Clone | Create a copy of the library. |
| Delete | Delete the library. |
| Rename | Change the name of the library. |
| Reset | Restore the library data by undoing all sculpting. |


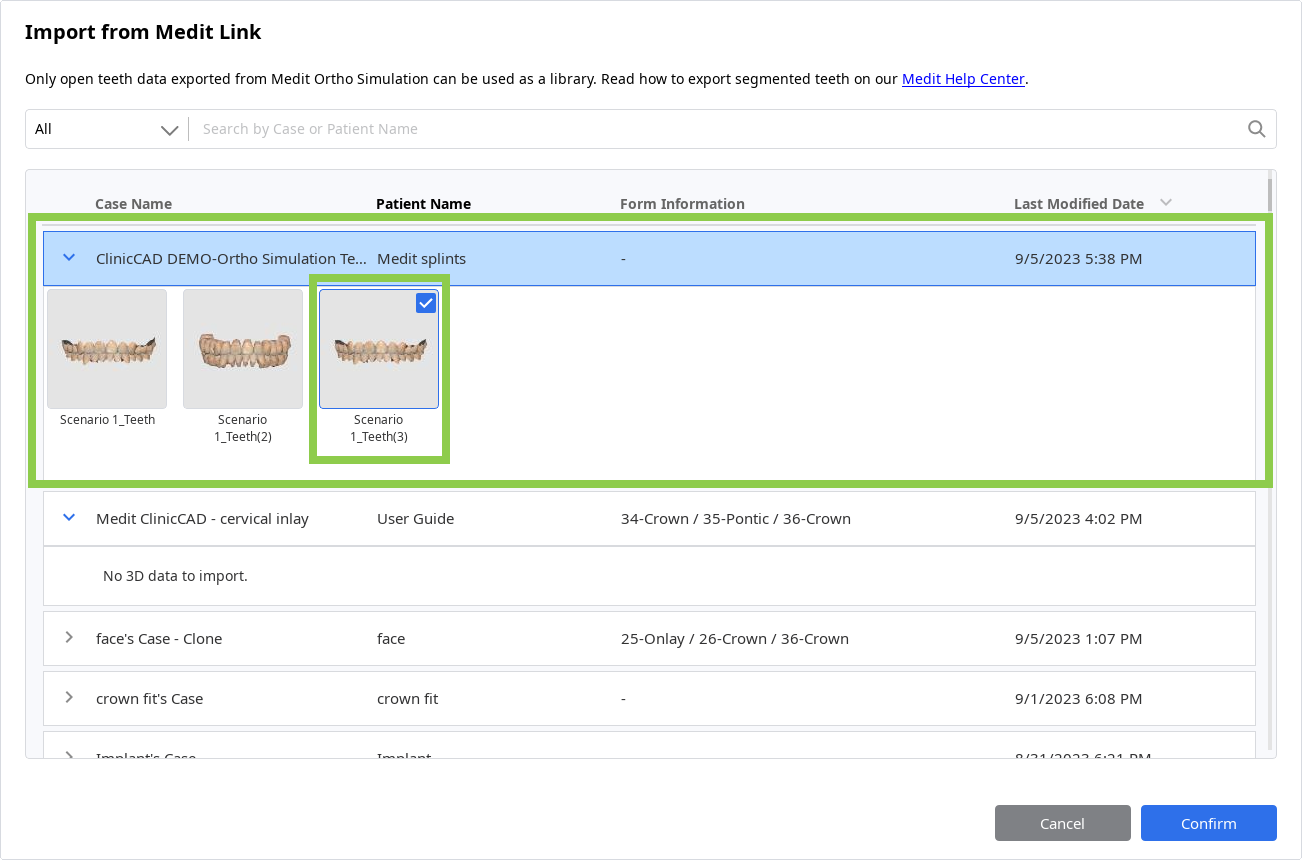
There is one more option for adding a library to the list - “Import from Medit Link.” This feature allows users to browse Medit Link cases for segmented teeth data and import it as a library into the app.
How to edit library data
Teeth data of a library can be edited using “Sculpting.” With the provided tools, users can add, remove, smooth, or morph the data of the selected tooth.
The visibility of the tooth in the Data Tree can be adjusted for a more comfortable editing process. To edit the default library, it must first be cloned.
Preset Management
In Medit ClinicCAD, users can manually configure printing parameters or use presets. The list of available presets is provided in the Parameter Settings widget.
If the user doesn’t register their 3D printer upon the initial launch of the app, only the the default preset will be available. To expand and control the preset list, use the Presets Management feature (the gear icon next to Preset List).
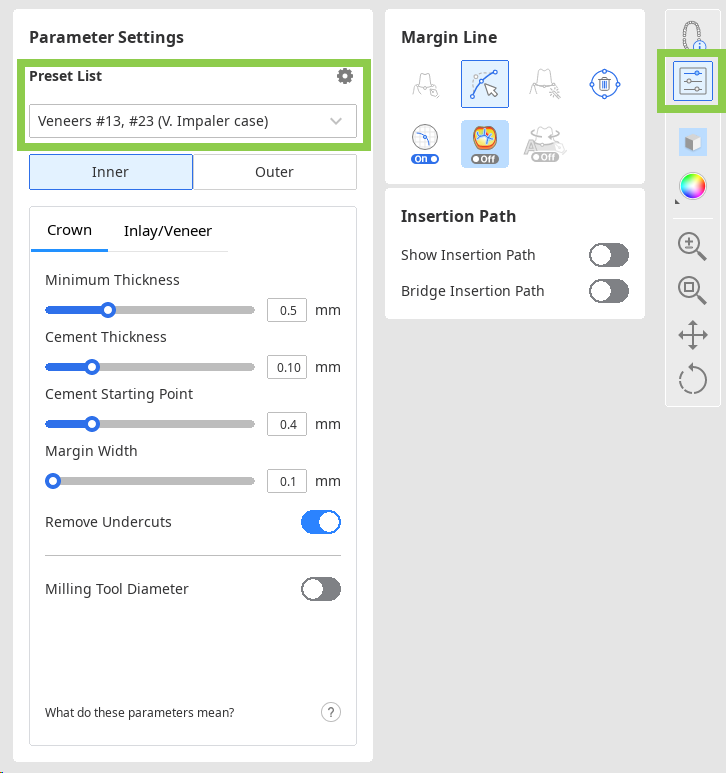
The Preset Management feature allows to control the preset list, edit the available presets, import preset files received from another user, or get the recommended preset by registering 3D printers.
How to manage the preset list
Users can export, delete, rename, and edit the values of the preset selected in the list on the left.
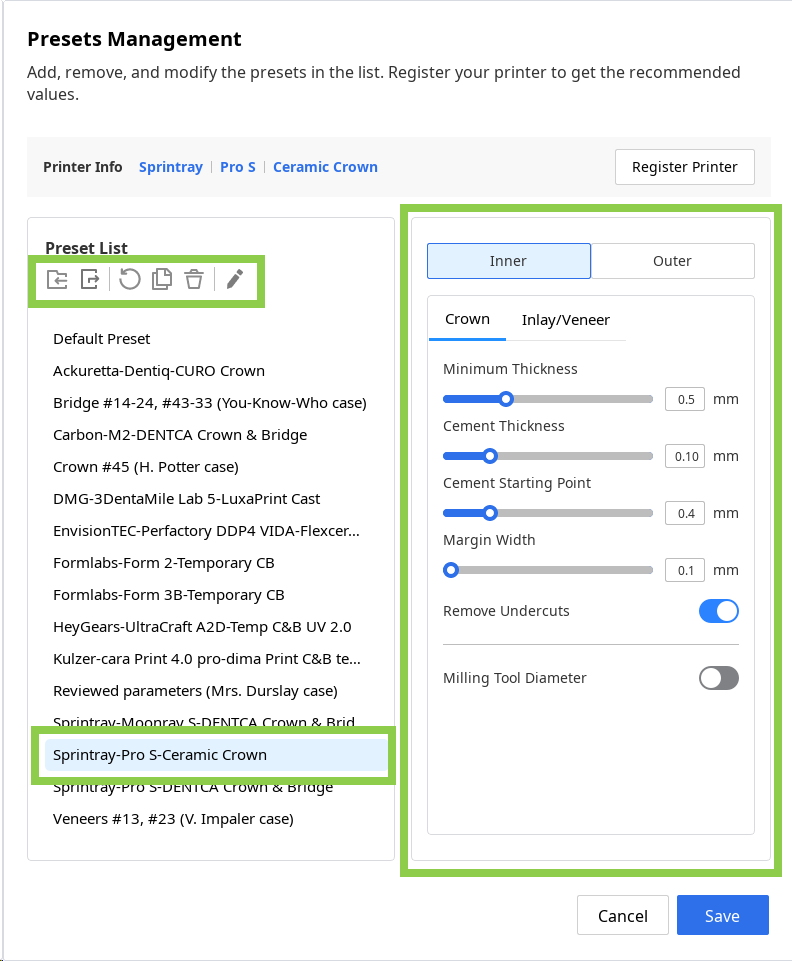
After changes were made, the preset values can be restored to the recommended ones via “Reset.”
If a preset file is received from another Medit user, it can be added to the list by importing it from the local storage.
Even if the original name of the recommended preset is changed, it will always be shown at the top in “Printer Info.”

How to get recommended preset
If printer registration was skipped upon the initial app launch, it can be done later using the “Register Printer” button.

To register a printer, user must select the manufacturer, printer, and printing material in the window shown below. Up to 5 printers can be registered. Printer registration will be completed after clicking “Confirm,“ and a preset with recommended values will be added to the list.
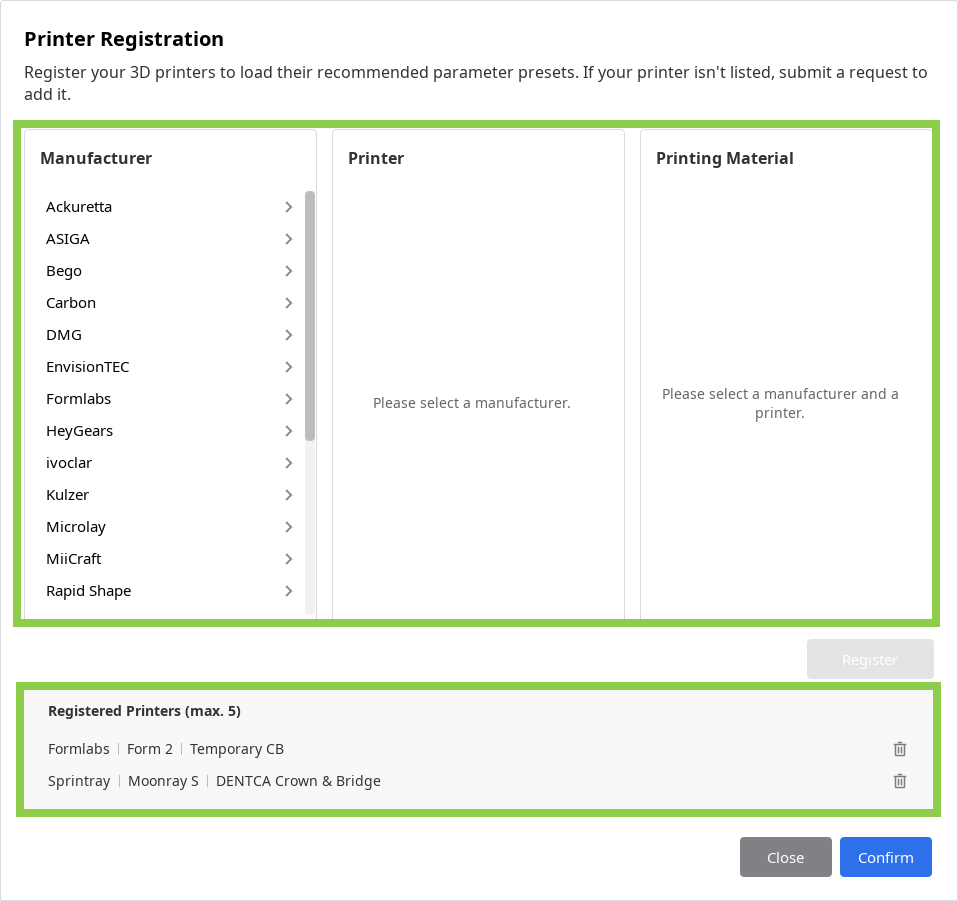
🔎Tip
If your printer isn’t listed, scroll down in the manufacturer section and click “Printer Request.“