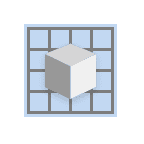
User Interface at a Glance
.png)
A | Title Bar |
B | Guide Message |
C | Data Tree |
D | Action Control Buttons |
E | Data Alignment & Editing Tools |
F | 3D Data |
G | Teeth Form |
H | Toolboxes |
I | Side Toolbar |
Title Bar
The Title Bar is the ribbon at the top of the application window that contains basic controls on the right and the menu on the left. It also displays the app name and the opened case name.
| Menu | Manage the opened project, access available assistance resources, and check app details. |
| Help Center | Go to the Medit Help Center page dedicated to this app. |
| Start/Stop Video Recording | Start and stop the video recording of the screen. |
| Screenshot | Take a screenshot. Capture the app with or without the title bar using automatic selection, or click and drag to capture only the desired area. |
| Screenshot Manager | View, export, or delete the screenshots. Upon completion, all captured images will be saved to the case automatically. |
| Minimize | Minimize the application window. |
| Restore | Maximize or restore the application window. |
| Exit | Close the application. |


Data Tree
The Data Tree is located on the left side of the screen and displays a list of data organized into groups. Data can be shown or hidden by clicking the corresponding icon in the tree, or its transparency can be adjusted using the associated slider. All data within the Data Tree is organized under two main groups: Scan Data Group and Restorations. The structure may vary slightly depending on the objectives of a specific step or tool. The image below provides an example from the final step.
| Scan Data Group
Restorations
|
.png)
Action Control Buttons
There are five buttons that control the overall work process. They are located in both bottom corners of the application window.
The “Complete” button will appear at the final step only.
Undo | Undo the previous action. |
Redo | Redo the previous action. |
Prev. | Go back to the previous step. |
Next | Apply changes and move to the next step. |
Complete | Complete the design process and save the restoration to Medit Link. |
Side Toolbar
The Side Toolbar is located on the right side of the screen; it offers a number of tools that may be required at any step of the design workflow.
Management Tools
| Form Info | Show or hide the form information registered in Medit Link. In the first step, you can also edit it. |
| Parameter Settings | Adjust the parameters for creating the inner and outer surfaces of the restoration. |
| Shortcut Keys | View and manage keyboard shortcuts |
| Import Additional Data | Bring in additional 3D data to serve as a reference or aid in the designing process. |


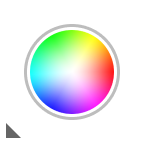
Display Tools
| Grid Settings | Show or hide the grid (overlay on/off). |
| Data Display Mode | Change between different data display options. |
Analysis Tools
| Contact Areas with Adjacents | Turn on to show the areas of contact between restoration and adjacents. Use while sculpting the outer surface of the restoration to add or remove material to ensure optimal fitting. This feature provides color-based visualization only and does not generate quantitative measurement data. |
| Contact Areas with Antagonists | When on, this function shows the areas of contact between the restoration and the antagonists. Turn on when sculpting the outer surface of the restoration to check the occlusion. This feature provides color-based visualization only and does not generate quantitative measurement data. |
| Switch Deviation Display Area | Switch deviation display scale between all data and contact area only. This feature provides color-based visualization only and does not generate quantitative measurement data. |
| Minimum Thickness | Turn on to see thin areas on the restoration. Use while sculpting to make sure that the restoration is not too thin to print or mill. The minimum thickness tool provides only qualitative warnings; it does not generate any quantitative measurement data. |


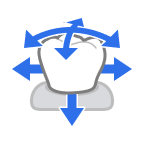
Data Control Tools (for touch screen/mouse)
| Zoom | Zoom in and out by click-and-drag. |
| Zoom Fit | Zoom to fit data to the screen. |
| Pan | Move data by click-and-drag. |
| Rotate | Rotate data by click-and-drag. |


Toolboxes
Toolboxes beside the Side Toolbar are different at every step. Each toolbox represents a task that can be performed in this step and provides all the necessary features for completing it.
Below are the explanations for the features provided in Toolboxes across the entire app.
Margin Line
| Manual Creation | Manually create a margin line based on the selected points. |
| Edit | Add, move, or delete the control points to edit the margin line. |
| Auto Creation | Automatically create a closed margin line based on the selected point. |
| Delete | Delete the margin line. |
| Section View | Display the section of the area where the mouse is located. This feature is only intended to assist with shape visualization; it doesn’t provide measurements in legally recognized units. |
| Curvature Display Mode | See the curvature of the data through the Color Map. This feature is only intended to assist with shape visualization; it doesn’t provide measurements in legally recognized units. |
| Dynamic View Change | Turn on Dynamic View Change to automatically rotate data according to the view direction.
Available only when using Manual Creation. |


.png)
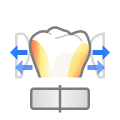
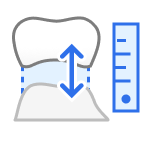
Positioning
| Free Move/Scale | Move the tooth freely without any constraints. Use shortcut keys to rotate and scale it. |
| 3D Manipulator | Scale, move, or rotate the tooth along axes. |


Selection
| Smart Single Tooth Selection | Automatically select the area of a single tooth, leaving out gingiva parts. Click and drag the mouse on the tooth. |
| Brush Selection | Select all entities on a freehand-drawn path on the screen. Only the front face is selected. |
| Brush Deselection | Deselect all entities on a freehand-drawn path on the screen. Only the front face is deselected. |
| Clear All Selection | Clear all selected areas. |


Sculpting
| Add | Add material to the restoration. |
| Remove | Remove material from the restoration. |
| Smooth | Smooth parts of the restoration. |
| Morph | Morph the material on the restoration by dragging it with your mouse. |
| Groove | Remove material from the restoration with a sharp blade to create grooves. |
.png)

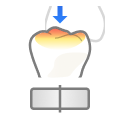
Adaptation
| Adapt to Adjacents | Adapt the restoration to adjacents. |
| Adapt to Antagonists | Adapt the restoration to antagonists. |
| Adapt to Gingiva | Adapt pontic to gingiva. |
Note
The adaptation features apply user-specific parameters; they do not calculate or report actual measured values.
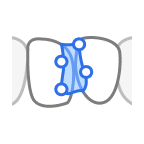
Connectors
| Move | Drag the center point to adjust the connector’s position and cross-section area. |
| Edit | Add, move, or delete the control points to reshape the connector. |
| Allow Small Connectors | Create smaller connectors based only on overlap areas. When enabled, connectors smaller than the minimum cross-section defined in Parameter Settings are allowed. |
| Add/Remove | Add or remove connectors between registered units as needed. |


Screw/Handle (tools for element control)
| Auto Set | Automatically place the chosen element at an optimal spot. |
| Set Toward You | Turn all elements to face toward you. |
| Delete All | Delete all elements. To delete one, right-click it. |
| Move | Change the element's position by dragging it. |
Design Review
| Margin & Insertion Path | Adjust the margin and insertion path as needed. Changes will affect only the inner surface, leaving the outer one unchanged. |
| Tooth Data Arrangement | Adjust tooth data positioning as needed. Changes will affect only the outer surface, leaving the inner one unchanged. |
| Dynamic Occlusion | Review the restoration design using the available mandibular movement recordings. |


