Data Assignment
After launching the application, the user enters the data assignment window, where one of five available modules must be selected and the necessary scan data assigned for the current project. These modules (or workflows) represent the core use cases of Medit ClinicCAD: two dedicated to restoration design, one for creating diagnostic wax-ups, one for building a custom teeth library, and one for temporary restoration with a pontic as a core element.
Each workflow guides the user through a structured sequence of steps, beginning with data assignment and progressing toward the intended design outcome. To proceed, the user must select a module and assign at least one data set to the target arch.
Pre-Op Data |
|
Prepared Data |
|
Diagnostic Wax-Up |
|
Custom Teeth Library |
|
Flipper |
|
After assigning the scan data, the user enters the first step of the workflow. Regardless of the selected module, this step includes two data management tools in the bottom left corner: Data Alignment and Data Editing. Although optional, these tools allow users to review and refine the imported scan data, ensuring greater accuracy and better results when designing the restoration in the subsequent steps.

![]() Caution
Caution
Returning to the first step to use either of these two tools will result in the loss of any progress made in designing the restoration.
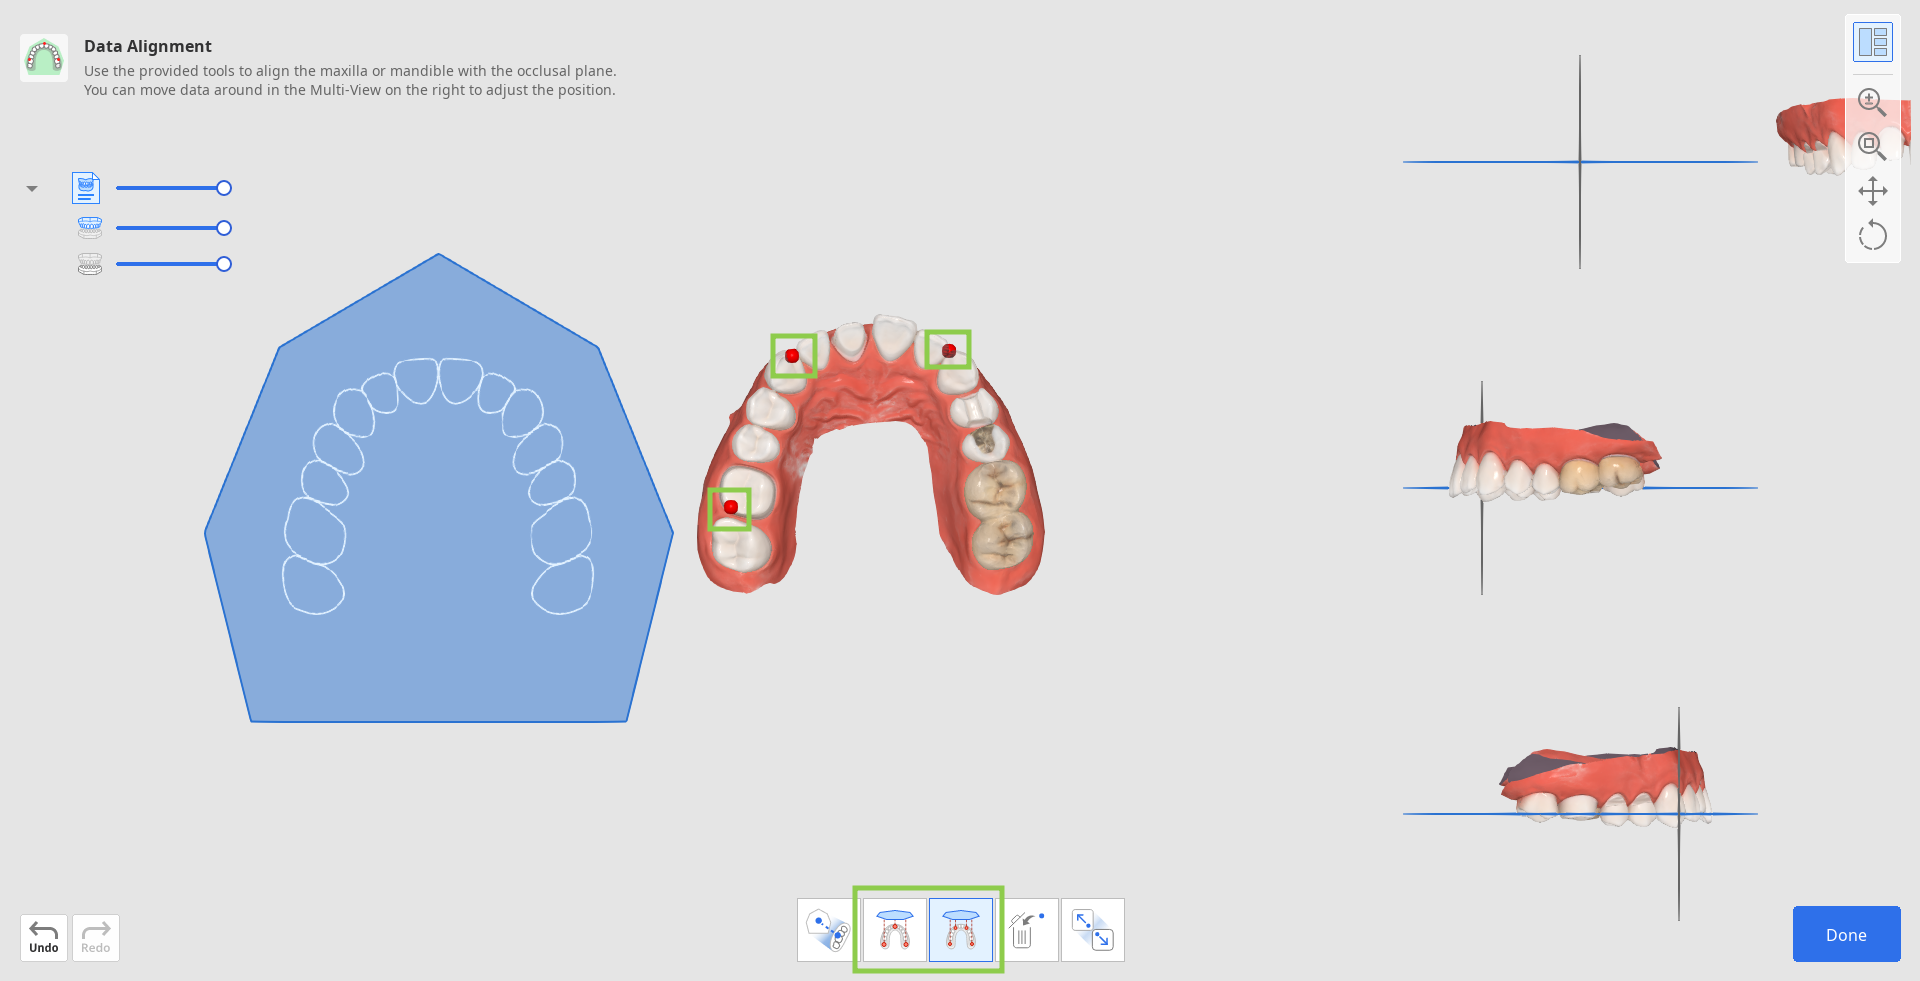
Data Alignment
Proper data alignment with the occlusal plane is crucial to ensure the accuracy of subsequent automated processes. In most cases, the scan data is automatically aligned upon import. However, if the alignment fails for any reason, the user will be prompted to complete the alignment manually.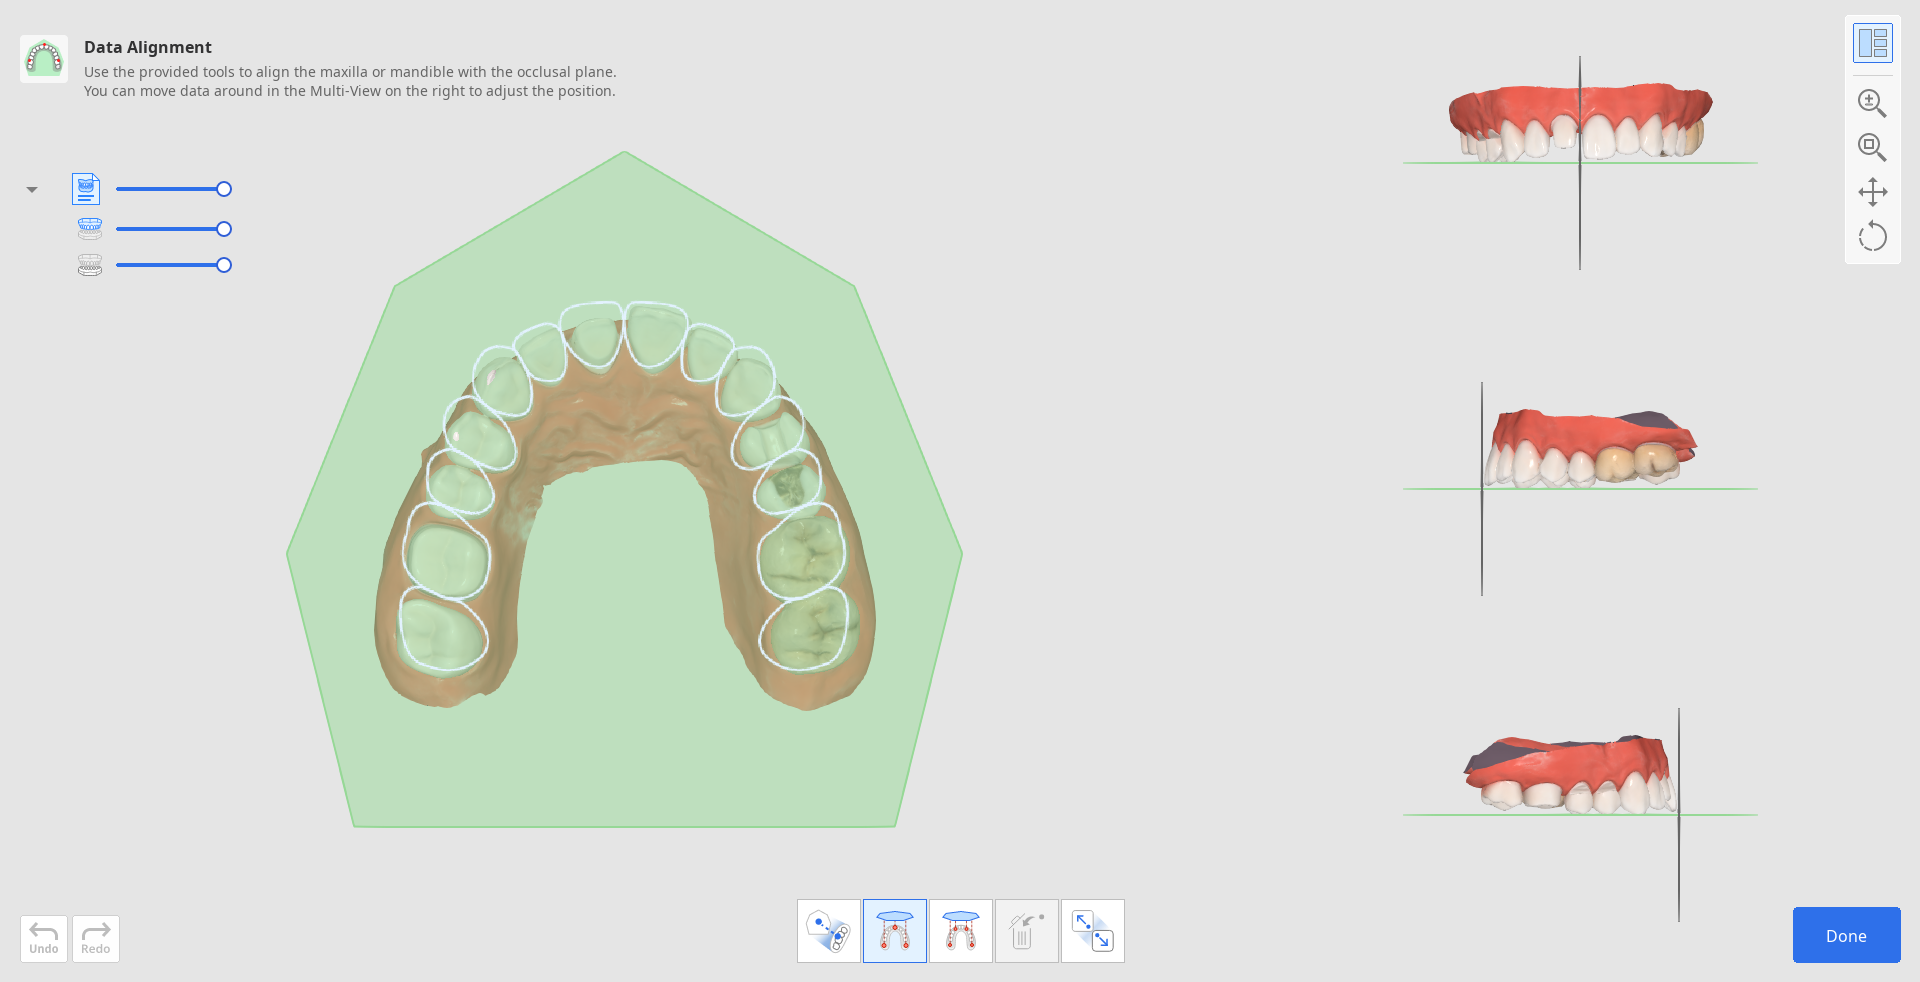
![]() Caution
Caution
Please review the automatically aligned data, as the results of automatic alignment may cause unintended errors and potential clinical risks.
To realign data manually, start by clicking "Detach Data" in the toolbox at the bottom.

Then, using either "Align by 3 Points" or "Align by 4 Points," set the corresponding number of points on the data.
If you set the point incorrectly, use "Delete Point" to remove the last added point.

If working with half arch data, use the "Half Arch Alignment" feature to ensure a more accurate alignment process.

3. Check the data alignment in the Multi-View on the right. If needed, adjust it by right-clicking to rotate and using both mouse buttons to move.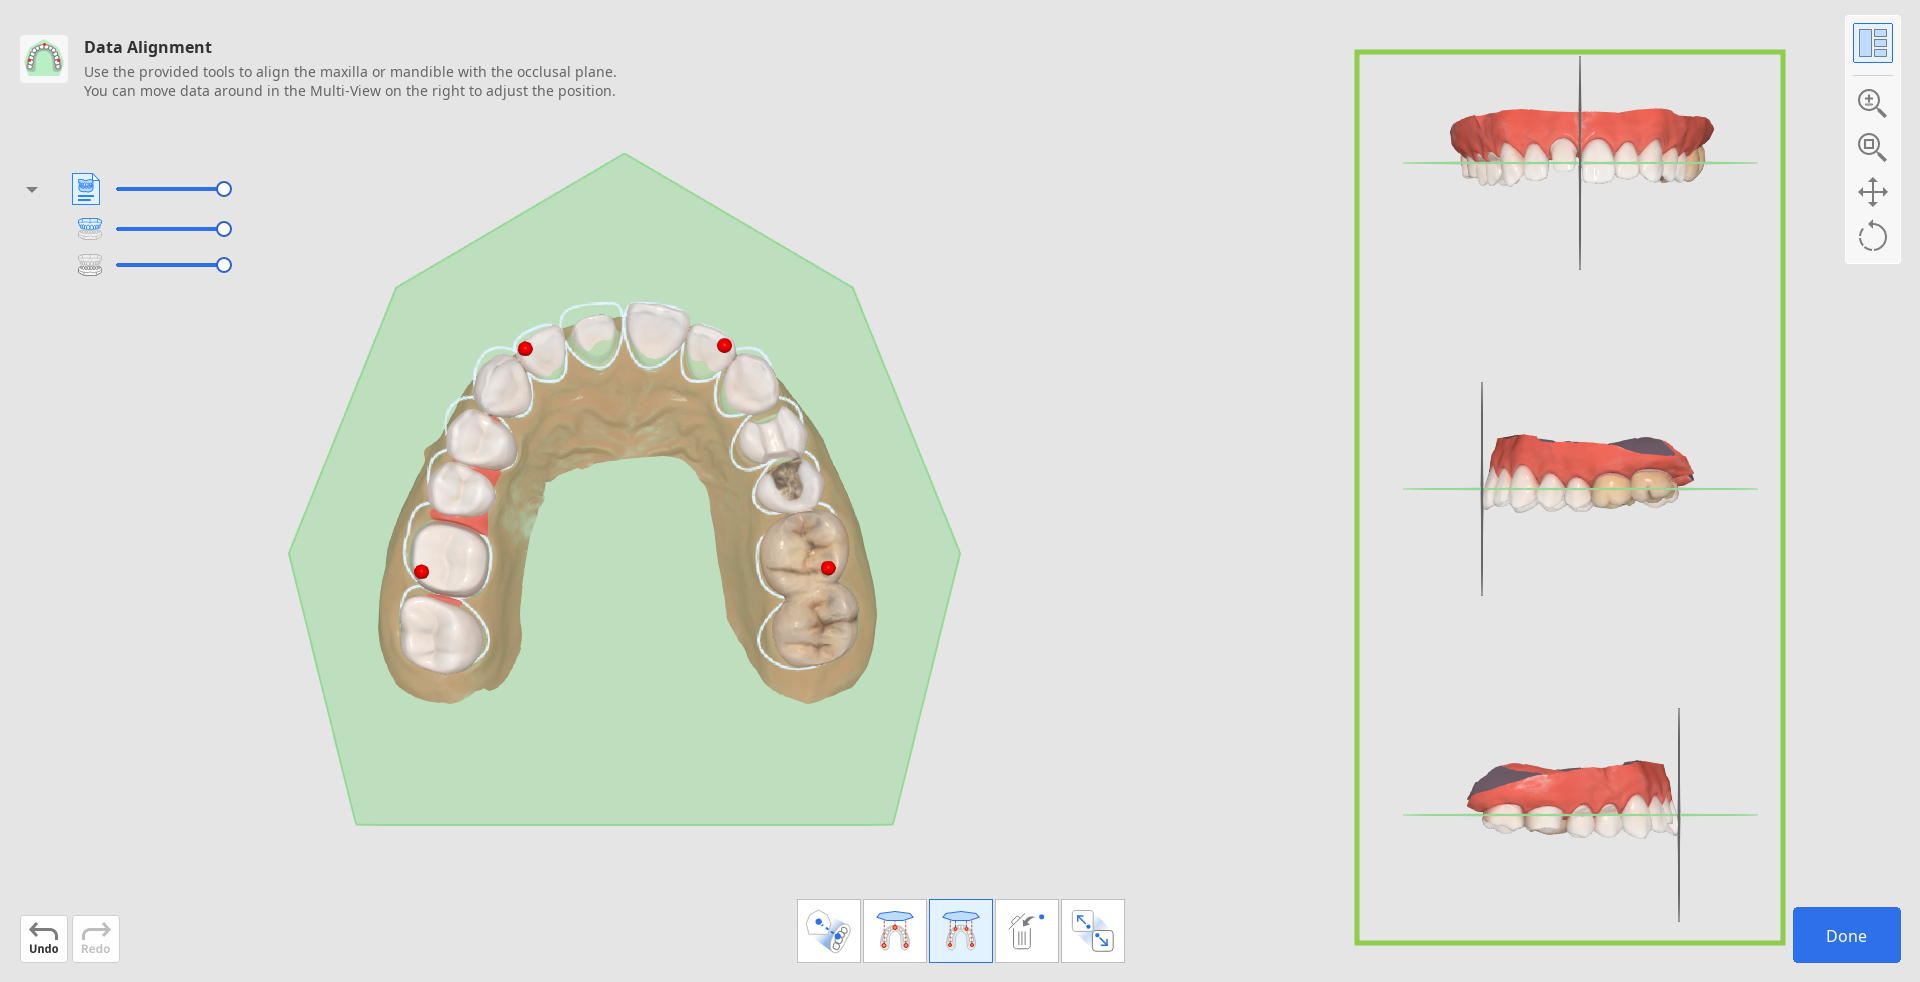
4. When finished, click "Done" in the bottom right corner to go to return to the first workflow step.
Data Editing
The Data Editing feature offers tools for refining imported scan data, removing the need for preparation in other programs. Clean scan data will ensure a faster work process and more accurate design results.
Using the provided tools users can trim the excessive or unneeded data parts, modify the data surface, and fill holes if any are present.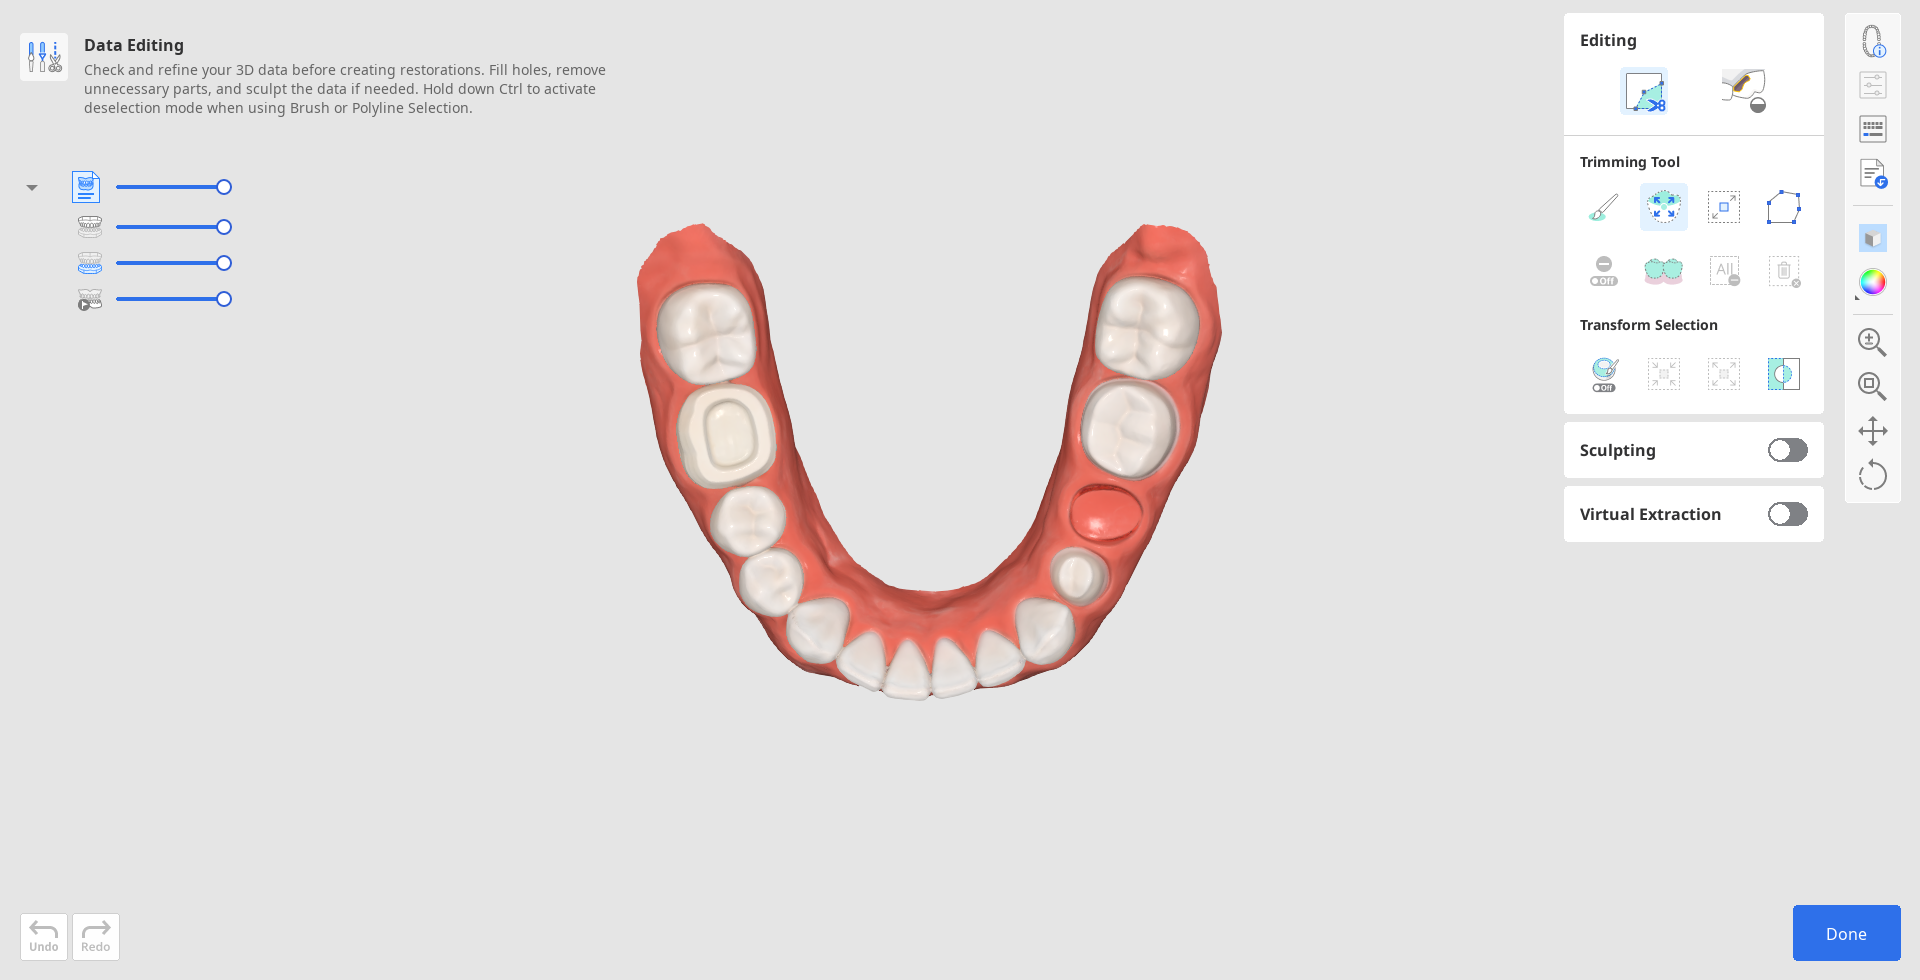
How to trim data
Trimming tools are automatically activated once the user enters.
1. Start by choosing a selection tool to help you designate parts of the data that need to be removed.
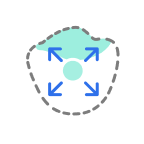
| Smart Teeth Selection | Automatically select all teeth of the arch, leaving out gingiva parts. |
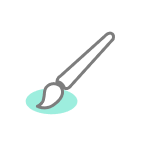
| Brush Selection | Select all entities on a freehand-drawn path on the screen. Only the front face is selected. |
| Smart Single Tooth Selection | Automatically select the area of a single tooth, leaving out gingiva parts. Click and drag the mouse on the tooth. |
| Polyline Selection | Select all entities within a polyline shape drawn on the screen. |
| Flood Fill Selection | Select the connected area based on the mouse movements. |
(1).png)
(1).png)
.png)
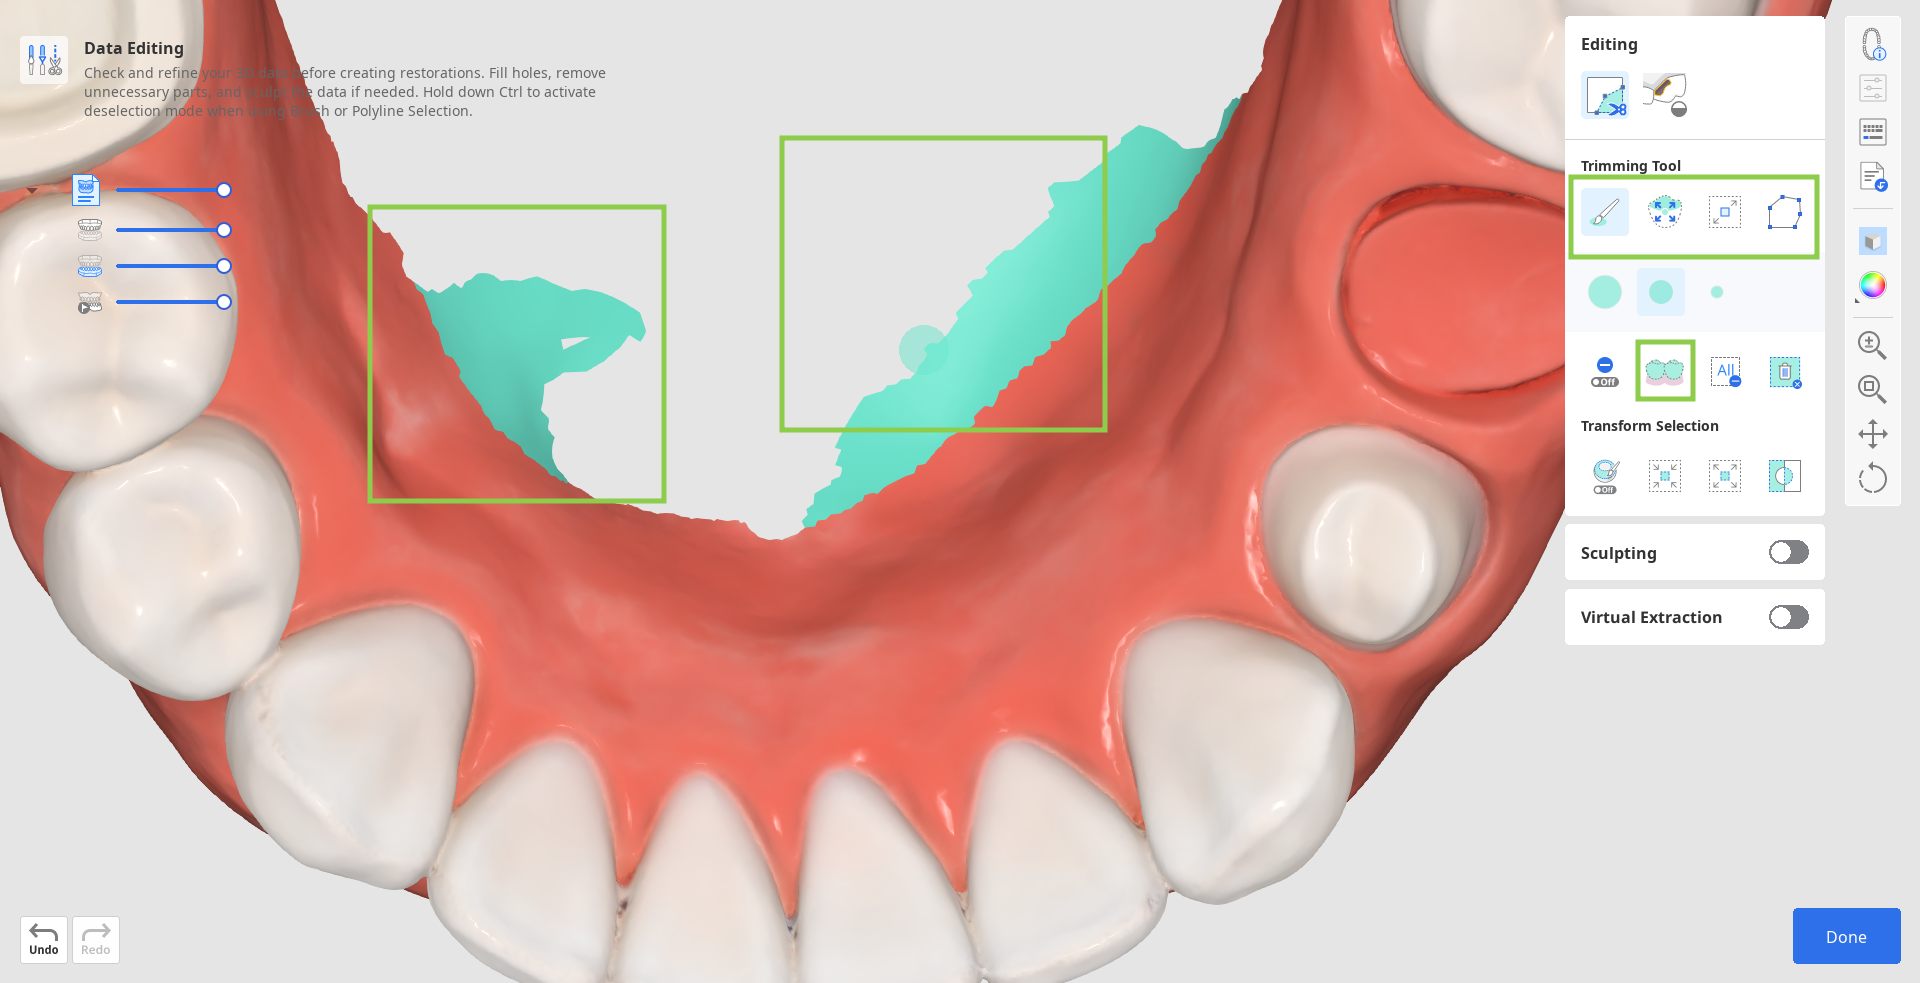
2. If needed, modify the selected area using the following tool options.
| Autofill Selected Area | Automatically fill in entities of the selected area. |
| Shrink Selected Area | Reduce the selected area each time you press the button. |
| Expand Selected Area | Expand the selected area each time you press the button. |
| Invert Selected Area | Invert the selection. |
.png)
.png)
.png)
.png)
You can also turn on "Deselection Mode" to modify selection manually or use "Clear All Selection" to automatically deselect everything.

![]() Caution
Caution
Please review the autofilled selections, as they may cause unintended errors and potential clinical risks.
3. To complete the trim, click "Delete Selected Area."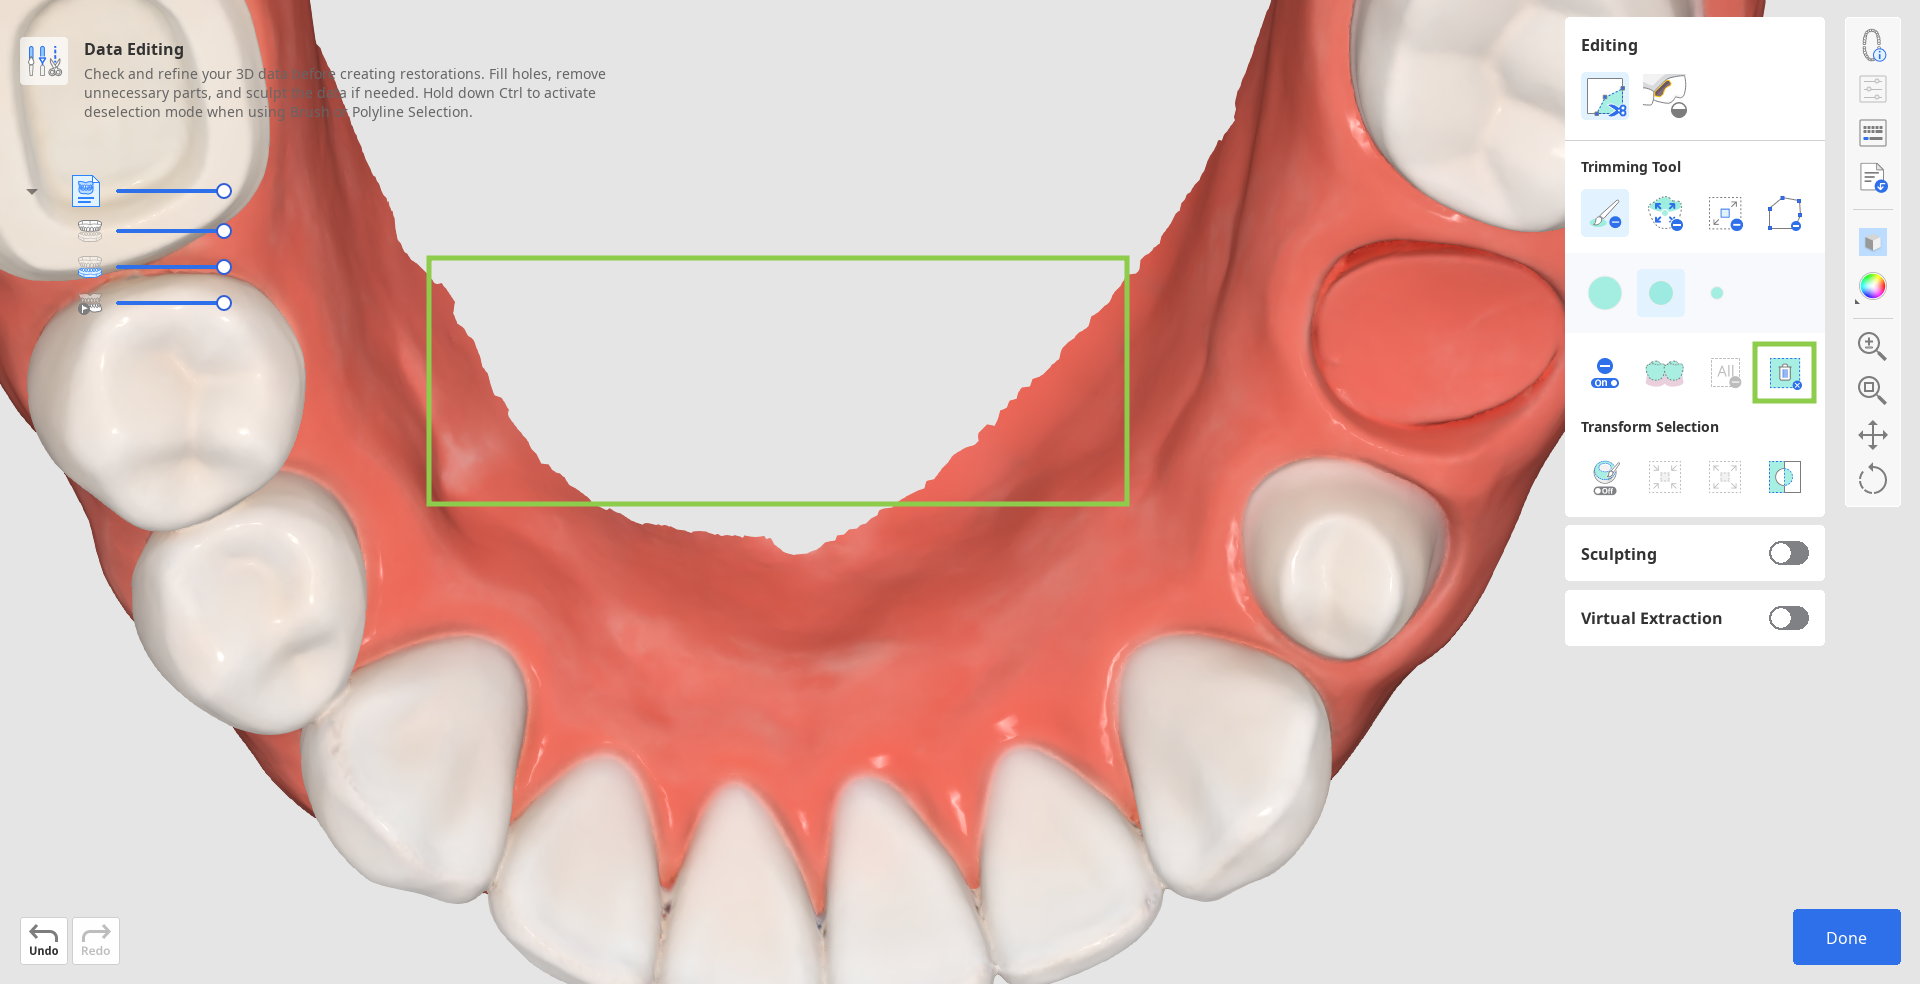
How to fill holes
1. Change to the "Fill Holes" tool.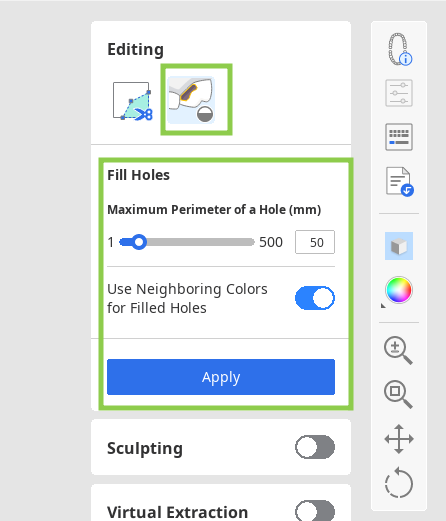
2. Find an area where data is missing and adjust the "Maximum Perimeter of a Hole" slider.
If the "Use Neighboring Colors for Filled Holes" option is on, the program will use the matching color palette to fill the area; otherwise, it is filled in grey.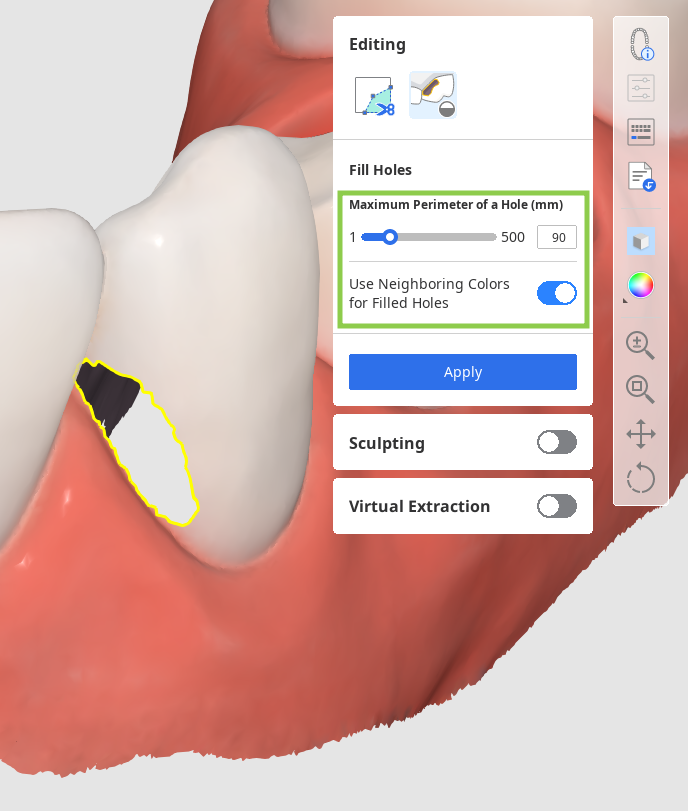
3. Click "Apply" to fill the holes with the new mesh.
How to sculpt data
Find the area of data you want to modify, then use the provided tools to add or remove data or to smooth and morph parts of it. You can also sculpt a more anatomical occlusal surface by using the "Groove" option.
Note that the strength and size of the sculpting brush is adjustable.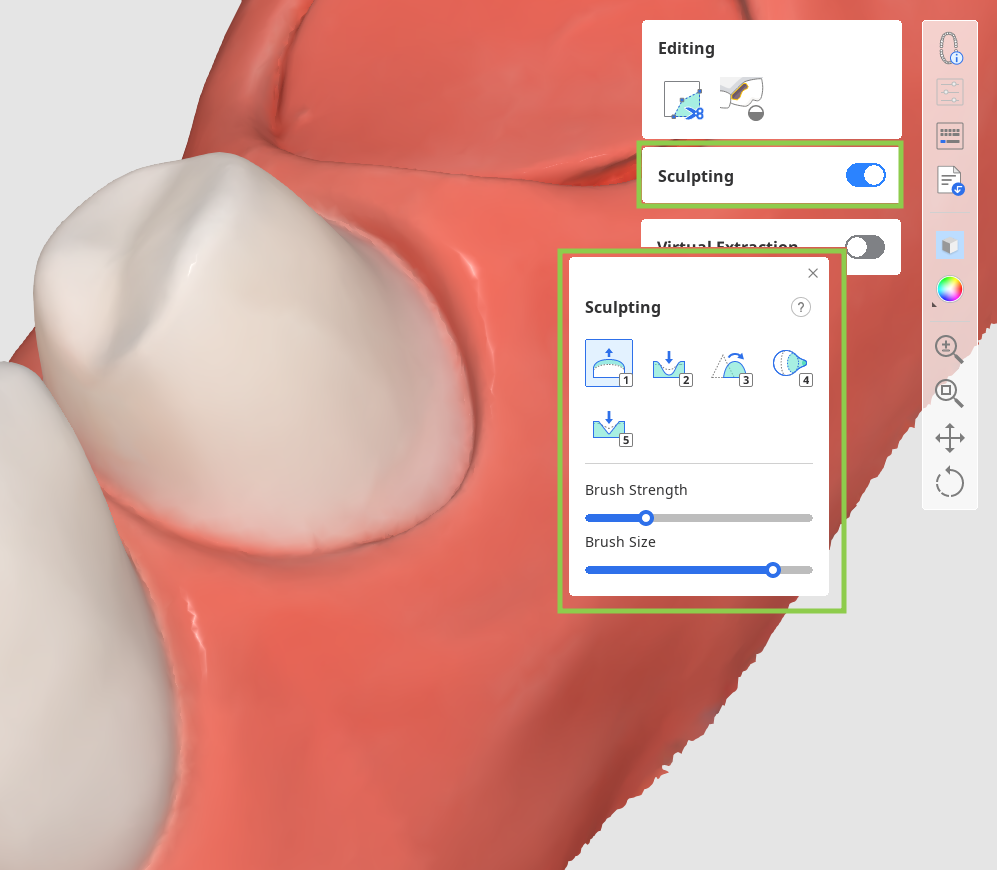
When finished, click "Done" in the bottom right corner to go to return to the first workflow step.
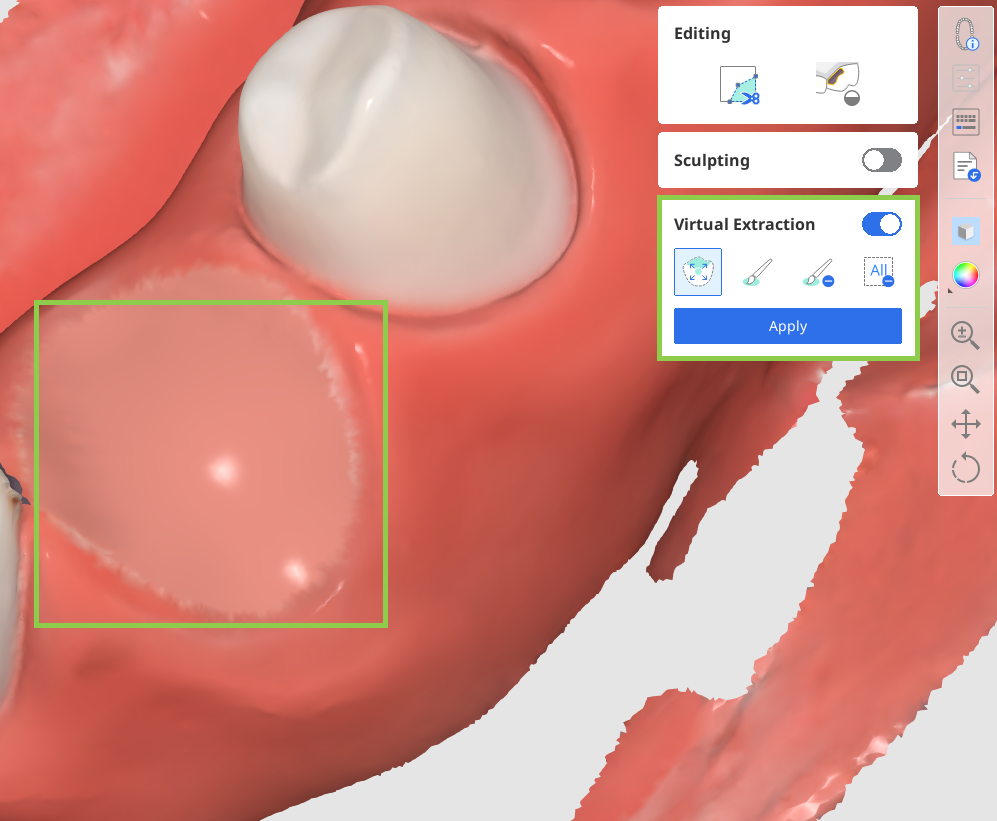
How to extract teeth
Turn on the “Virtual Extraction” feature. Select the tooth you want to remove using the provided tools, then click “Apply” to complete the extraction. Afterward, check for any holes in the gum data or nearby teeth, and use “Fill Holes” to repair them.