🔎Note
Refer to Tools and Functions > Main Toolbar Tools > Function Tools > Register Abutments on how to register abutments in the library.
You can register custom or ready-made abutments with adjusted length, angle, etc.
You can register custom or ready-made abutments with adjusted length, angle, etc.
You can use the library to substitute acquiring data for areas that may be difficult to reach, such as abutment margin areas located below the gingiva or areas too close to the adjacent teeth. You can acquire abutment scan data more accurately and easily this way.
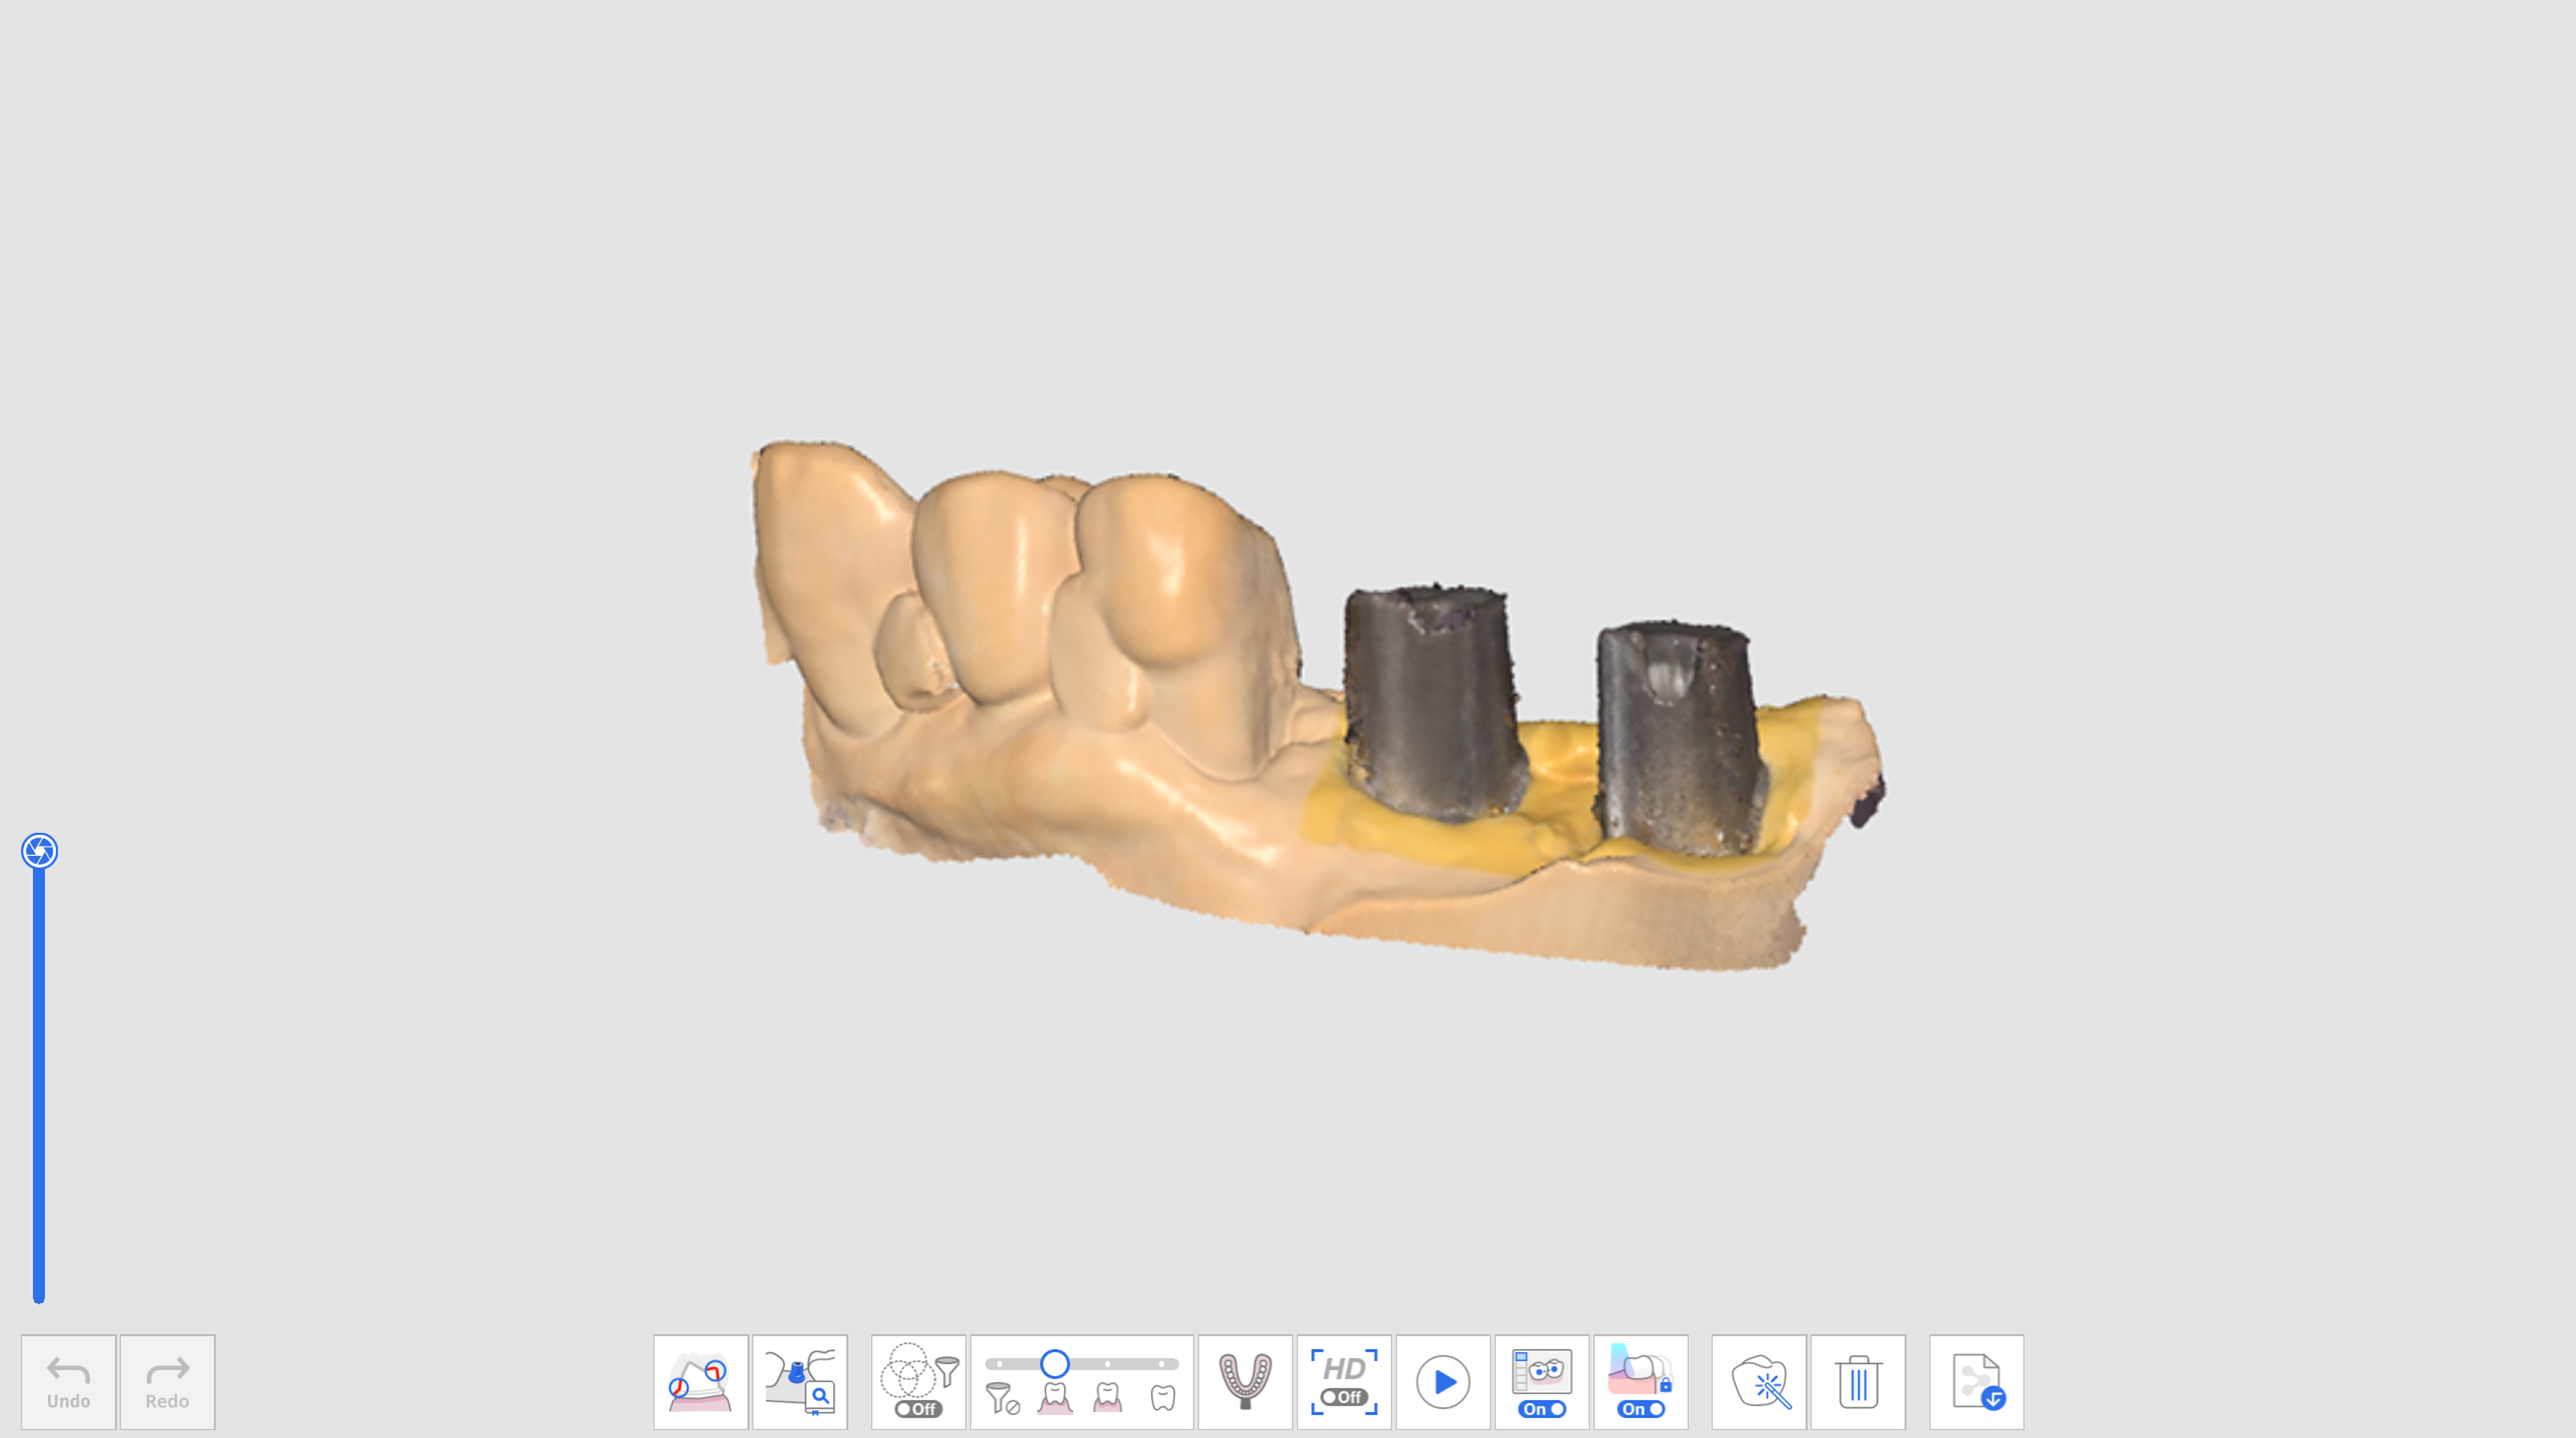
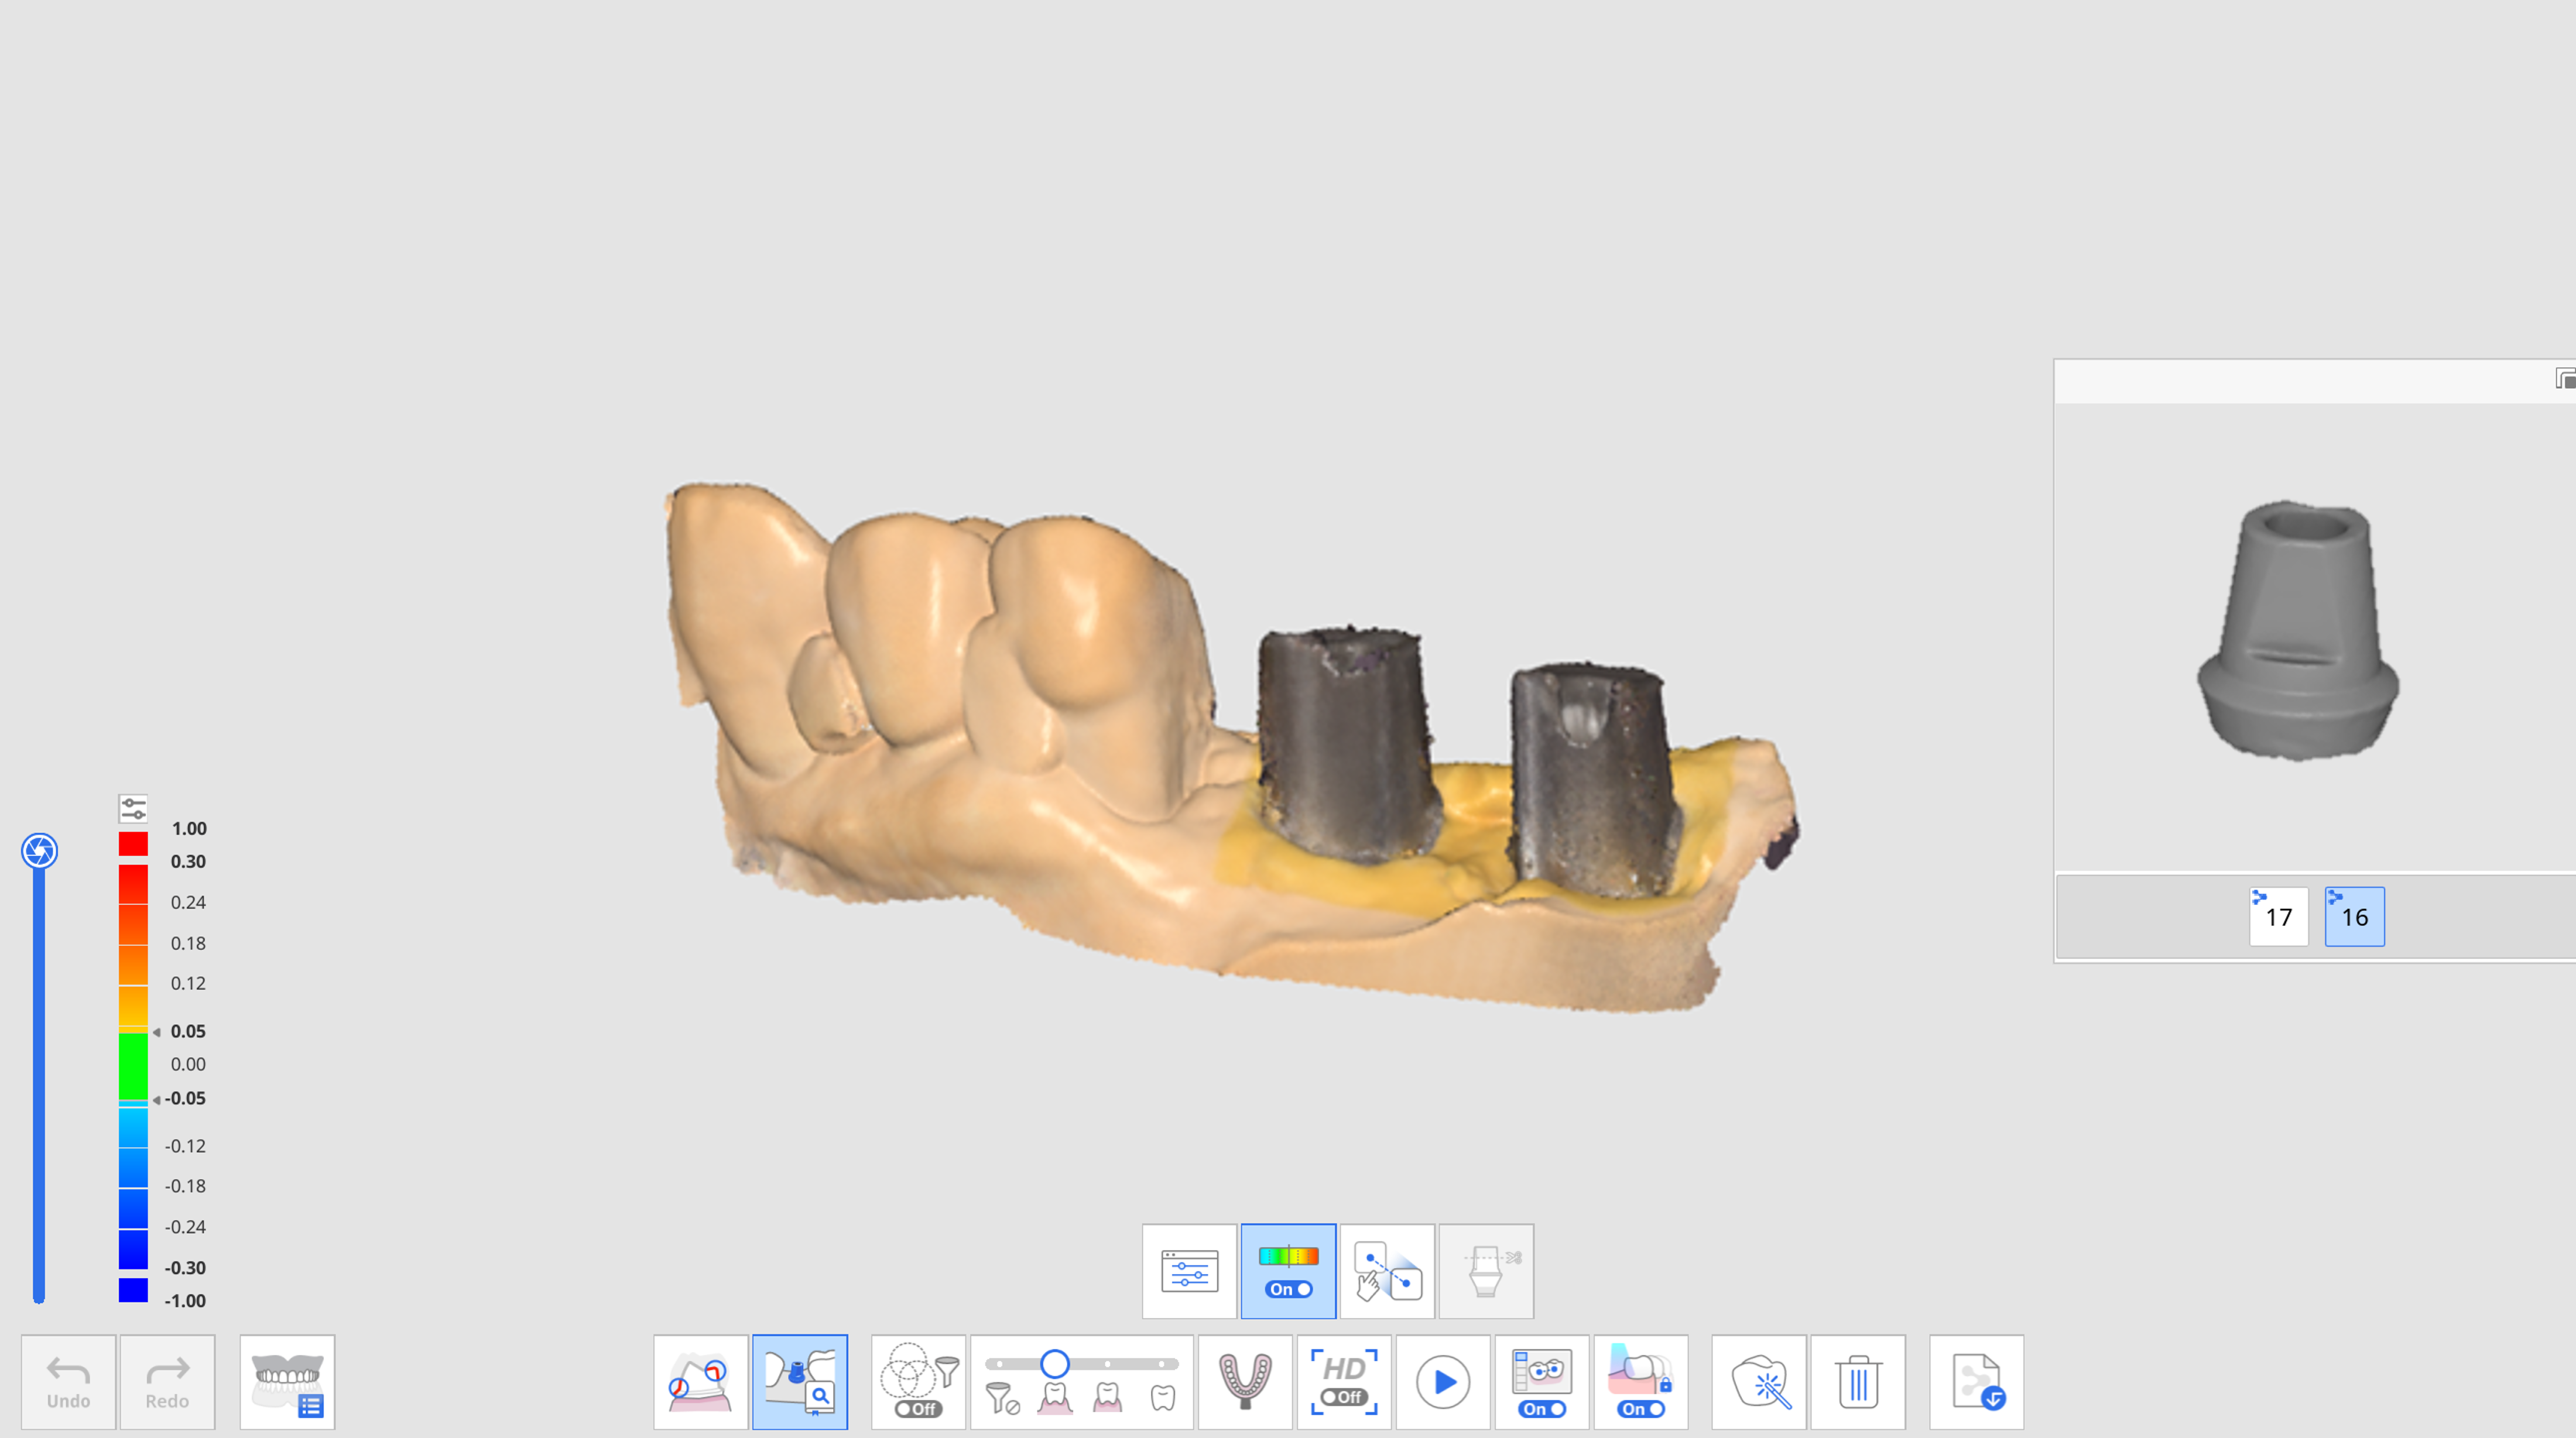
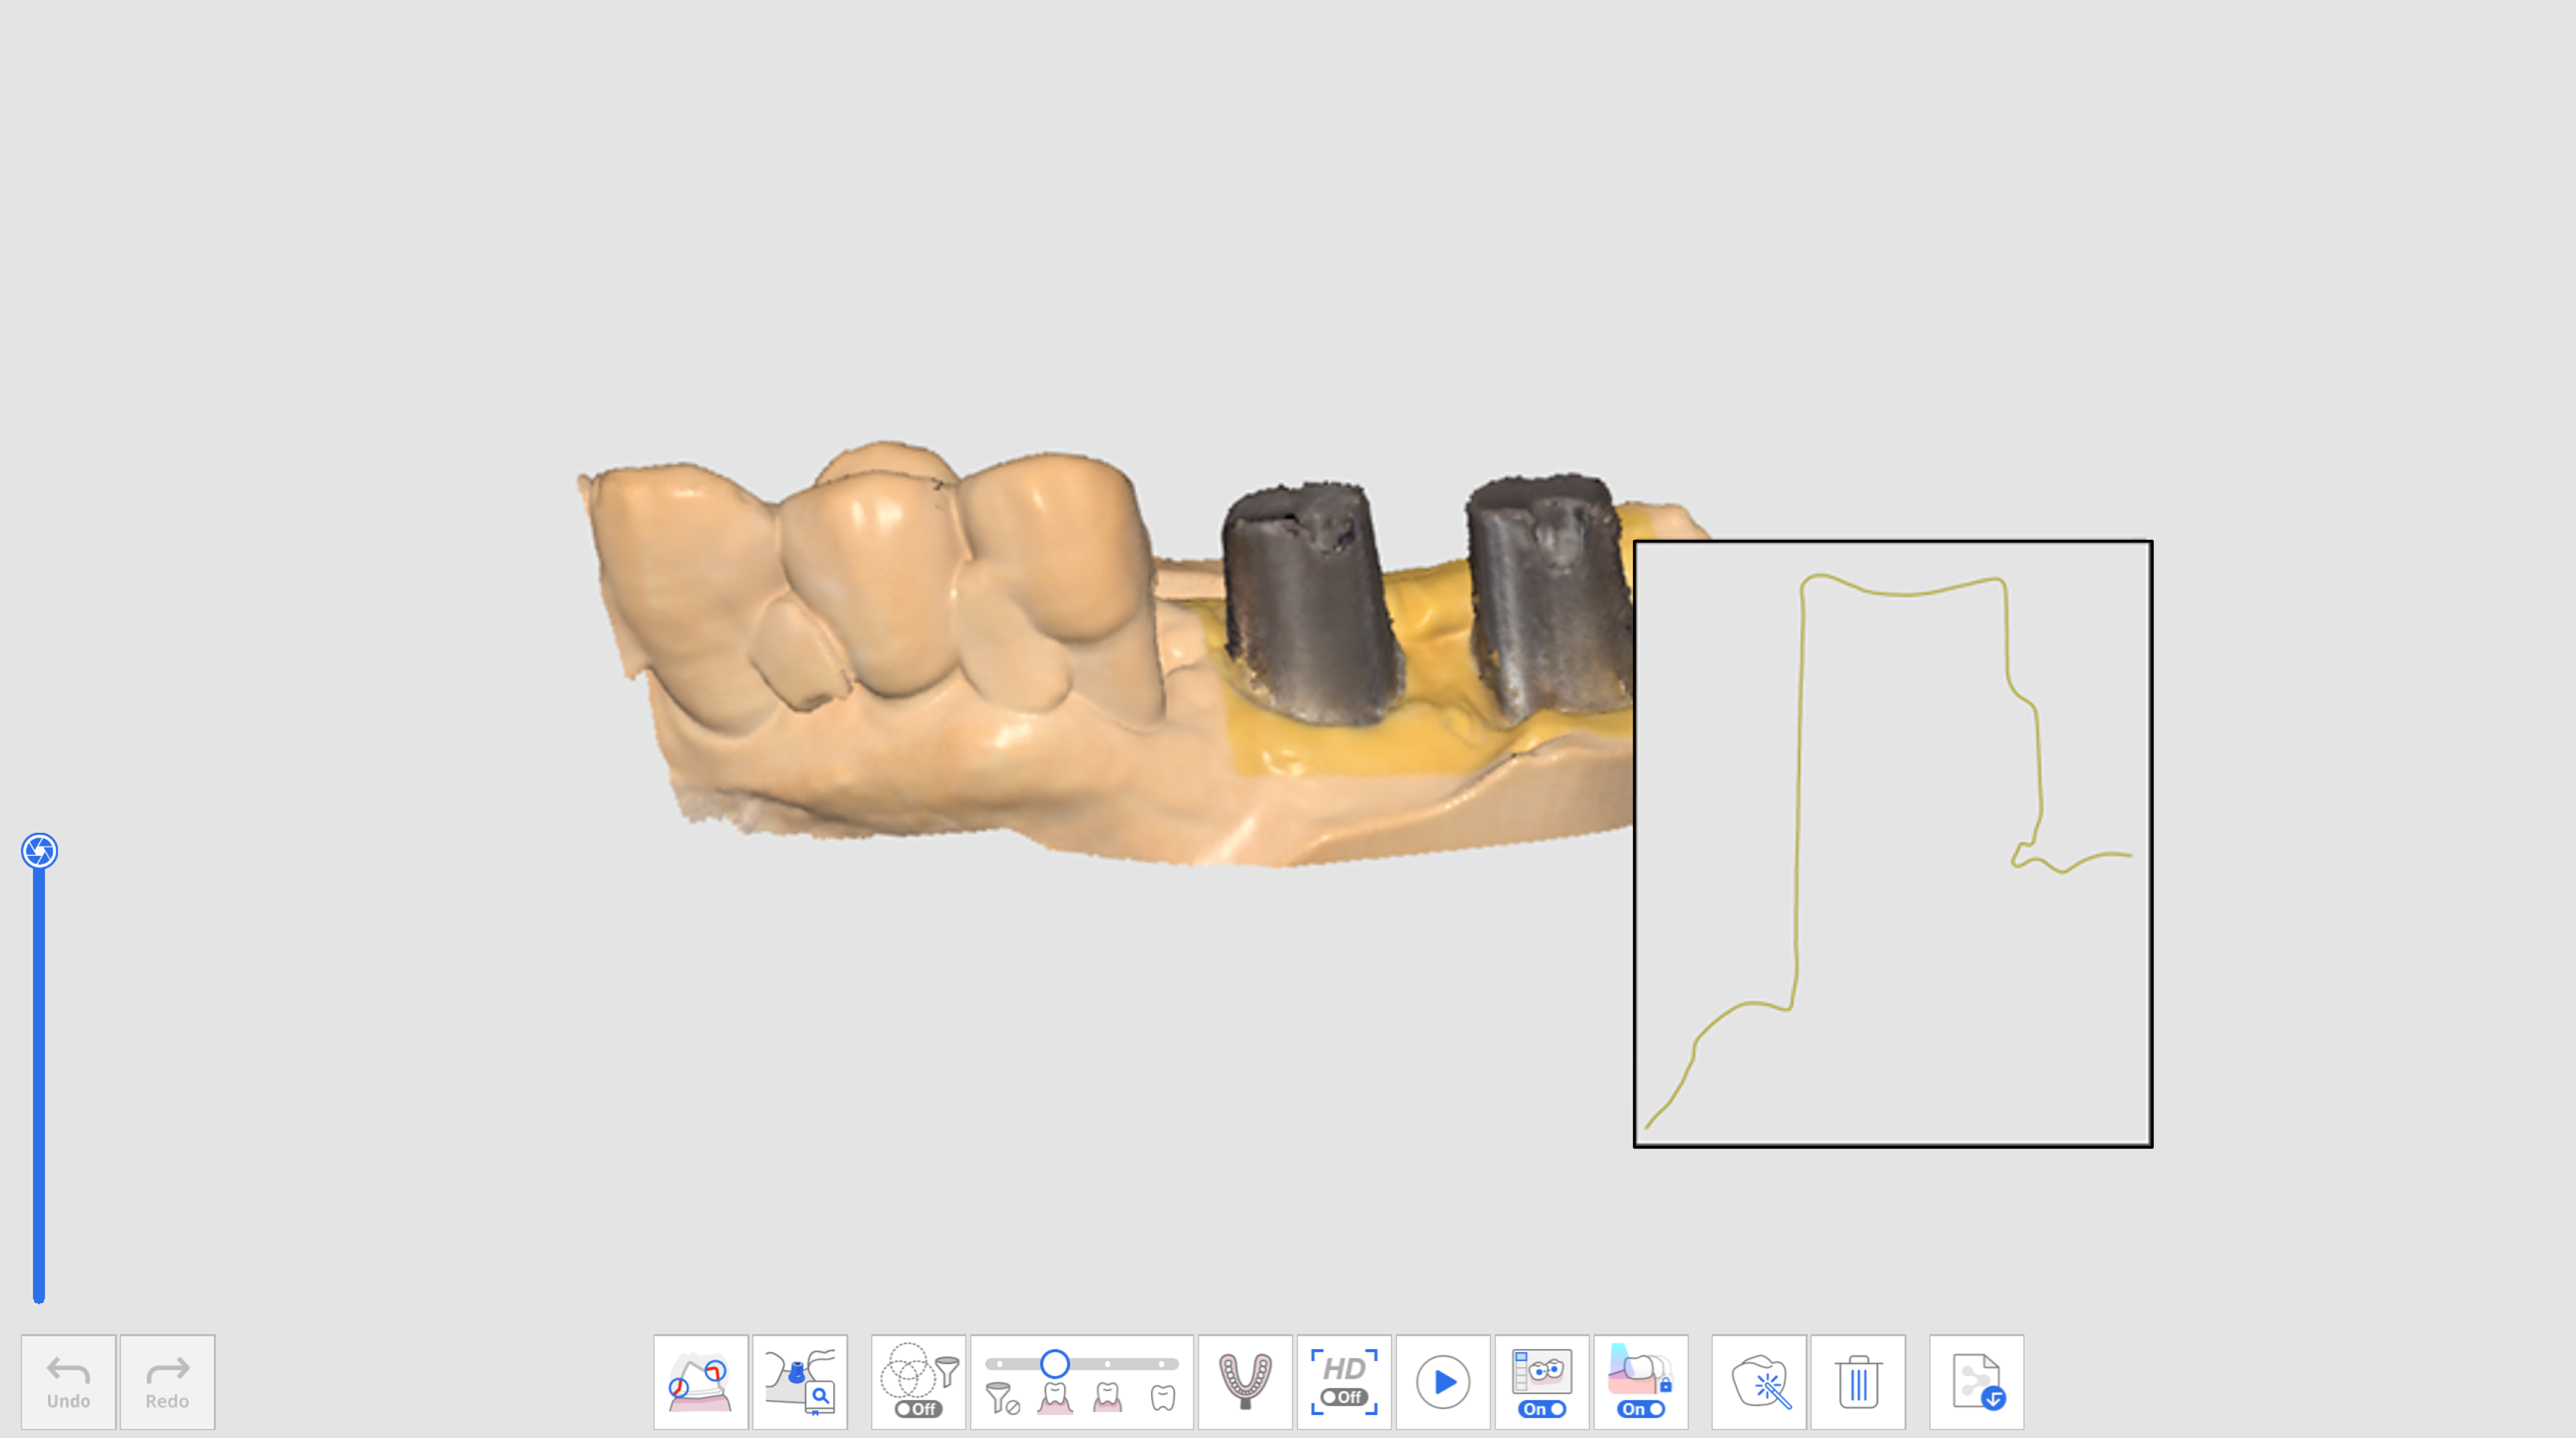 Scanned Abutment Data
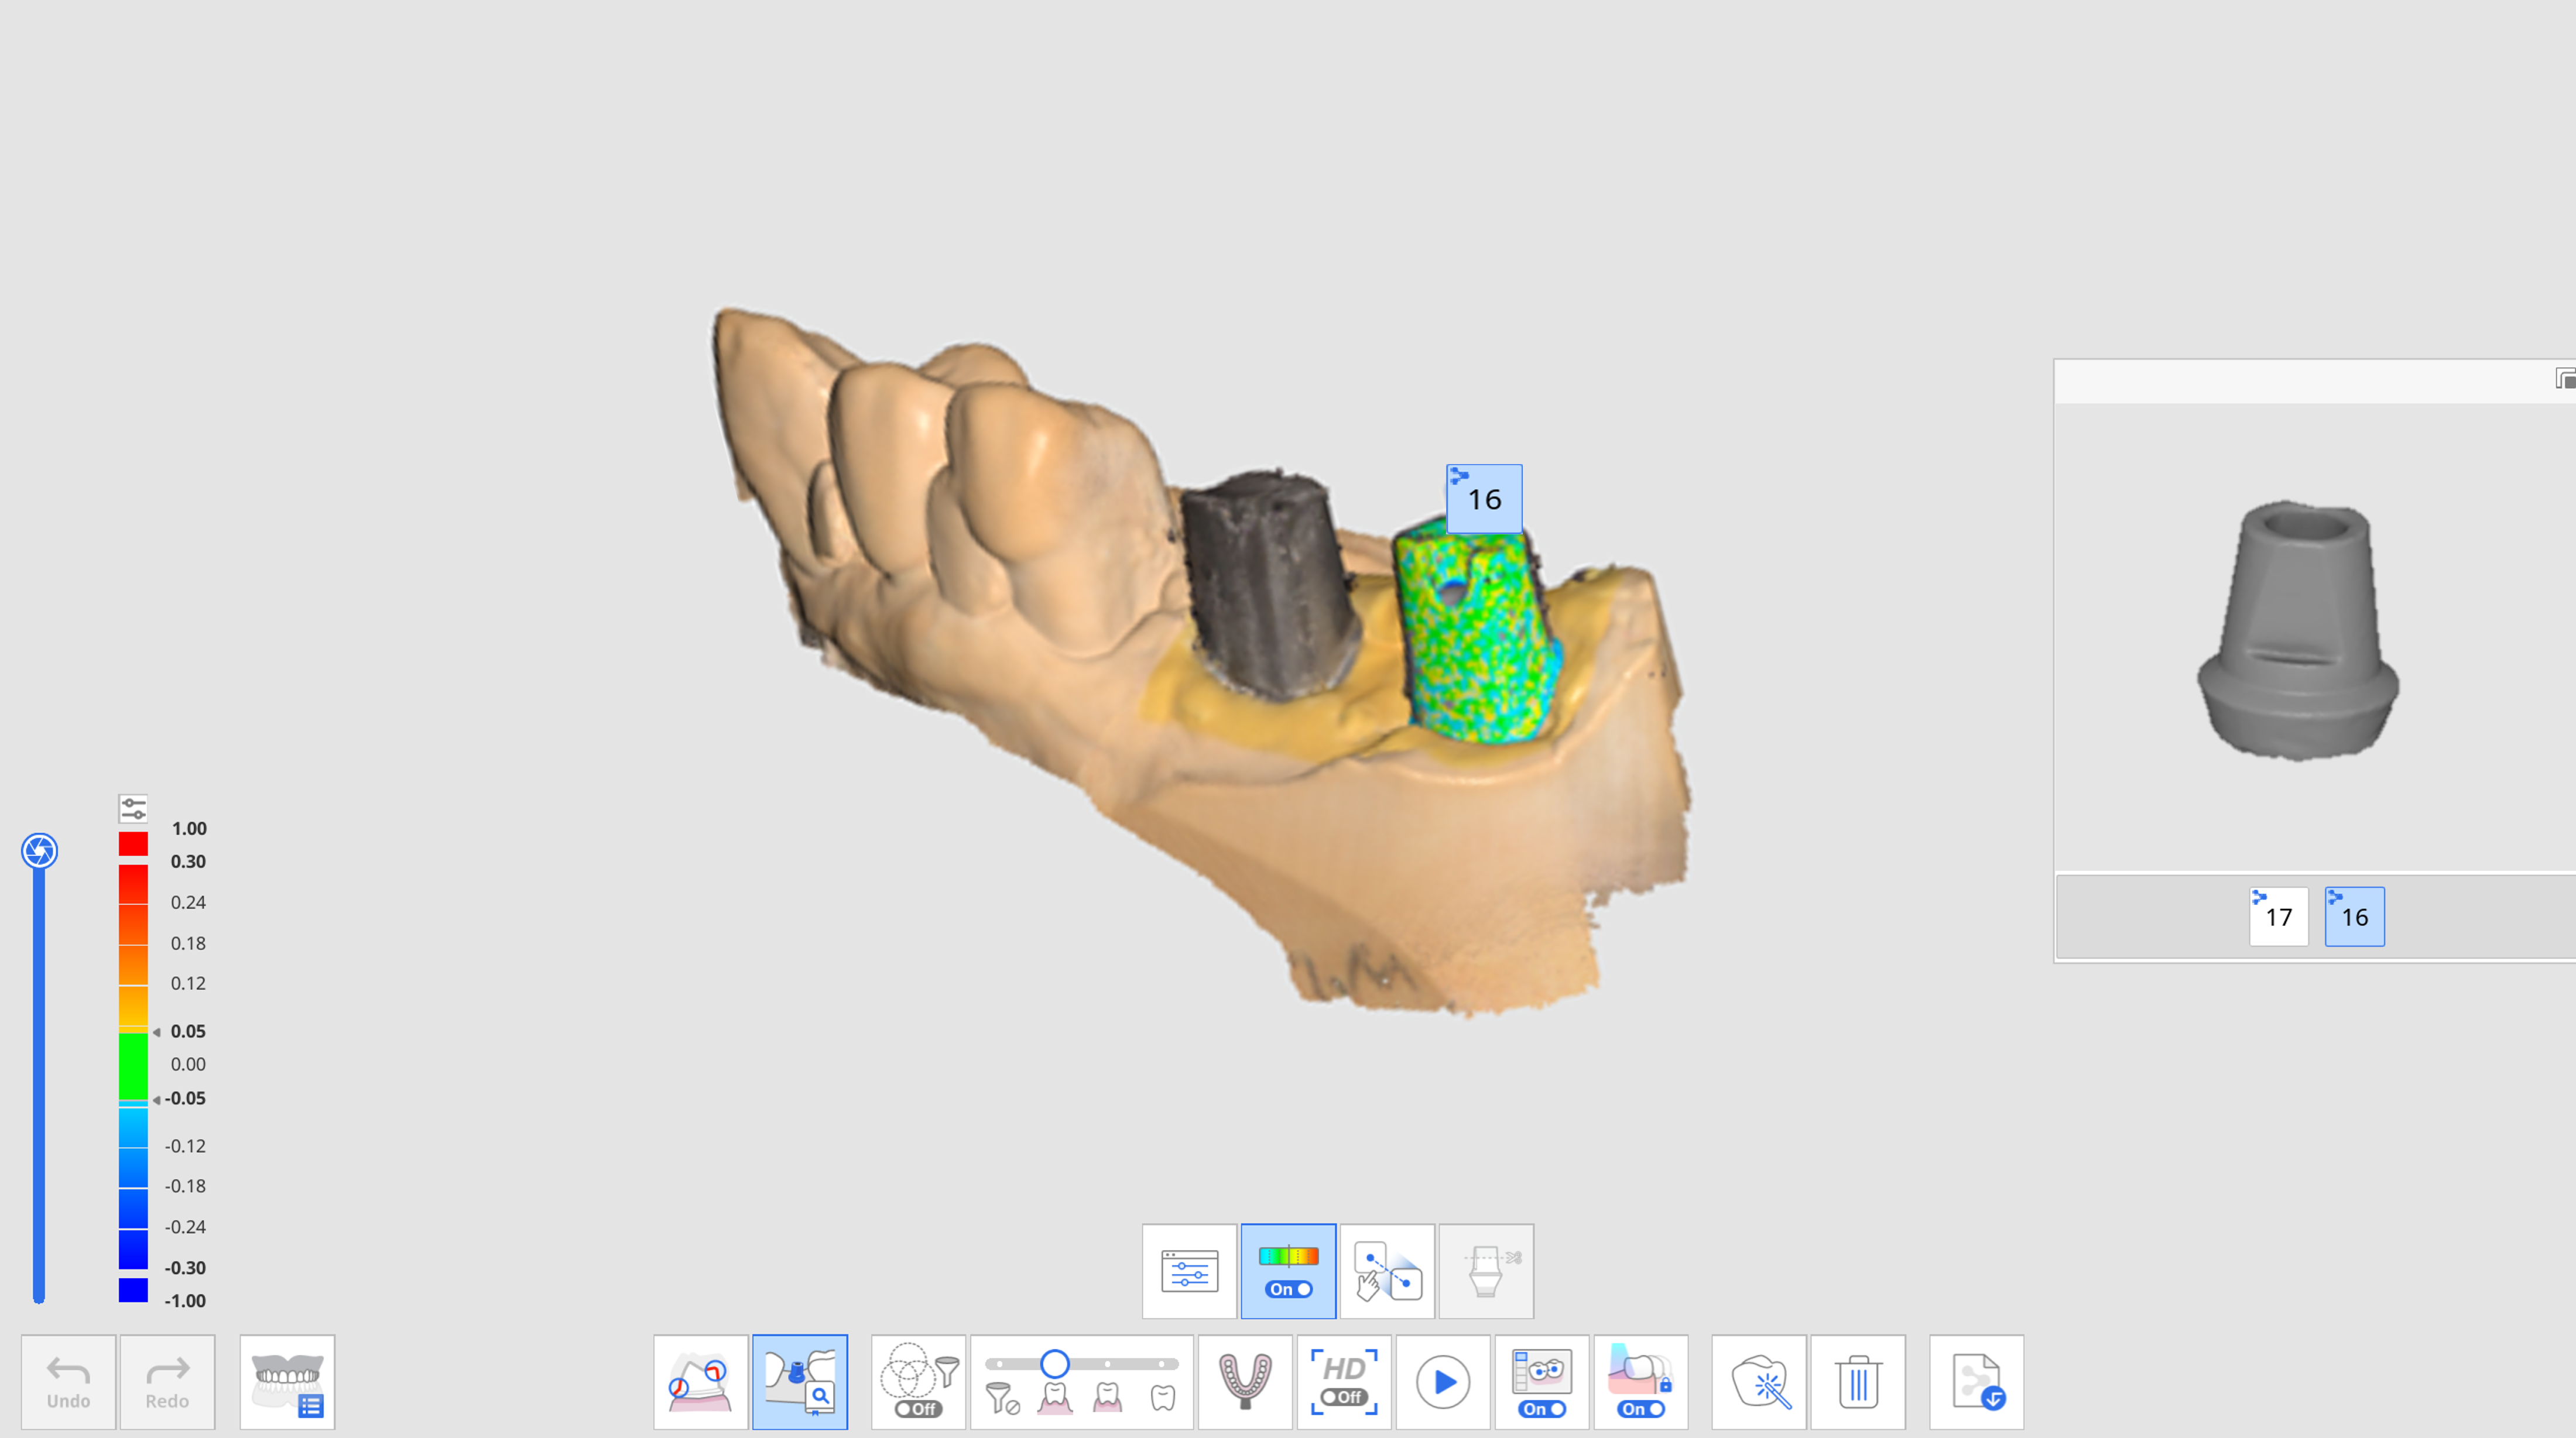
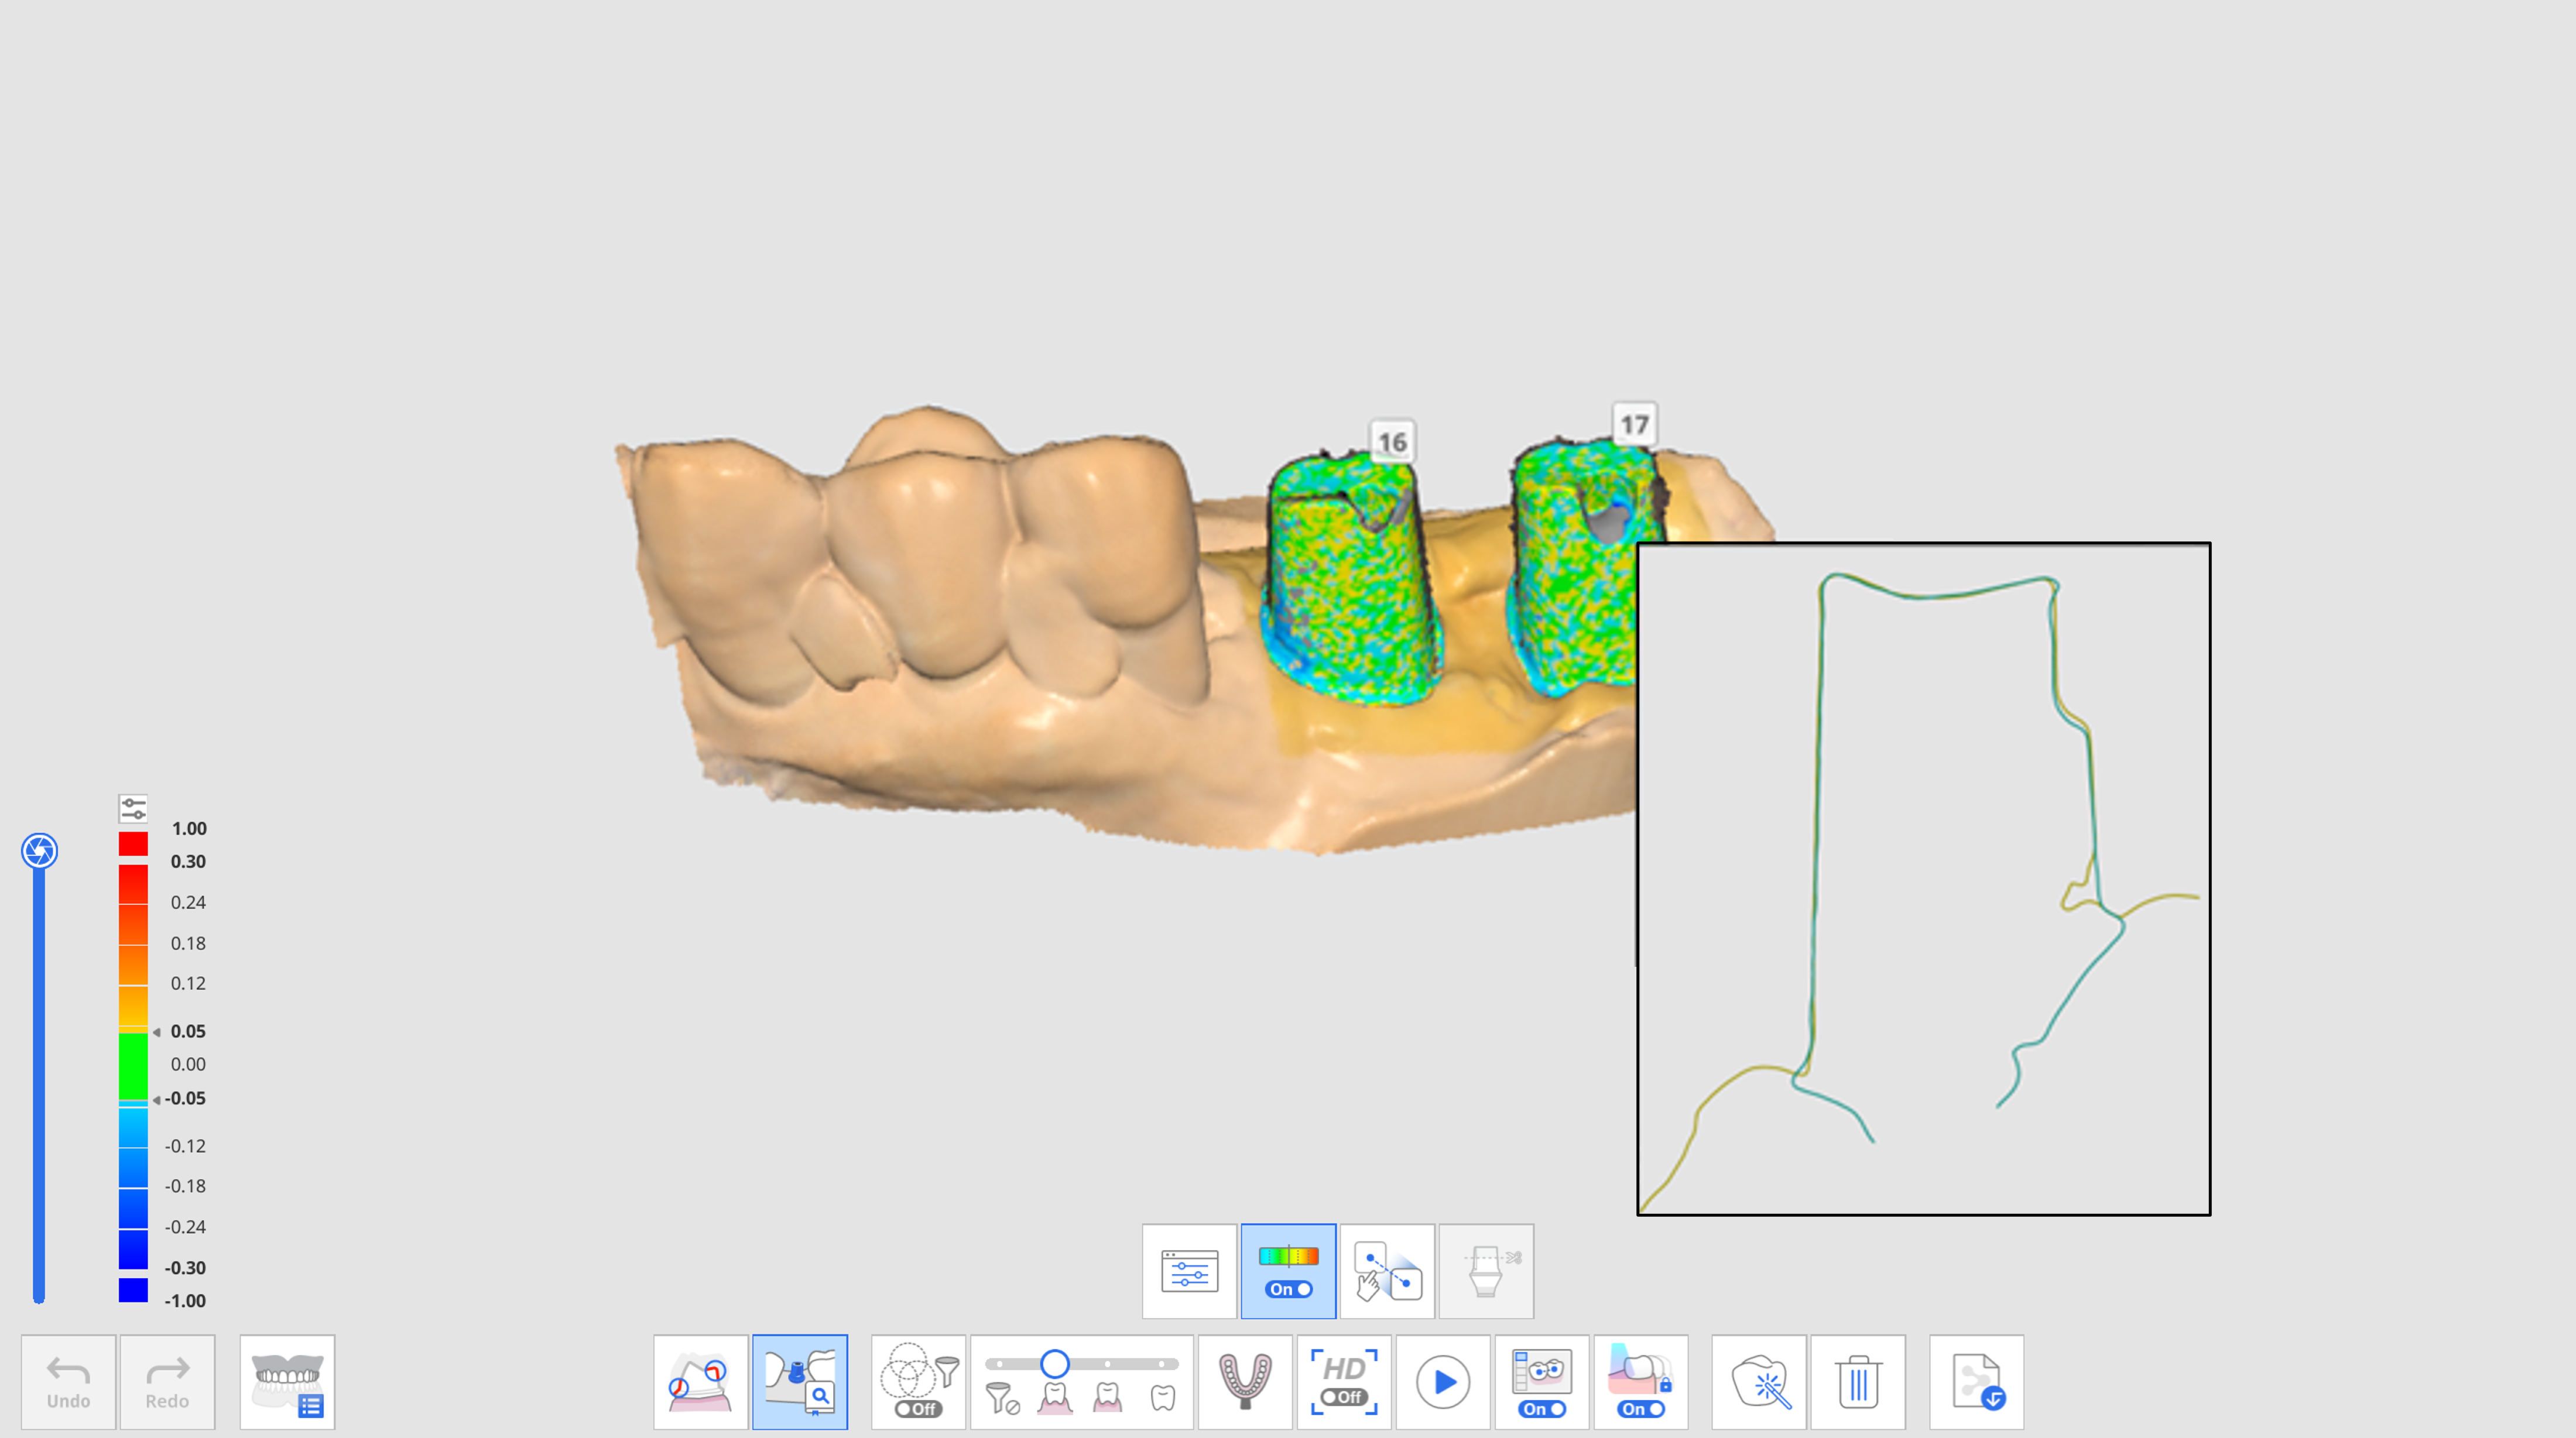 Abutment Data After Abutment Library Matching
The following tools are provided for the Abutment Library Matching feature.
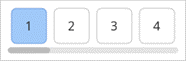 | Tooth Number | Allow users to select an individual tooth number for the data acquisition target. |
 | Abutment Library | Assign library data for each tooth and manage the library data. |
 | Show/Hide Deviation | Show or hide the deviation between aligned data using a color map. |
 | Manual Alignment | Allow users to align the library data and scan data manually. You can align data with one or three alignment points. |
 | Cut Abutment Manually | Cut the abutment by adjusting the height manually. |
How to Use Abutment Library Matching
Assign Abutment Library
Before you scan the abutment data, you must assign the desired library to each tooth number.
- Acquire data in the Maxilla or Mandible stage.
- Click the "Abutment Library Matching" tool icon at the bottom of the Maxilla or Mandible stage.
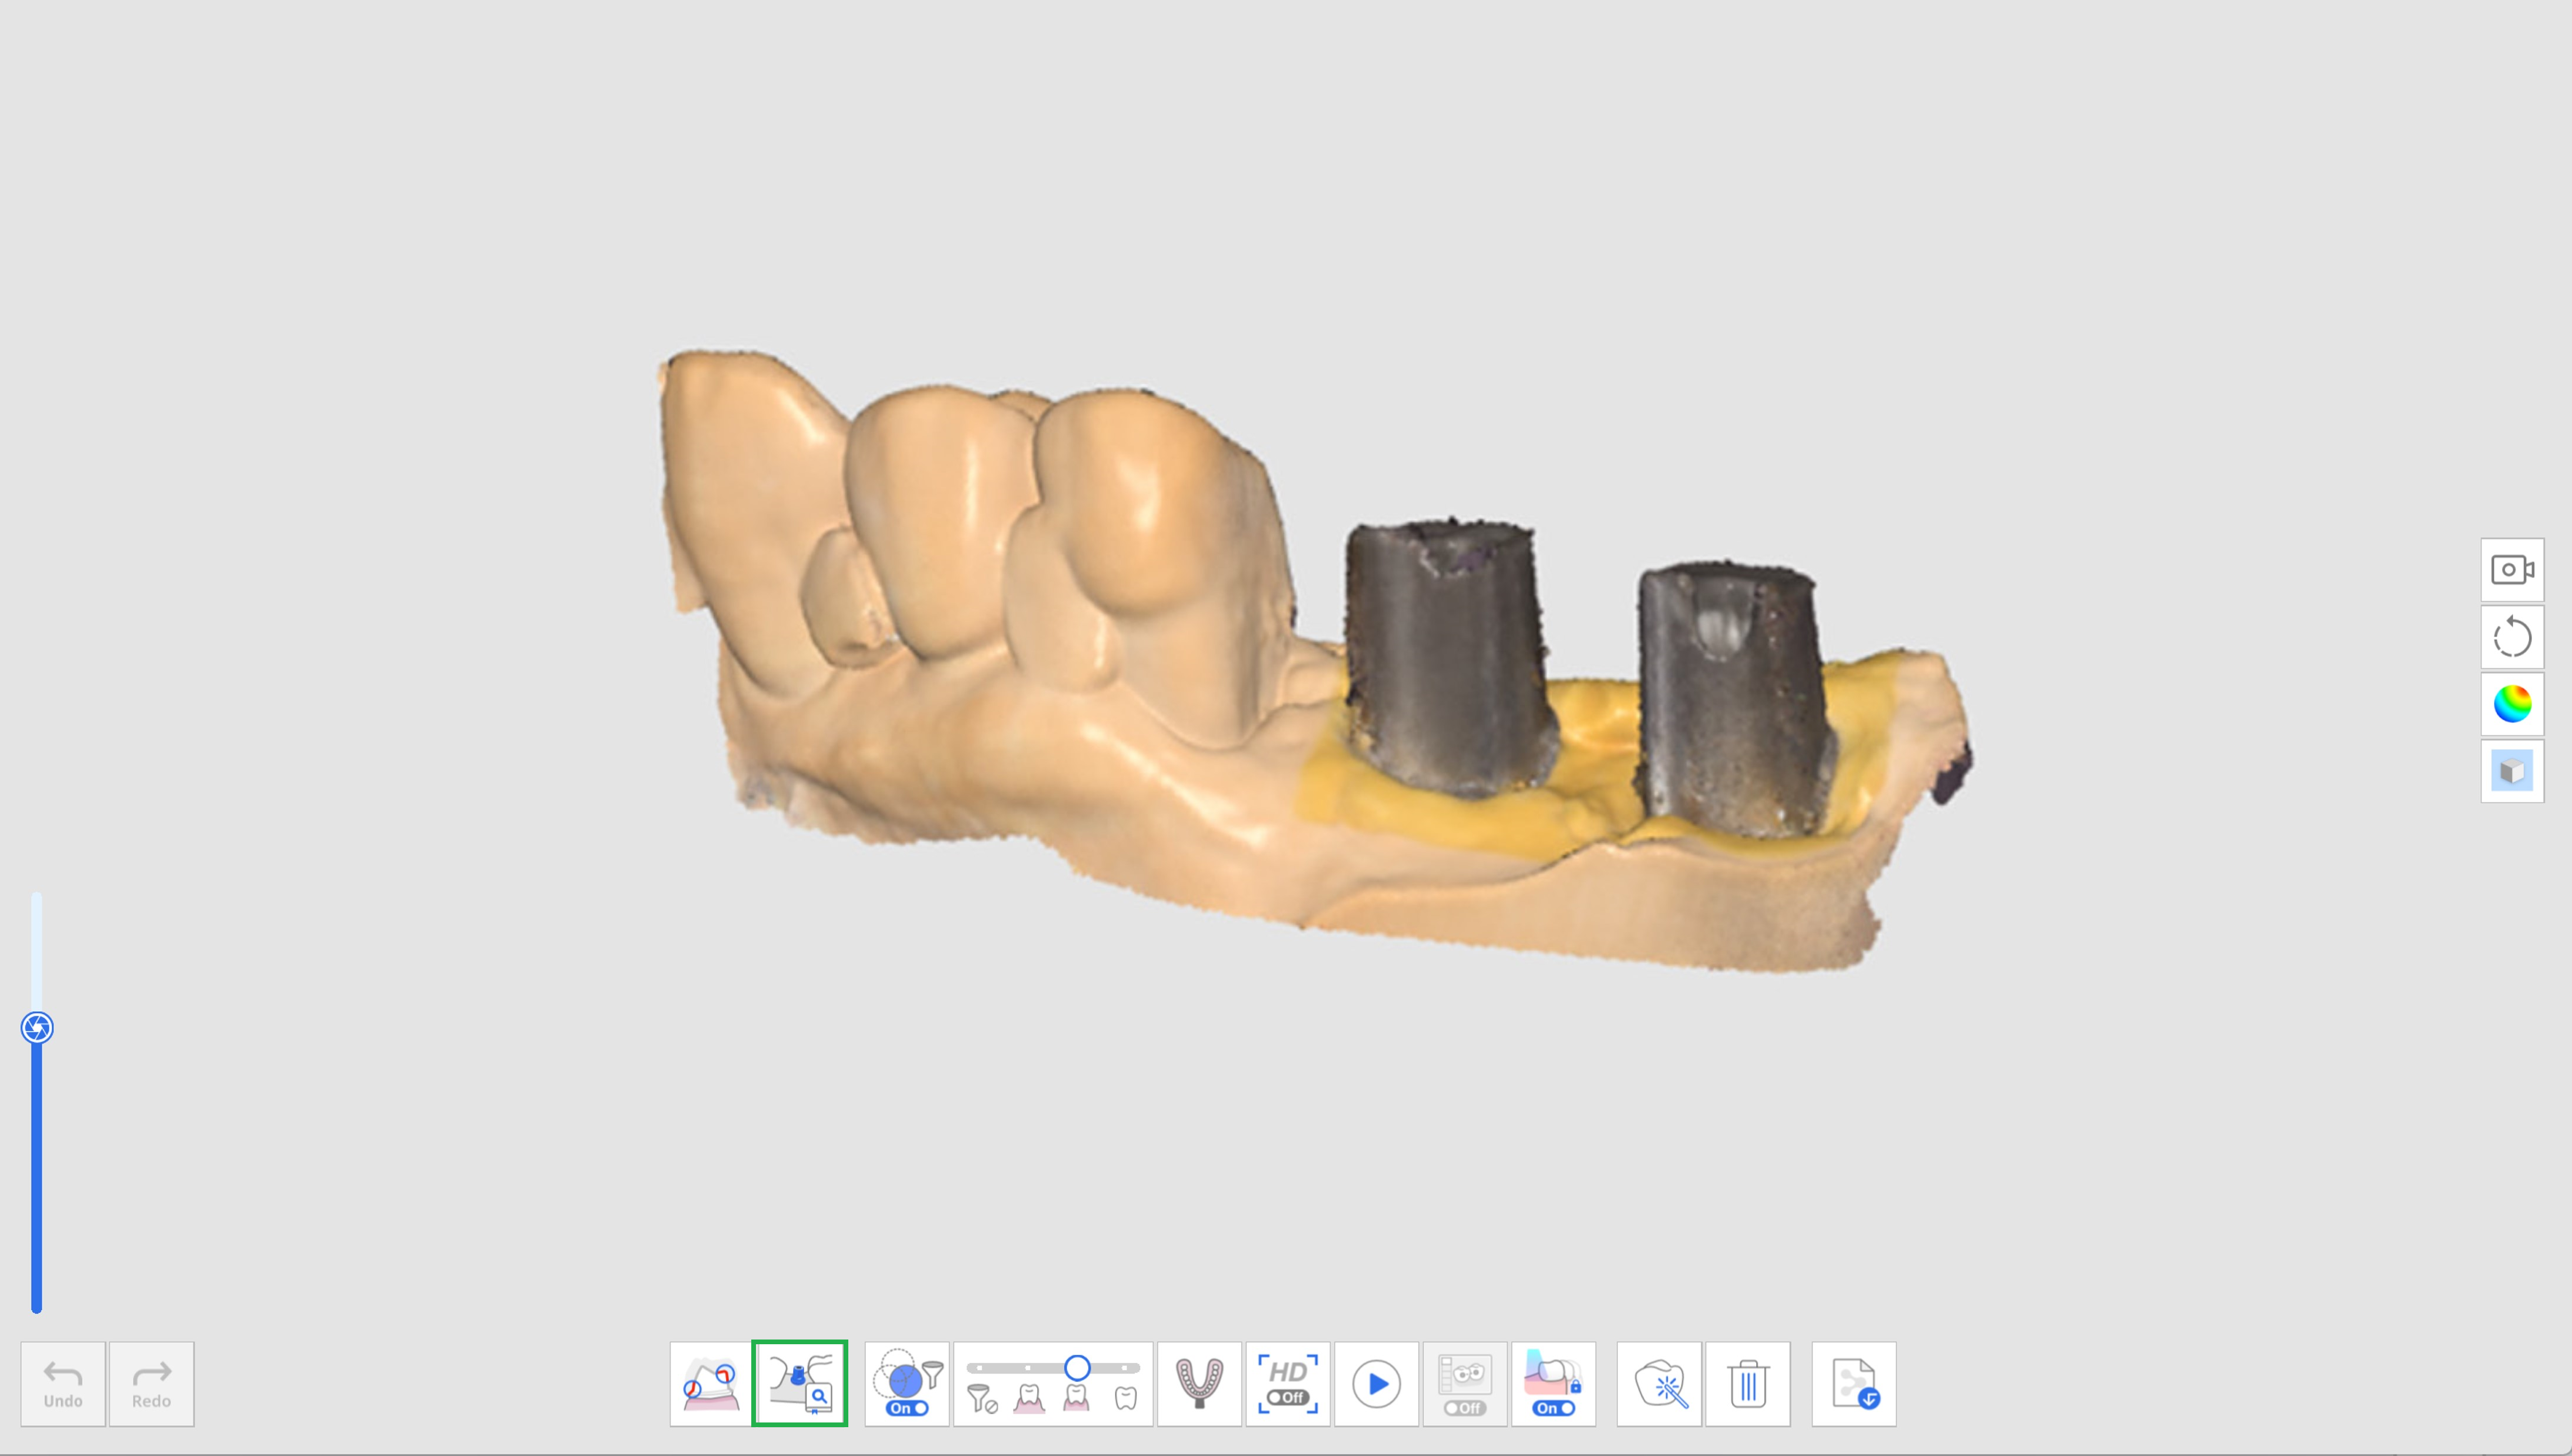
- Click the "Abutment Library" icon.

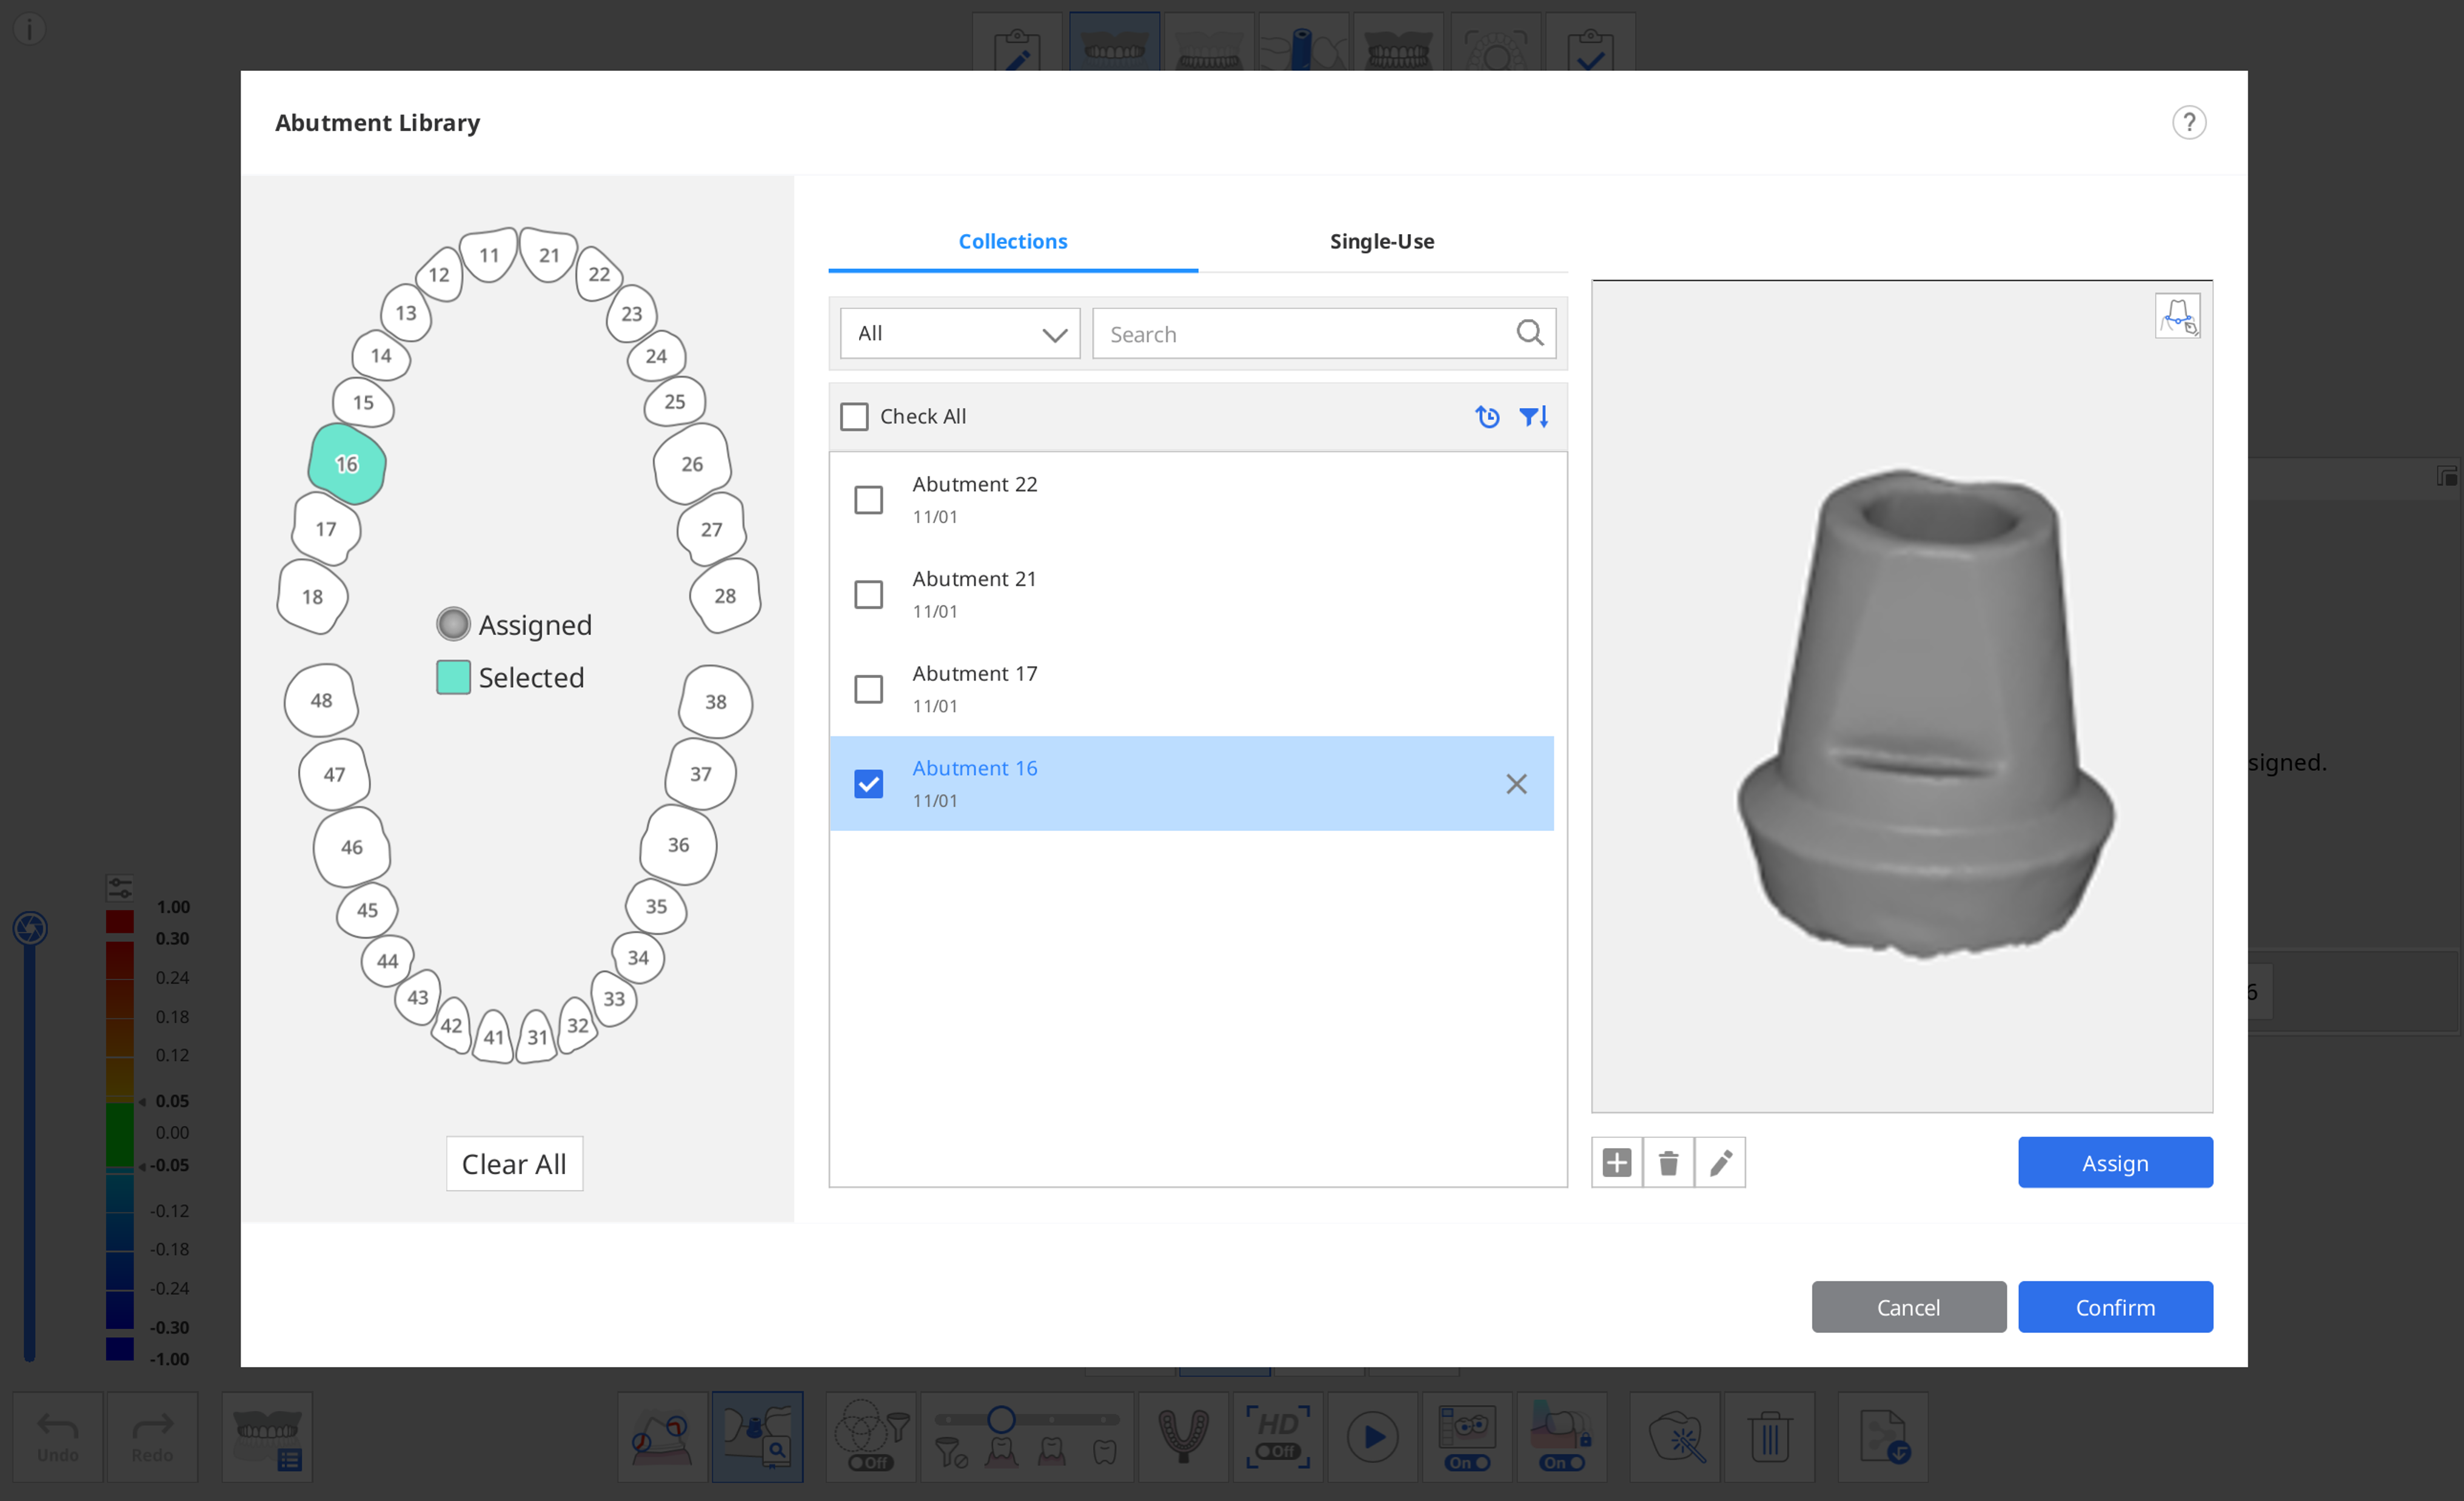
- The following dialog appears to define the abutment library for each tooth.
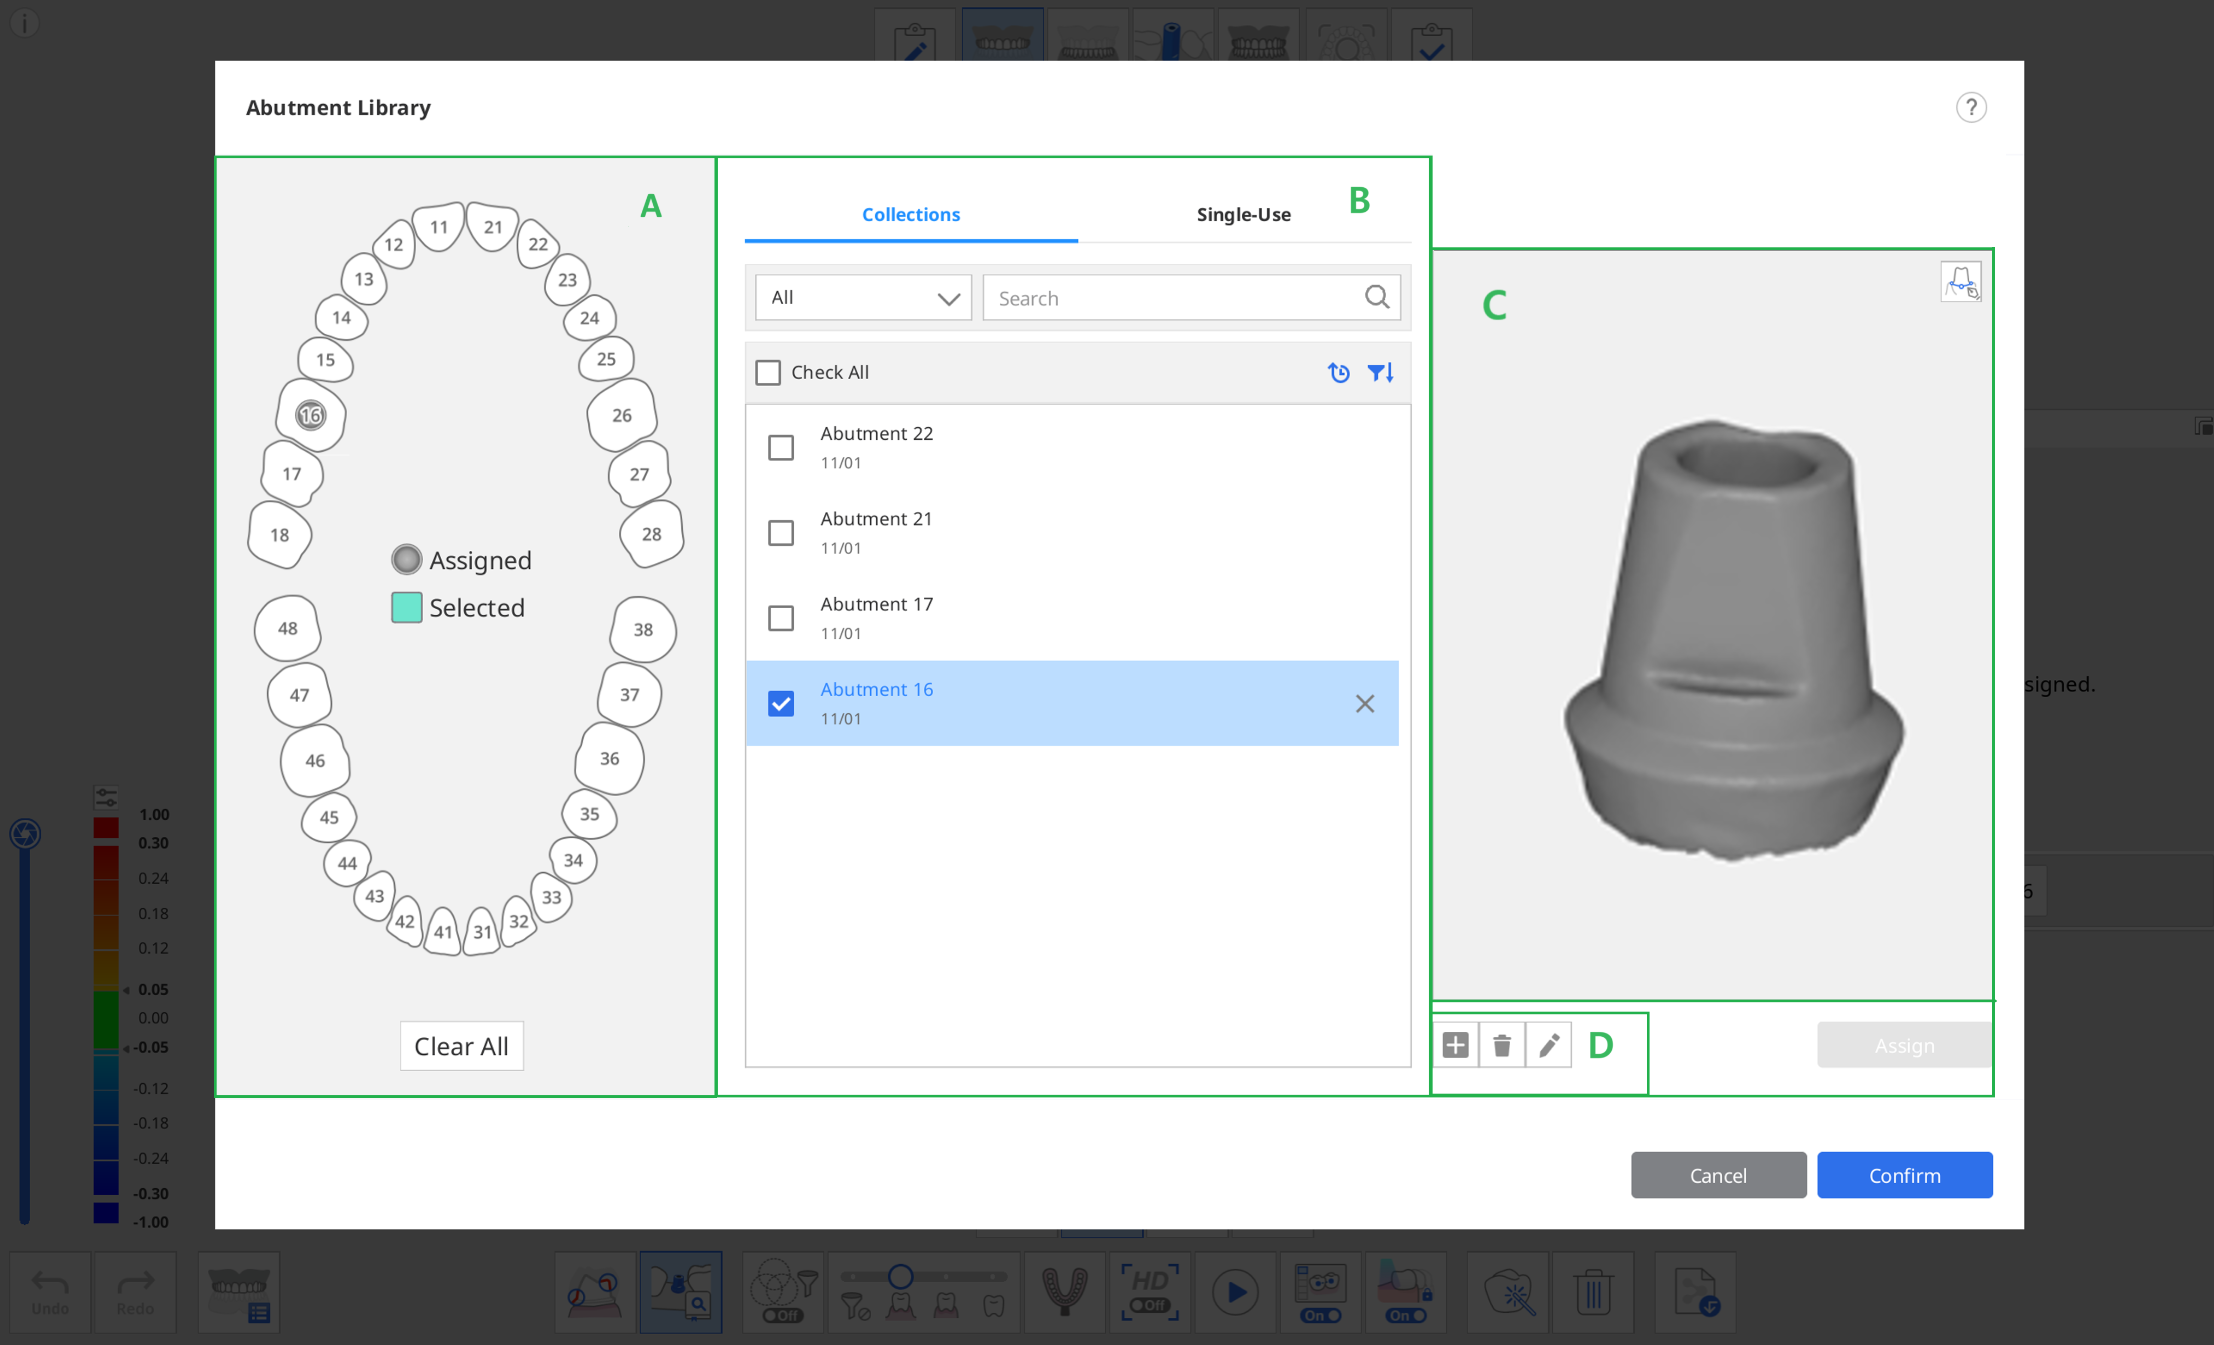 The following two tabs are provided in section B for abutment library selection.
- Collections: The list of abutment libraries registered as collections so that they can continue to be used in multiple cases.
- Single-Use: The list of abutment libraries registered as single-use so that they can only be used in the case.
- Select a tooth or multiple teeth from section A and select a library in section B.
- You can add a new library by clicking the "+" button below the preview image. Files in STL, OBJ, and PLY formats are supported to register.
- You can also delete the selected case or edit a case name by clicking the "Delete" or "Edit" button below the image.
- Check the selected library in the 3D preview in section C. You can rotate, move, zoom in, and zoom out.
- You can also register the abutment with a margin line by clicking the Margin Line icon on the upper right corner of the preview.🔎NoteRefer to Tools and Functions > Main Toolbar Tools > Function Tools > Margin Line for detailed information on how to draw a margin.
- Click "Assign" to assign the selected abutment to the selected tooth number.
- After assigning all required libraries, click "Confirm."
Align Abutment Library
Once you assign a library to a tooth number, the Abutment Library Matching will automatically align the library to the scan data while scanning.
- Turn on the "Abutment Library Matching" tool at the bottom of the screen.
- While scanning the data, the program automatically attempts to align the library you assigned for the tooth number to the acquired scan data.
- Once an abutment library is aligned, you can check the scan data and library deviation through the color map.
- Repeat to select another tooth number in the preview to align more abutment libraries.
- After the scanning, you can manually align any libraries that were not automatically aligned during the scan.
- Click the "Manual Alignment" icon.

- Click one to three corresponding alignment points on the library data for the selected tooth number in the library preview and the scan data.
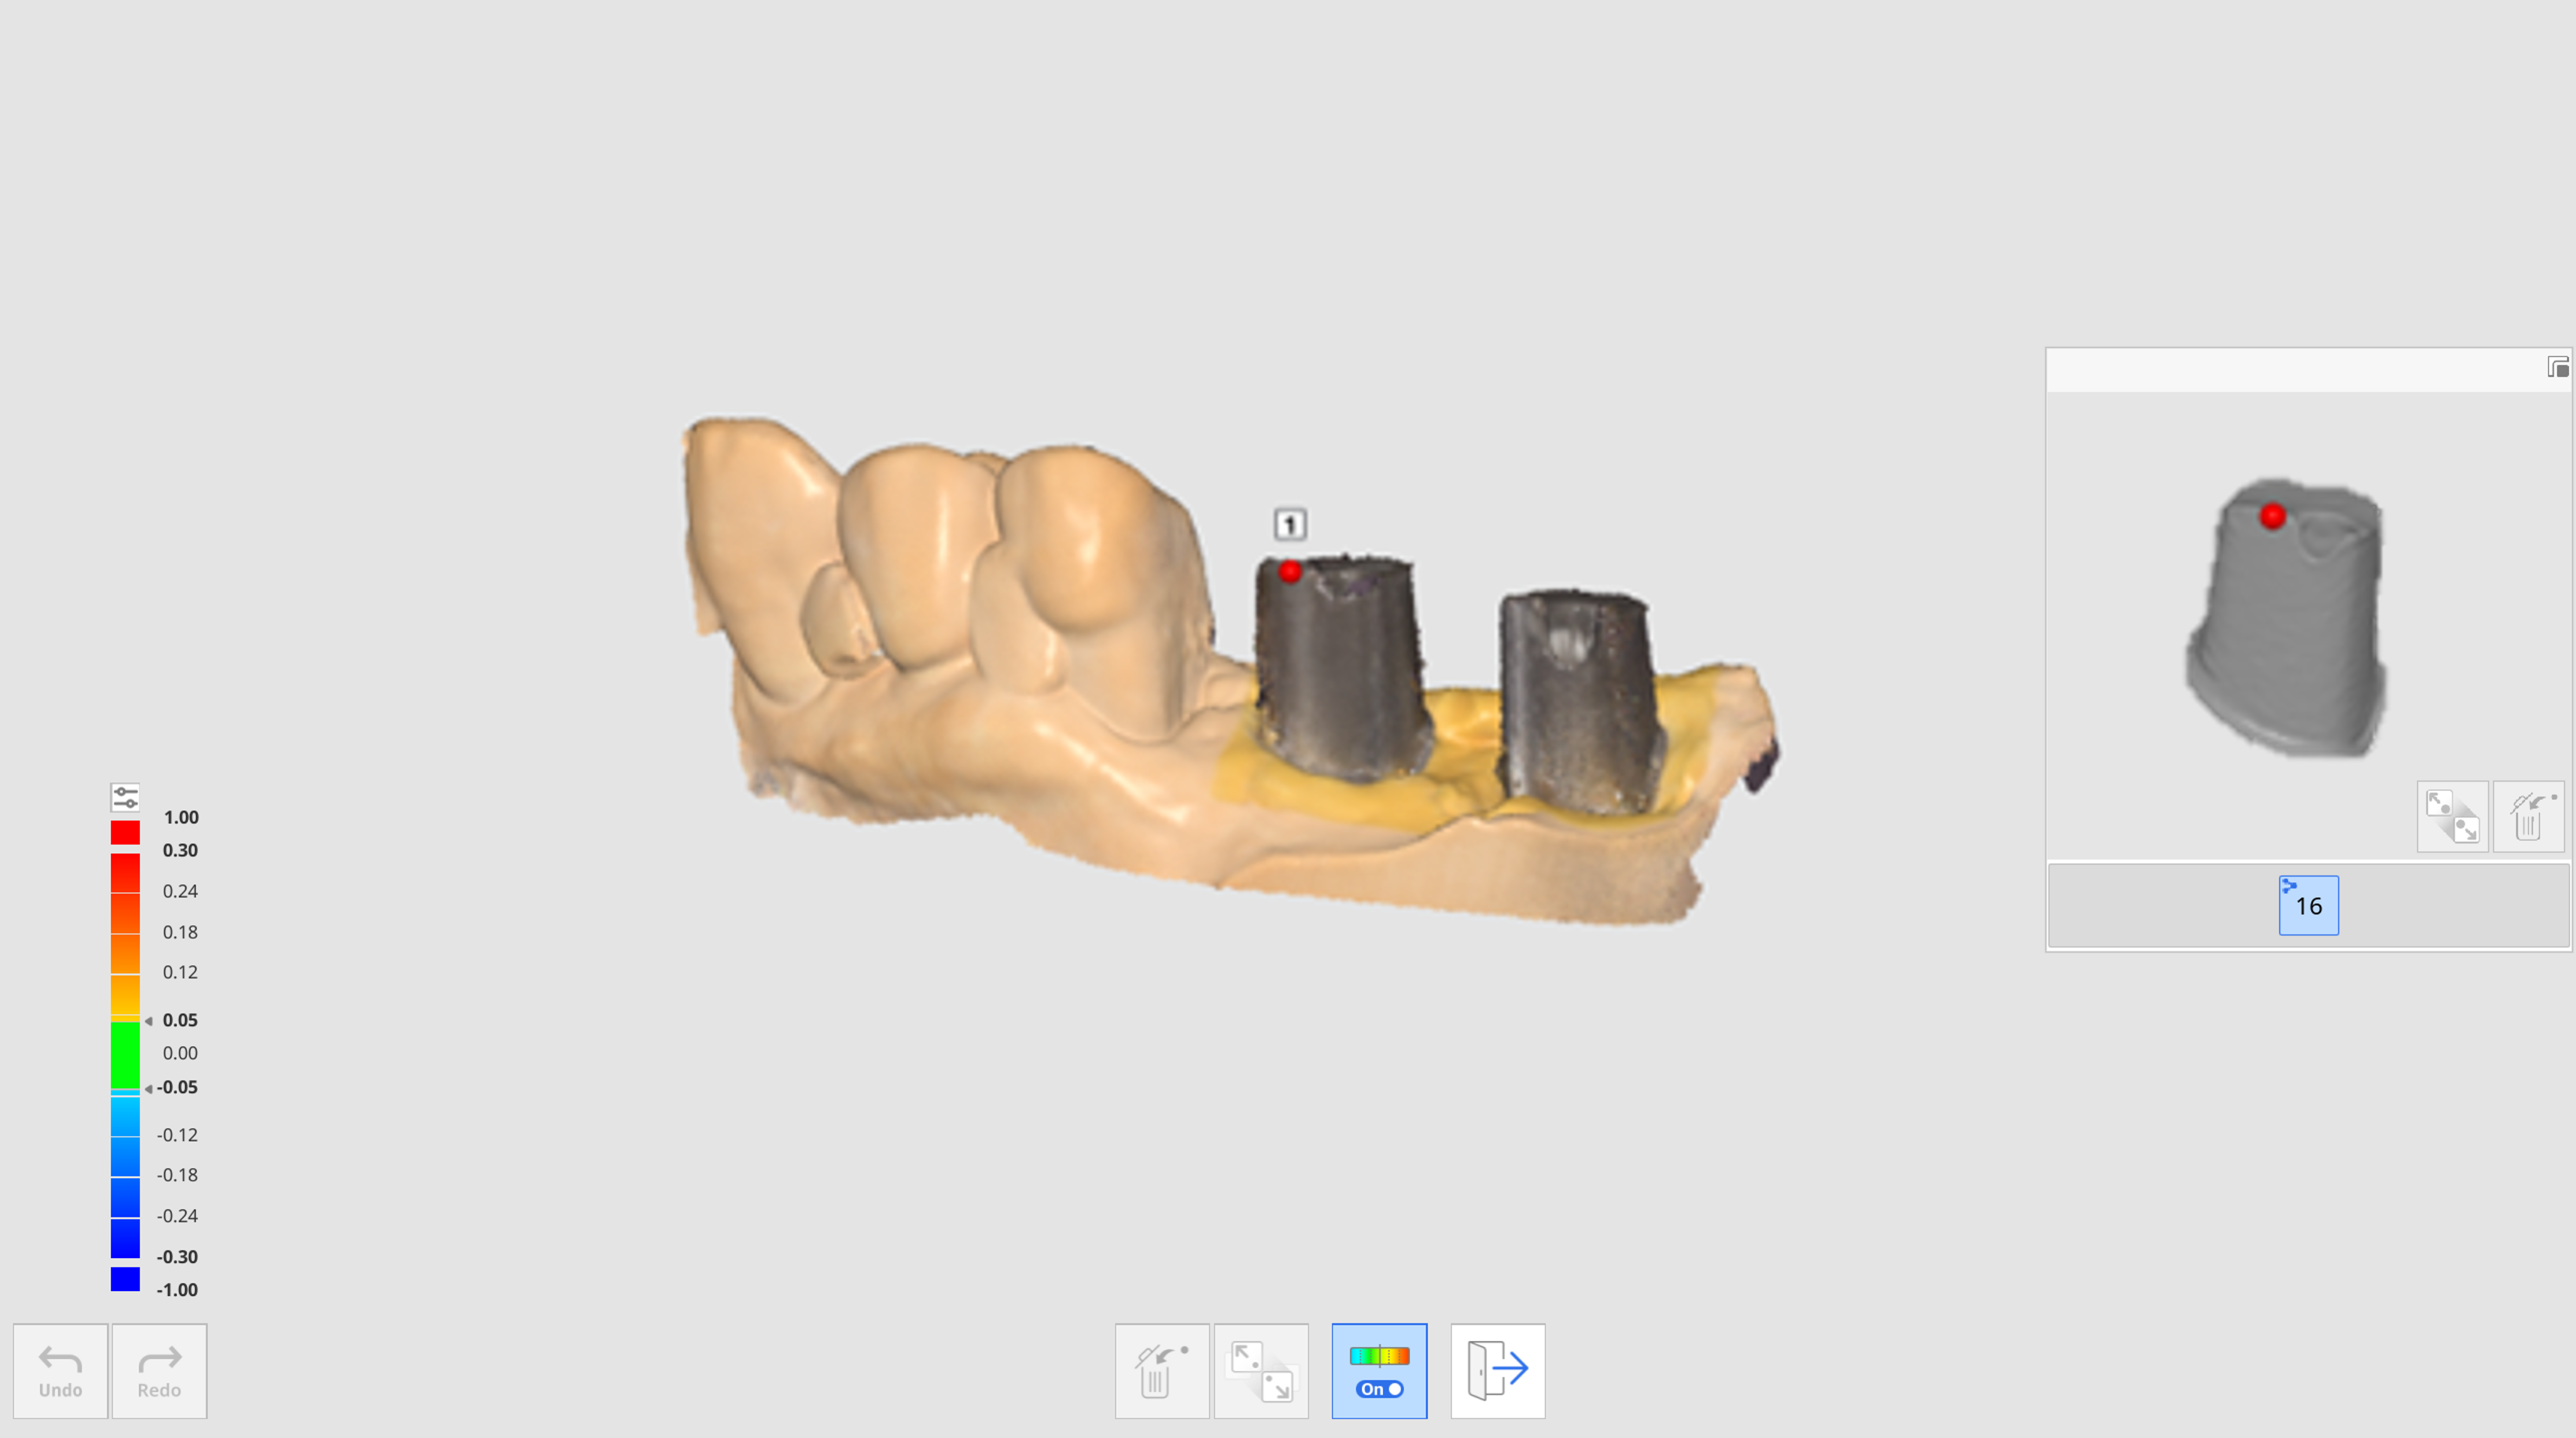
- After completing manual alignment, click "Exit" to check the aligned libraries.
- If abutments are touching each other when fastened together, you can use the "Data Group for Library Alignment" icon at the bottom. With this feature, you can create a new data group to acquire scan data and align the abutment libraries assigned to each tooth number.