The Scan Body Library Matching feature is useful when scanning difficult-to-reach areas, such as a narrow implant area or metal scan body materials.
By scanning the scan body fastened to the implanted fixture, you can replace the scan body data with the library data to accurately reproduce the position and angle of the implant.
The following tools are provided for the Scan Body Library Matching feature.
| Tooth Number | Allow users to select an individual tooth number for the data acquisition target. |
| Scan Body Library | Assign library data for each tooth and manage the library data. |
| Show/Hide Deviation | Show or hide the deviation between aligned data using a color map. |
| Manual Alignment | Allow users to align the library data and scan data manually. You can align data with one to three alignment points. |


How to Use Scan Body Library Matching
Assign Scan Body Library
Before you acquire the scan body data, you must assign the desired library to each tooth number.
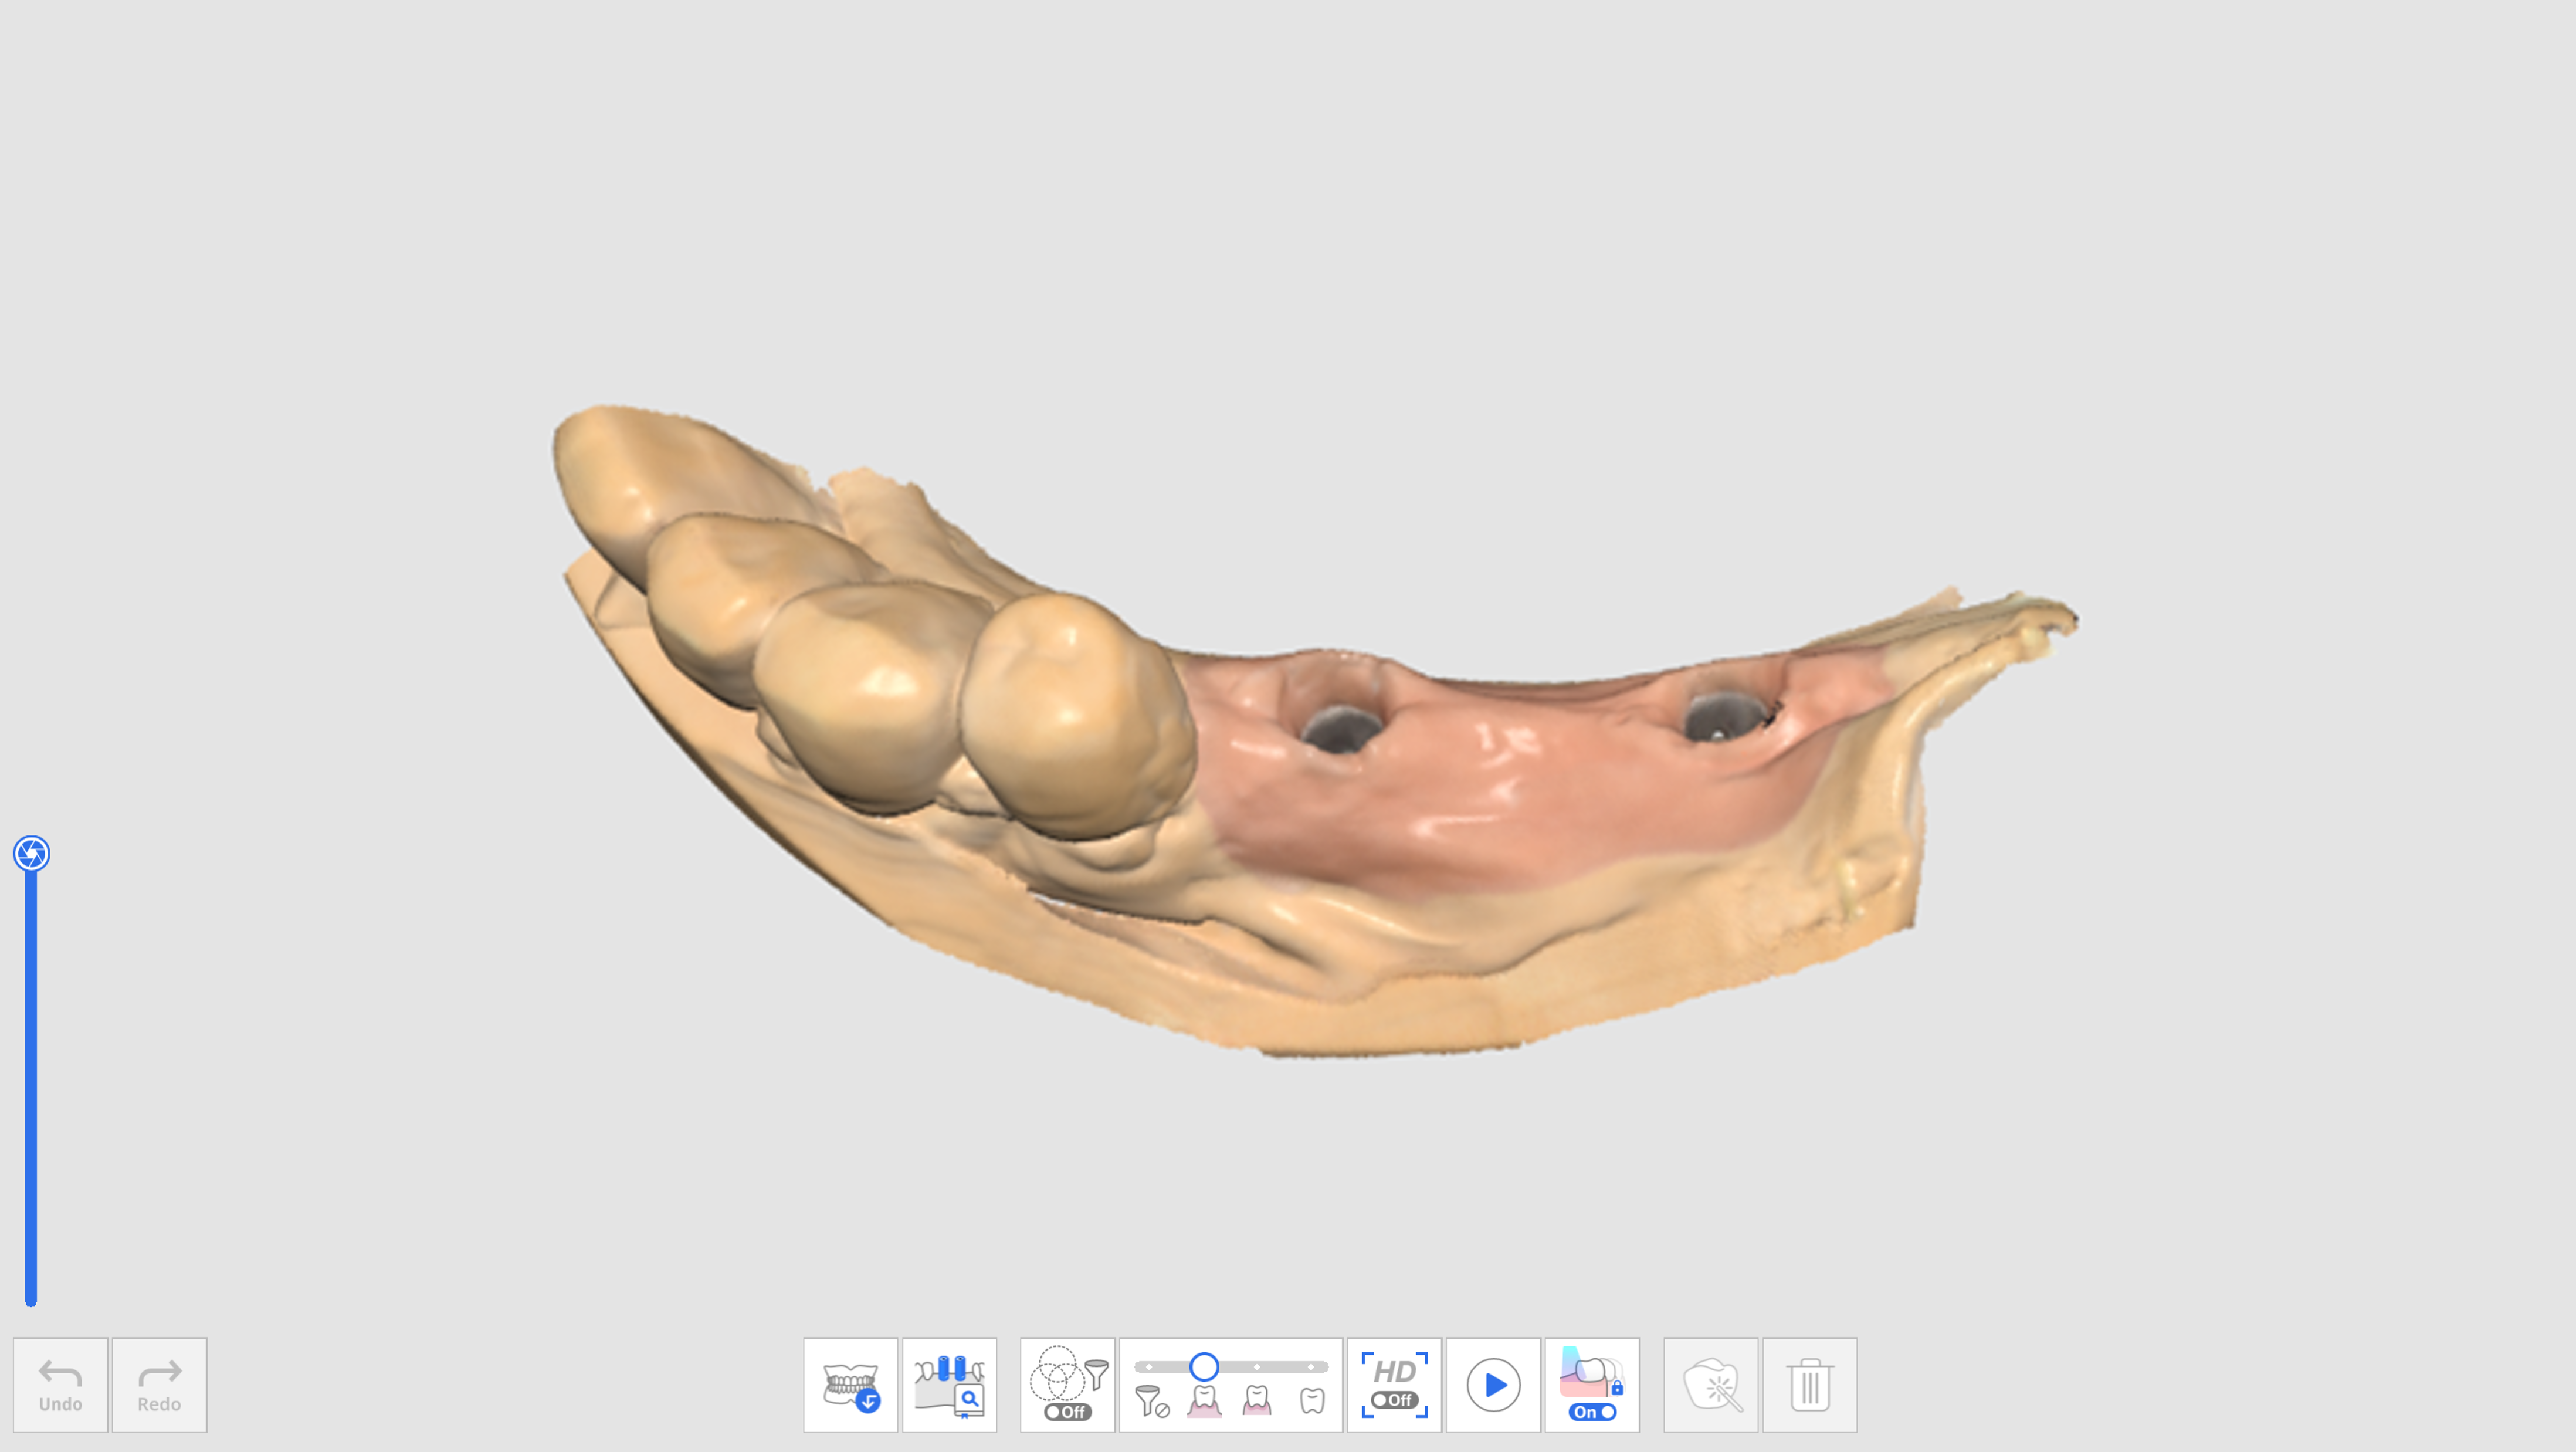
Acquire data in the Maxilla or Mandible stage before fastening the scan body.
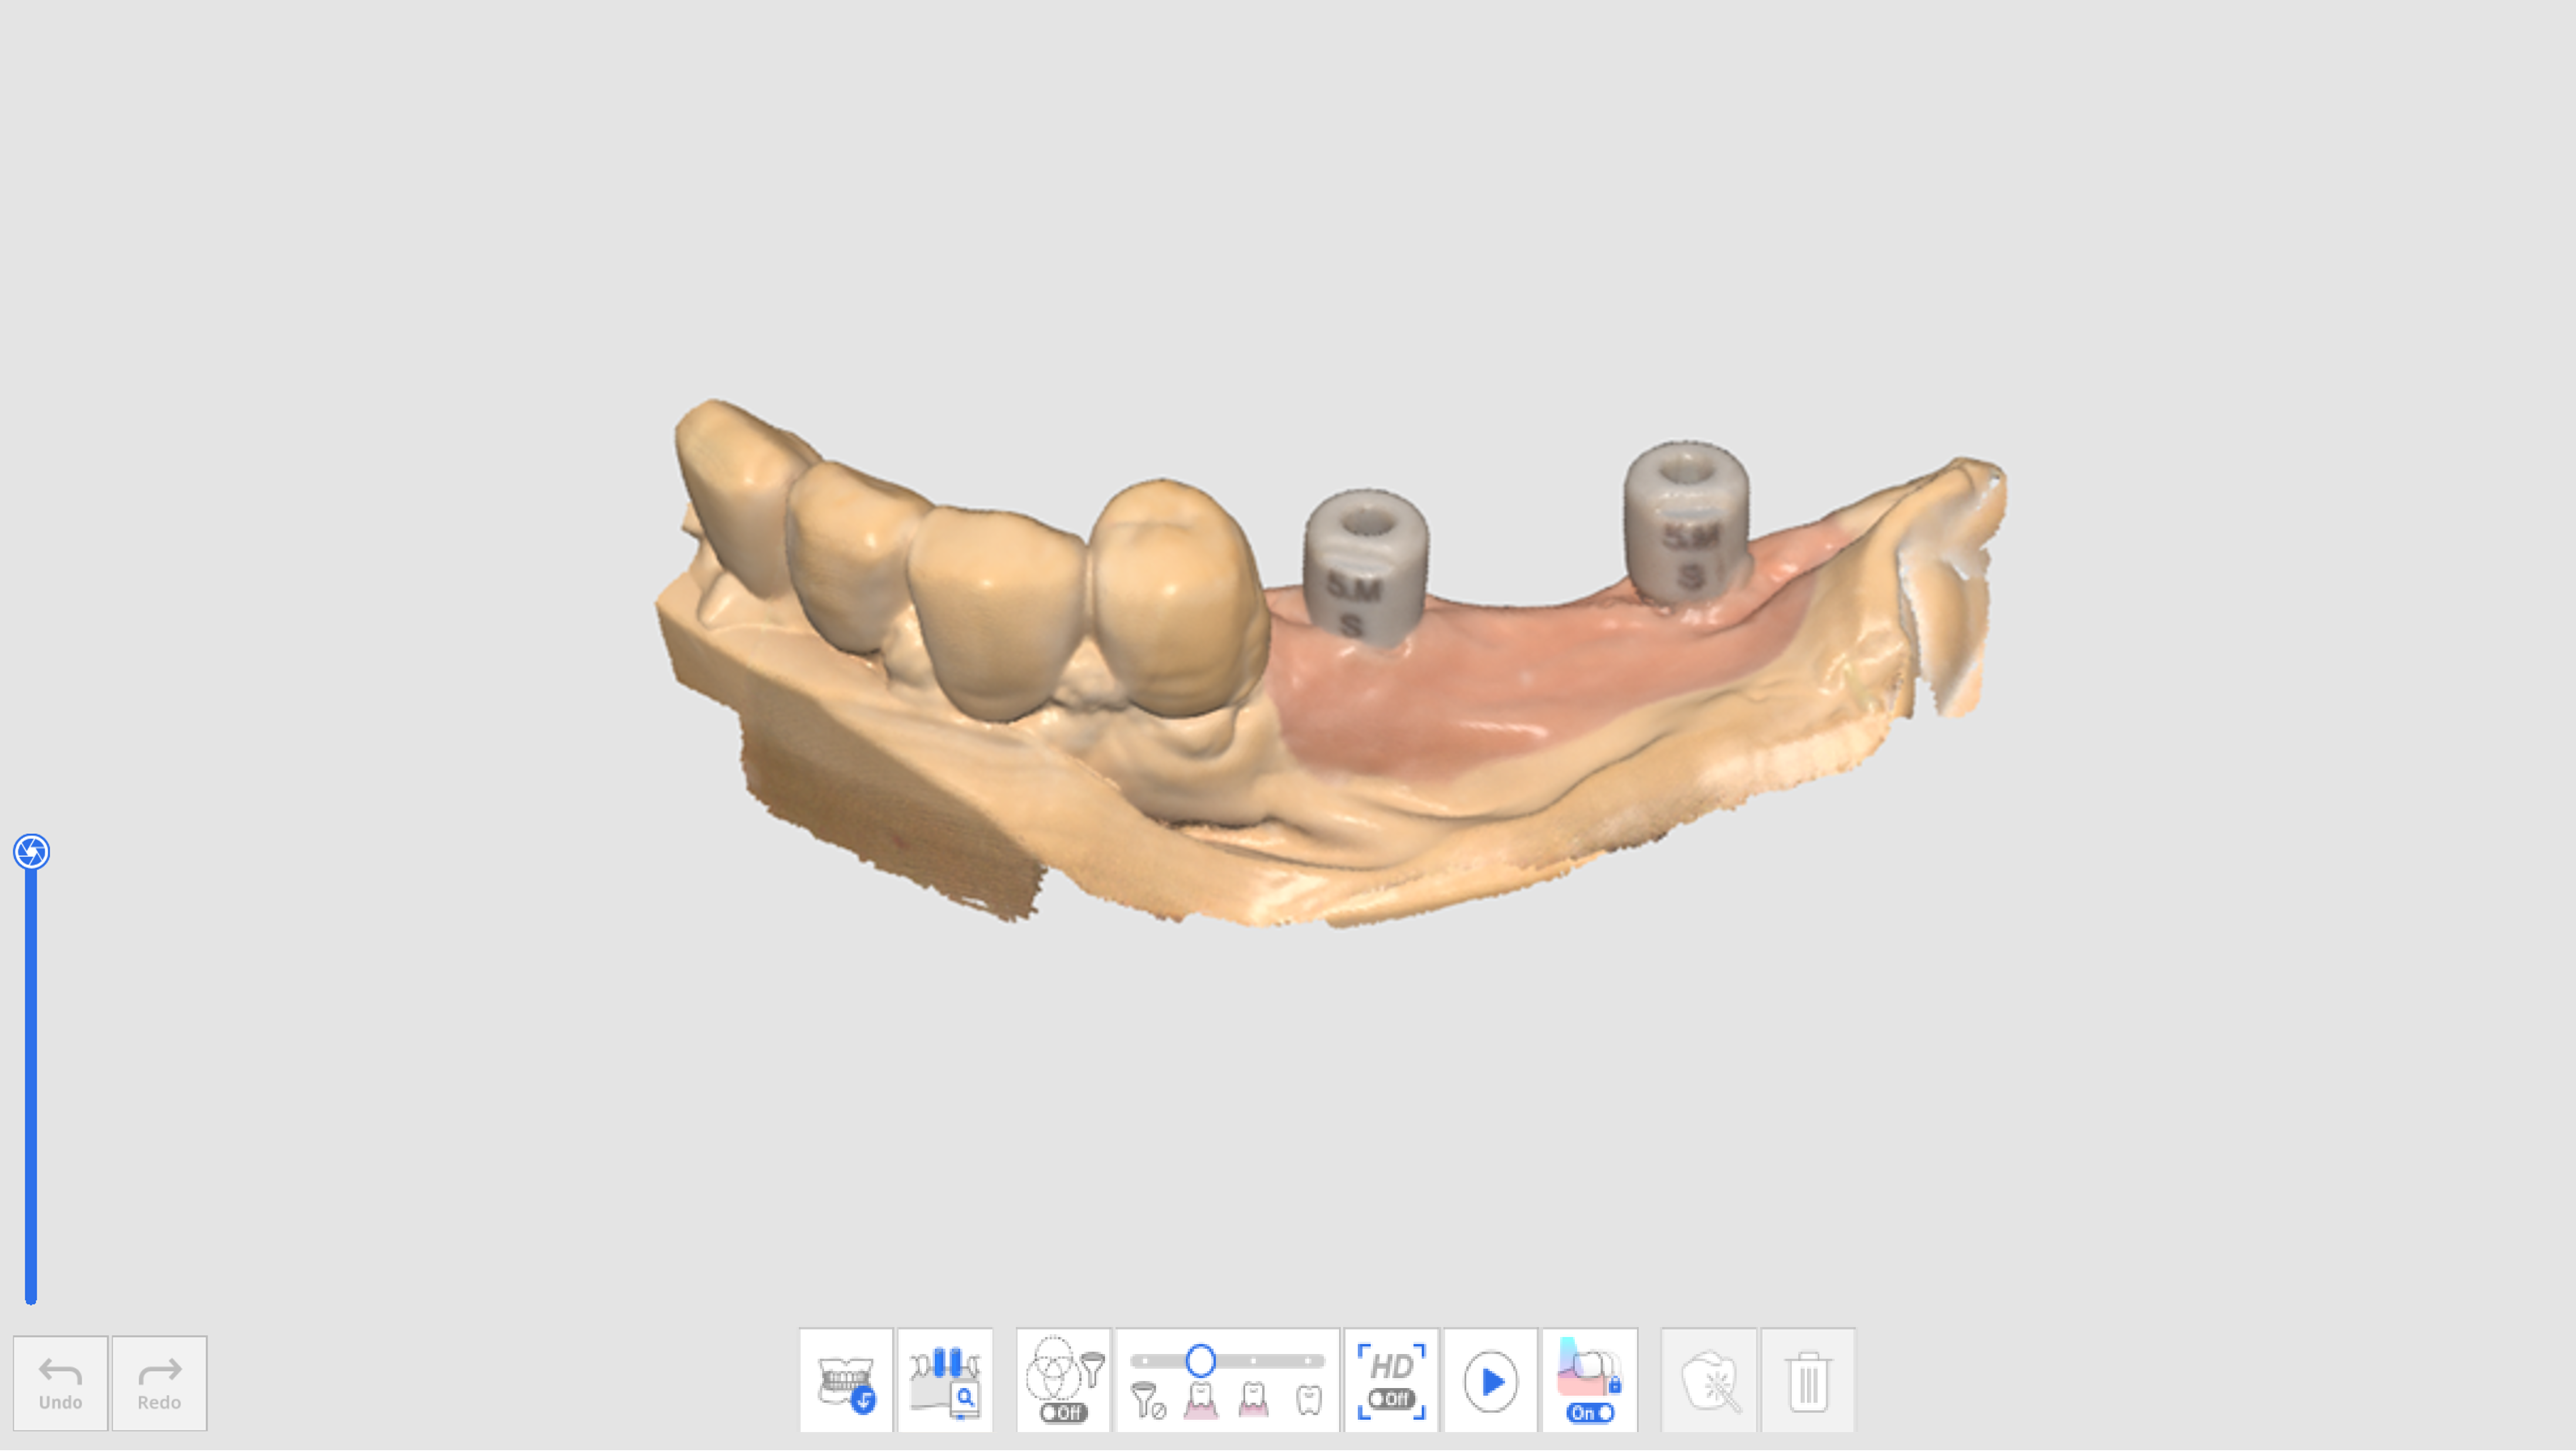
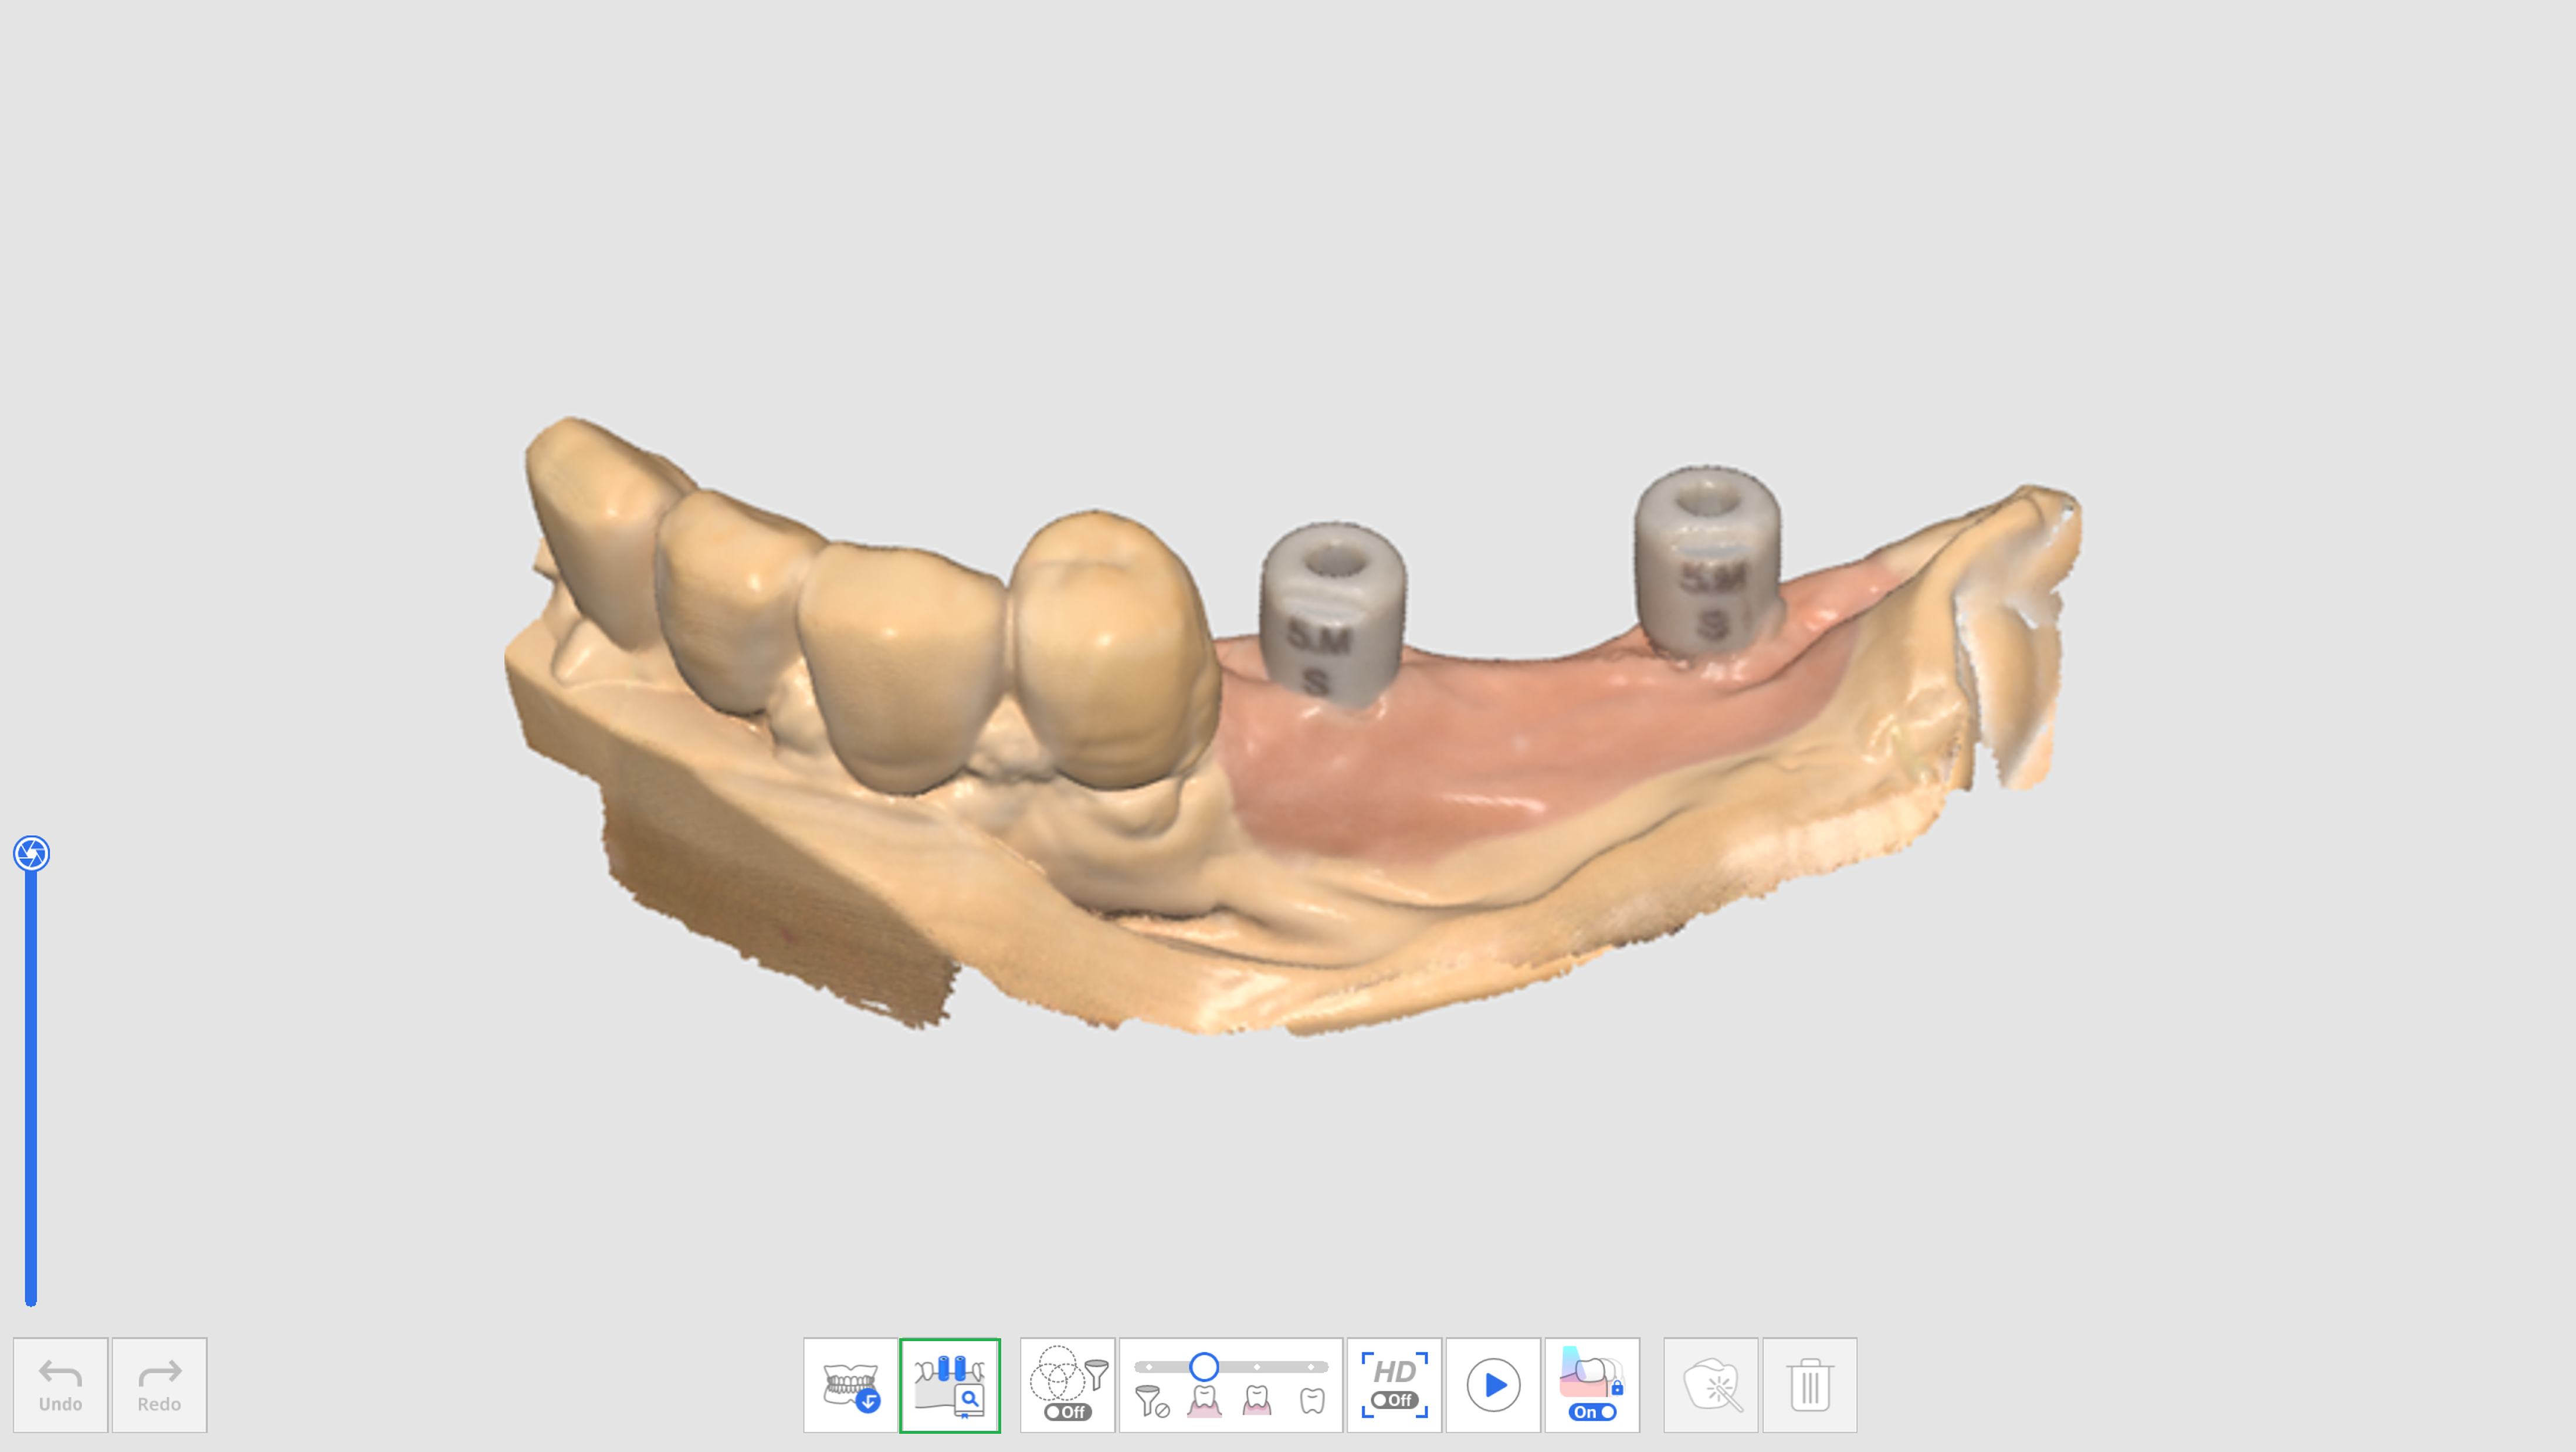
Move to the Scan Body stage and obtain scan data after fastening the scan body.
Click the "Scan Body Library Matching" tool icon at the bottom of the screen.
Click the "Scan Body Library" icon.

The following dialog appears to define the scan body library for each tooth.
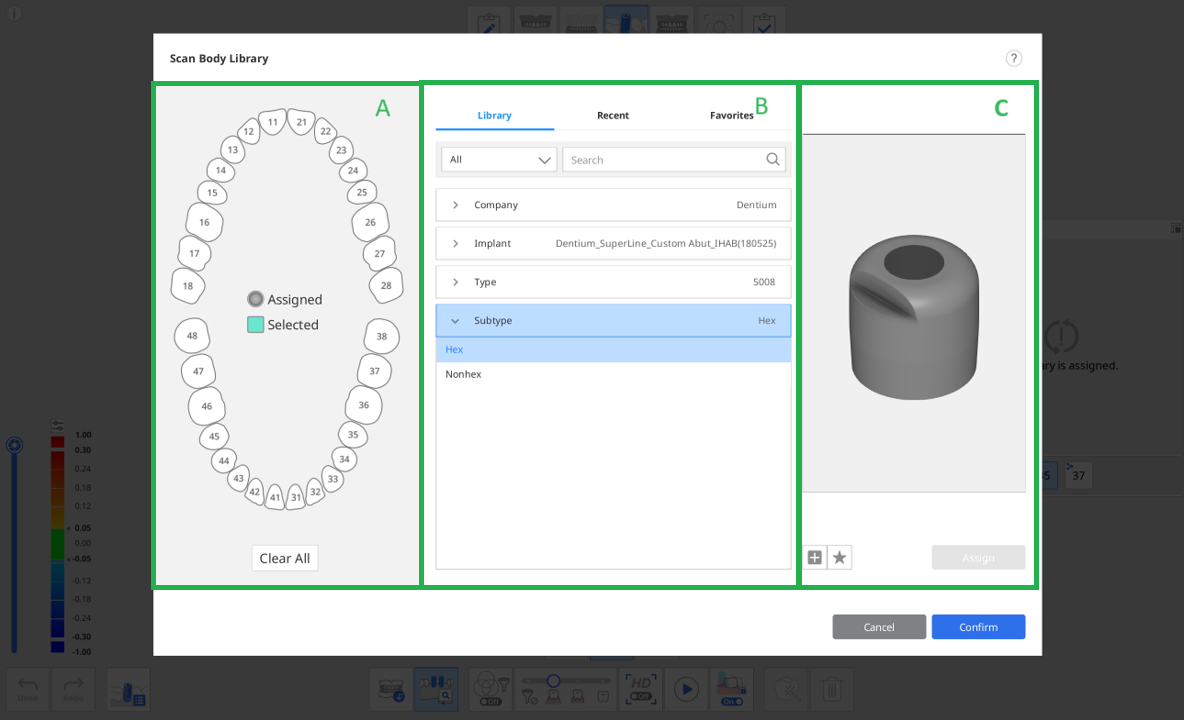
The following three tabs are provided in section B for scan body library selection.
Library: All registered scan body libraries are listed by Company, Implant, Type, and Subtype. You can search for scan body libraries by entering their name.
Recent: The most recently used scan body libraries are listed with the date of last use.
Favorite: The starred scan body libraries are listed. You can add a scan body library to the Favorite tab for easy access by clicking the "Add to Favorite" icon below the preview image.
Select a tooth or multiple teeth from section A and then select a library in section B to assign.
You can add a new library by clicking the "+" button below to preview the image. Files in STL, OBJ, and PLY formats are supported to register.
Check the selected library in the 3D preview. You can rotate, move, zoom in, and zoom out.
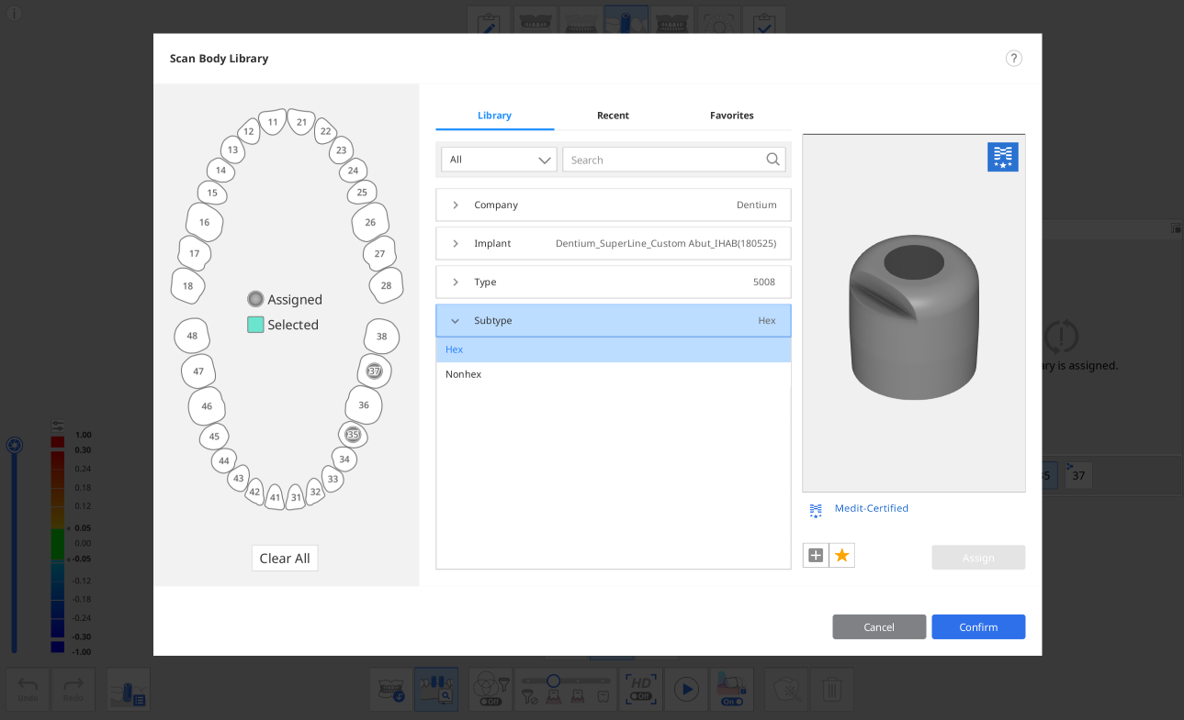
Medit-Certified
The scan body libraries with the Medit logo on the upper right corner apply an algorithm optimized for scan body library alignment to minimize the impact of scan error due to the processing and material of the scan body manufacturer.
Click "Assign" to assign the selected scan body to the tooth number.
After assigning all required libraries, click "Confirm."
Align Scan Body Library
Once you assign a library to a tooth number, the Scan Body Library Matching will automatically align the library to the acquired data while scanning.
Turn on the "Scan Body Library Matching" tool at the bottom of the screen.
While scanning the scan body data, the program automatically attempts to align the library you assigned for the tooth number to the acquired scan data.
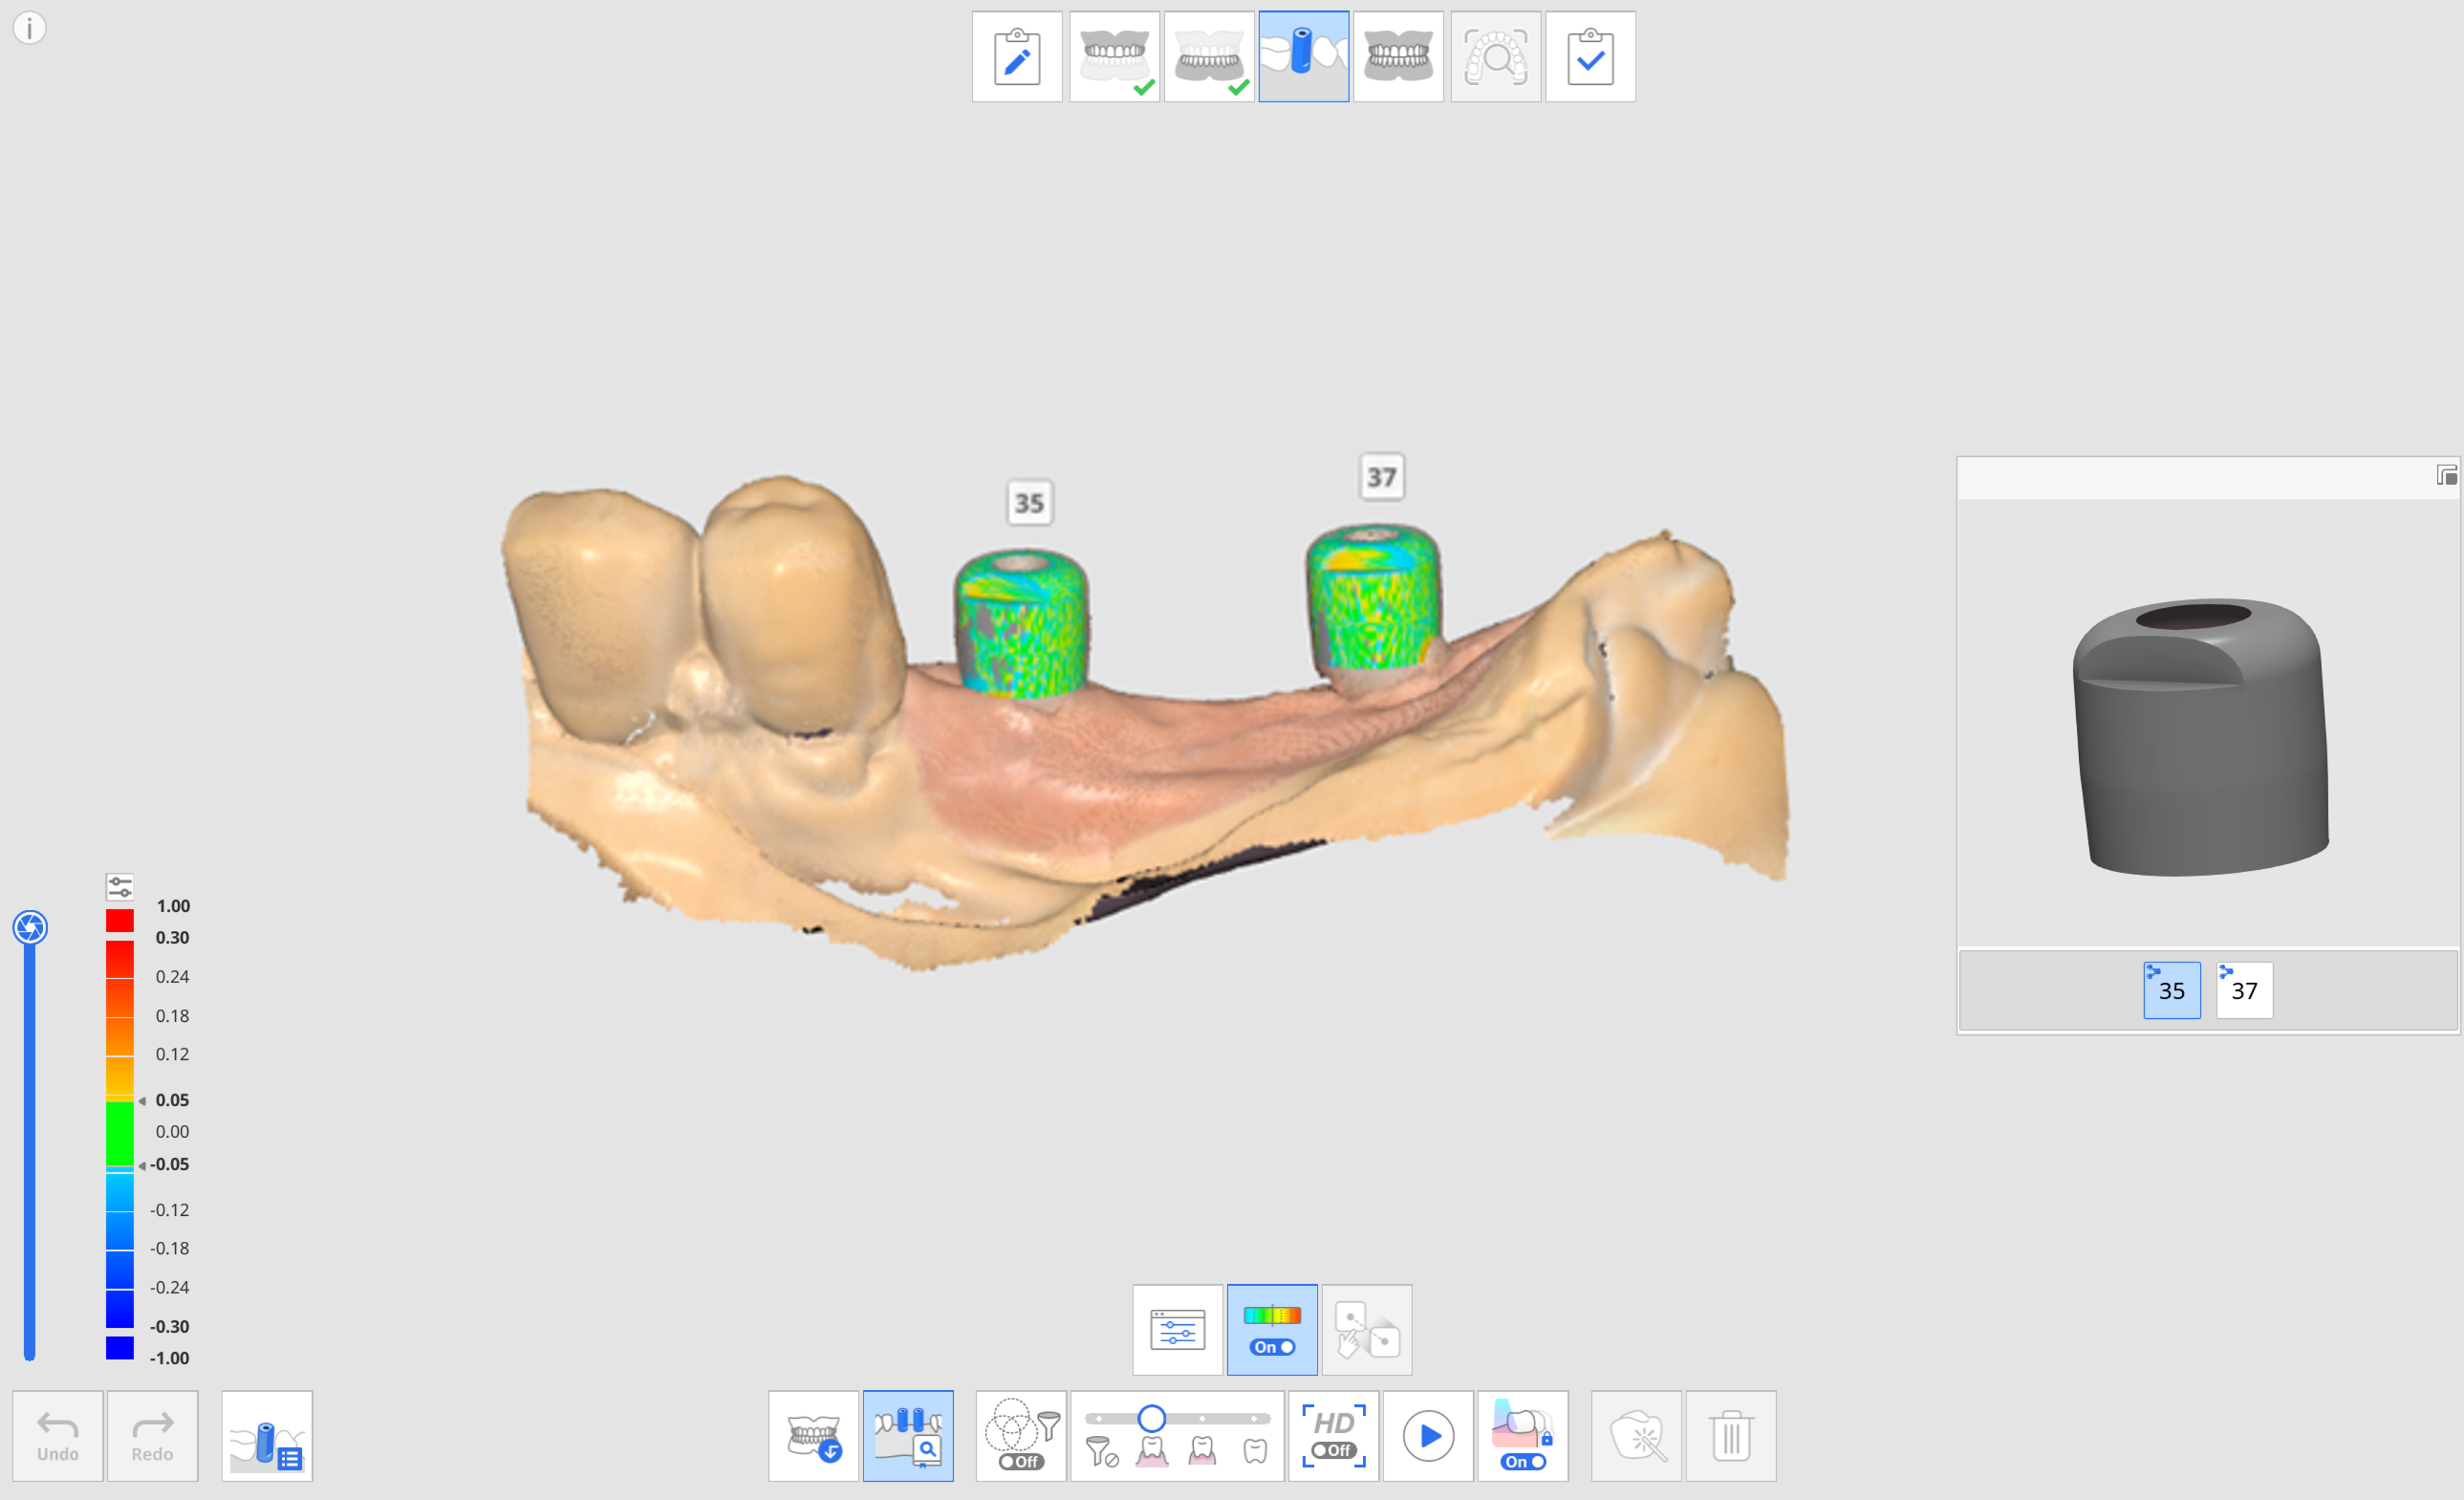
Once a scan body library is aligned, you can check the scan data and library deviation through the color map.
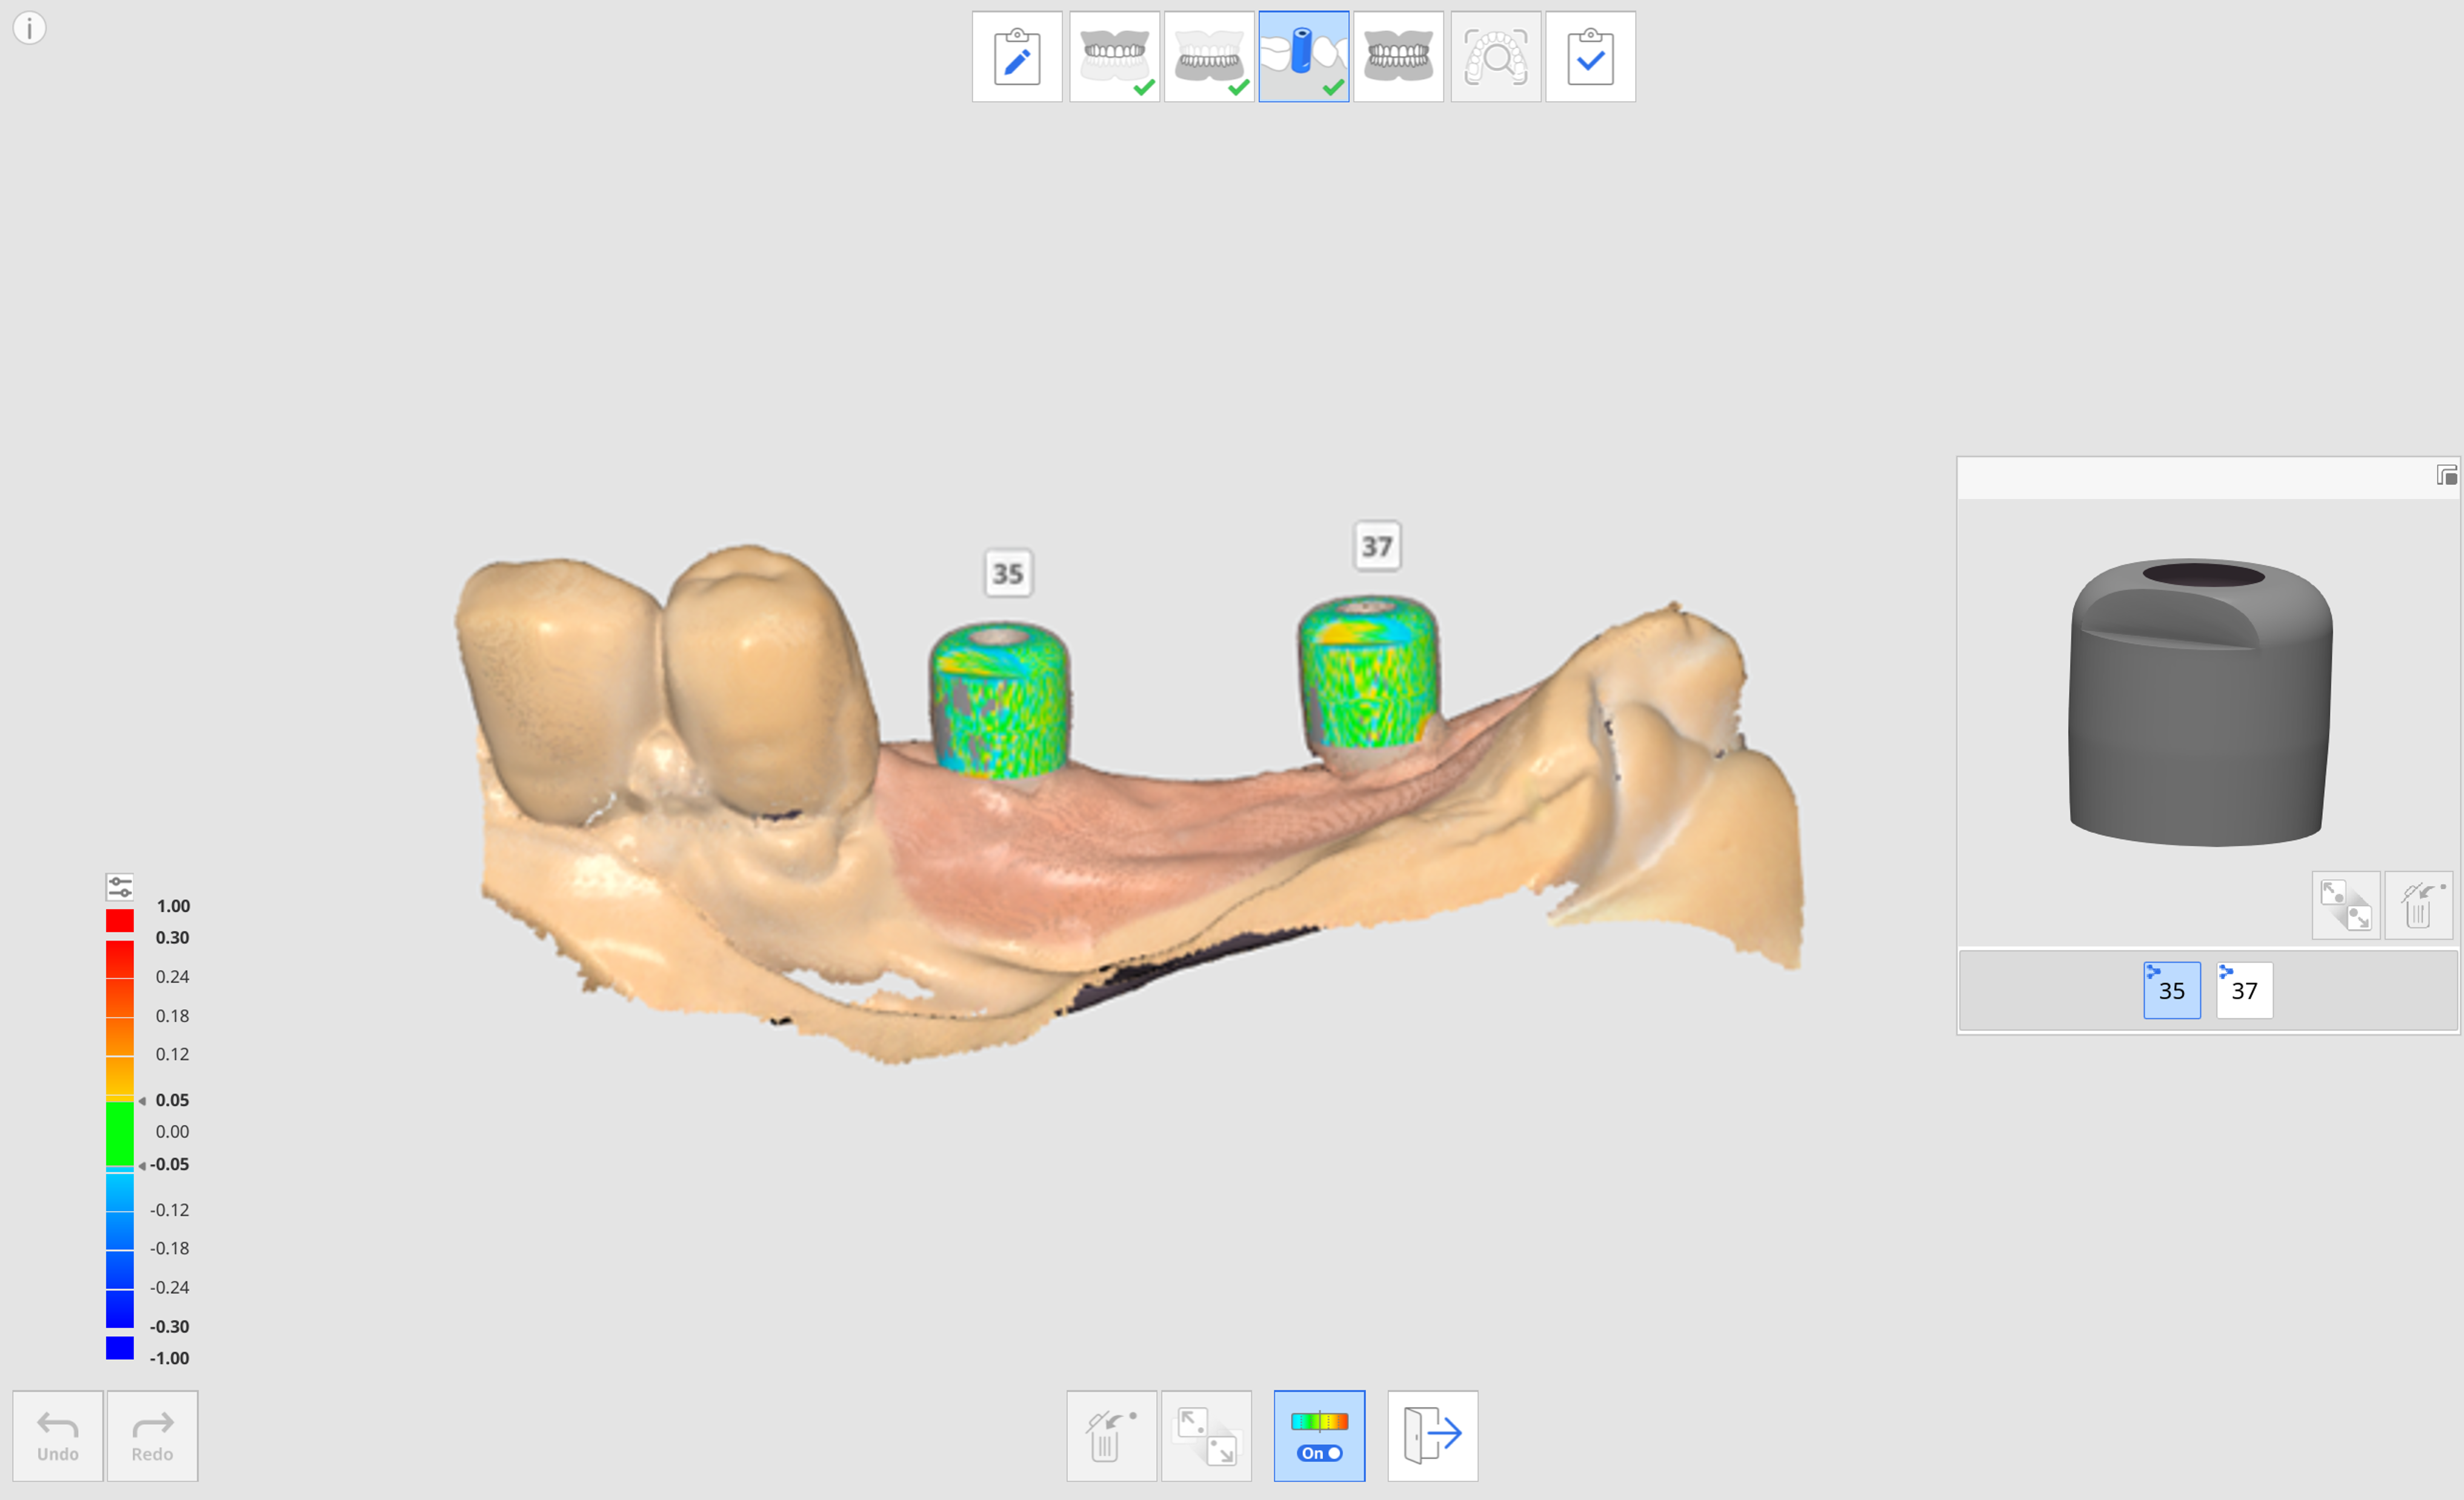
Repeat to select another tooth number in the preview to align more scan body libraries.
After the scanning, you can manually align any libraries that were not automatically aligned during the scan.
Click the "Manual Alignment" icon.

Click one to three corresponding alignment points on the library data for the selected tooth number in the library preview and the scan data.
After completing manual alignment, click "Exit" to check the aligned libraries.
If scan bodies are too close to each other or touching each other when fastened together, you can use the "Data Group for Library Alignment" icon at the bottom. With this feature, you can create a new data group to acquire scan data and align the scan body libraries assigned to each tooth number.