The "Preparation Review" icon appears only when the following product has been registered in the Medit Link form.
- Crown
- Pontic
- Post & Core
- Implant Crown
- Post & Core and Crown
- Post & Core and Coping
The Preparation Review icon is located at the bottom of the Maxilla and Mandible stages and is enabled when enough scan images have been acquired in each stage.

The following tools are available for the Preparation Review feature.
 | Preparation Review Settings | Set options for preparation review. This allows users to enter their own values for the criteria to determine if the tooth reduction is insufficient. | |
 | Insertion Path | Calculate the insertion path for the area selected in the prepared data. | |
 | Auto Direction | Automatically calculate and display the insertion path in the direction where the undercut area is minimized. | |
 | Manual Direction | Calculate and display the insertion path in the direction of the user's viewpoint. | |
 | Distances | Mark areas with insufficient tooth reduction compared to the set values. | |
 | Tooth Reduction Depth | Show the amount of tooth reduction compared to the pre-op data. * Pre-op data must exist and be aligned with prepared data to use this tool. | |
 | Distance to Antagonist | Show the distance between the prepared tooth and its antagonist based on the occlusion alignment data. * Antagonist and occlusion data must exist, and occlusion data must be aligned to use this tool. | |
 | Distance to Adjacent | Show the distance between the prepared tooth and its antagonist. * This tool is available only with prepared data. | |
How to Use Preparation Review
Preparation Review Settings
Before conducting the Preparation Review, you can set the options and criteria for the feature in the Preparation Review Settings.
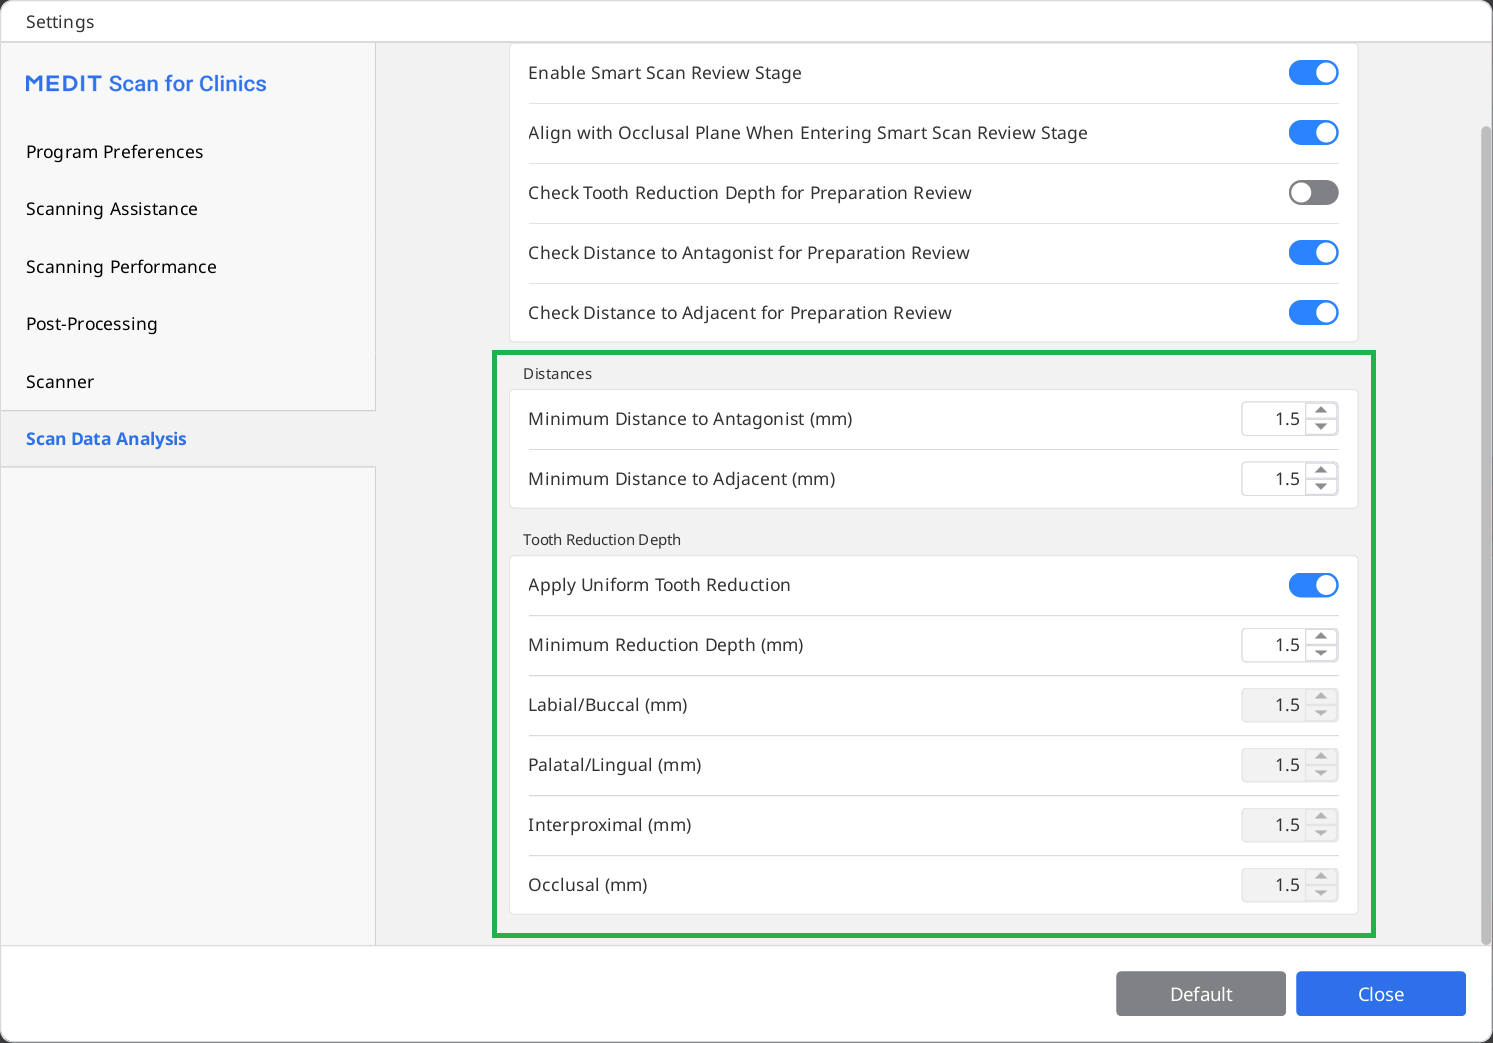
The settings dialog allows users to enter minimum values for distance to the antagonist, distance to the adjacent, and tooth reduction depth to help them establish tooth preparation criteria for treatment and prosthetic fabrication.
Utilizing Preparation Review Tools
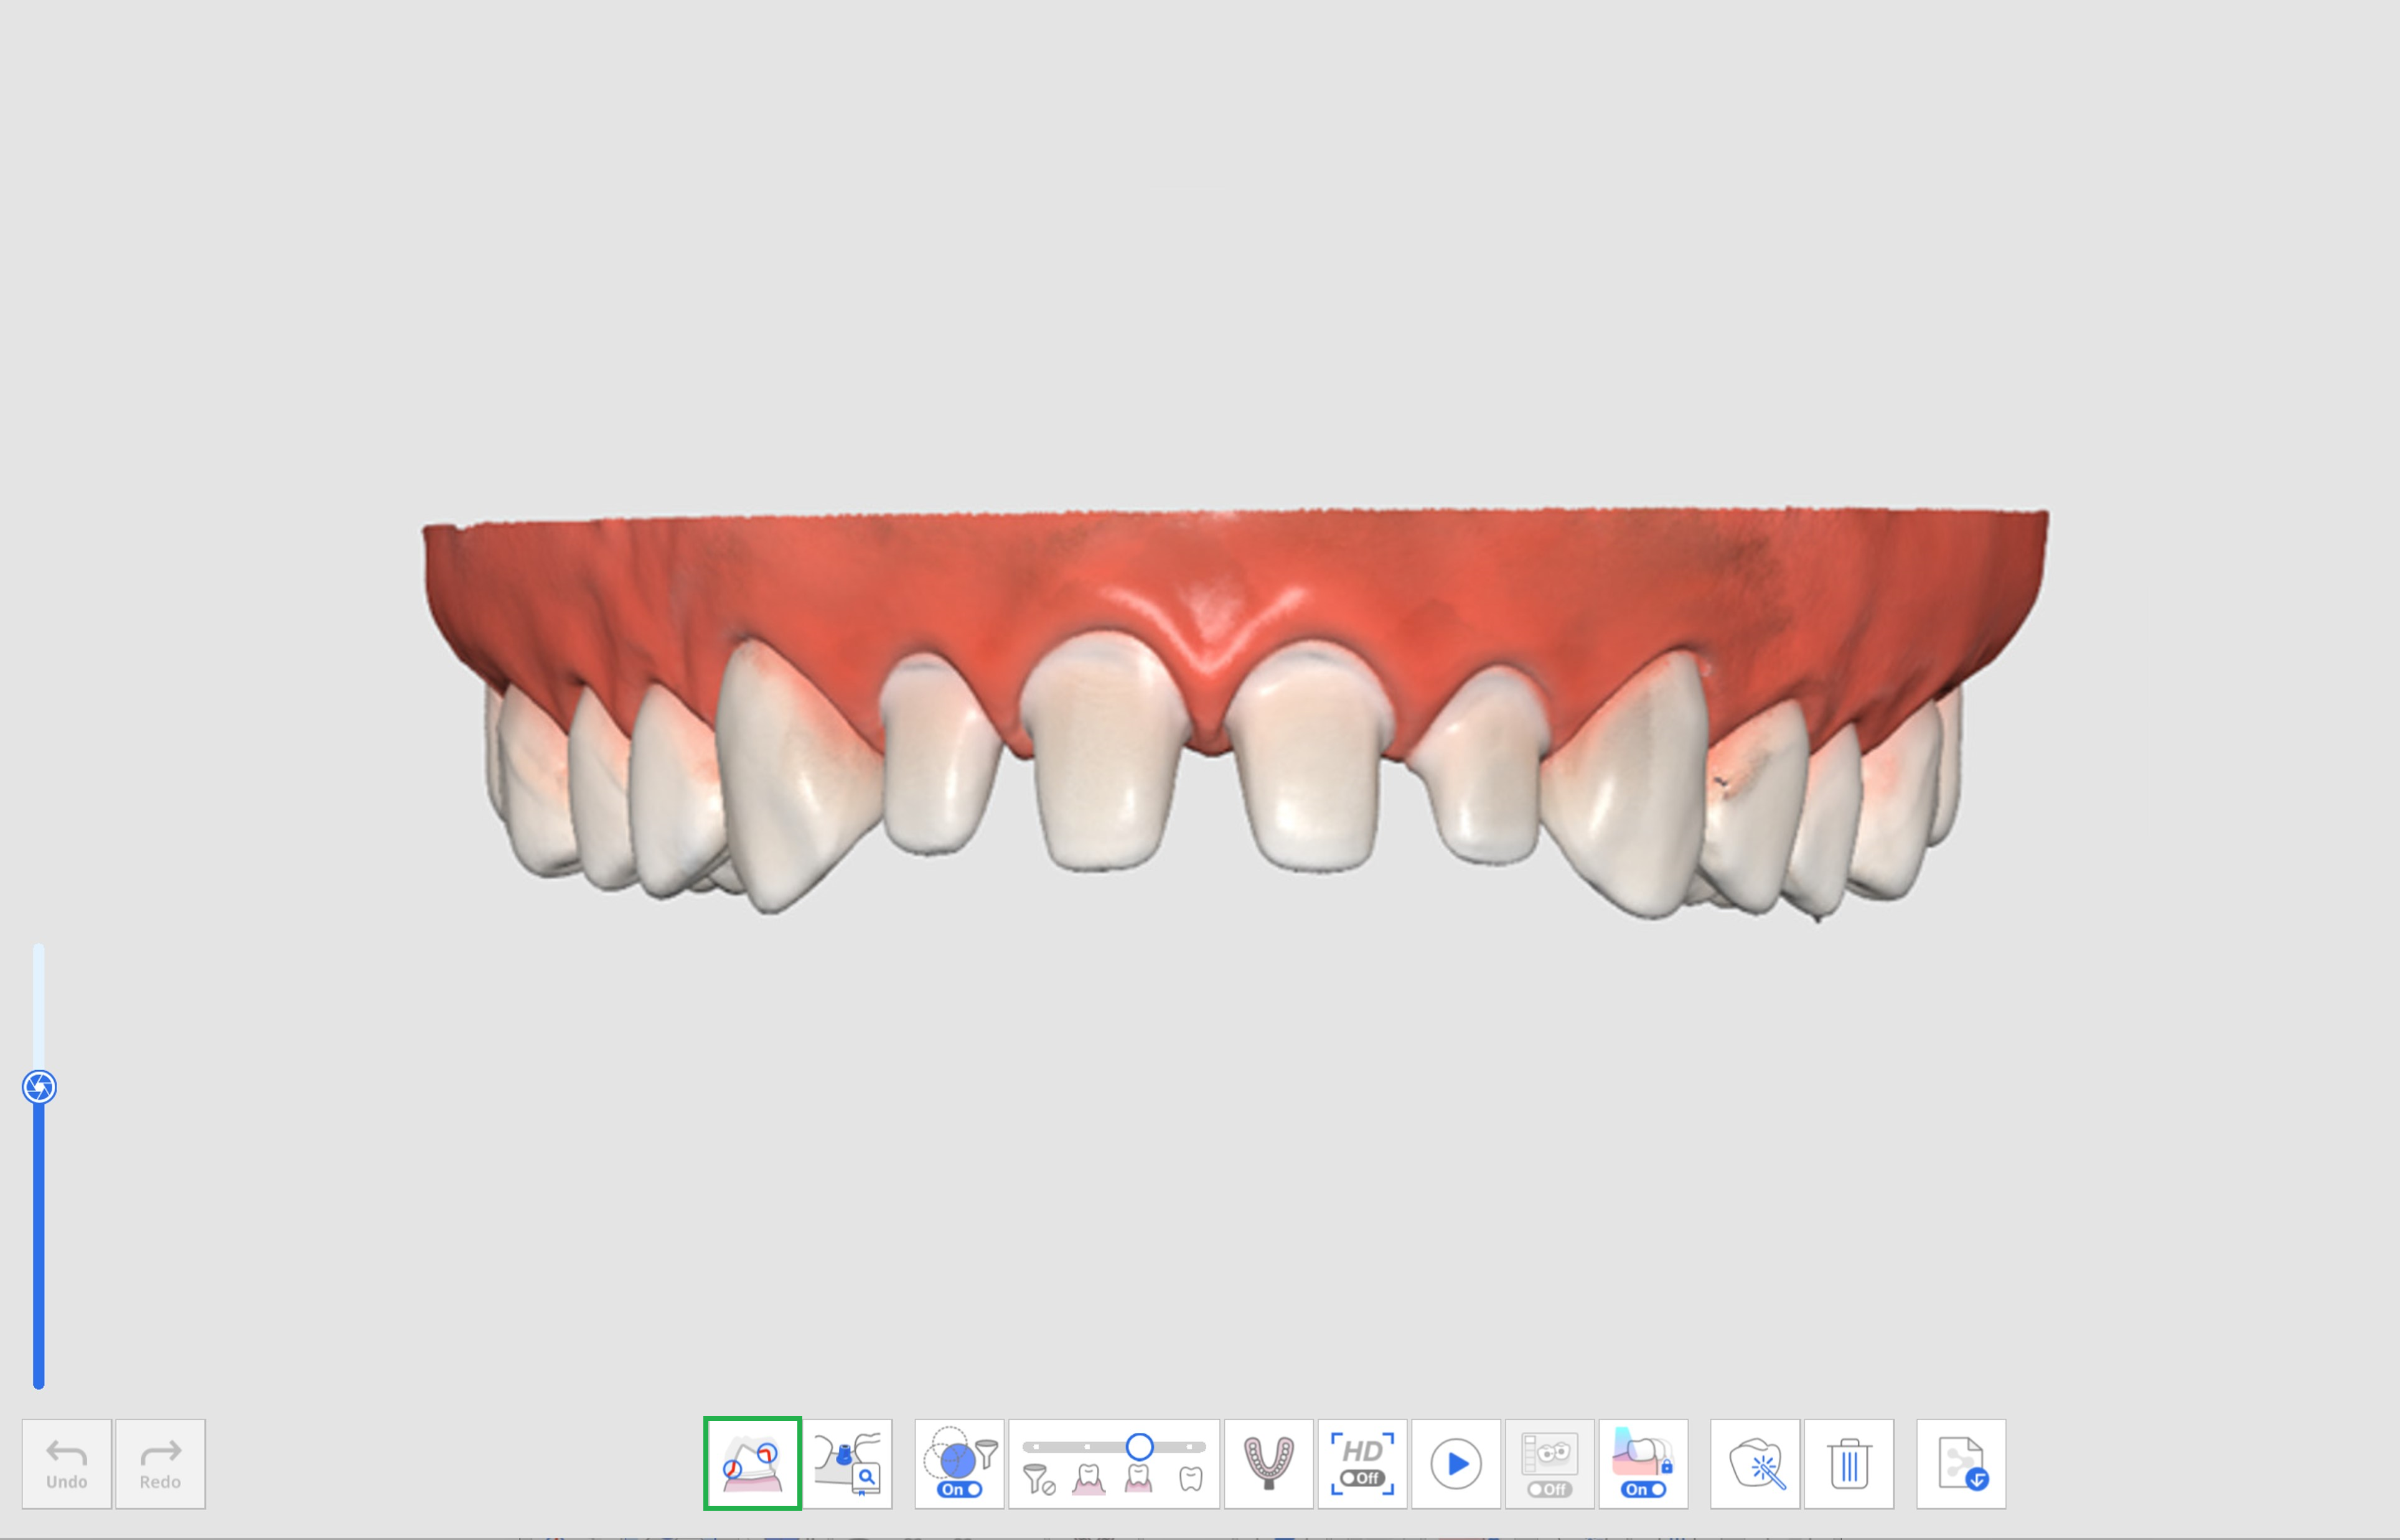
- Acquired scan data in the Maxilla or Mandible stage and click the Preparation Review tool icon.
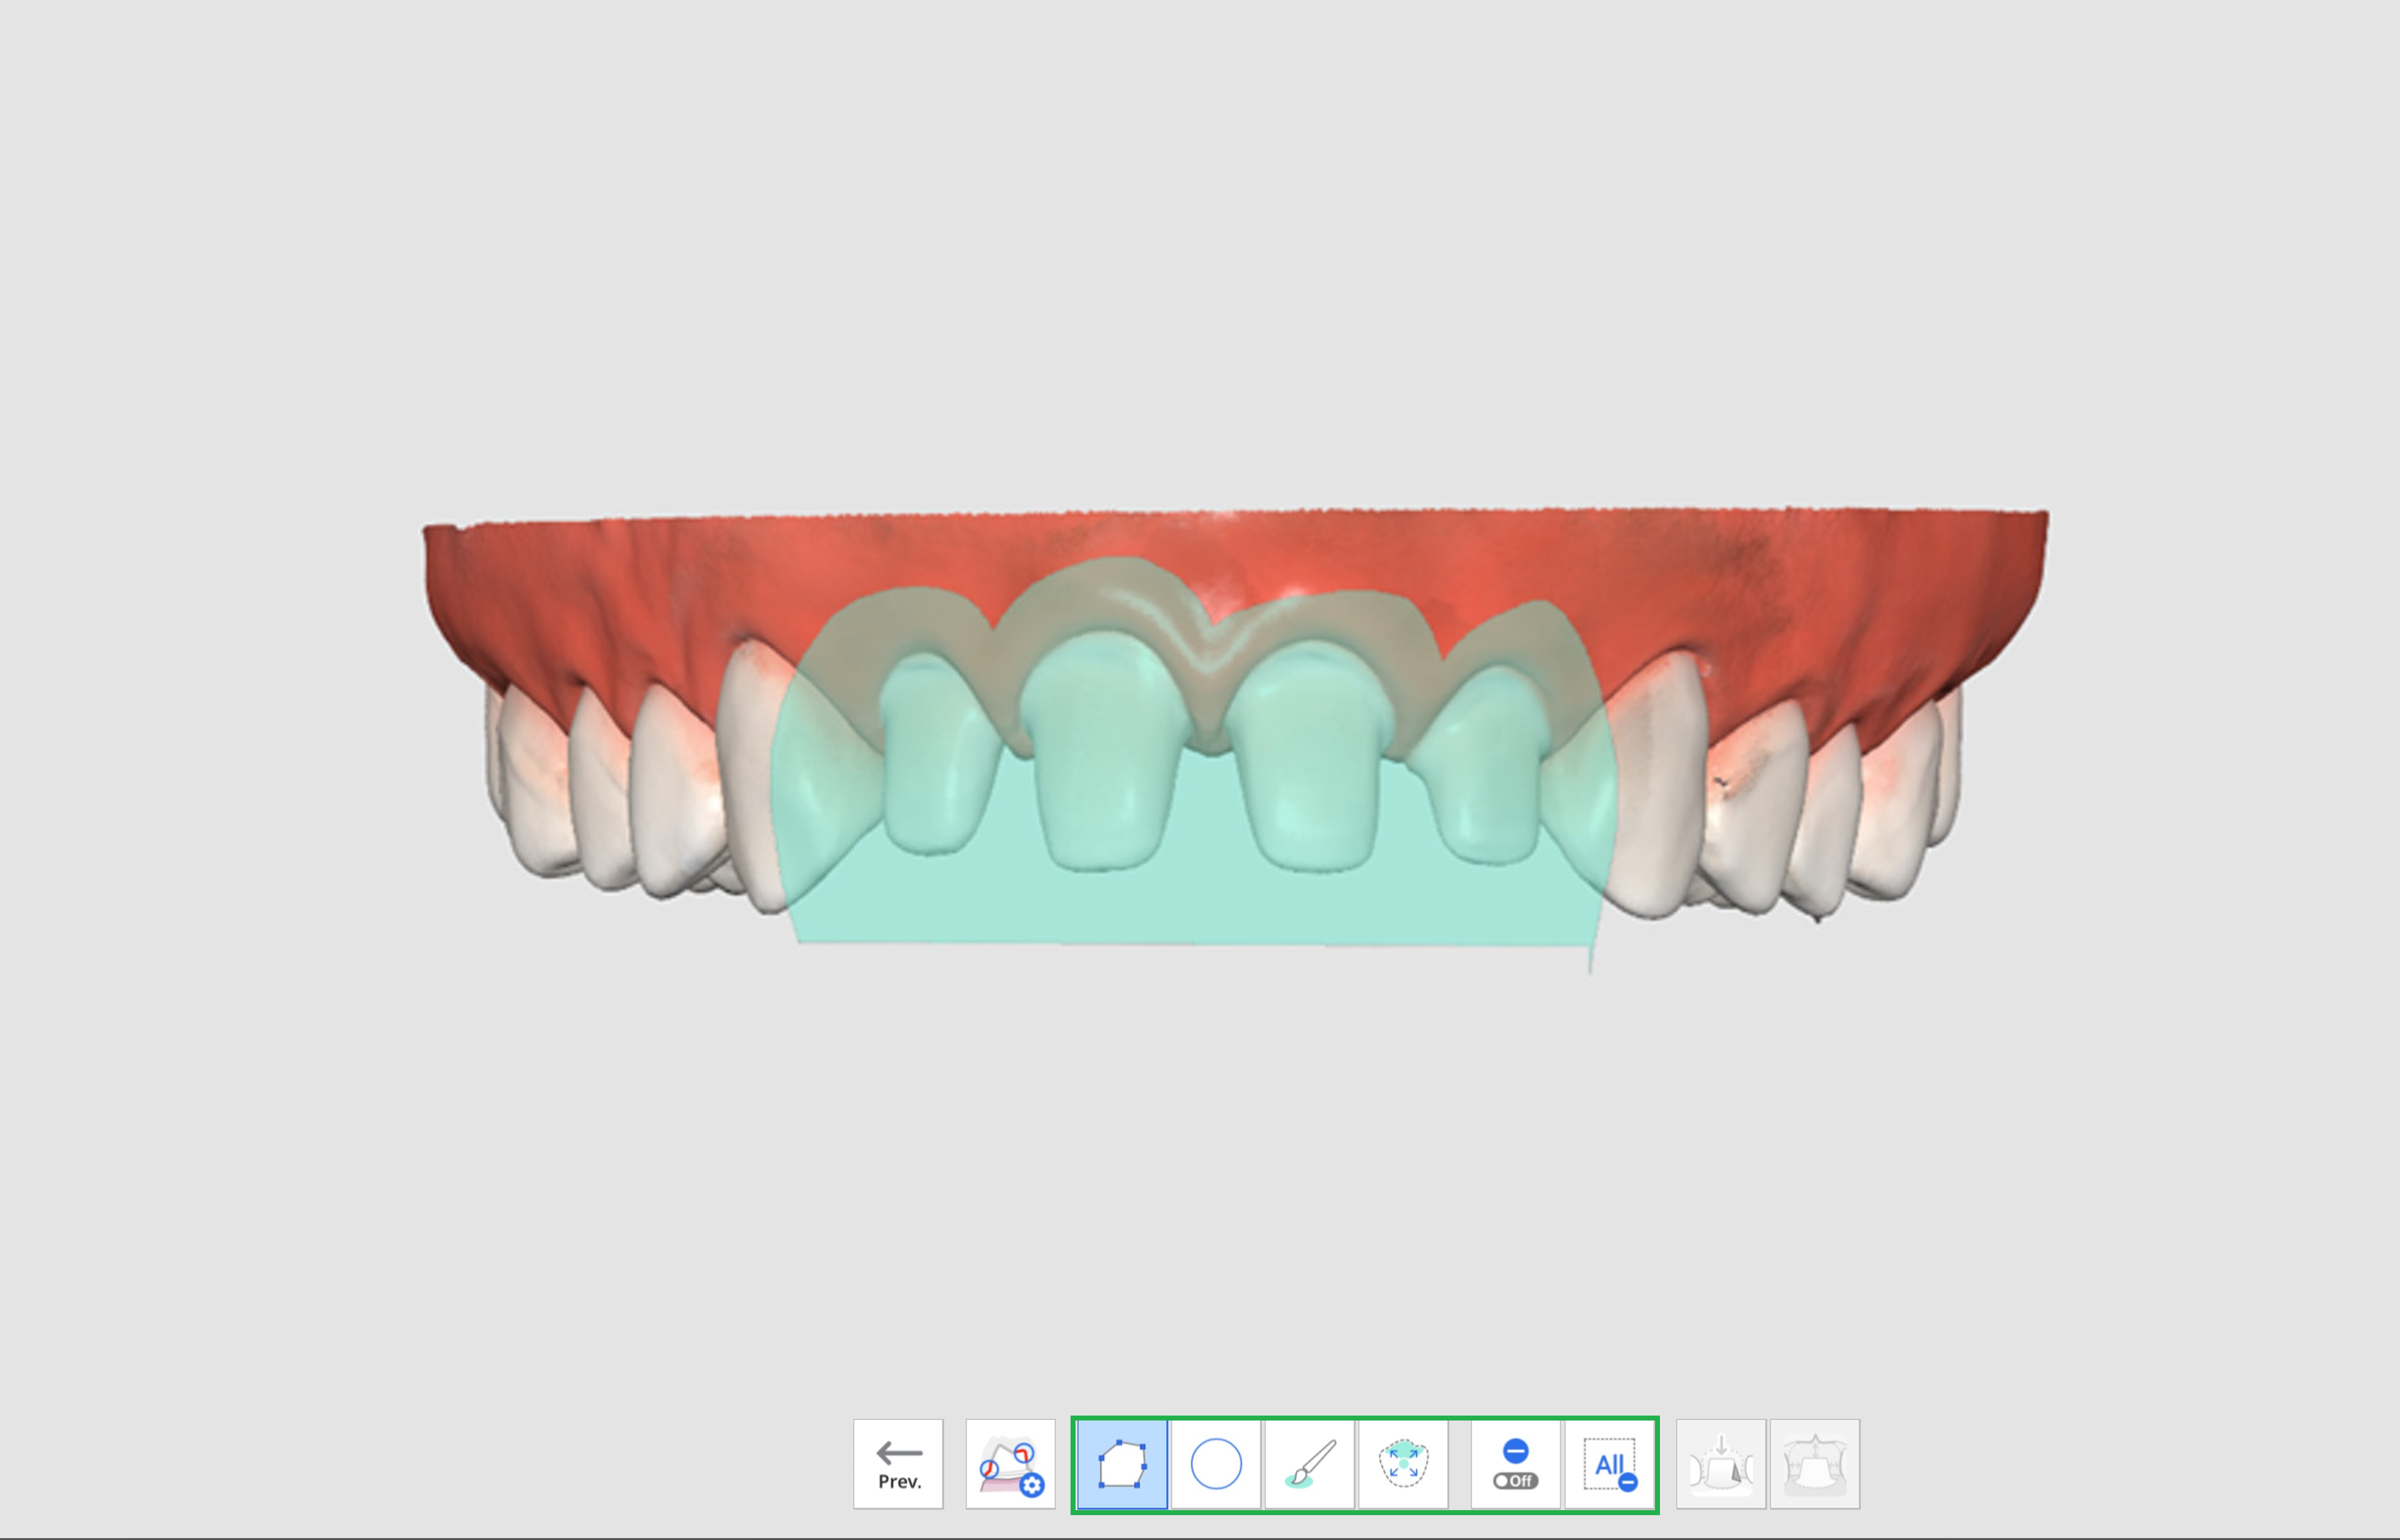
- Select an area on the prepared teeth data using the area selection tools.
- If you click the Insertion Path icon, an insertion path is automatically created in a direction where undercut areas are minimized.
.png)
- You can change the insertion direction by clicking and dragging the arrow or using the Manual Direction tool. Based on the insertion path, undercut areas are displayed on the data.
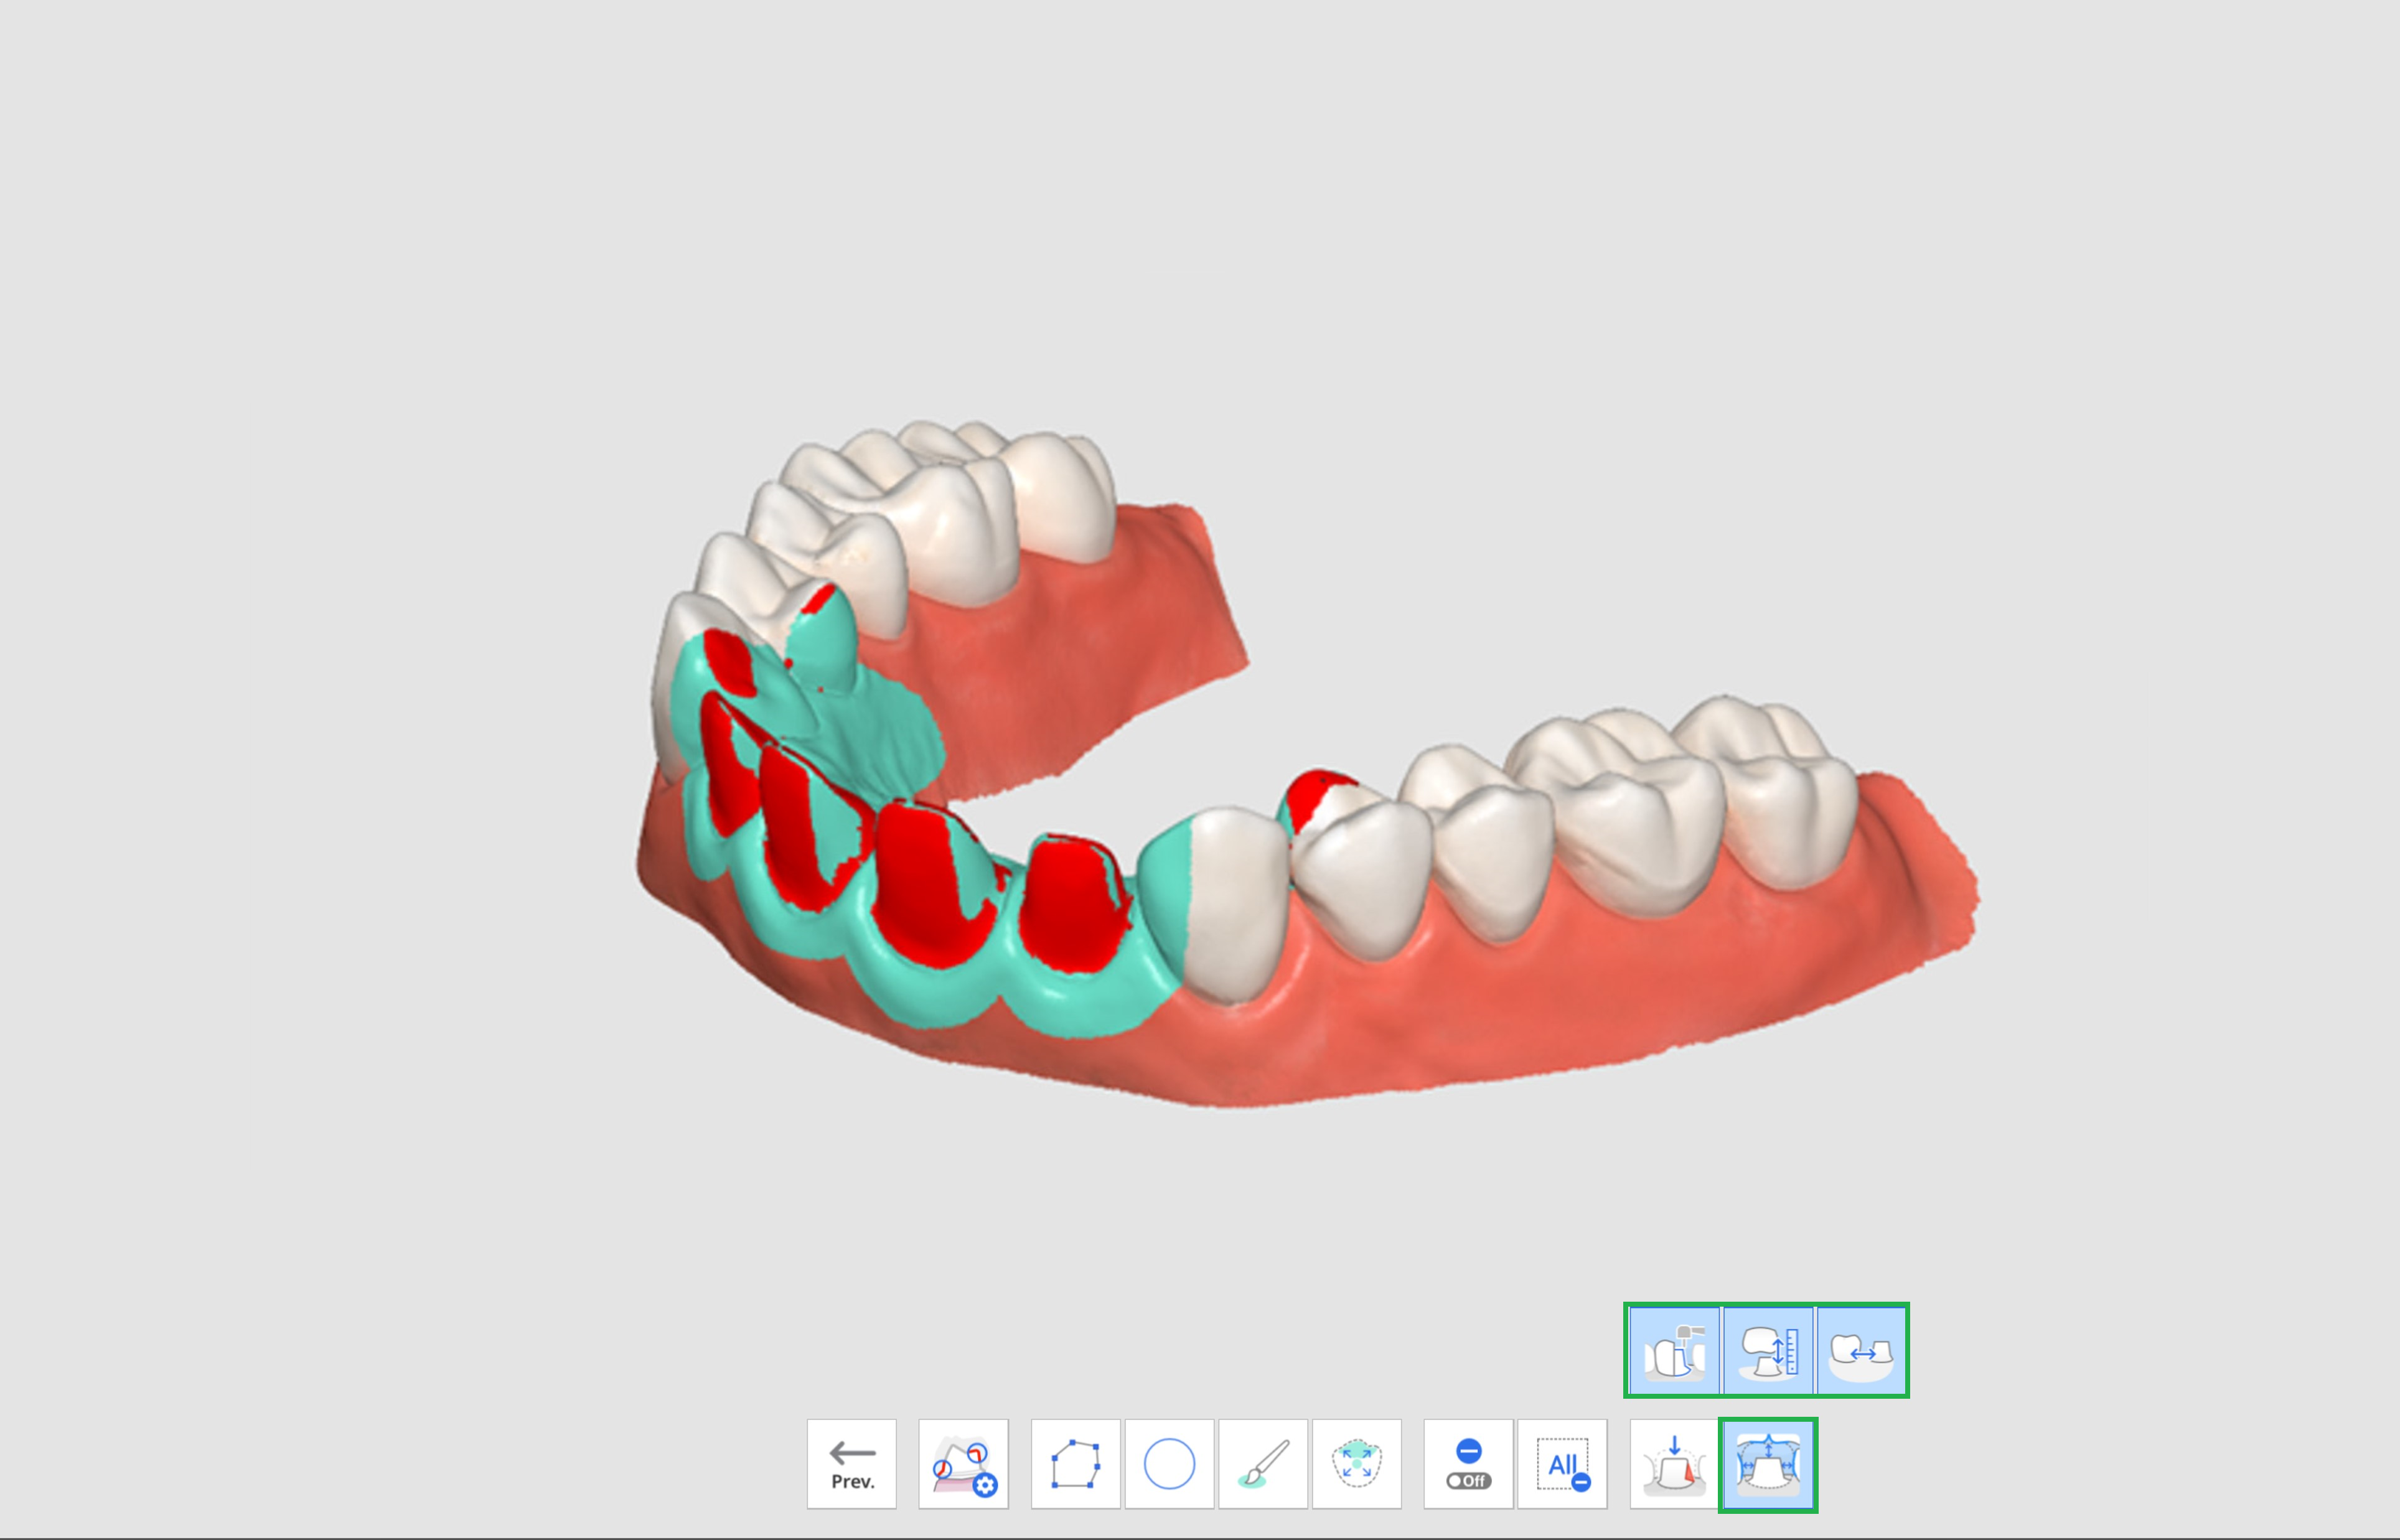
- Click the Distances icon and select one of the following tools.
- Tooth Reduction Depth
- Distance to Antagonist
- Distance to Adjacent
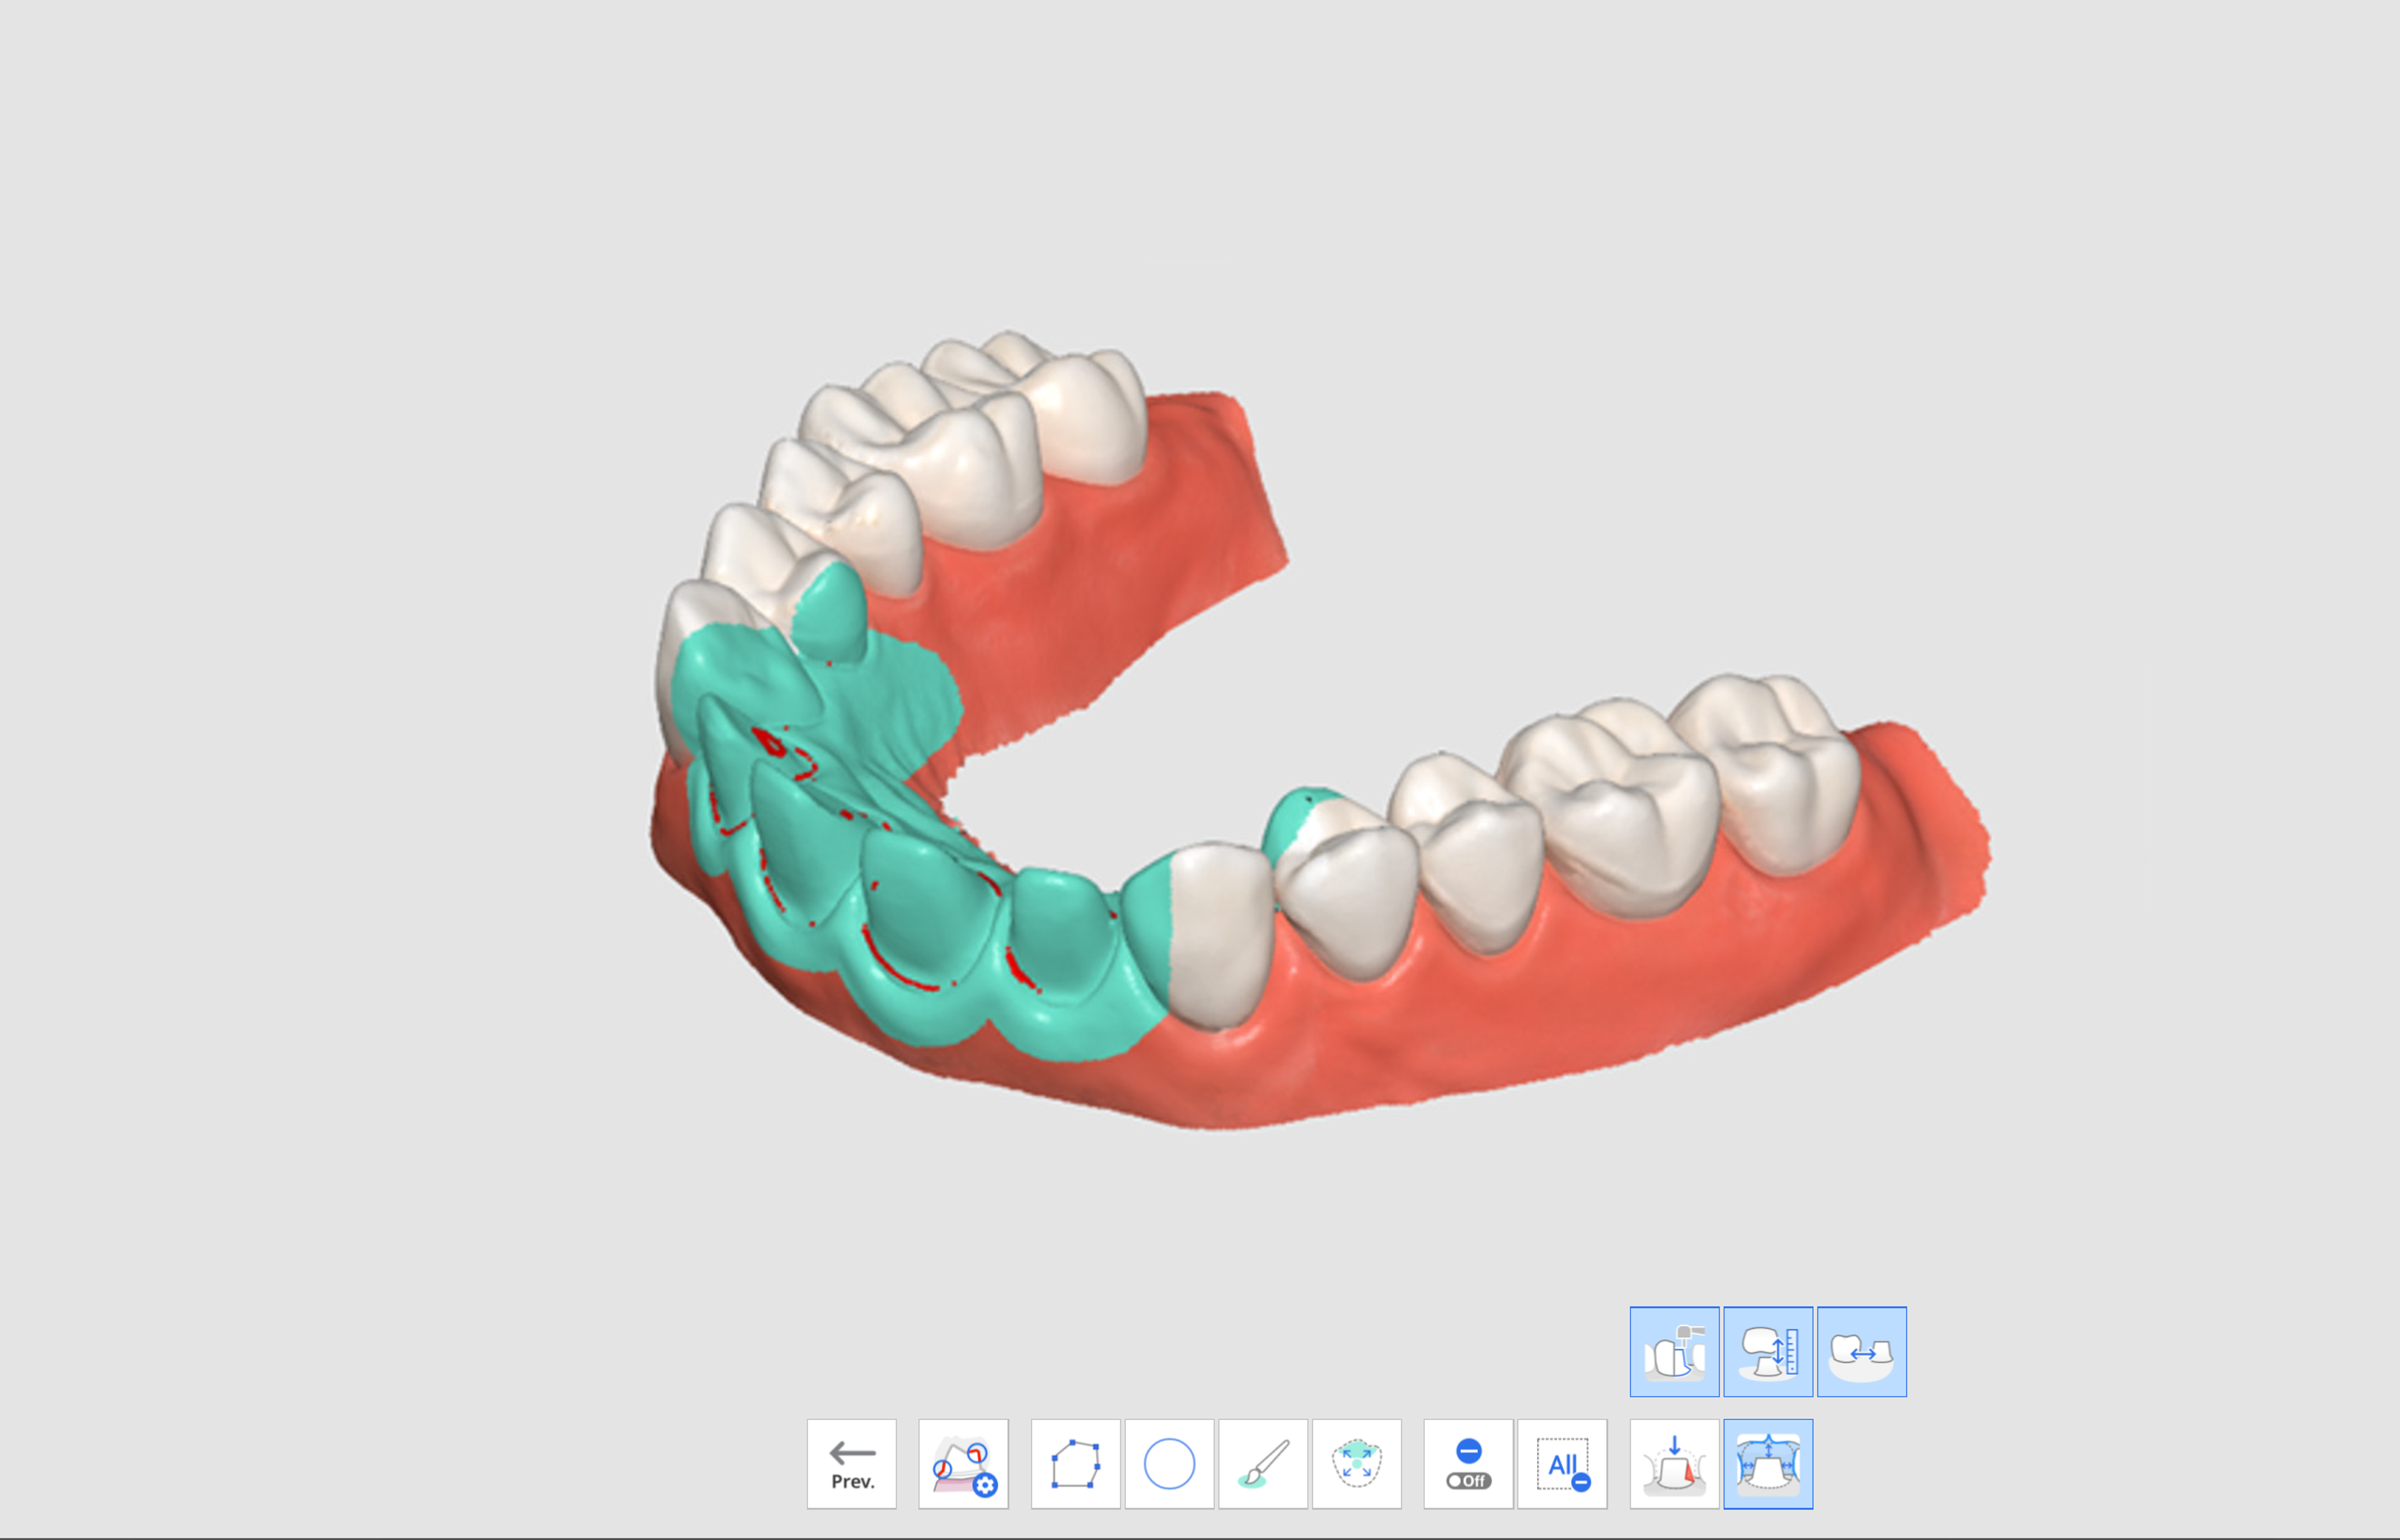
- The areas with insufficient tooth reduction in the scan data are shown in red.
- When hovering the mouse over the red area, an image of the insufficient item and its value will be displayed.
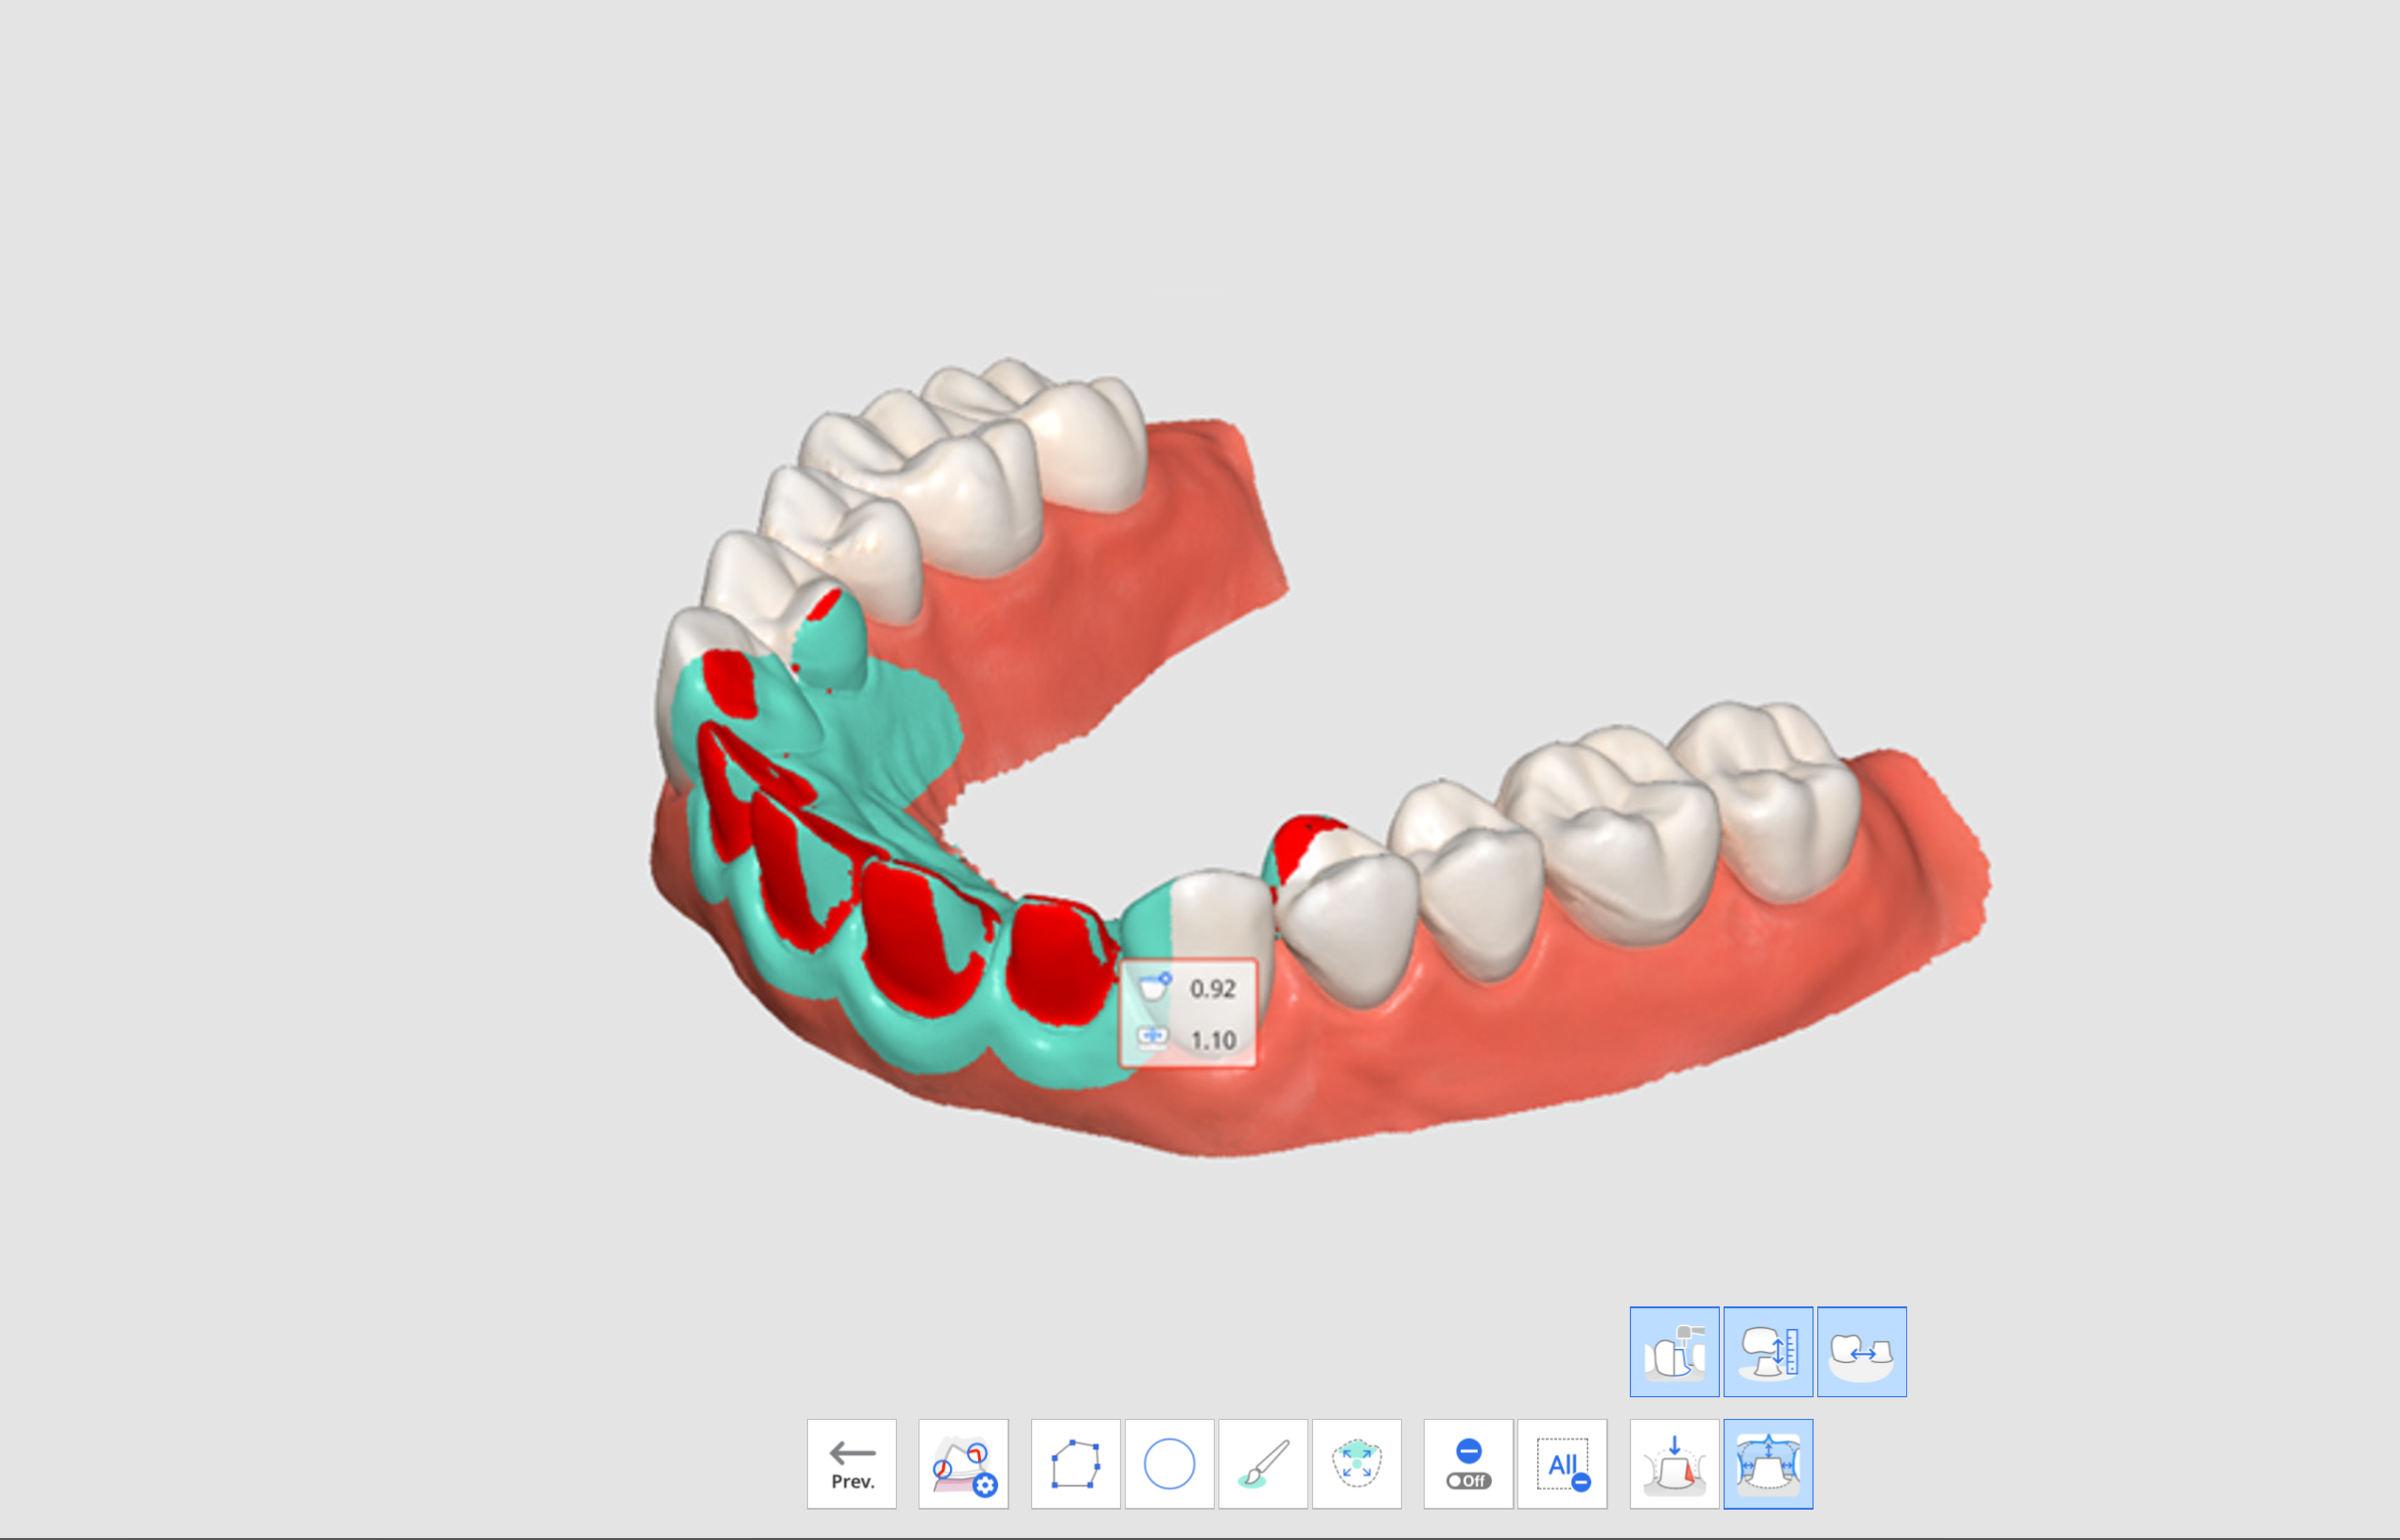
- With the displayed values, the user can plan whether additional tooth preparation is needed and how much more to remove.
- After additional tooth preparation, you can trim the area and acquire additional scan data. Then, you can go through the Preparation Review again for final confirmation.