In this step, the user must arrange the tooth data to create restorations. They can use either tooth library data or any available preoperative or reference scan data.
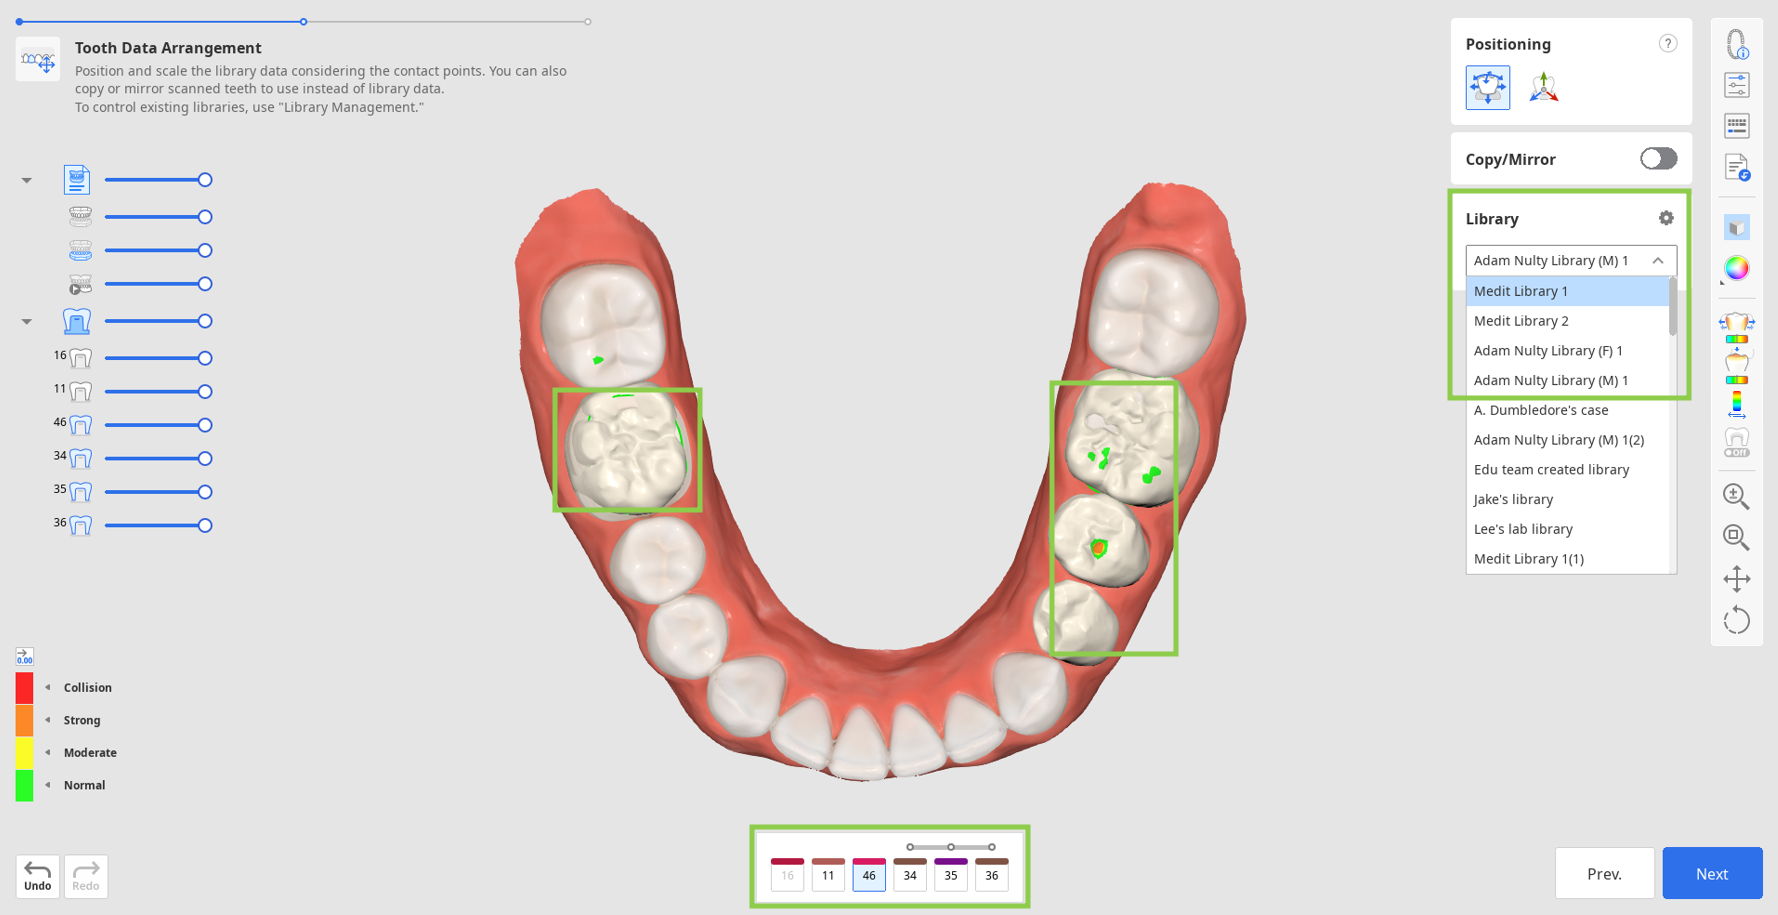
1. When you enter this step, tooth data from the selected library will be automatically assigned to all the target teeth specified in the form. There are 6 default tooth libraries, and you can choose which one to use in the Library toolbox on the right.
2. Alternatively, you can duplicate other available data to use it instead of the library one. For duplication, you can use either the pre-op data imported via the Assign Data dialog in the beginning or any other reference scans you load via "Import Additional Data" in the Side Toolbar. The latter lets you import additional data from other Medit Link cases or any locally stored data. To duplicate the data, use the "Copy/Mirror" tool. ”Copy” creates an exact replica of a scanned tooth, while “Mirror” creates a symmetrical one. Note that the copied or mirrored data will be applied only to the single tooth currently selected in the form at the bottom, allowing you to retain the library data for other teeth.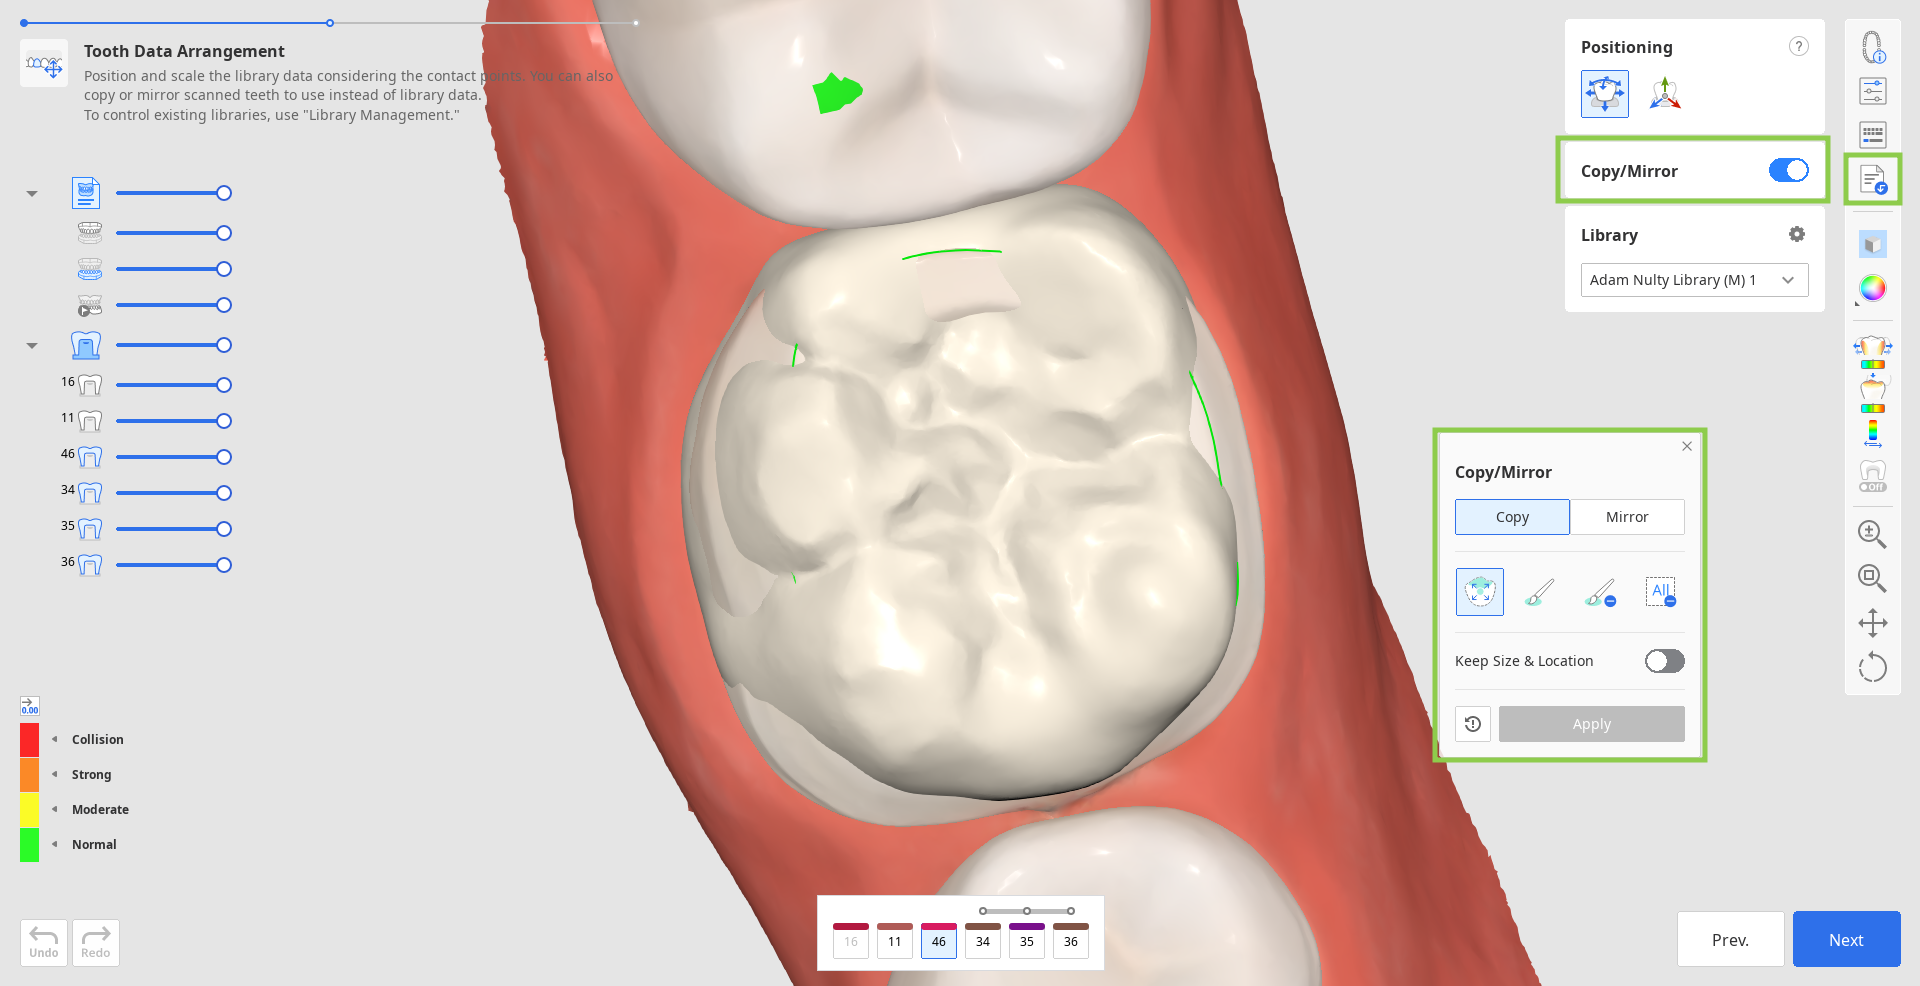
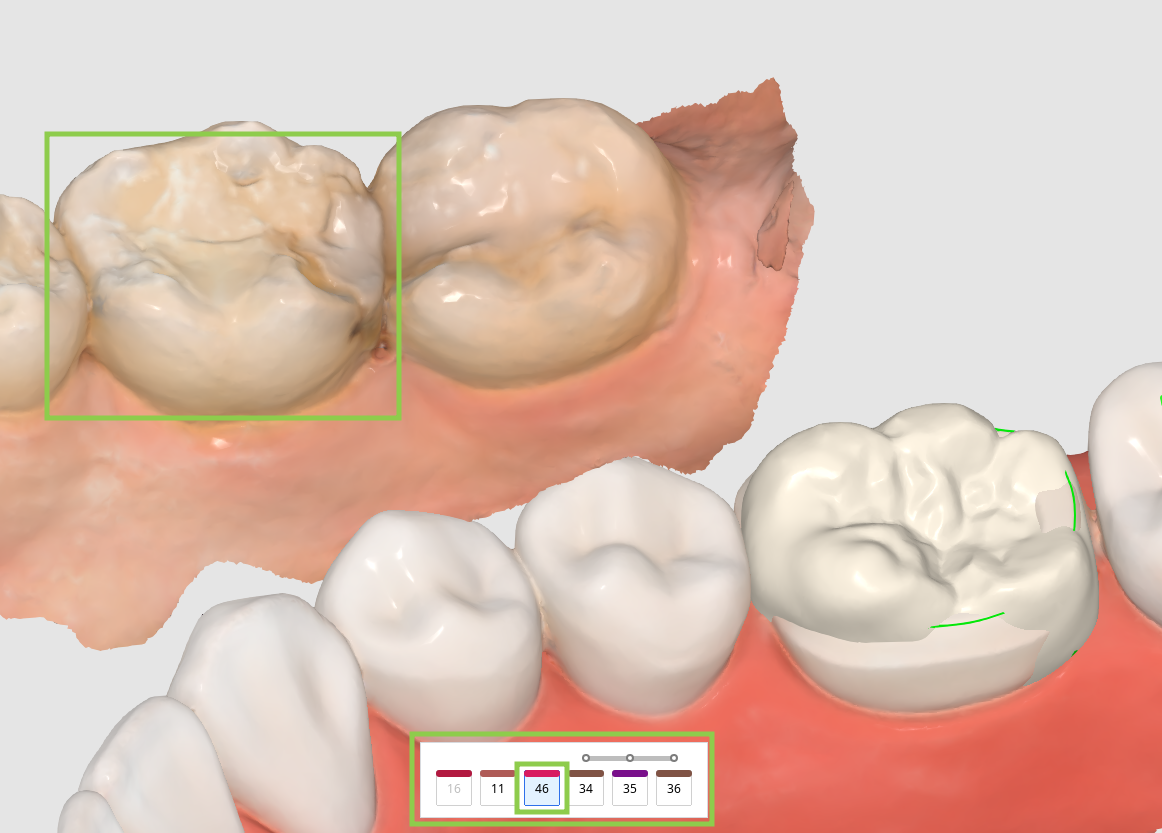
- Start by selecting a tooth number for which you want to use the duplicated data in the form at the bottom and finding the data you will be duplicating (use the Data Tree to make it visible).
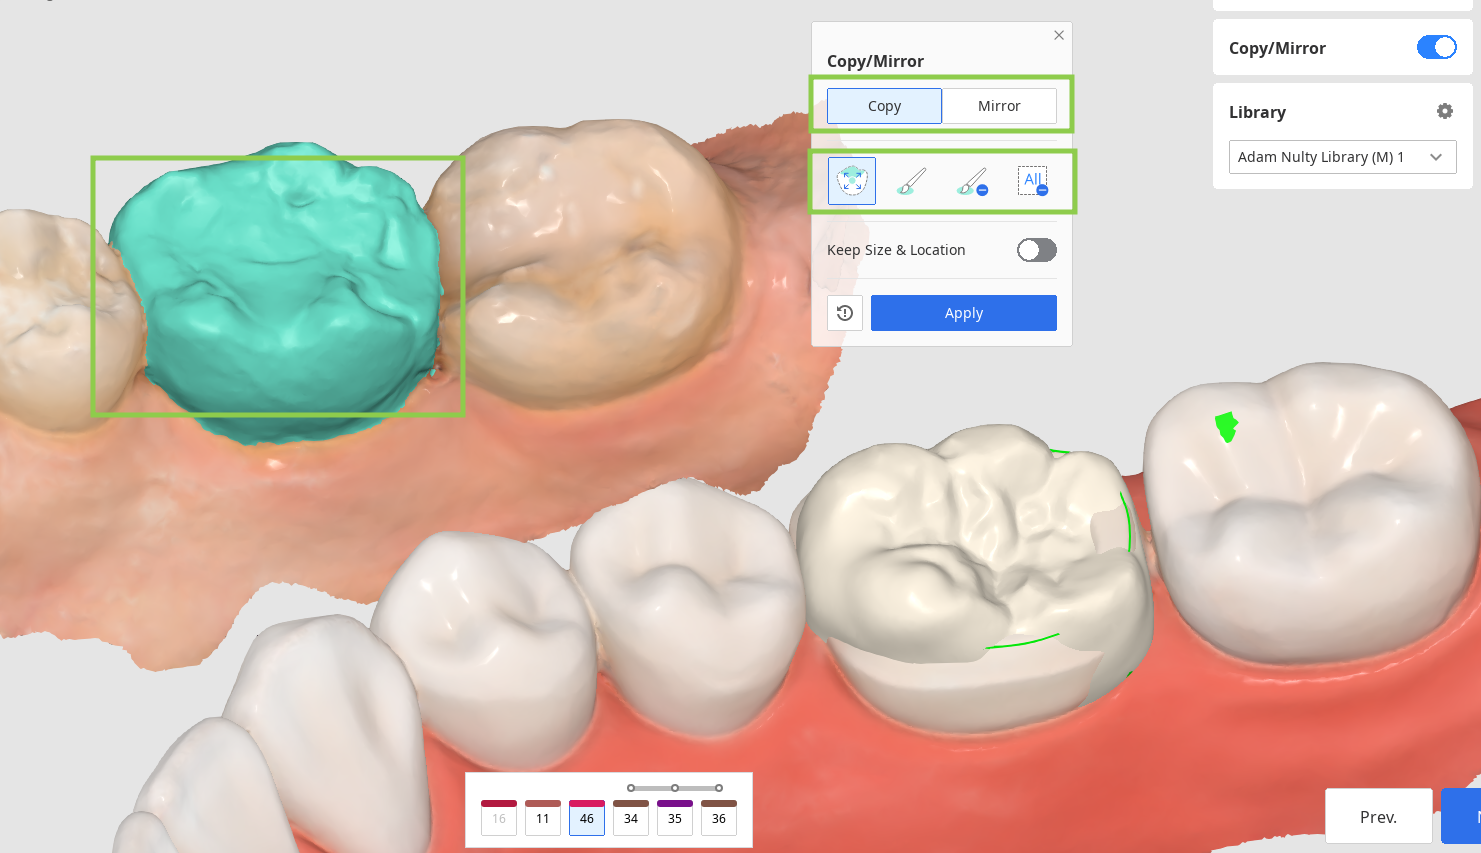
- Then, choose "Copy" or "Mirror" in the floating widget and select the desired tooth data using the provided tools. 🔎TipWhen copying data, note that the "Keep Size & Location" toggle allows you to create a duplicate of the same size and location as the original. If not turned on, the copied data will be placed onto the designated target tooth.
- Click "Apply" to substitute the library data with designated data. If you want, you can return to using the library data by clicking "Reset."

3. When you have arranged the tooth data for all your target teeth, adjust the data's placement using the "Positioning" tools. You can move, scale, or rotate the tooth data to ensure it is positioned properly.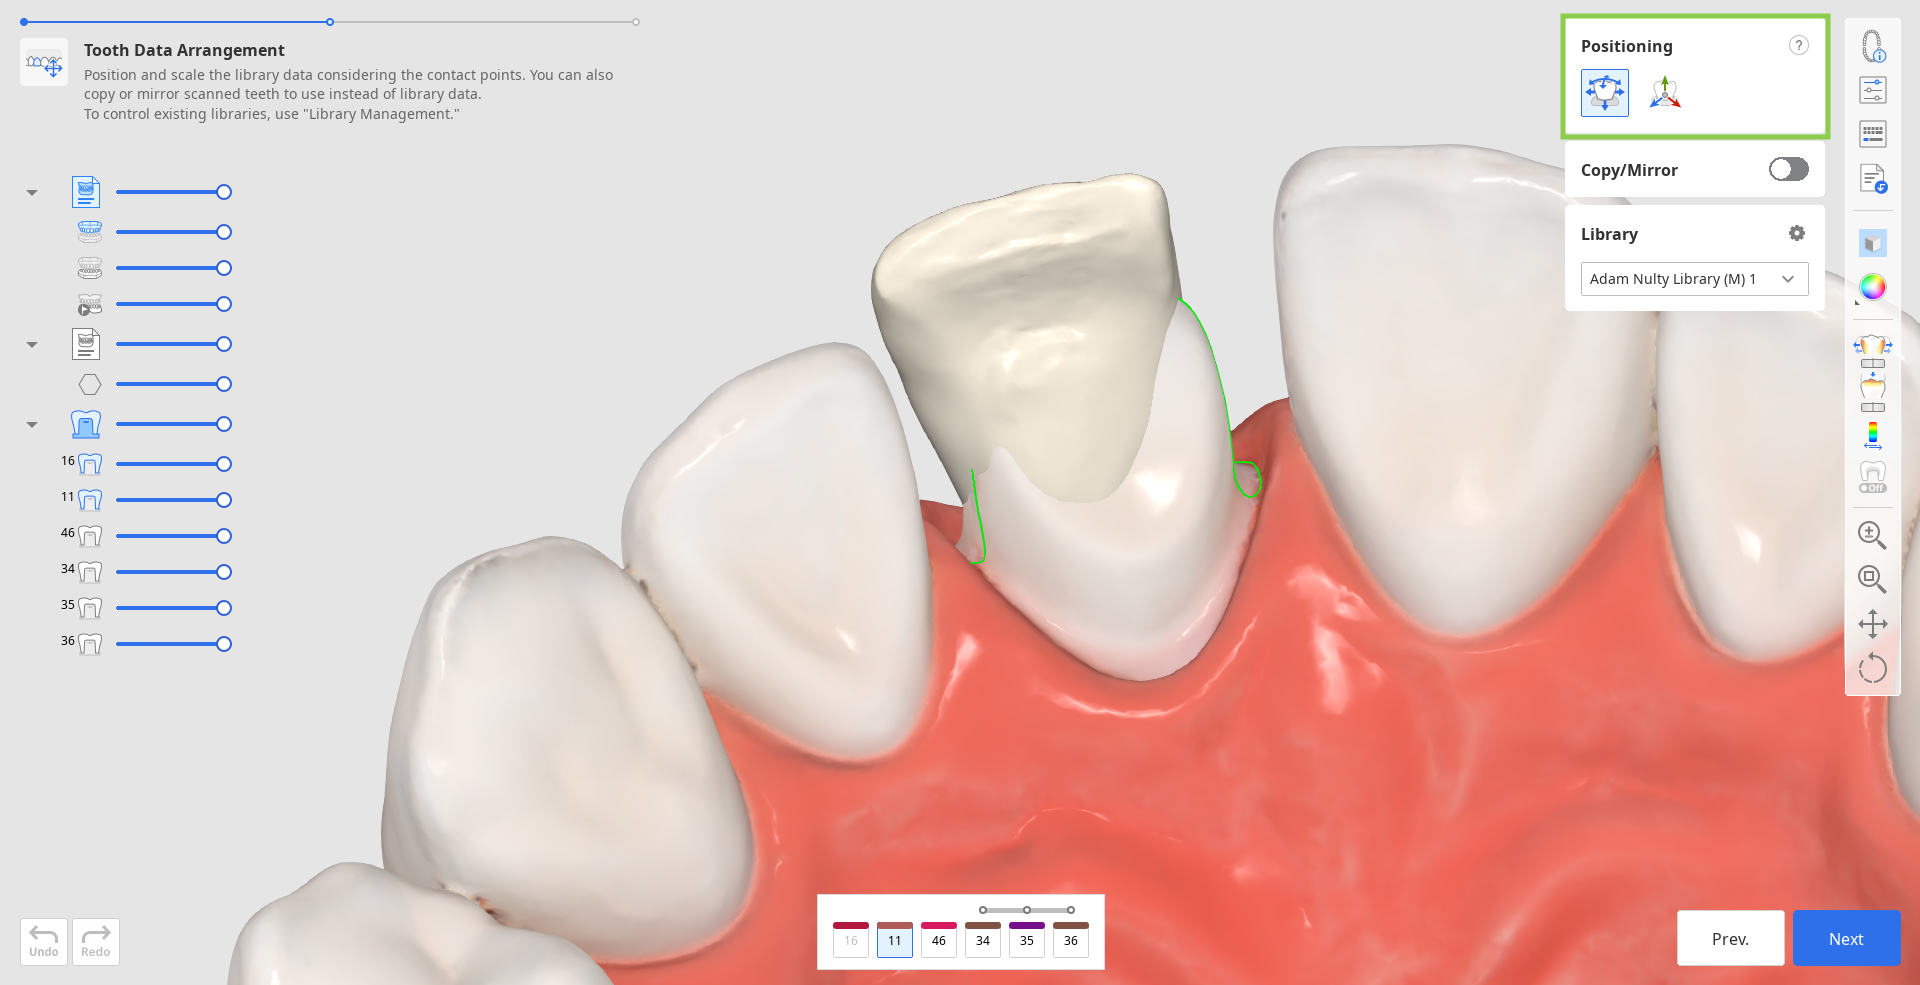
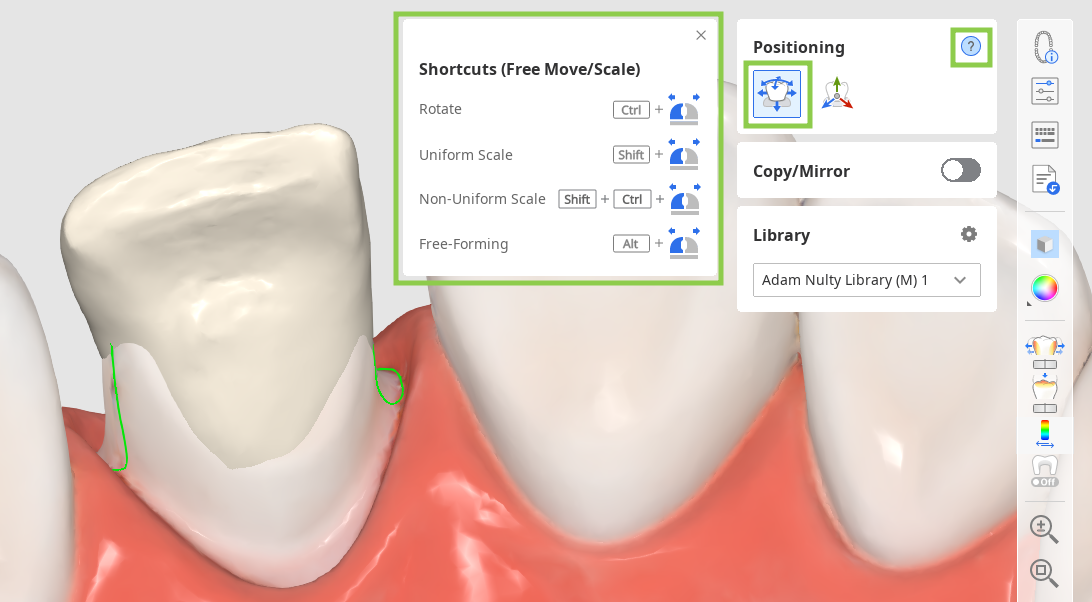
- Use "Free Move/Scale" if you want to control data movements with no restrictions. To move data, use the mouse. For other actions like rotating and scaling, check the keyboard shortcuts under the question mark in the toolbox.
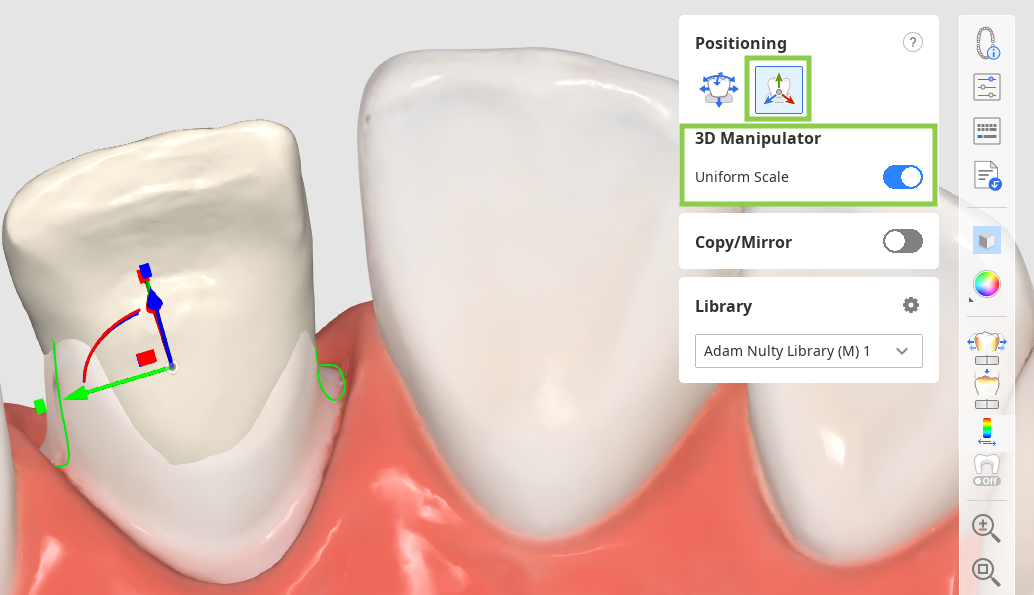
- Use "3D Manipulator" if you want to make precise or small adjustments to the data positioning. This feature lets you control data along the axis.
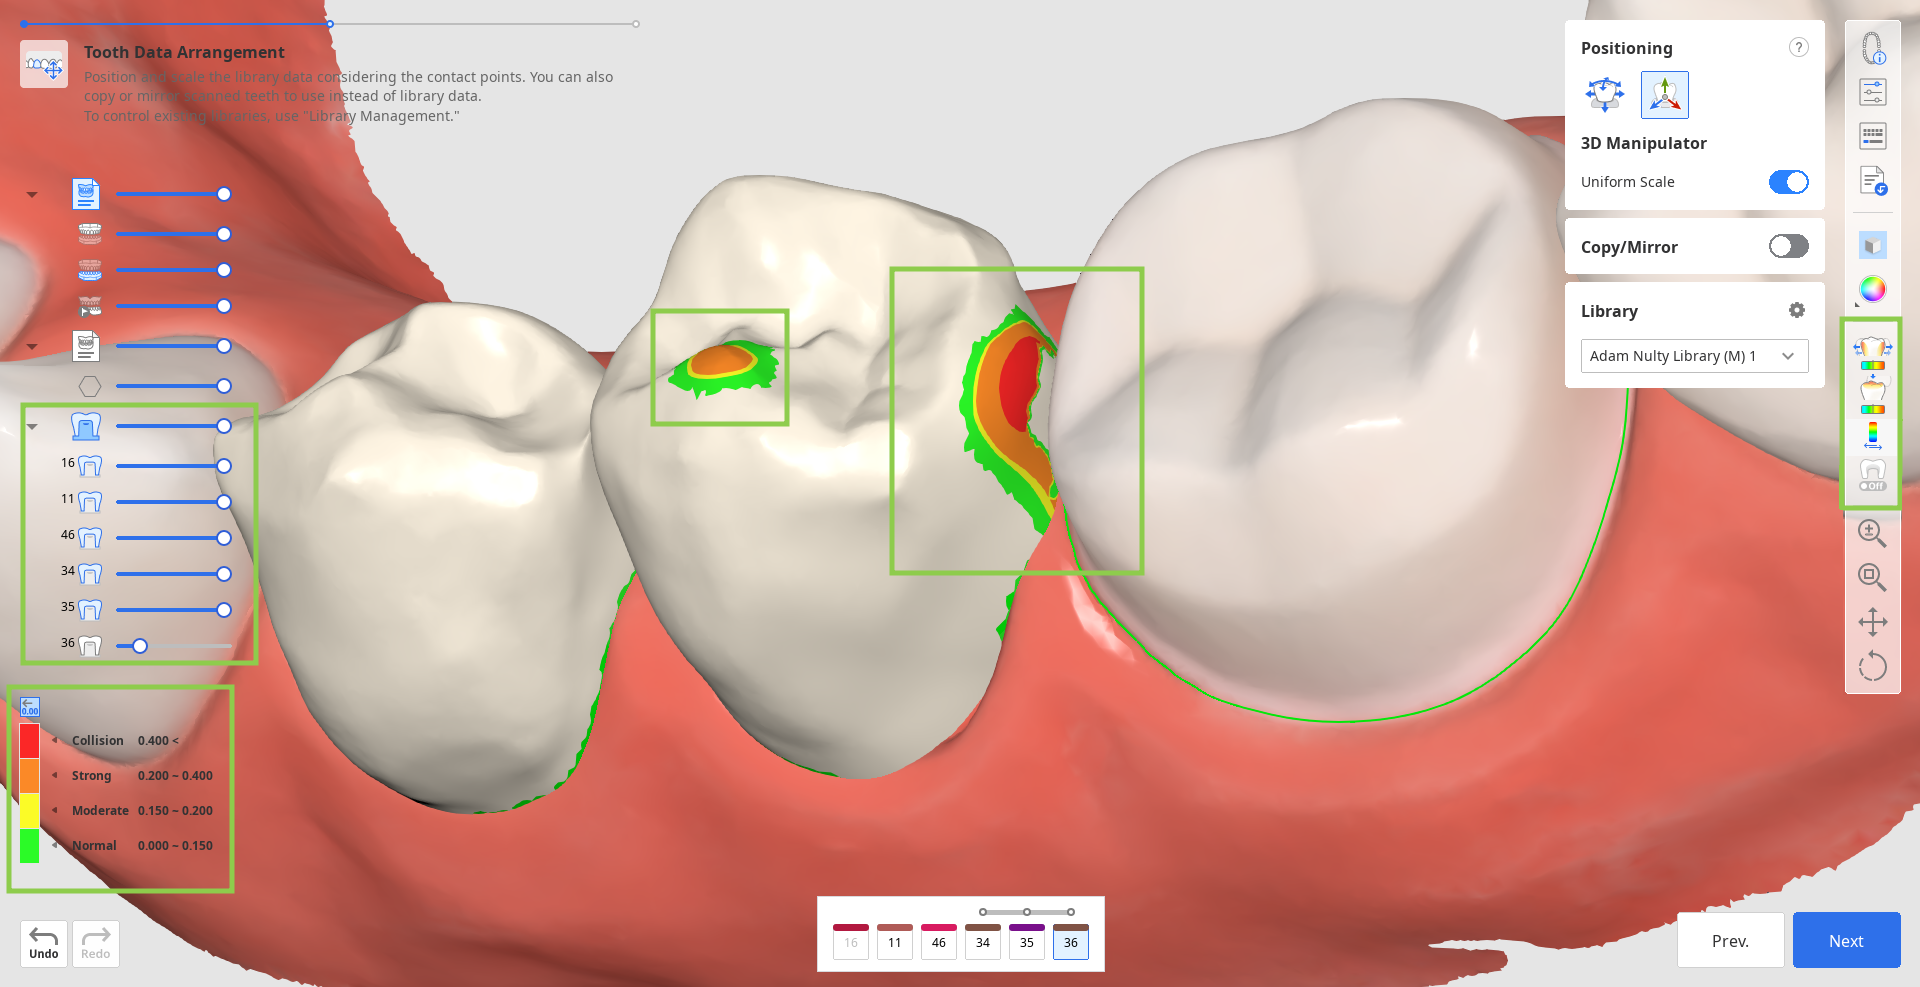
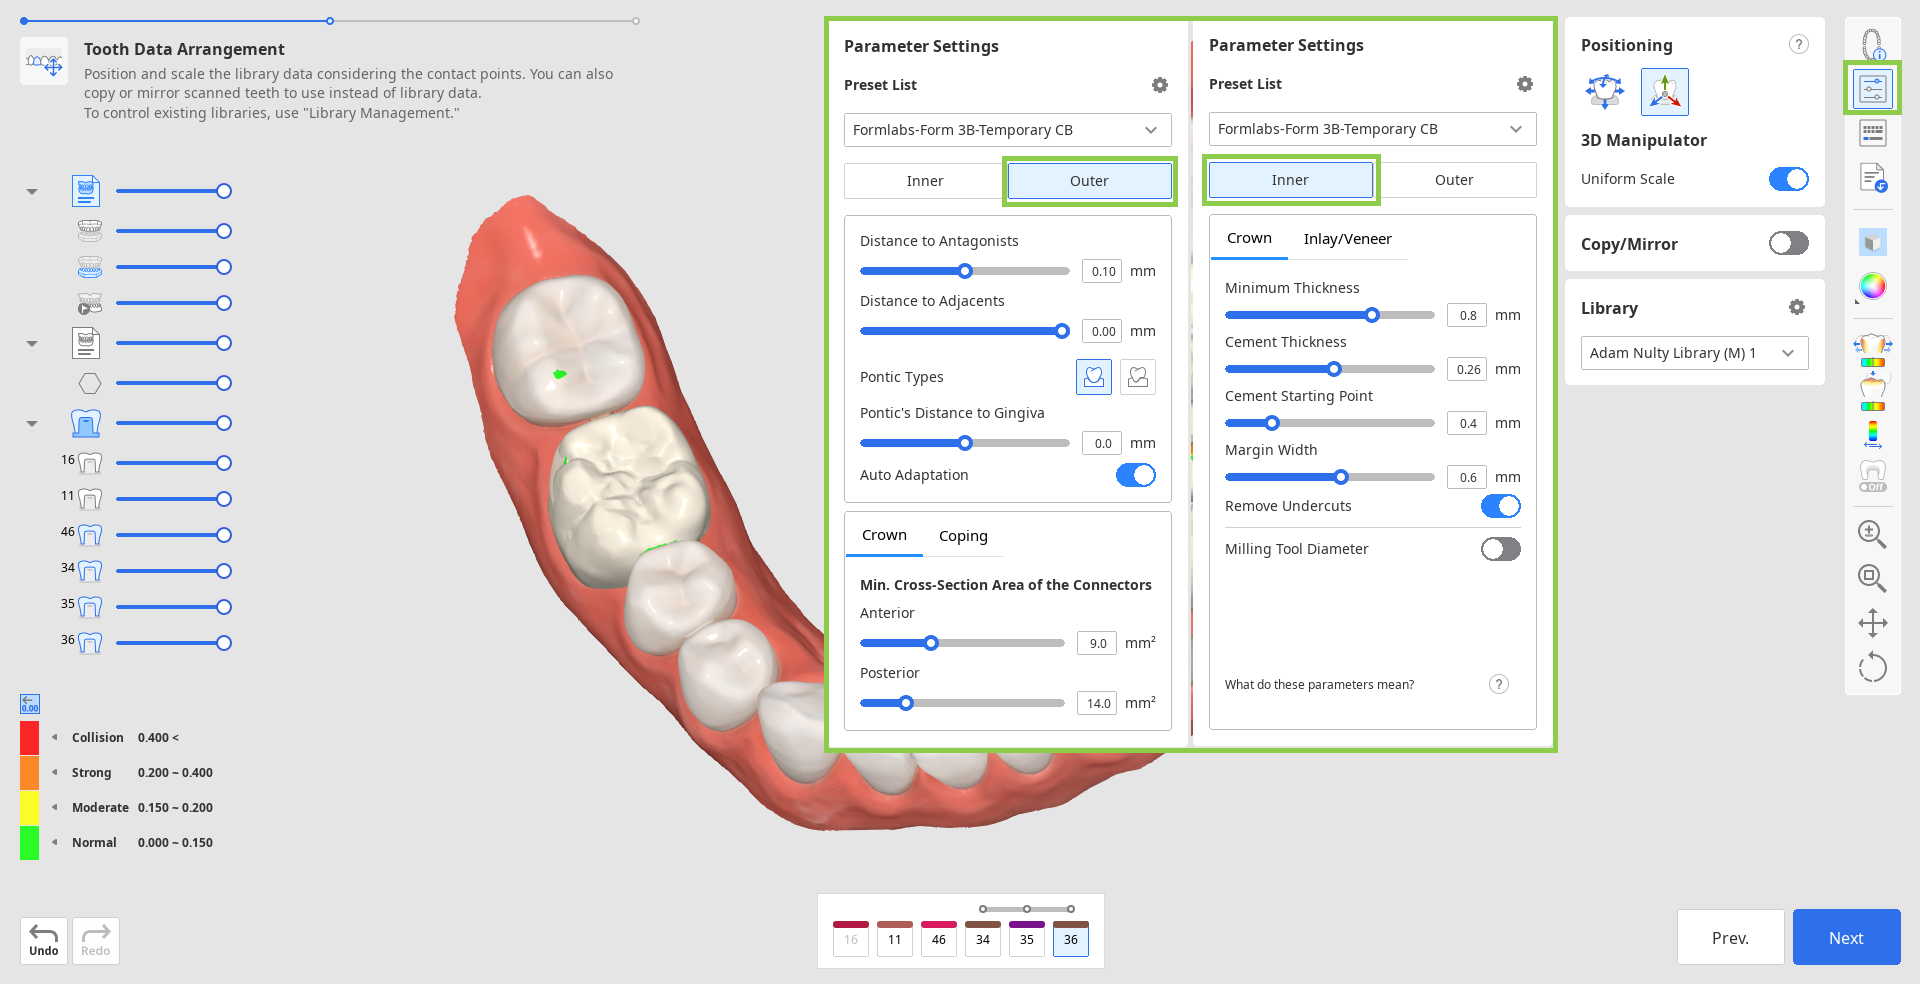
4. You should consider the contact points with other teeth when positioning the tooth data. To evaluate the contact between the restoration and its opposing or adjacent teeth, refer to the color bar in the bottom left corner.
5. In this step, you can also review the parameters for the restoration's inner and outer surfaces before they are applied. To do this, click the "Parameter Settings" feature in the Side Toolbar on the right. You can use the recommended presets for your specific printer or manually adjust each parameter. By default, the most recently used parameters will be set up for you.
6. When done, click "Next."