In this stage, users can preview automatically generated simulations alongside the original data model. The "Simulation Preview" stage serves two main purposes: facilitating patient consultations and supporting visual review of the simulated scenarios.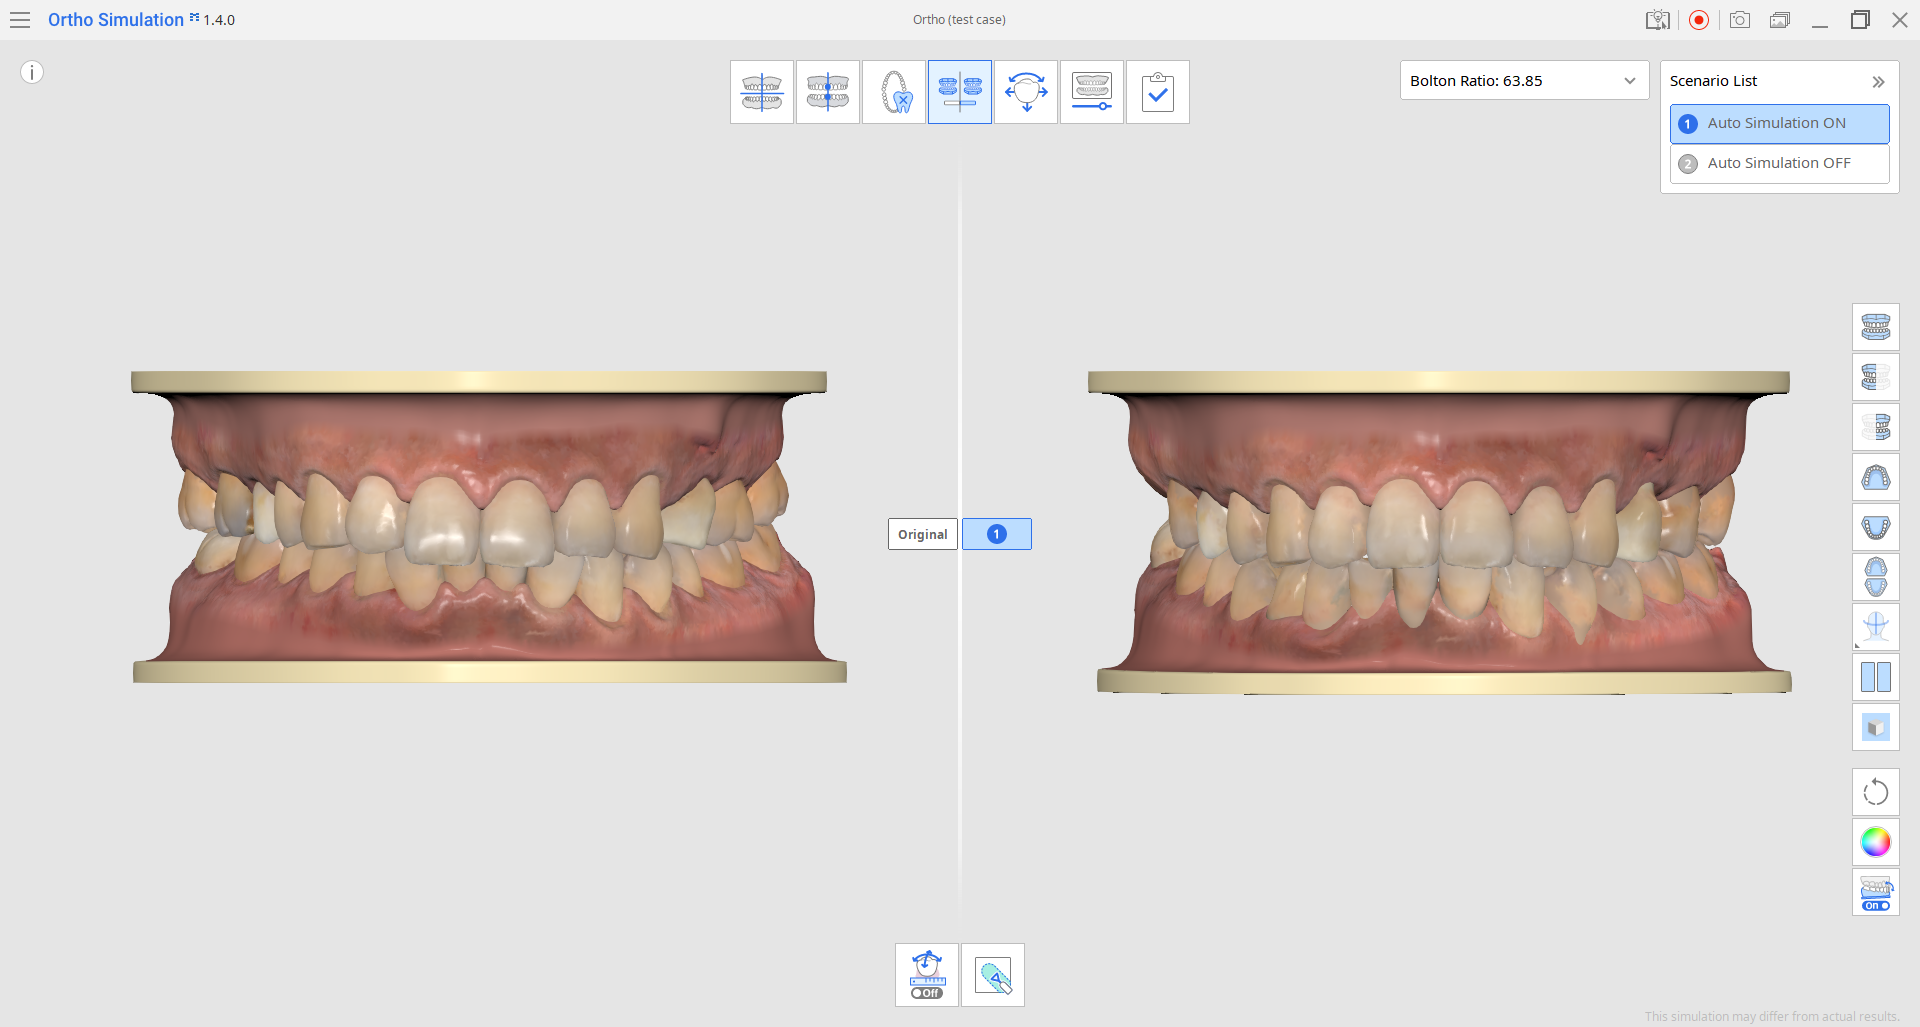
Patient Consultation
This stage allows users to preview dental models showing initial dentition and a visualized potential outcome. These visual aids can be beneficial during patient consultations.
Here are some helpful features available in the Side Toolbar on the right that can be used.
1. Model Display Mode
If the realistic model display makes your patient uncomfortable, you can change to a simplified two-color study display mode.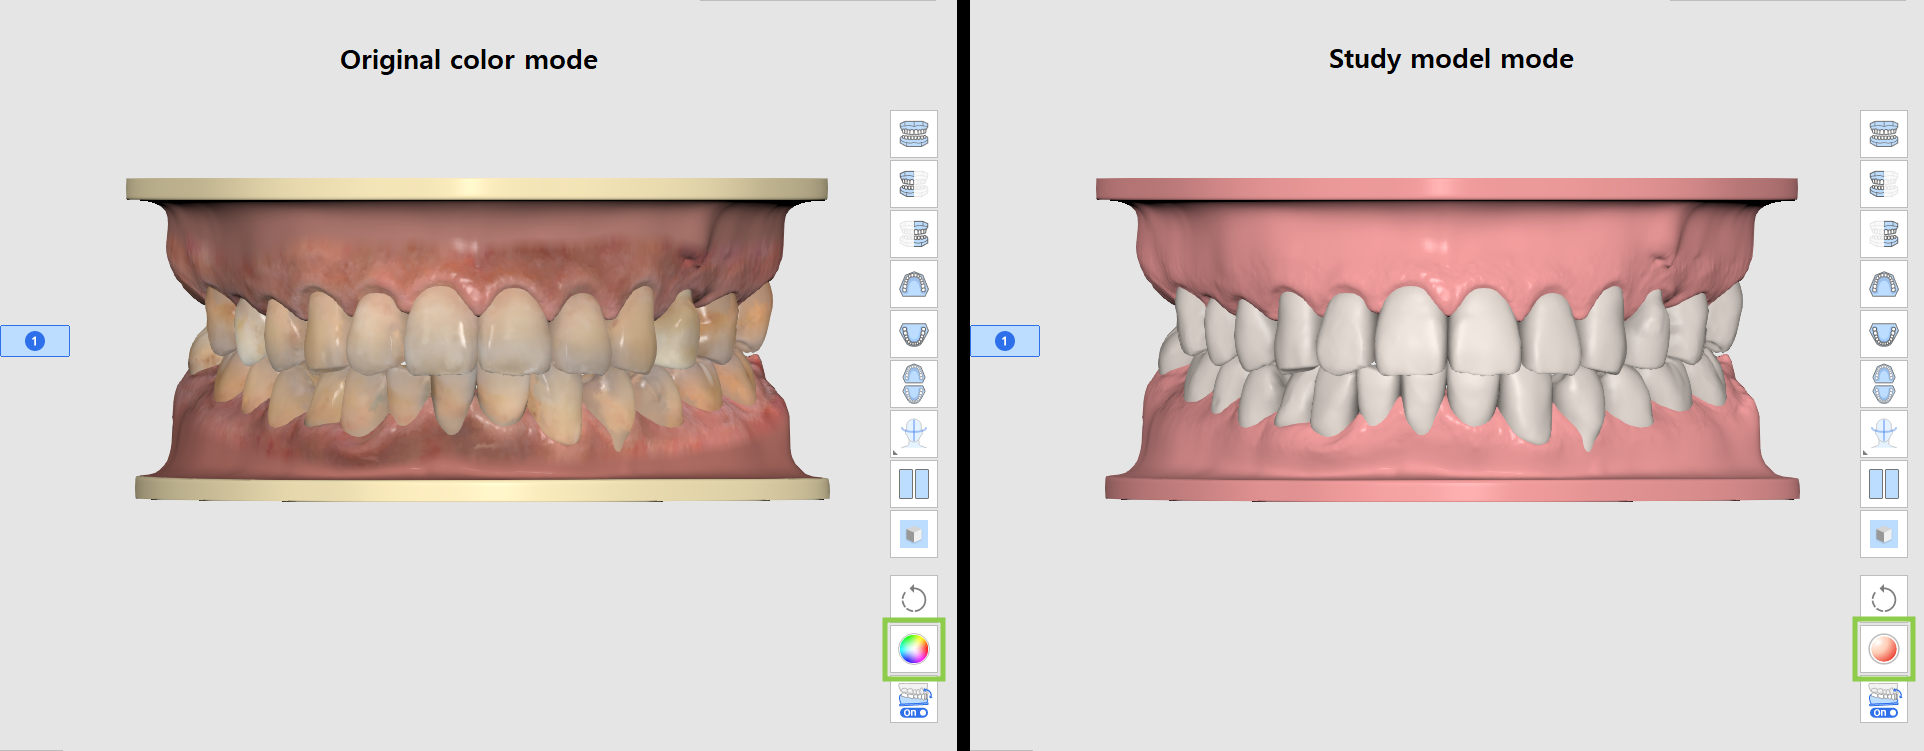
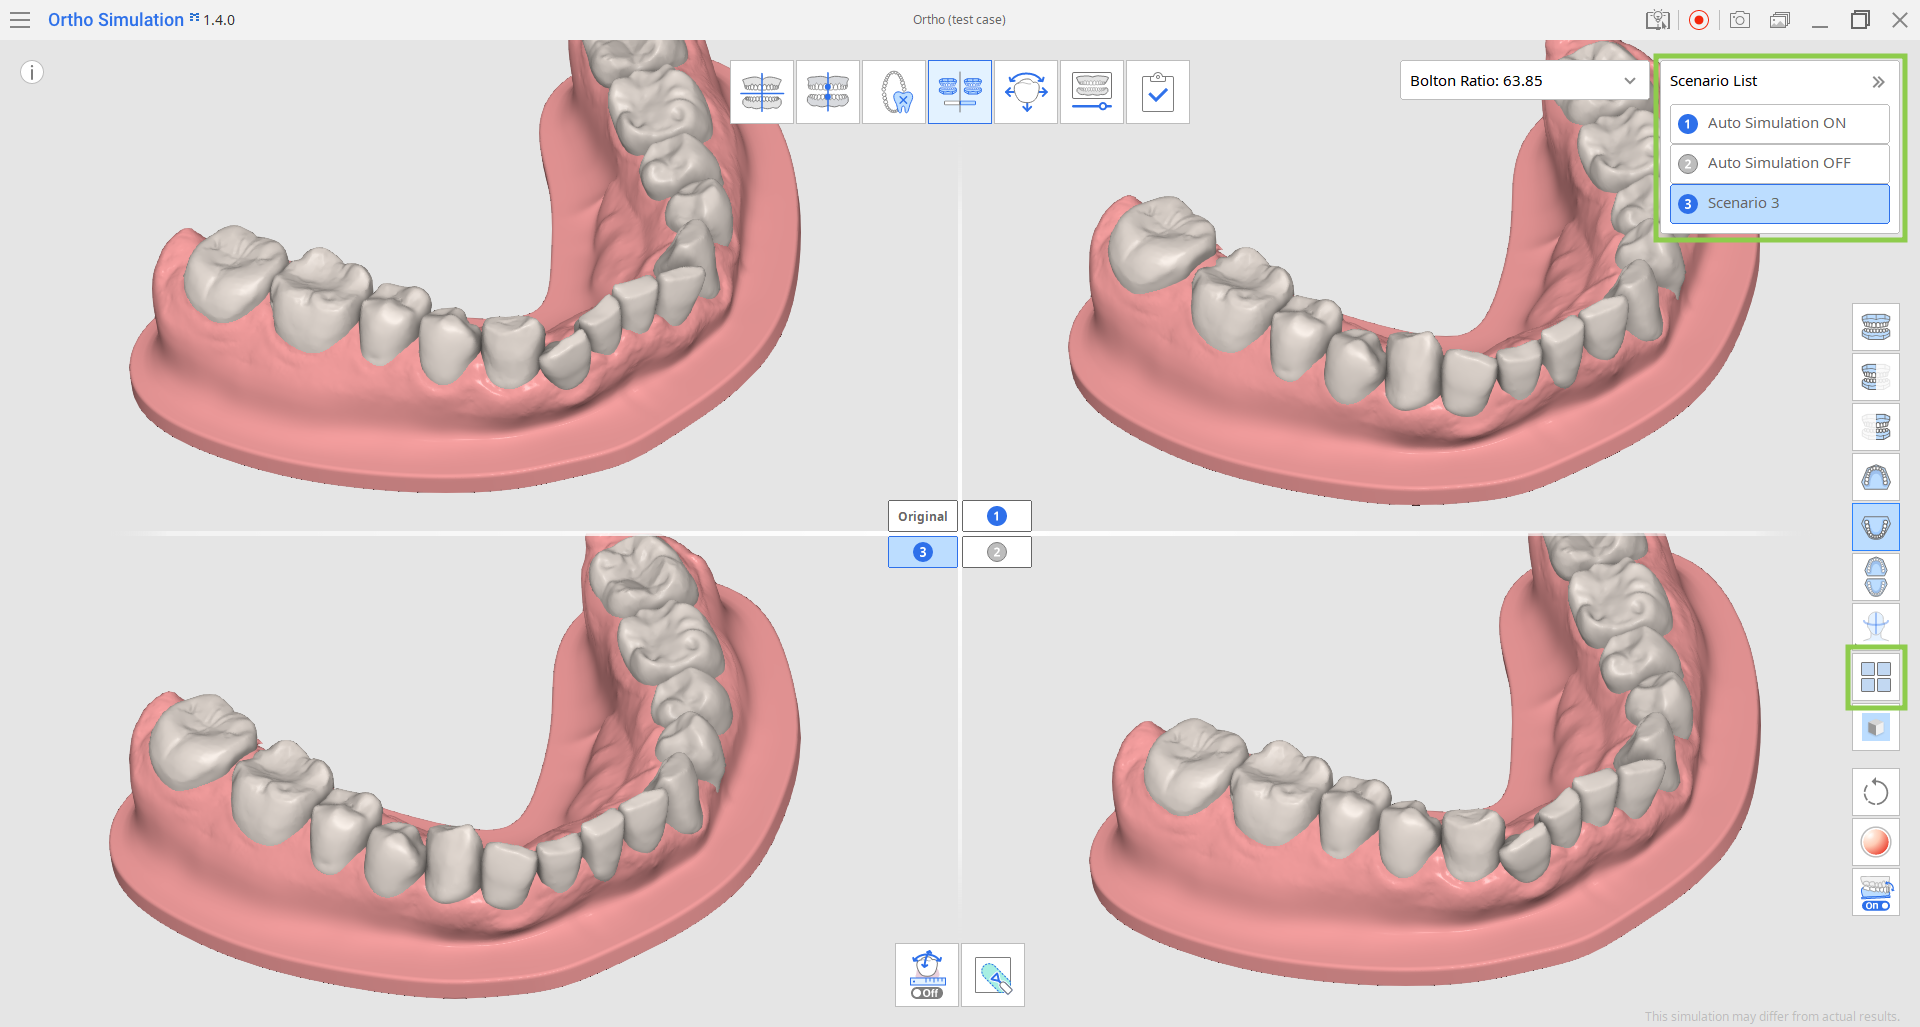
2. Scenario Comparison Mode
You can compare each scenario's simulation individually with the original model by switching between them in the top right corner. Alternatively, you can use "Scenario Comparison Mode" to simultaneously view all scenarios alongside the original model.
3. Show/Hide Reference Data
You can preview simulations with the reference data: midline, arch line, and face scan data. Click the feature icon in the Side Toolbar and choose what data you want to see.
If needed, the midline and arch line can be adjusted in the next stage.

4. Grid Settings
Click this feature in the Side Toolbar multiple times to show, overlay, and hide the grid. The grid utilizes millimeters as a measurement unit.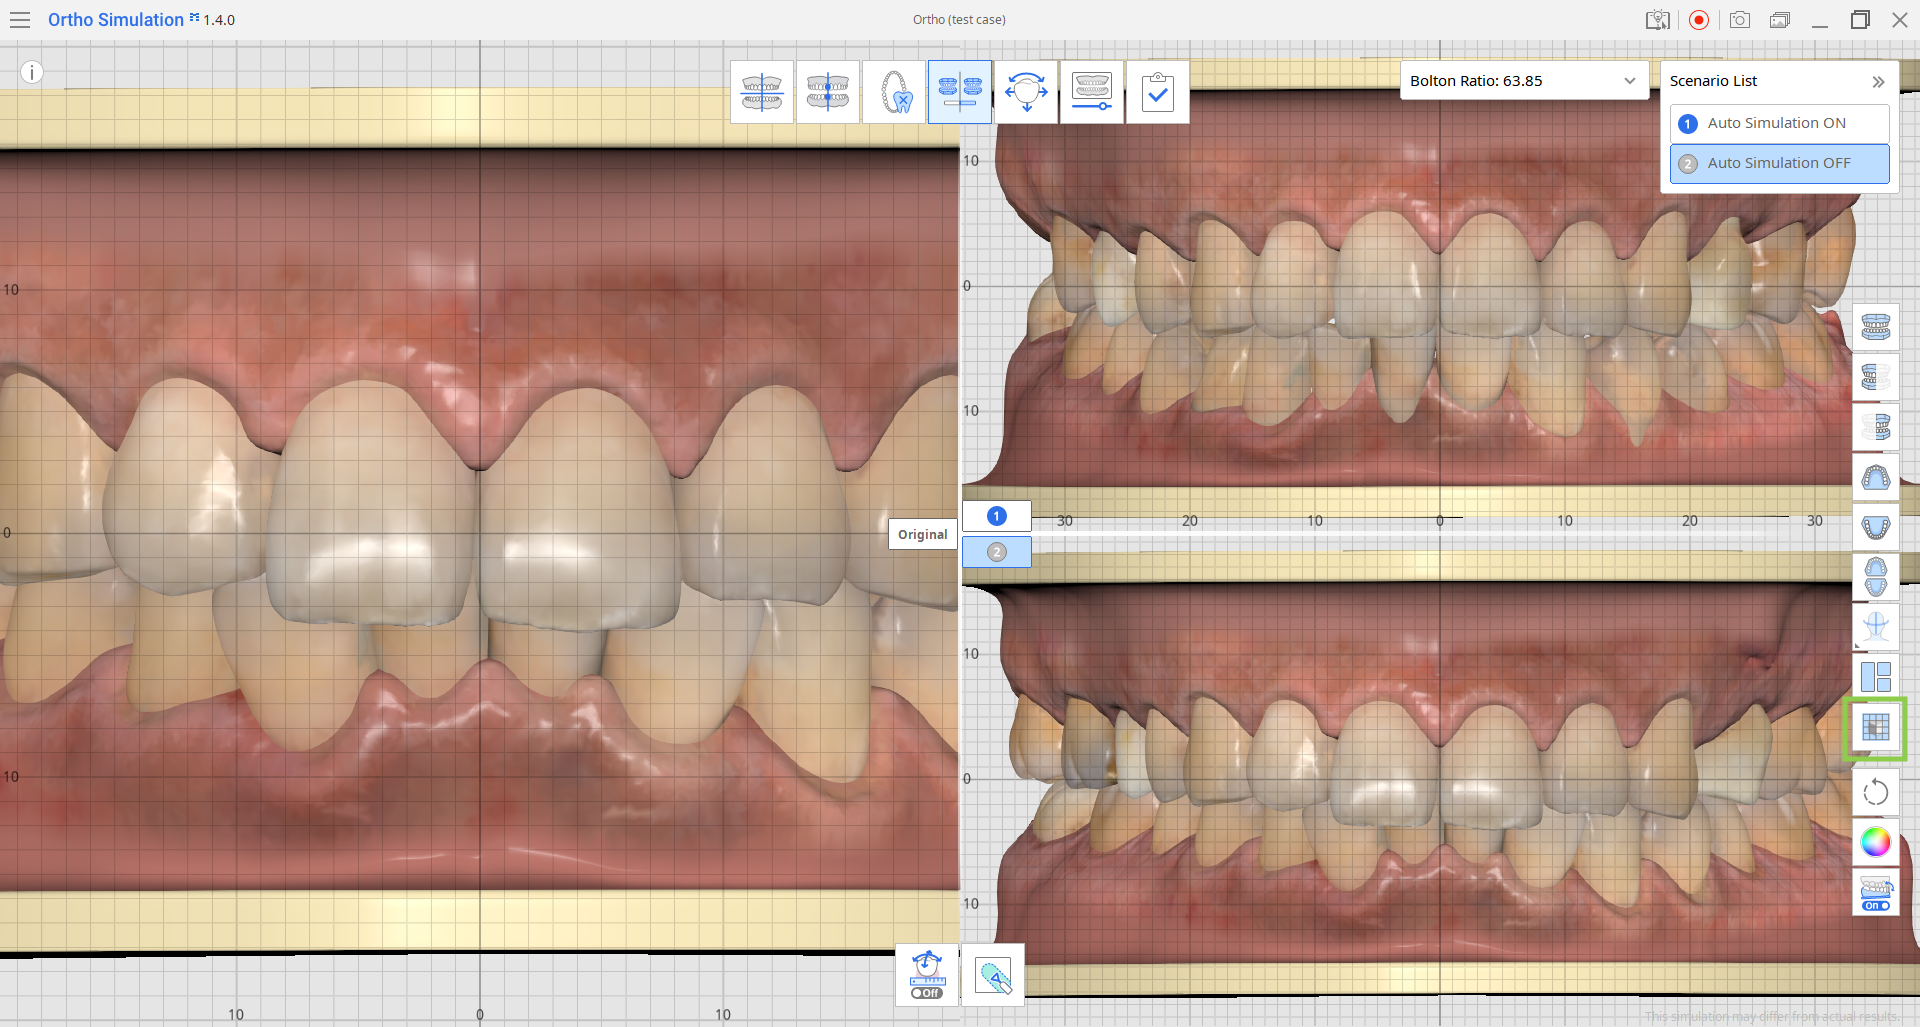
Simulation Analysis
This stage offers three features for visually reviewing and comparing the simulated scenarios: Bolton Ratio, Teeth Movements Data, and Sculpting.
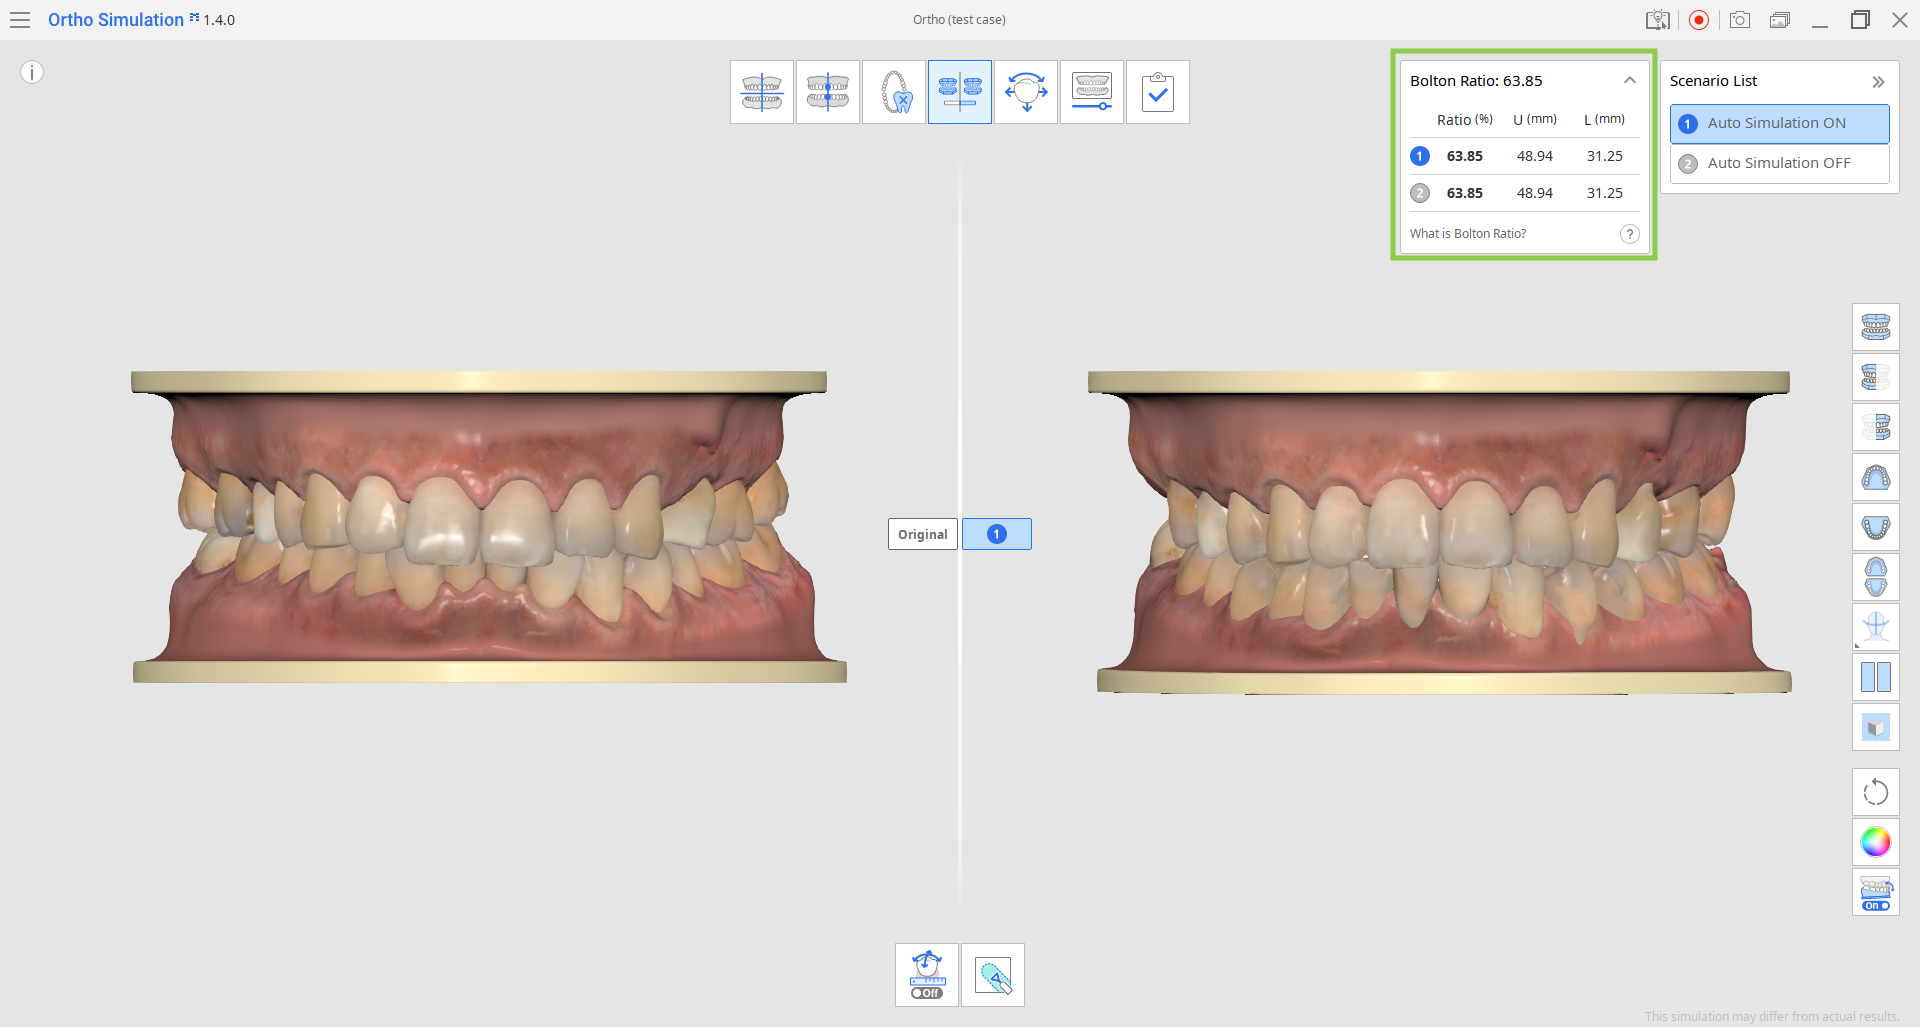
1. Bolton Ratio
The Bolton Ratio is calculated automatically, and the results for the currently selected scenario are displayed in the top right corner. You can expand the widget to see the results for all scenarios.
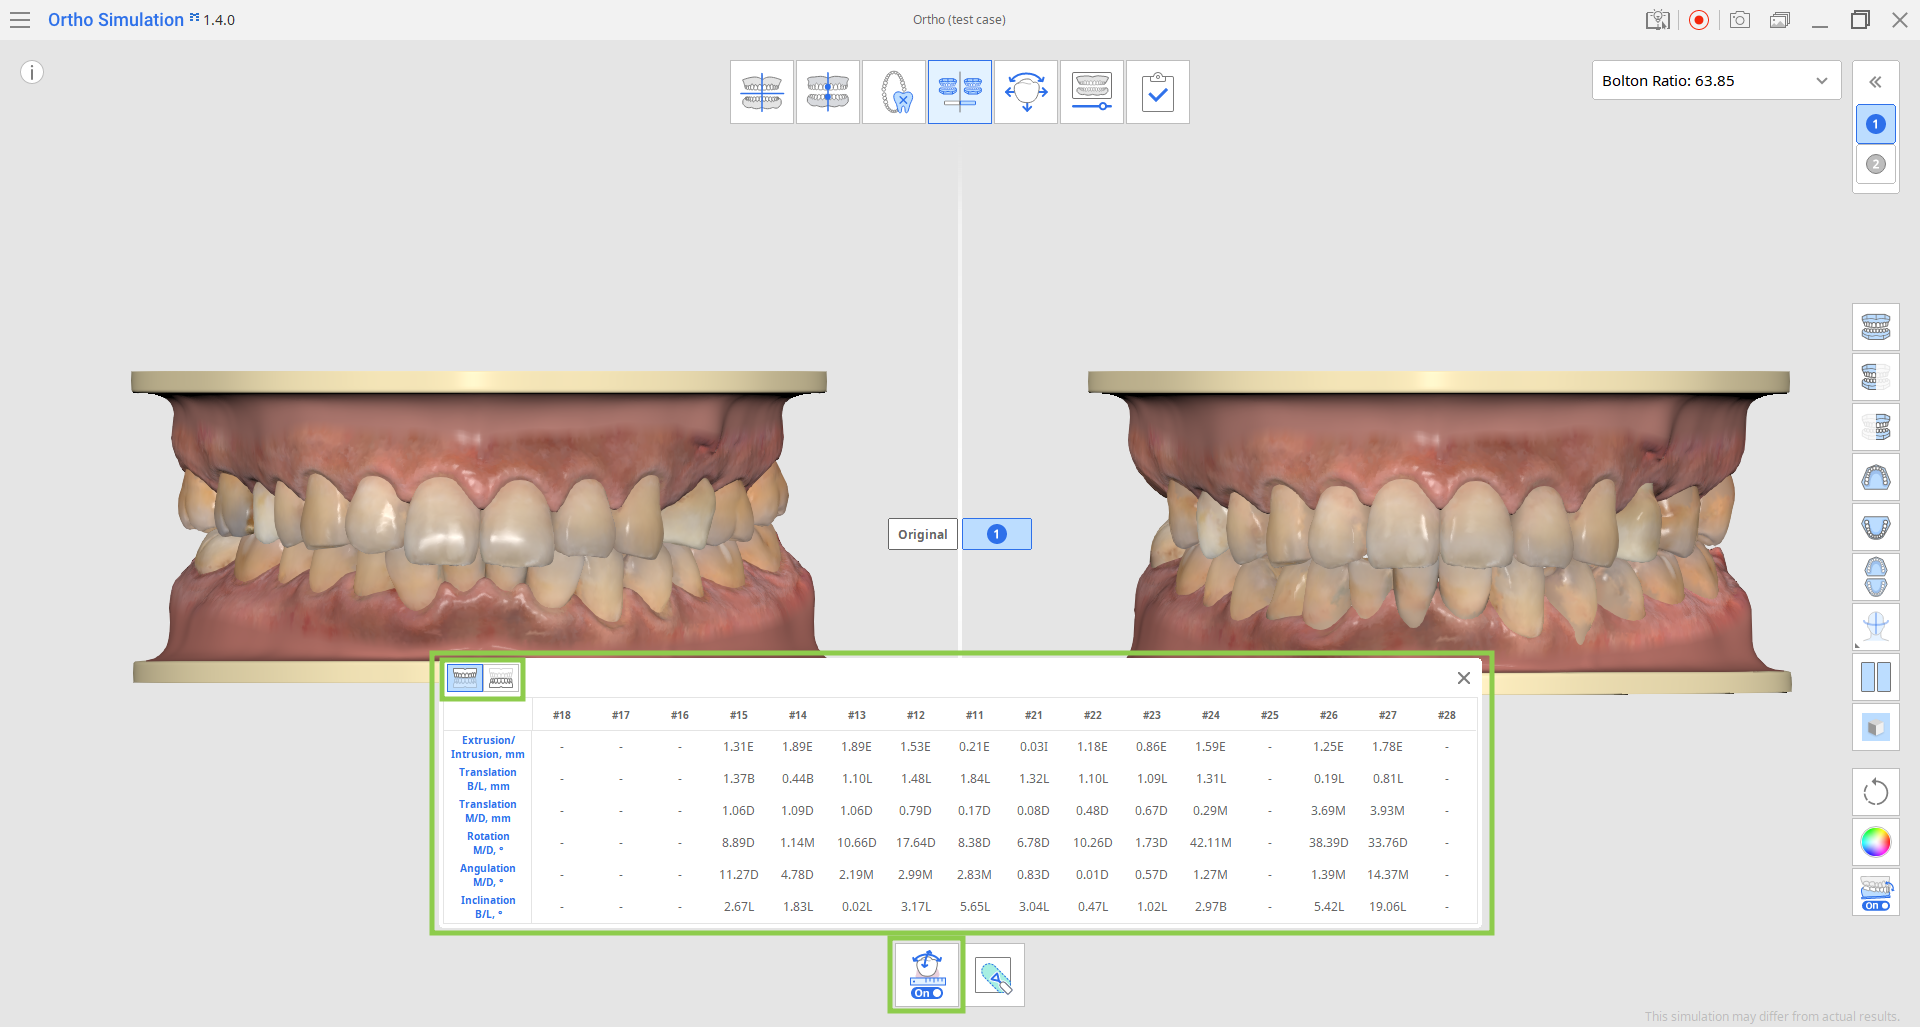
2. Teeth Movements Data
This feature is located in the Toolbox at the bottom of the screen. It shows the calculations for tooth movements in the simulation, allowing you to check the feasibility of the proposed scenario. This data is also helpful when comparing different visualization scenarios, including cases with user-defined assumptions such as extractions, and supporting patient consultations.
This data can also be included in an exported Ortho Simulation Report.
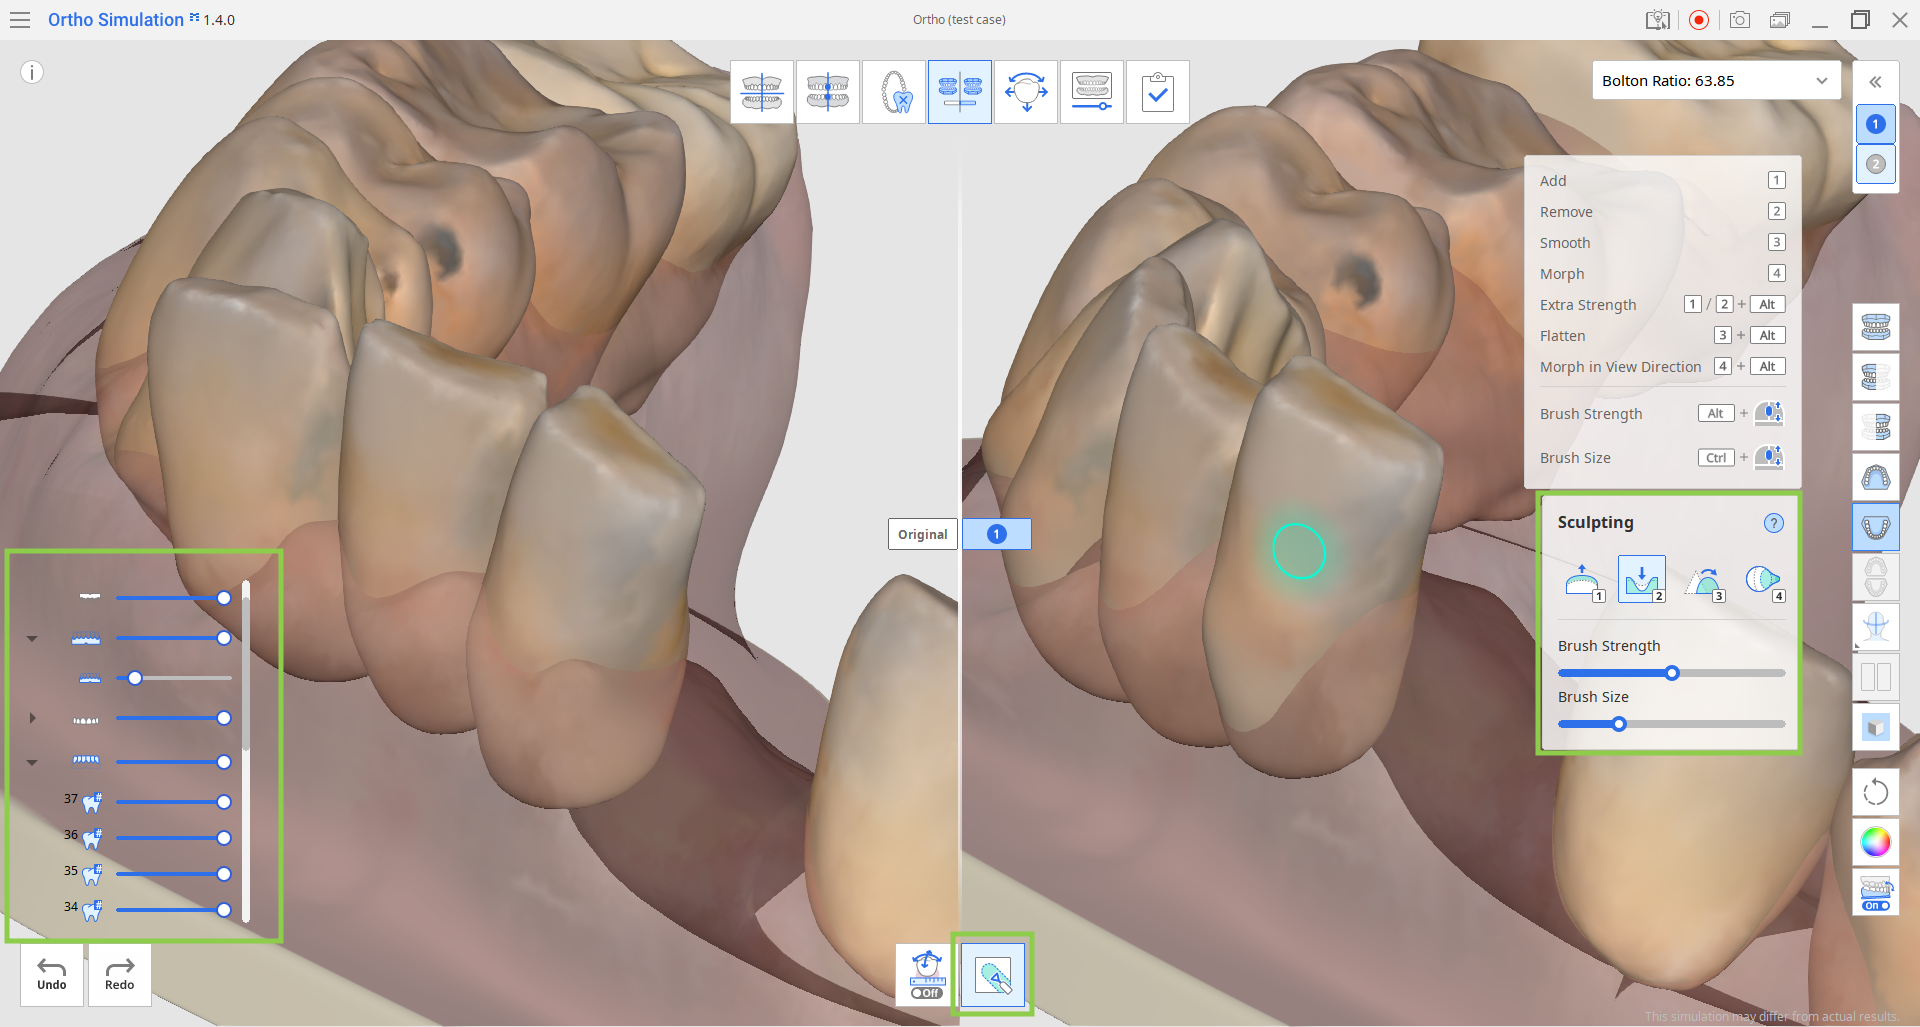
3. Sculpting
The "Sculpting" tool in the Toolbox at the bottom lets you modify gum and teeth data. Changes made to either the original or simulation data are automatically mirrored on the other.
Note that sculpting does not affect the results for the Bolton Ratio.
With this tool, you can add, remove, morph, and smooth data. Adjust the brush size and strength for more control, and use the Data Tree to hide data from the view for greater comfort.
When you're done, click the next stage icon at the top of the screen.