This is the most important stage in the simulation generation process. The user must complete two tasks here: create and set up simulation scenarios and segment the teeth data. The simulation will be generated in the next stage based on the input of provided here.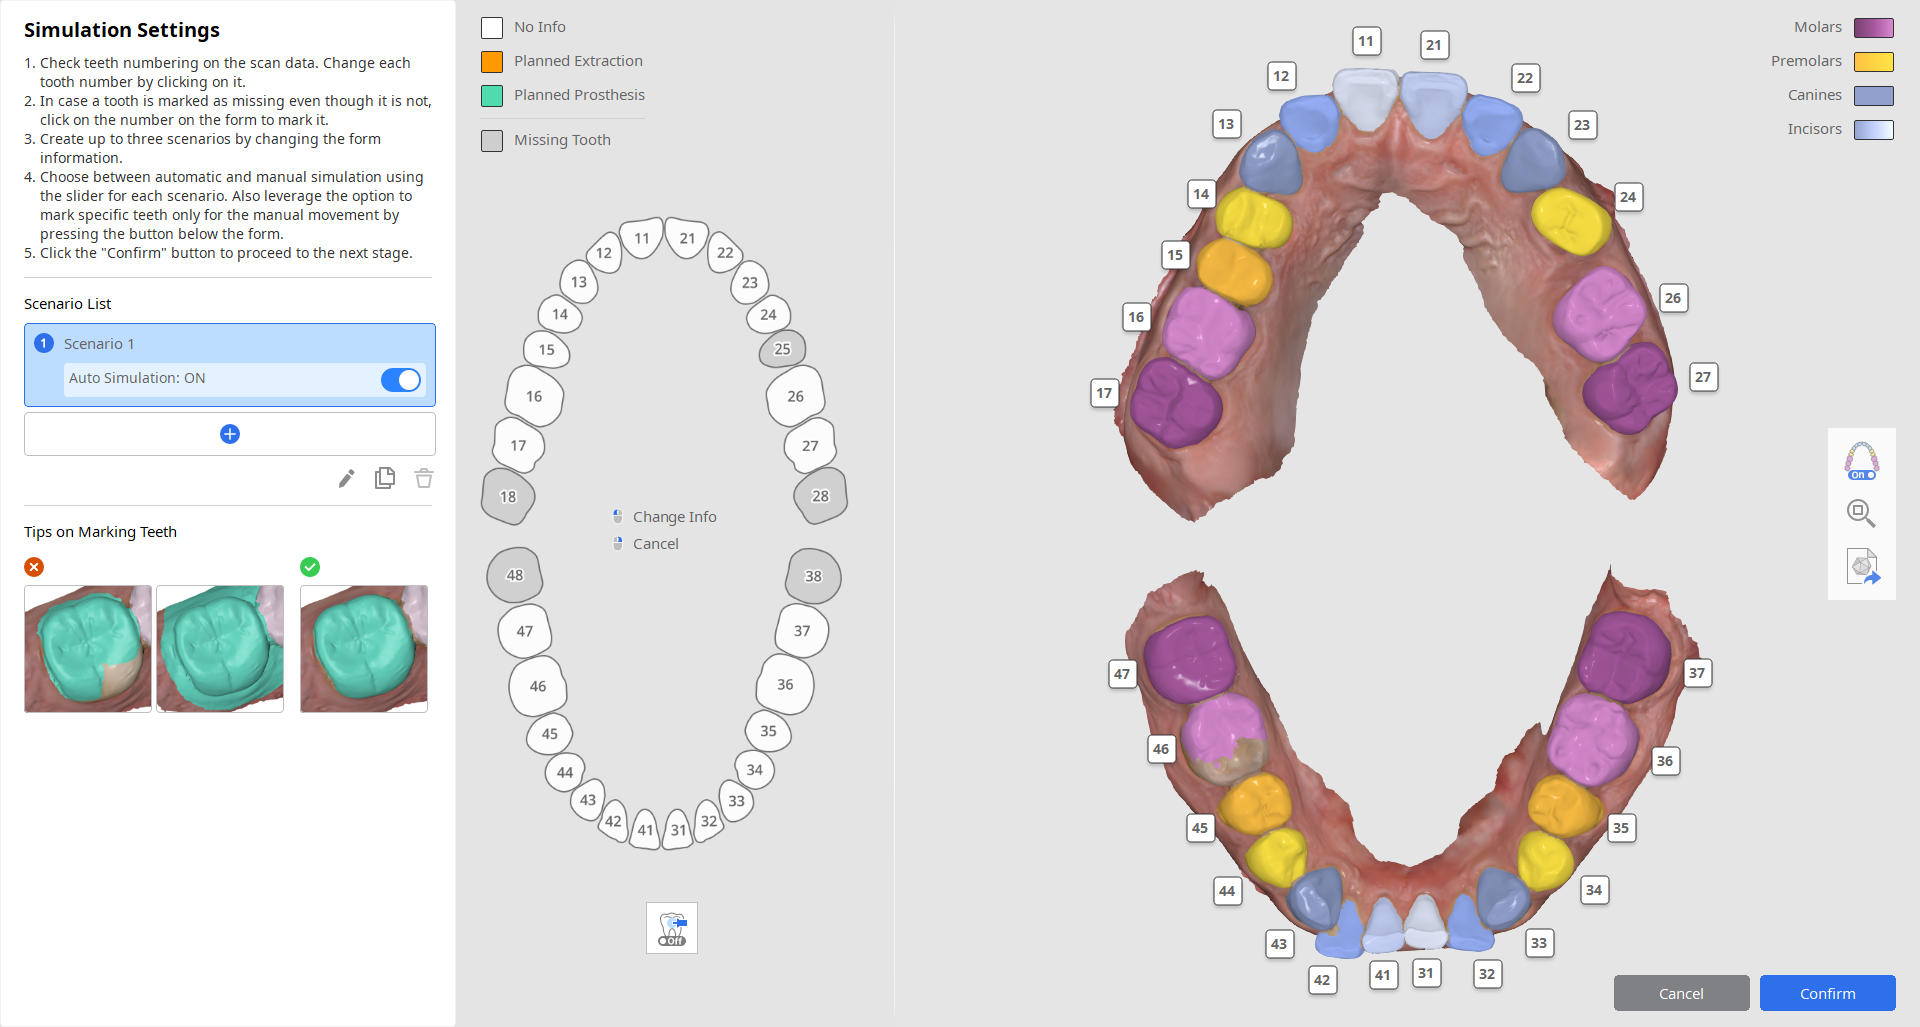
Creating Simulation Scenarios
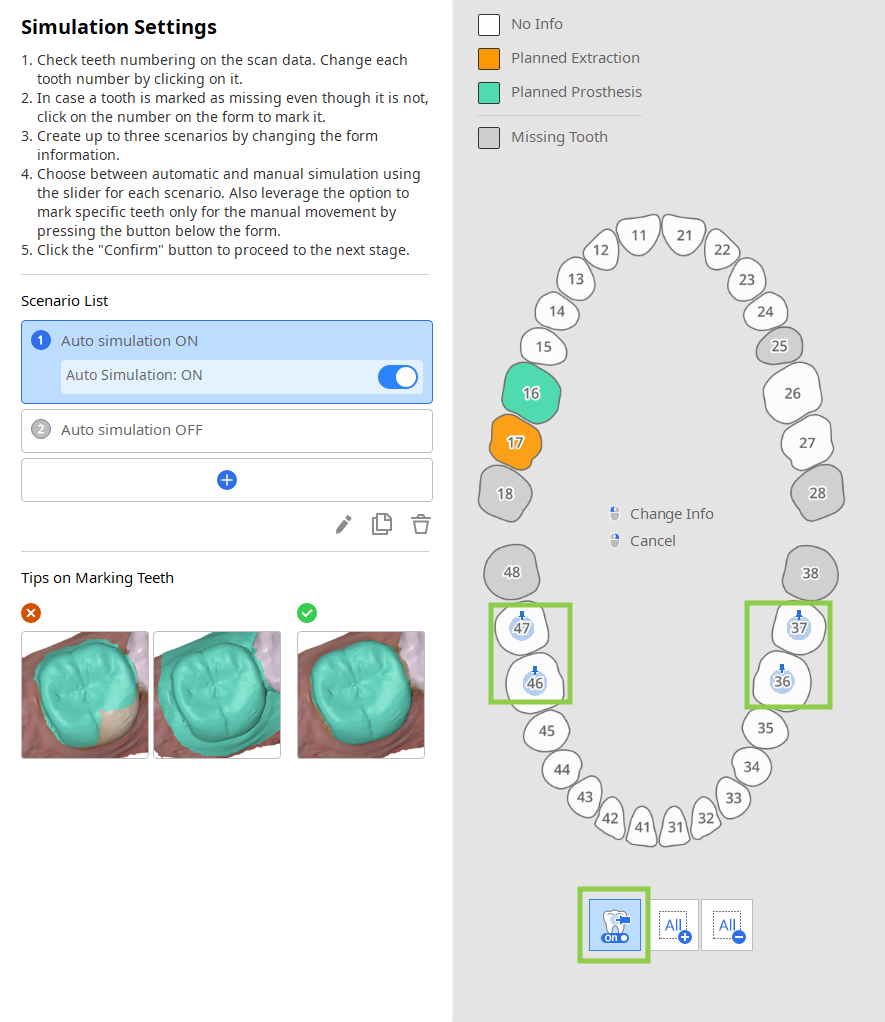
To create a simulation, the user must set up a scenario to visualize potential tooth alignment changes by providing details on the patient's dentition and user-defined inputs. This is done on the left side of the screen.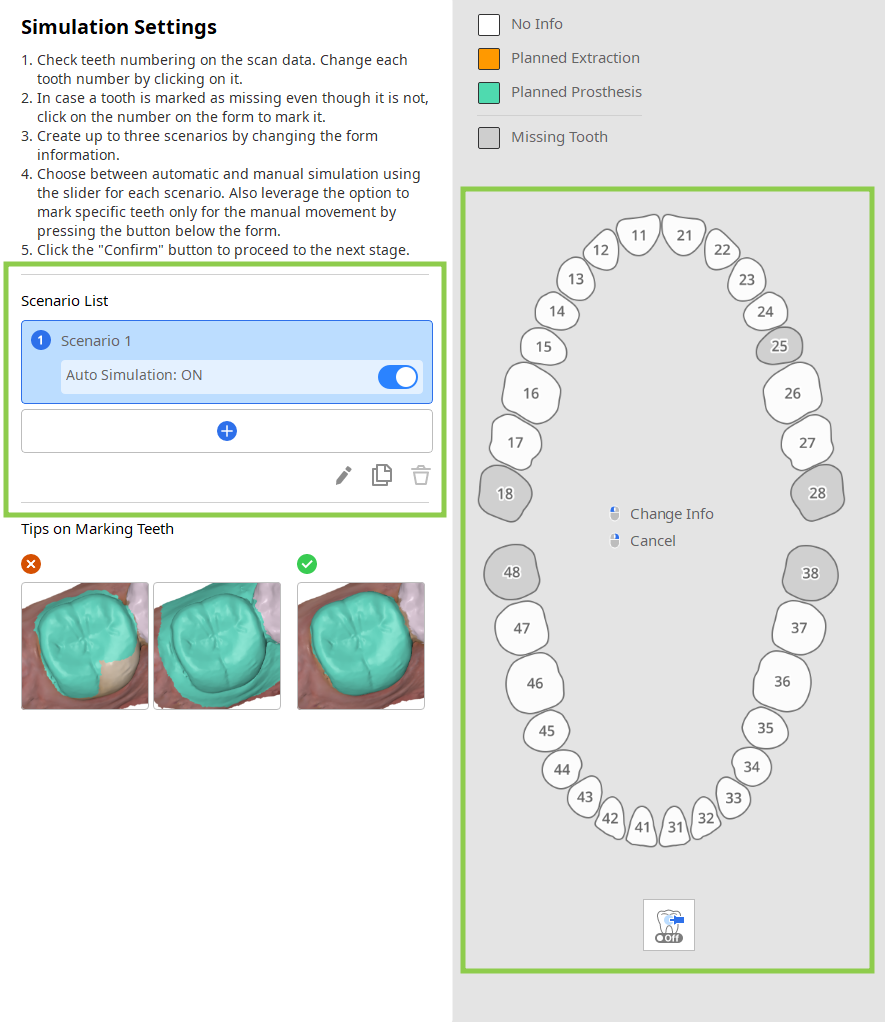
1. Start by checking your scenario list in the guide panel on the left. You can create up to 3 scenarios by either adding one with an empty form or cloning an existing one. Here, scenarios can also be renamed or deleted.
The "Auto Simulation" toggle is on by default for each scenario. If you toggle it off, the teeth positions in the original and simulation data will remain the same, requiring you to move each tooth manually in the following stages.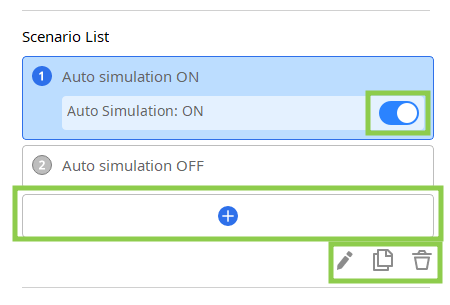
2. Next, check the form information on the right and edit it for each scenario to visualize different scenarios.
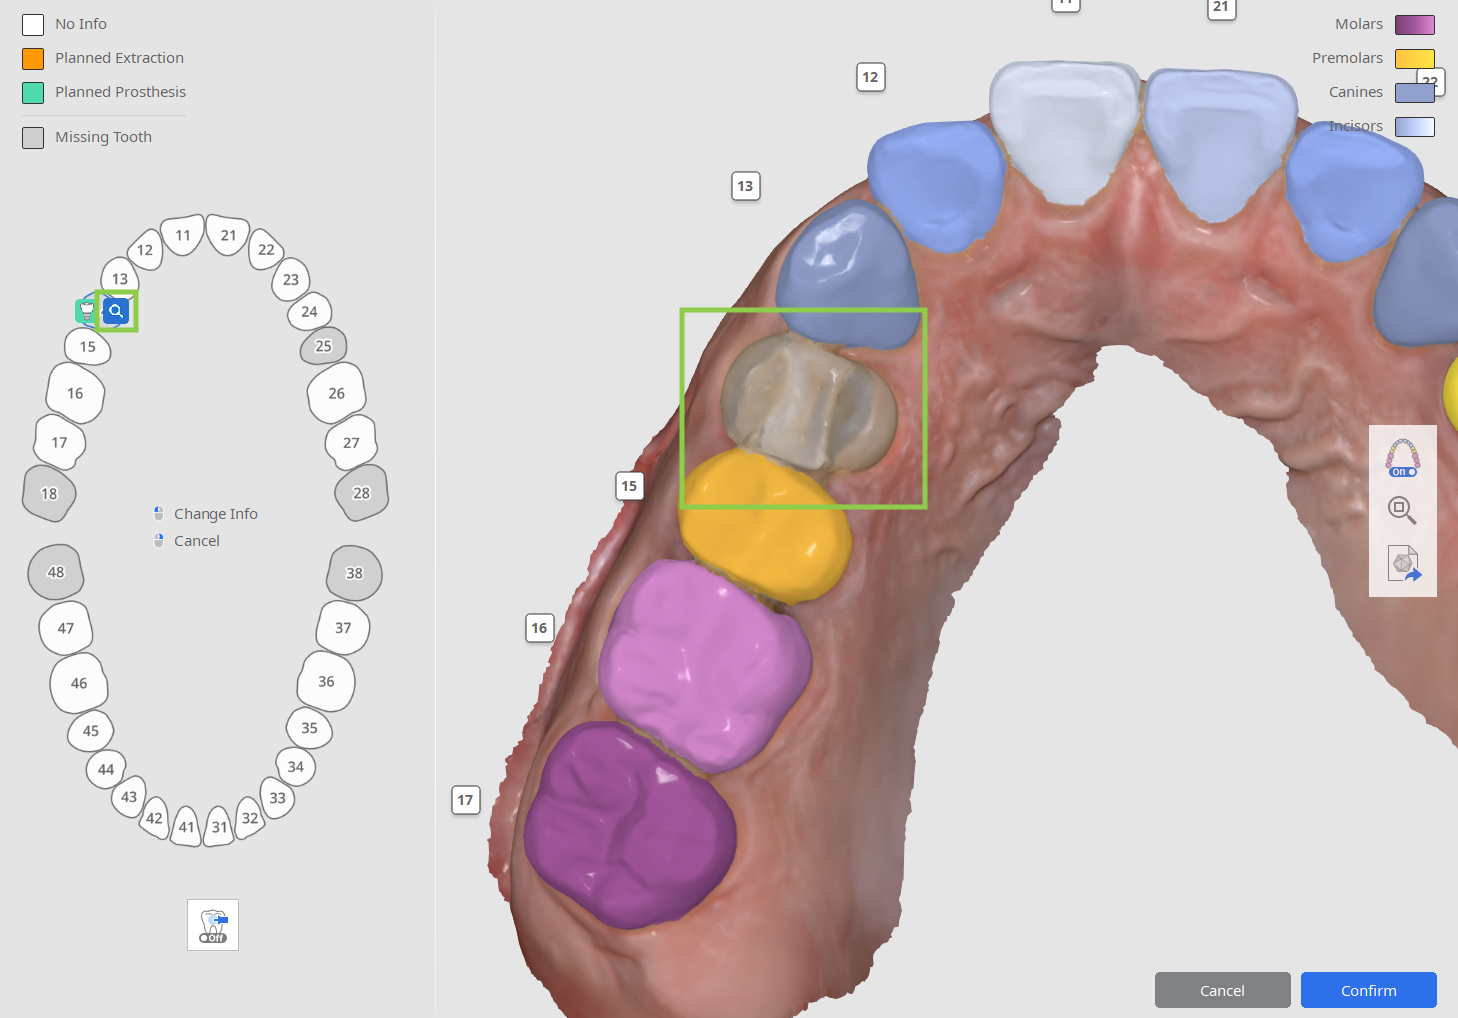
The first click on a tooth number will set it as a planned extraction, and the second will change it to planned prosthesis. Information on missing teeth is updated automatically based on the teeth numbering and data selection on the right side of the screen.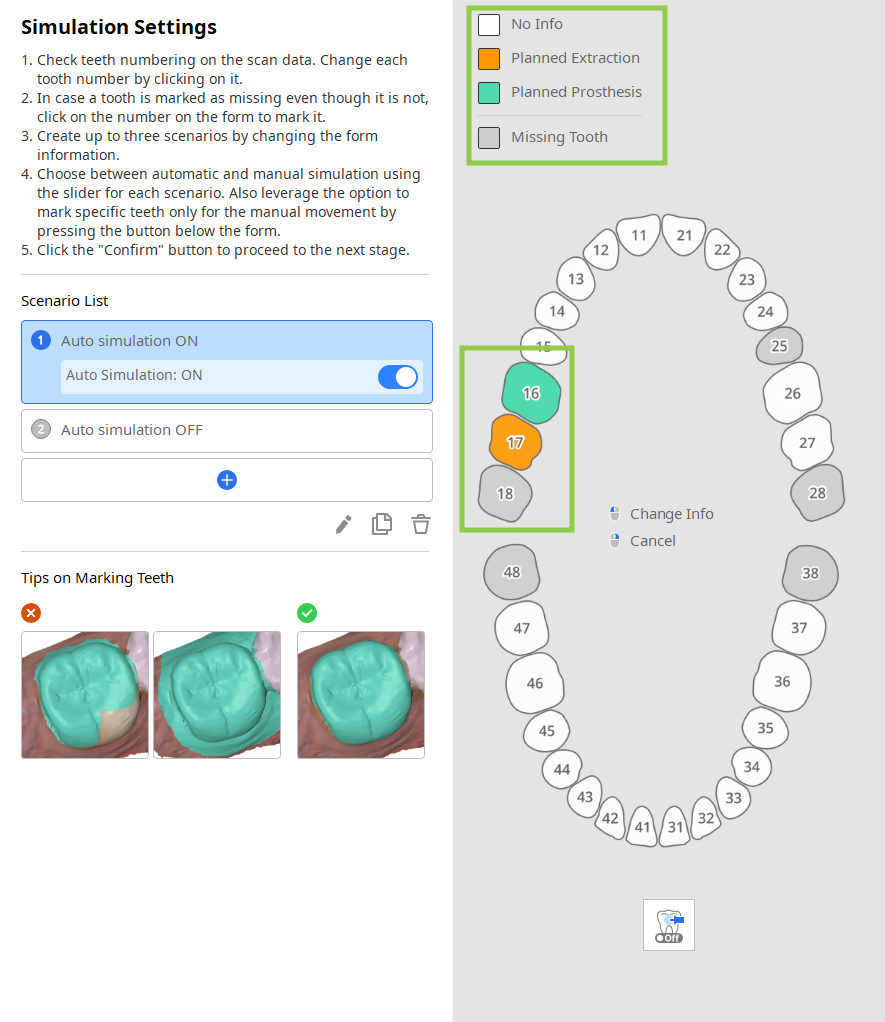
- When "Auto Simulation" is enabled, you can use the "Manual Movement Only" feature to pin specific teeth in the form. The pinned teeth will remain in their original position after generating the simulation.
Segmenting Teeth Data
The teeth data is automatically segmented, and the results are displayed on the right side of the screen. Users must review the teeth numbering and data selection for accuracy.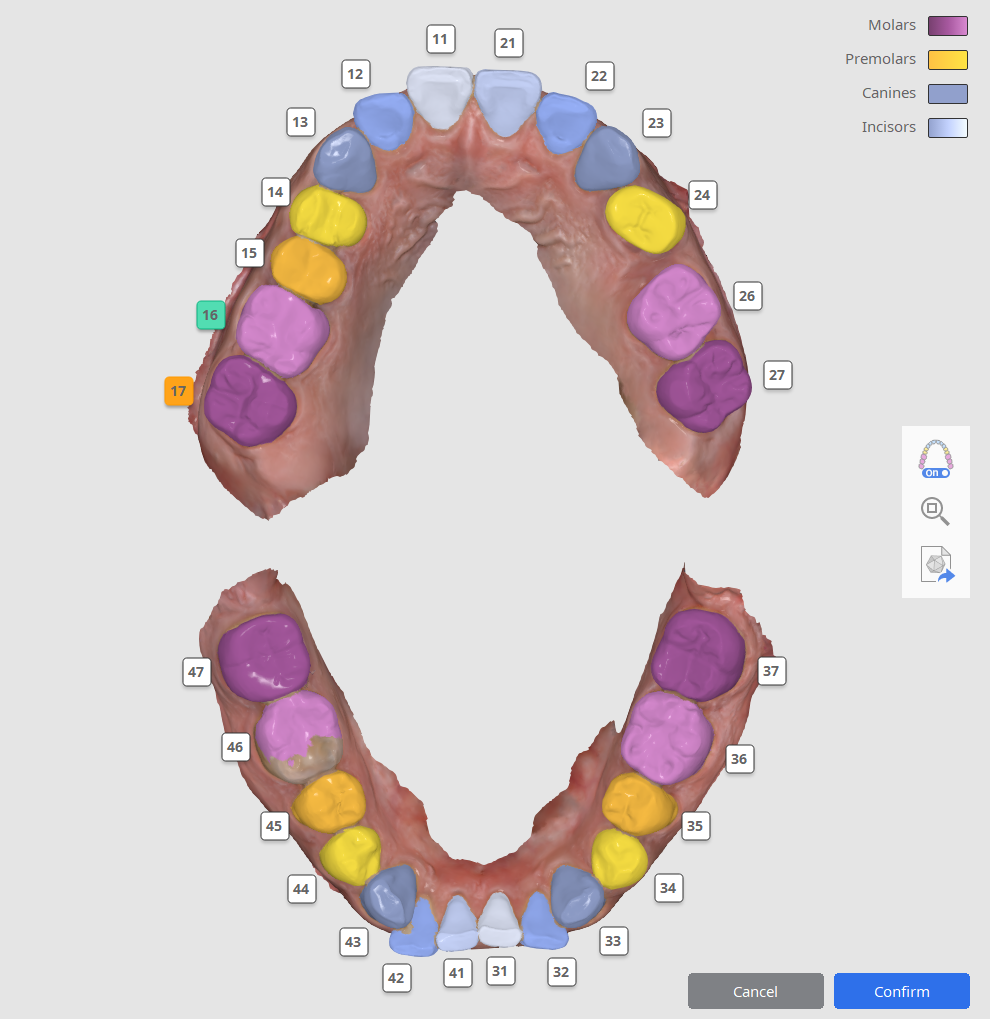
1. First, check the teeth numbering. If a tooth was incorrectly identified, click its number to reassign it.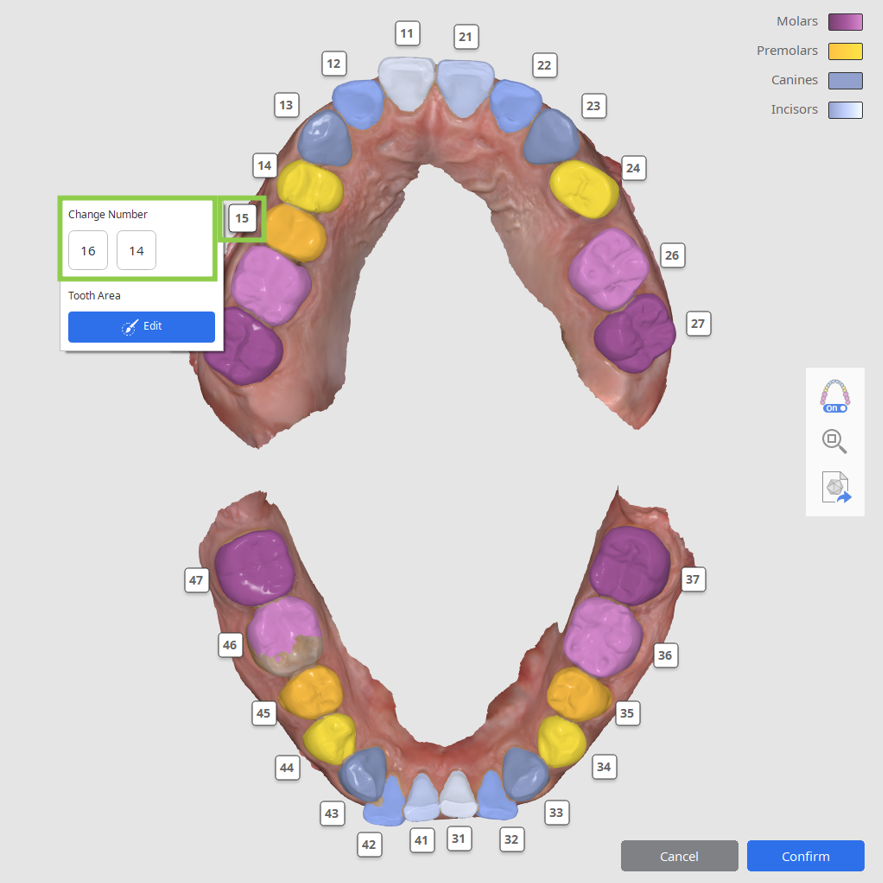
2. Next, review the data selection to ensure each tooth is accurately selected. The entire surface of the tooth must be selected, excluding any gum data. If the data selection needs editing, click the tooth number and choose "Edit" to manually reselect tooth data on the scan.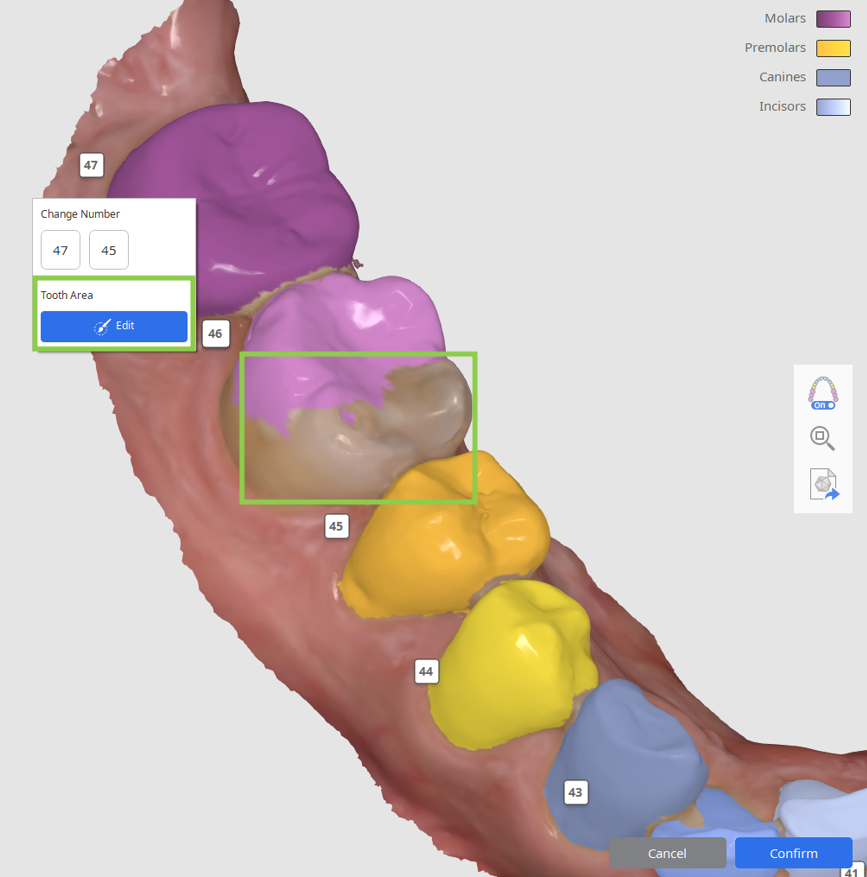
3. Teeth numbers with no corresponding data will be automatically marked as missing in the form on the left. If that needs correction, hover over the missing tooth and choose "Tooth Area Selection" to manually select the data of that tooth on the scan.
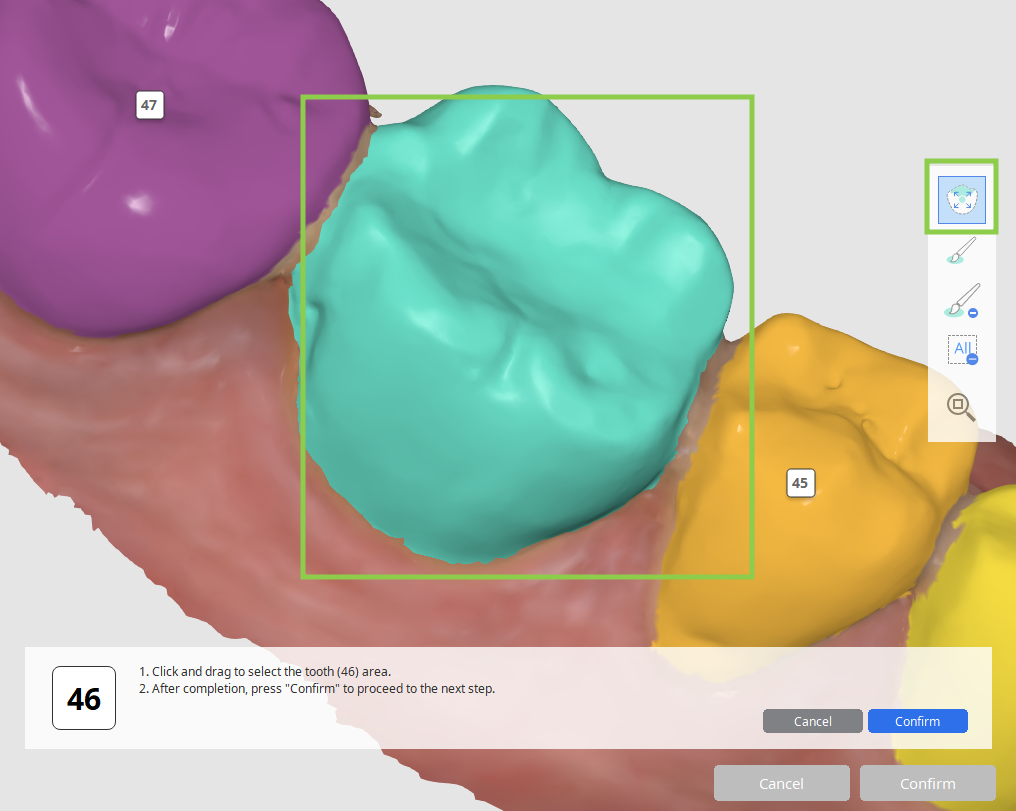
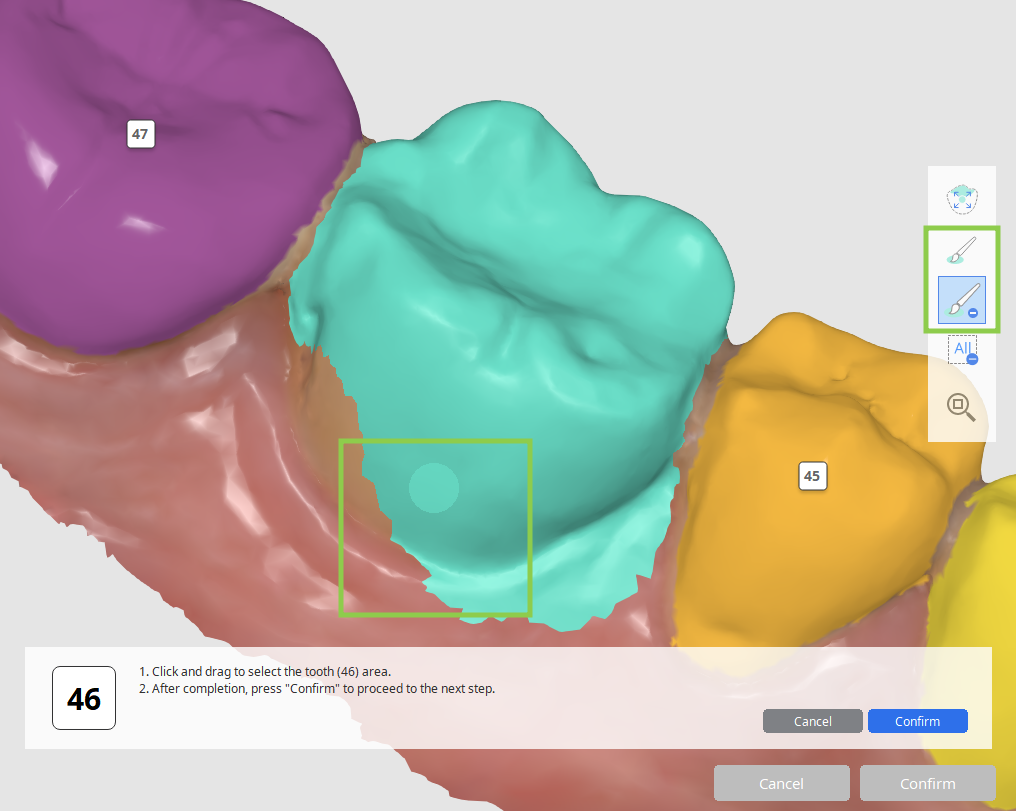
How to select tooth data
Selection editing mode is prompted if users need to manually select data for a non-identified tooth or correct the existing data selection.
- Use the “Smart Tooth Selection” tool to automatically select an area of an entire tooth with a click and drag.
- To make the data selection more precise, adjust it using “Brush Selection” or “Brush Deselection.”
- To clear all selection and start over, use “Clear Selection.”
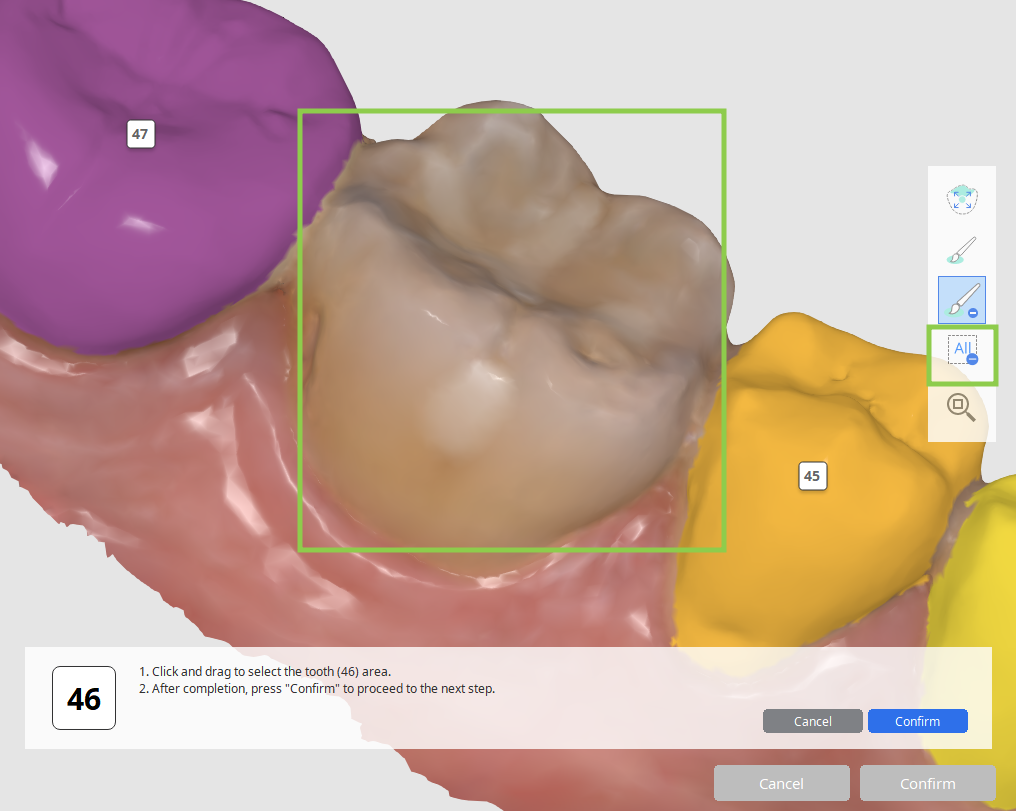
- Click “Confirm” in the bottom right corner when done to save changes.
When all work in this stage is done, click "Confirm" in the bottom right corner.