Идентификация зубов — это этап, на котором пользователи создают подробную стоматологическую карту для текущего проекта. На этом этапе пользователи должны проверить нумерацию зубов справа и записать данные о зубном ряде слева. Все данные, указанные на этом этапе, будут учтены при последующем формировании перемещения зубов.
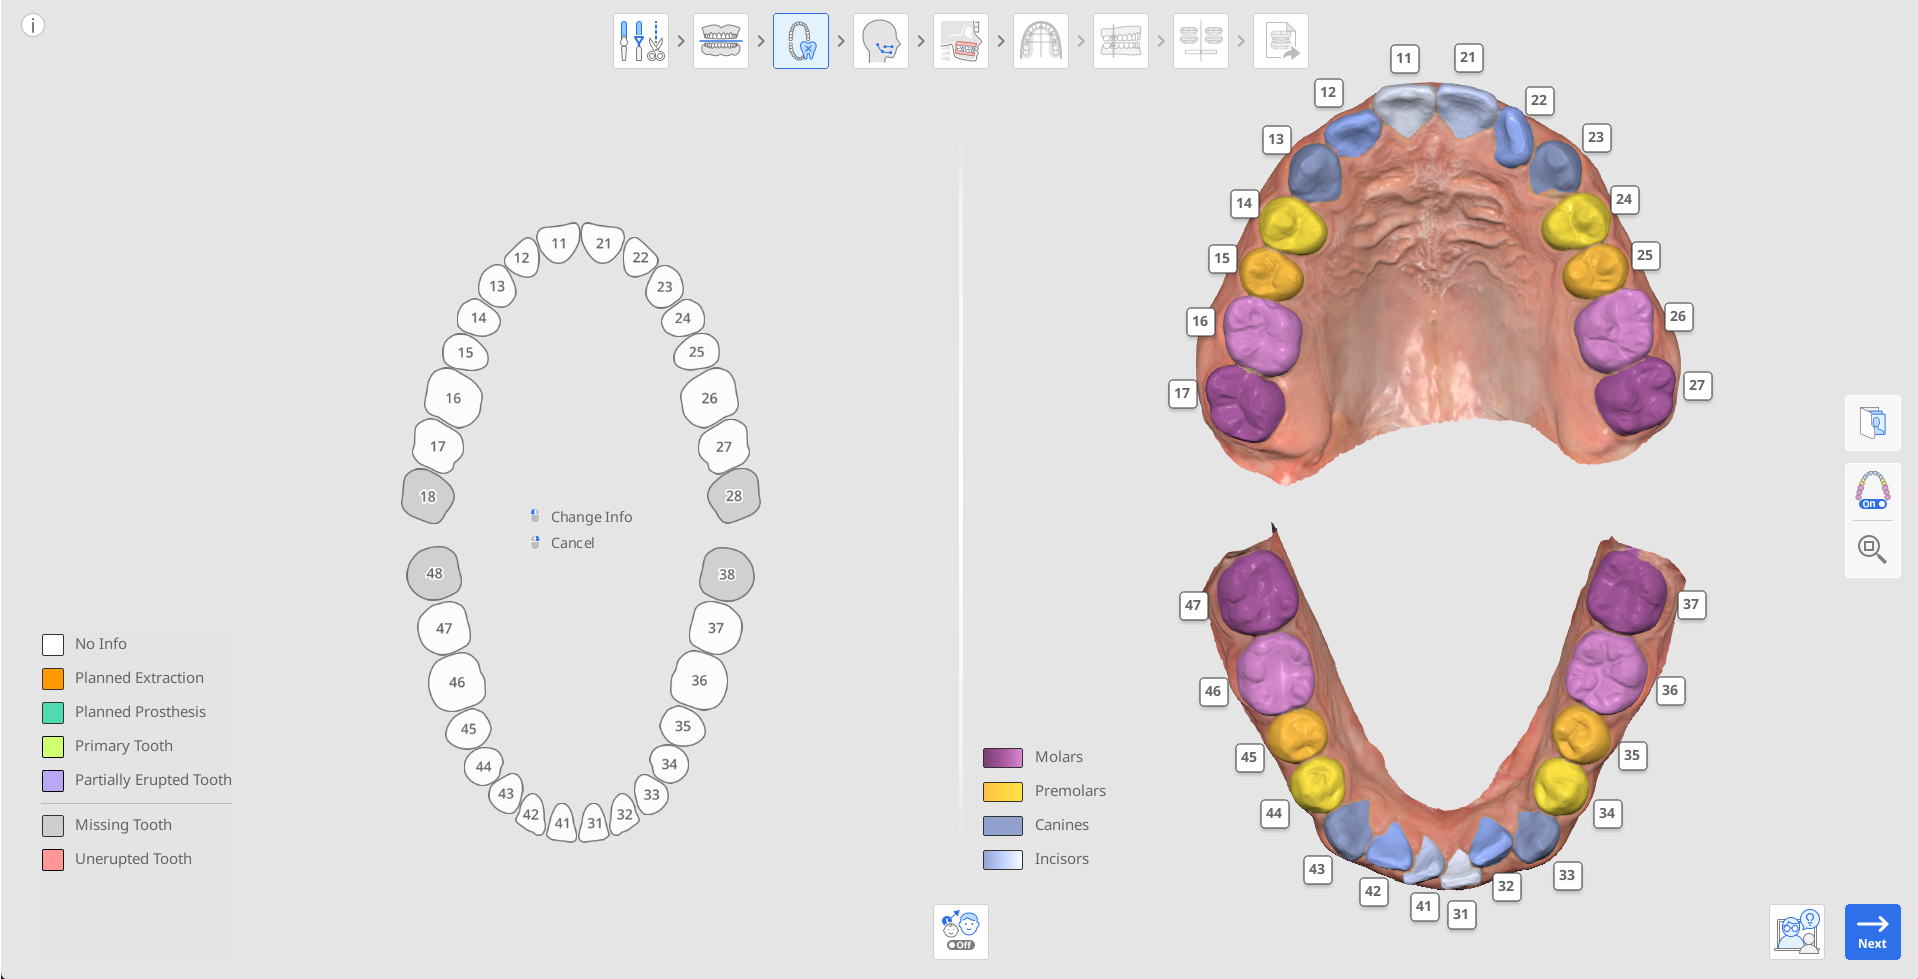
Сначала проверьте автоматическую нумерацию зубов справа, чтобы убедиться, что все зубы были правильно идентифицированы и пронумерованы.
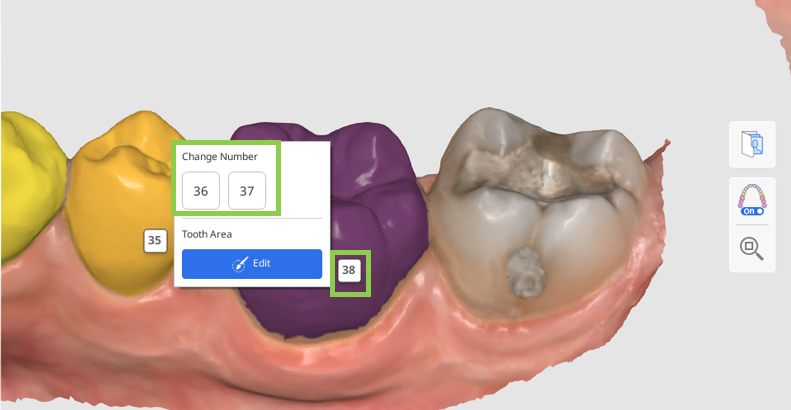
Если нумерация зубов неверна, нажмите на номер, чтобы его переназначить.
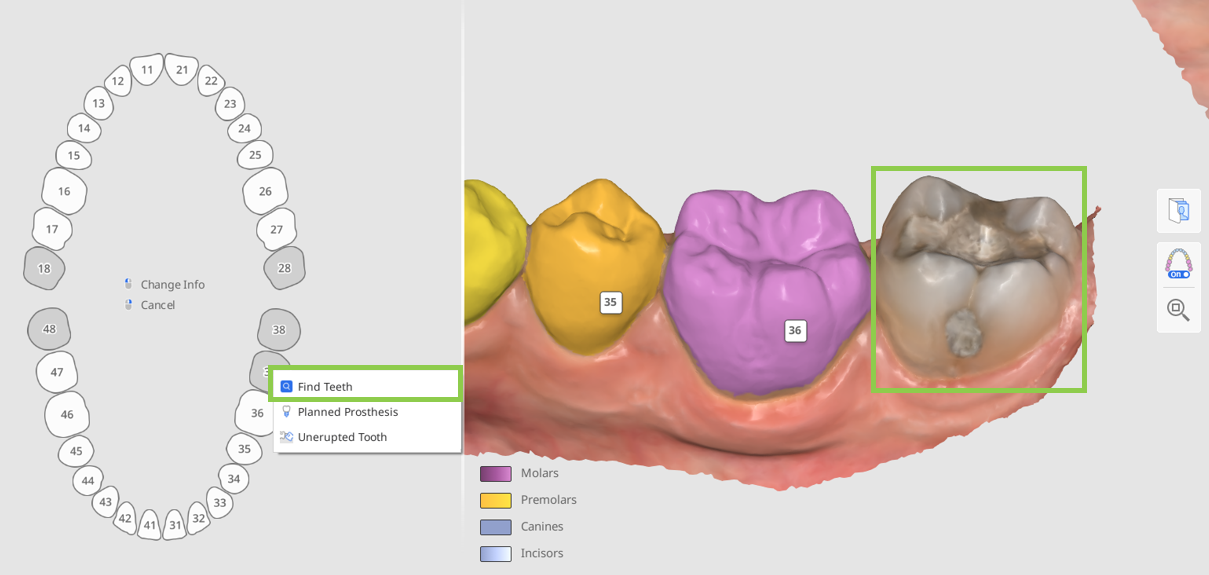
Если зуб не идентифицирован, он будет отображаться как отсутствующий на карте слева (окрашен в серый цвет). Чтобы идентифицировать его вручную, нажмите на него на карте и выберите «Найти зуб». Это позволит выбрать данные зуба на скане вручную.
 Насадка
В сложных случаях, когда сложно определить число зубов только по их текущему положению, используйте функцию ортодонтических фотографий. Импортированные панорамные рентгеновские снимки можно просматривать для проверки нумерации зубов и выбора данных.
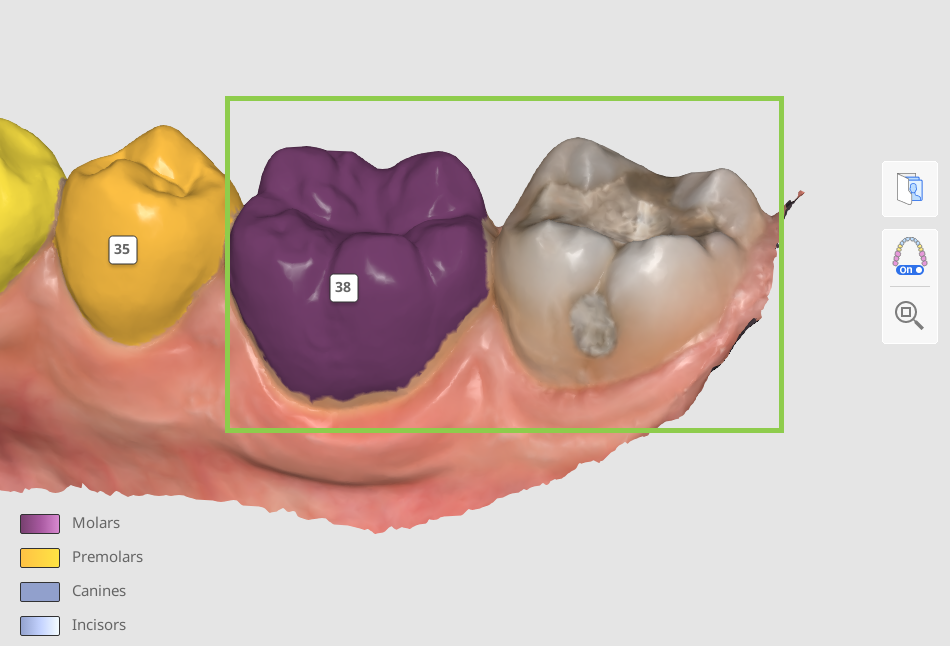
Убедитесь, что данные для каждого зуба выбраны точно: выделение охватывает весь зуб без данных десны. Это обеспечит более высокий уровень детализации при каждом перемещении зуба позднее.
Чтобы отрегулировать или исправить выбор, нажмите на номер зуба и выберите «Редактировать».
Далее необходимо задокументировать сведения о текущем зубном ряде пациента или любом запланированном лечении на карте слева. Вся добавленная информация изменит результат симуляции в соответствии с предоставленными данными карты. Чтобы добавить информацию о конкретном зубе, нажмите на него; чтобы удалить информацию, щелкните правой кнопкой мыши.
Ниже представлен список данных и действий, применимых к существующим зубам (окрашены белым) и отсутствующим зубам (окрашены серым).Существующий зуб
Отсутствующий зуб
Планируемое извлечение
Планируемое протезирование
Планируемое протезирование
Непрорезавшийся зуб
Молочный зуб
Найти зуб
Частично прорезавшийся зуб
Закрепить зуб
 Насадка
Чтобы предотвратить перемещение зуба во время симуляции, «закрепите» его на карте.
Когда для зуба установлен режим «Планируемое протезирование», в симуляции будут использоваться данные противоположного зуба, если они доступны, или, в противном случае, данные из библиотеки зубов. Если зуб изначально был помечен как отсутствующий, а затем режим был изменен на «Планируемое протезирование», изменение вступает в силу на последнем этапе, показанном в обзоре выходных данных. Если для зуба стояла отметка «Нет информации», а затем режим был изменен на «Планируемое протезирование», изменение применяется с первого этапа лечения элайнерами.
Как выбрать данные зуба
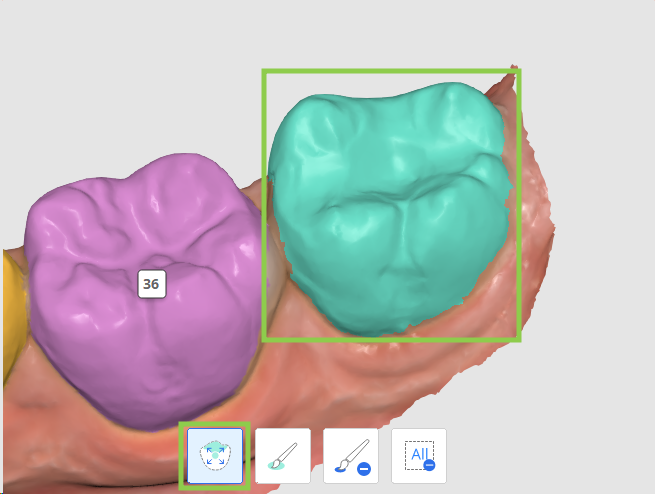
Режим редактирования выбора может быть использован в том случае, если необходимо вручную выбрать данные для неидентифицированного зуба или исправить существующий выбор данных.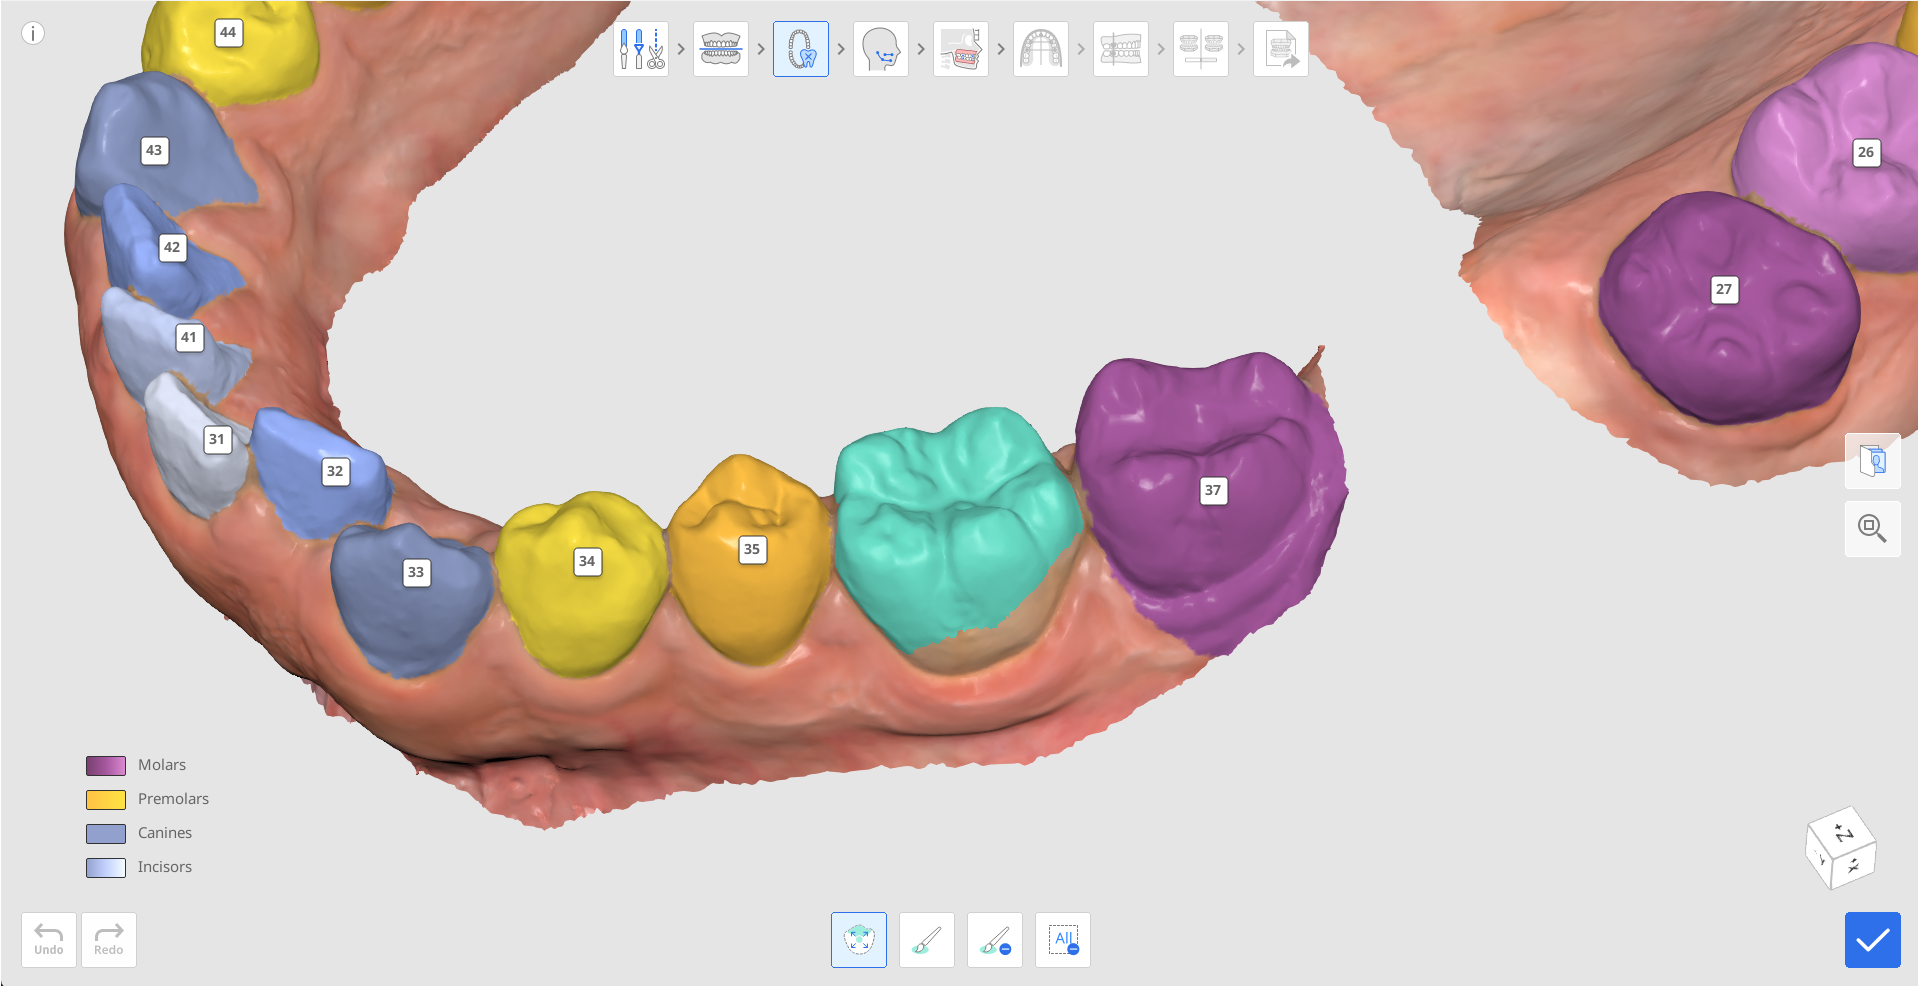
Используйте инструмент «Умное определение области зуба», чтобы автоматически выбрать область всего зуба одним щелчком мыши и перетаскиванием.
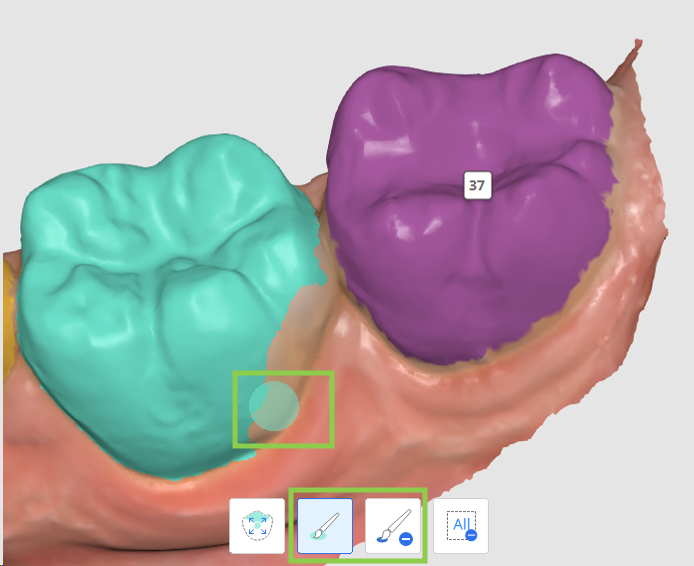
Чтобы сделать выбор данных более точным, отрегулируйте его с помощью инструментов «Выбор кистью» или «Отмена выбора кистью».
 Примечание
Если требуется изменить выбор нескольких зубов, нажмите на соответствующие номера, чтобы переключить фокус.
Чтобы очистить все выбранное и начать заново, используйте инструмент «Очистить выбранное».
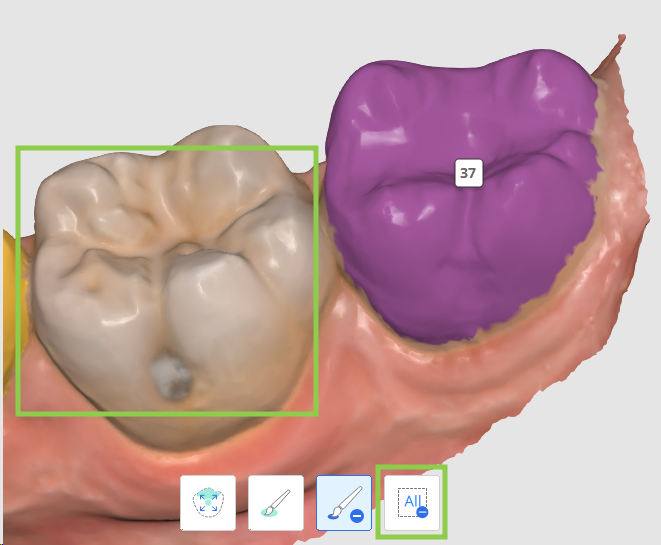
По завершении нажмите кнопку «Готово» в правом нижнем углу экрана, чтобы сохранить изменения и вернуться к созданию карты.