Этап цефалометрической трассировки будет доступен только в том случае, если данные цефалограммы были импортированы во время назначения данных. Целью этого этапа является создание цефалограммы с цифровой трассировкой. Программа автоматически очерчивает костные и тканевые структуры на импортированном рентгеновском снимке и размещает некоторые основные ориентиры.
Предостережение
Для принятия решений о лечении пользователи должны импортировать данные цефалограммы. Если программа запущена без данных цефалограммы, ее следует использовать только для изучения вариантов лечения. Ограничения программы без данных цефалограммы включают следующее:
Значения Wits автоматически устанавливаются в диапазоне от -3 до +3.
Рост пациента не учитывается.
Функция наложения цефалограммы недоступна. Таким образом, пользователь не может визуализировать окончательное положение зубов над костной структурой.
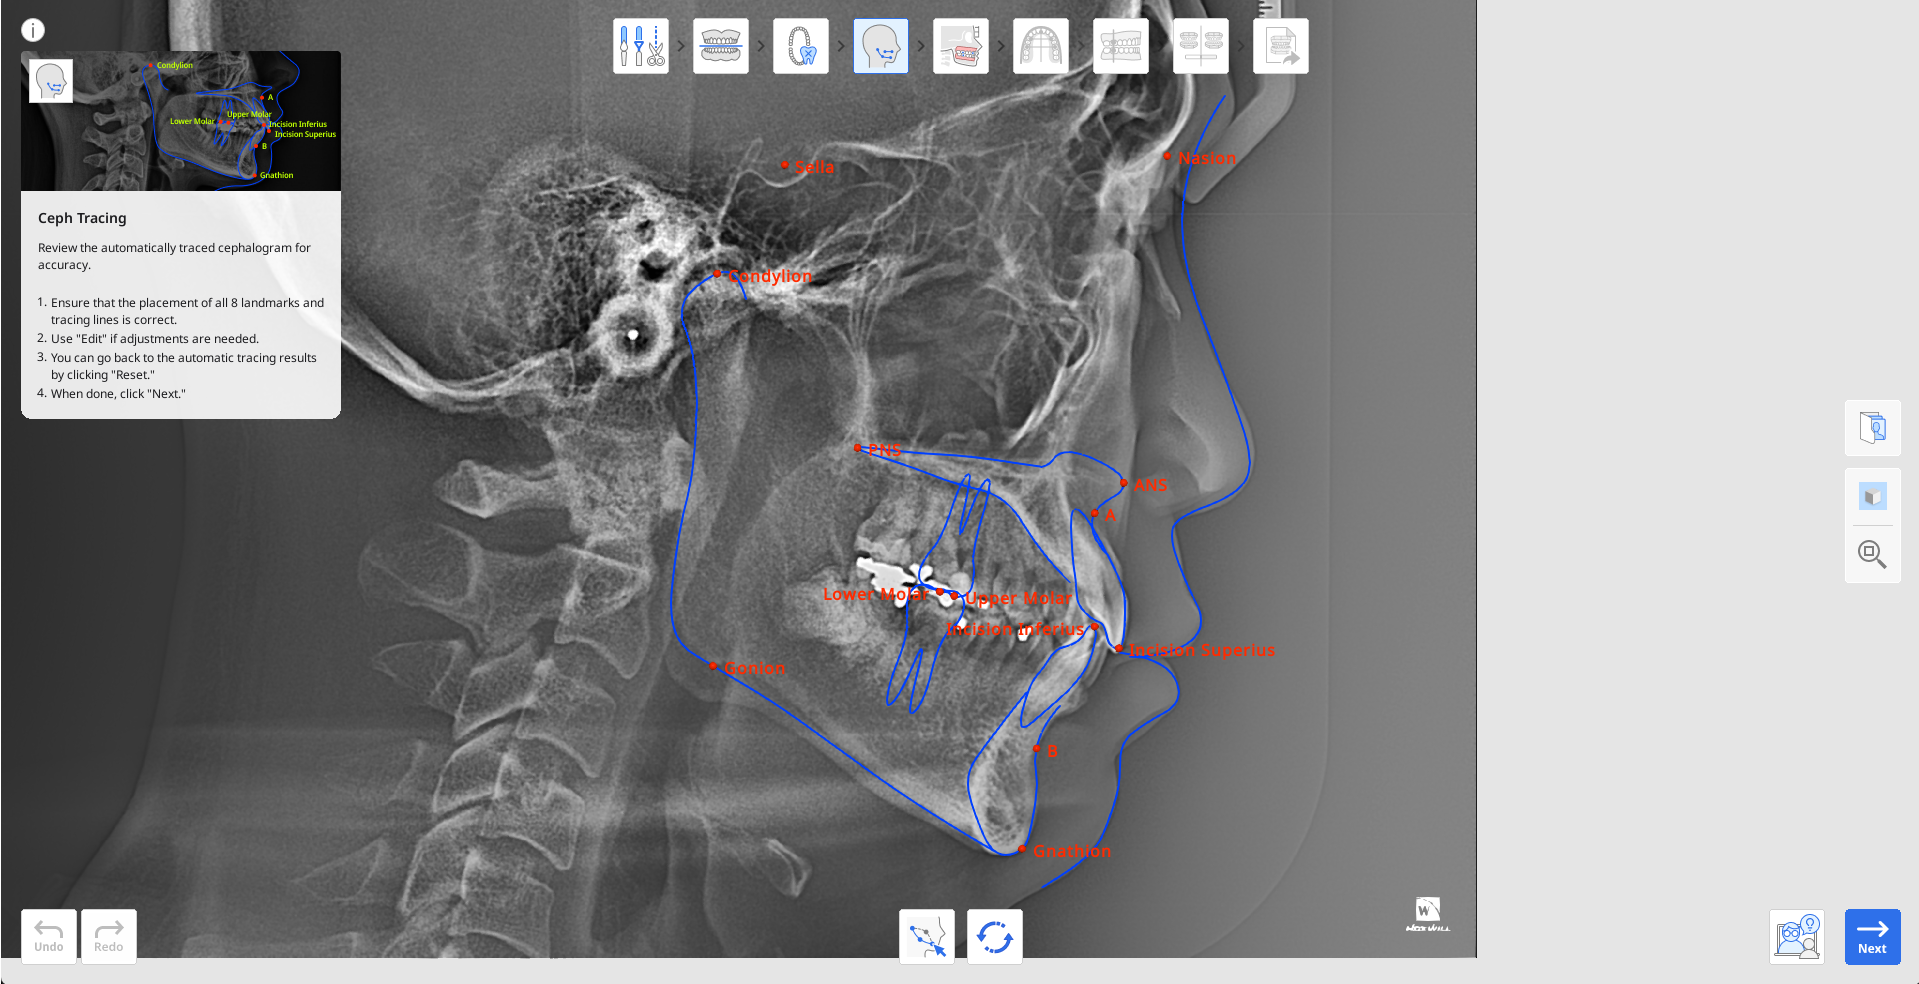
Для начала изучите результаты автоматической трассировки. Убедитесь, что контуры не имеют острых углов и что все 13 ключевых точек расположены правильно.
Приложение должно определить следующие точки и ориентиры: точка A, точка B, Gnathion (Gn), Condylion (Con), верхний моляр, нижний моляр, Incision Superius (Is), Incision Infernius (Ii), Nasion (N), Sella (S), передняя носовая ость (ANS), задняя носовая ость (PNS) и Gonion (Go).
При необходимости корректировки нажмите кнопку «Редактировать» и перетащите контрольные точки. Наведите указатель мыши на красные точки, чтобы увидеть, где должна быть размещена точка.
Нажмите «Редактировать» еще раз, чтобы сохранить внесенные изменения.
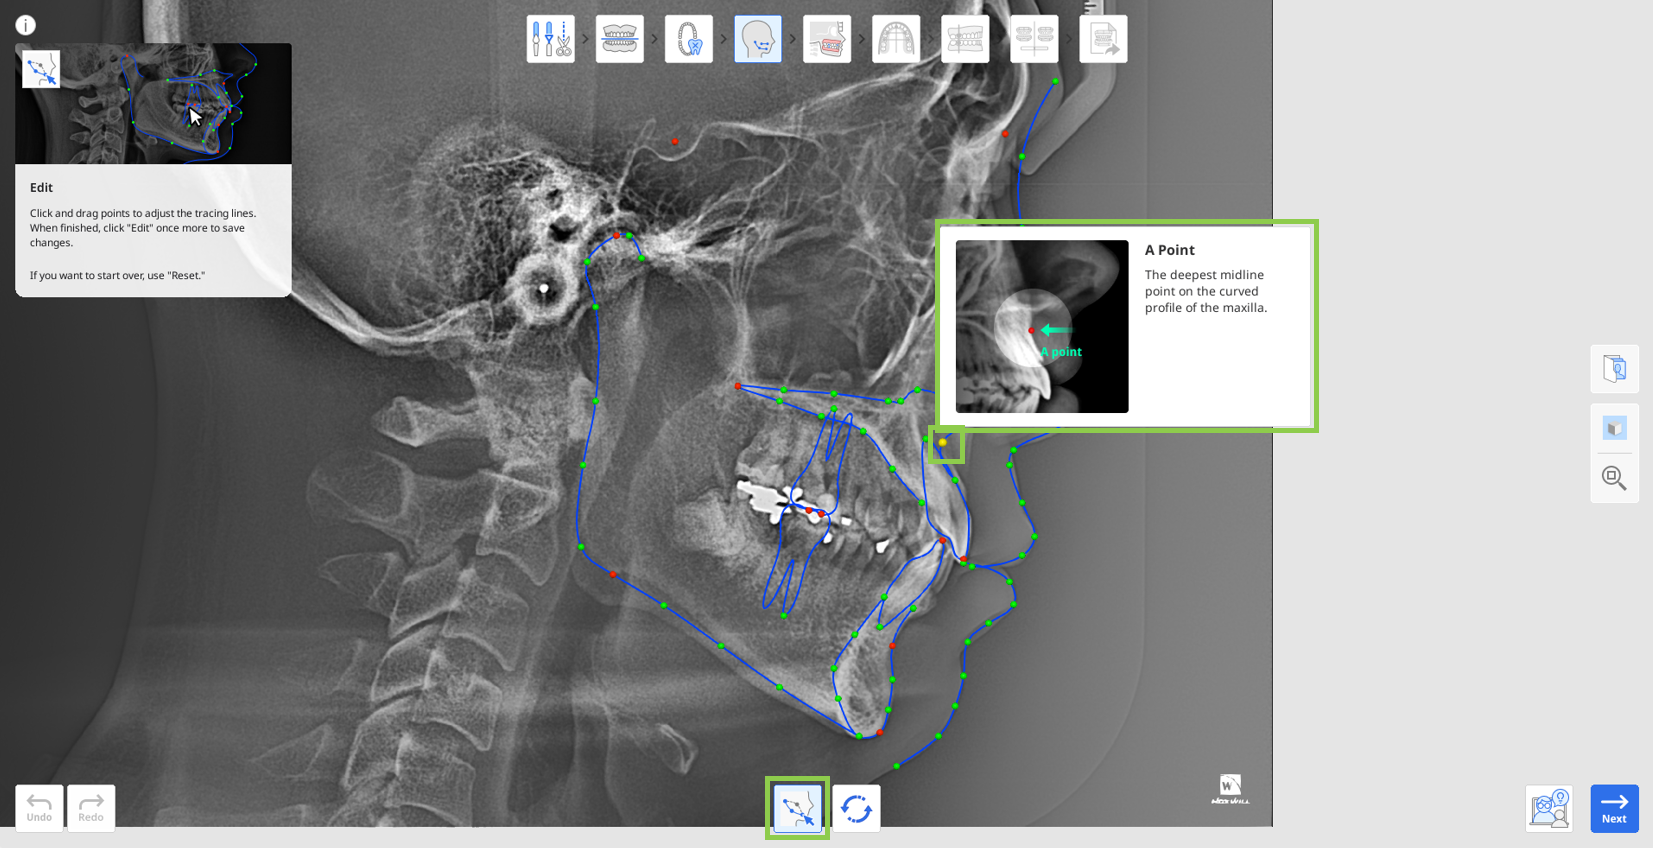
Для восстановления результатов автоматической трассировки в любой момент нажмите кнопку «Сброс».
По завершении нажмите «Далее».