The purpose of the second step is to establish the margin lines and set the insertion path for future restorations.
1. The margin lines will be created automatically upon entering this step. You must review the generated margin lines and edit them if needed.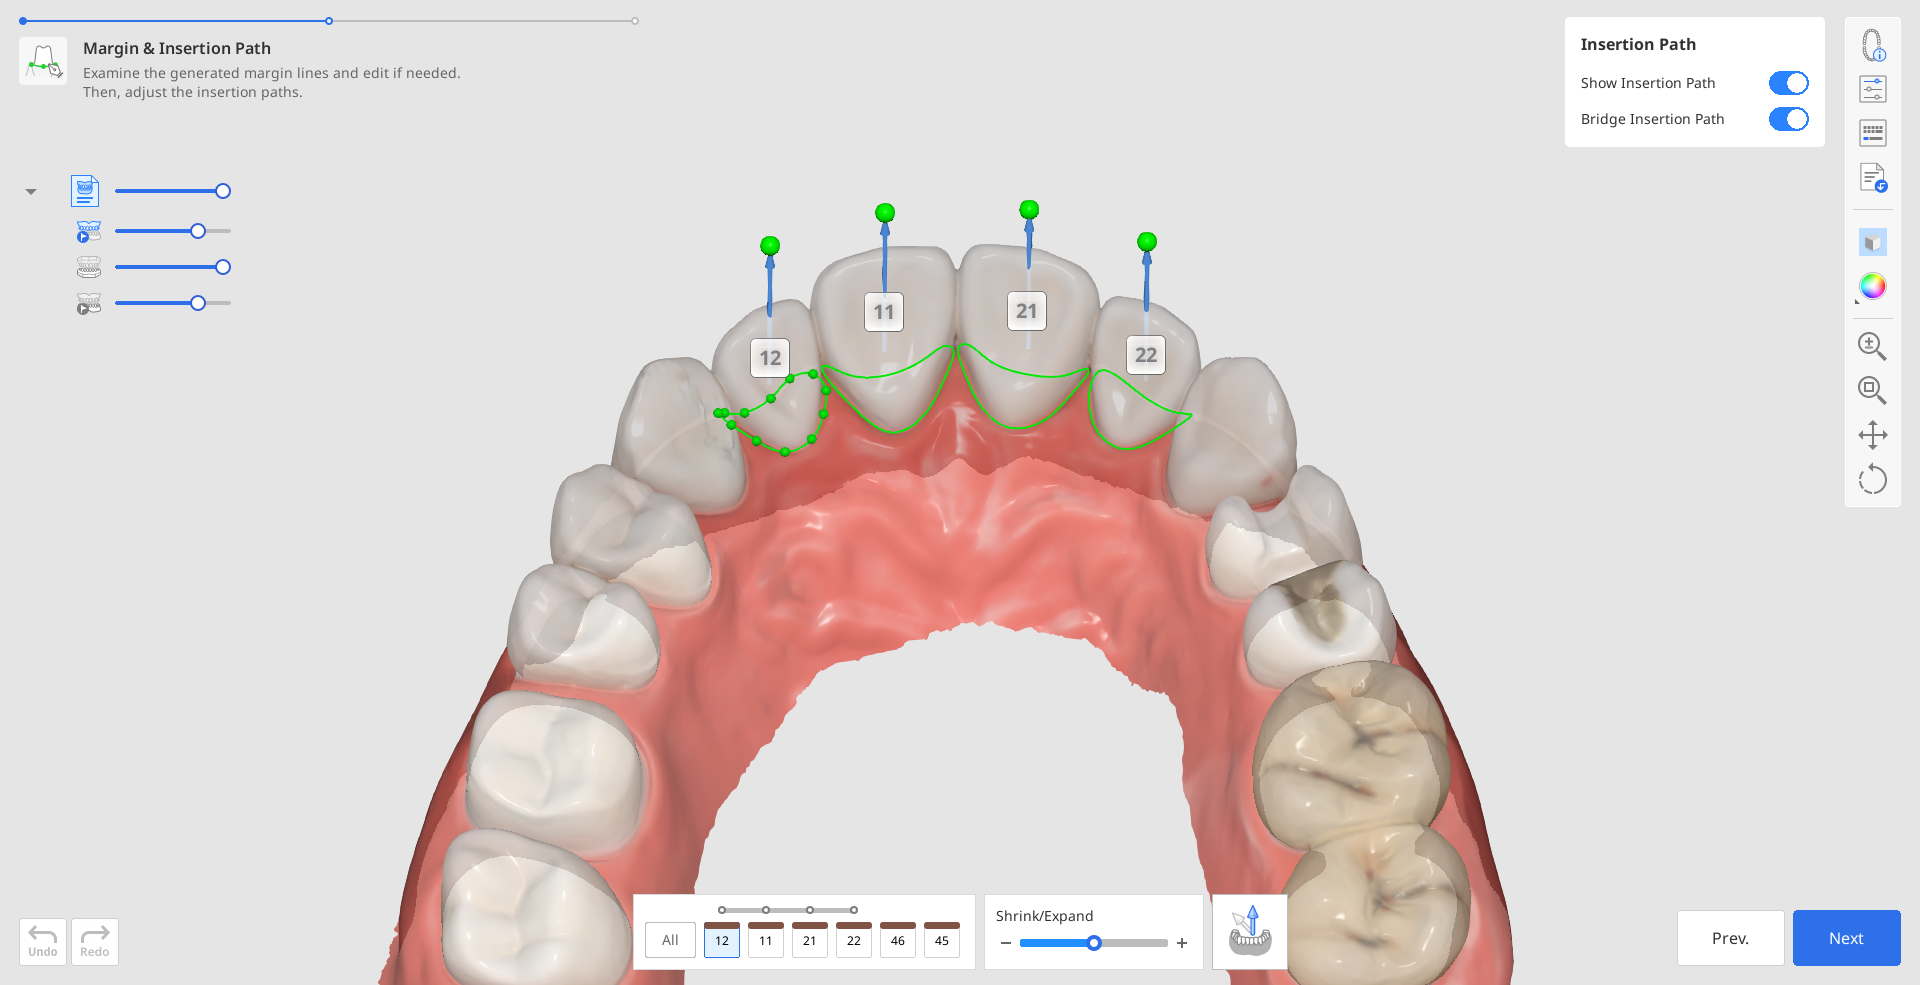
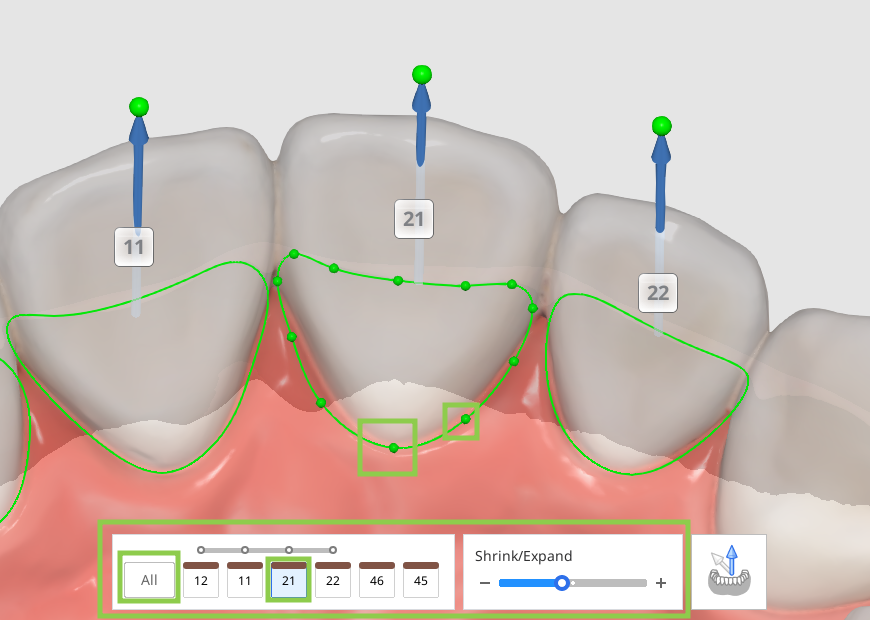
To edit the margin lines, use the “Shrink/Expand” slider at the bottom. You can shrink or expand the margin for all teeth at once or for a specific tooth number by specifying it in the form at the bottom.
You can also edit the margin line by adding, moving, or deleting the control points. Click to add a point, right-click it to delete, and drag it to move.
 Caution (Shrink/Expand)
Avoid excessive use of the feature, as it may cause failure in selecting the correct area or compromise the fit and design of the restoration.
2. The insertion path will be automatically detected. Review the detected insertion path, and if adjustments are needed, drag the insertion path arrow to modify its direction. The gray arrow will show the originally detected direction.
![]() Tip
Tip
You can turn off "Bridge Insertion Path" individually and set the path for each crown in a bridge.
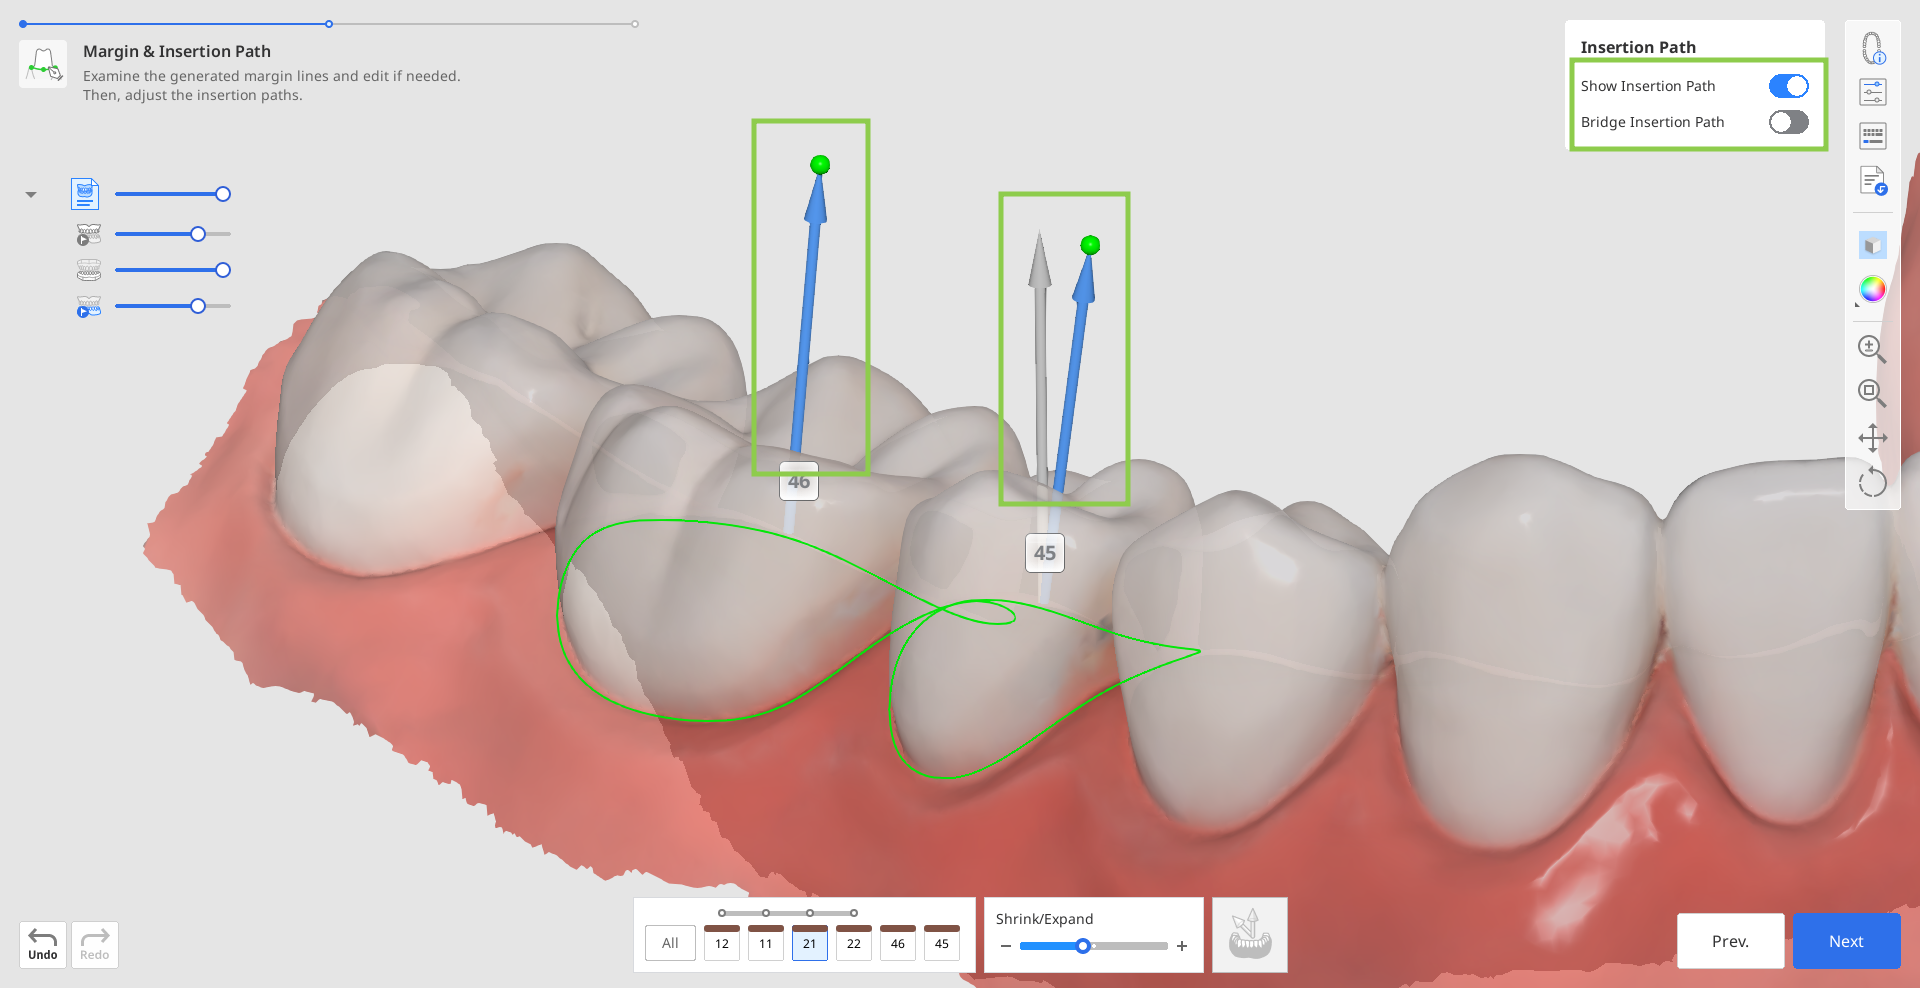
Incorrect insertion direction may affect the quality of the prosthesis.
Alternatively, you can rotate the 3D data and click “Set Arrow to Your Viewpoint” at the bottom.

3. In this step, you can also review the parameters for the restoration’s inner and outer surfaces before they are applied in the next step. By default, your most recently used parameters will be applied. Click “Parameter Settings” in the Side Toolbar to see the details.
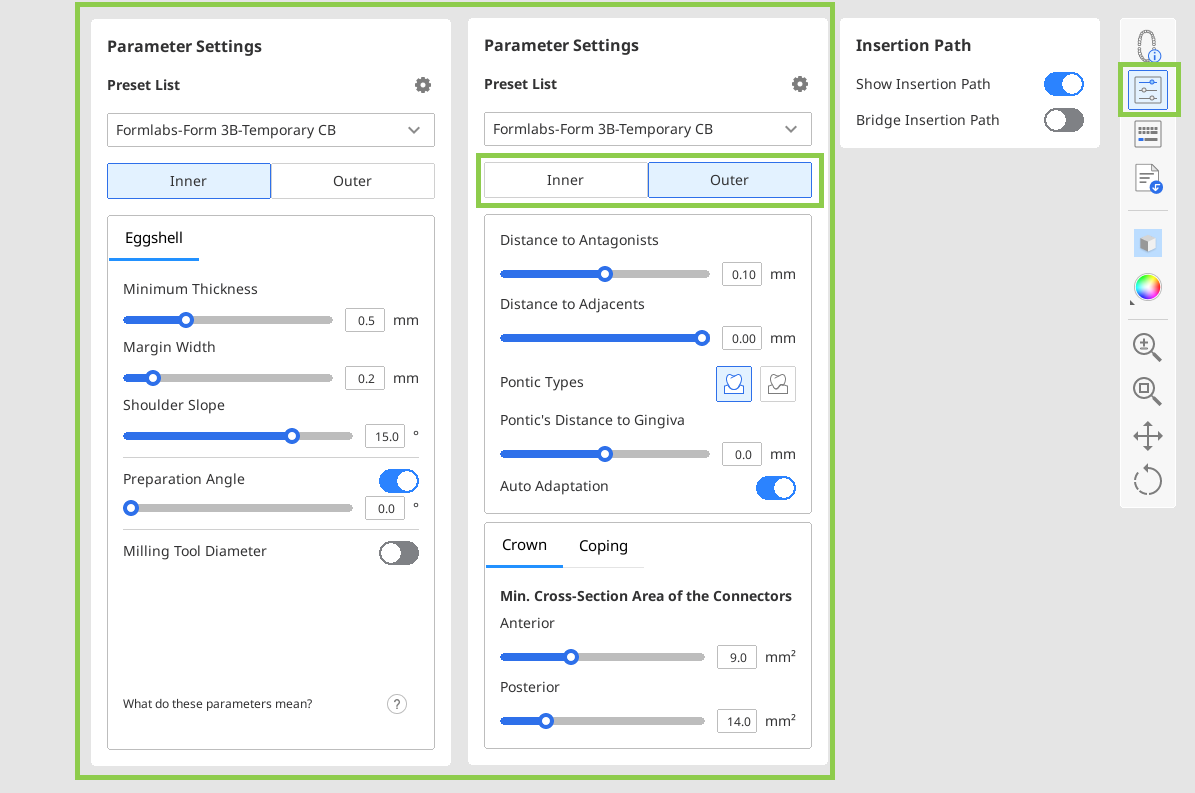
You can manually configure the parameter values or use the recommended preset for your particular printer.
![]() Note
Note
Read more on receiving recommended presets and managing the preset list in the Data Management > Presets Management chapter of this guide.
4. When done, click "Next."
![]() Note
Note
If you choose to use the library instead of preoperative data in the first step, you will then proceed to the additional Tooth Data Arrangement step. Please refer to the Workflow > Prepared Data Module > Tooth Data Arrangement section of this guide for detailed instructions on how to use that step.