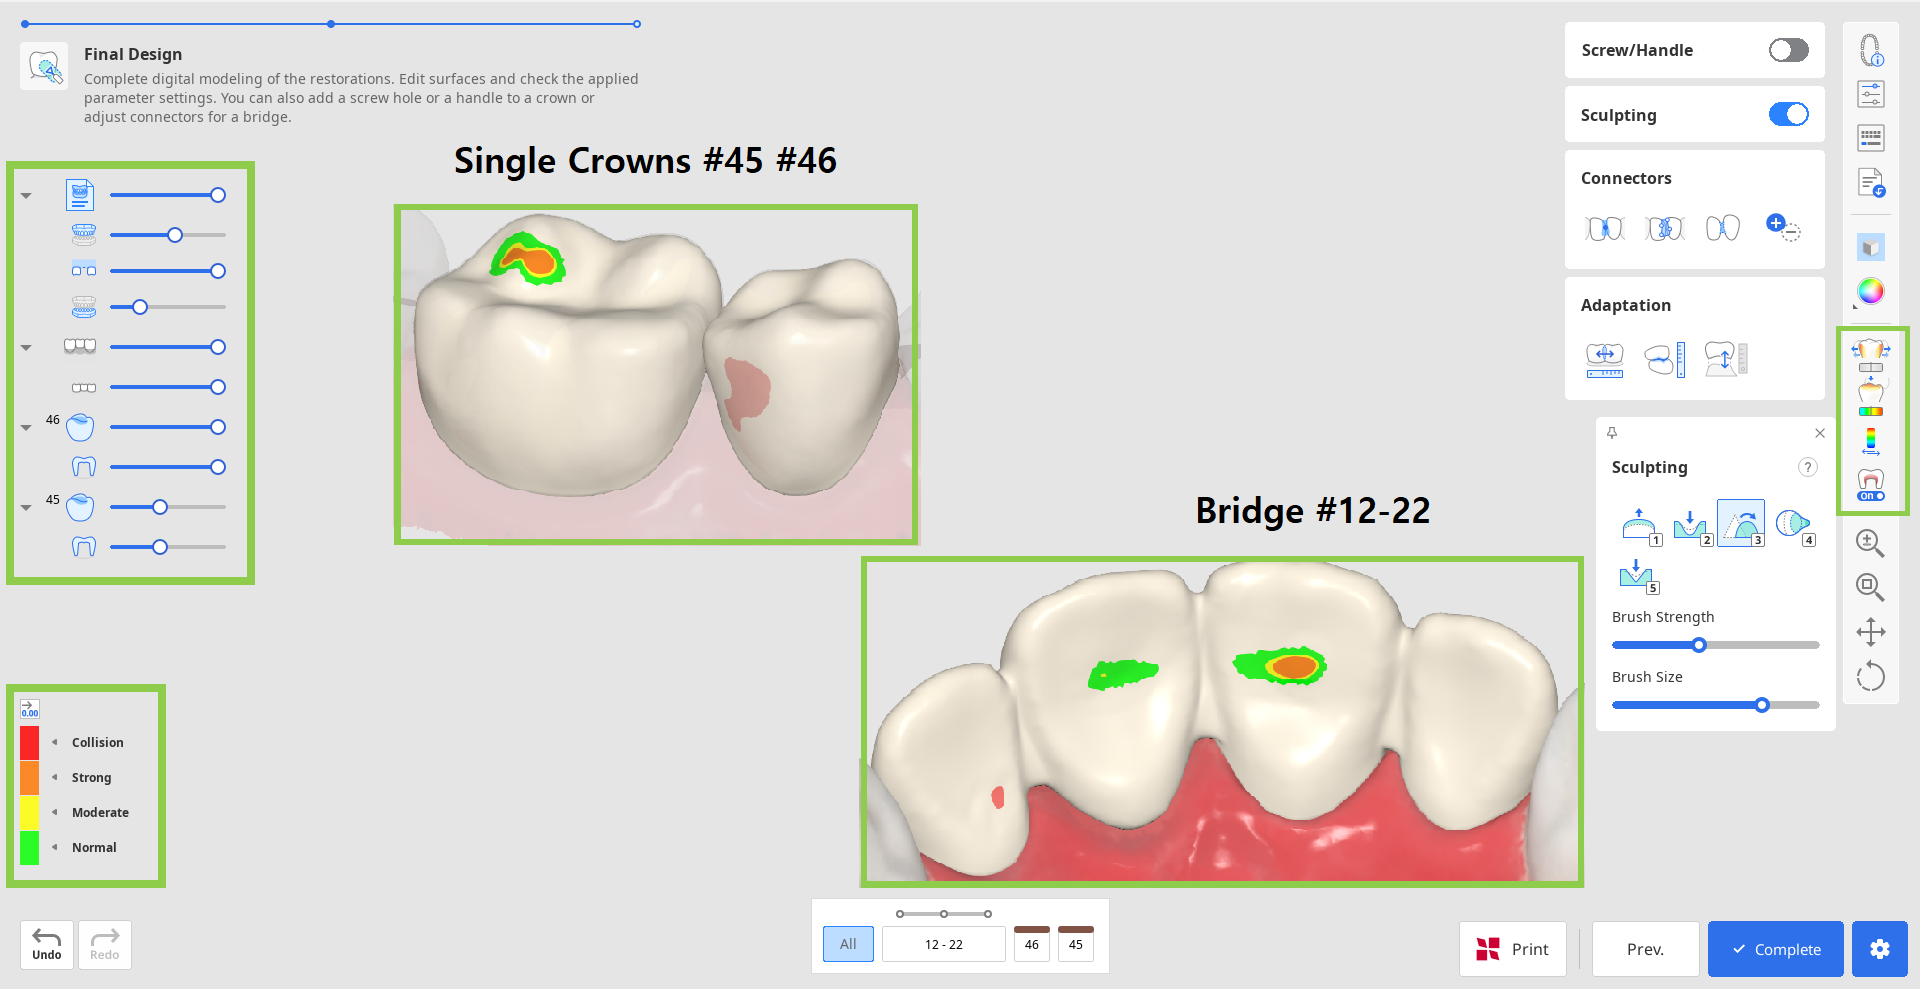
This is the final step in designing the restorations. In this step, the user should review the design of the created restorations, make any necessary edits, and check the applied parameters before proceeding with printing. There are also two additional tasks that can be performed in this step: editing the bridge connectors and adding optional design elements to a crown.
1. Start by reviewing the created restorations. Turn on the analysis tools in the Side Toolbar to see where sculpting of the outer surfaces might be needed. ”Contact Areas with Adjacents” and “Contact Areas with Antagonists” will show the contact points with neighboring teeth through colors. ”Minimum Thickness” will point out areas of the crowns that are too thin in red. Add more material in these areas using sculpting tools.
![]() Tip
Tip
Control data visibility in Data Tree for easy review of contact points and restoration fit.
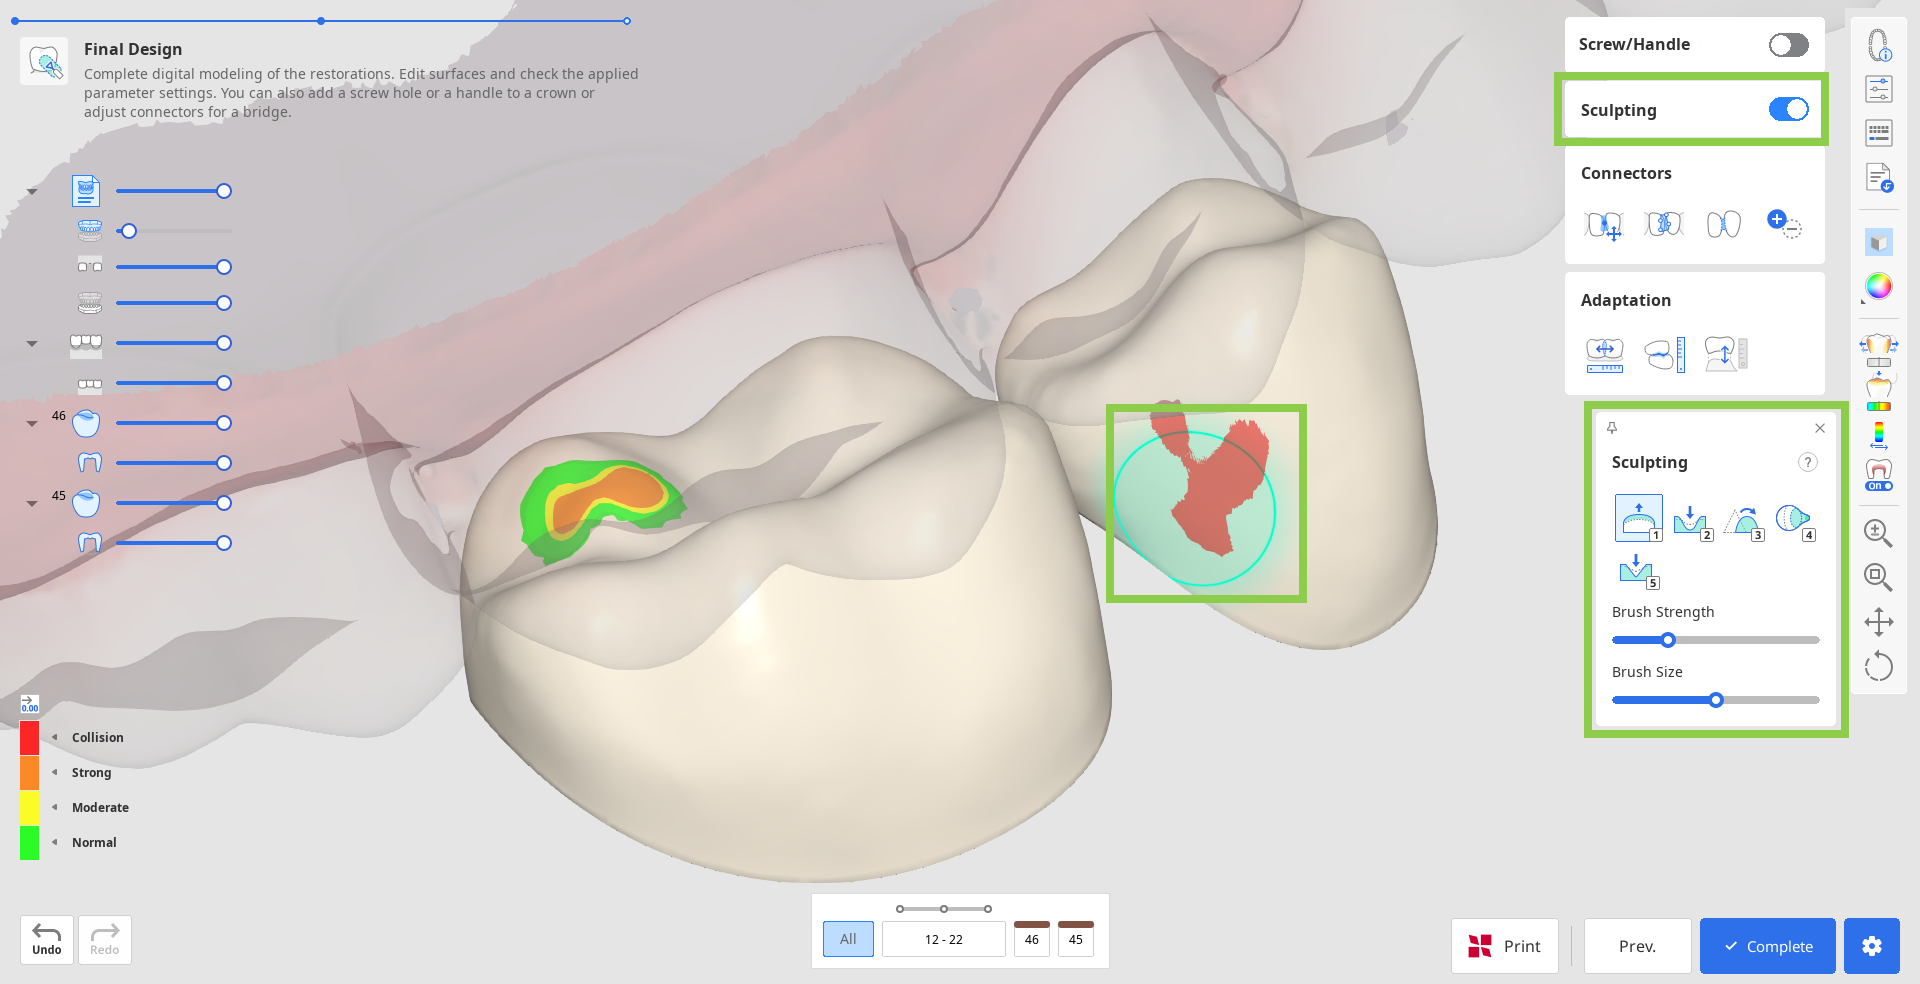
2. Correct any design flaws using “Sculpting.” You can add, remove, smoothen, morph, and carve out material on the restoration’s outer surface. Choose a sculpting tool, adjust the brush strength and size, and then modify the required areas. Use the “Groove” option to create grooves easily.
![]() Tip
Tip
Click the question mark in the "Sculpting" widget to see the shortcuts.
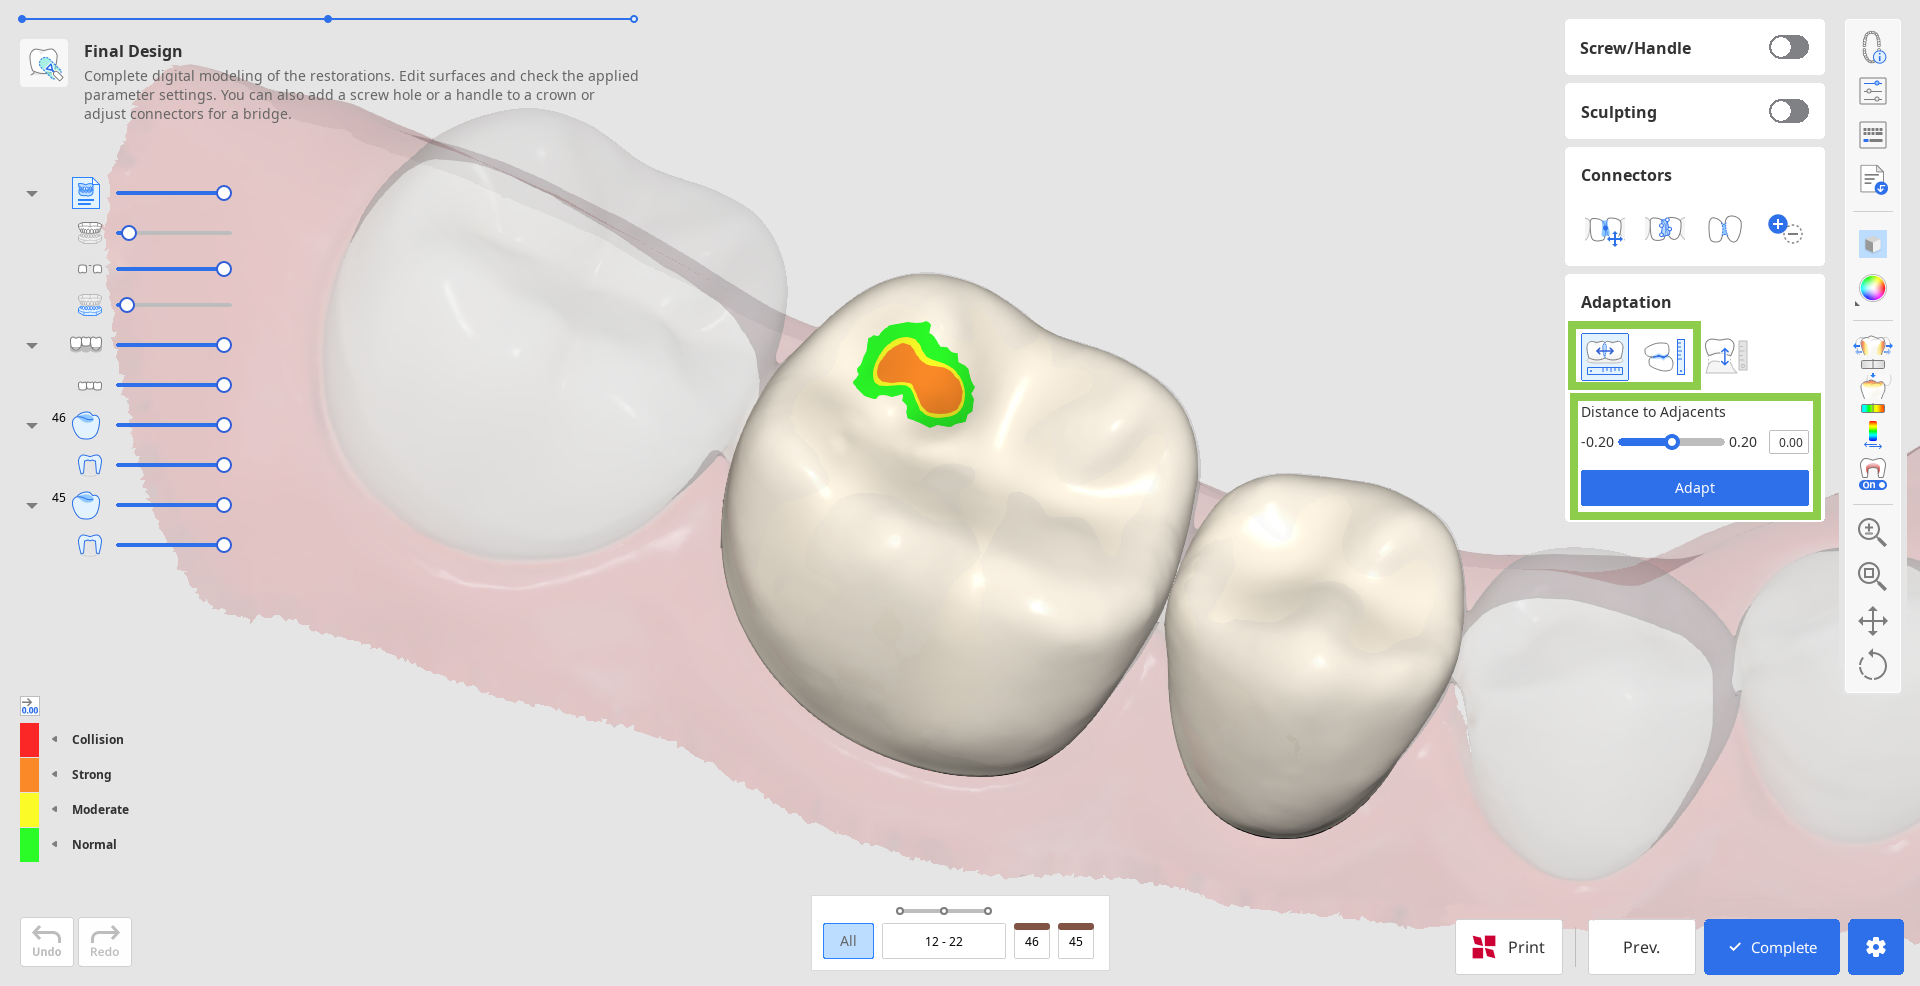
3. Any substantial sculpting might require additional review of the restoration fit and previously set parameters. Use “Adaptation” to make quick adjustments; you can adapt the restoration to adjacents and antagonists by a set distance.
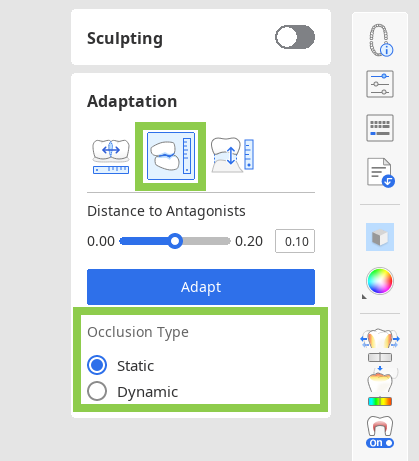
If your bridge has a pontic, you can adjust its distance to gingiva using the Adaptation Tools in this step. Choose the “Adapt to Gingiva” feature, set the desired distance, and click “Adapt.”

If dynamic occlusion data was imported, you can choose whether to adapt to antagonists based on ‘static’ or ‘dynamic’ occlusion.
4. If you are working on a bridge, the data of each individual element will be combined into one by adding connectors. Edit the connectors using the “Move,” “Edit,” “Allow Small Connectors,” or “Add/Remove” tools.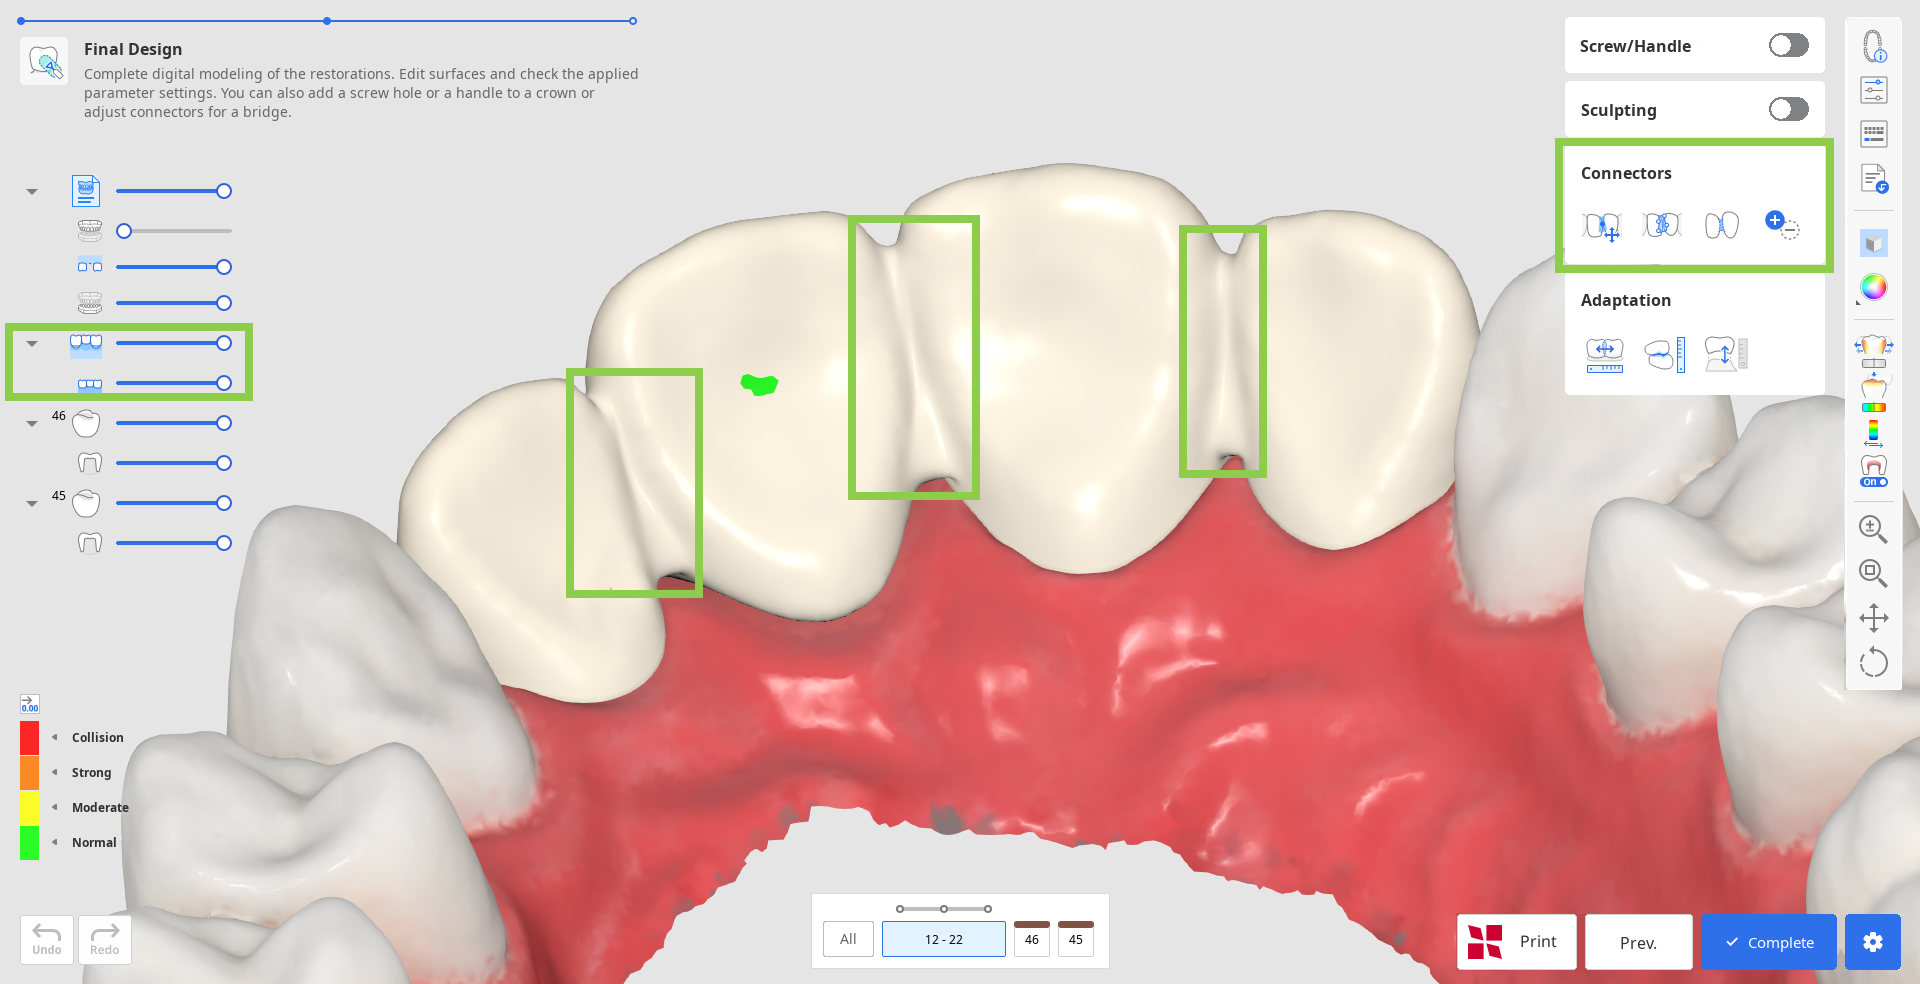
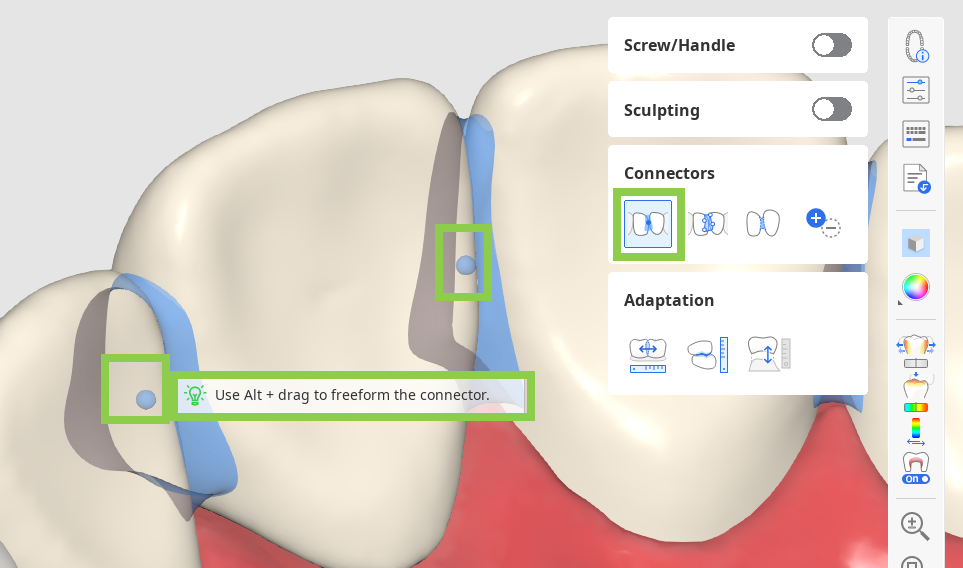
When using ”Move,” drag the center point of a connector to readjust the connector’s position and cross-section area automatically.
 Tip
TipHold down Alt/Option to quickly freeform the connector with a mouse.
When using ”Edit,” margins of the connector on both teeth will appear. You can reshape the connectors by editing those margins. Similar to editing the tooth’s margin line, click to add a point, right-click it to delete, and drag the points to move.
TipHold down Ctrl/Command to quickly make minor changes in the margins.

When “Allow Small Connectors” is enabled, the program ignores the minimum cross-section area defined in the Parameter Settings. Instead, it creates connectors solely based on the actual contact points between adjacent teeth.
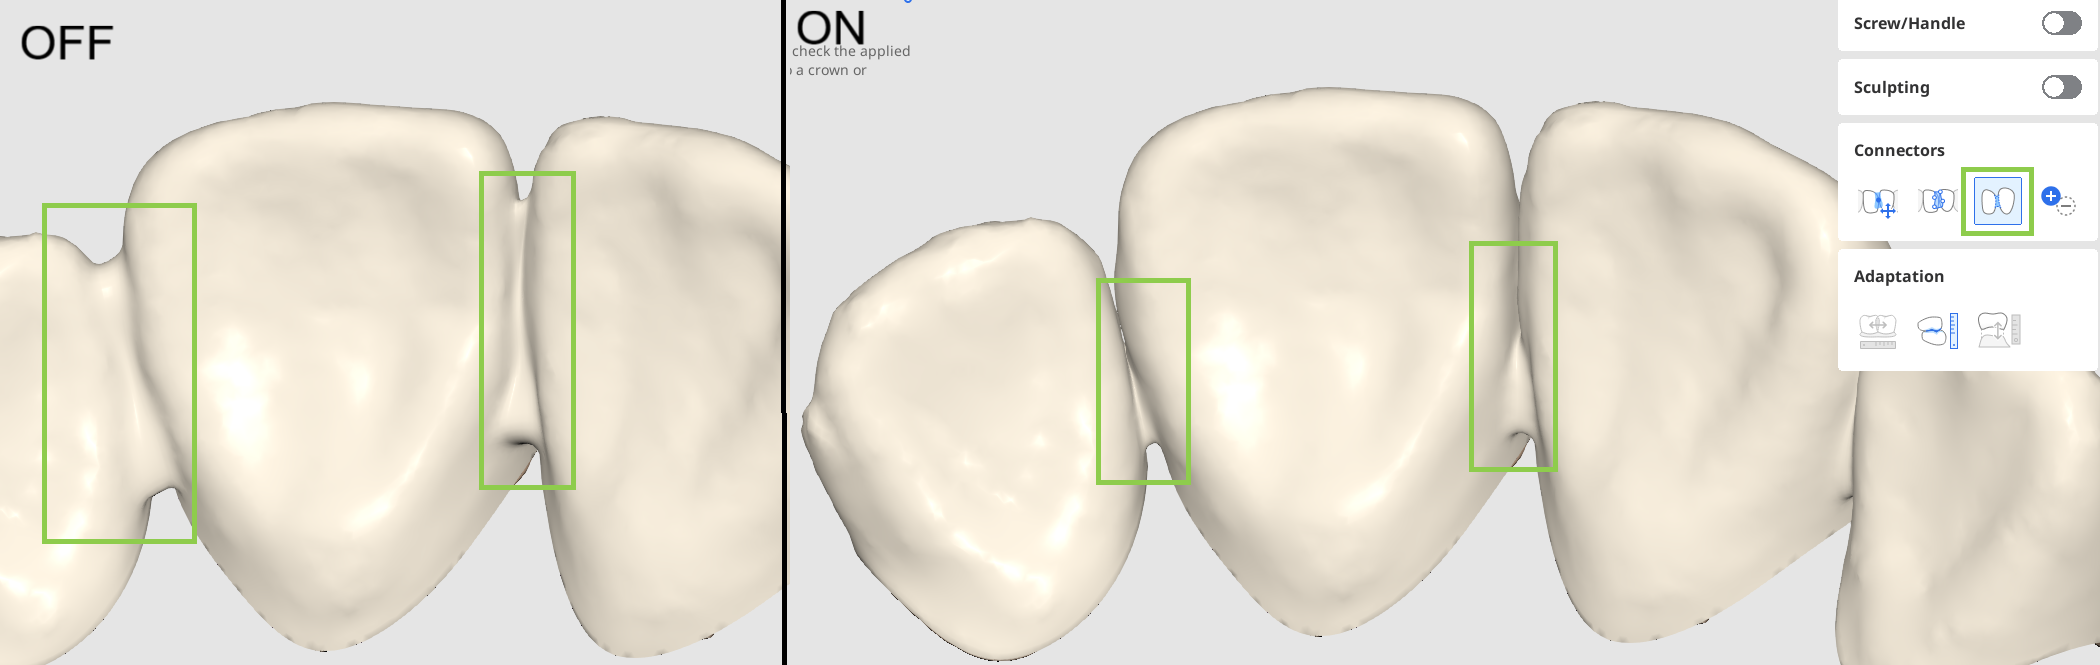
Turn on “Add/Remove” to manage connectors between all registered units, regardless of form information. This allows you to separate a bridge into single units or connect single units into a bridge.

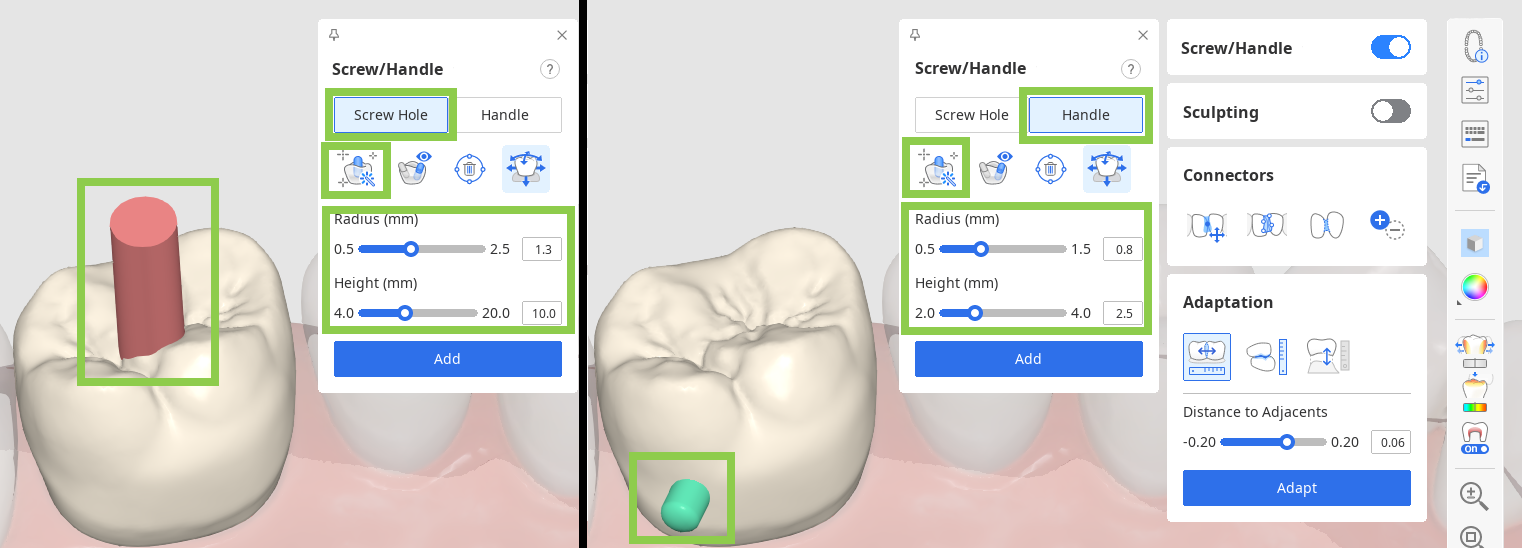
5. If you are working on a crown design, you can add screw access holes or handles with “Screw/Handle.”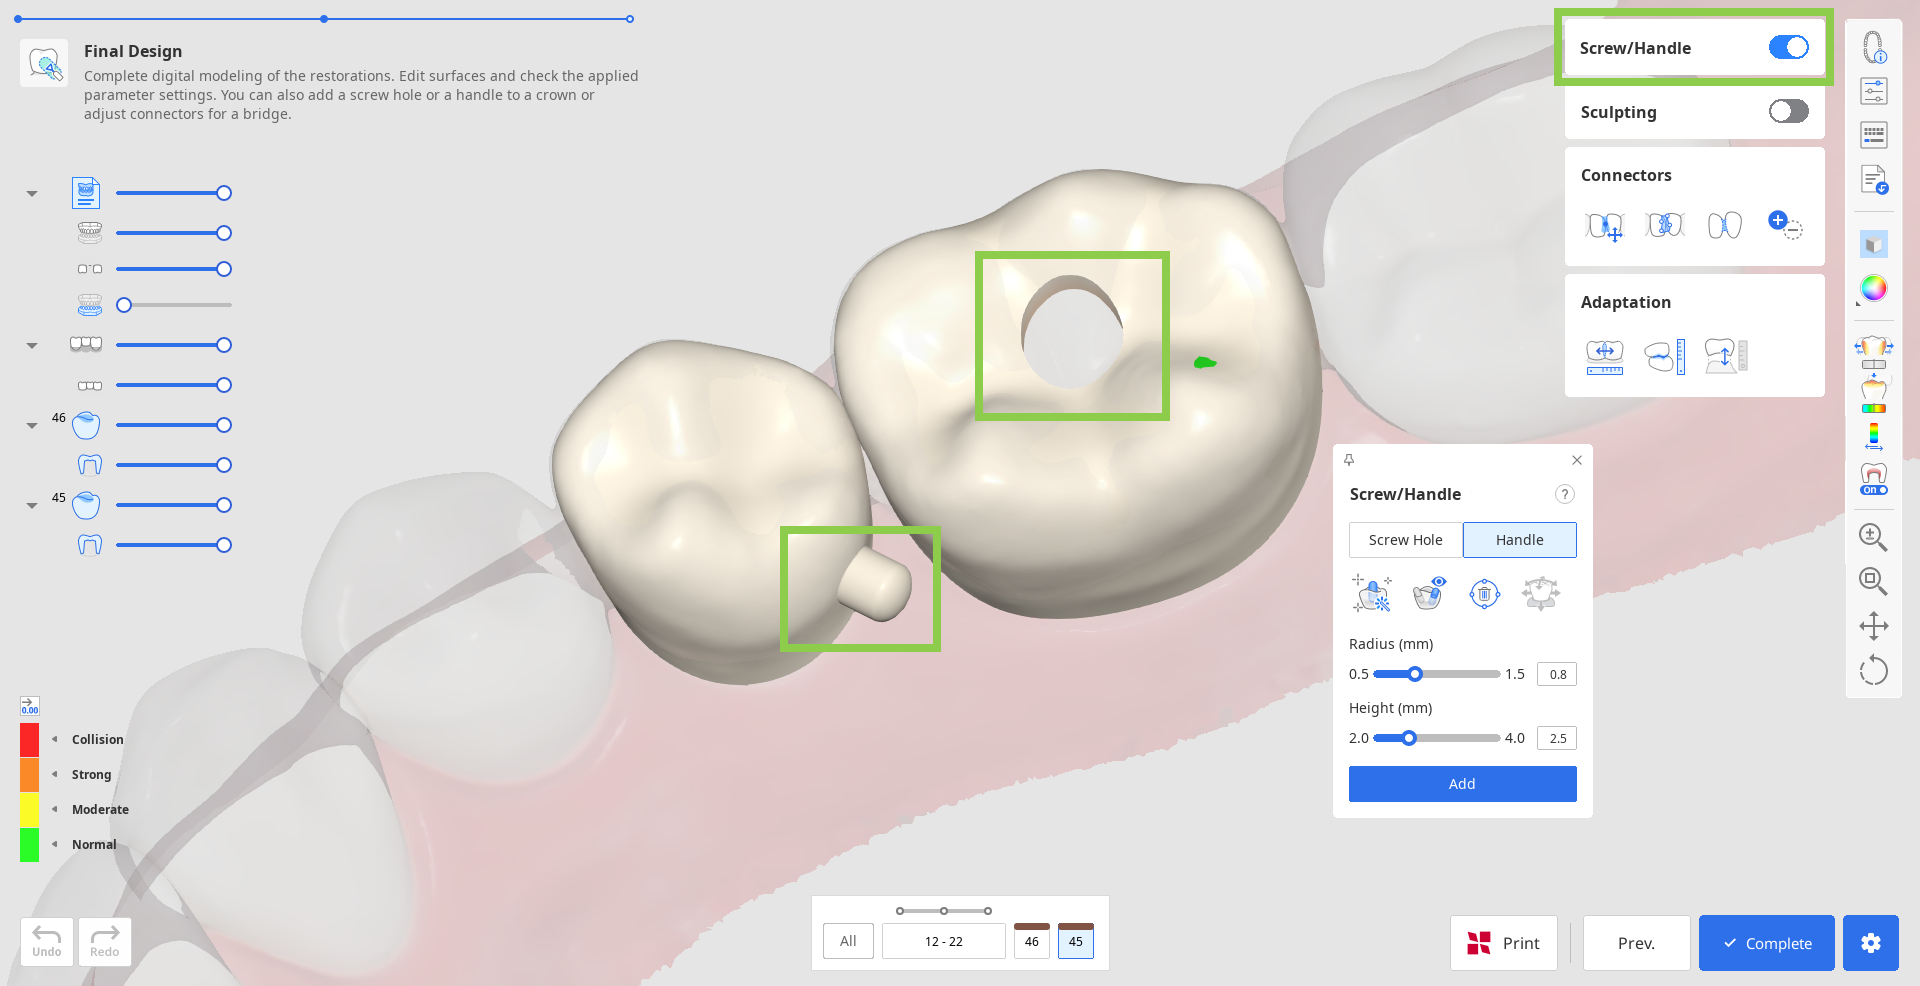
Start by choosing what element you want to add and click “Auto Set.” This will automatically place the cylinder to create an element in the most optimal place—a handle on the lingual side and a hole in the center. Then, adjust the radius and height of the cylinder below and click “Add.”
![]() Tip
Tip
The cylinder for creating an element can also be placed manually in your chosen spot with a double-click.
Caution
Check that the screw/handle is not positioned in a functionally important area of the restoration.
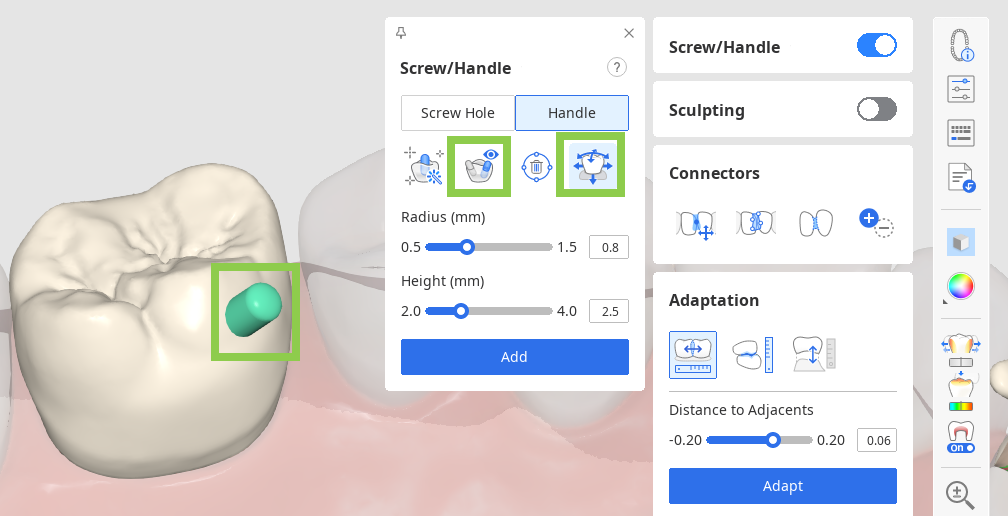
You can also quickly move the cylinder around with a “Move” tool and change its direction by rotating the data and then setting it to your view with “Set Toward You.”
6. Lastly, review the inner and outer parameters in “Parameter Settings” before saving your design and sending it to printing.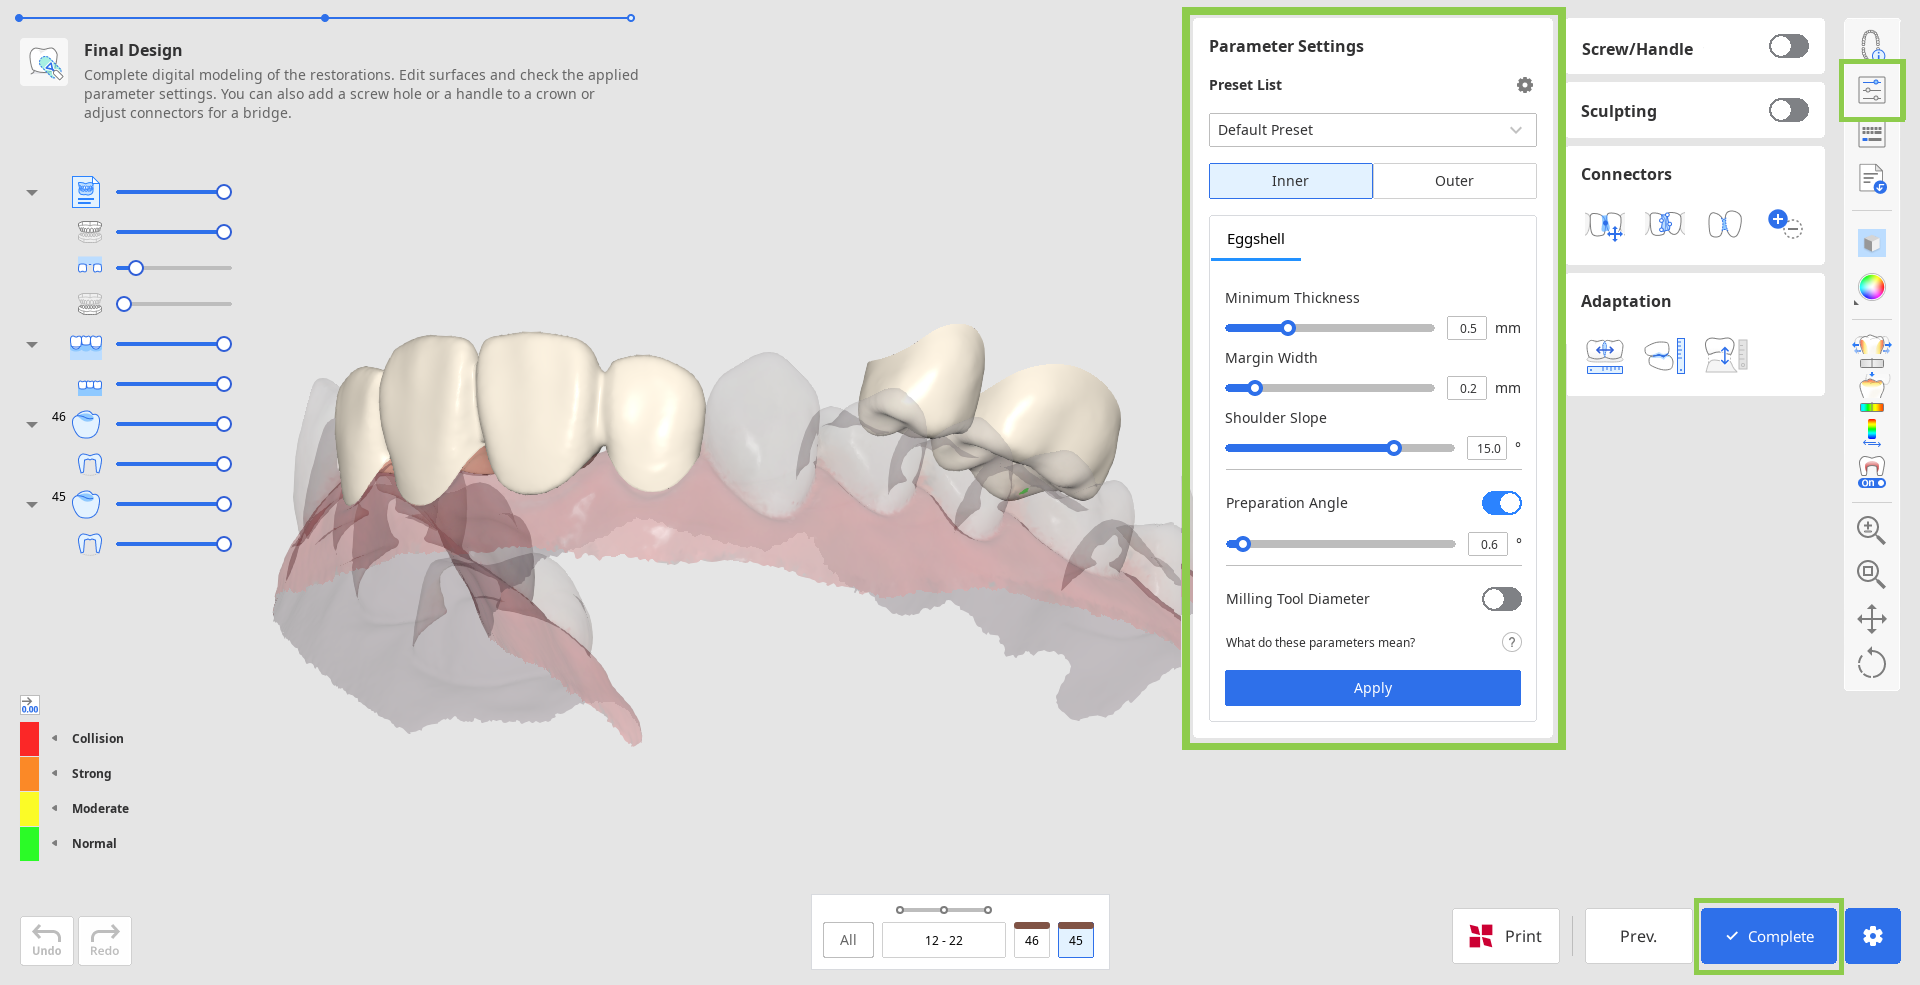
Incorrect parameter settings may affect the fit of the restoration; ensure that the parameters are set correctly.
7. To save your restoration designs, click “Complete” at the bottom right corner.
Paid Feature
Saving and exporting the completed restoration design as an STL file is a paid feature. Pricing may vary based on your scanner ownership status and location.
For more details about payment, please visit the Medit Help Center or click here.
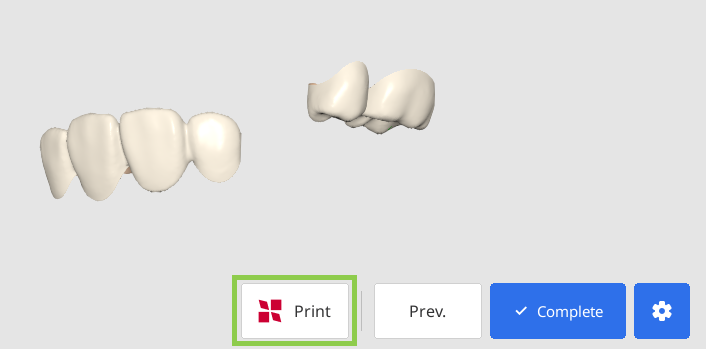
8. If you have a SprintRay 3D printer, you can transfer your restoration design from this step right into the RayWare Cloud. For this, use the “Print with SprintRay” at the bottom and follow the guidance on the screen. You must already have a RayWare Cloud account to use this feature.
Caution
If you encounter difficulties connecting to RayWare Cloud, please refer to the following troubleshooting guidelines:
check your internet connection
verify your login credentials (username and password)
review your restoration design
If the issues persist, please reach out to SprintRay support.