In this step, users select the implant for each target tooth from the available library and position it on the scan data.
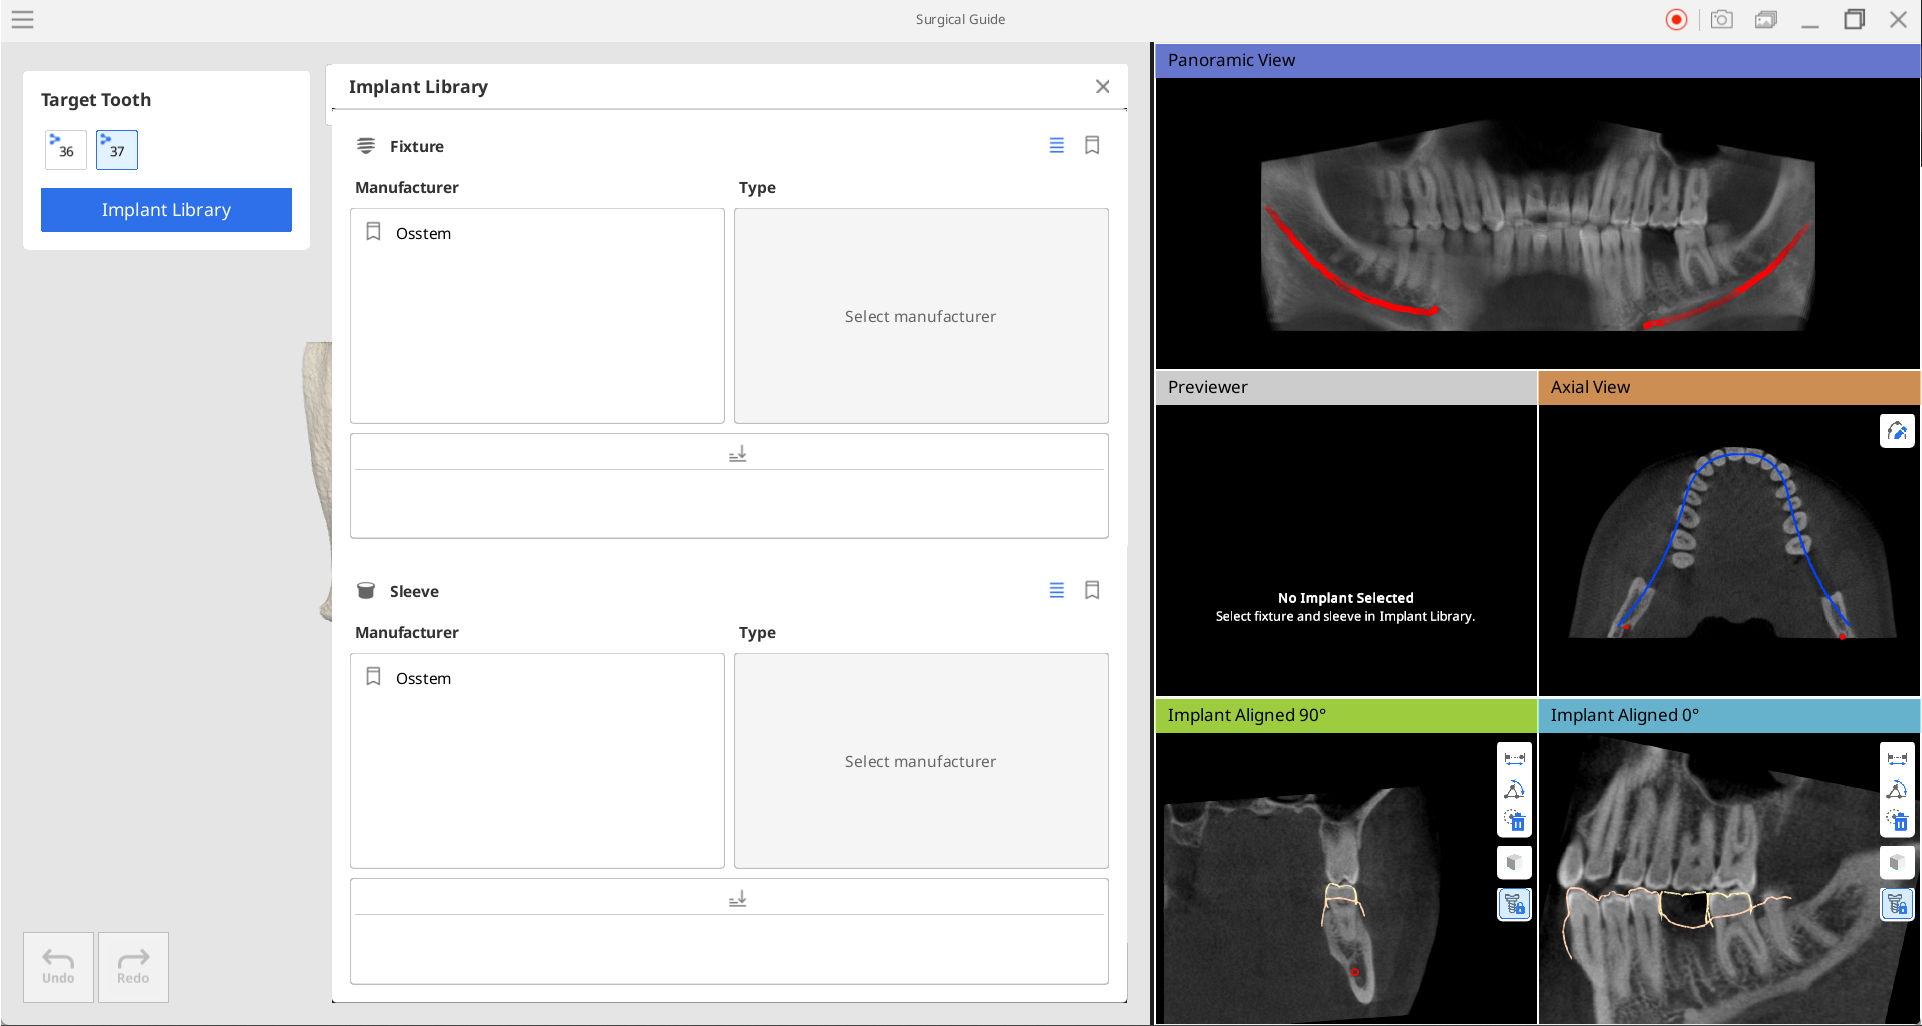
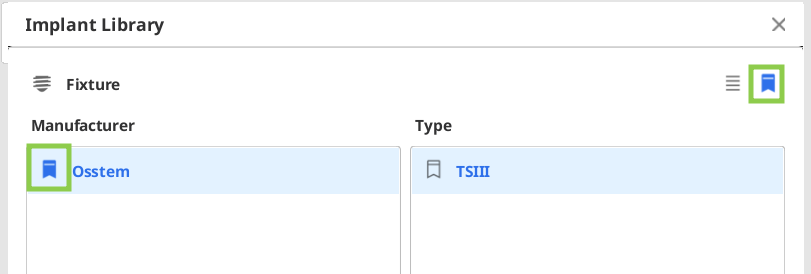
1. First, select the target tooth for which you want to choose an implant. Next, designate the implant and sleeve you plan to use in the Implant Library during surgery. Make sure to select both the manufacturer and type to view the available options. Your chosen implant and sleeve and their details will be displayed for preview on the right side.
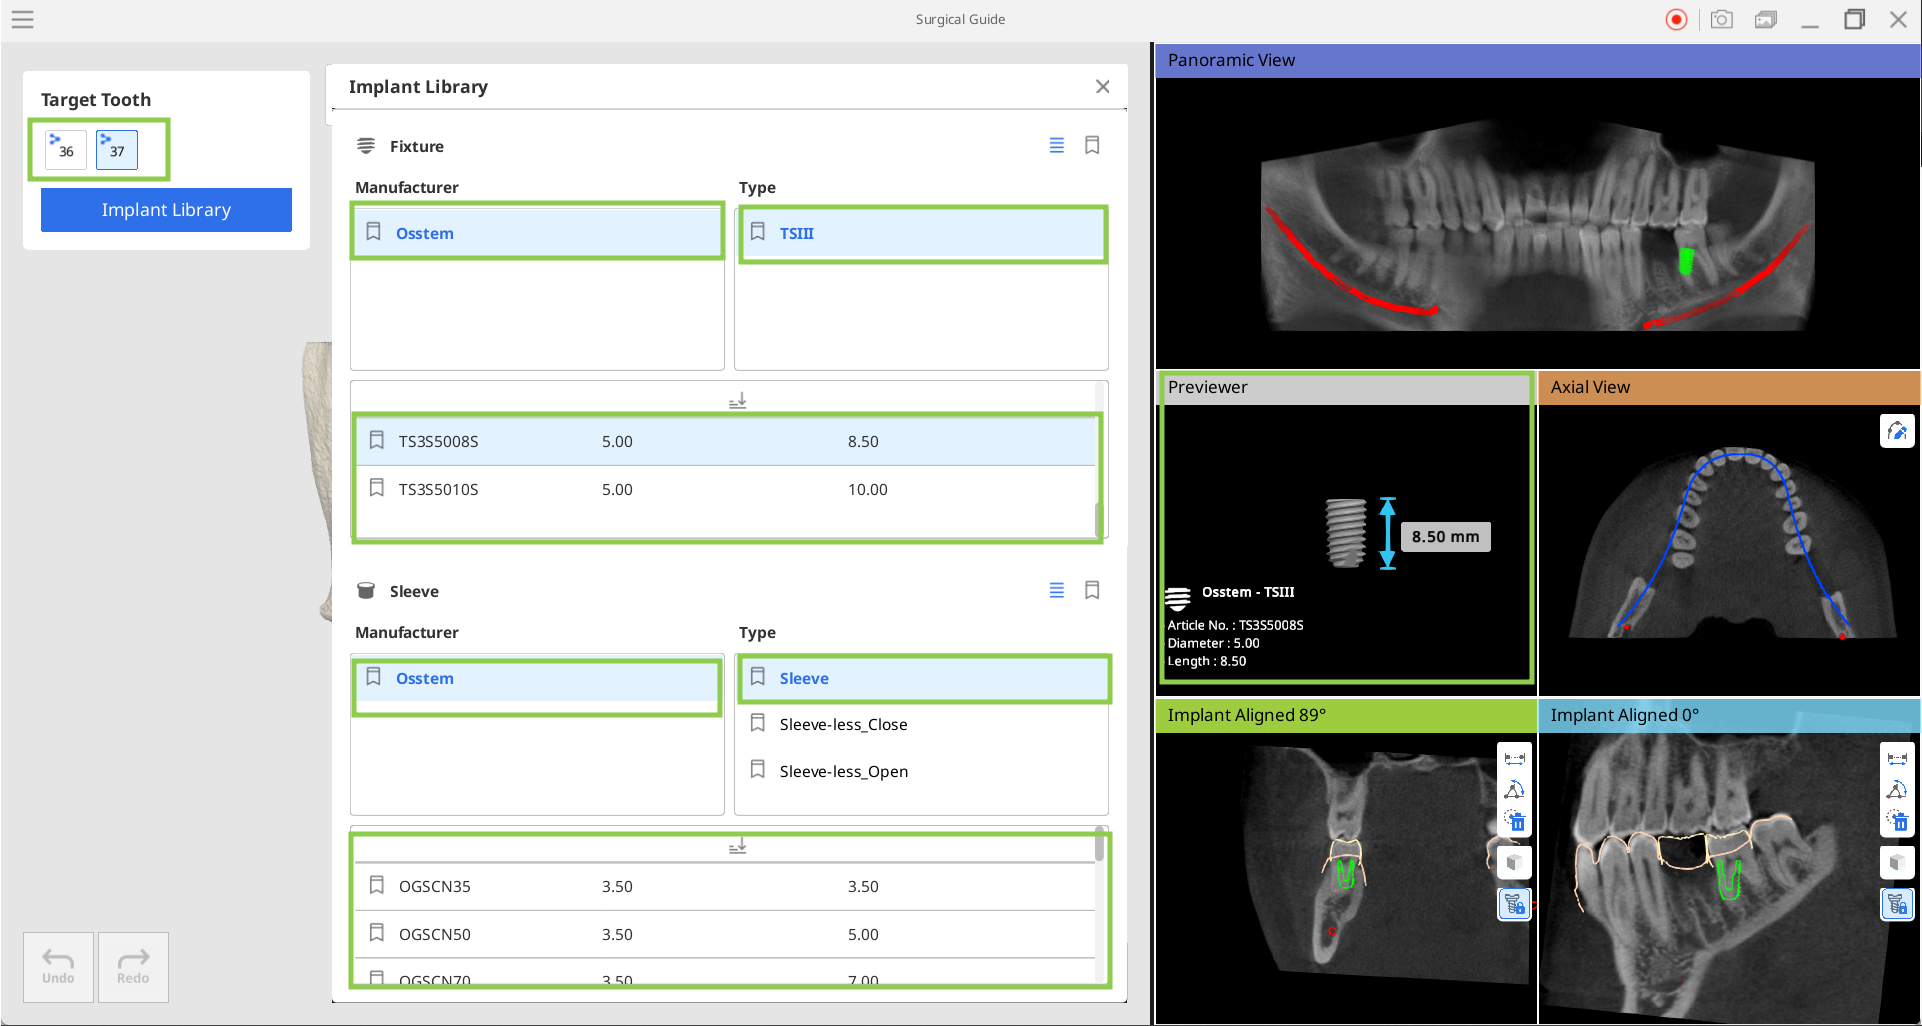
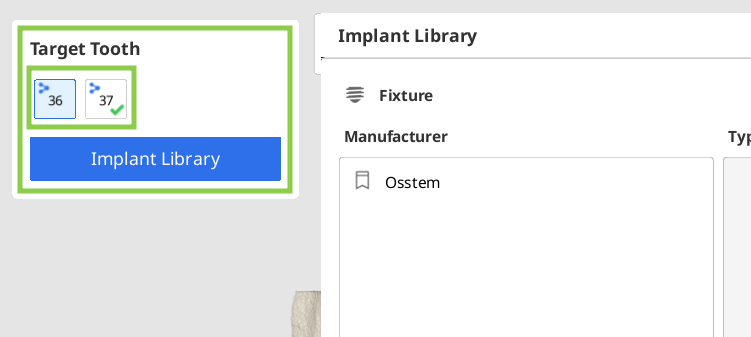
2. When working with multiple implants, be sure to select the target tooth in the toolbox before choosing the implant and sleeve. A green check mark will appear to indicate that both the implant and the sleeve have been selected for that tooth. When all teeth are done, click the exit button in the Implant Library window.
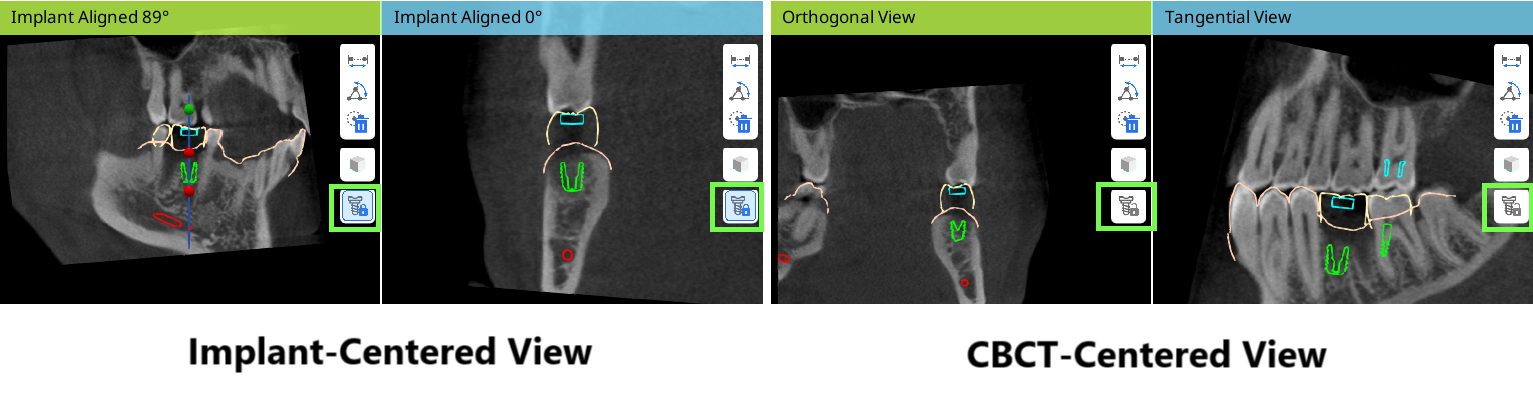
3. Check the positioning of the implant and sleeve in both the scan data and sectional view windows. To adjust the implant, click and drag the control points to rotate the implant data, or click and drag the implant outlines in the planar view windows to move it.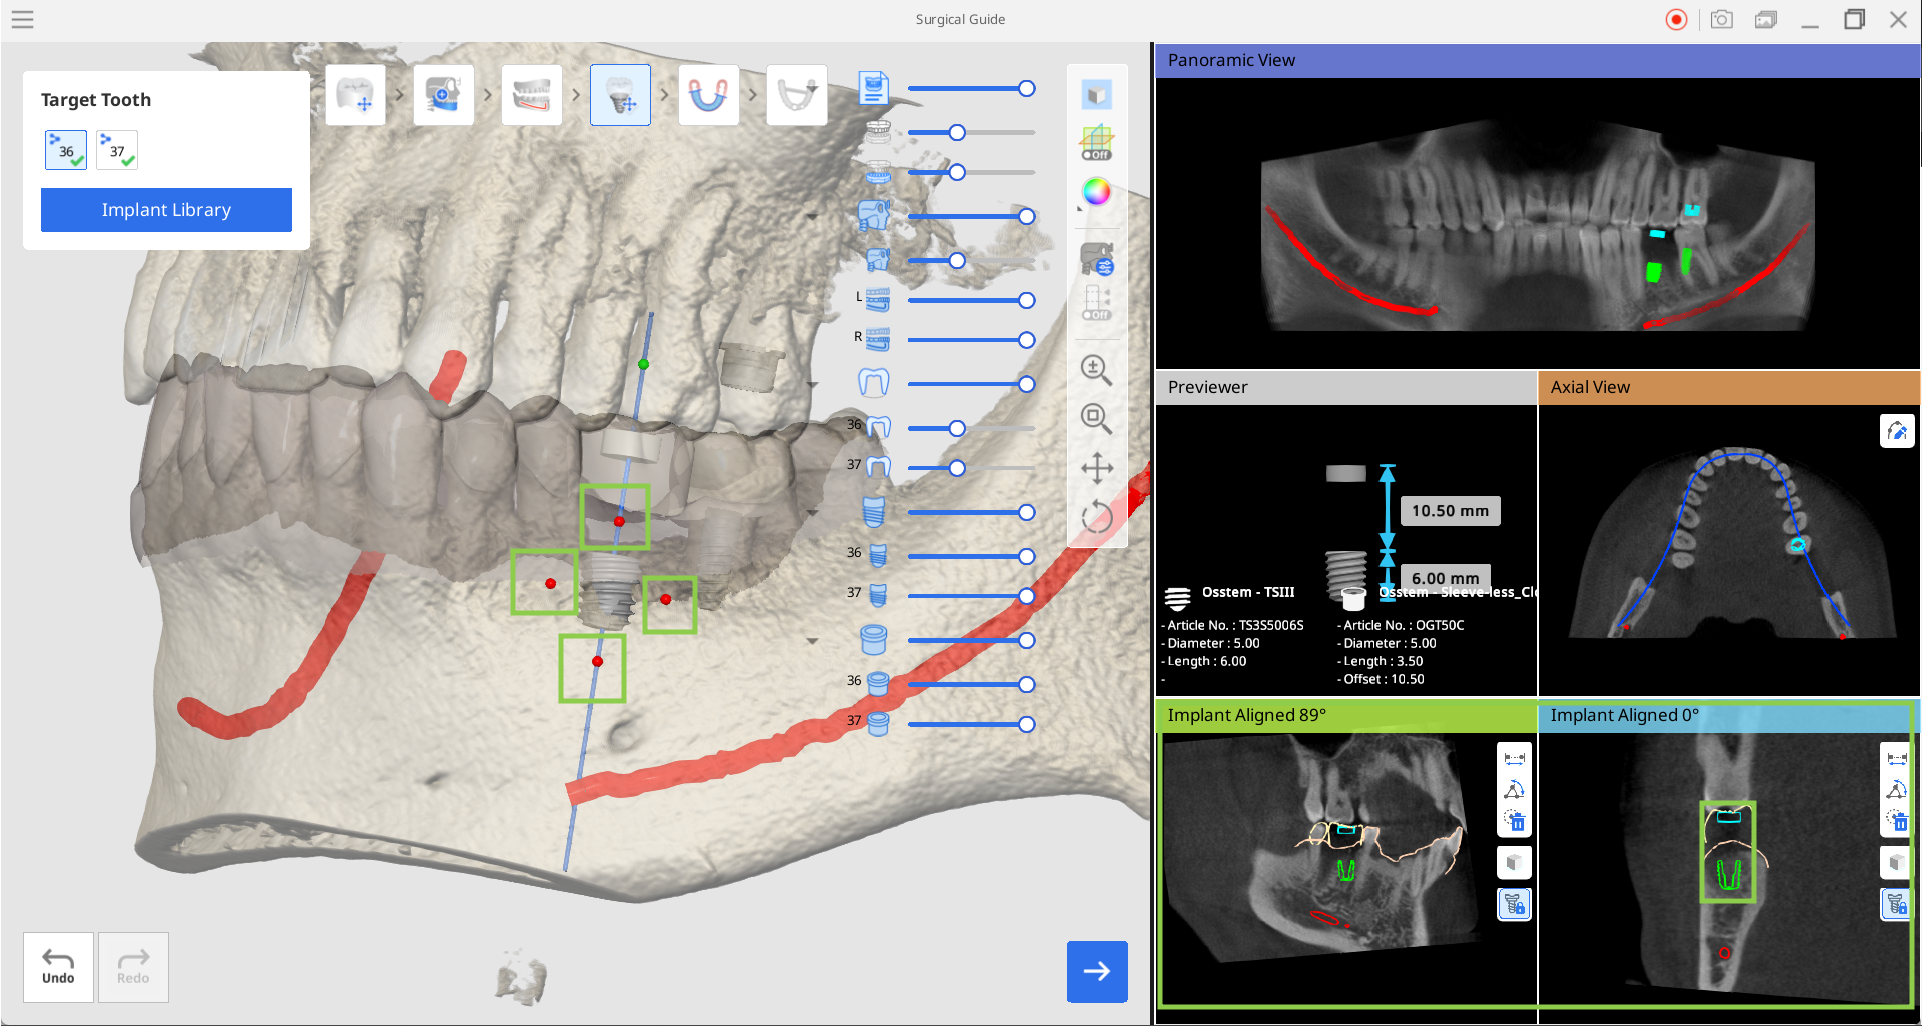
4. When the implants and sleeves are positioned as needed, click "Next."