This workflow is intended for the fast and easy design of a temporary restoration with a pontic as the core element (referred to as a flipper). Both the pontic and its supporting base are designed within this process. The workflow consists of four steps: Tooth Data Arrangement → Insertion Path → Flipper Base → Final Design.
To begin working on a flipper, launch the app from a Medit Link case with an empty form (flippers are not supported as a standalone product type in Medit Link).
Once the app is open, you can complete the form within the app. Choose the tooth number that will be converted into a pontic, then select “Flipper” on the right. Caution
The recommended number of pontics is one or two to ensure accurate design.
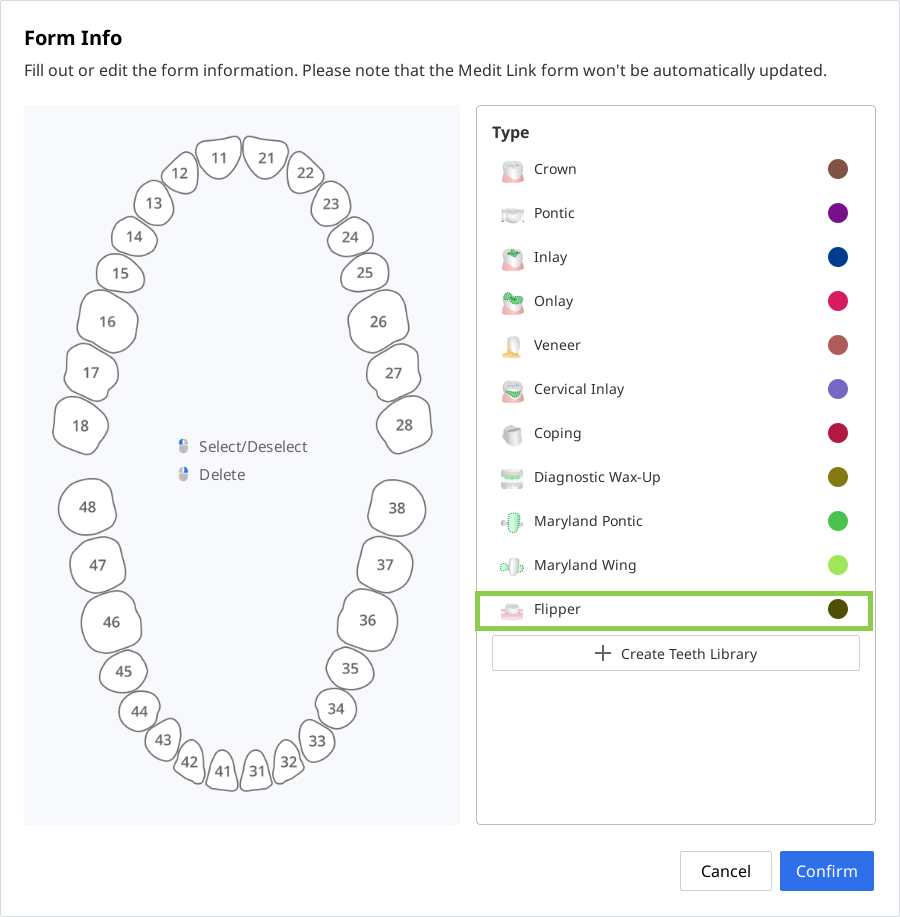
After completing the form, select the “Flipper” module and assign the scan data. Click “Confirm“ to import the assigned data.
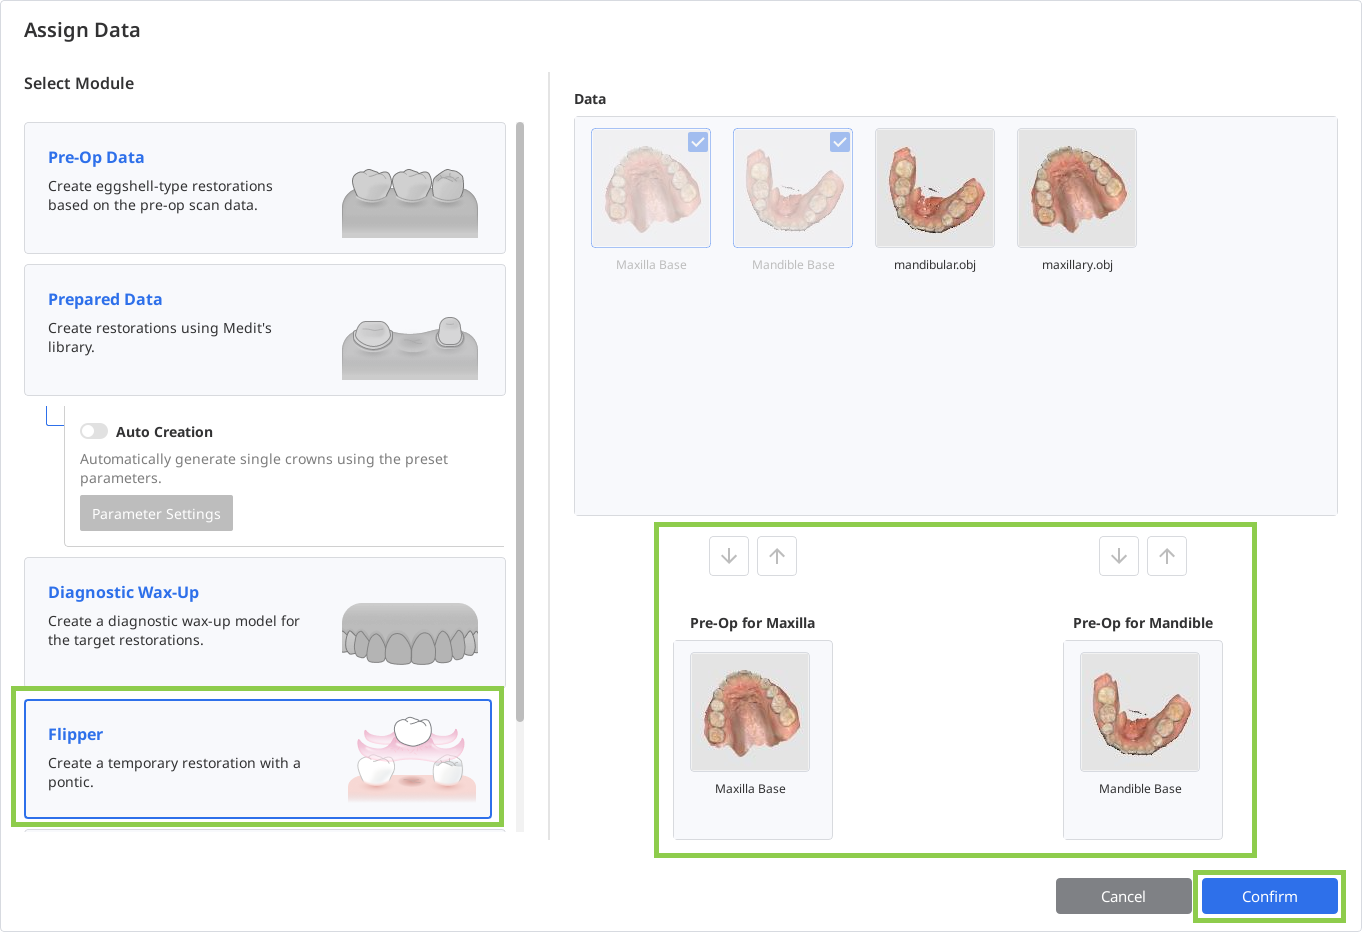
First, you will enter the Tooth Data Arrangement step, where a pontic will be positioned. Before starting the design, review the scan data for unnecessary soft tissue or misalignment. If needed, use the “Data Alignment” and “Data Editing” modes in the bottom-left corner to make adjustments.
 Note
NoteRead how to use “Data Alignment“ and “Data Editing“ in the Workflow chapter of this guide.

You can create the target restorations either by using the teeth library data or by duplicating a tooth from the imported scan data.
The library data will automatically appear for the designated target teeth. You can change the selected library in the Library Toolbox on the right.
NoteFor more details on managing available teeth libraries, refer to the Data Management chapter of this guide.
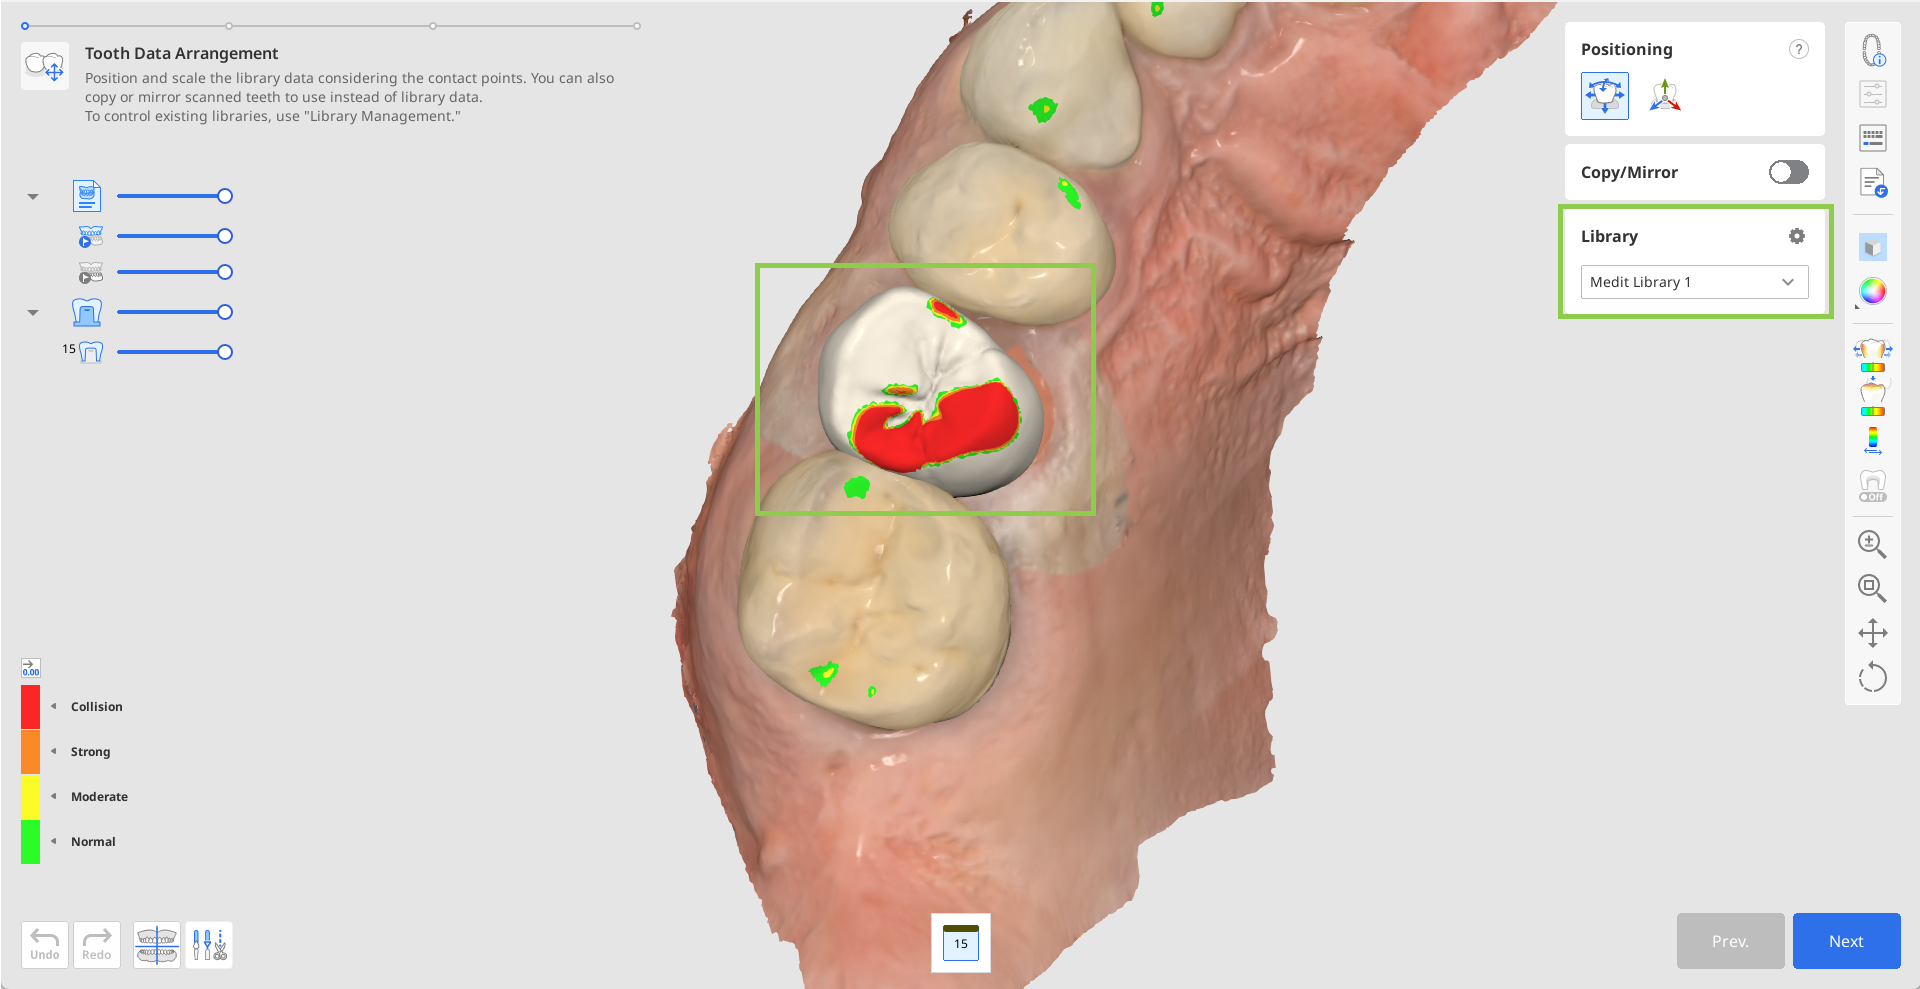
For duplication, you can use either the pre-op data imported via the Assign Data dialog in the beginning or any other reference scans you load via "Import Additional Data" in the Side Toolbar. The latter lets you import additional data from other Medit Link cases or any locally stored data. To duplicate the data, use the "Copy/Mirror" tool. ”Copy” creates an exact replica of a scanned tooth, while “Mirror” creates a symmetrical one. Note that the copied or mirrored data will be applied only to the single tooth currently selected in the form at the bottom, allowing you to retain the library data for other teeth.
Start by selecting the target tooth in the form at the bottom, then choose either the “Copy” or “Mirror” option. Next, use the available selection tools to define the data to be duplicated, and click “Apply.”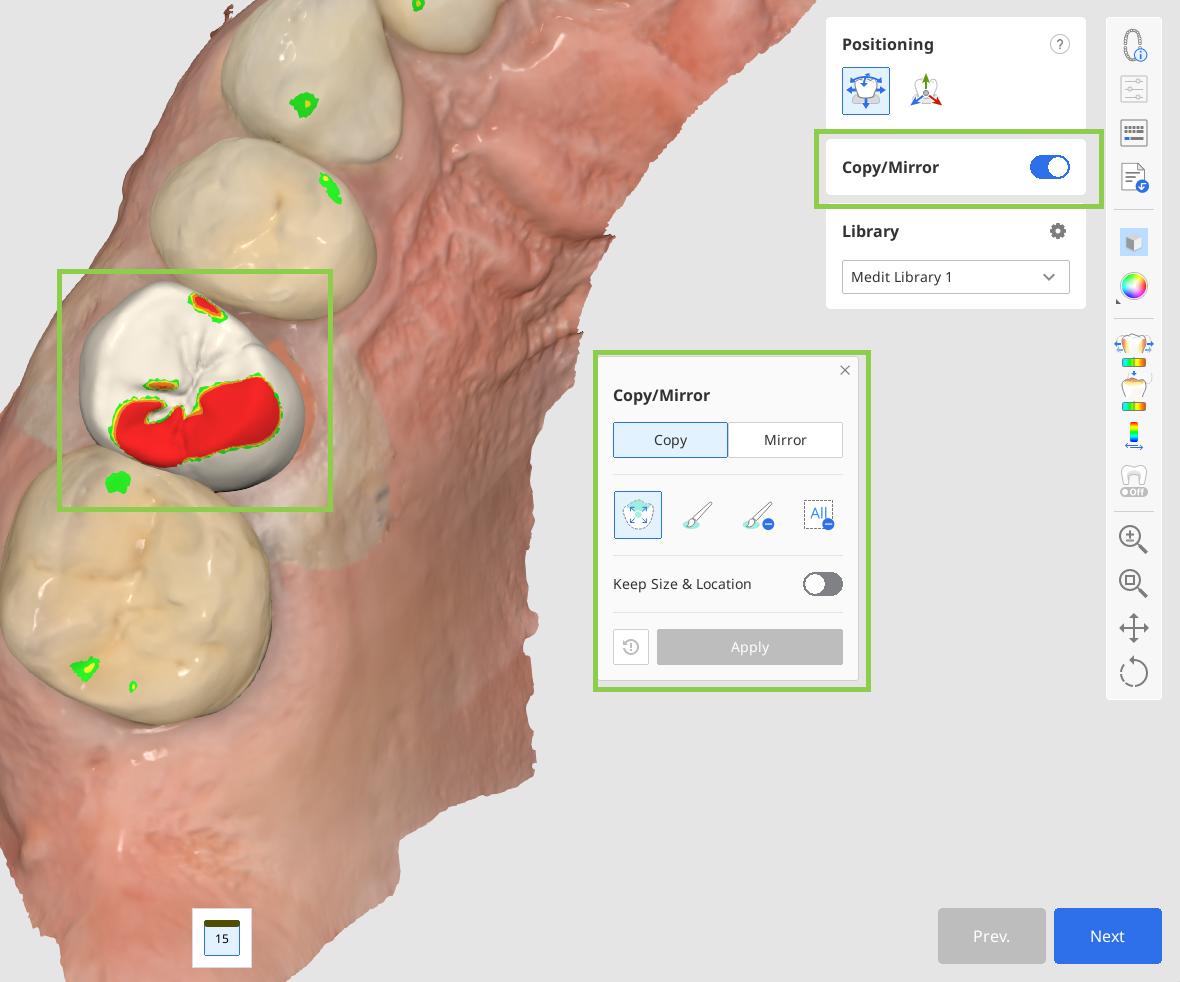
When you have arranged the tooth data for all your target teeth, adjust the data's placement using the "Positioning" tools. You can move, scale, or rotate the tooth data to ensure it is positioned properly. Make sure the arranged tooth data is not sticking out on the gingiva side.
Use "Free Move/Scale" if you want to control data movements with no restrictions. To move data, use the mouse. For other actions like rotating and scaling, check the keyboard shortcuts under the question mark in the toolbox. Use "3D Manipulator" if you want to make precise or small adjustments to the data positioning. This feature lets you control data along the axis.
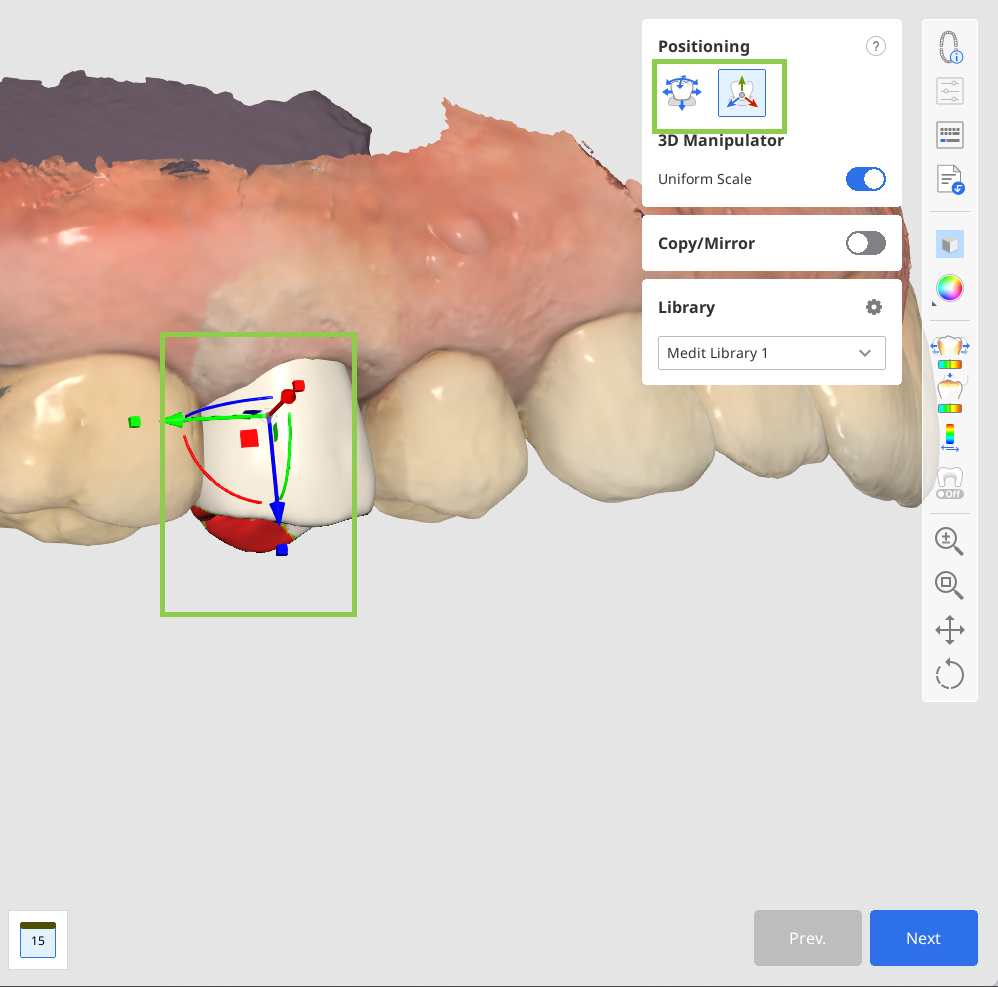
Once all tooth data has been arranged and positioned, click “Next.“
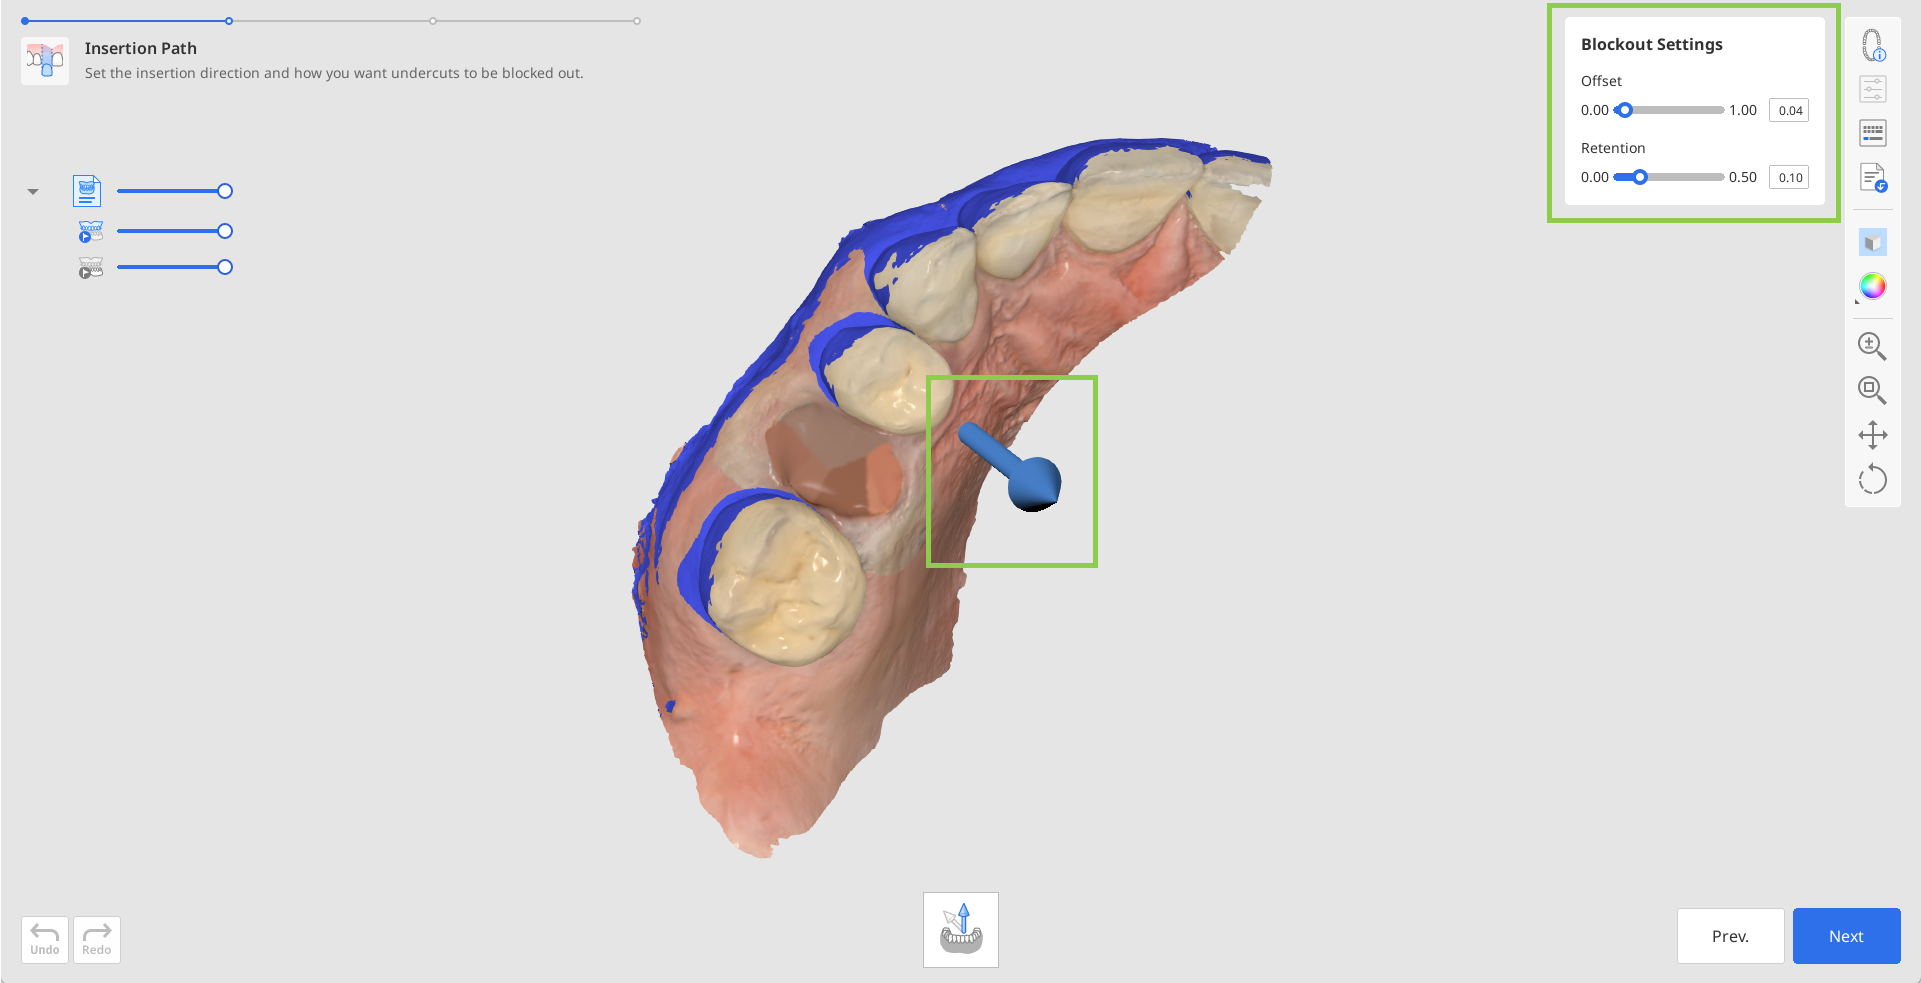
In the Insertion Path step, drag the insertion path arrow to adjust its default position. Review the available blockout settings and modify them as needed to ensure a proper fit for the final restoration. You can also set the offset distance and retention values. Click “Next” when you are ready to proceed.
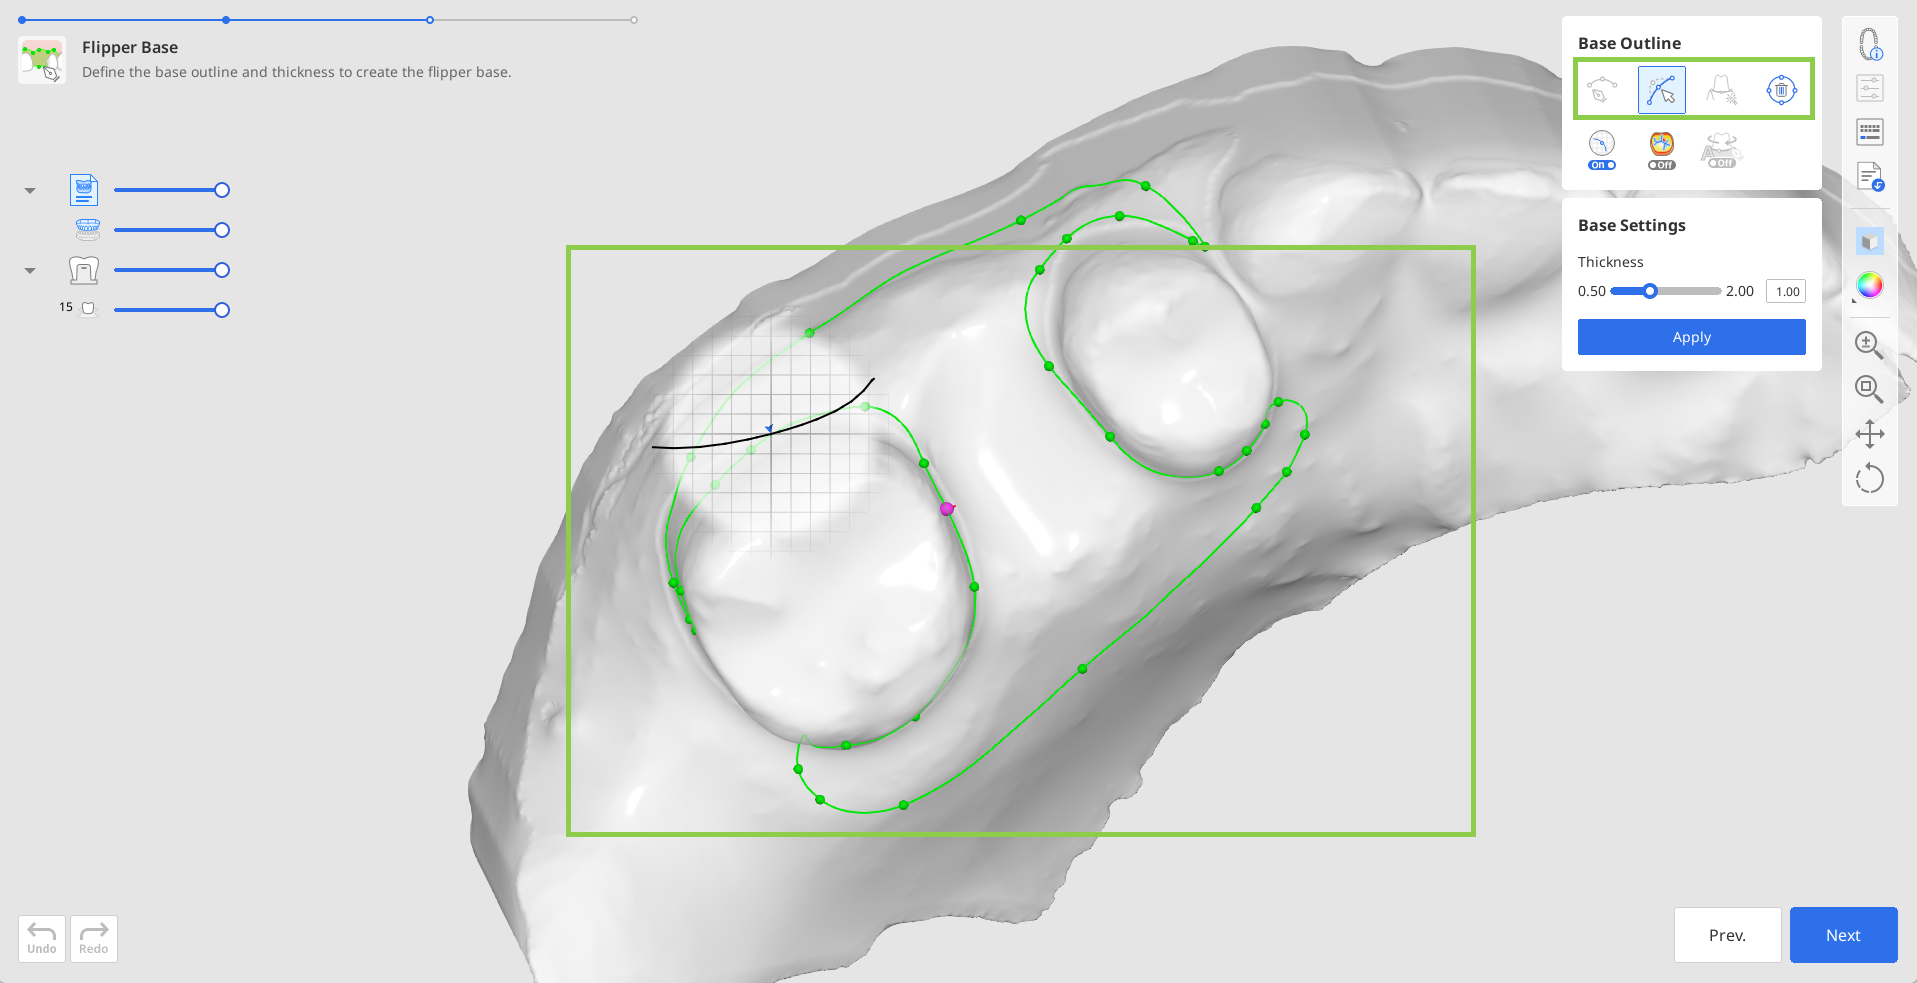
In the Flipper Base step, an automatic base outline is created. You can adjust it using the “Edit” tool. If the automatically generated outline is not satisfactory or was not created, you can draw it manually using the “Manual Creation” tool.
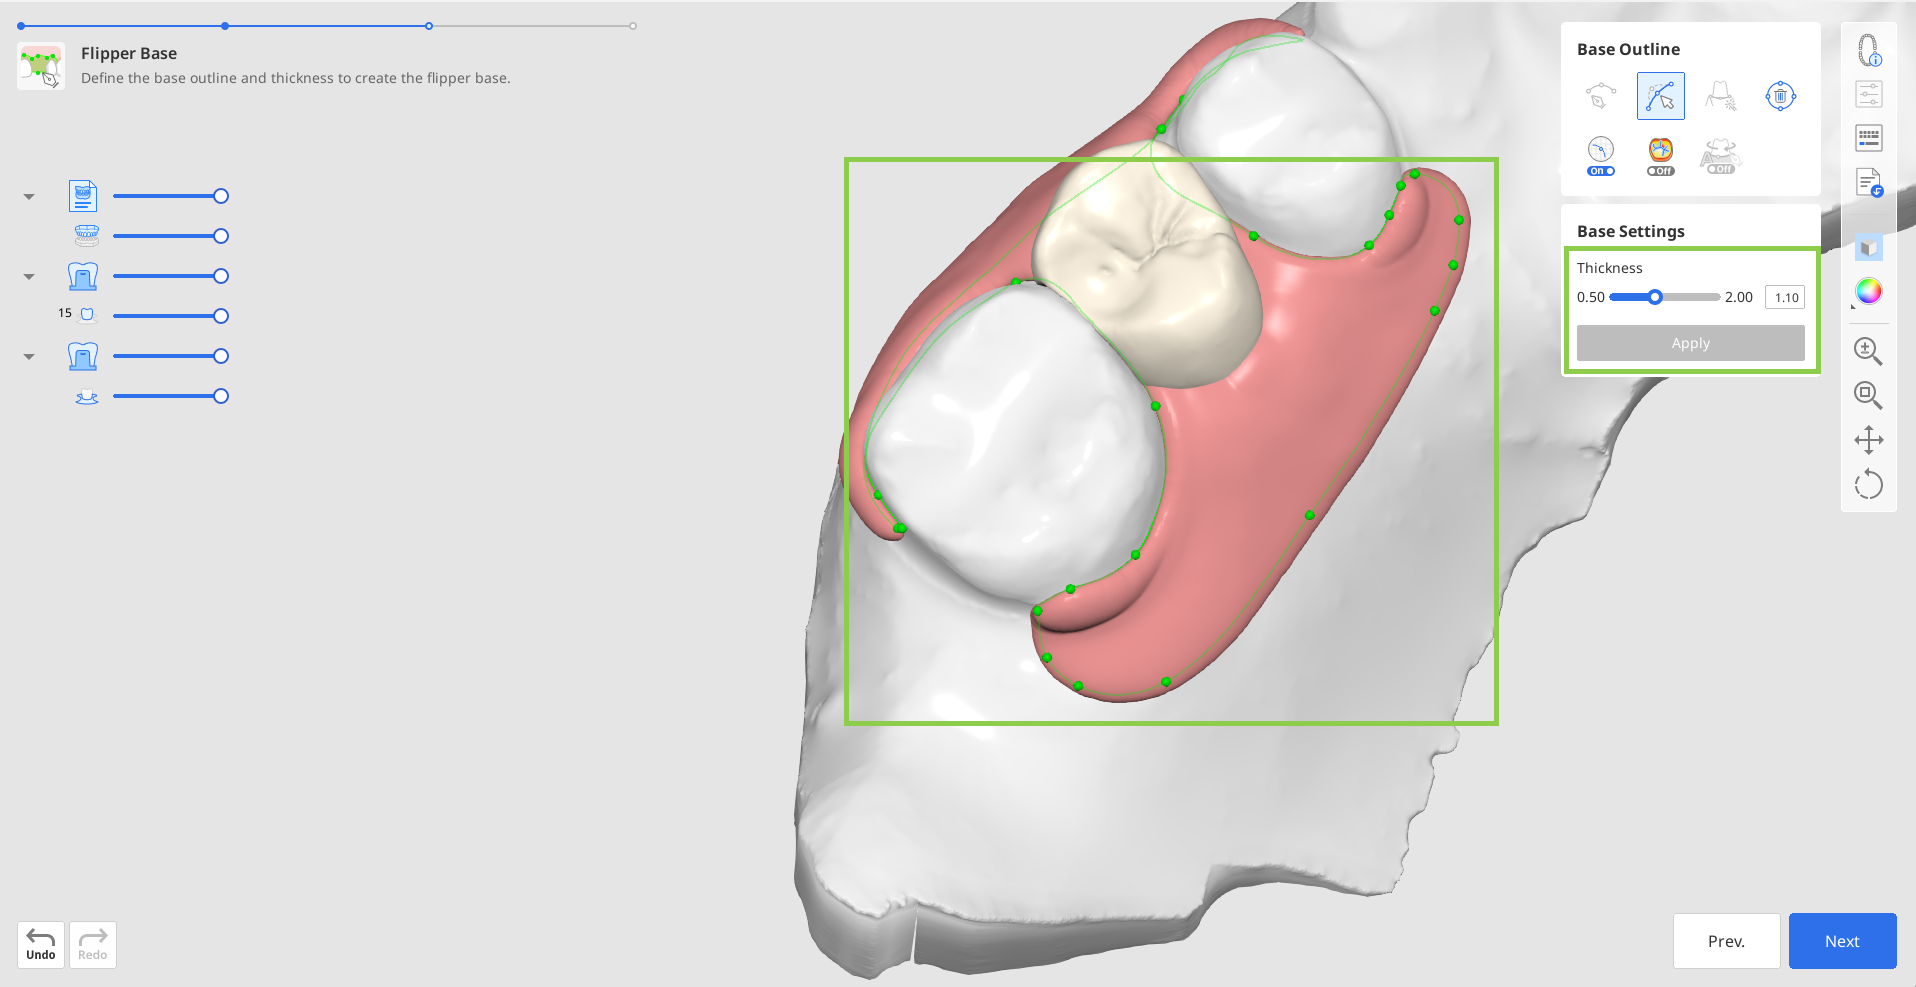
Next, adjust the thickness of the flipper base. Click “Apply” to apply the selected values and generate the base. When you are ready, proceed to the final step.
In the last step of the workflow, you can review the final flipper design. Use “Sculpting” to refine the surfaces, and use the adaptation tools to adjust the pontic in relation to adjacent and antagonist teeth.
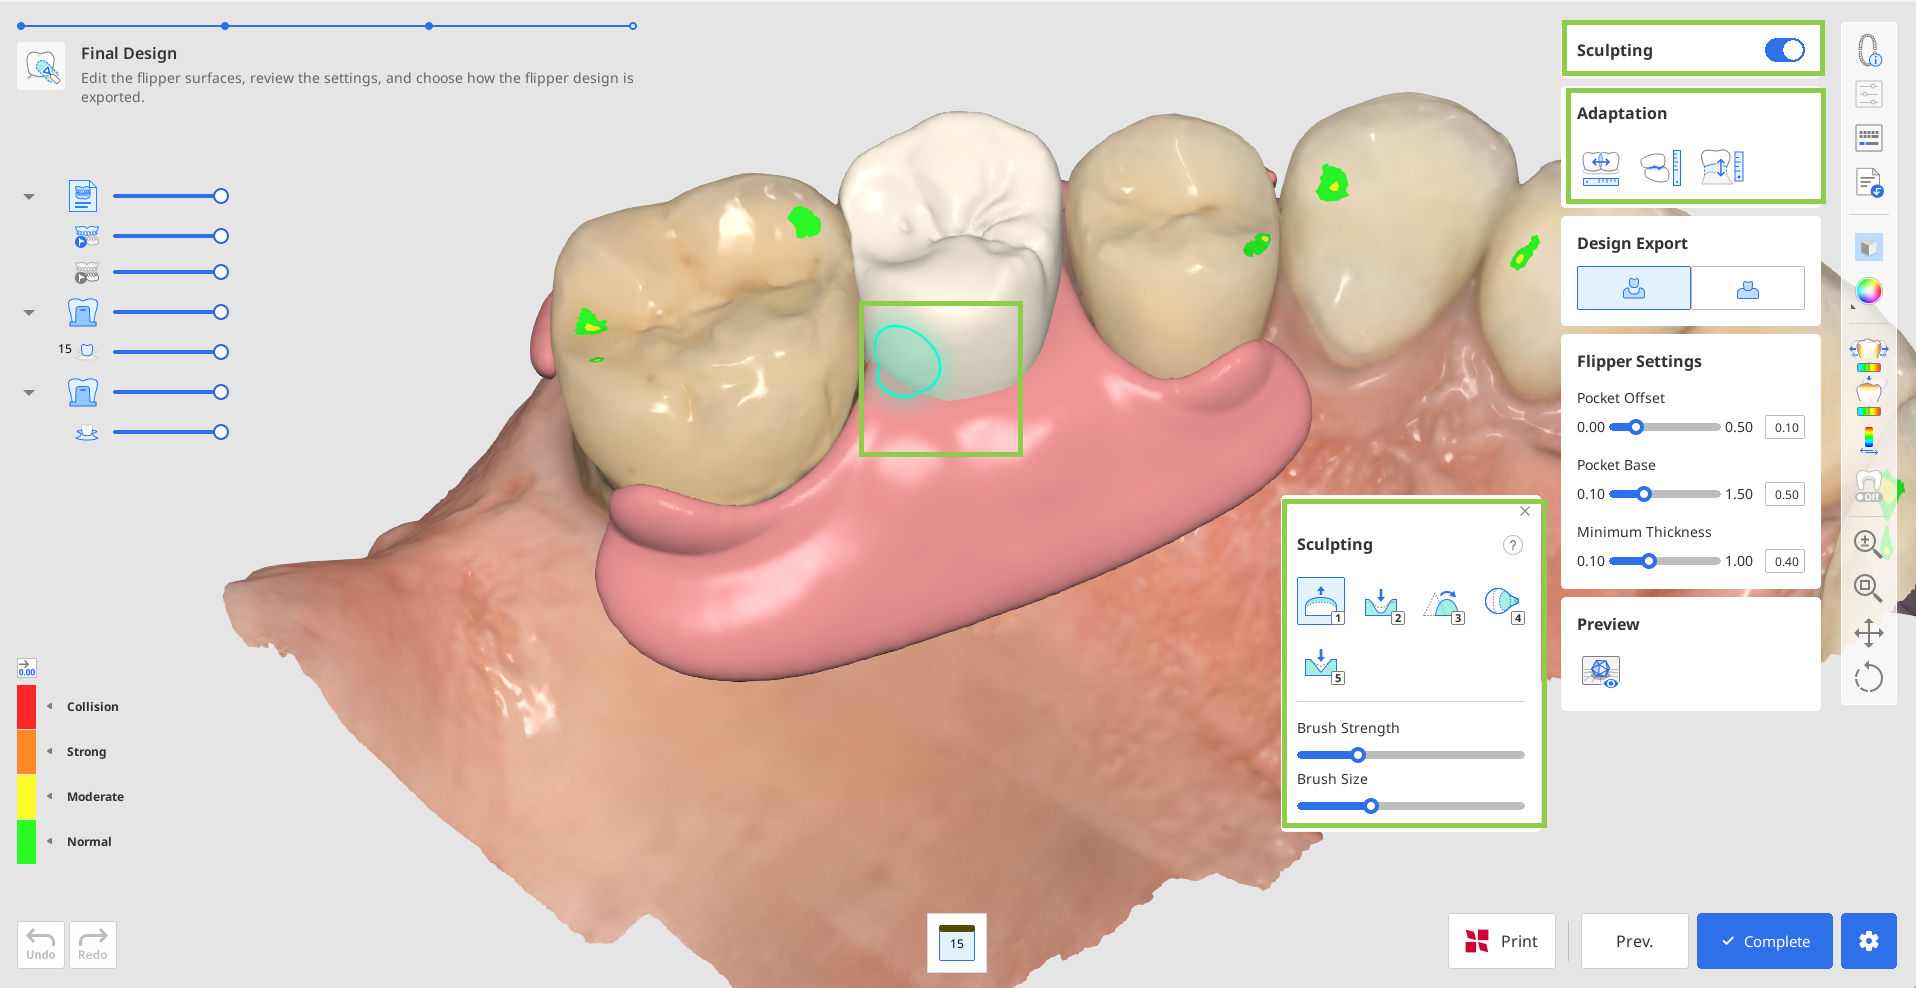
There are two options for exporting the final flipper design:
Merged: export the pontic and base as a single combined file (single mesh)
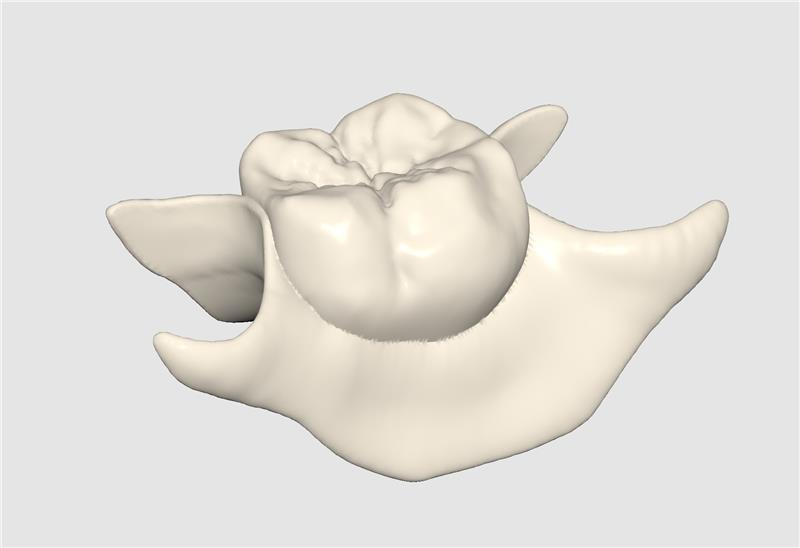
*The merged file after export is shown in a single color.
Separated: export them as two separate files (two meshes)
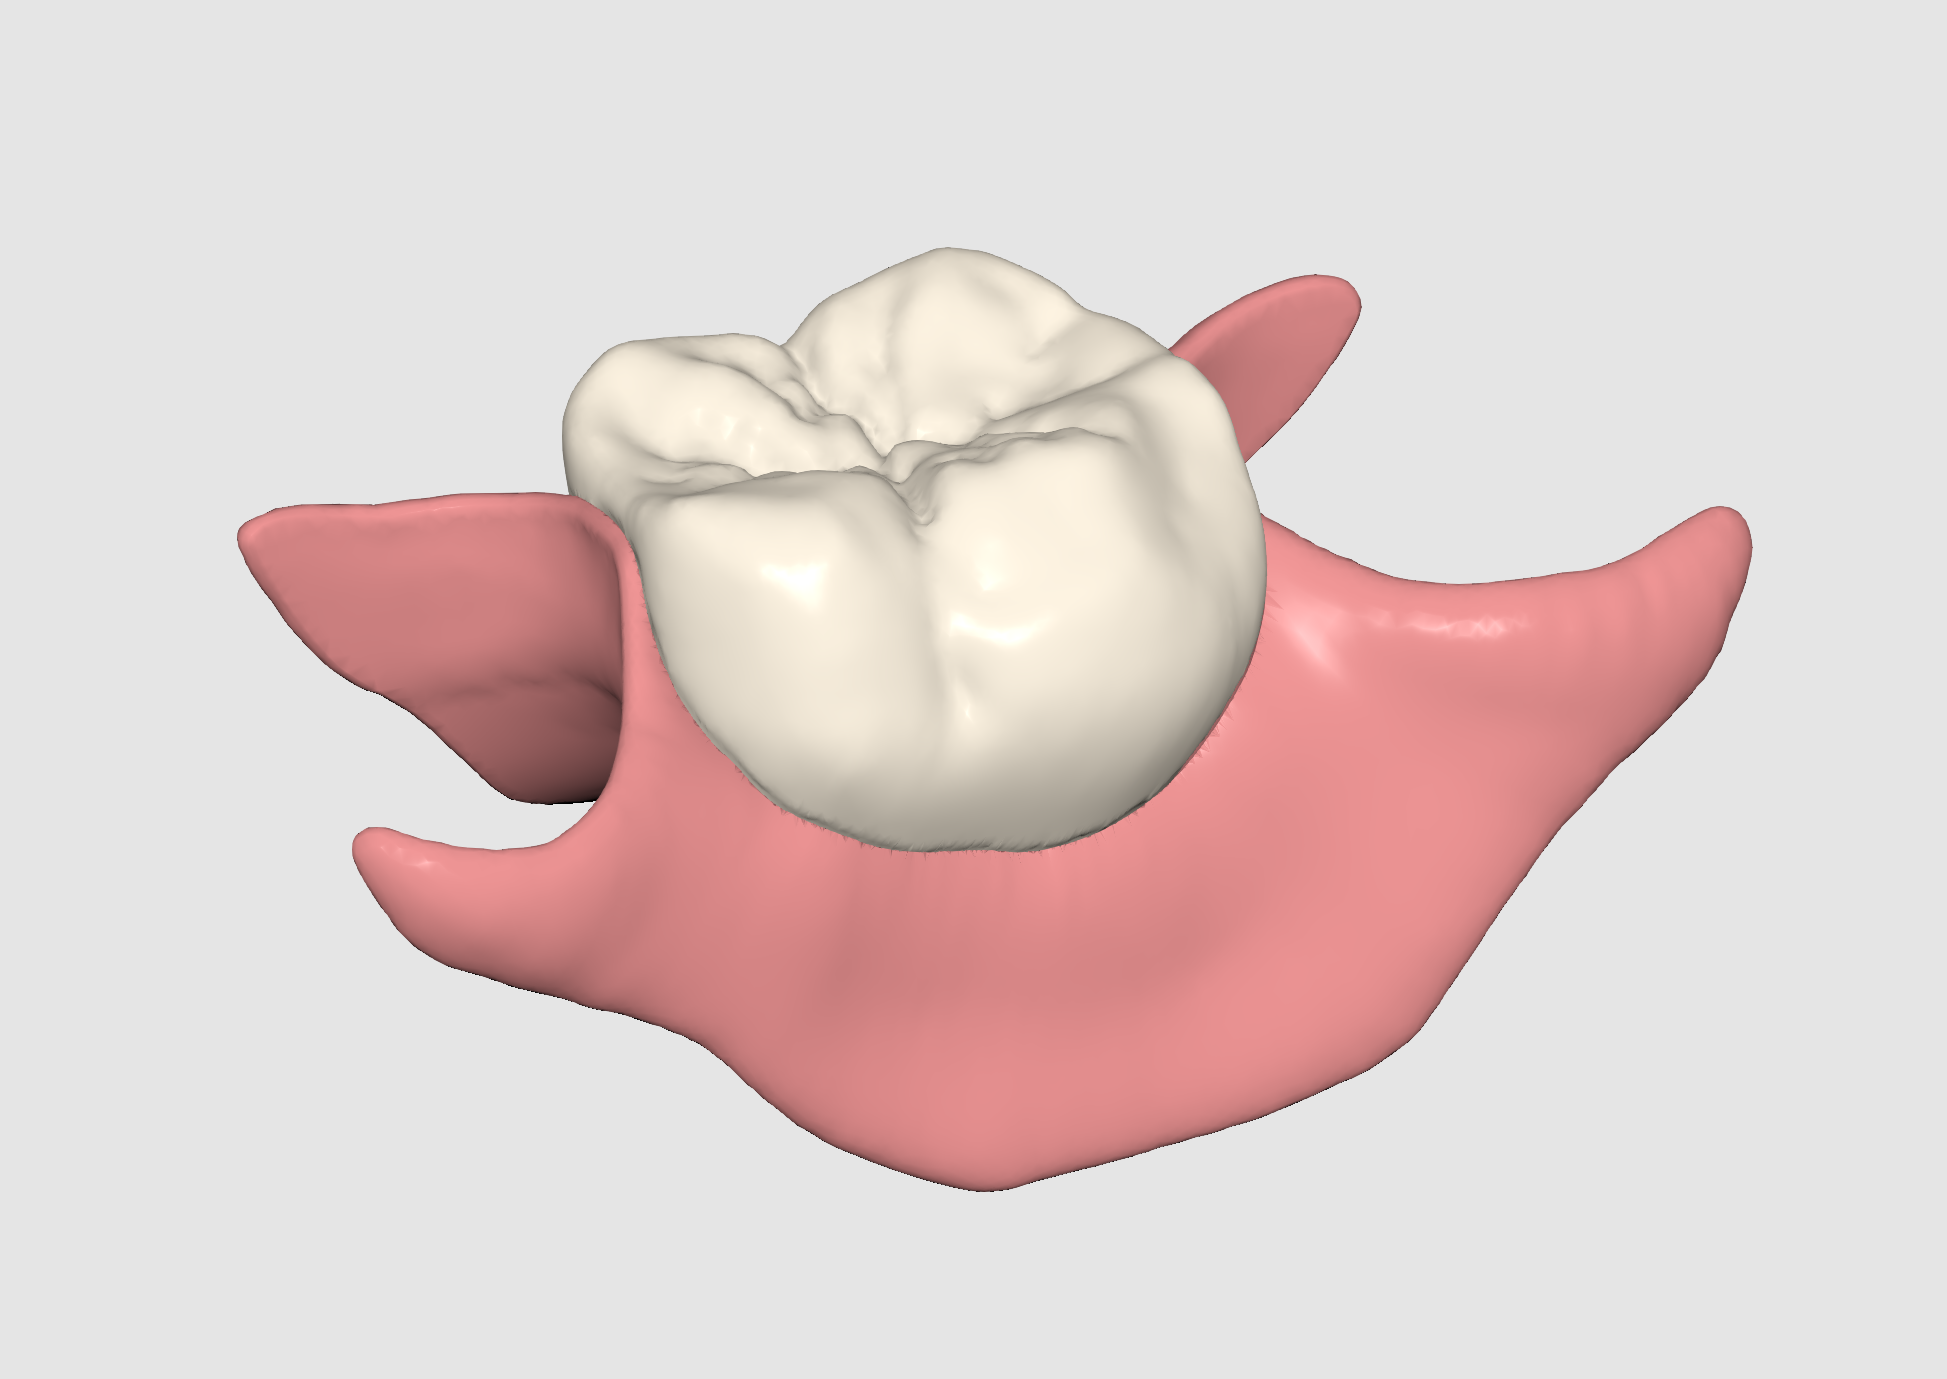
Depending on the selected option, you can adjust the flipper settings, including the offset, the base of the pontic pocket, and the minimum thickness. (Pocket settings are not available when exporting a merged design.)
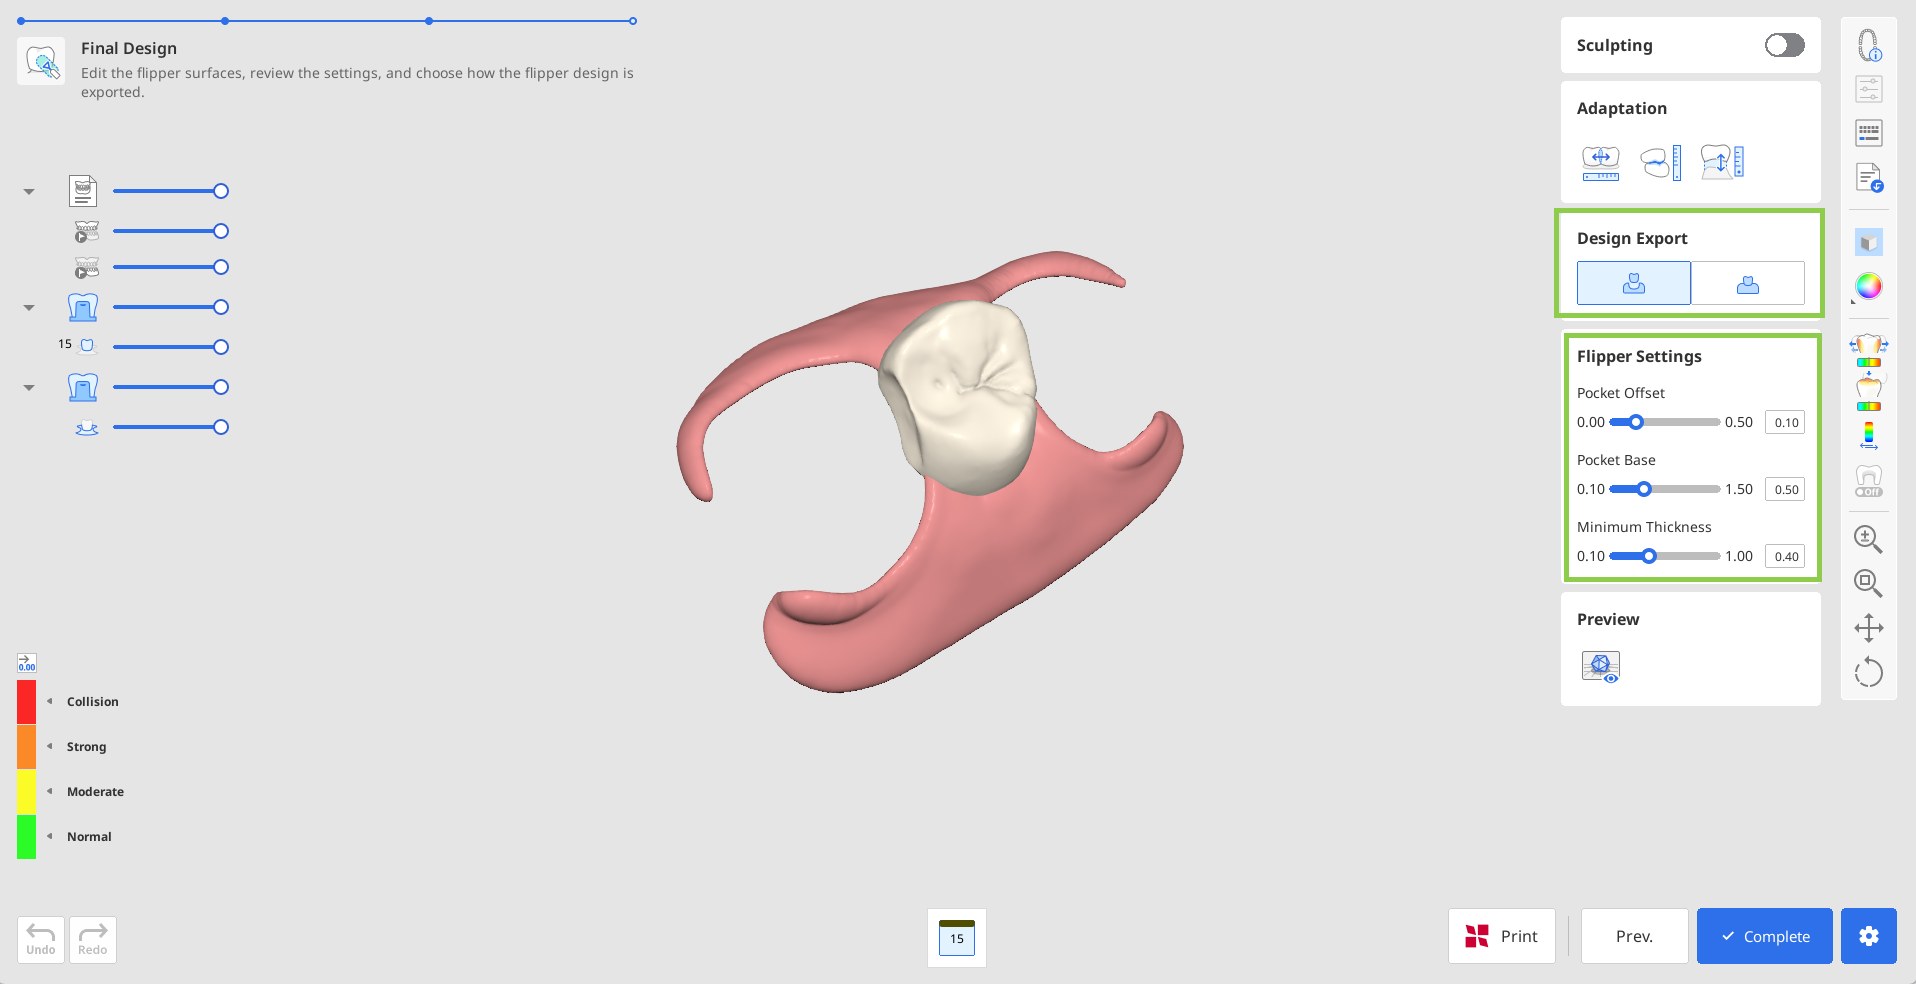
Use “Preview” to check and verify the completed design one more time before saving the project to Medit Link.