This module allows users to create their own custom teeth libraries, which can later be used for restorations. Custom libraries can be generated either from scanned data or from the existing dataset of individual tooth files.
Start by choosing the type of data you will use to create your custom library—scan data or individual files—and prepare that data accordingly.
Scan Data: Pre-operational scan data available in the corresponding Medit Link case.
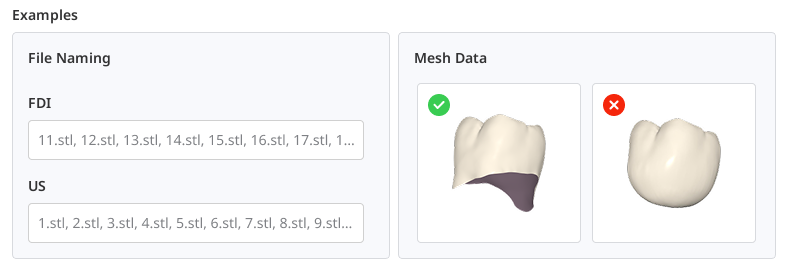
Individual Data: Dataset of individual tooth files that are available locally. File names must follow the FDI or US numbering system. Each tooth mesh must have an open base (underside open). Supported file formats are STL, OBJ, PLY, and MeditMesh.
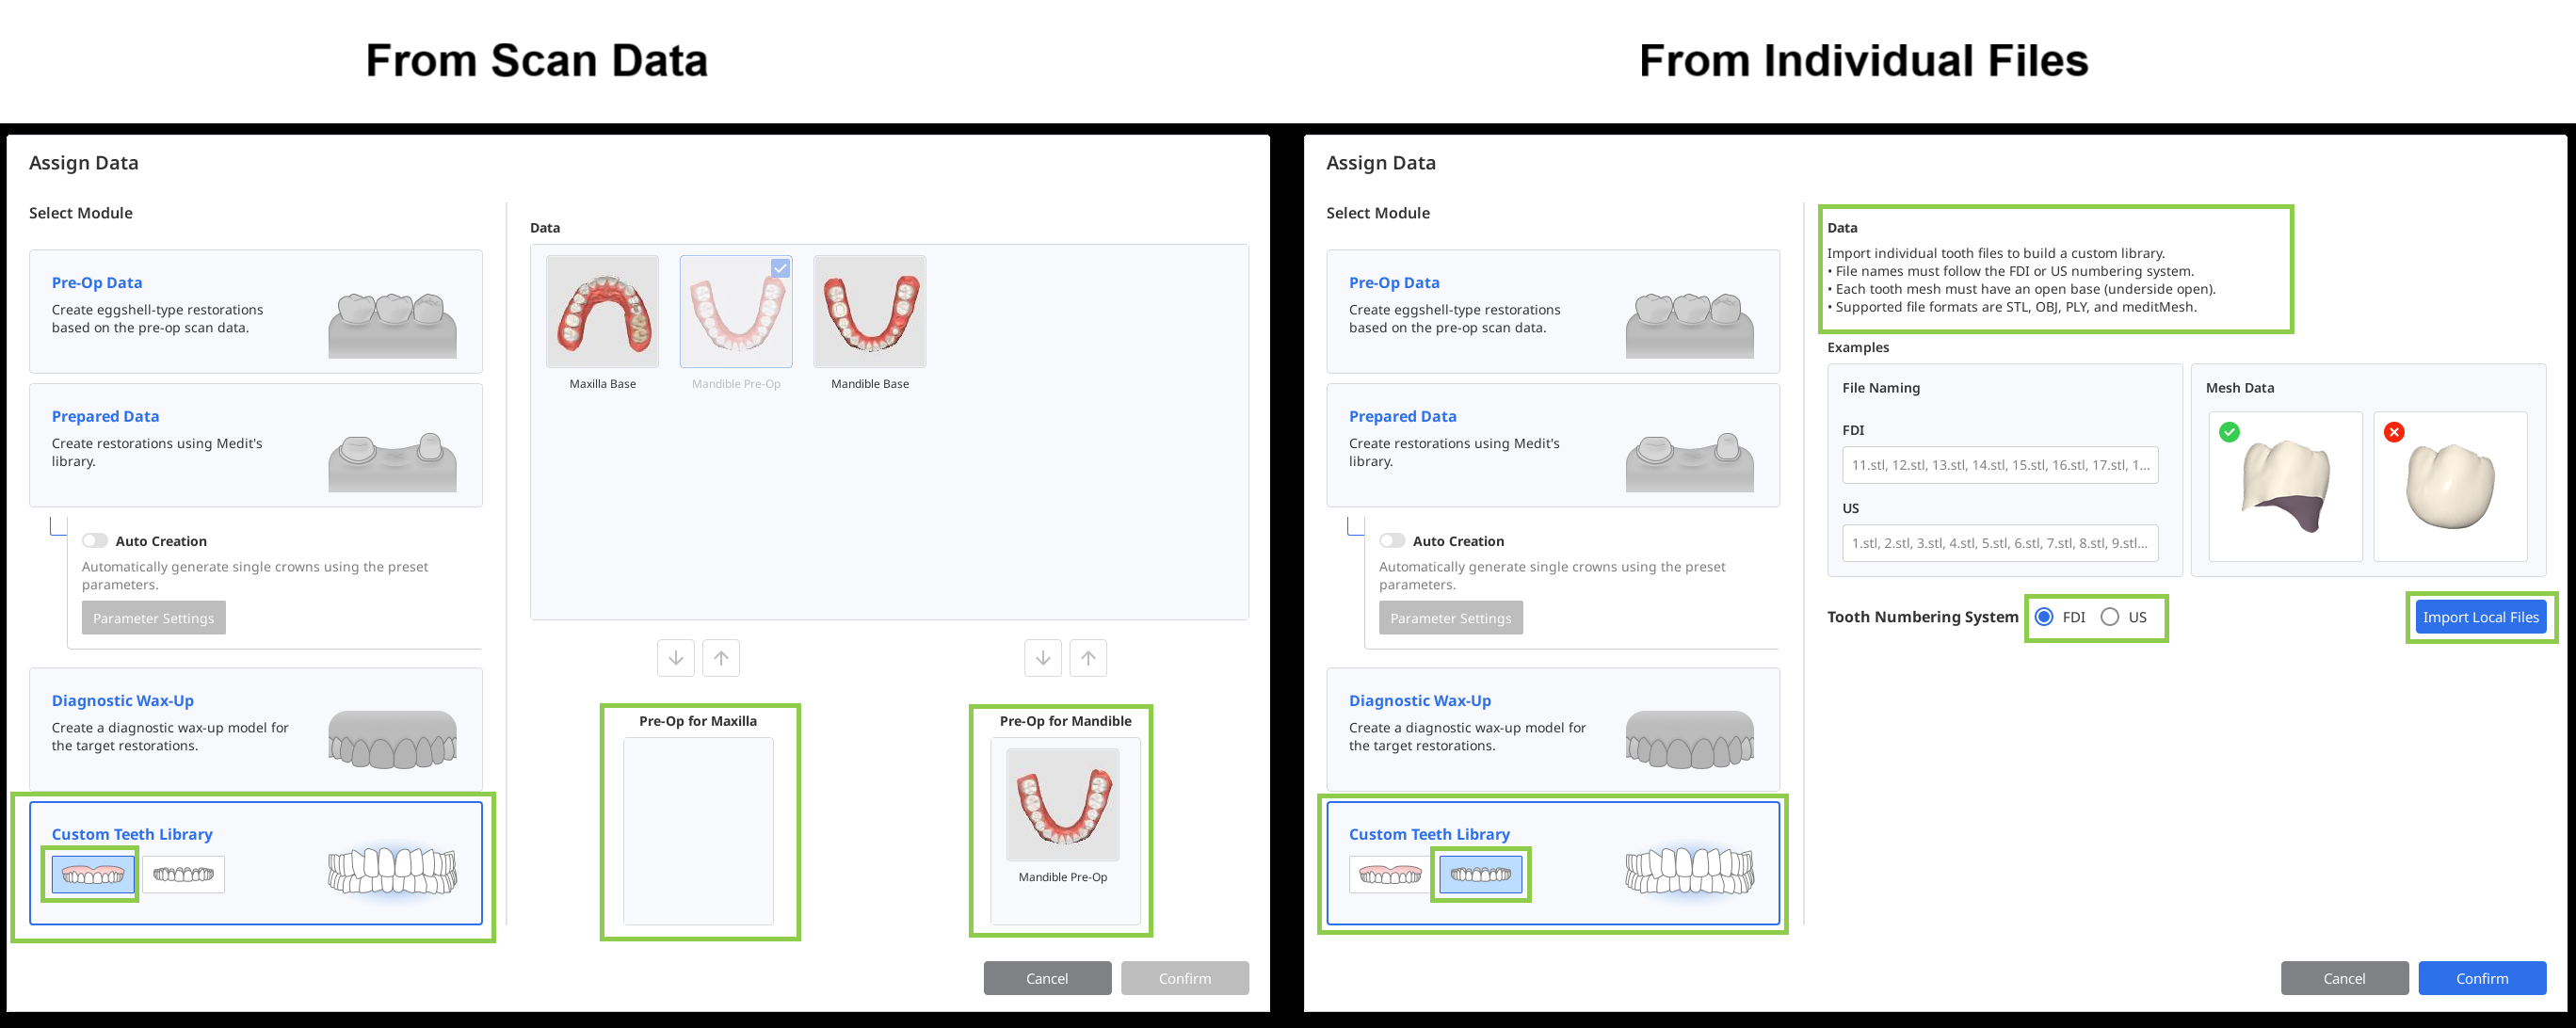
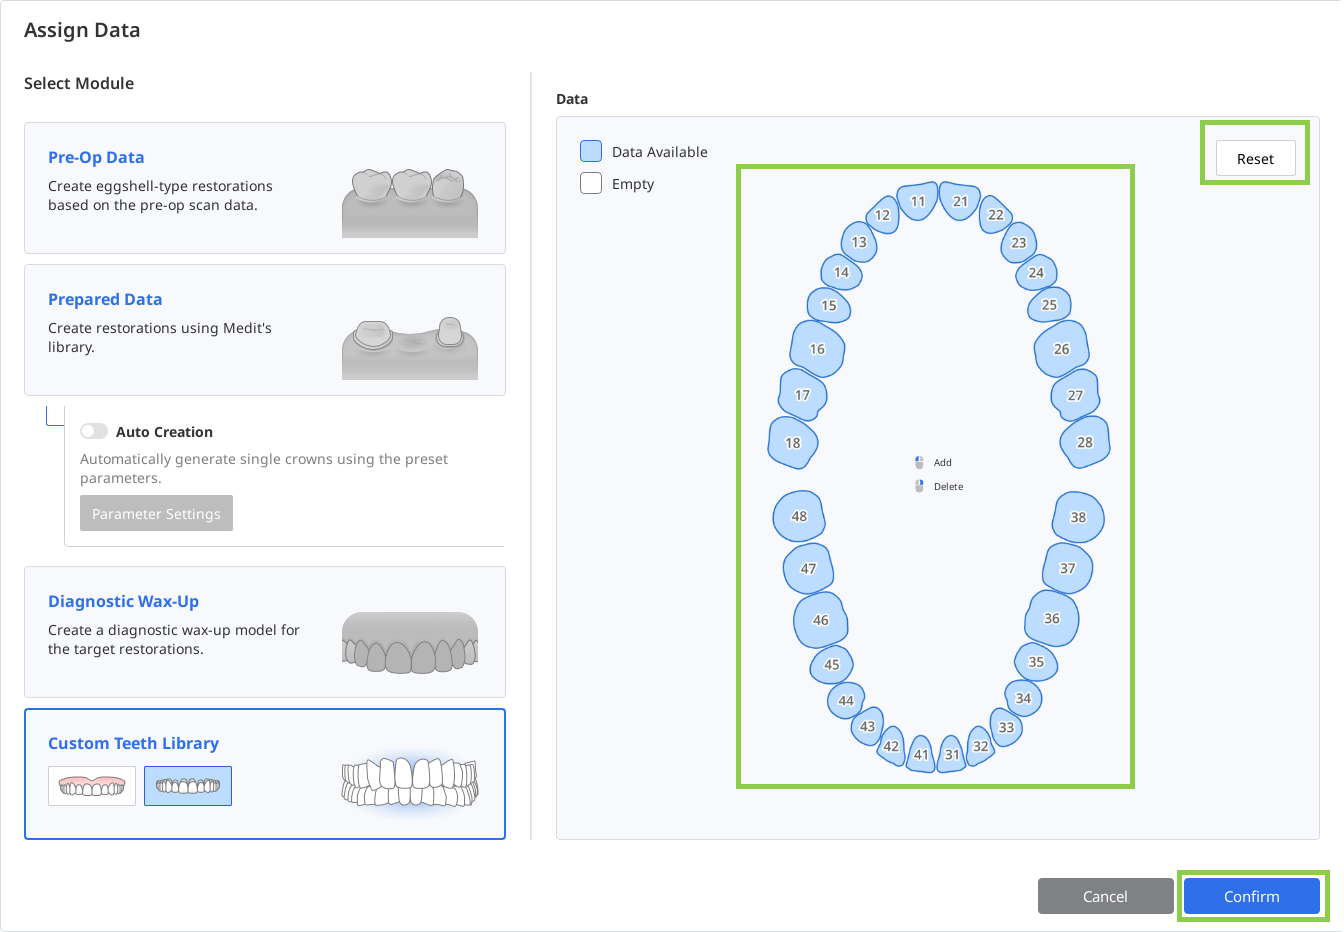
In the Assign Data dialog, select “Custom Teeth Library” and choose either “Scan Data” or “Individual Files.” If you are using data from a Medit Link case, assign the data as maxilla and mandible. If you are using individual files, select the what tooth numbering system was used and import all available files using “Import Local Files.”
Library From Scan Data
Once the scan data is imported, the application will automatically identify and segment each tooth. Review the results carefully to ensure that every tooth number has been assigned correctly and that the corresponding data is properly selected.
If any tooth requires correction, select its number in the form at the bottom, then reassign its data using the available selection tools.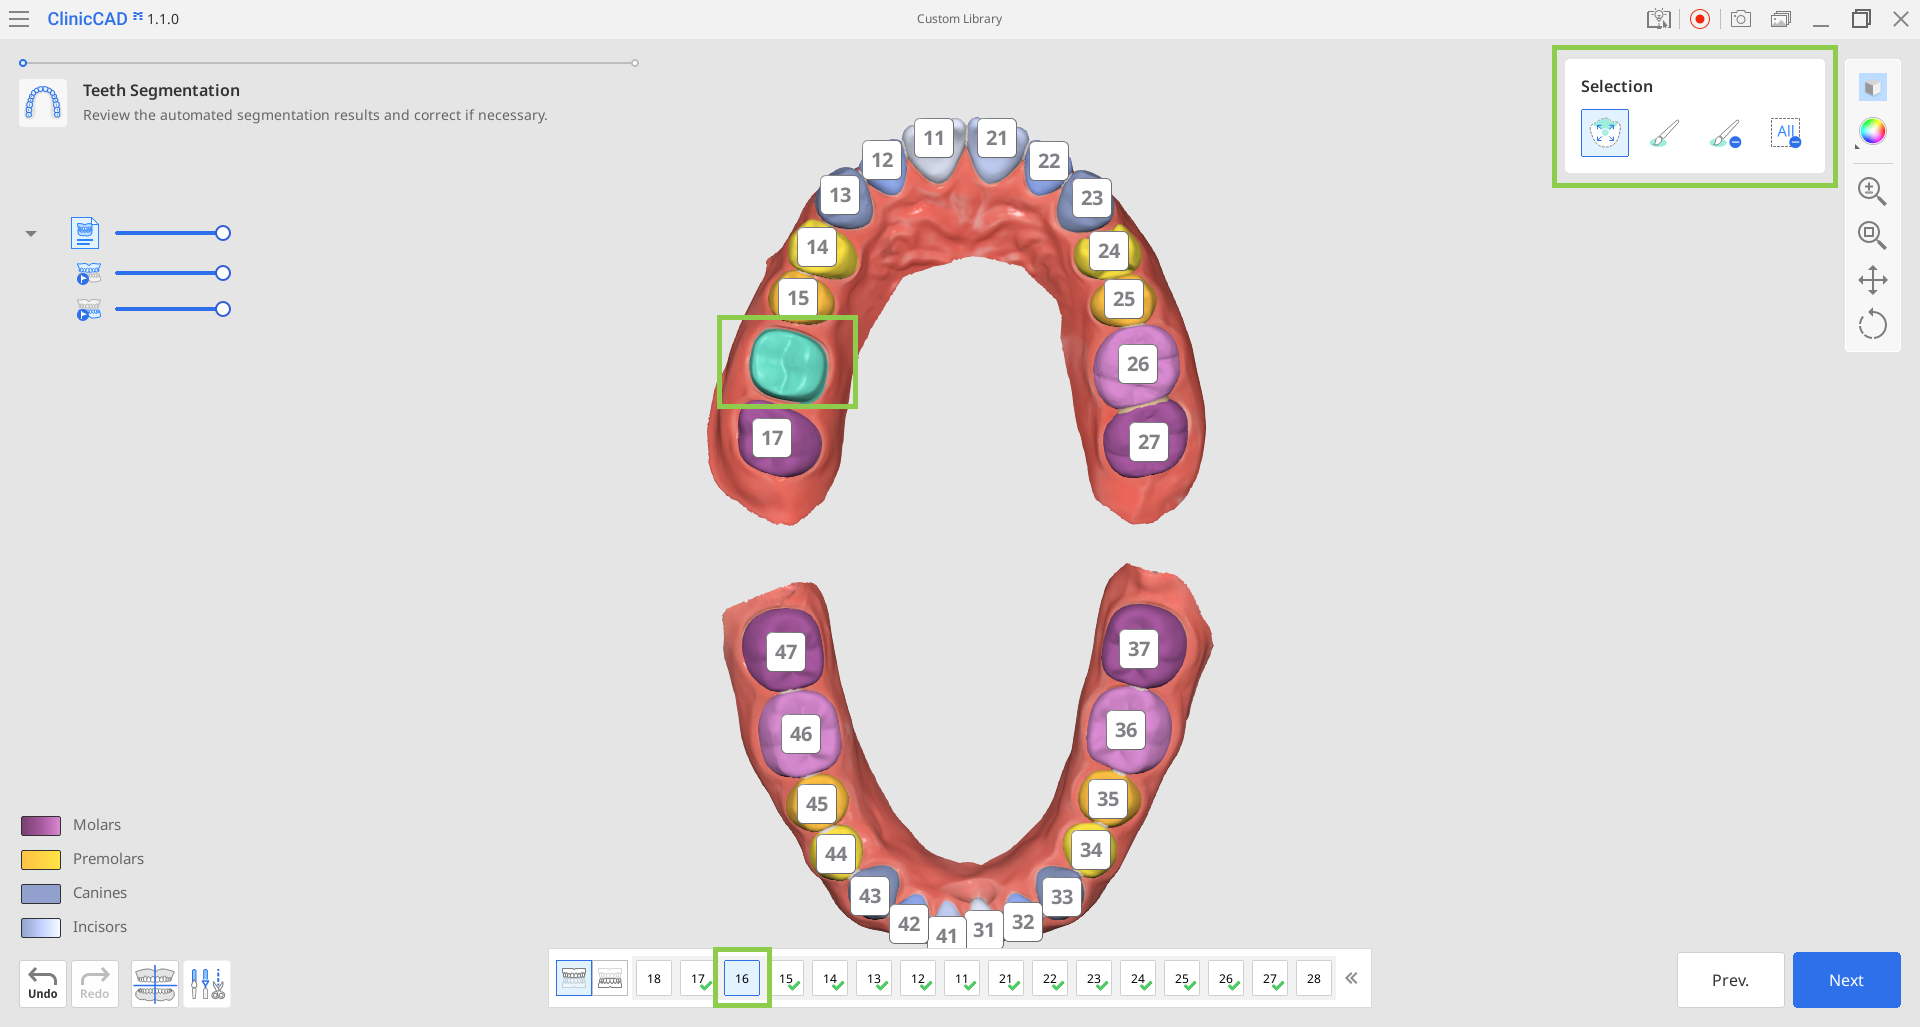
 Note
NoteIf needed, use the “Data Alignment” and “Data Editing” modes located in the bottom left corner to make the necessary adjustments to scan data. Read how to use “Data Alignment“ and “Data Editing“ in the Workflow chapter of this guide.
When all teeth are correctly selected, click “Next.“
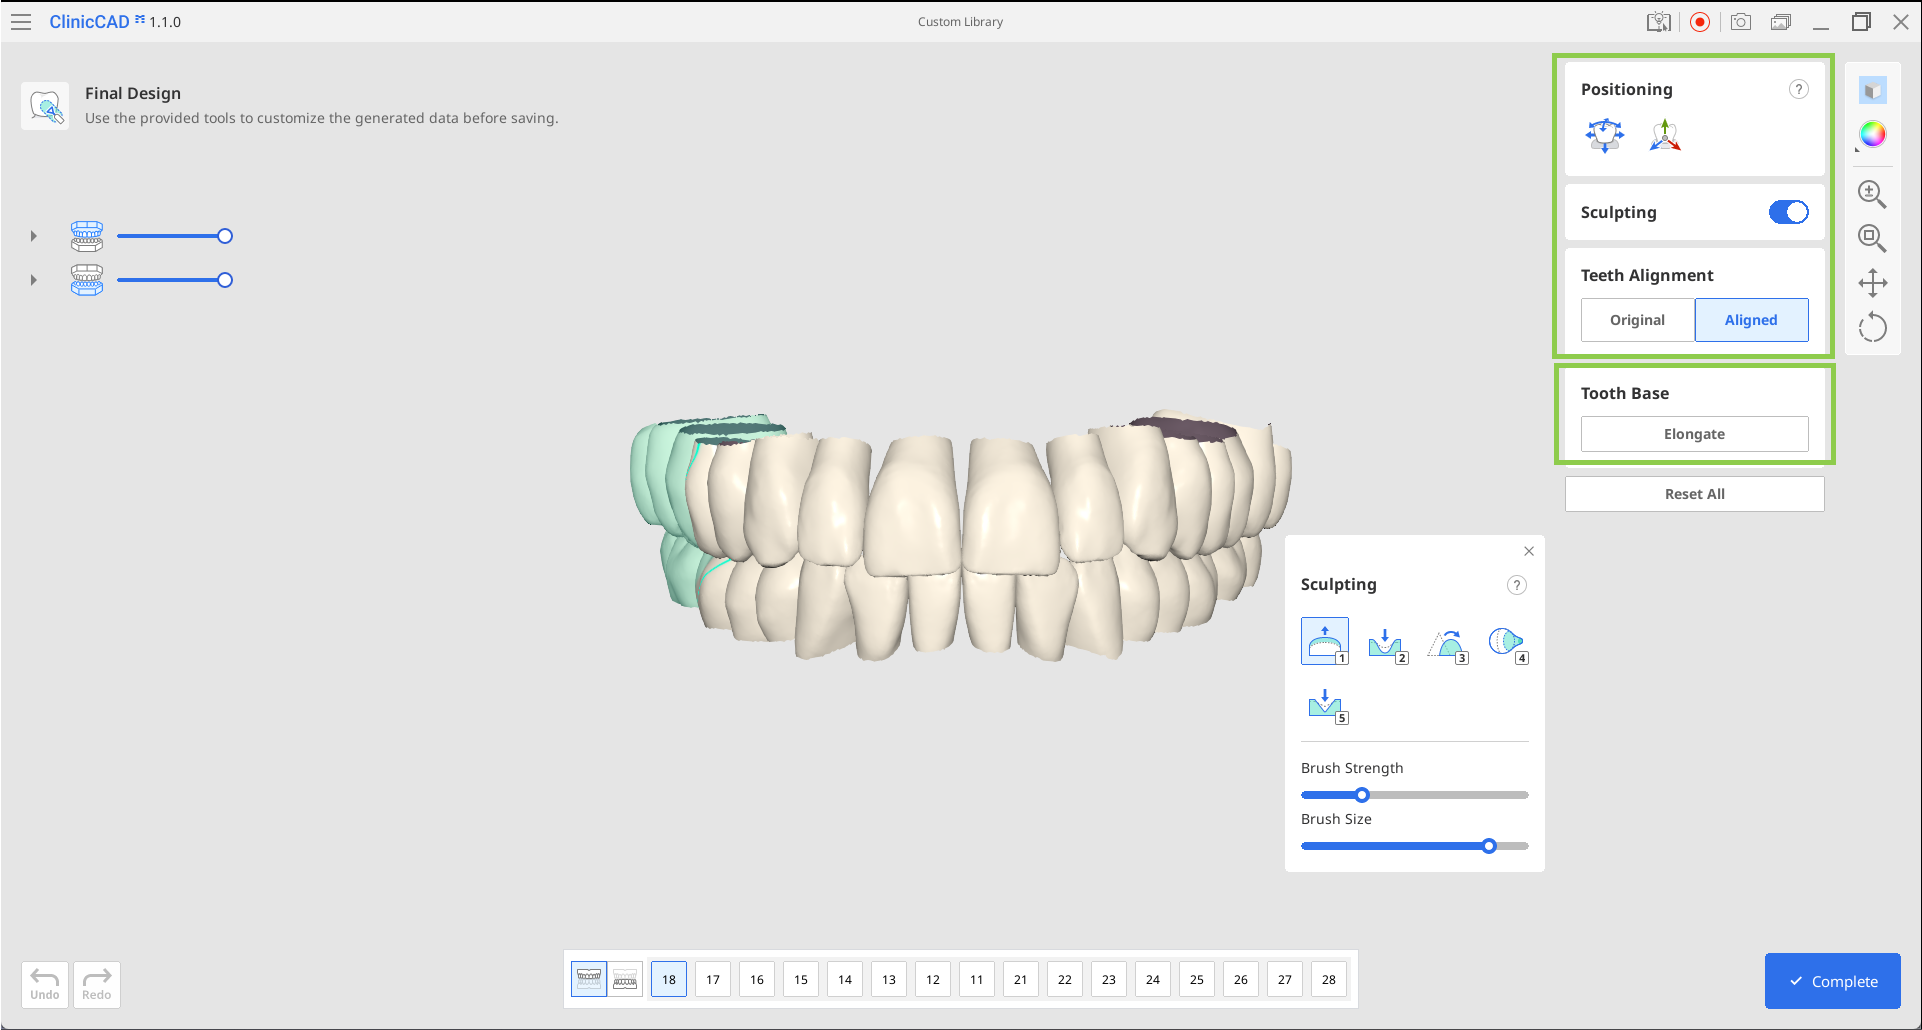
Your teeth library will be generated in the final step. Review the data to determine if any teeth need to be repositioned or sculpted. Make sure to select the target tooth in the form below before adjusting its position or sculpting it. You can also choose to align the teeth either according to the original scan or along the jaw curve.
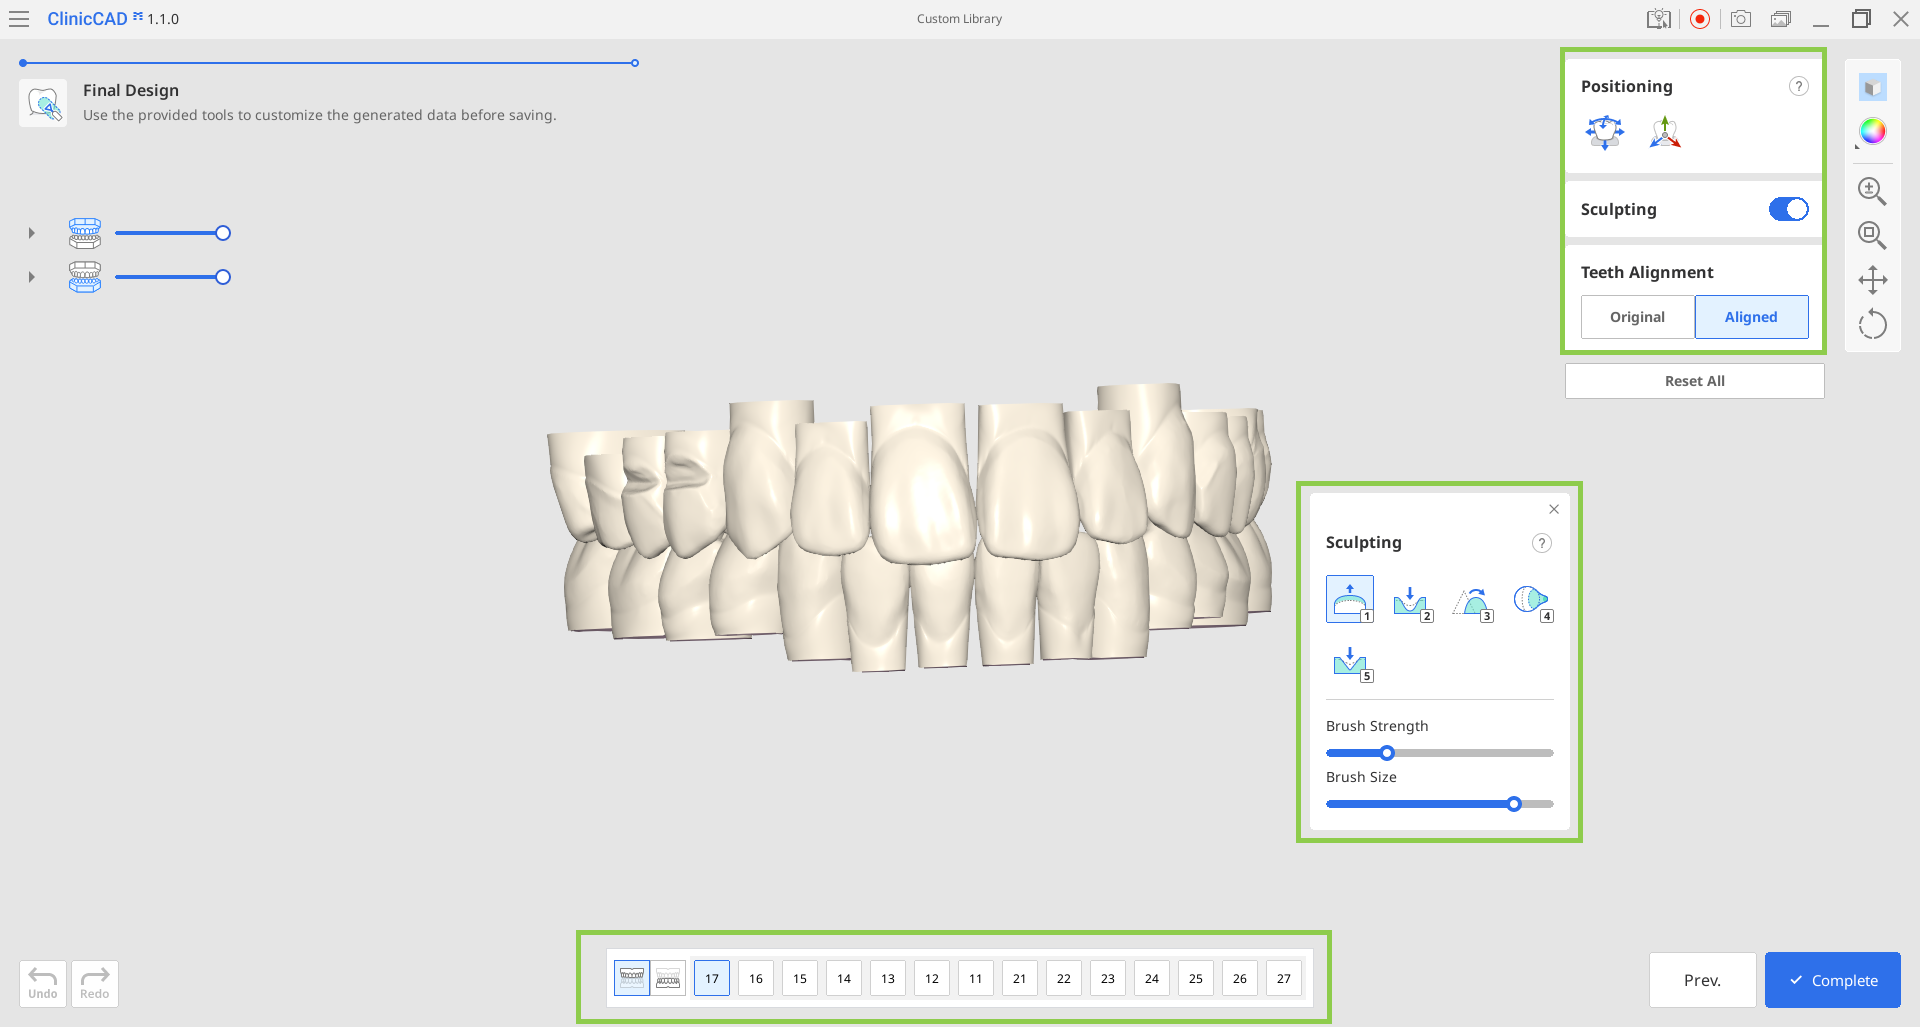
When all done, click “Complete“ to save the library to the Medit Link case.
Library From Individual Files
Once the files are imported, a chart will display the available tooth data. Confirm that all desired teeth have been imported. If you need to reupload the data, click “Reset” at the top.
You will then enter the final step, where you can reposition and sculpt the imported data, adjust its alignment, and modify the tooth base by extending its length.
 Note
NoteUse the “Elongate” feature to extend the base of all tooth data. Each click adds approximately 3–4 mm. A longer base may be necessary if the library will be used in cases with significant gum recession.
When all done, click “Complete“ to save the library to the Medit Link case.