Add Patient
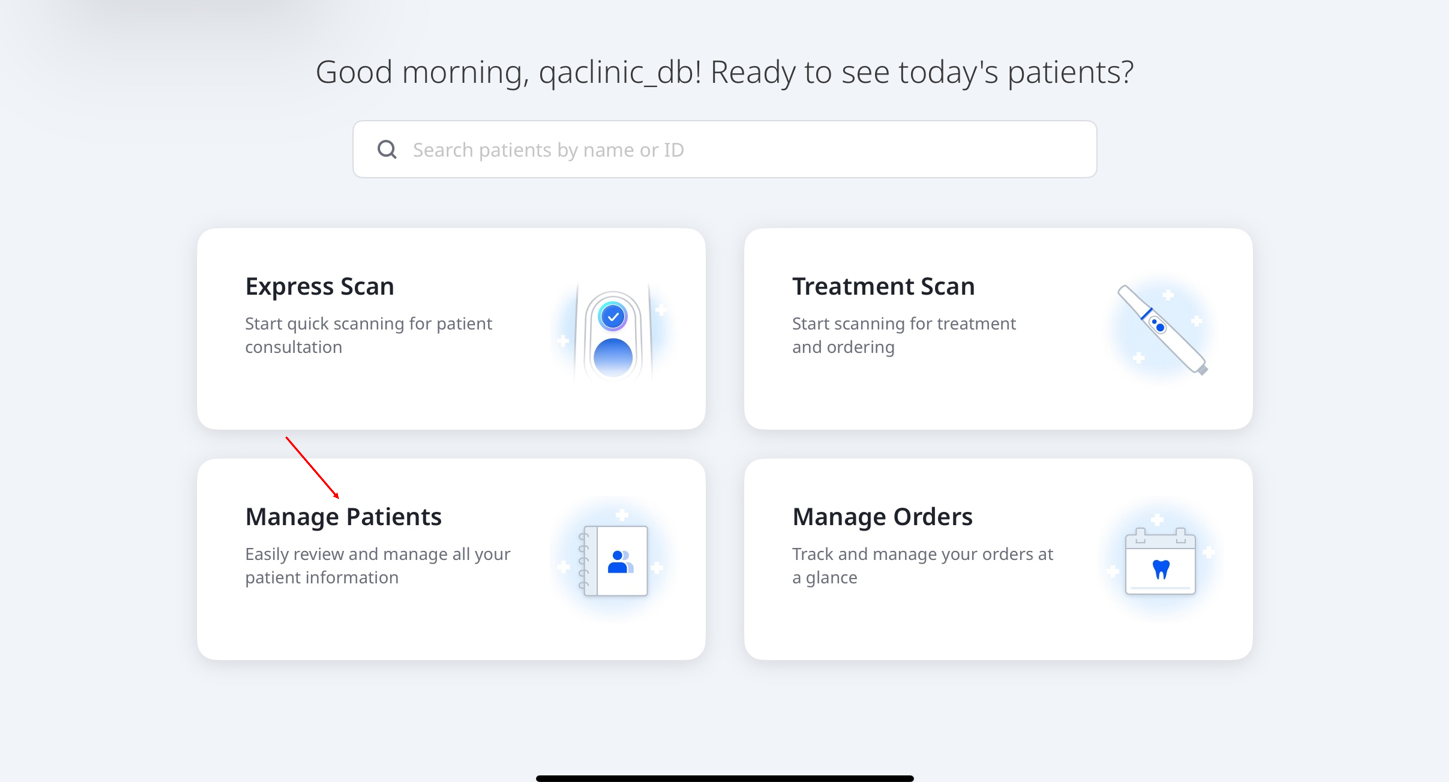
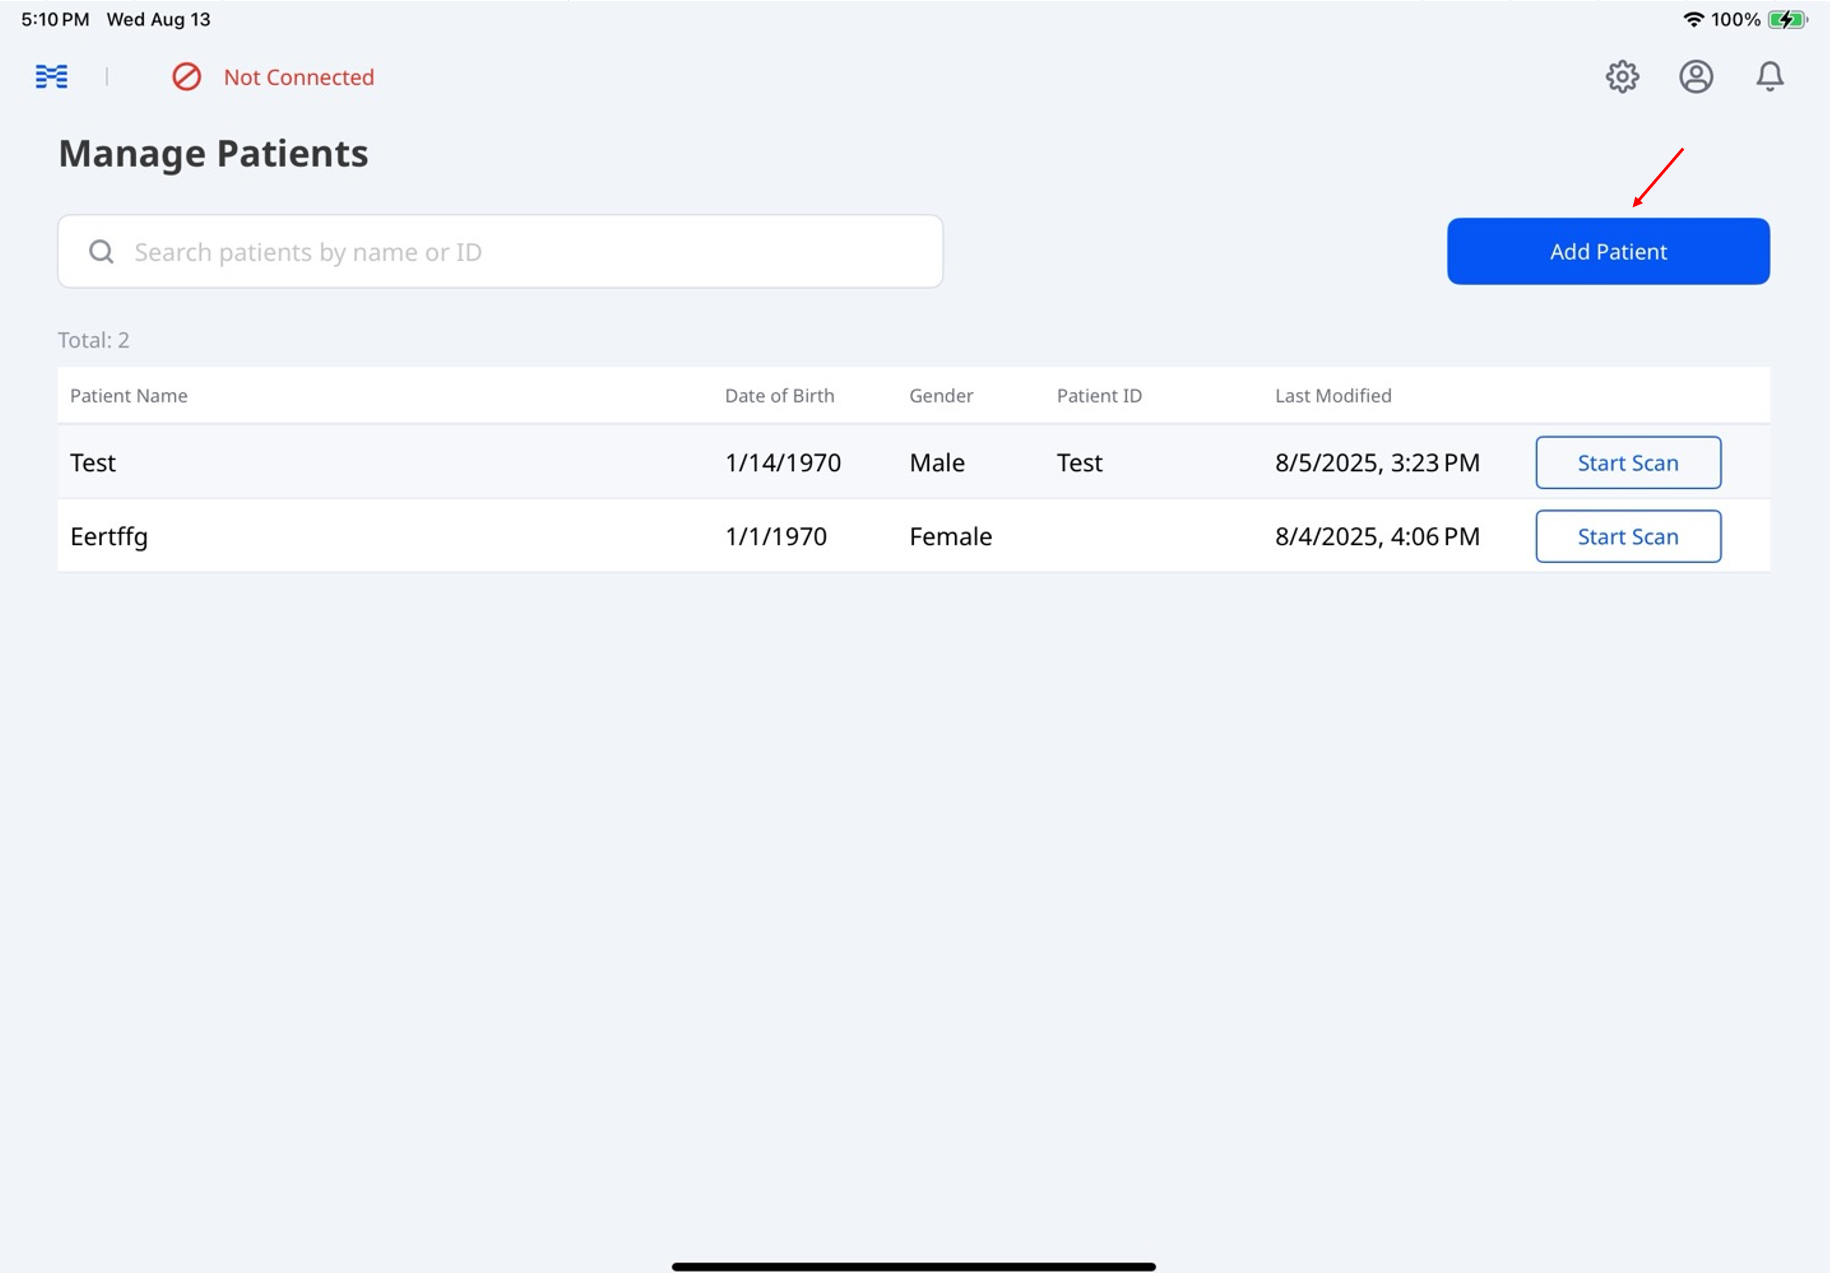
From the main screen, tap Manage Patients, then tap Add Patient on the next screen.
Enter the required details — patient name, date of birth, and gender. Optionally, enter their ID.
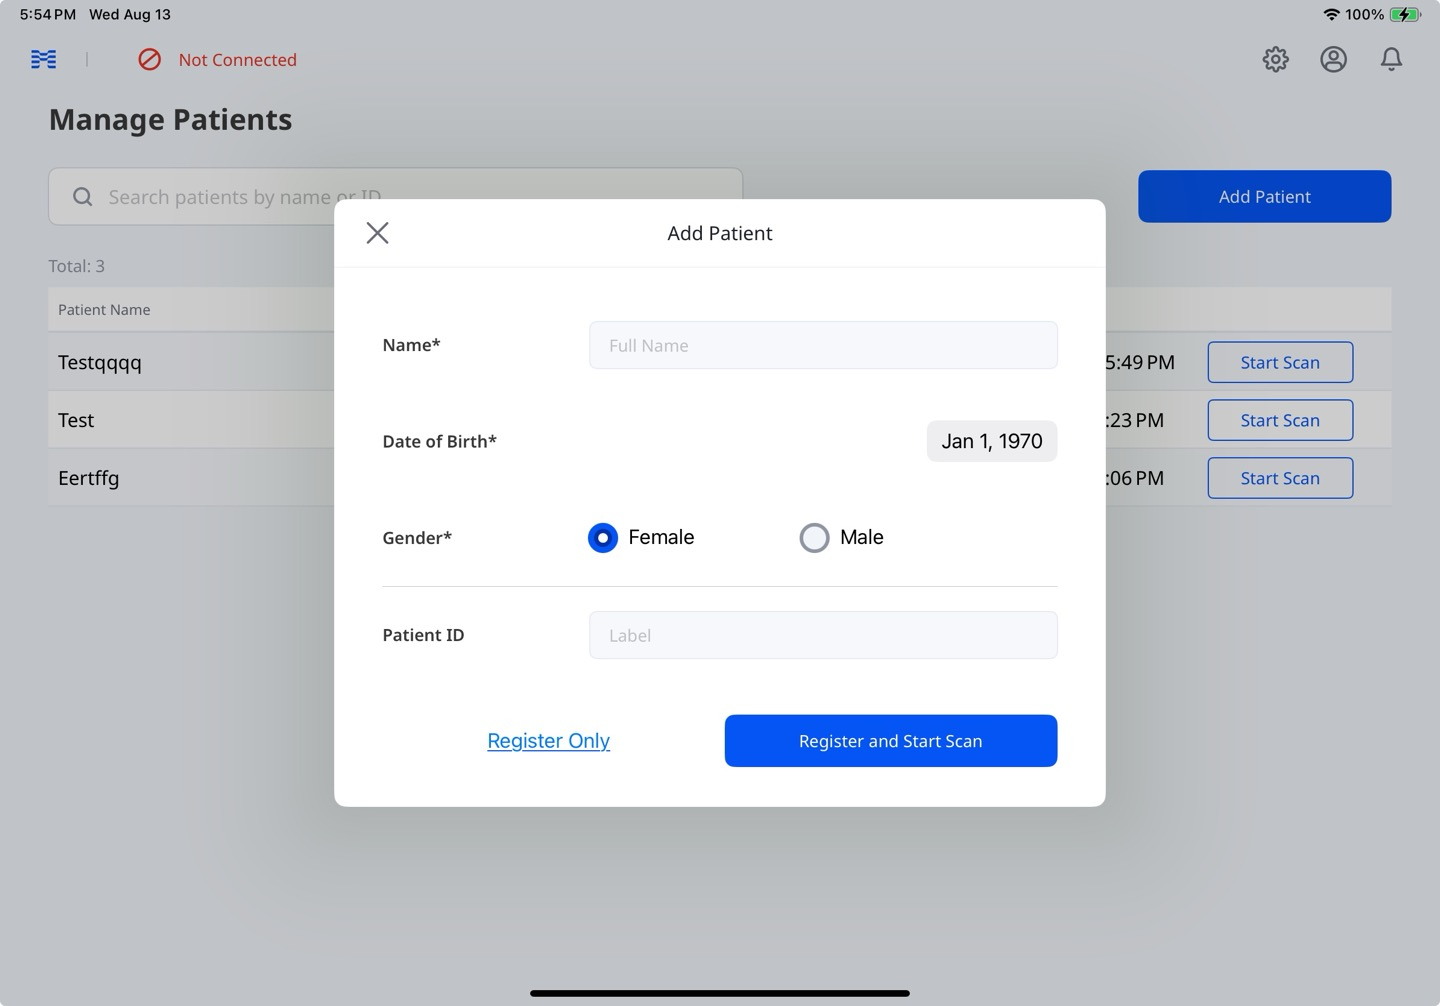
Tap Register Only to save the patient information without starting a scan, or Register and Start Scan to save and begin scanning.
Edit/Delete Cases
From the main screen, tap Manage Patients.
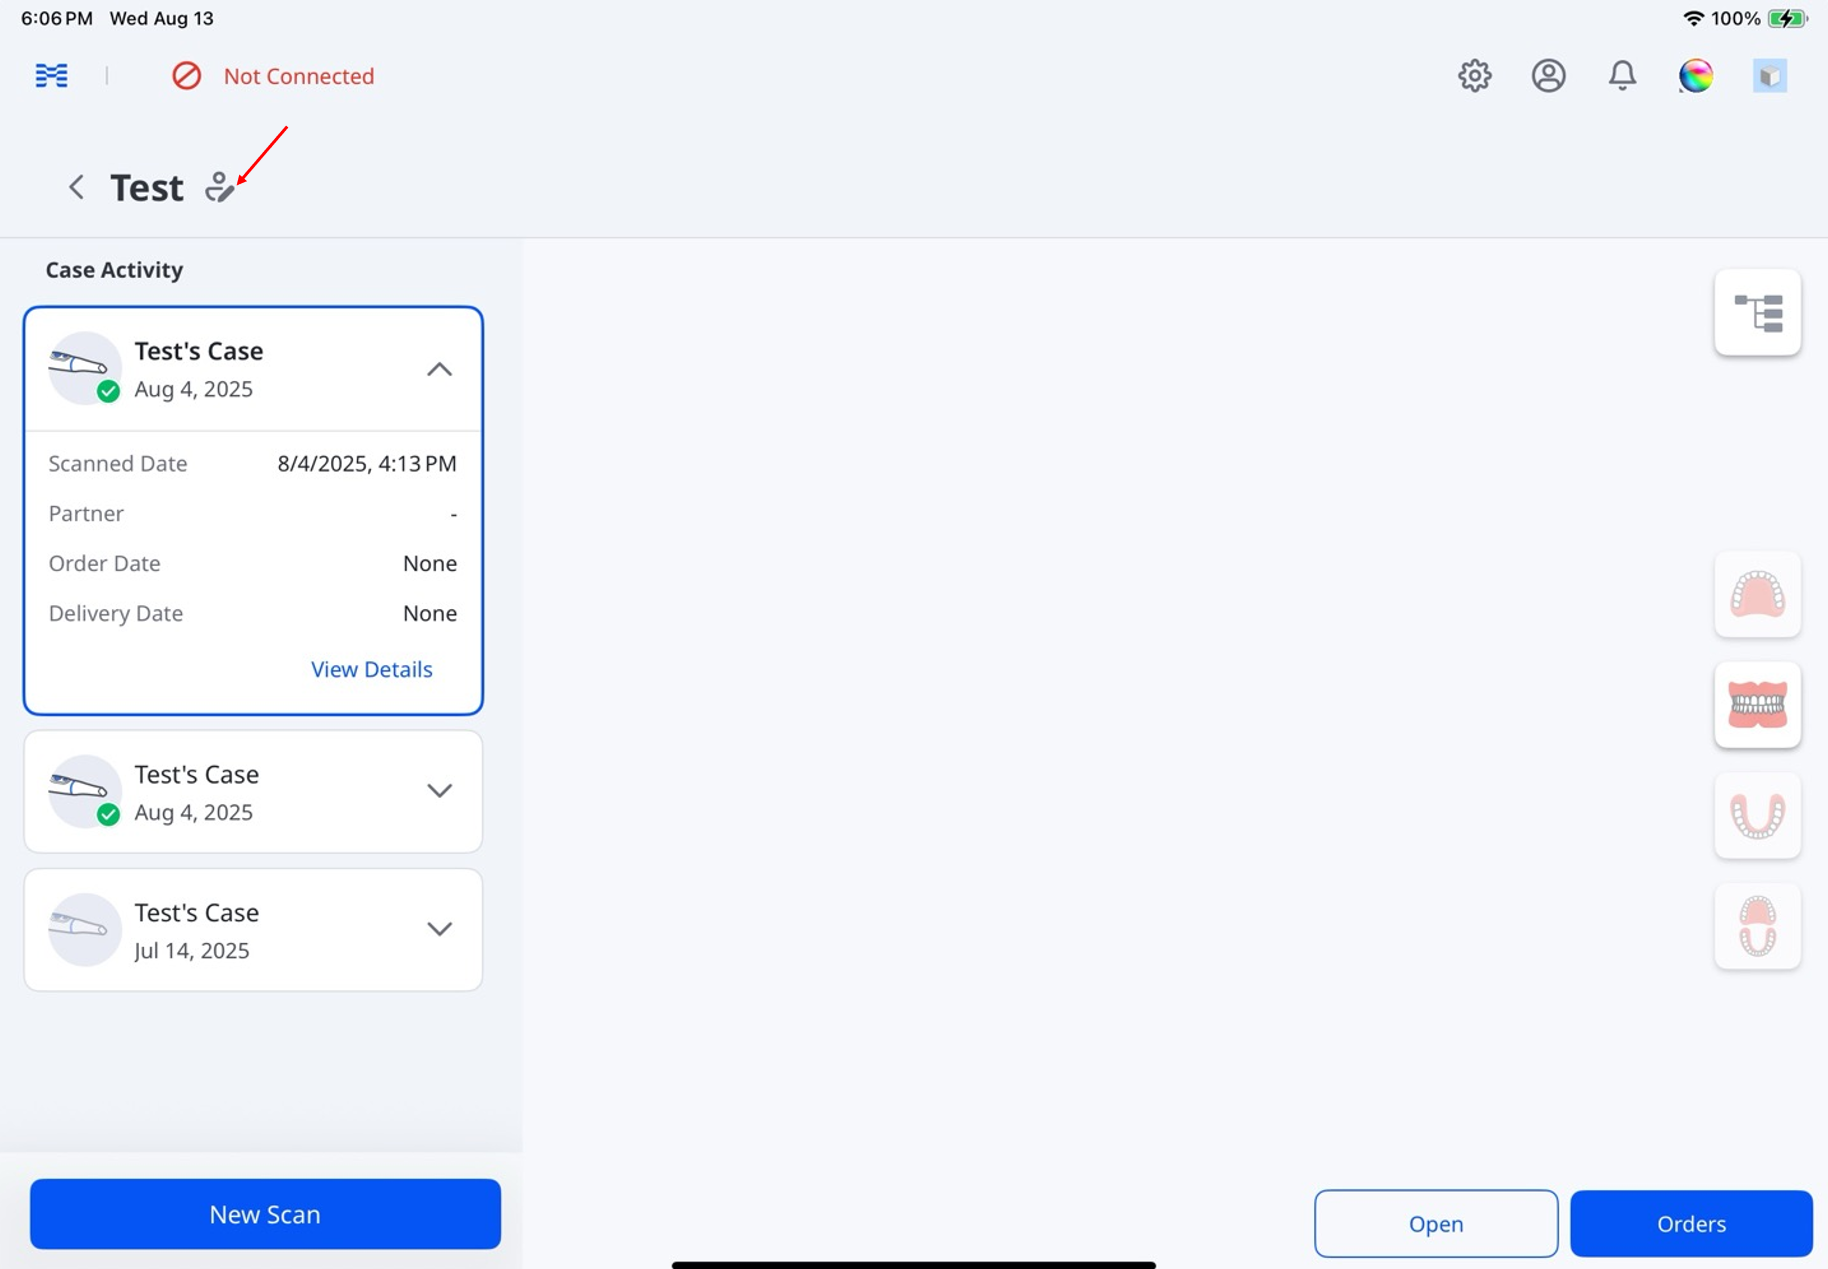
Choose the patient whose case you want to delete or modify.

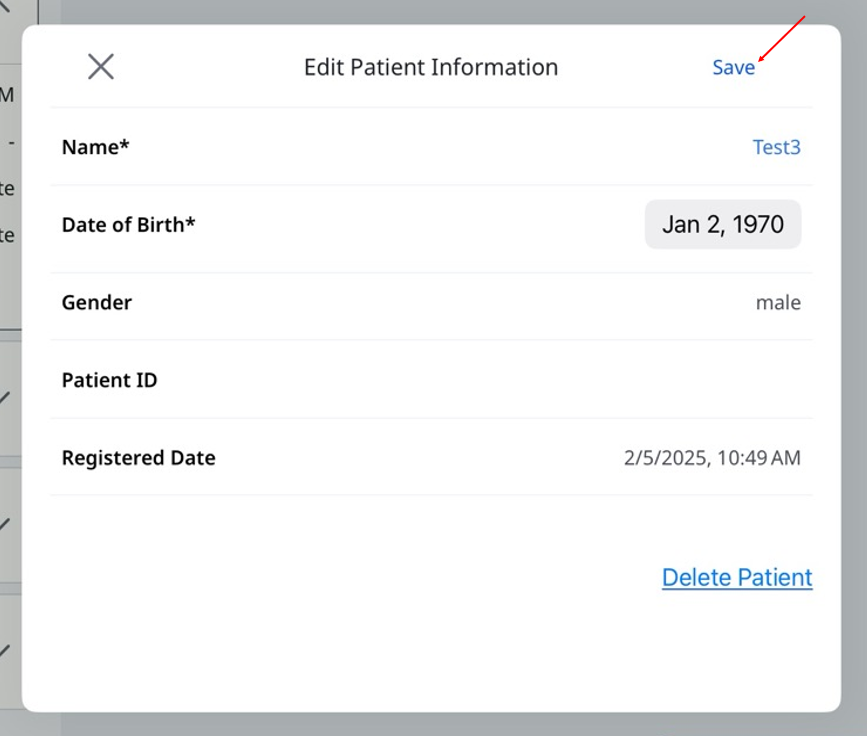
From Case Activity, tap the pencil icon next to the patient’s name.
Update the patient’s information and tap Save.
🔎Note
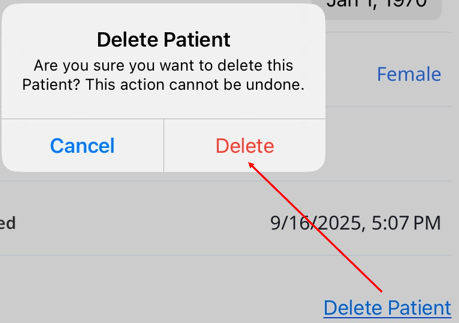
Tap Delete Patient, then select Delete from the pop-up to permanently remove the patient’s information.
Long press a case to access options such as Copy, Raw File Upload, and Delete.

🔎Note
Tap Delete, then tap Delete again from the pop-up to permanently remove the case.

Case Status
Status | Description | Indicator | Remarks |
|---|---|---|---|
Draft | The case has been created but not submitted |
| The case is stored locally as a temporary file until uploaded to the cloud. This status appears if the app is closed unexpectedly or crashes. |
Need Processing | The case has been scanned but requires post-processing |
| The case is saved in the cloud but the scan or post-processing was not completed. |
Processing | Post-processing is in progress |
| – |
Processing Failed | The case has been scanned, but post-processing failed |
| – |
Scan Completed | The case has been scanned and processed successfully |
| This status also includes cases rejected by labs. |
Ordered | The case has been ordered successfully |
| For details on the order status, go to Manage Orders > Tracking Orders. |


