This quick guide provides an overview of the essential steps for using Medit Link Express, from scanning to placing orders. Follow the steps below to get started.
Express Scan: Scan First, Add Later
Express Scan removes the burden of creating or selecting a case before scanning. You can start scanning immediately and add a case later if necessary.
This simplifies the consultation process and allows initial assessments to be carried out more efficiently.
To start scanning first without selecting or creating a case:
Ensure your scanner is properly connected and calibrated. See the Scanner Setup section for instructions on how to connect and calibrate your scanner.
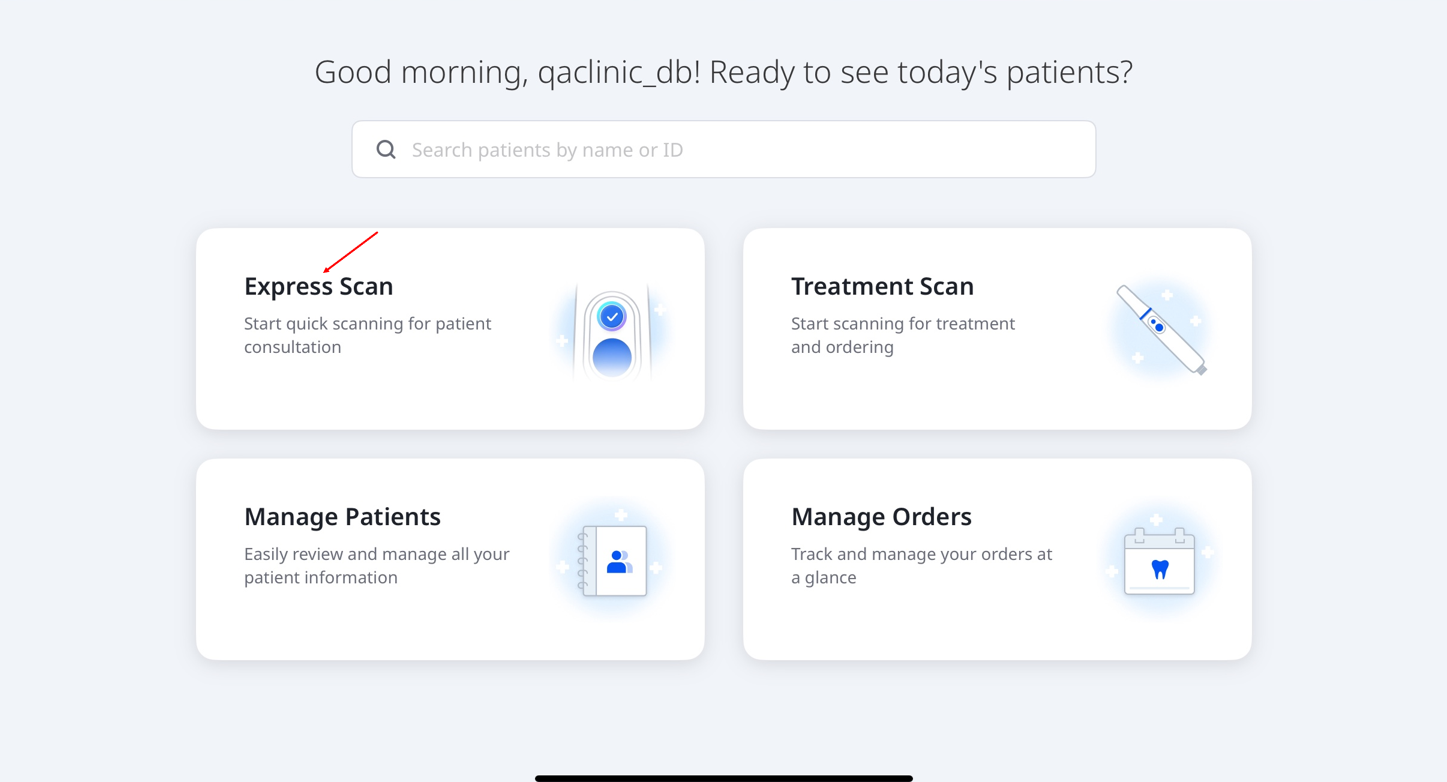
Tap Express Scan on the main screen.
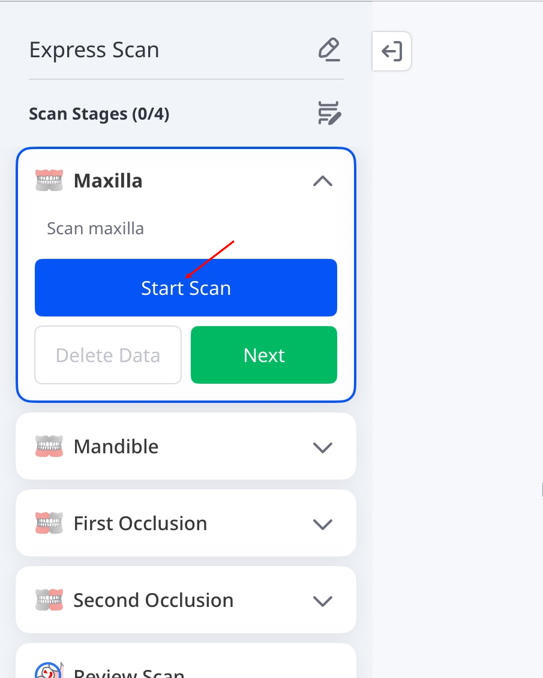
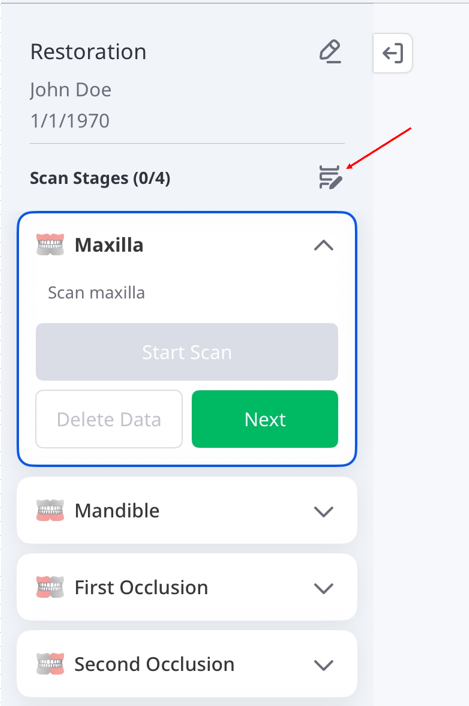
Express Scan offers four predefined stages: Maxilla, Mandible, First Occlusion, and Second Occlusion.
Tap Start Scan to begin scanning. Alternatively, press the scan button on the handpiece, as indicated below.

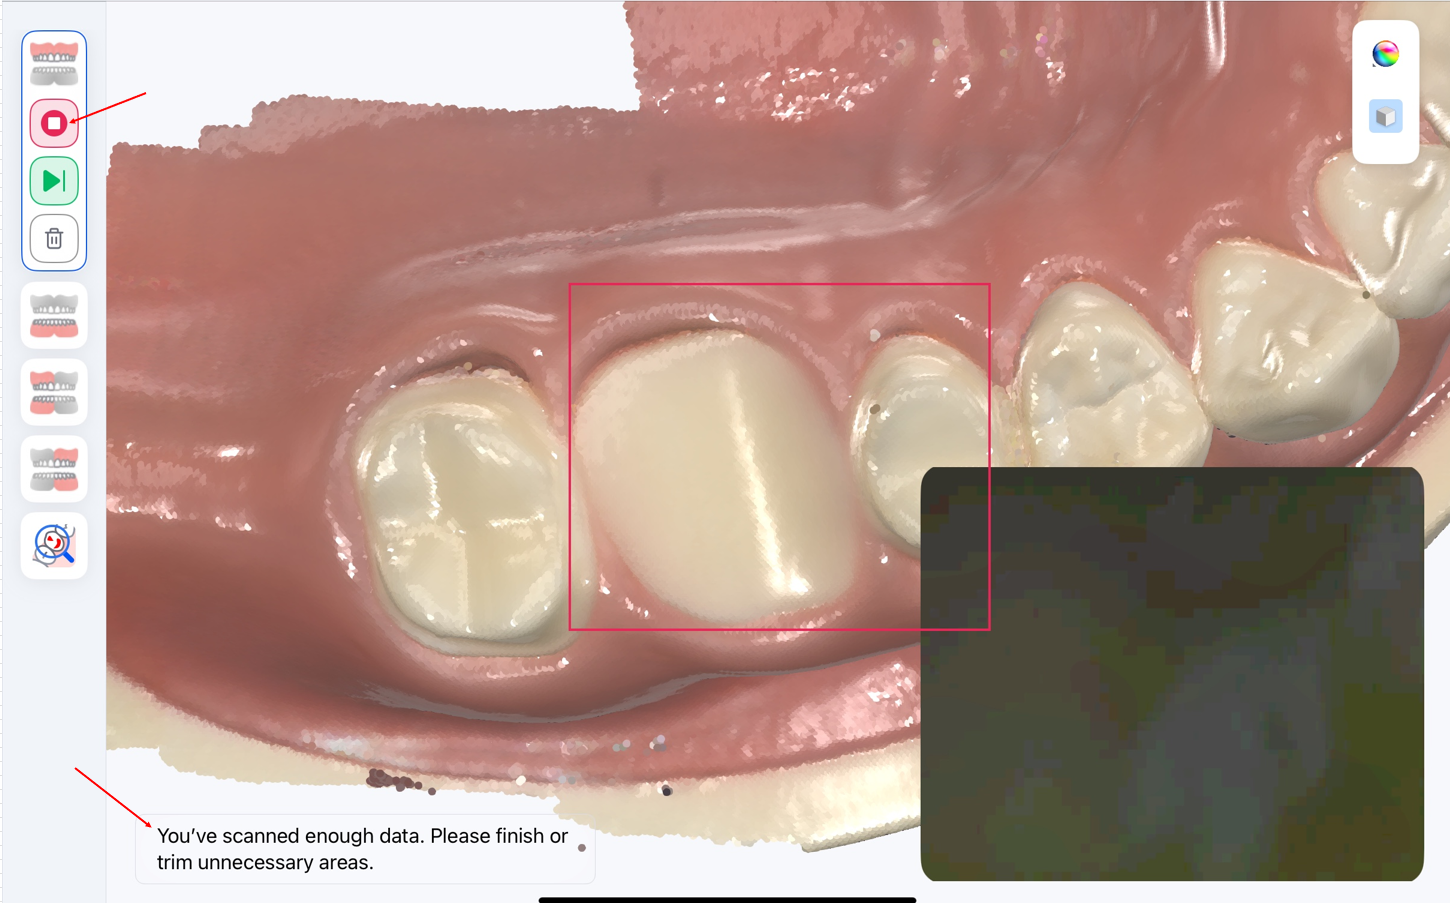
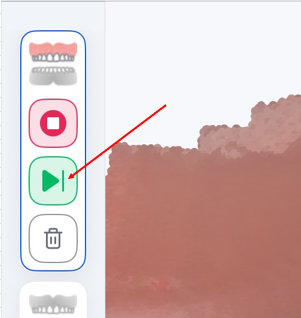
Start scanning. When “You’ve scanned enough data...” appears, you may stop or continue scanning if necessary. To return to the Scan Stages screen, tap the stop icon (■) on the screen or press the scan button on the handpiece again.
Review the scan data for each stage to make sure the scans are complete and accurate. For occlusion stages, check that the upper and lower scans are properly aligned on the contact surfaces of the teeth. Then tap Next to move to the next stage.
To move directly to the next stage from step 5, tap the next stage icon (▶|). Tap Resume Scan to add more data to the current stage, or Delete Data to clear the current scan.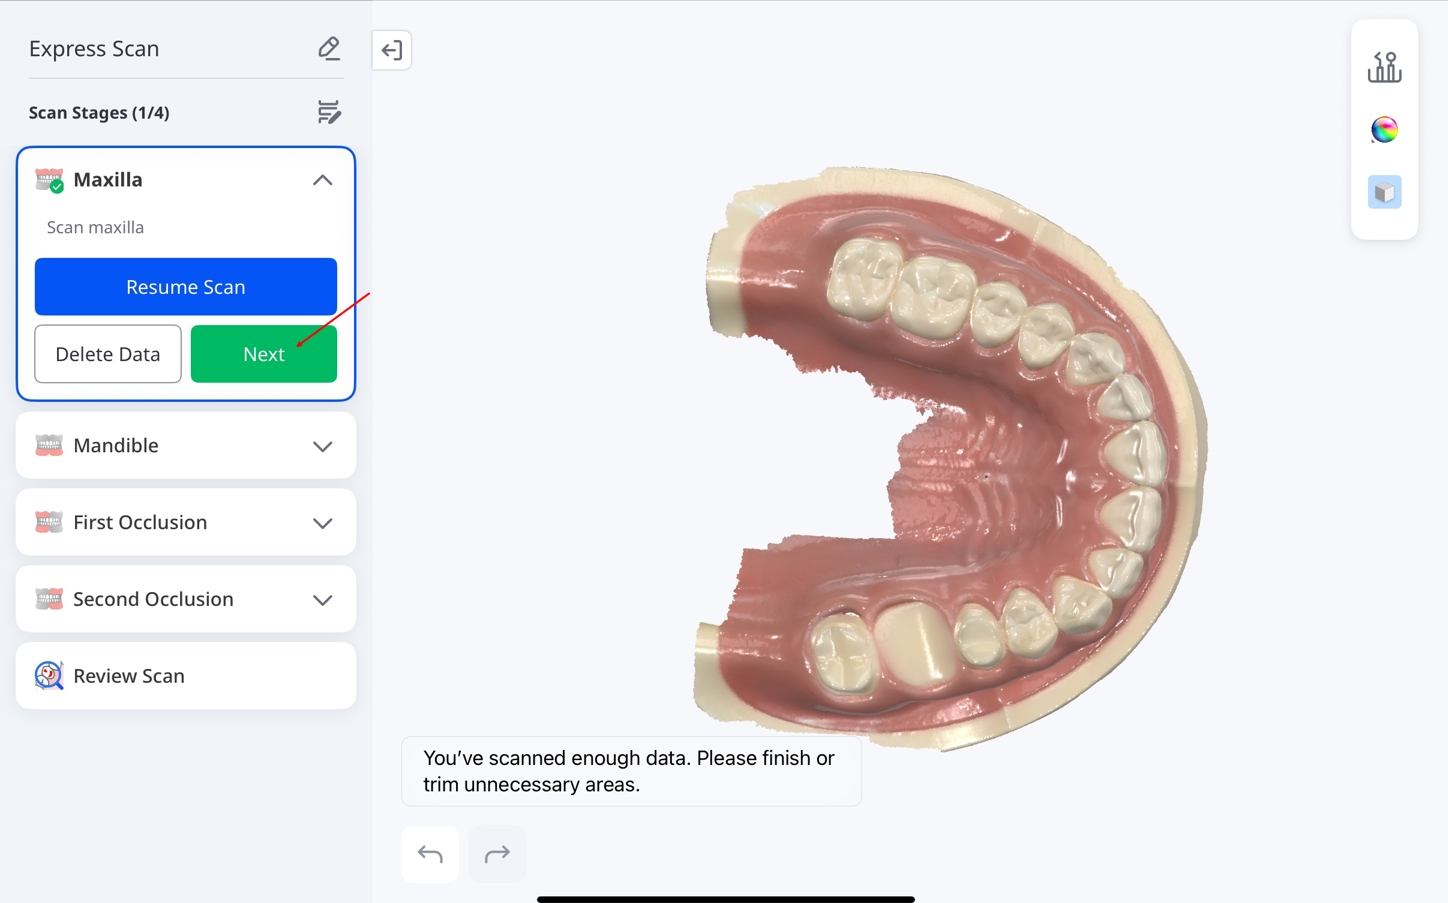
🔎Note
If you scanned the wrong arch during a scan stage, you can swap the scan data by tapping the swap icon at the bottom of the screen.
A “Swapping data...” message appears while the swap is in progress. This feature is not available in some cases, such as when only scan body data is available.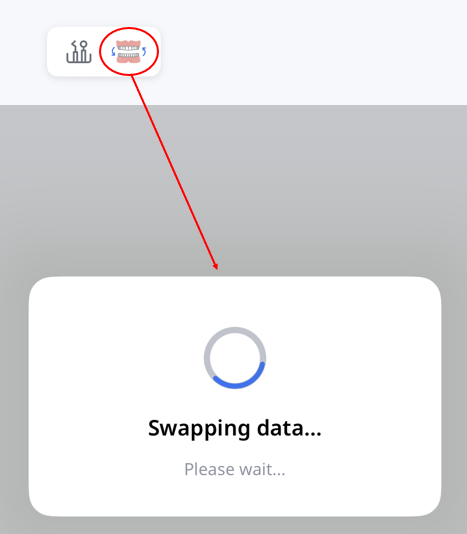
You can perform manual alignment by selecting 1–3 corresponding points on each dataset.
This feature is available only when sufficient scan data exists and may be unavailable or disabled depending on the stage and scan status. For details about the tools, see the Scan Stages and Tools section.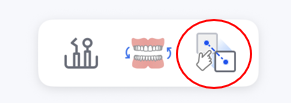
After completing all scan stages, you will reach the Review Scan stage. Tap the icons on the right side of the screen to review your scan results. For details about these tools, see the Scan Stages and Tools section.
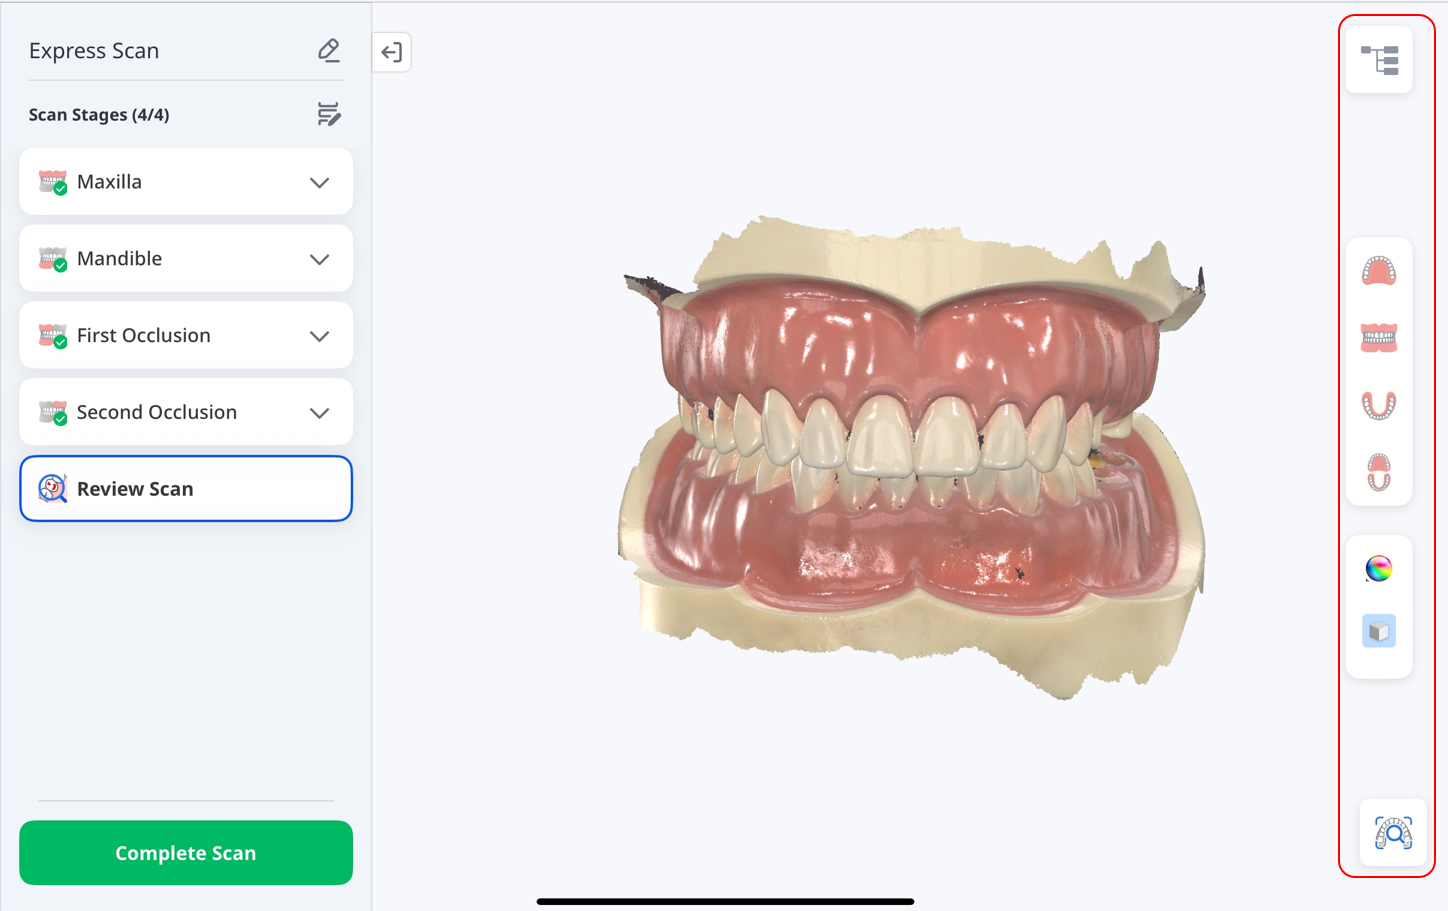
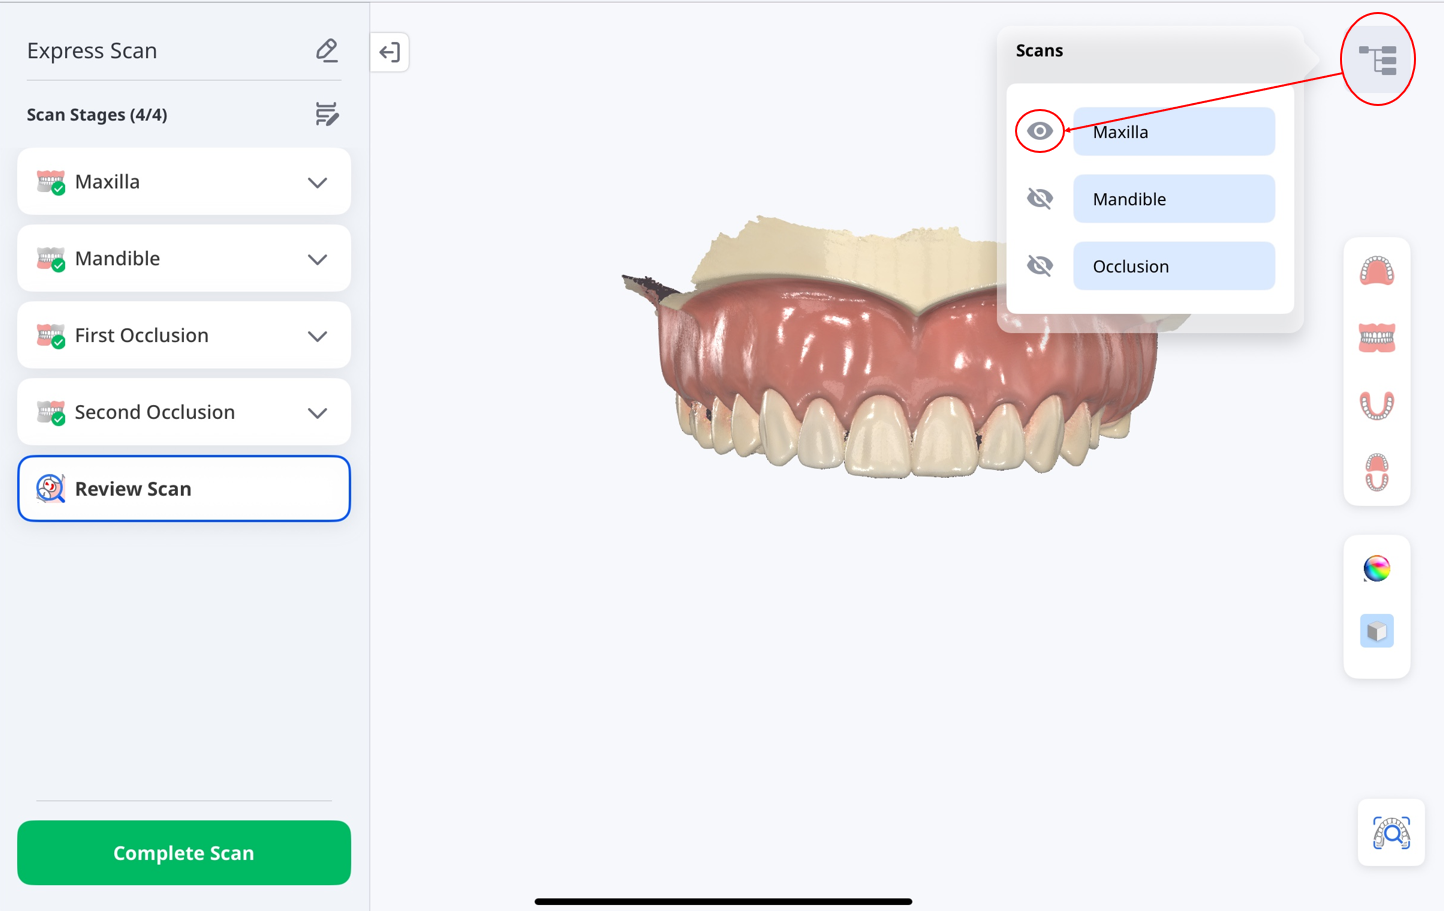
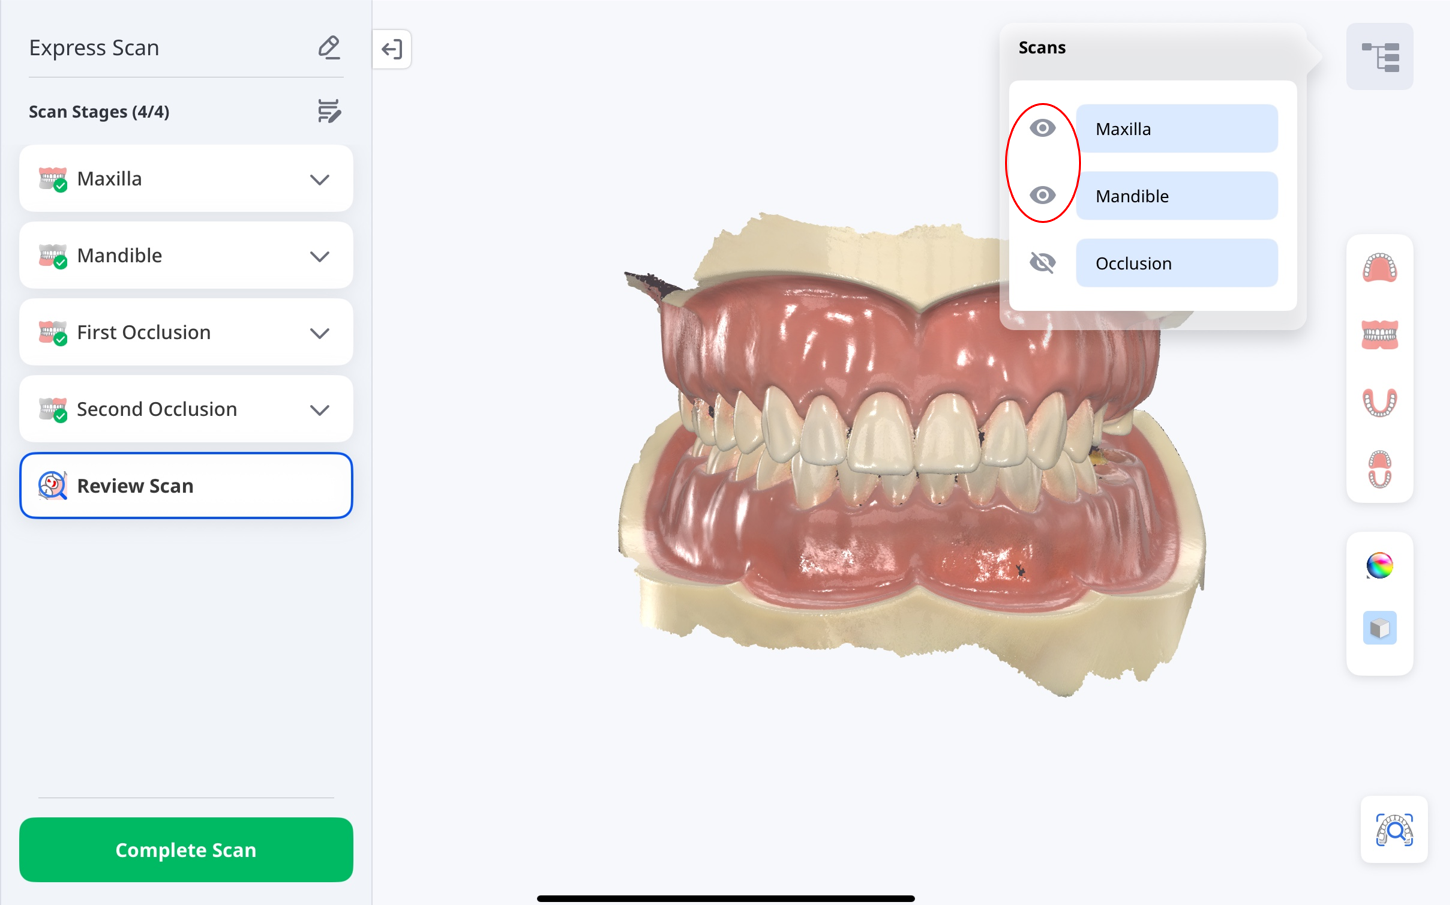
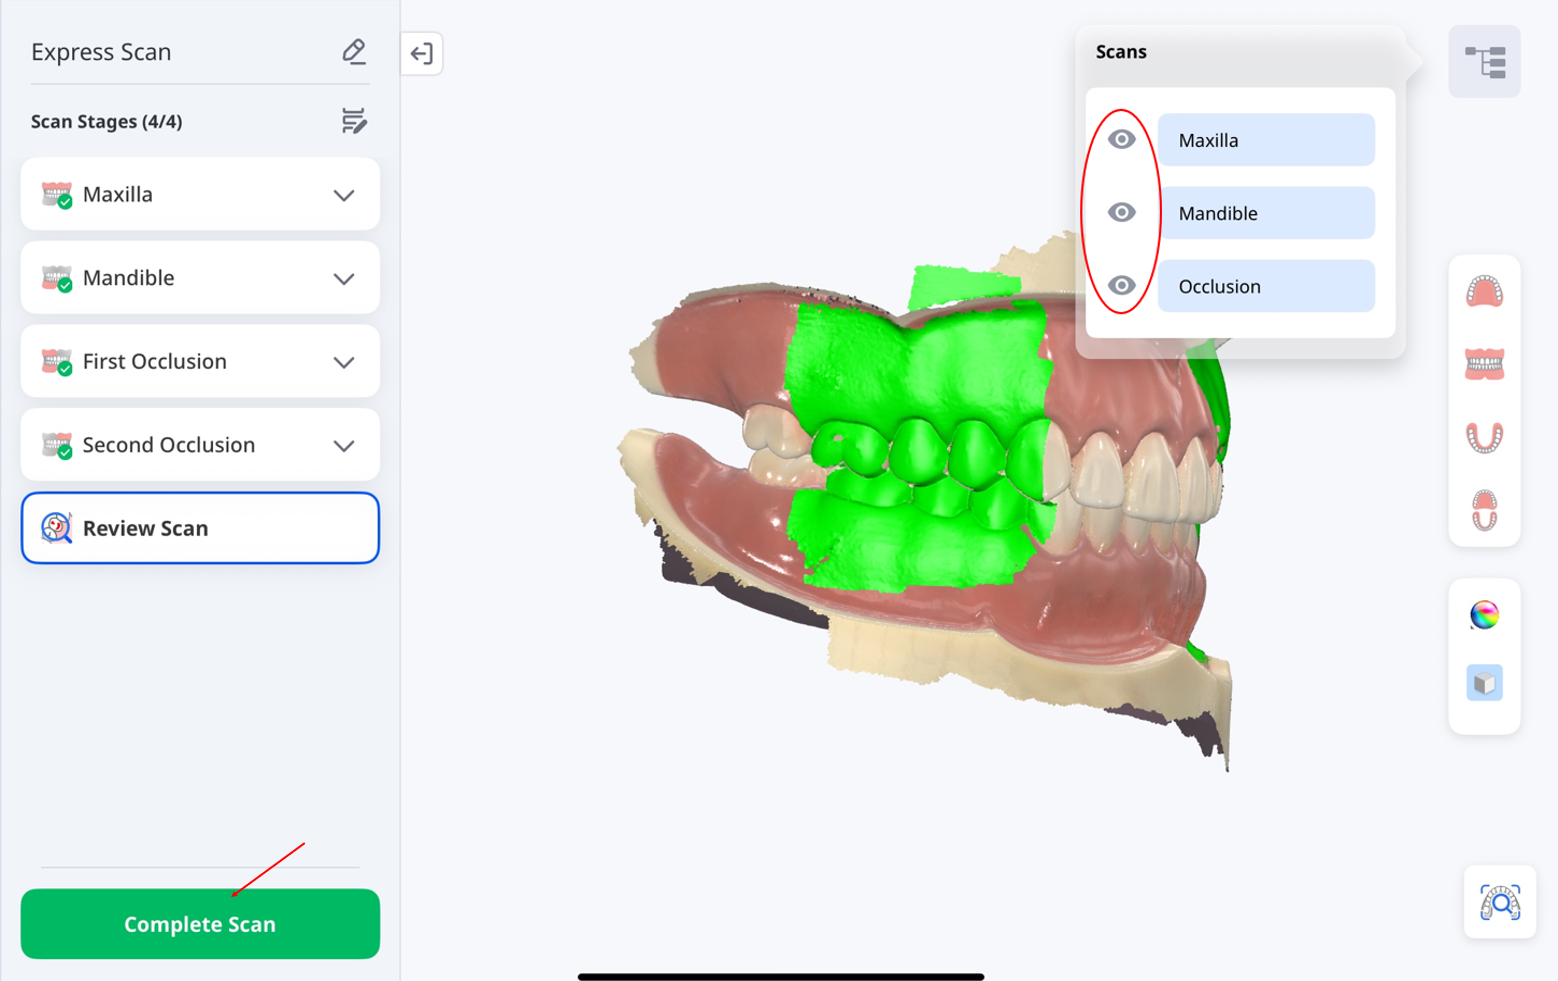
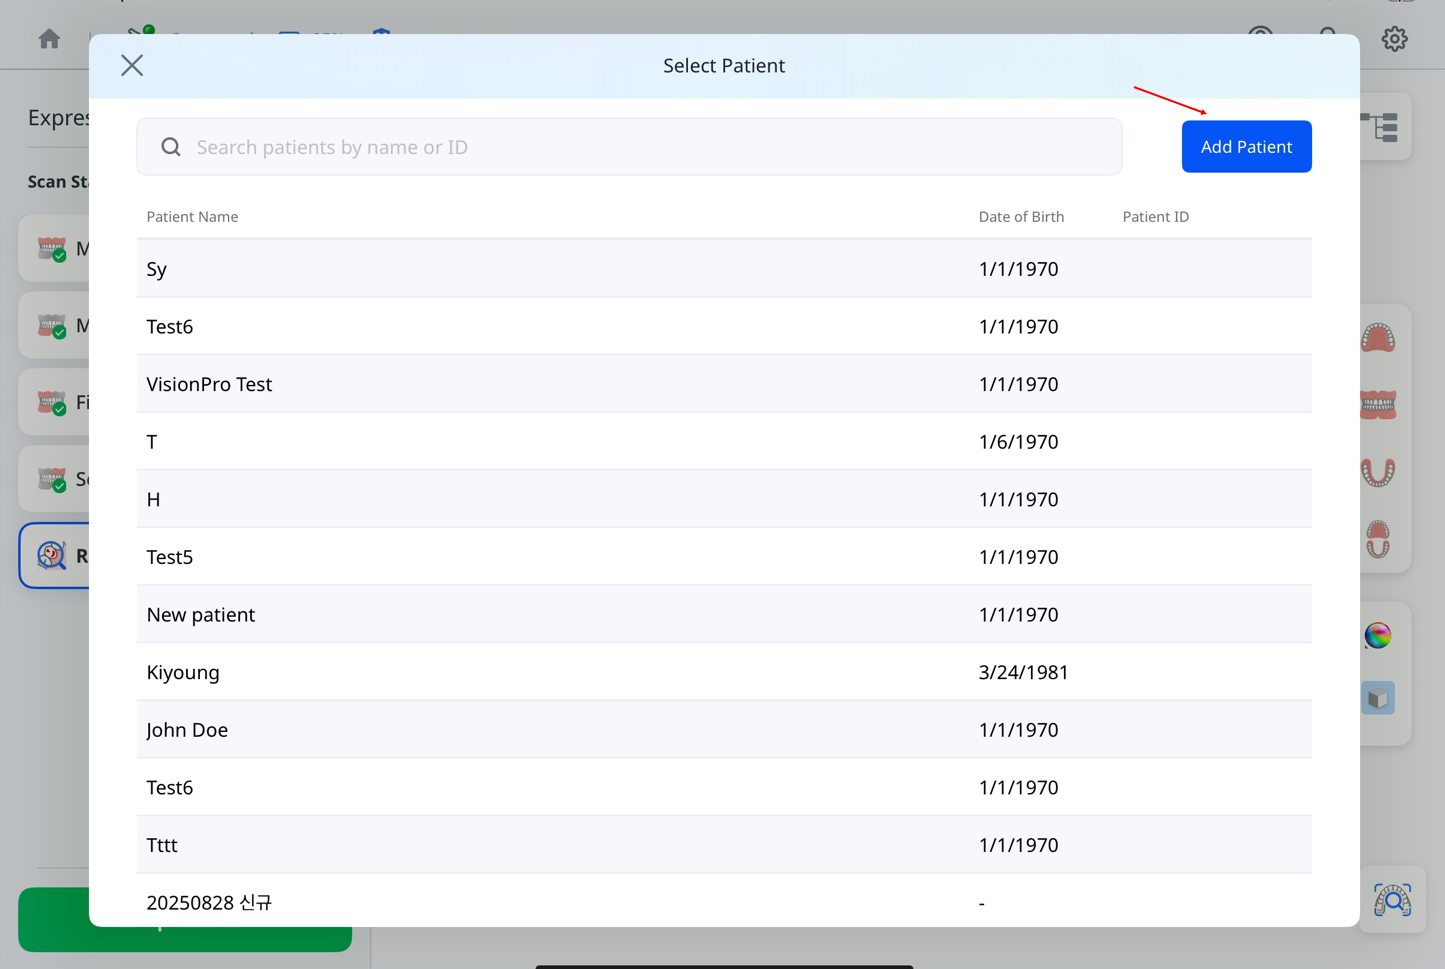
Use the Scans panel in the top-right corner to show or hide scan segments such as Maxilla, Mandible, and Occlusion. To proceed and save the case, tap Complete Scan.
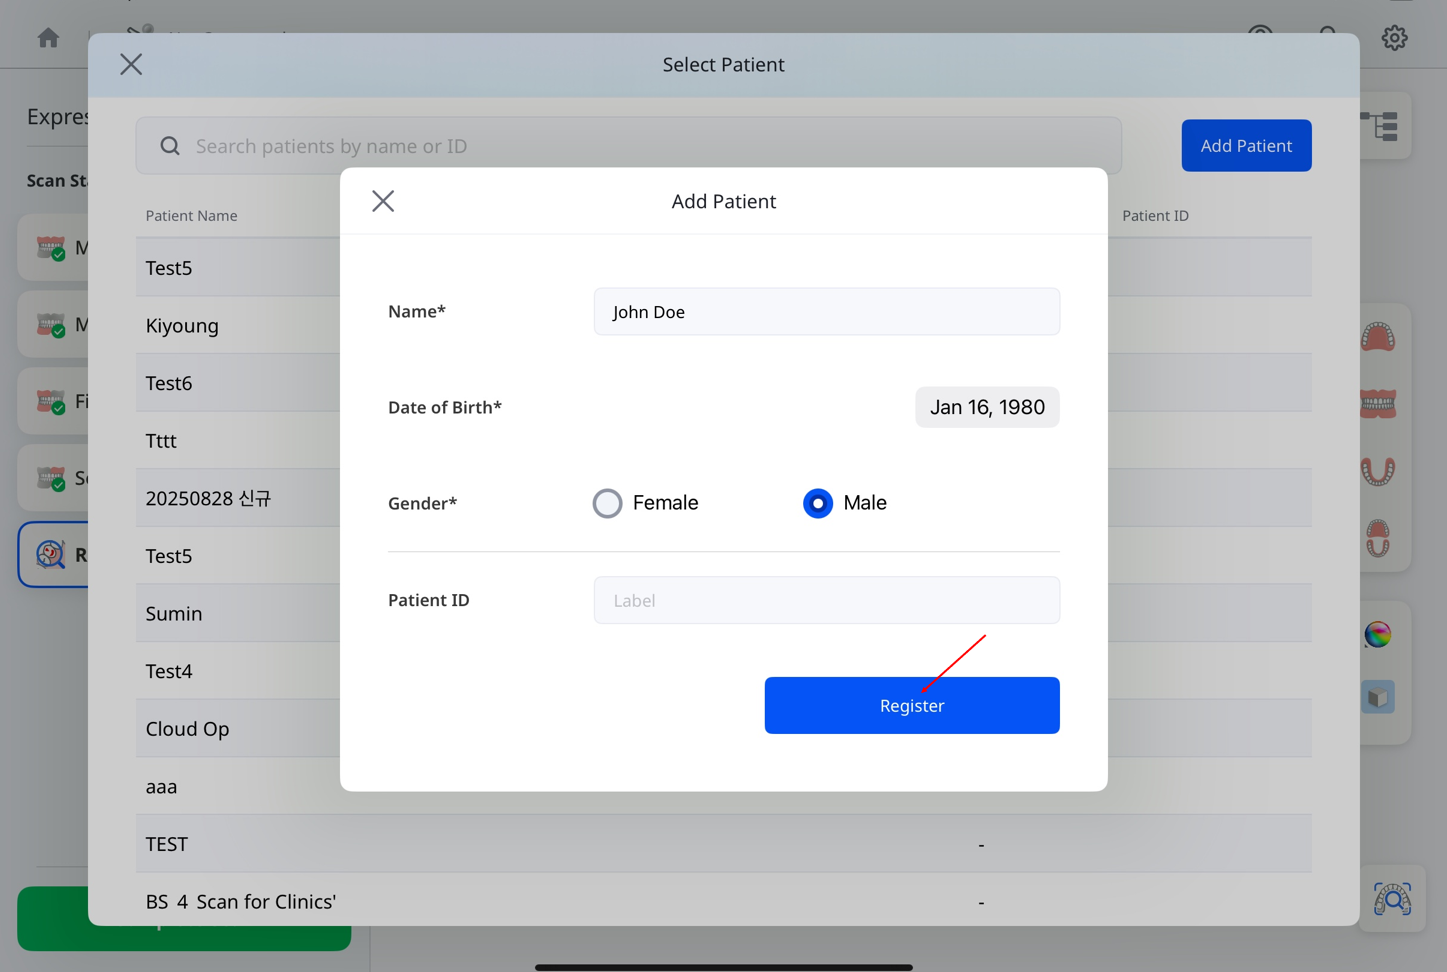
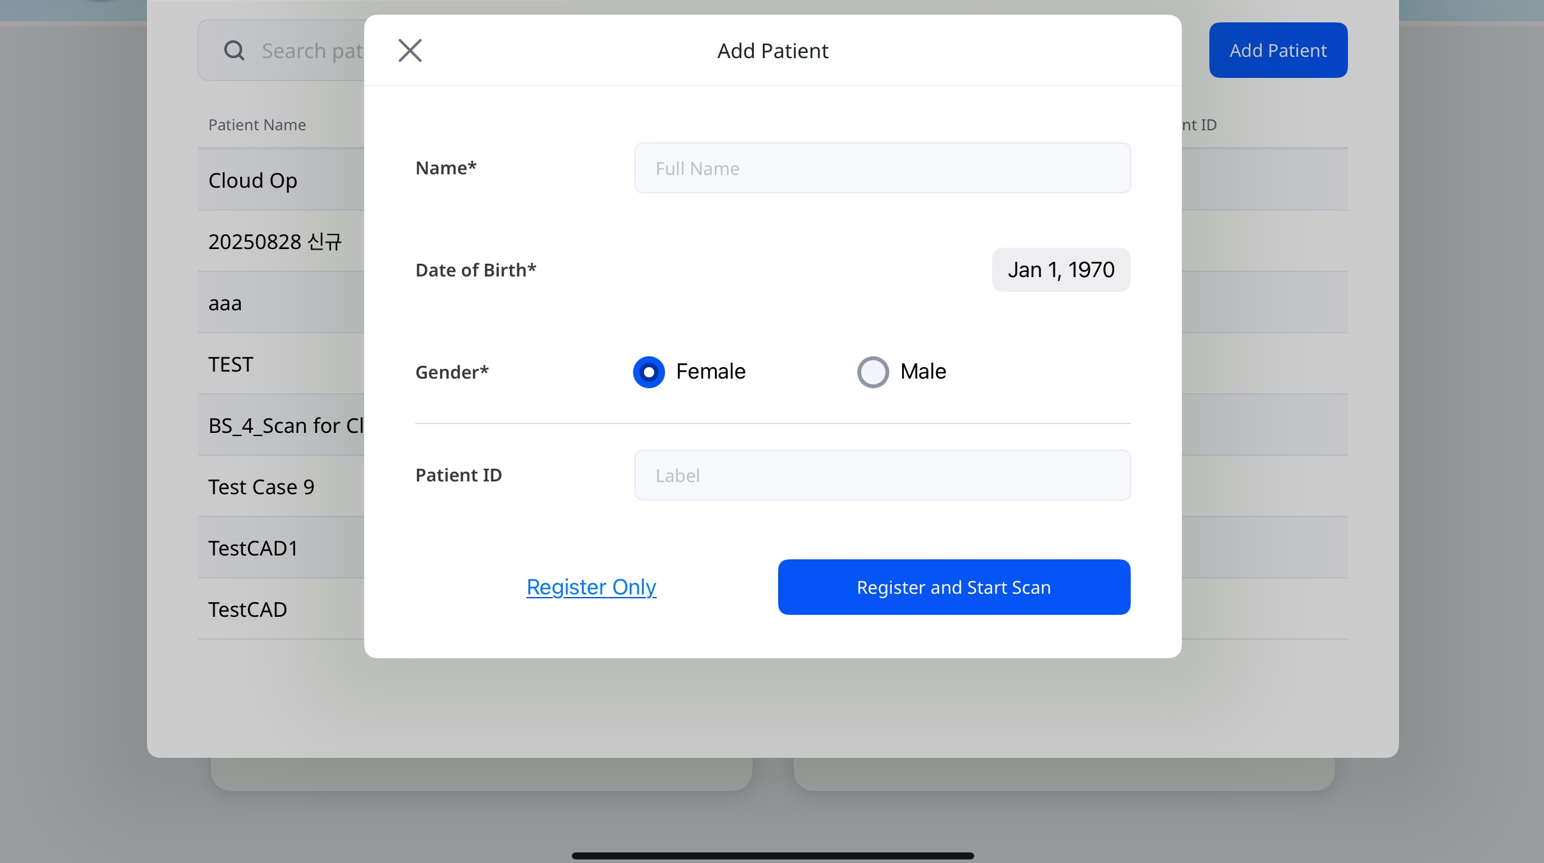
Tap Add Patient.
Fill in the patient details and tap Register.
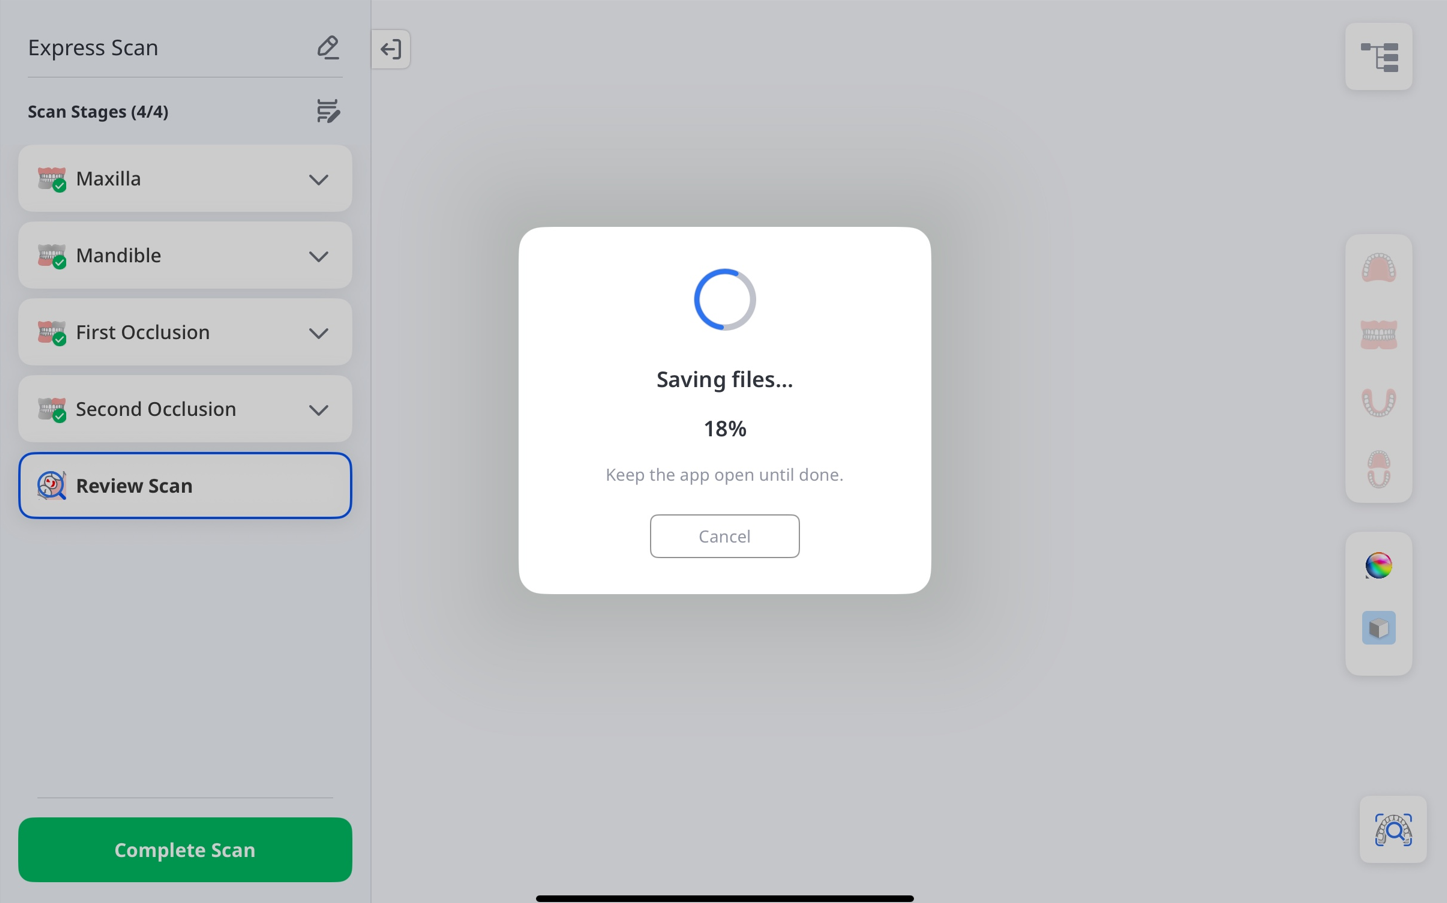
Wait until processing reaches 100%.
Treatment Scan
Use Treatment Scan to obtain accurate scan data for a wide range of dental applications, such as prosthetic fabrication, treatment planning, and clinical workflows. This data can be applied in both laboratory and chairside environments to ensure reliable outcomes.
Step 1: Connect & Calibrate Scanner
See the Scanner Setup section for instructions on how to connect and calibrate your scanner.
Step 2: Select Patient
To start scanning:
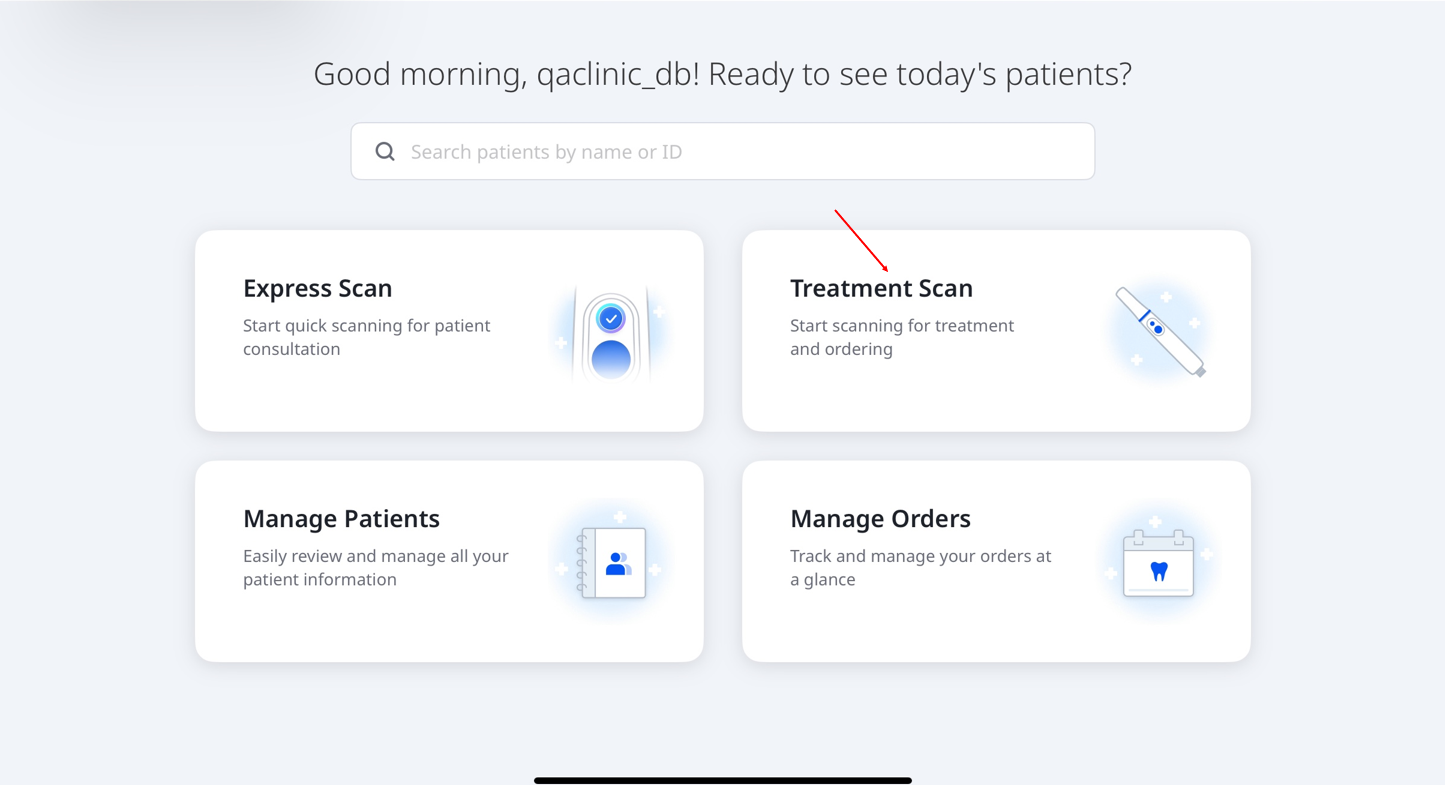
Tap Treatment Scan on the main page.
Select a patient to proceed. To create a new case, tap Add Patient in the top-right corner of the screen.
For more information on how to add a case, refer to Workflow > Manage Patient.
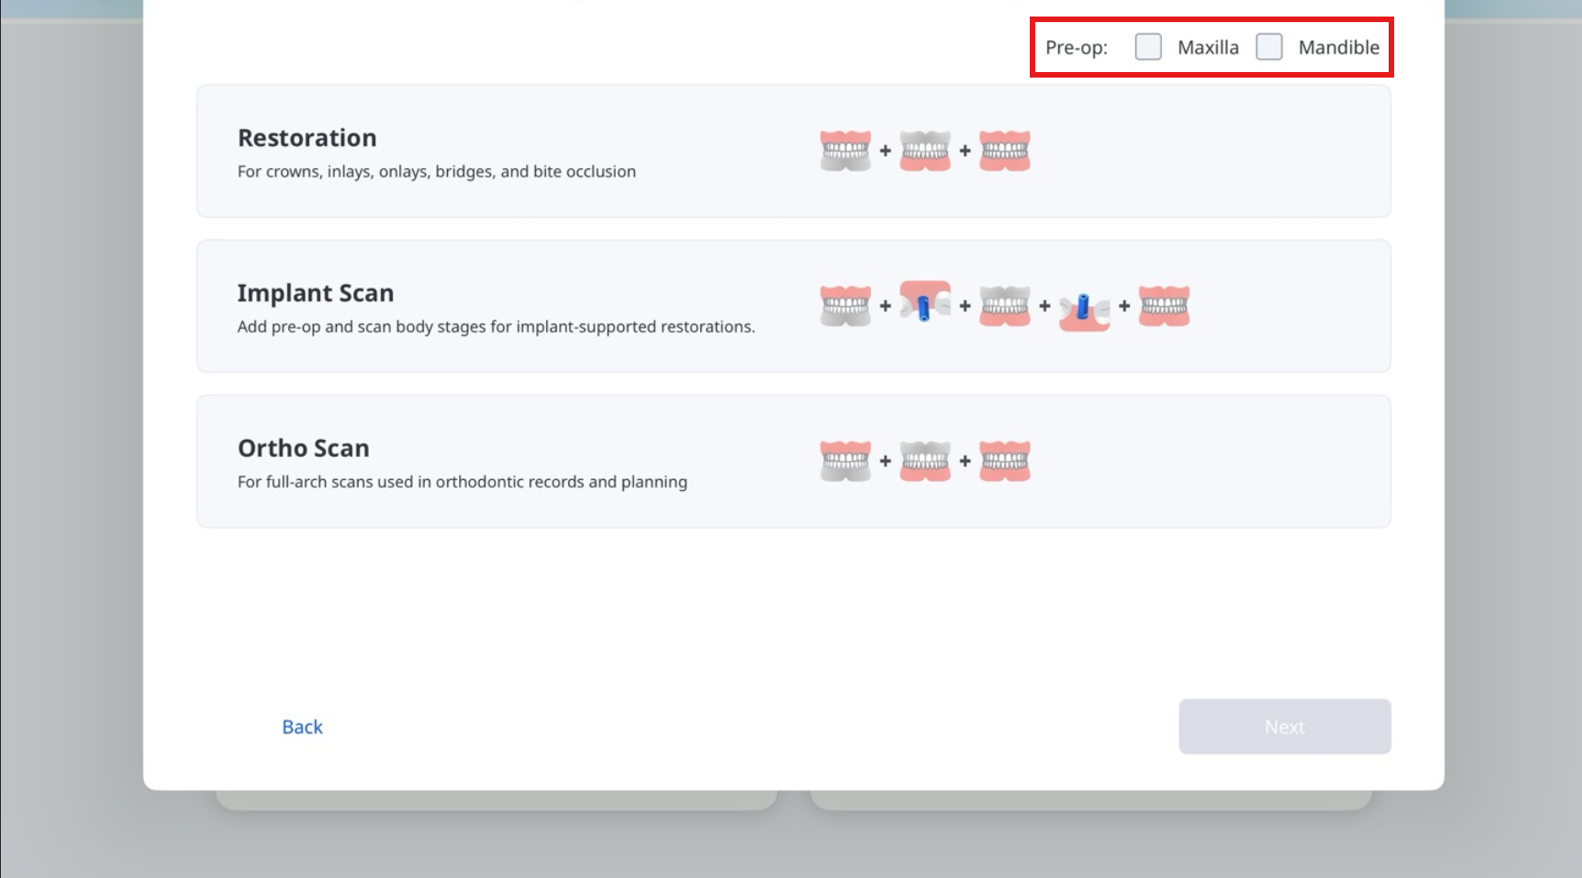
Step 3: Select Workflow
Select a workflow from the following three options: Restoration, Implant Scan, or Ortho Scan. You can include pre-op stages when a reference of the original anatomy is needed for more accurate alignment or treatment planning.
🔎Note
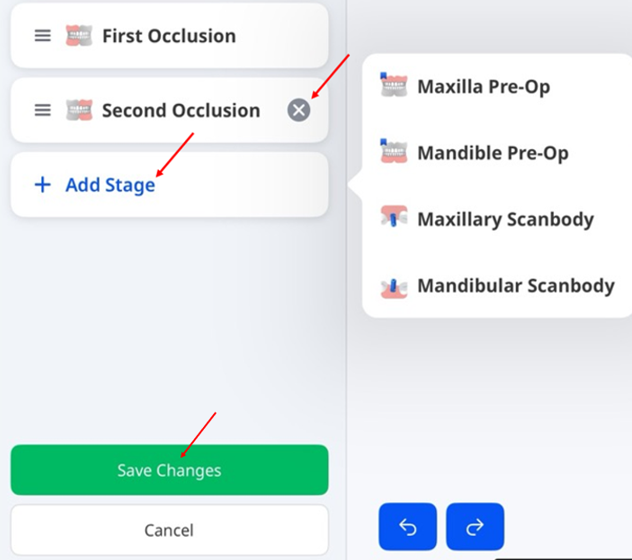
To add or remove a stage from the Scan Stages screen, tap the pencil icon as shown in the screenshot below.
To delete a stage, select the X icon next to it. To add a stage, tap Add Stage. When finished, tap Save Changes to apply your updates.
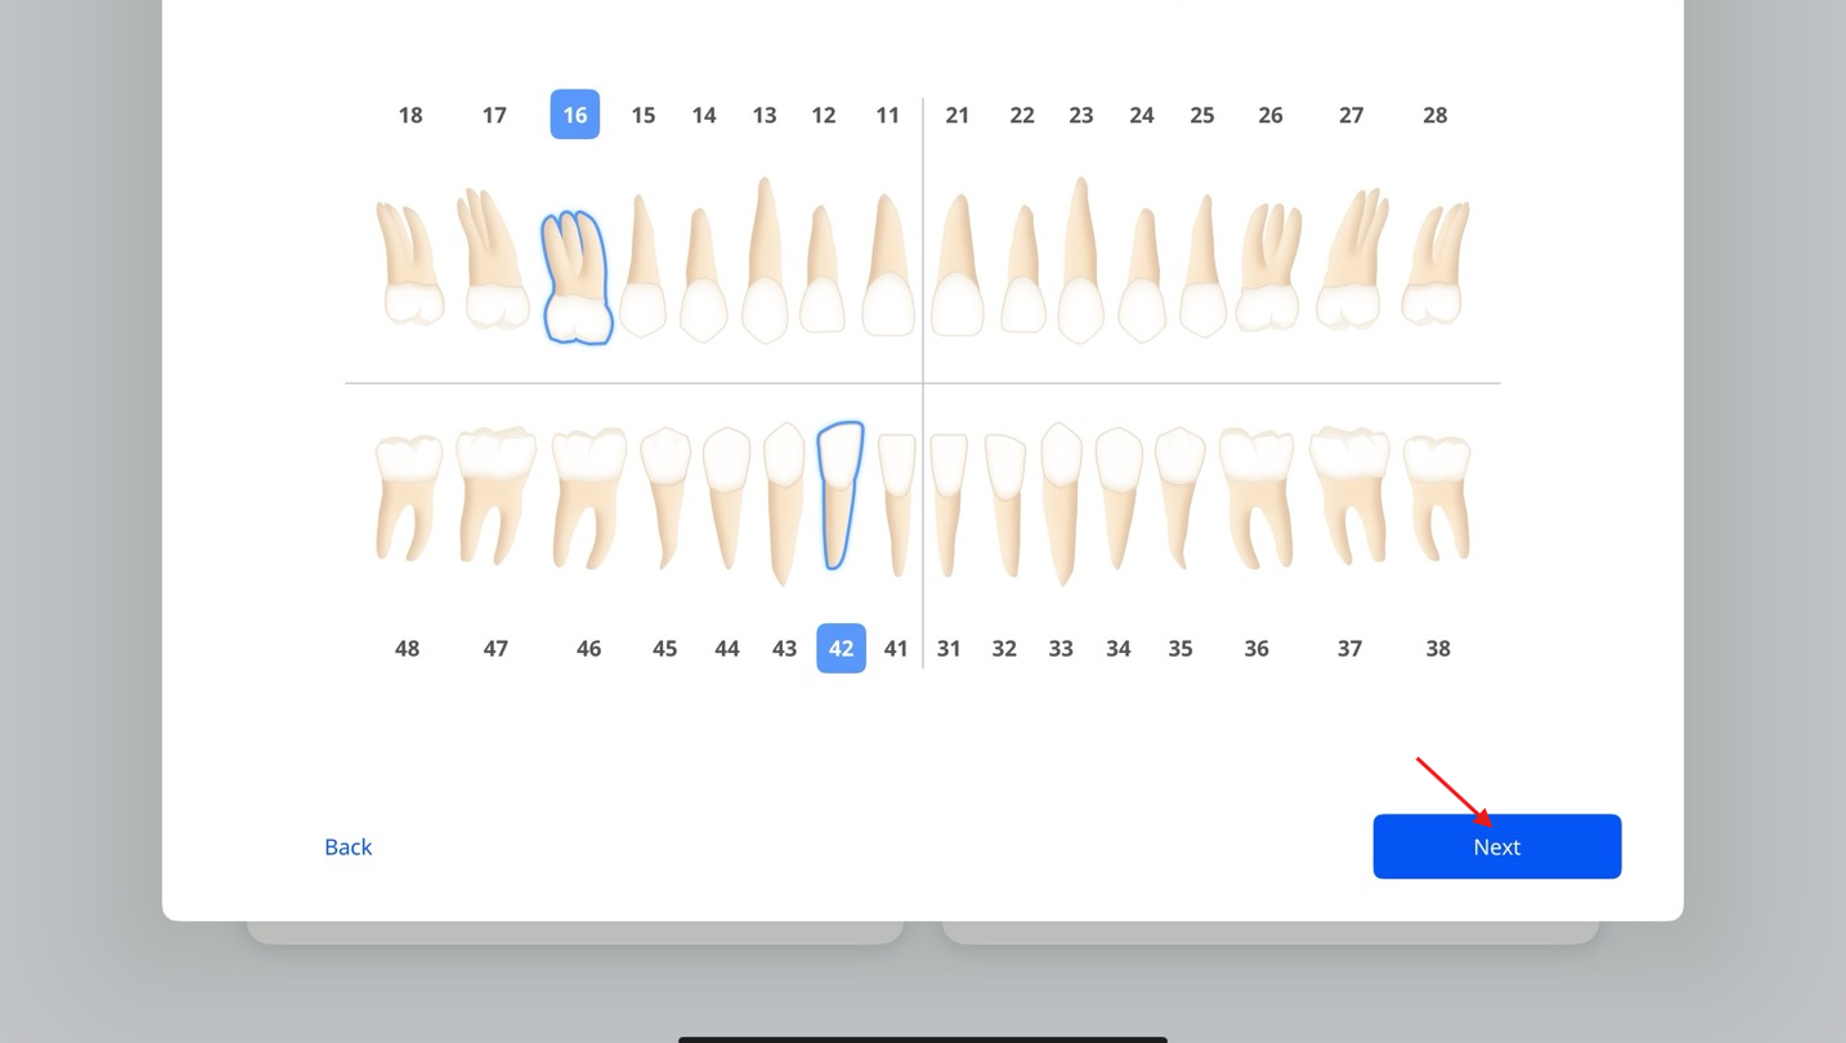
Step 4: Select Teeth or Jaw – Restoration & Implant Scan
Select the tooth or teeth that require treatment, then tap Next.
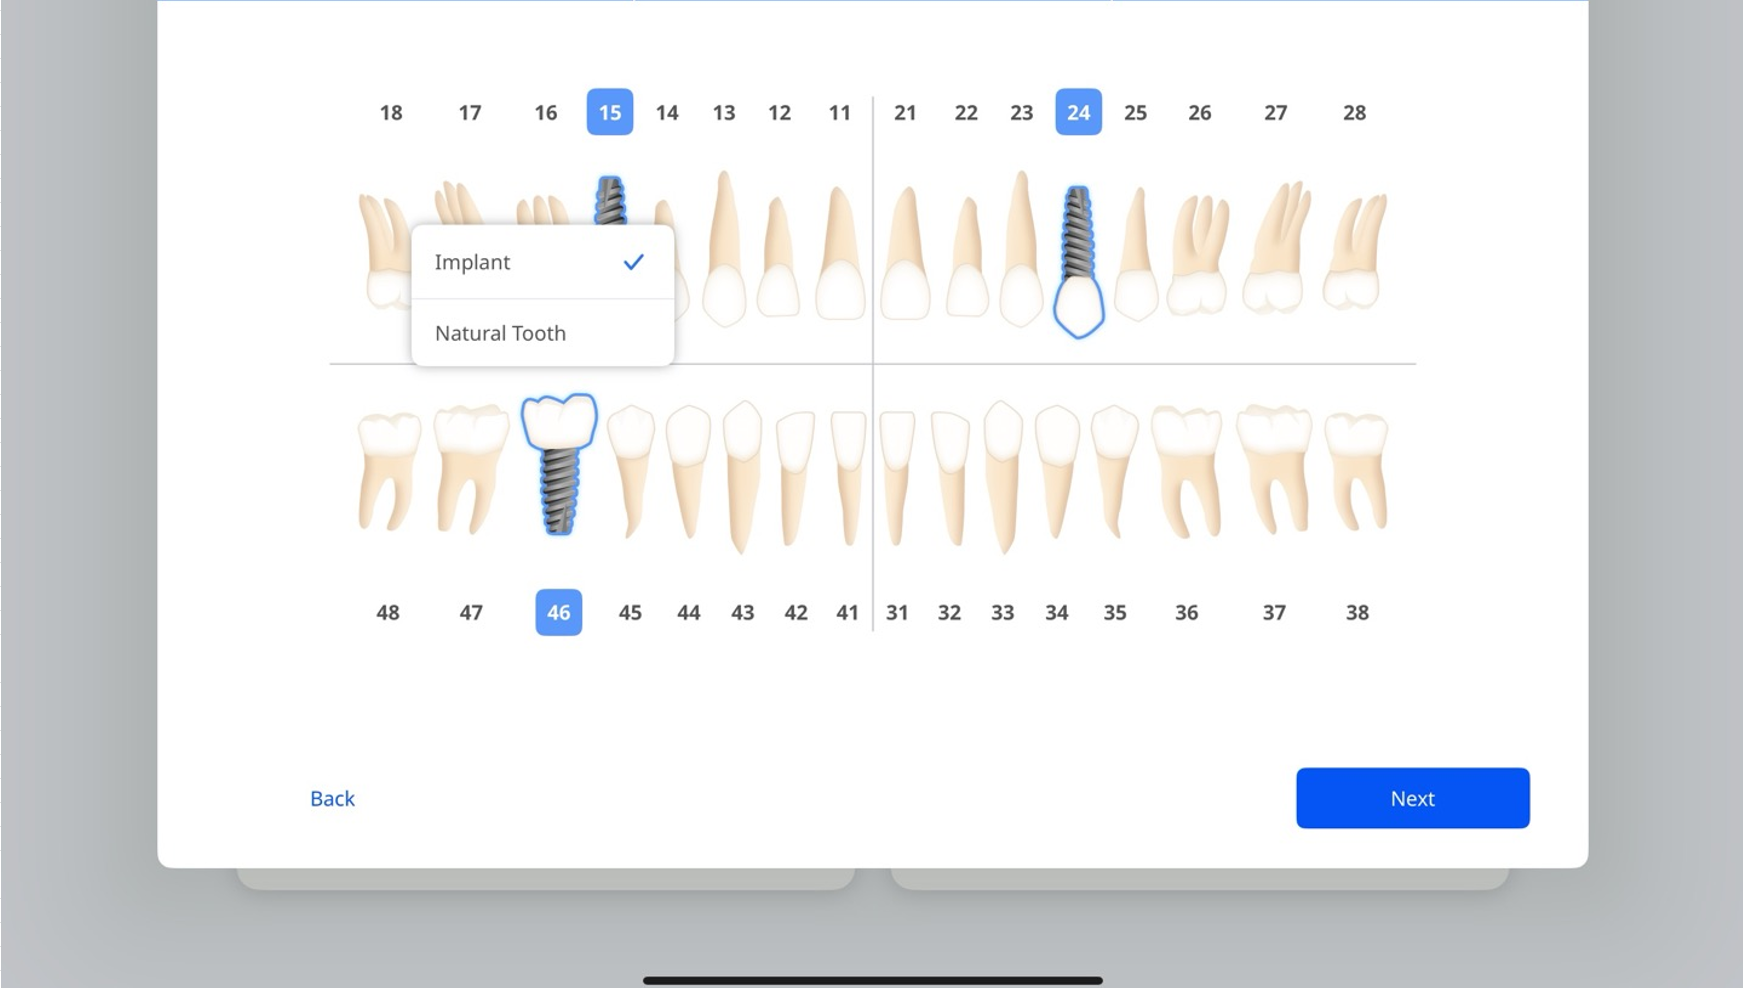
If the workflow is Implant Scan, choose Implant from the options list for teeth requiring implant treatment, and Natural Tooth for those requiring general care.
Then tap Next.
🔎Note
To switch between the US and FDI systems, go to Settings > General Settings.
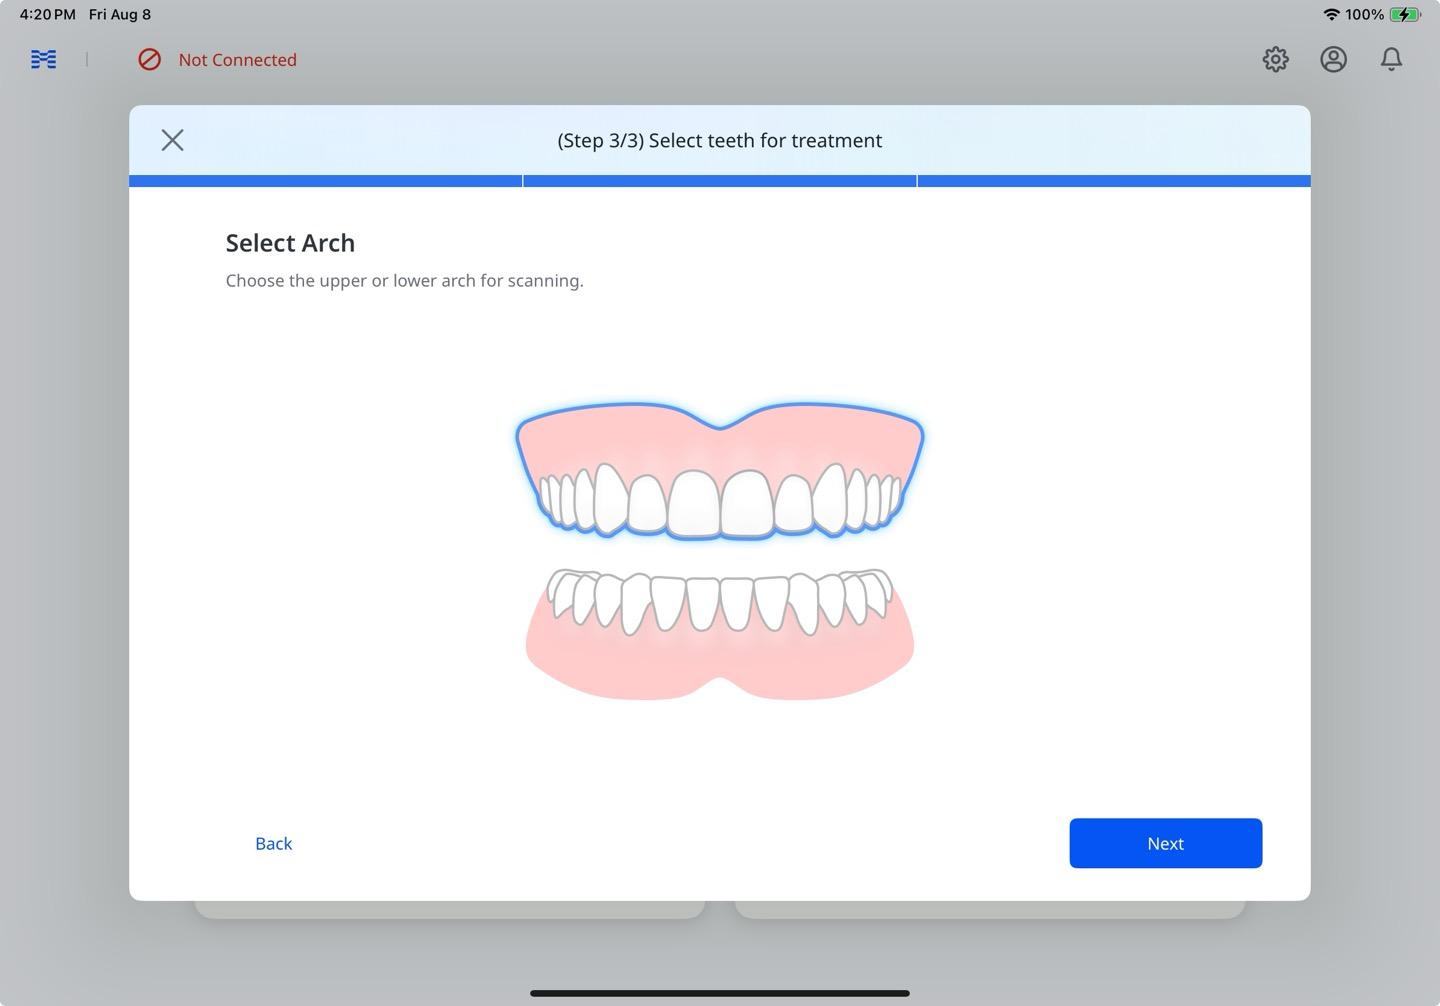
Step 4: Select Teeth or Jaw – Ortho Scan
Select the upper arch, lower arch, or both arches requiring treatment, then tap Next.
Step 5: Scan & Review
Refer to steps 4–8 in the Express Scan: Scan First, Add Later section above for details on the scanning process.
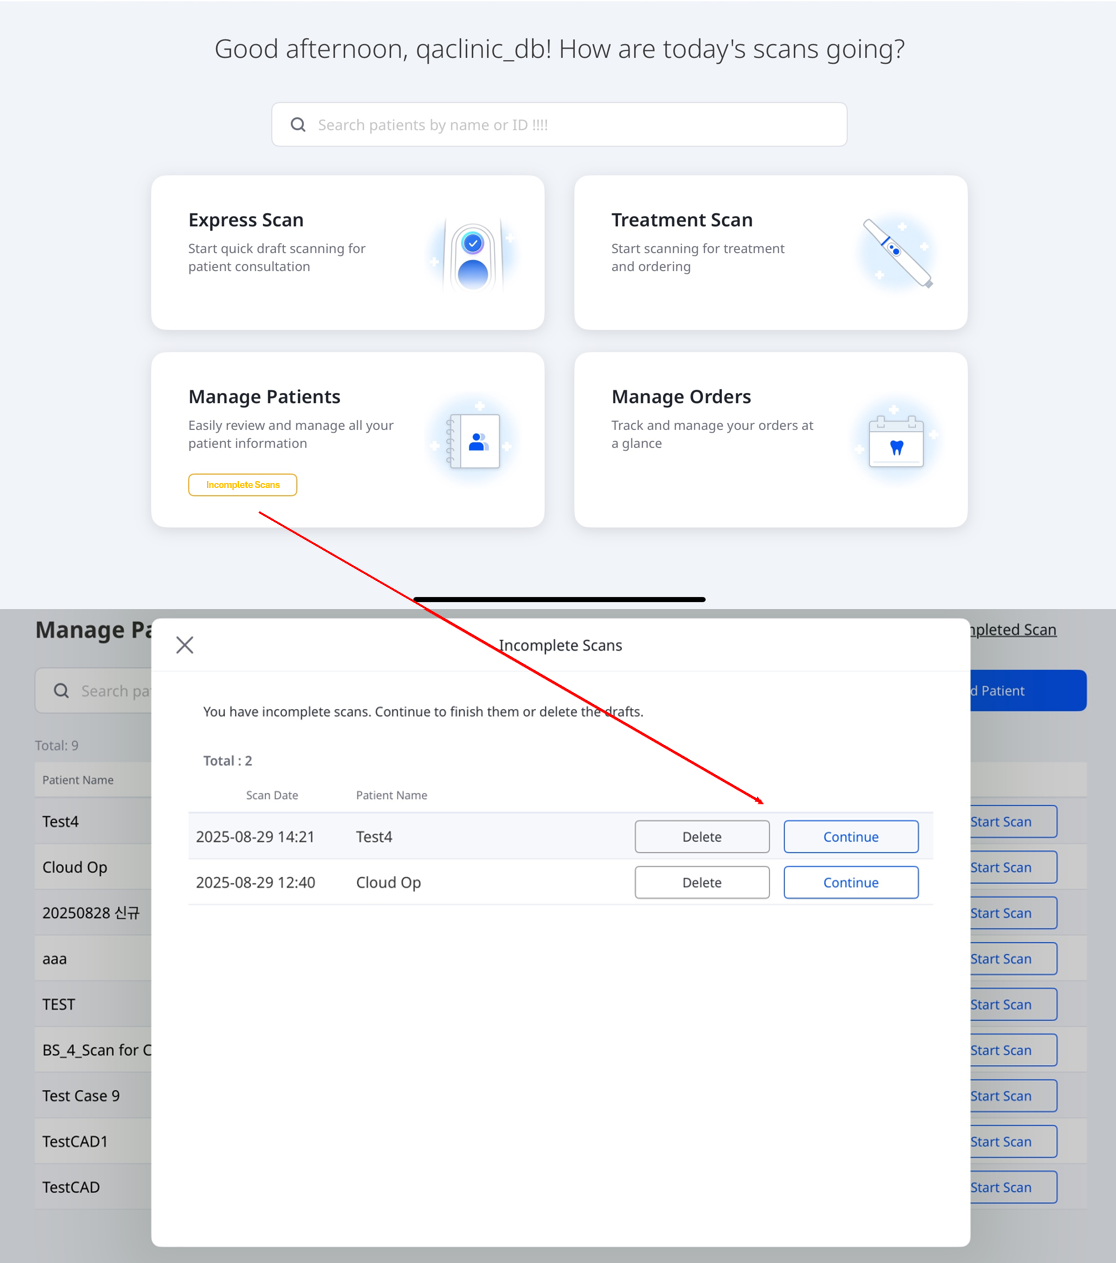
🔎Note
If a scan is interrupted, the Incomplete Scans label will appear under the Manage Patients card on the home screen (see the screenshot below). Tap this label to open the Incomplete Scans window, where you can either discard the draft or resume scanning from where you left off.
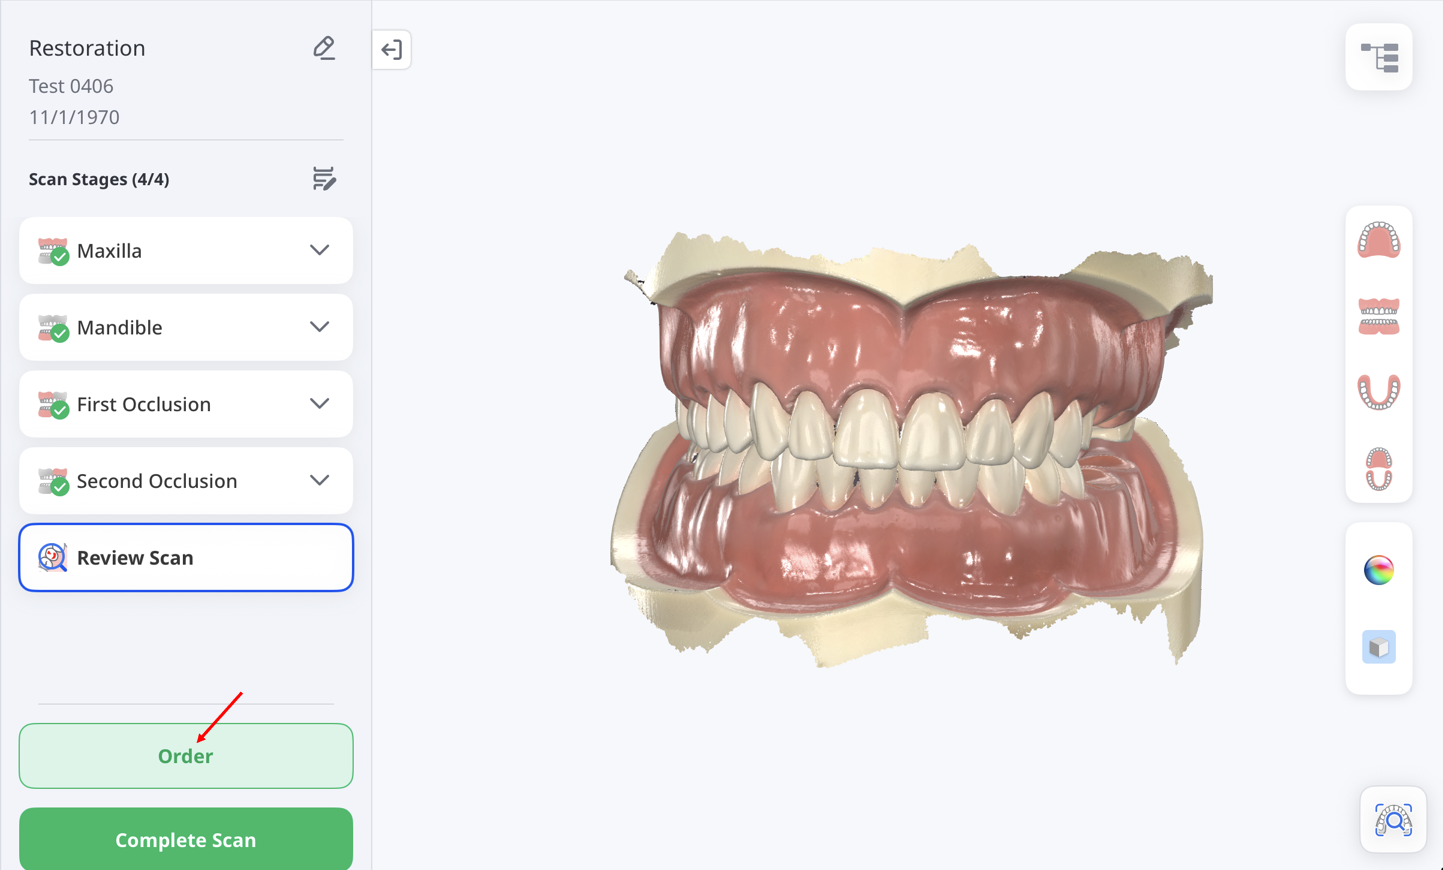
Step 6: Order
Once you have finished reviewing the data, place an order as follows:
Tap Order.
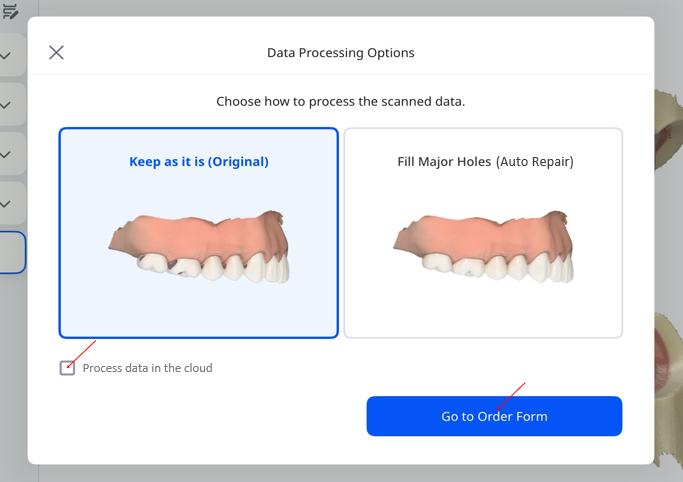
When the Data Processing Options window appears, choose to either keep the original data unchanged (Original) or automatically fill major holes (Auto Repair).
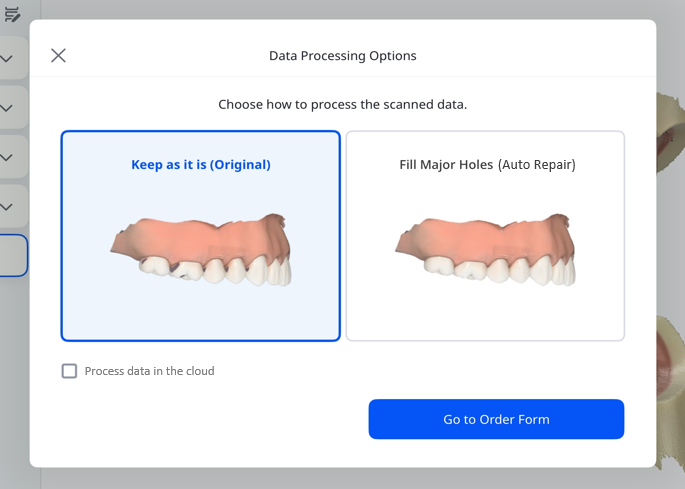
Select the checkbox if you want to process the data in the cloud. When done, tap Go to Order Form.
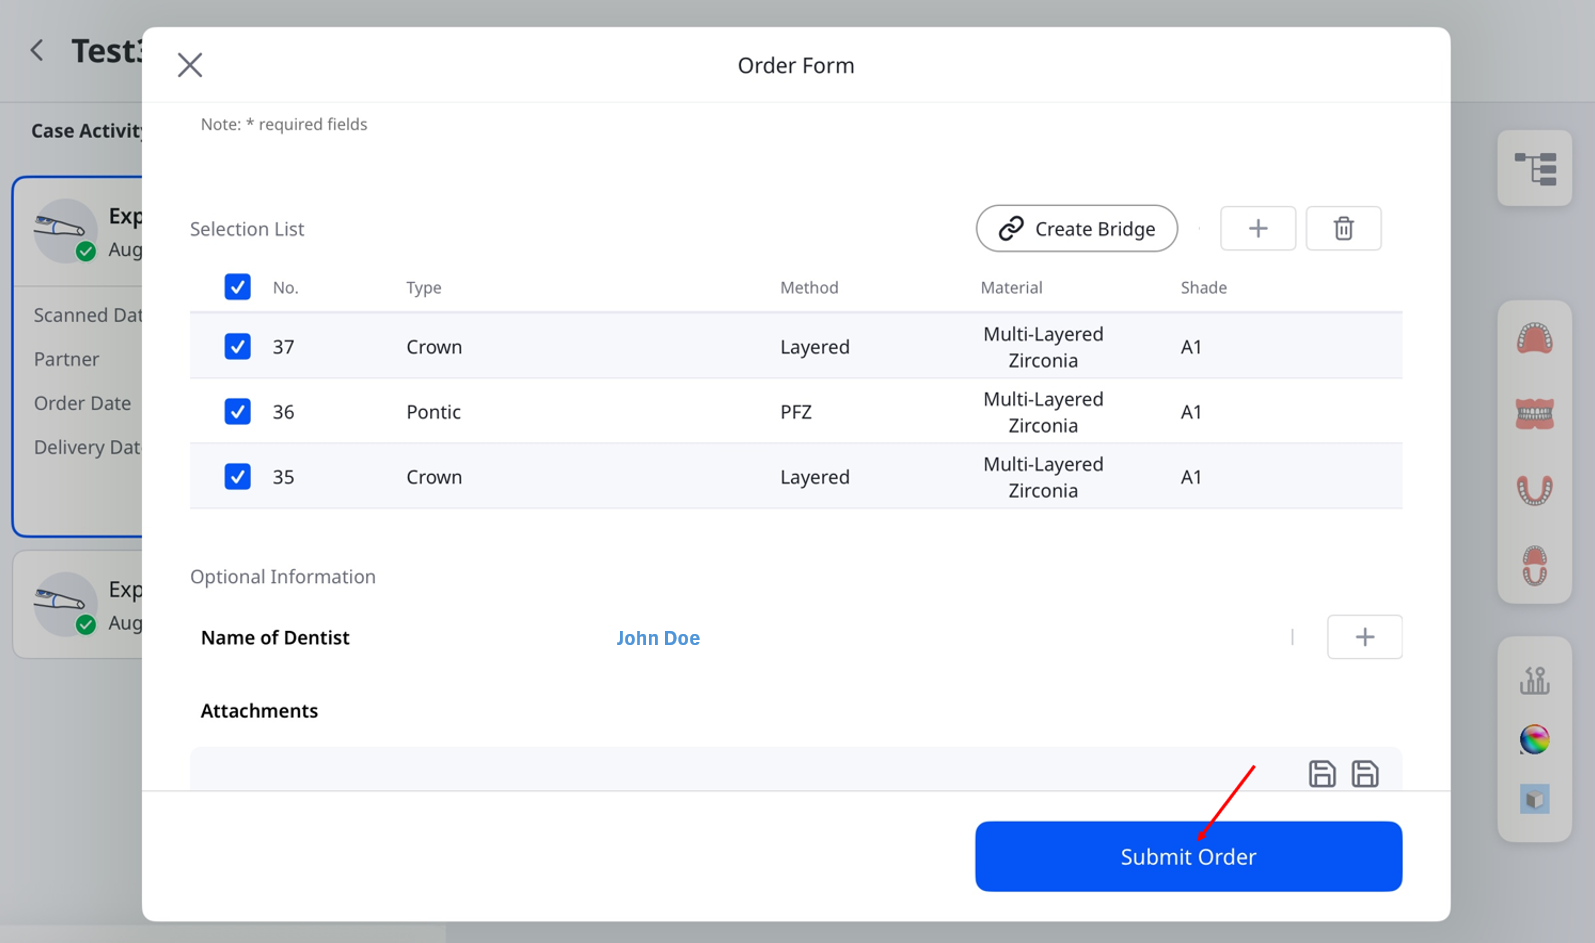
Complete the Order Form by entering the required information. Add optional details if needed. When finished, tap Submit Order to finalize.
Step 7: Manage Orders
To view order details and track their status:
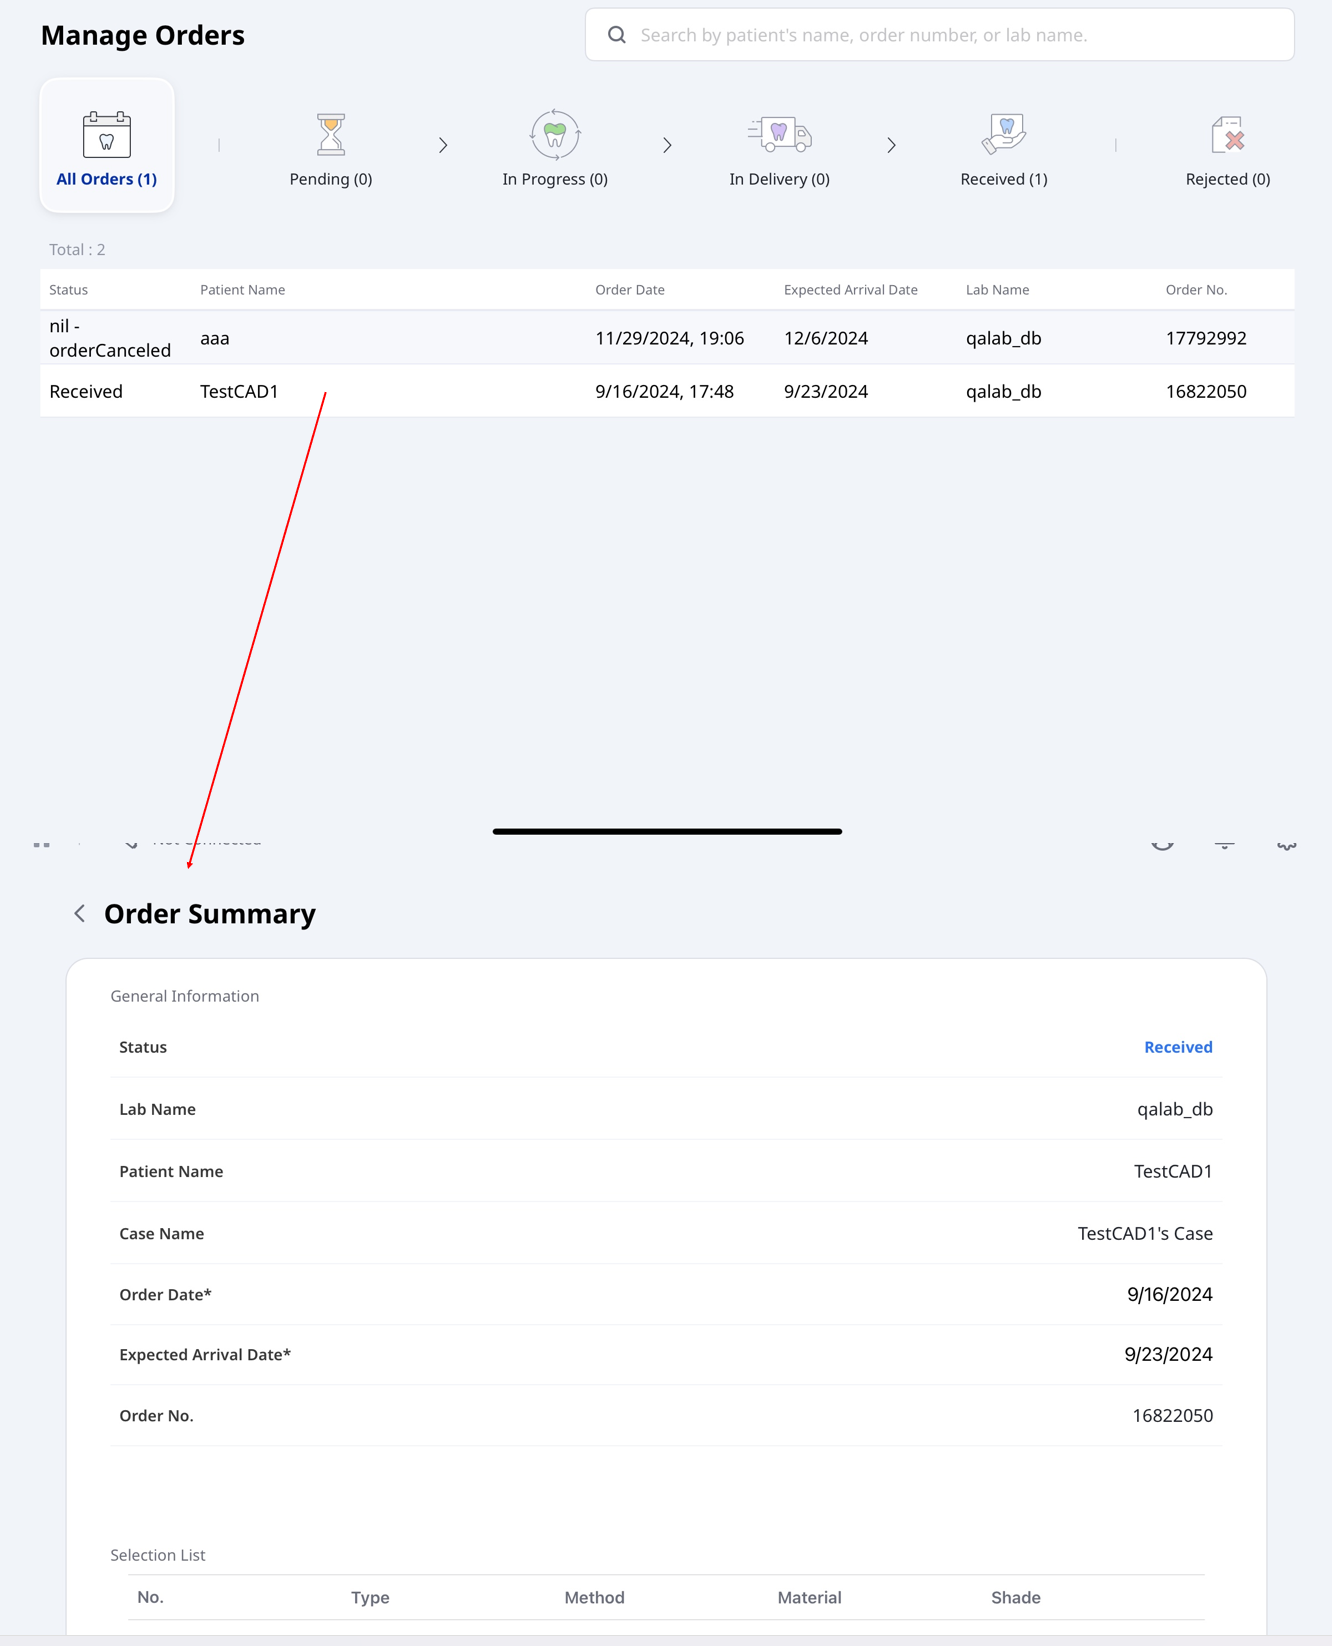
On the main screen, tap Manage Orders.
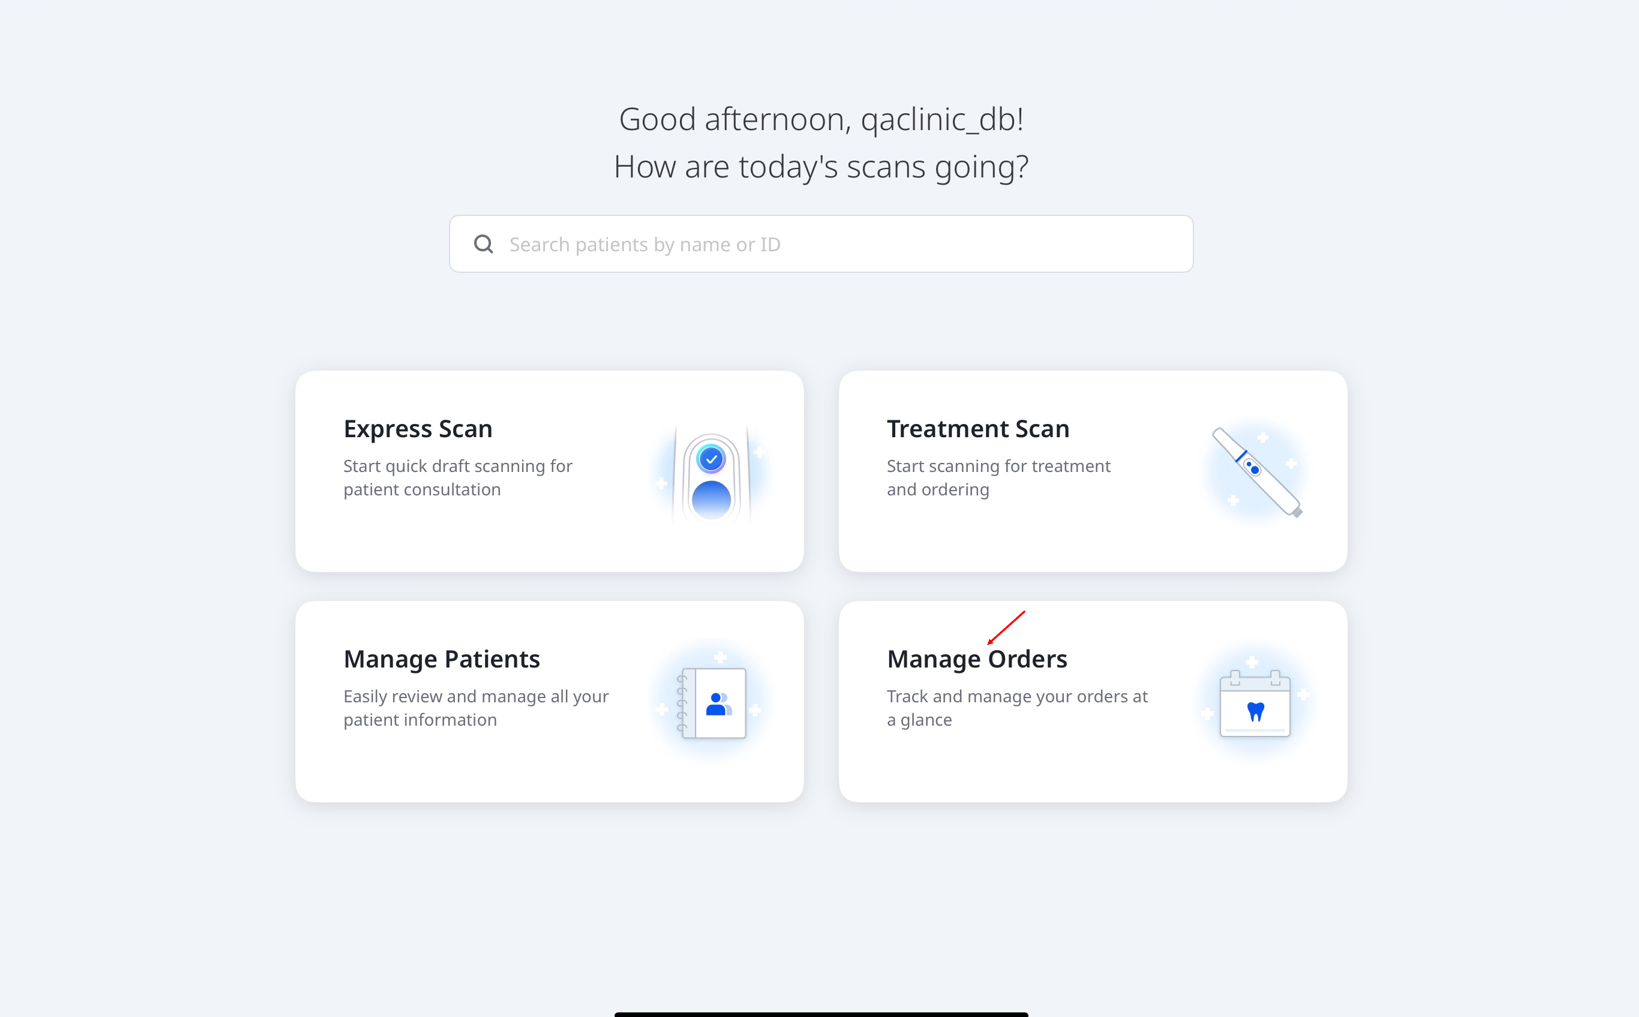
The Manage Orders screen will open, where you can view order details, filter orders by status, and search by order information. Tap an order in the list to open its summary page and view more information.