Scanner Connection
Medit Link Express supports wireless (direct or hub-based) and USB connections for compatible scanners.
Connection types vary by model and platform:
Wireless: Available for i900 Mobility (iPad and Mac)
USB: Available for i900 and i900 classic (Mac)
Wireless Connection (Direct)
Medit Link Express automatically detects and pairs with the Medit i900 Mobility over a Wi-Fi network or an iPad Personal Hotspot. Before connecting, ensure that the scanner is powered on:
Insert the battery into the bottom of the handpiece, and press the power button once.

When power is applied, the two rear LEDs turn on: the one near the Medit 'M' logo blinks in light gray, while the other at the bottom of the battery stays solid blue.

🔎Note
The four LEDs on the battery’s fuel gauge indicate the remaining battery level:
4 LEDs lit: 75 – 100%
3 LEDs lit: 50 – 74%
2 LEDs lit: 25 – 49%
1 LED lit: 12 – 24%
1 blinking LED: 1 – 12%
* The indicator blinks when the charge is between 1% and 12% while the battery is inserted in the handpiece. When it’s checked separately or placed in the charger, however, the indicator remains steady, with a single LED indicating the 1–12% charge range.
No LEDs lit: 0%
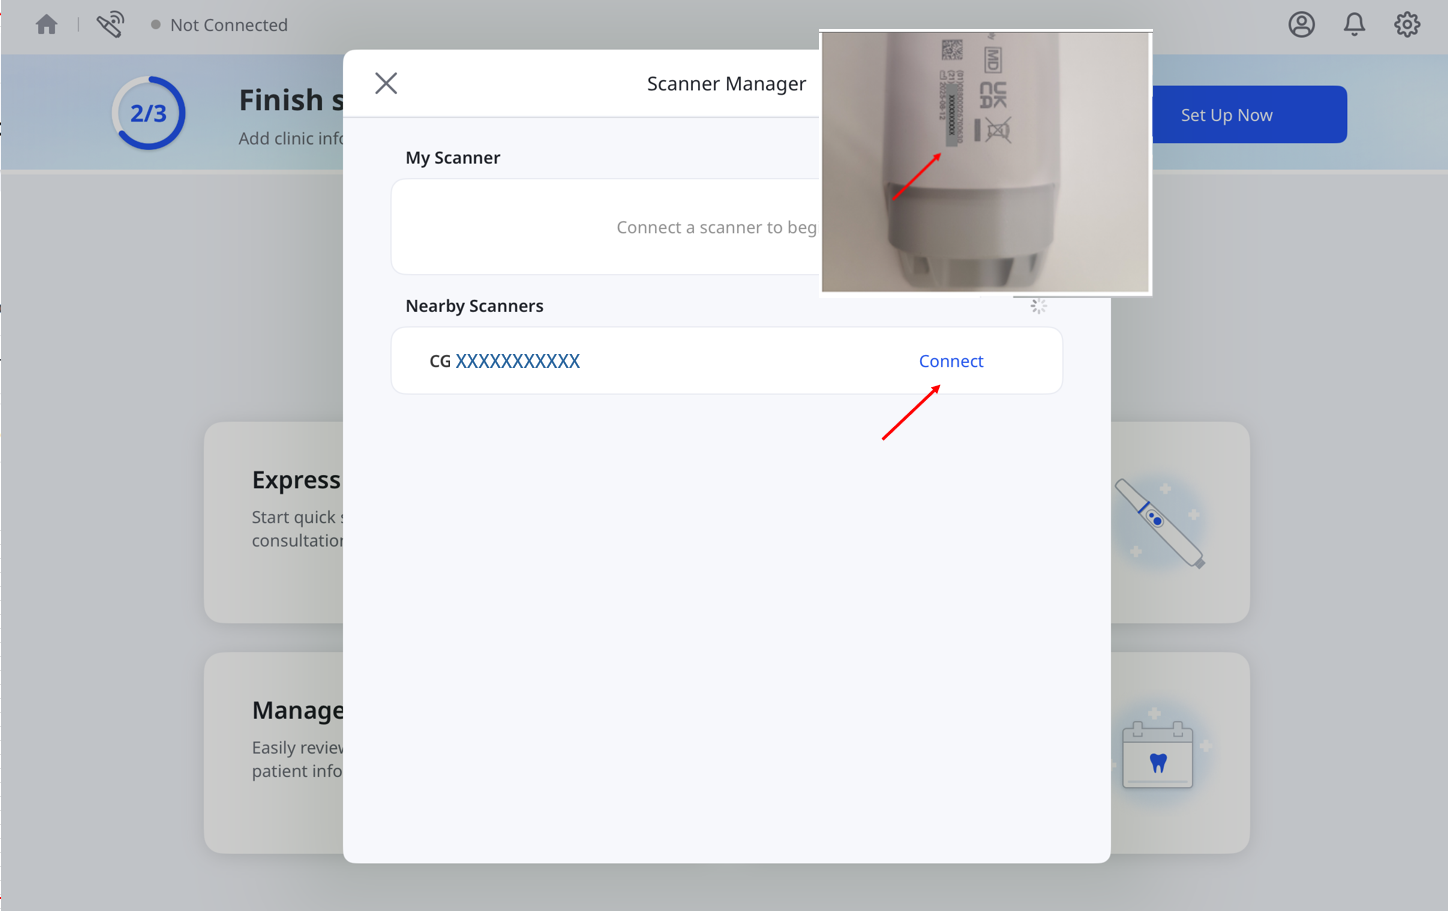
From the home screen, tap the Scanner Manager icon in the top-left corner.
🔎Note
You can also access the Scanner Manager using the following methods:
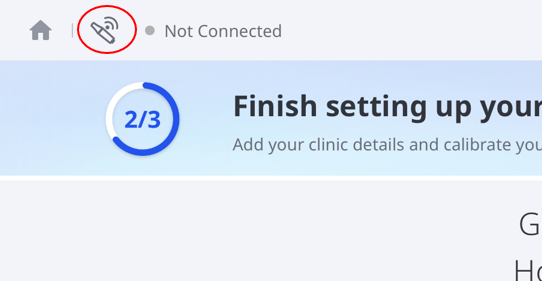
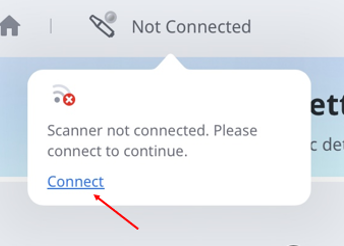
• Tap Not Connected in the top-left corner, then tap Connect in the pop-up.
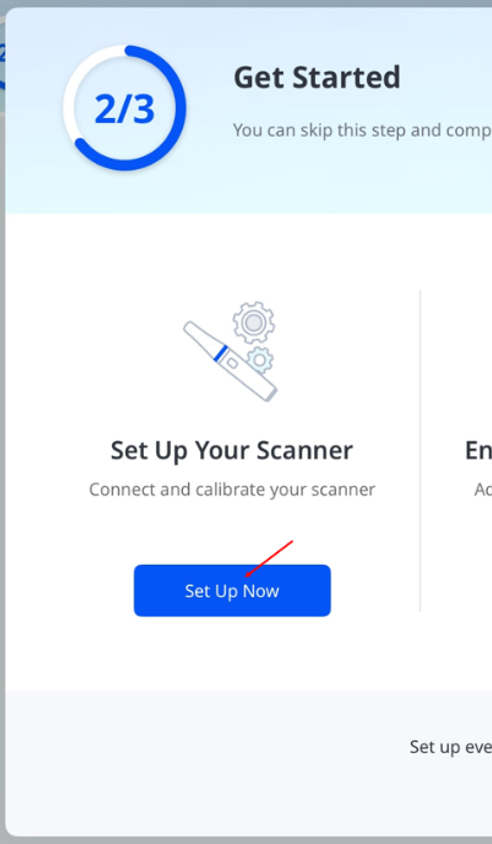
 • Tap Set Up Now on the home screen, then tap Set Up Now again in the Get Started dialog.
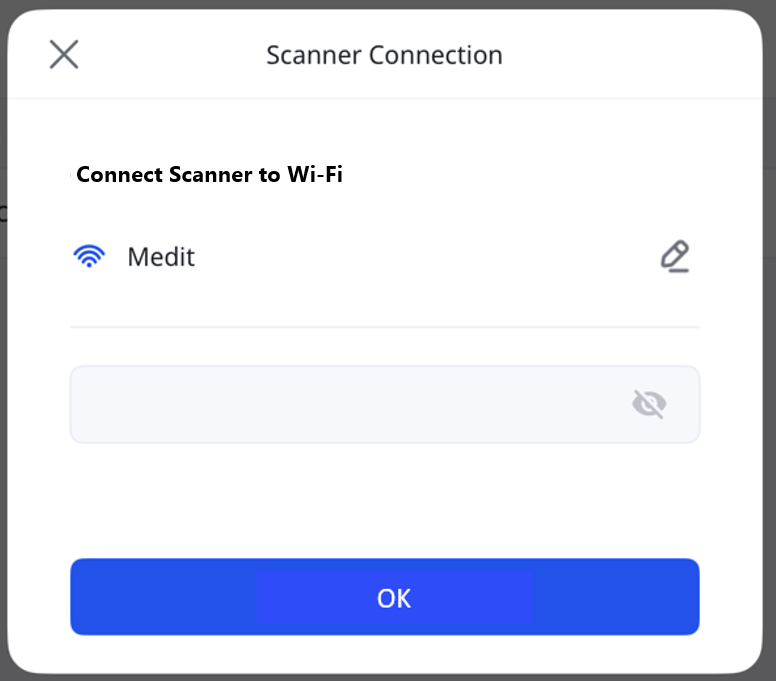
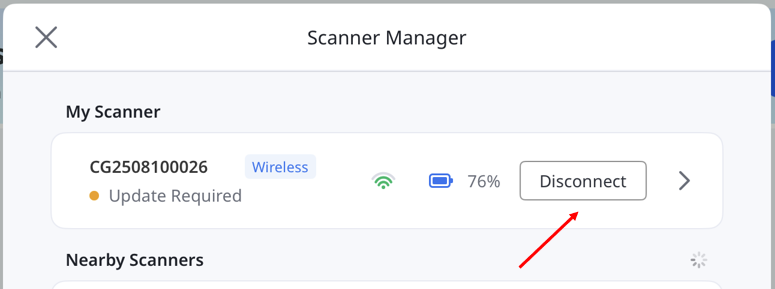
In the Scanner Manager, select the scanner that matches your serial number, and tap Connect. The serial number is located on the back, near the bottom of the handpiece.
Enter the password for the Wi-Fi network, and then tap OK.
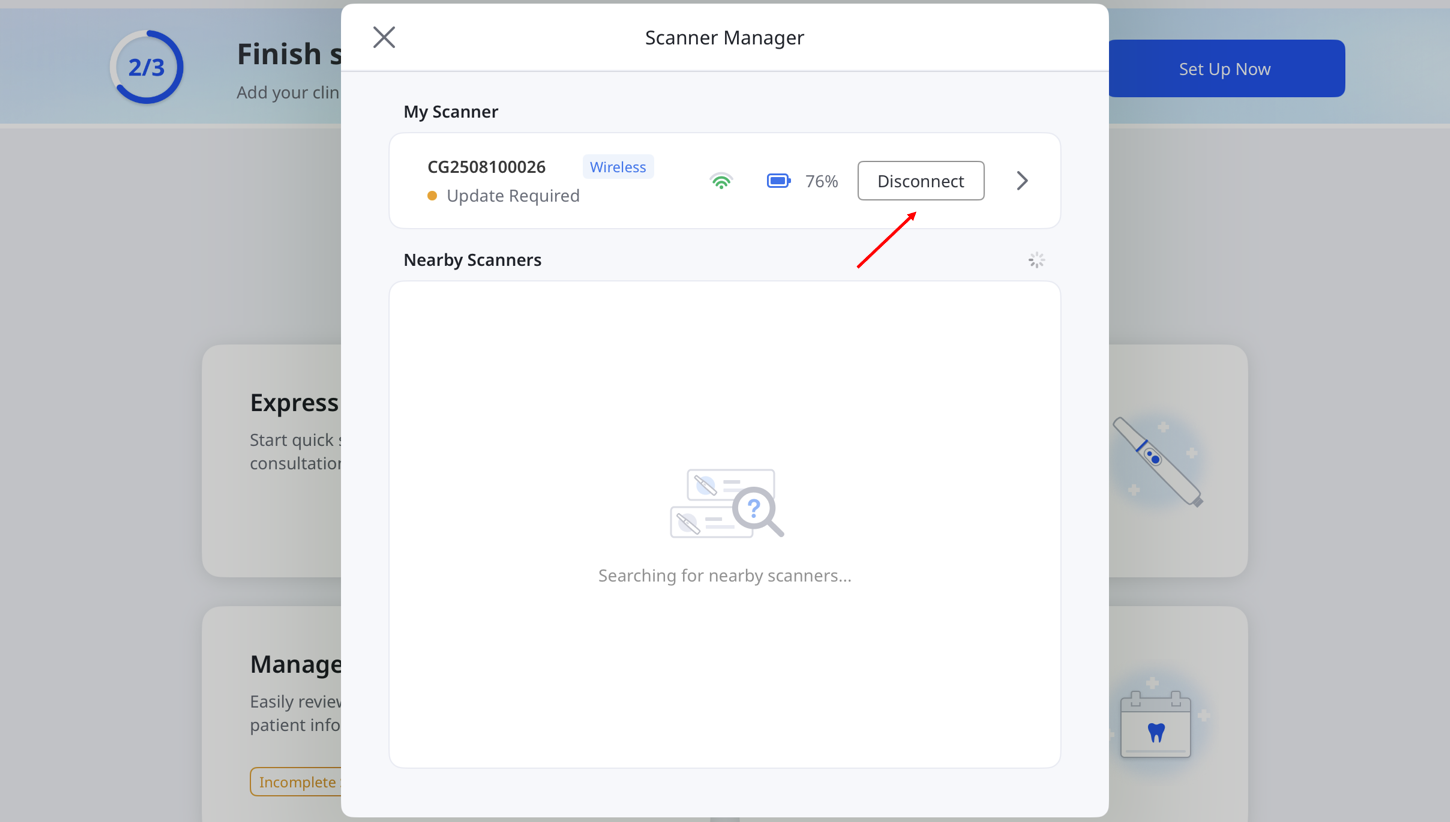
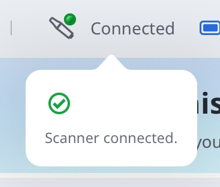
The Disconnect button appears next to your scanner when it is connected.
🔎Note
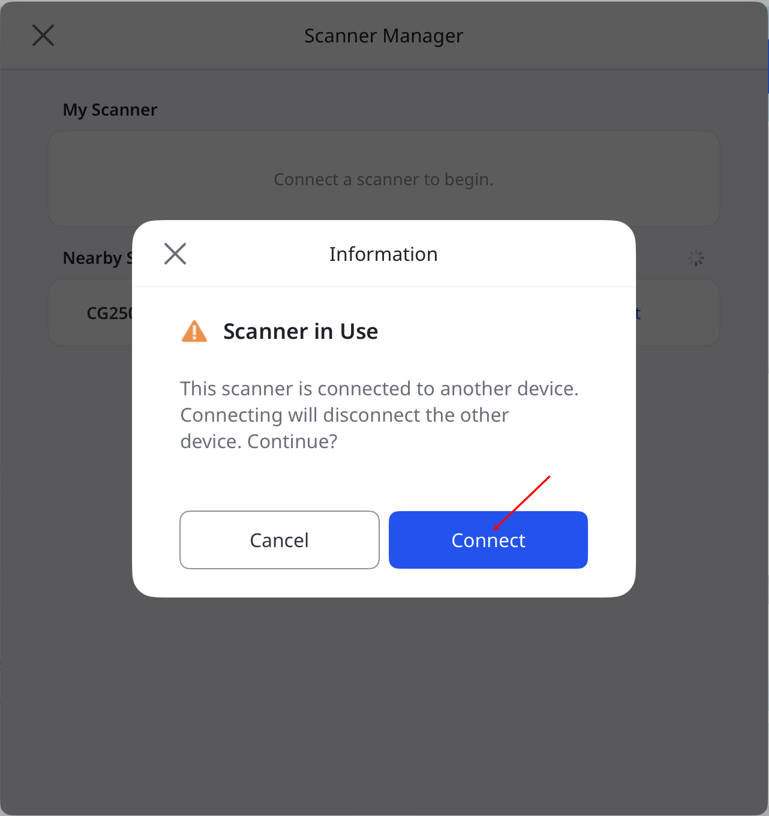
If the scanner is already connected to another device, select it from Nearby Scanners or My Scanner to connect. This will disconnect the scanner from the other device.
You cannot connect the scanner while it is scanning or updating firmware on another device.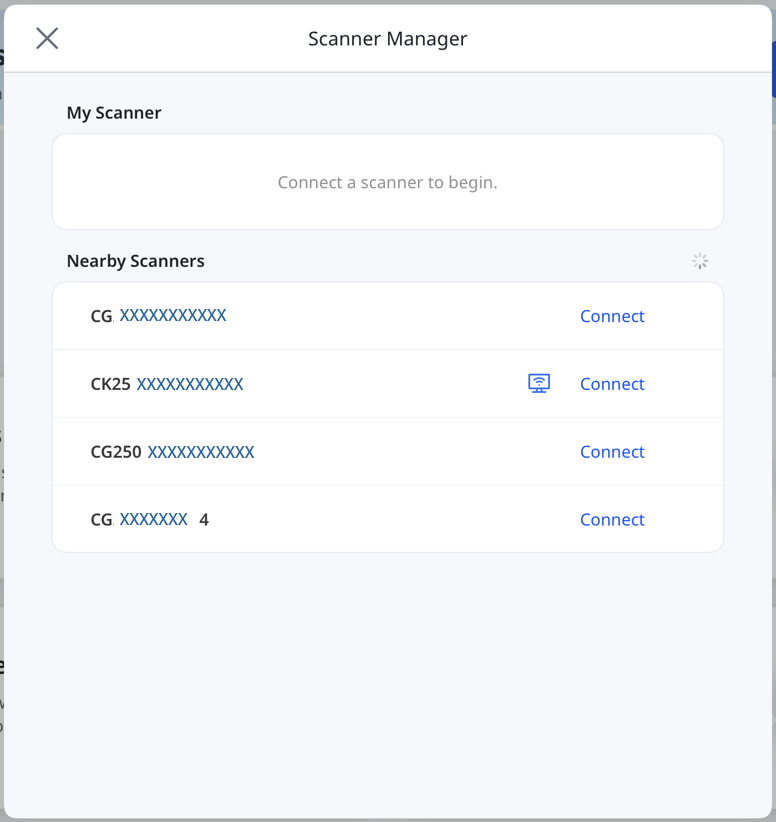
If Wi-Fi is not available, use Personal Hotspot to connect the scanner.
Turn on Cellular Data and enable Personal Hotspot on the iPad.
Connect the scanner to the hotspot network shown on your iPad.
Turn off Maximize Compatibility for optimal performance.
**This option is only available on cellular-enabled iPads.
Wireless Connection (Hub)
Medit Link Express can connect to supported wireless scanners through a hub as an alternative to a direct wireless connection. Before connecting, ensure that the scanner is powered on:
🔎Note
Ensure that the hub is connected to your device using the Power Delivery cable included with the i900 Mobility scanner.
Insert the battery into the bottom of the handpiece, and press the power button once.
When power is applied, the two rear LEDs turn on: the one near the Medit 'M' logo blinks in light gray, while the other at the bottom of the battery stays solid blue.
🔎Note
The four LEDs on the battery’s fuel gauge indicate the remaining battery level:
4 LEDs lit: 75 – 100%
3 LEDs lit: 50 – 74%
2 LEDs lit: 25 – 49%
1 LED lit: 12 – 24%
1 blinking LED: 1 – 12%
* The indicator blinks when the charge is between 1% and 12% while the battery is inserted in the handpiece. When it’s checked separately or placed in the charger, however, the indicator remains steady, with a single LED indicating the 1–12% charge range.
No LEDs lit: 0%
From the home screen, tap the Scanner Manager icon in the top-left corner.
🔎Note
You can also access the Scanner Manager using the following methods:
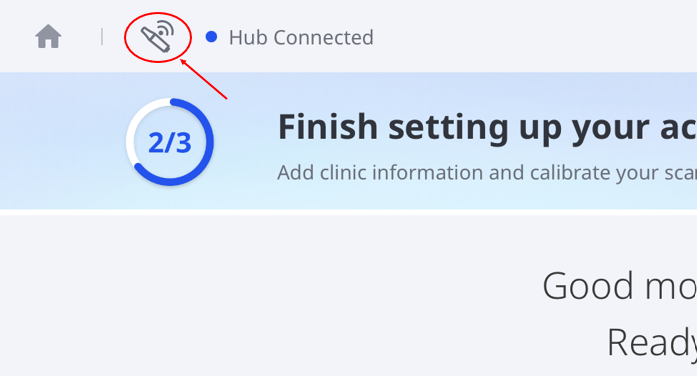
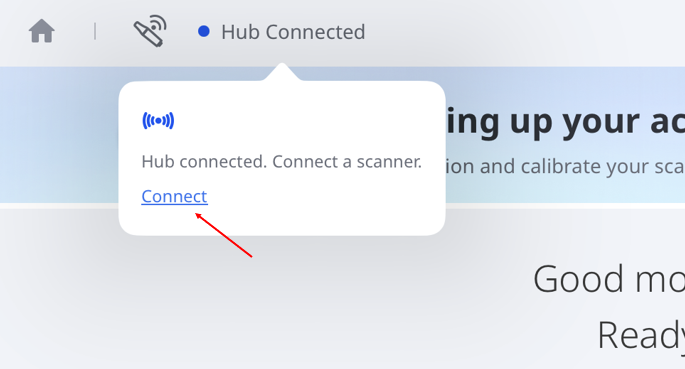
• Tap Hub Connected in the top-left corner, then tap Connect in the pop-up.
• Tap Set Up Now on the home screen, then tap Set Up Now again in the Get Started dialog.
In the Scanner Manager, tap Connect next to your scanner.
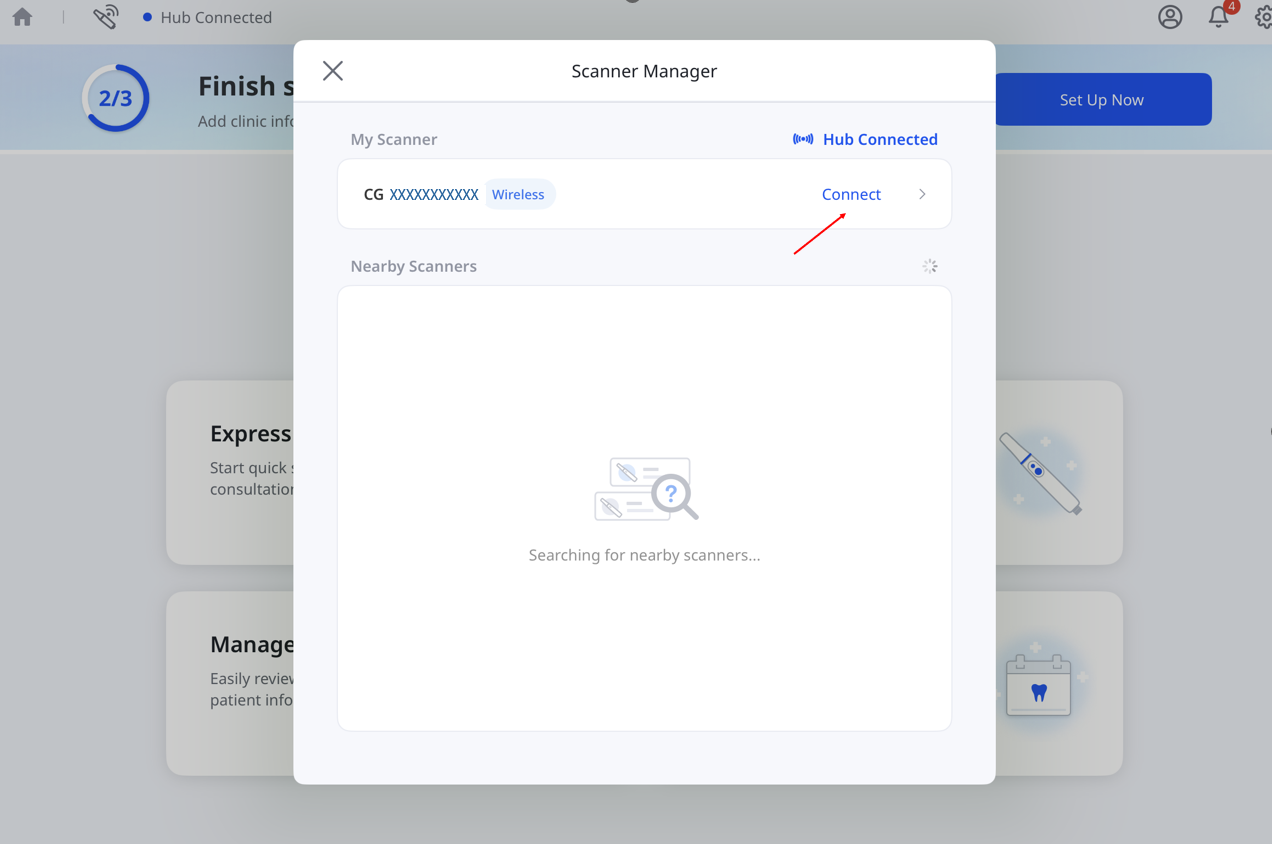
The Disconnect button appears next to your scanner when it is connected.
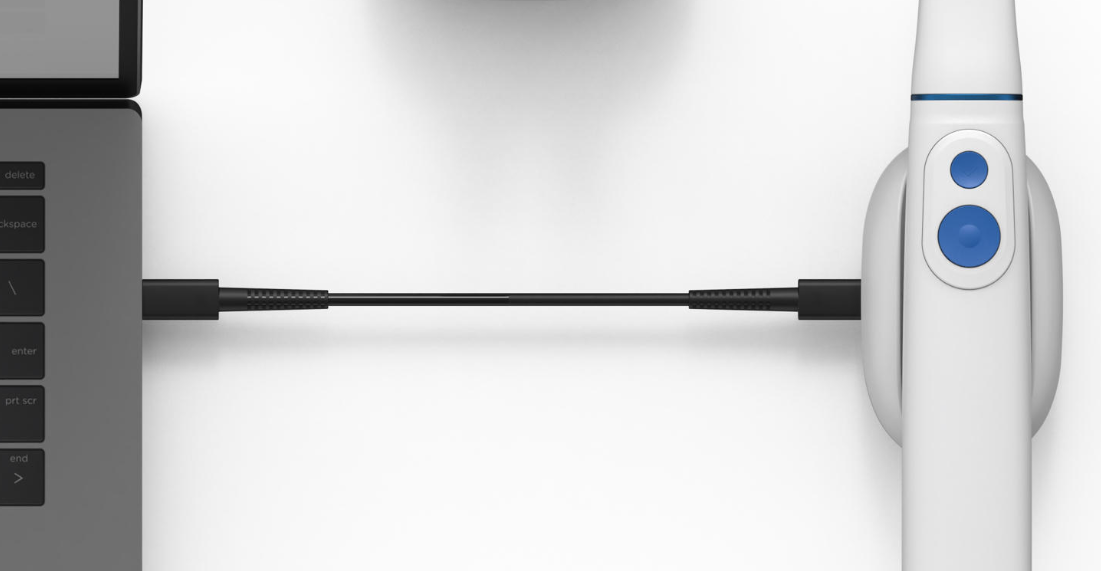
USB Connection
Medit Link Express supports USB connection for the Medit i900 and i900 classic. Connect the scanner to your Mac using the dedicated cable while the app is running.
A valid license is required to start scanning.
Scanner Calibration
🔎Note
It is recommended that the scanner be calibrated periodically.
Regular calibration helps maintain scanning accuracy and stable device performance.
Calibrate the scanner in the following cases:
Scan data quality is lower than in previous scans
External conditions, such as device temperature, have changed during use
The user-defined calibration interval has passed
Calibration is more accurate when the scanner temperature is similar during calibration and scanning.
Before calibration, allow the scanner to warm up until it reaches the operating temperature.
How to Calibrate
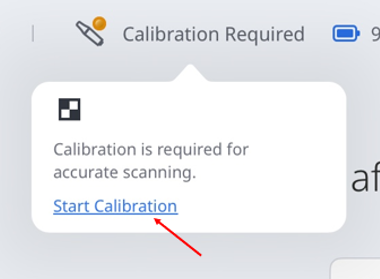
Make sure the scanner status shows Calibration Required, then tap it.

When the pop-up message appears, tap Start Calibration.
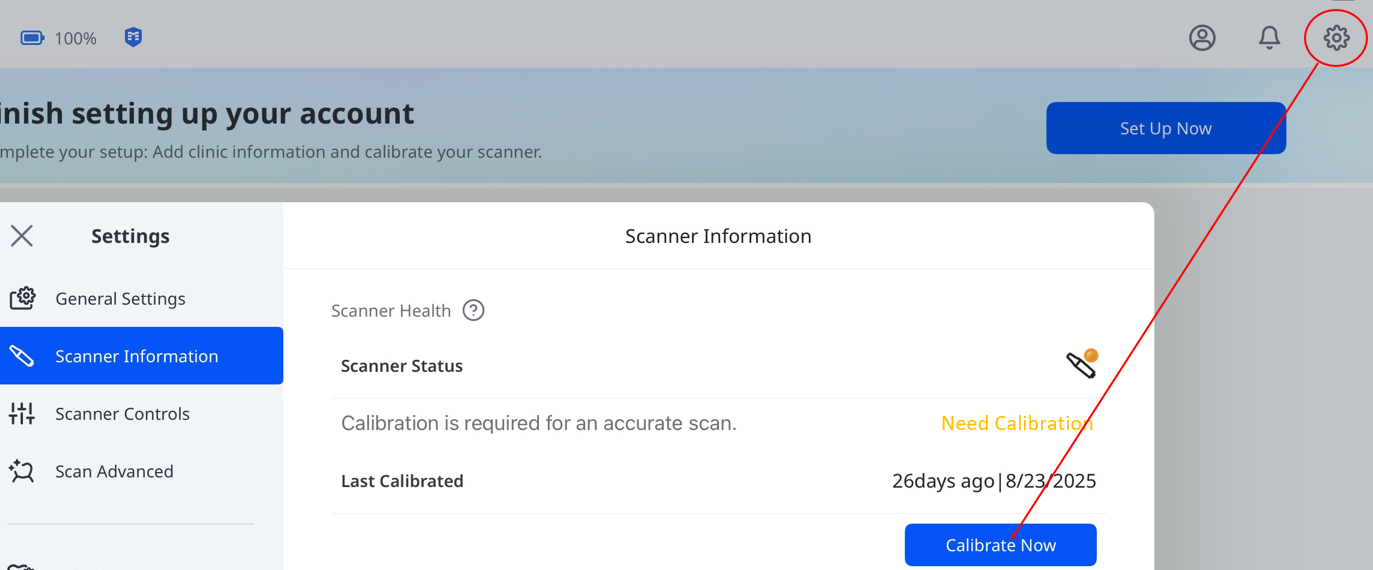
Or go to Settings > Scanner Information, then tap Calibrate Now.
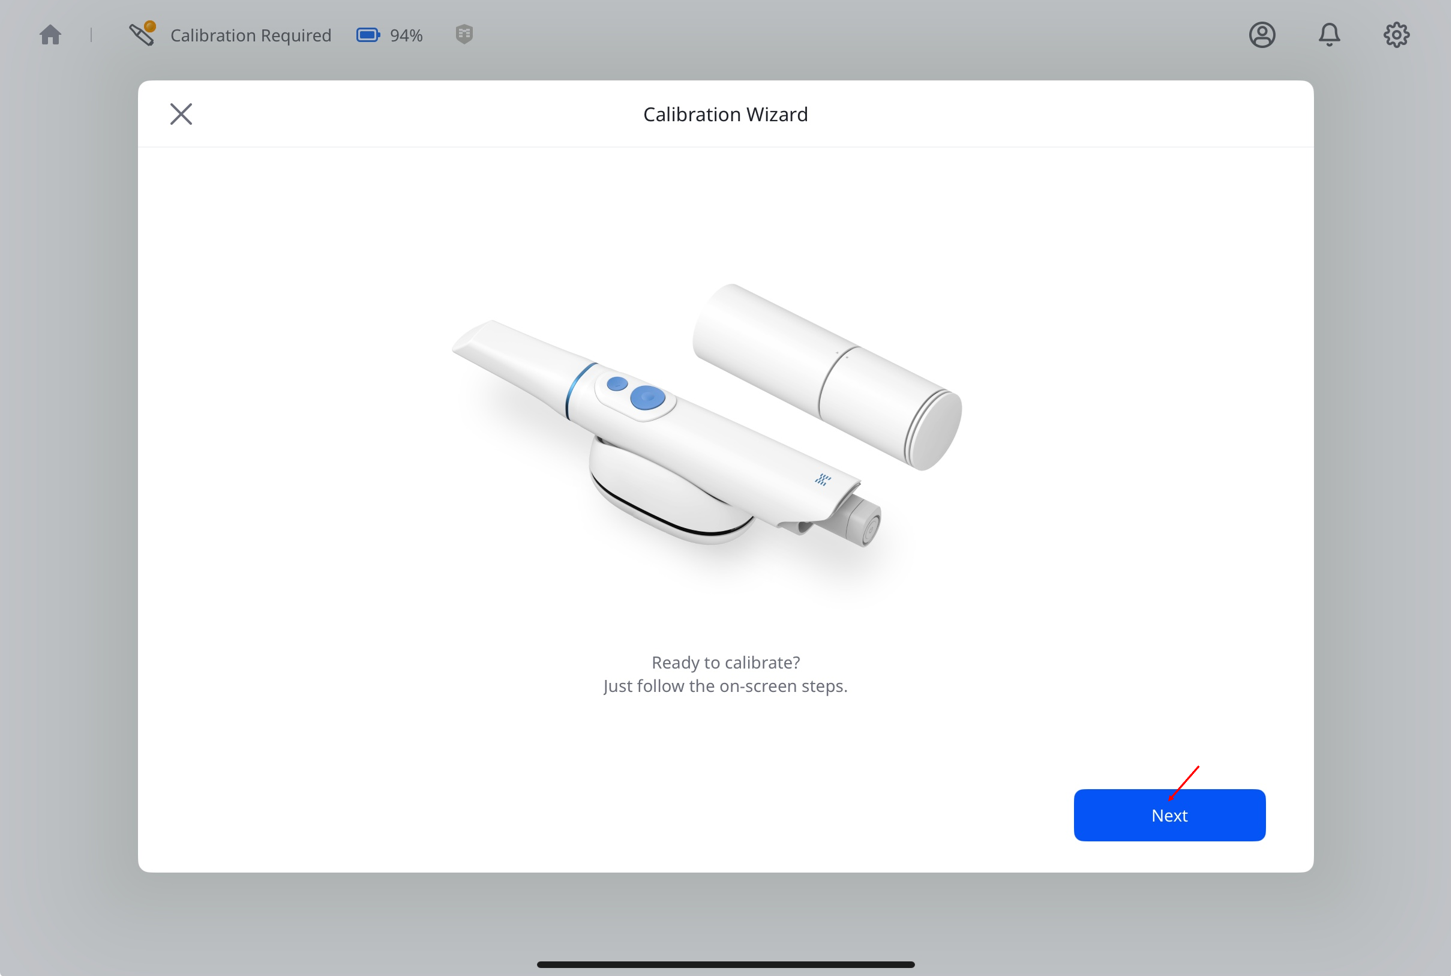
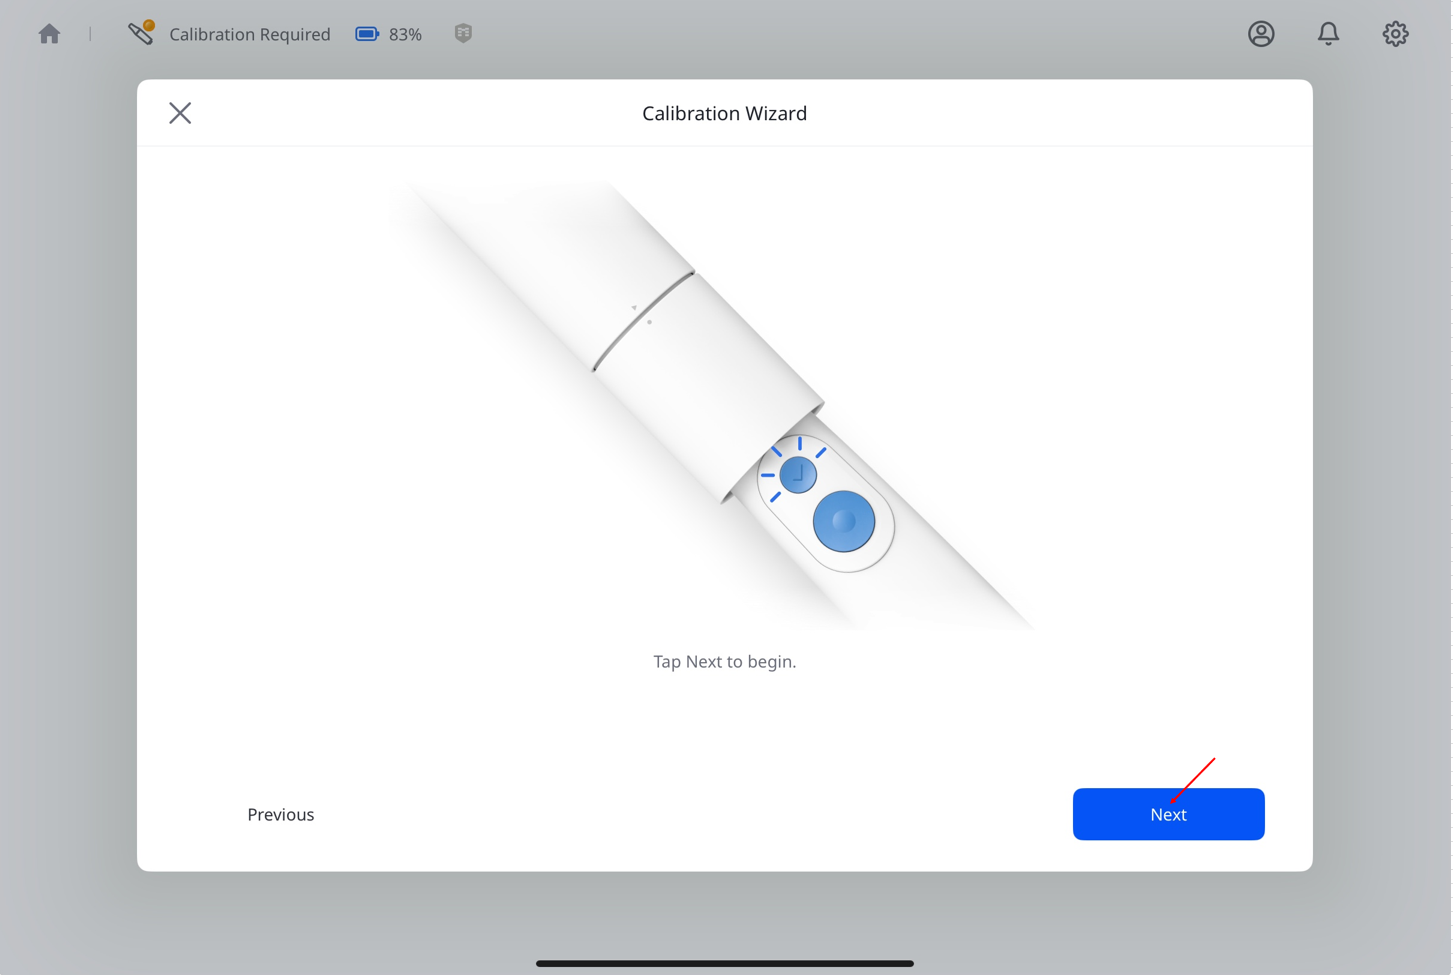
Prepare the calibrator and tap Next to start the calibration process.
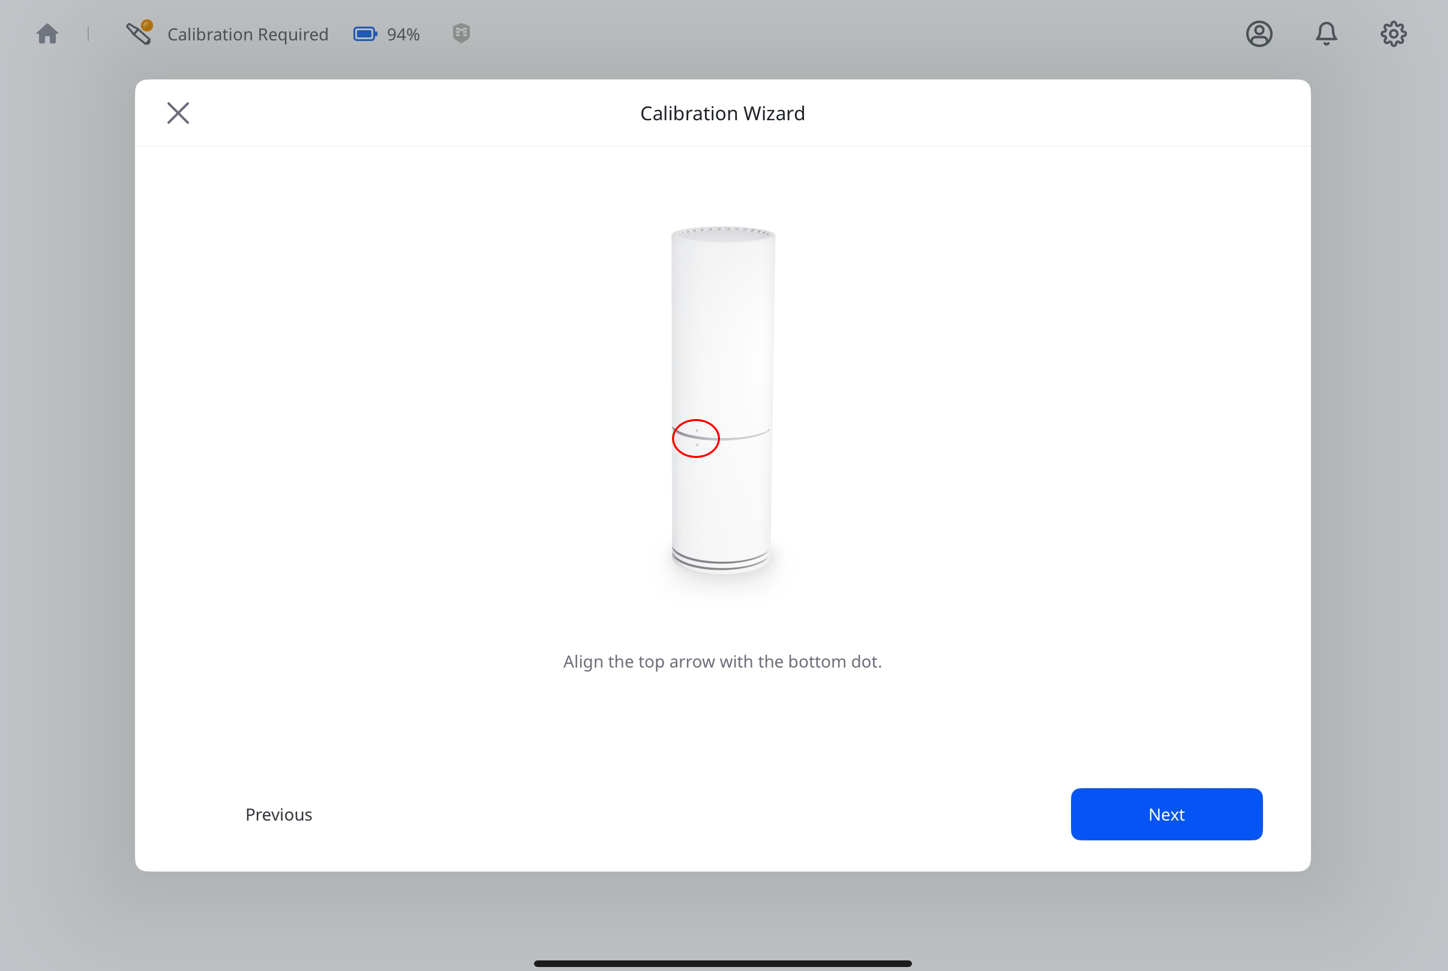
Turn the upper part of the calibrator until the arrow and dot align, then tap Next.
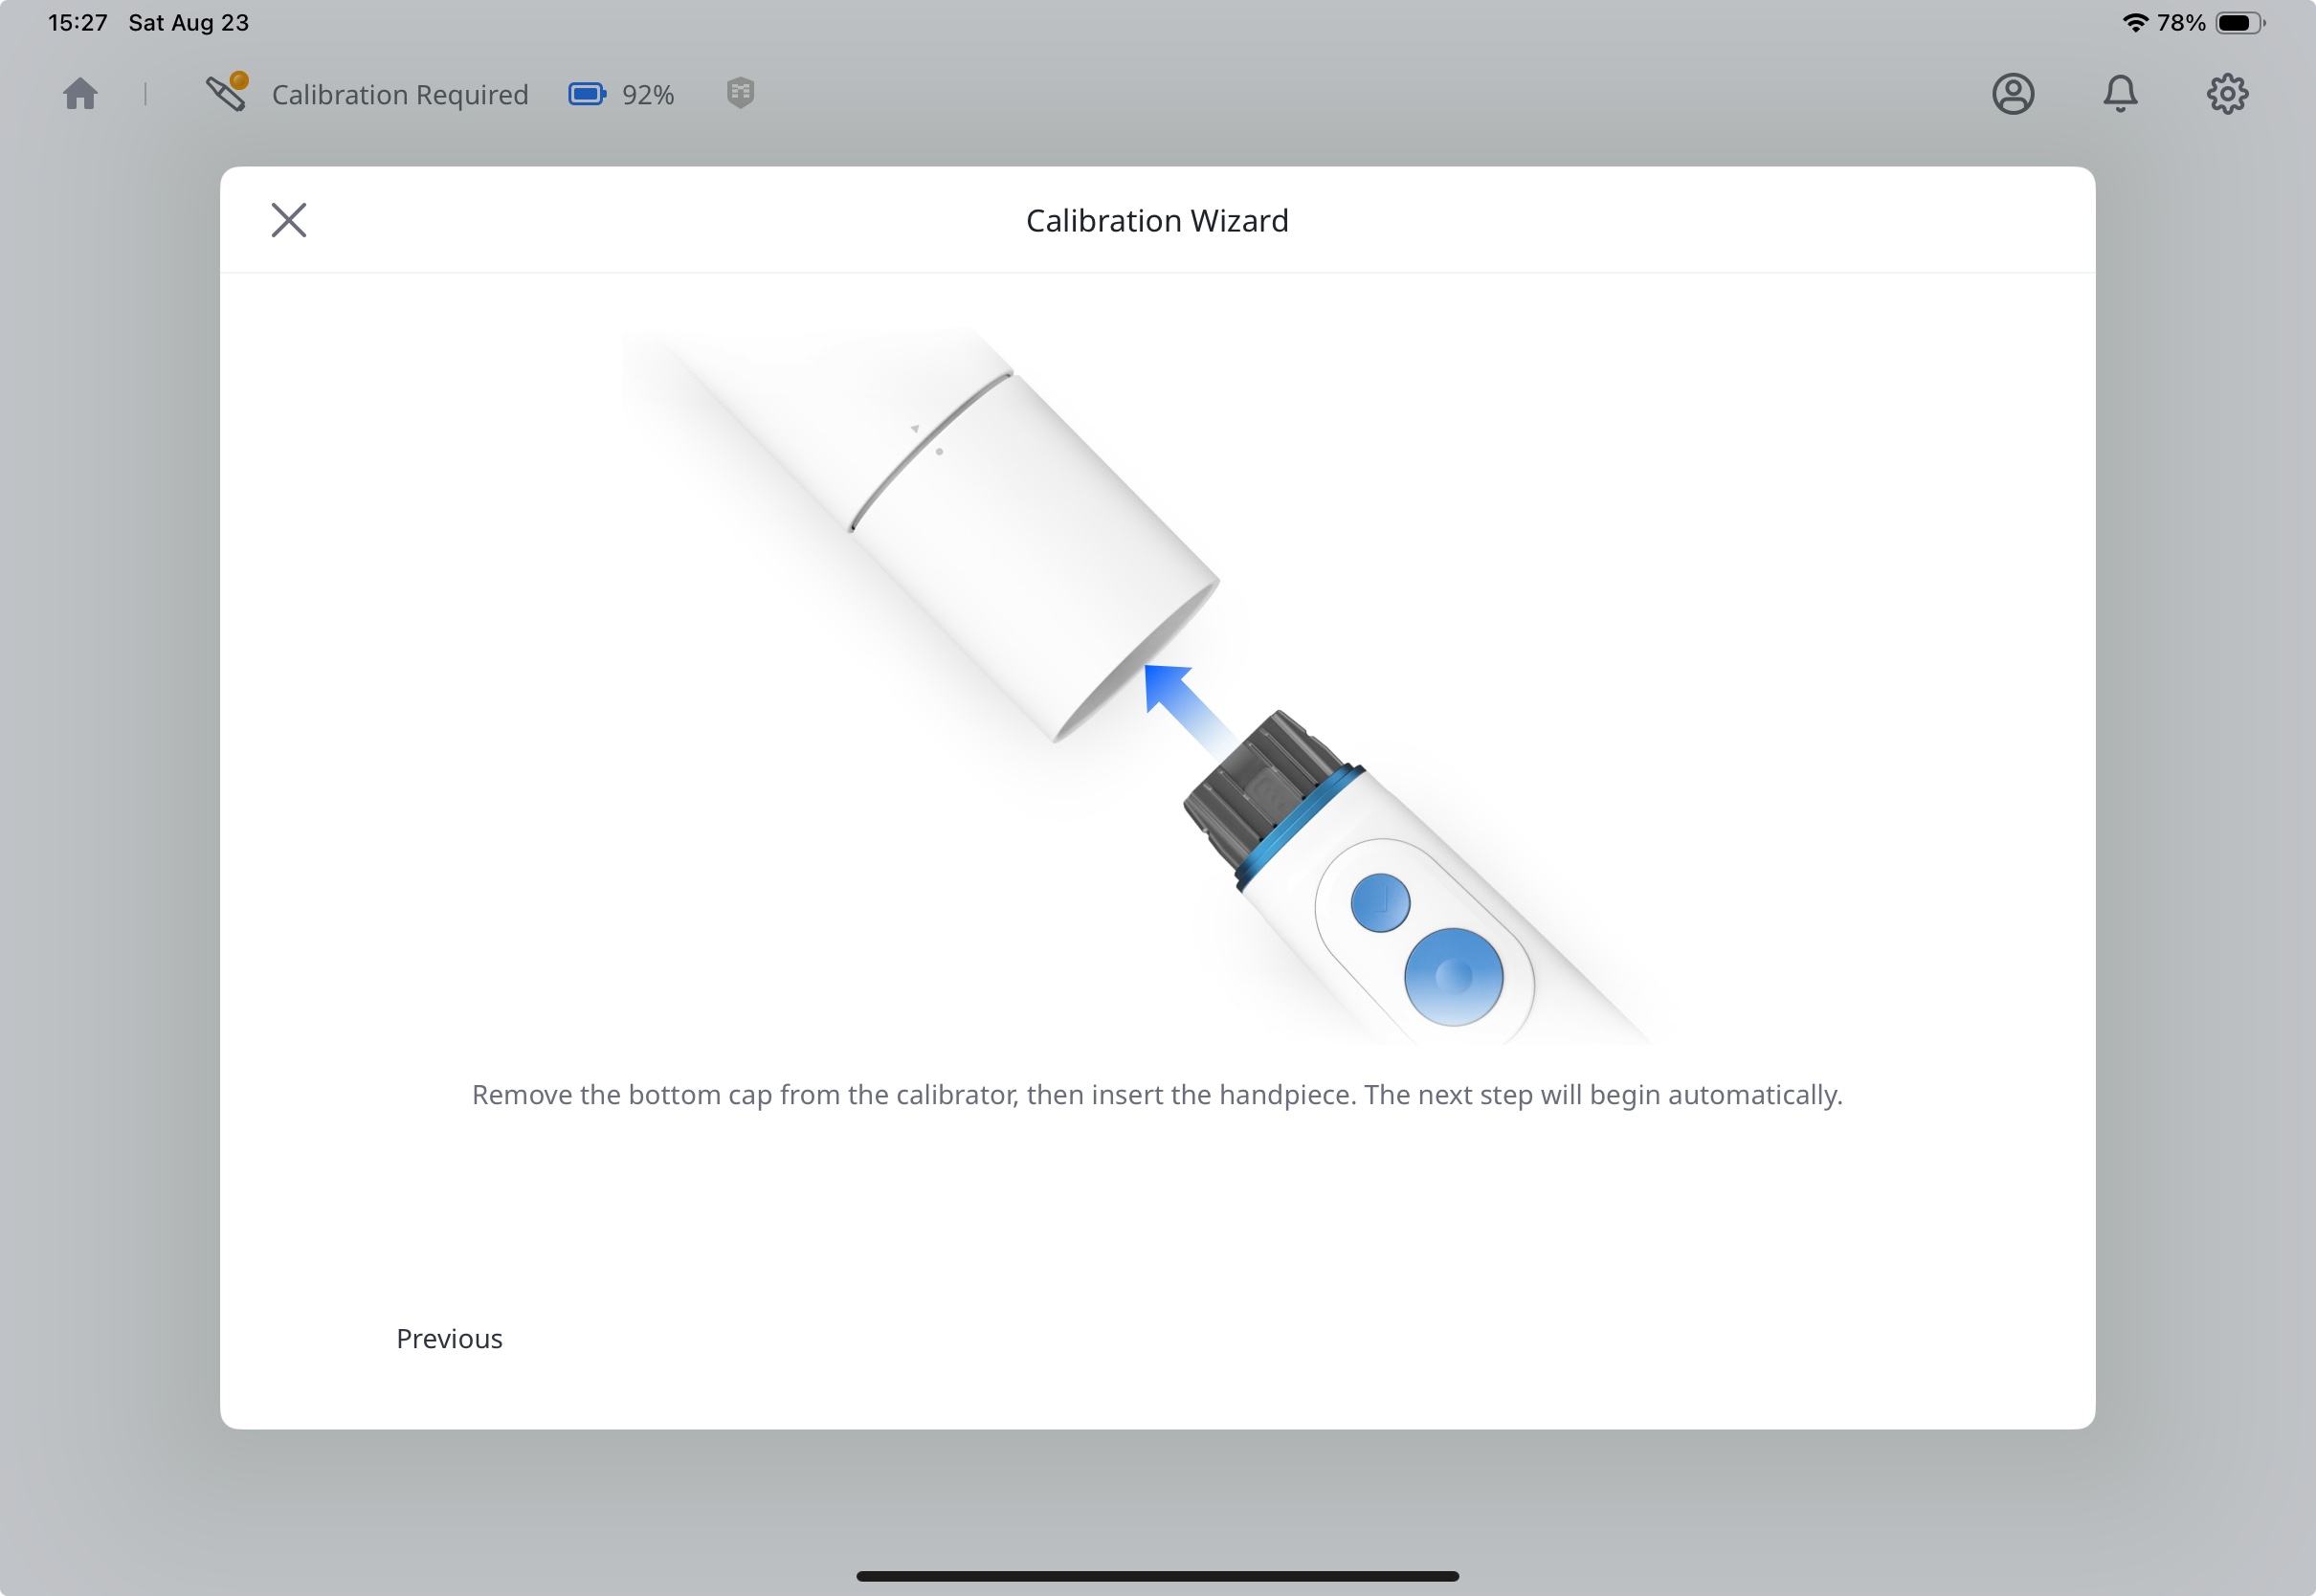
Remove the bottom cap of the calibrator and the scanner tip.
Before inserting the scanner, check that the aligned symbols on the calibrator are in line with the physical buttons on the scanner handpiece.
Firmly push the scanner into the calibrator until it clicks into place.
When the Next button appears at the bottom right, it means the connection is complete. Tap it to continue.
Rotate the upper part of the calibrator to the next position, following the on-screen instructions.
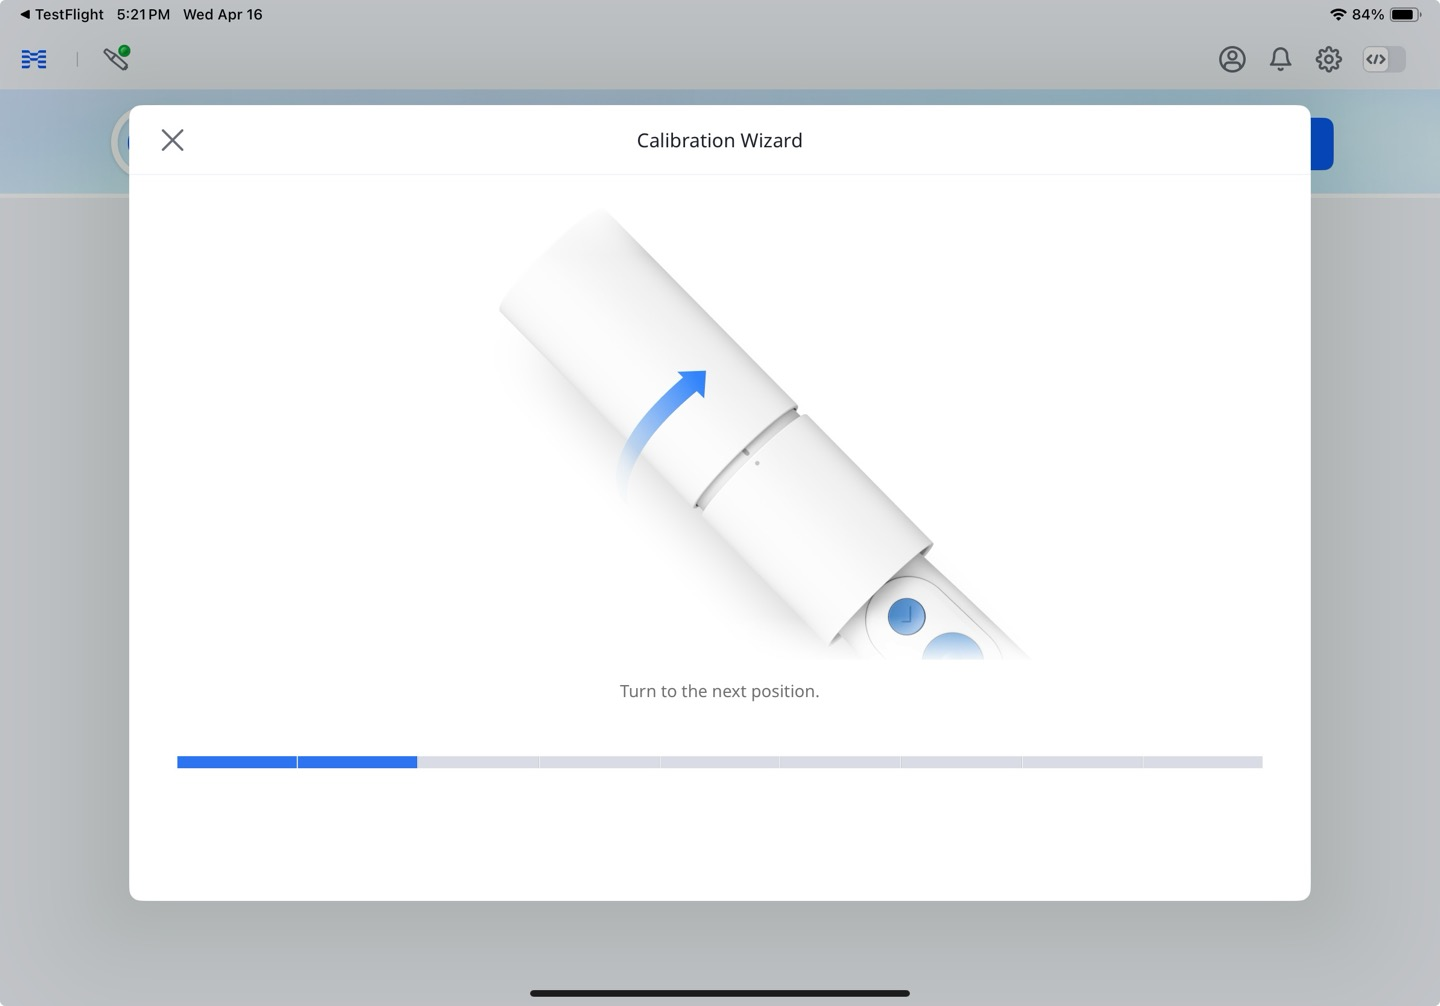
Repeat the process above until you reach the final position.
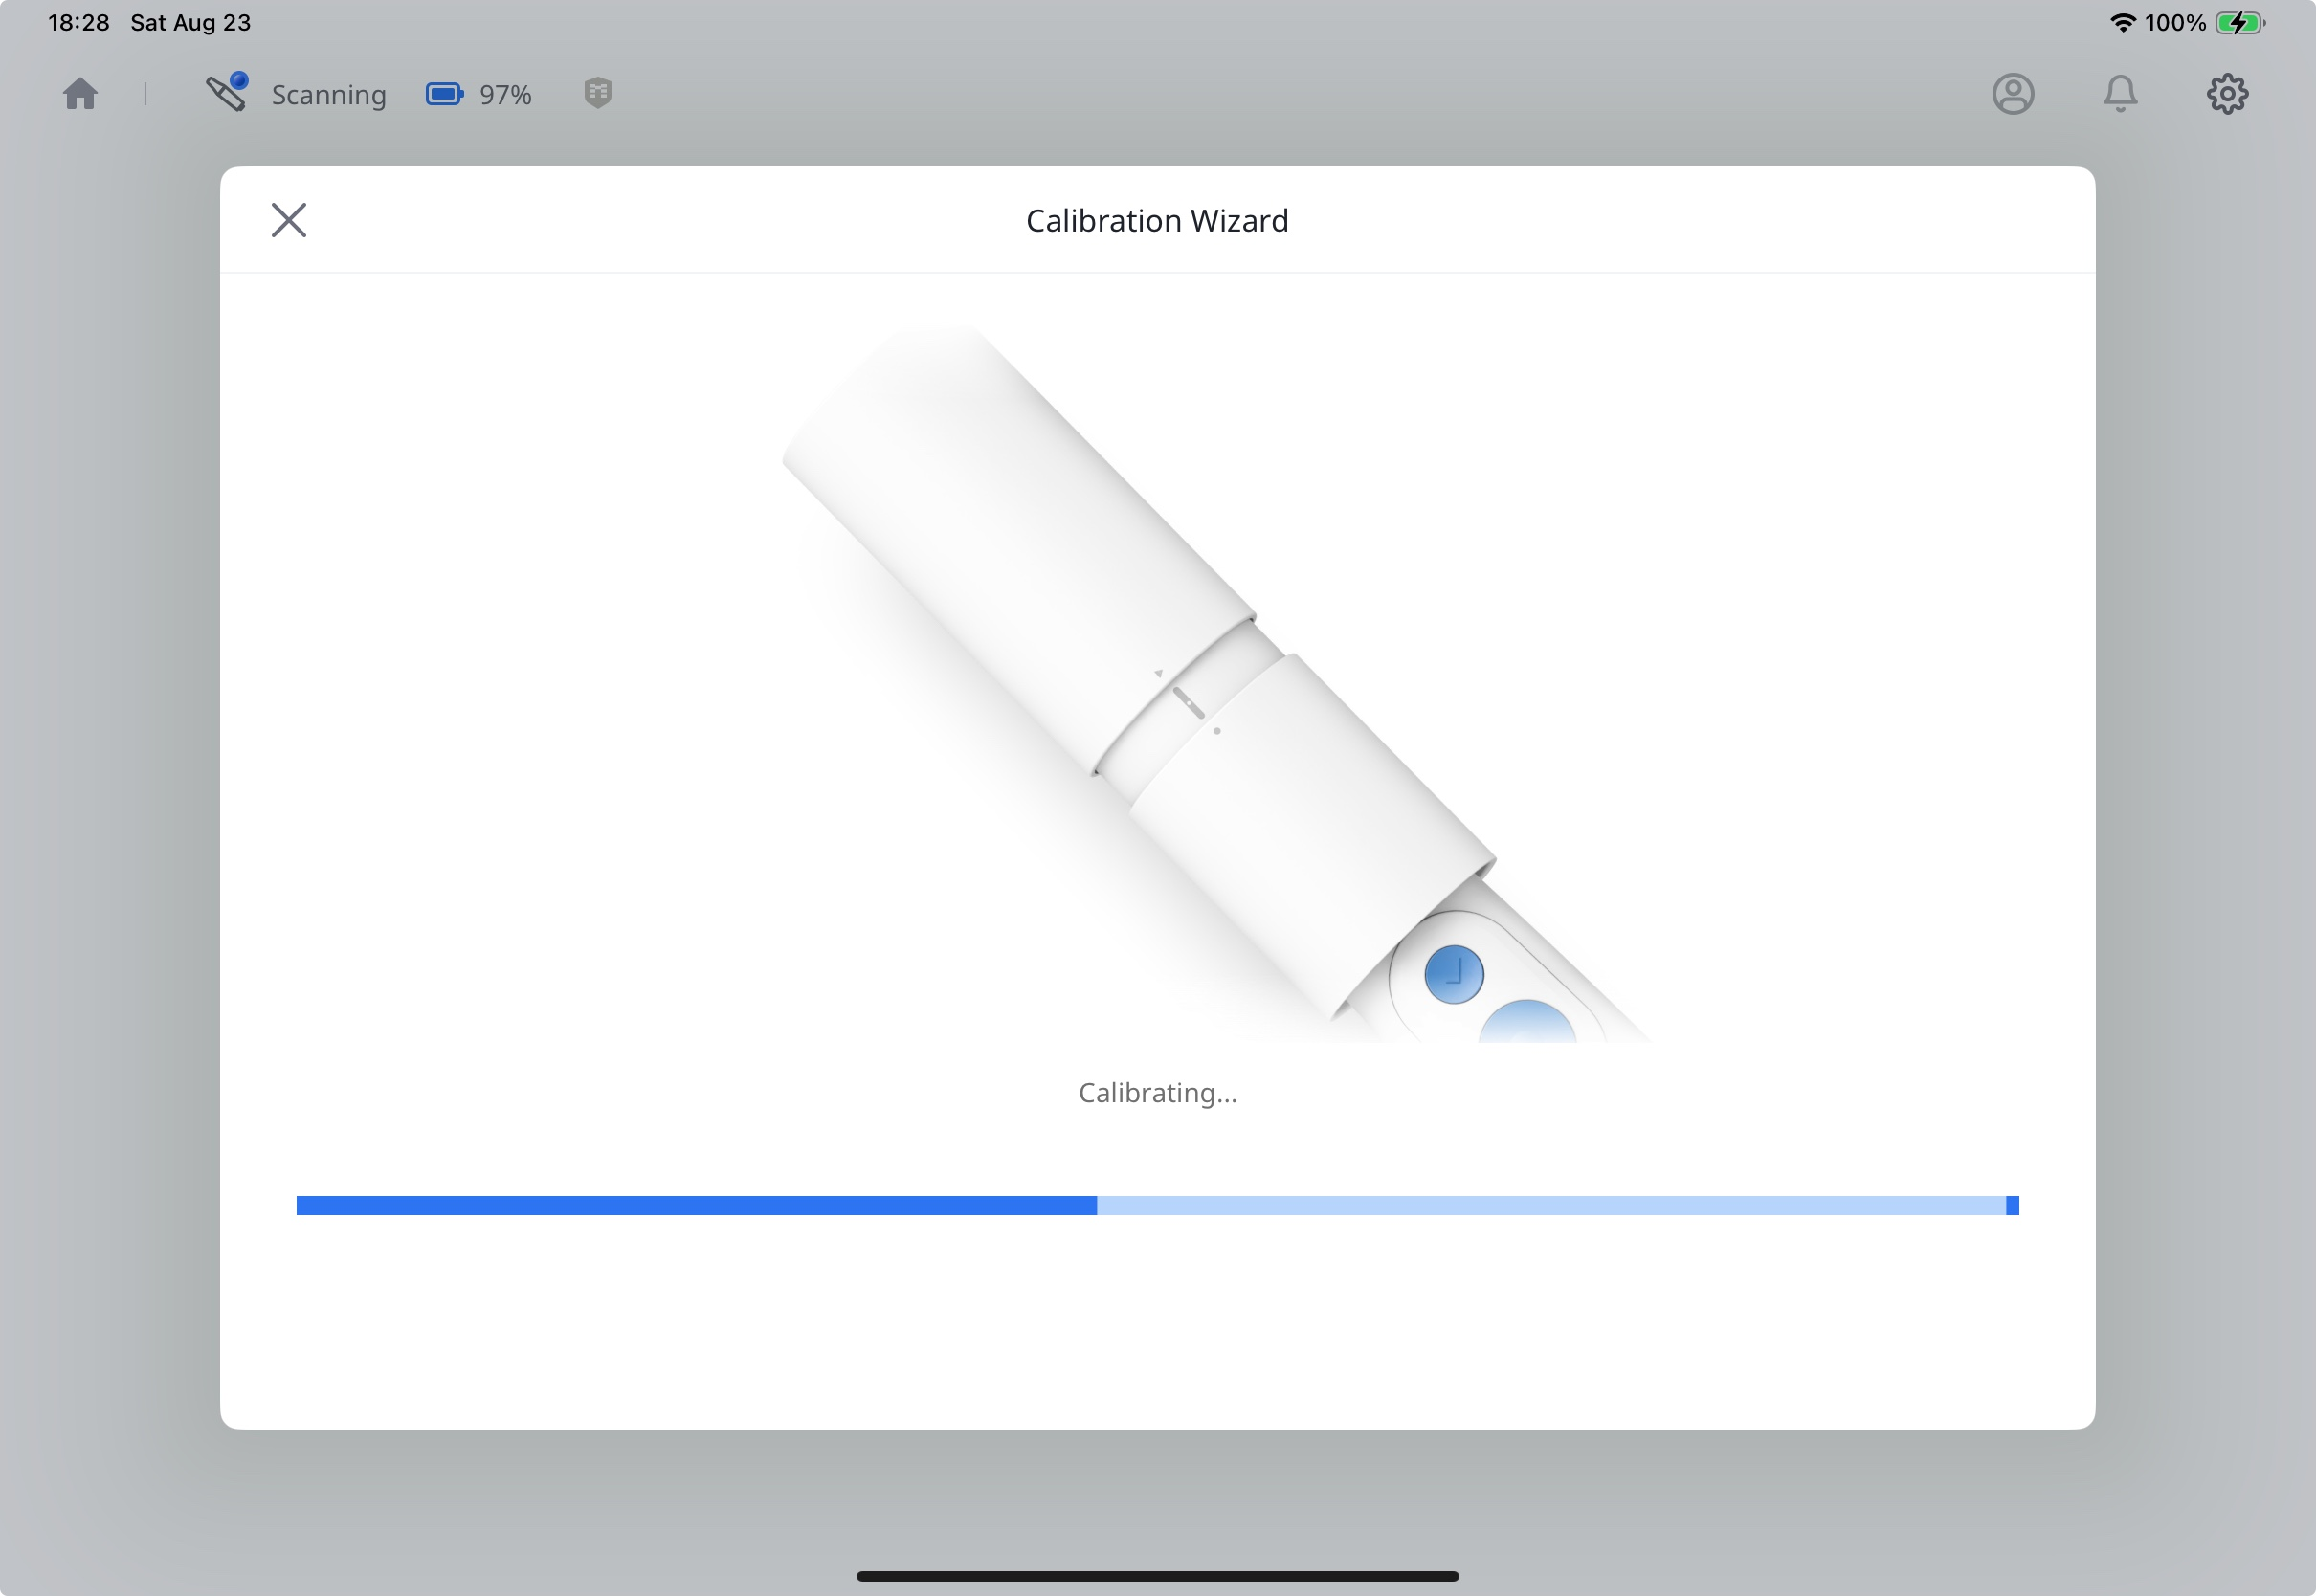
Once calibration begins, the result will be displayed automatically.
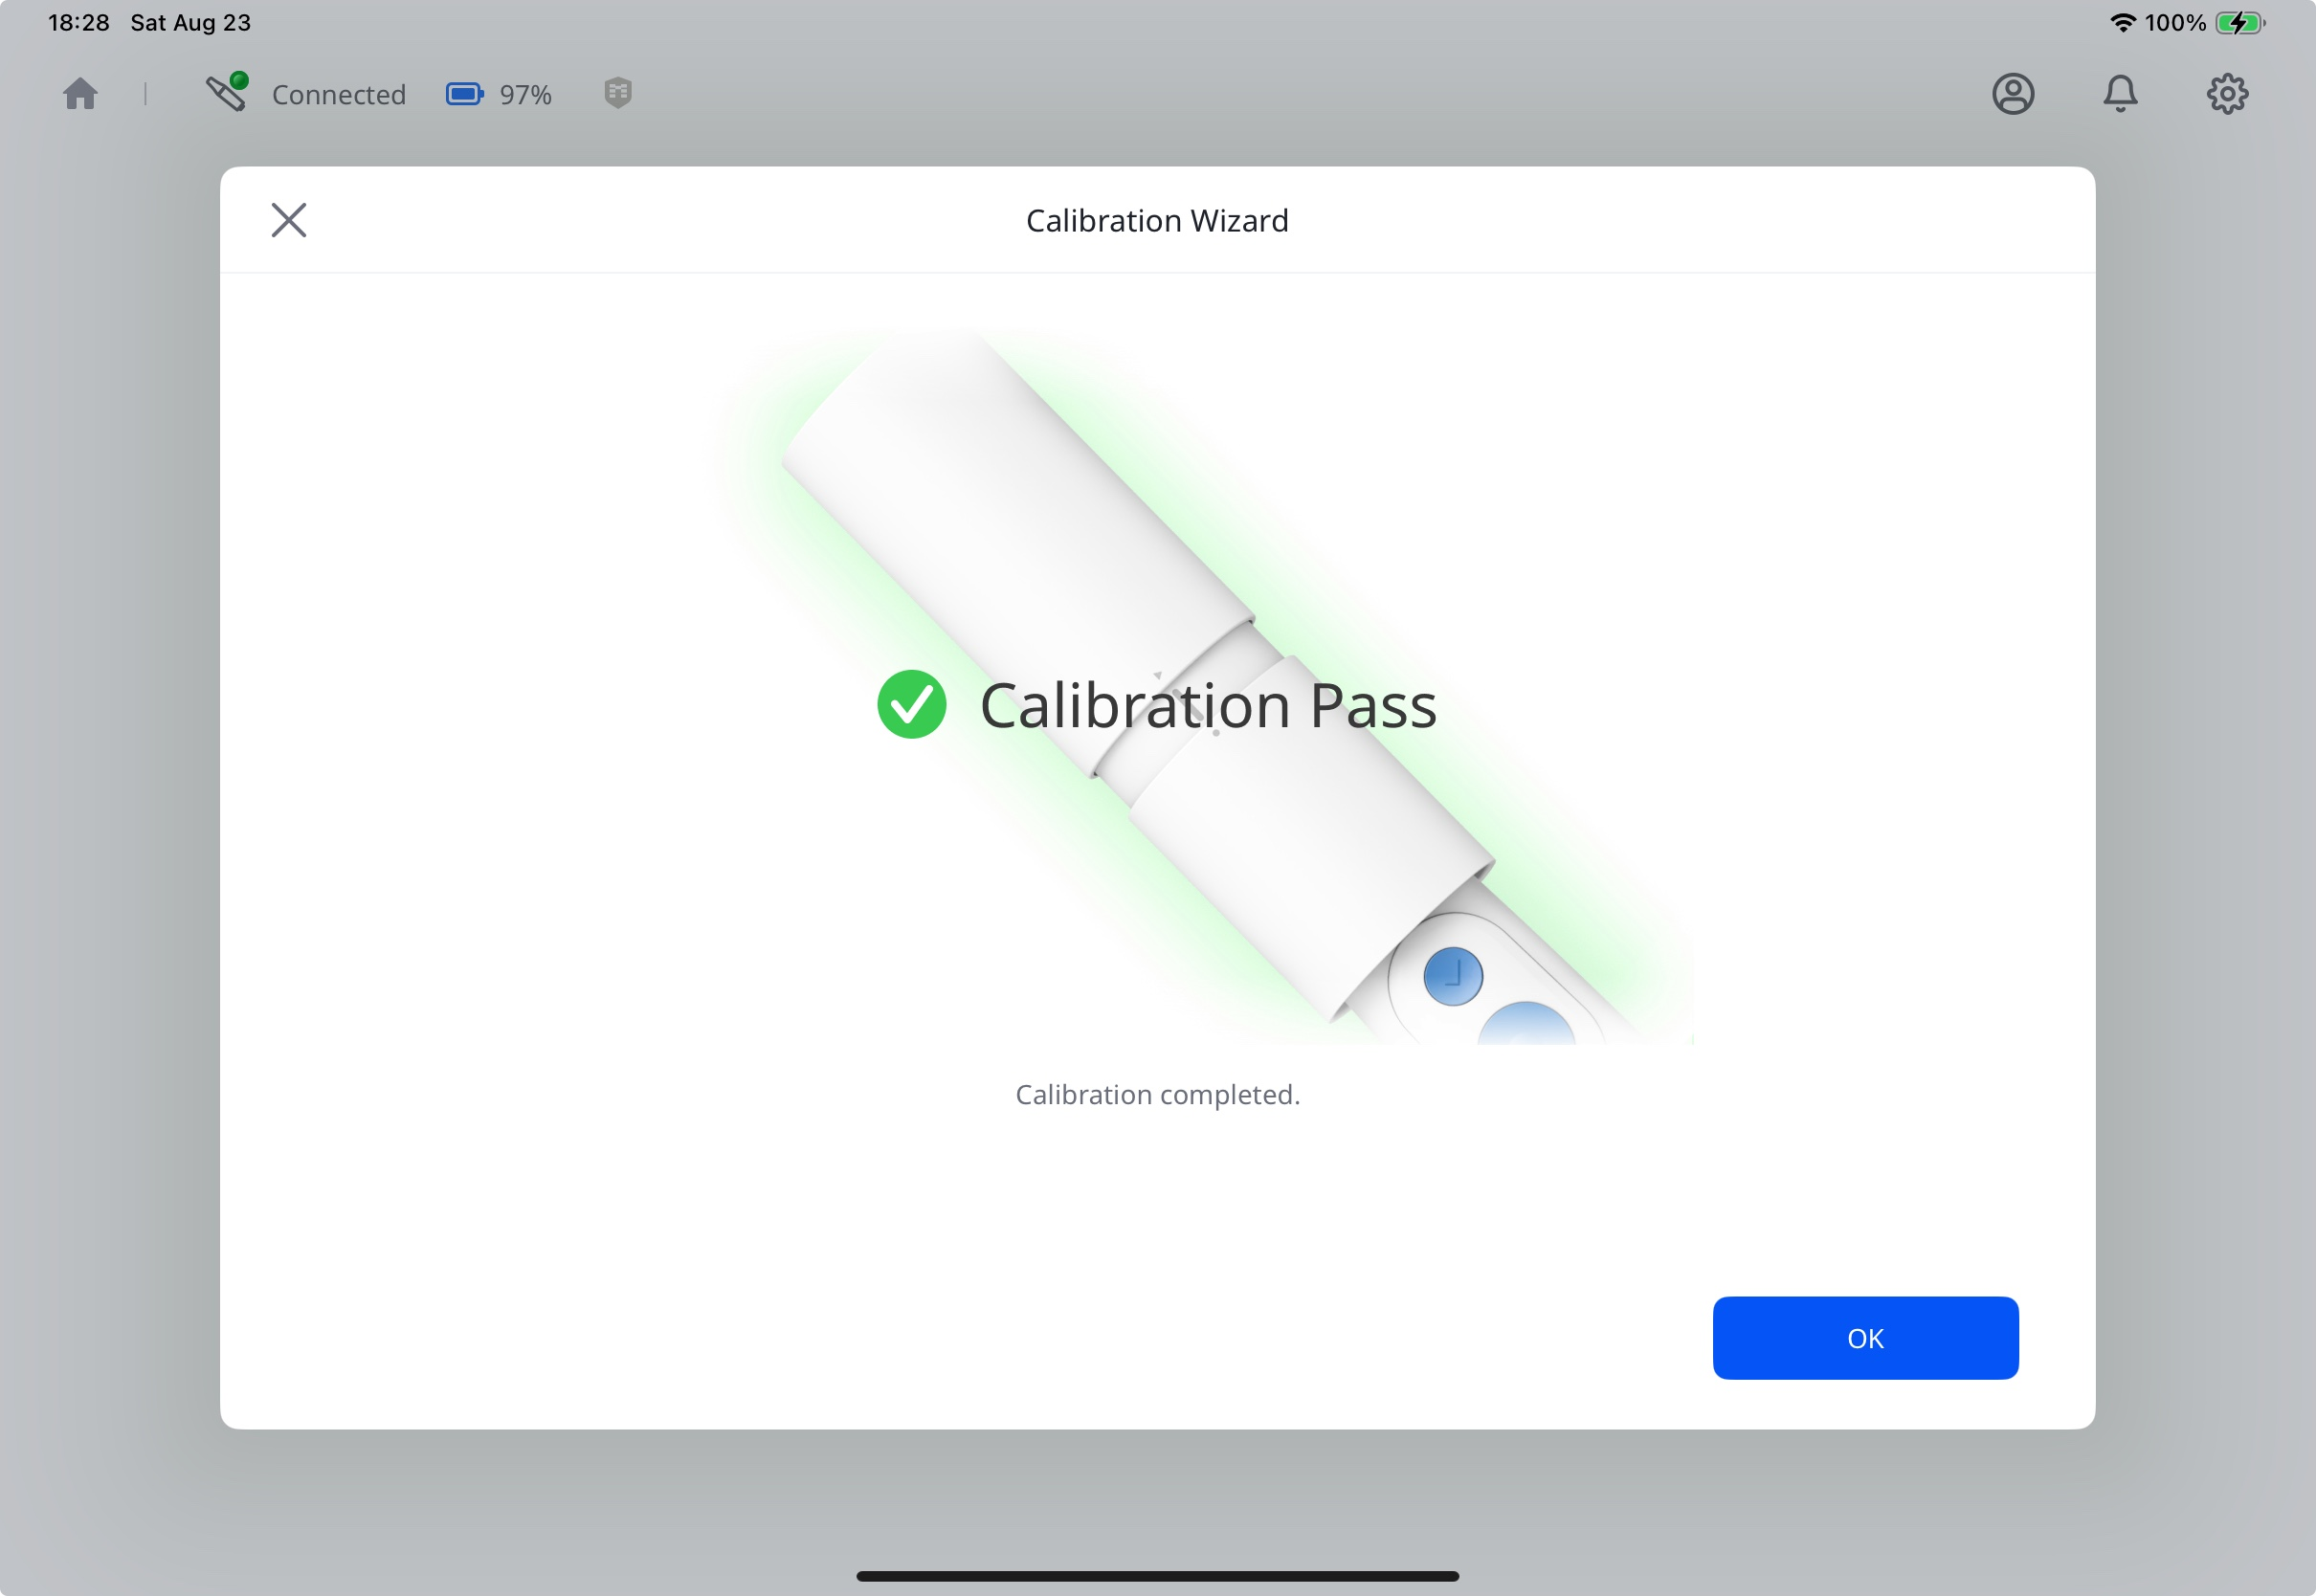
Your scanner is connected and ready to use.
Scanner Status
The table below lists the scanner status indicators in Medit Link Express. Familiarize yourself with the indicators below to better understand the scanner status and required actions.
Icon | Status | Description |
|---|---|---|
|
| The scanner is not connected. Check the Wi-Fi or Bluetooth connection. |
| The scanner is in sleep mode. | |
|
| The scanner tip is missing or not attached correctly. |
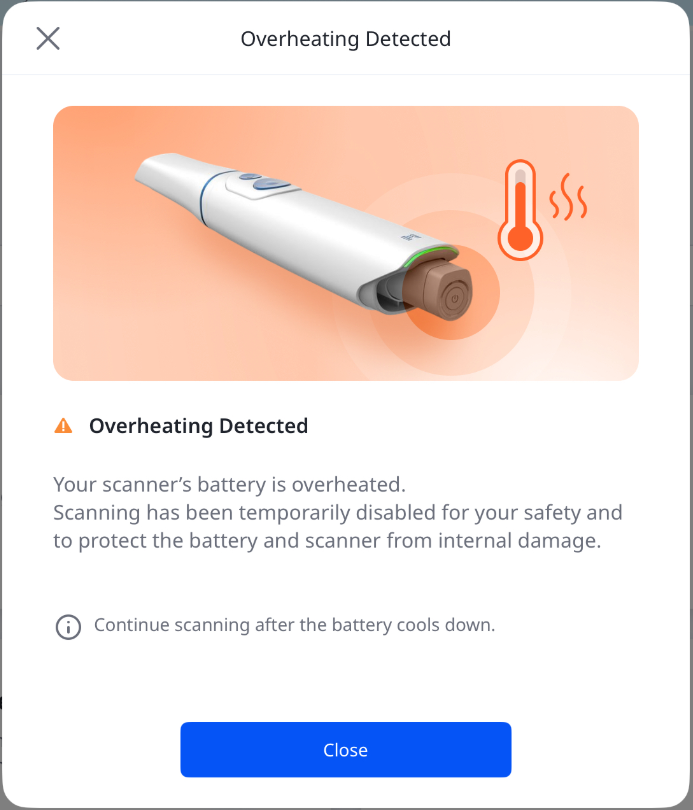
| The scanner temperature is too high. Stop scanning and allow it to cool down. 🔎Note When the battery overheats, the scanner will shut down automatically, and the alert dialog below will appear. You can resume scanning once the battery cools down.
| |
|
| The scanner is establishing a Wi-Fi or Bluetooth connection. |
| The scanner is in operation. | |
|
| The scanner is restarting. |
| Calibration is needed before scanning can continue. | |
| The scanner is warming up. | |
|
| The scanner is connected and ready to use. |


Manage Scanner Connection
You can disconnect the scanner in the following ways:
Tap Disconnect next to your scanner.
Tap the arrow next to your scanner to open Scanner Details, then tap (⋯) and select Disconnect.
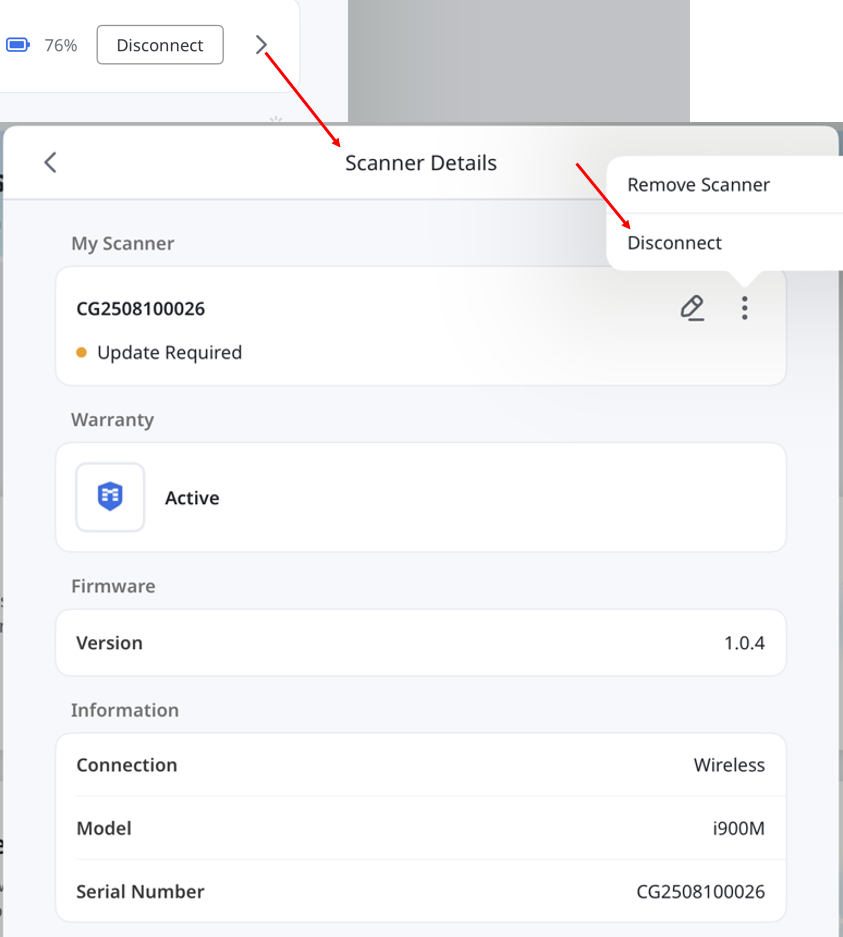
In Scanner Details, you can view information such as connection type, model, serial number, firmware version, and warranty status.
You can also manage the scanner by renaming or removing it.