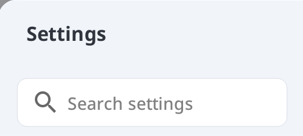
Search Settings
Enables you to find a feature name across all tabs in the Settings window. Selecting a result automatically opens the related tab, helping you locate options more quickly.
General
Provides options for overall system setup.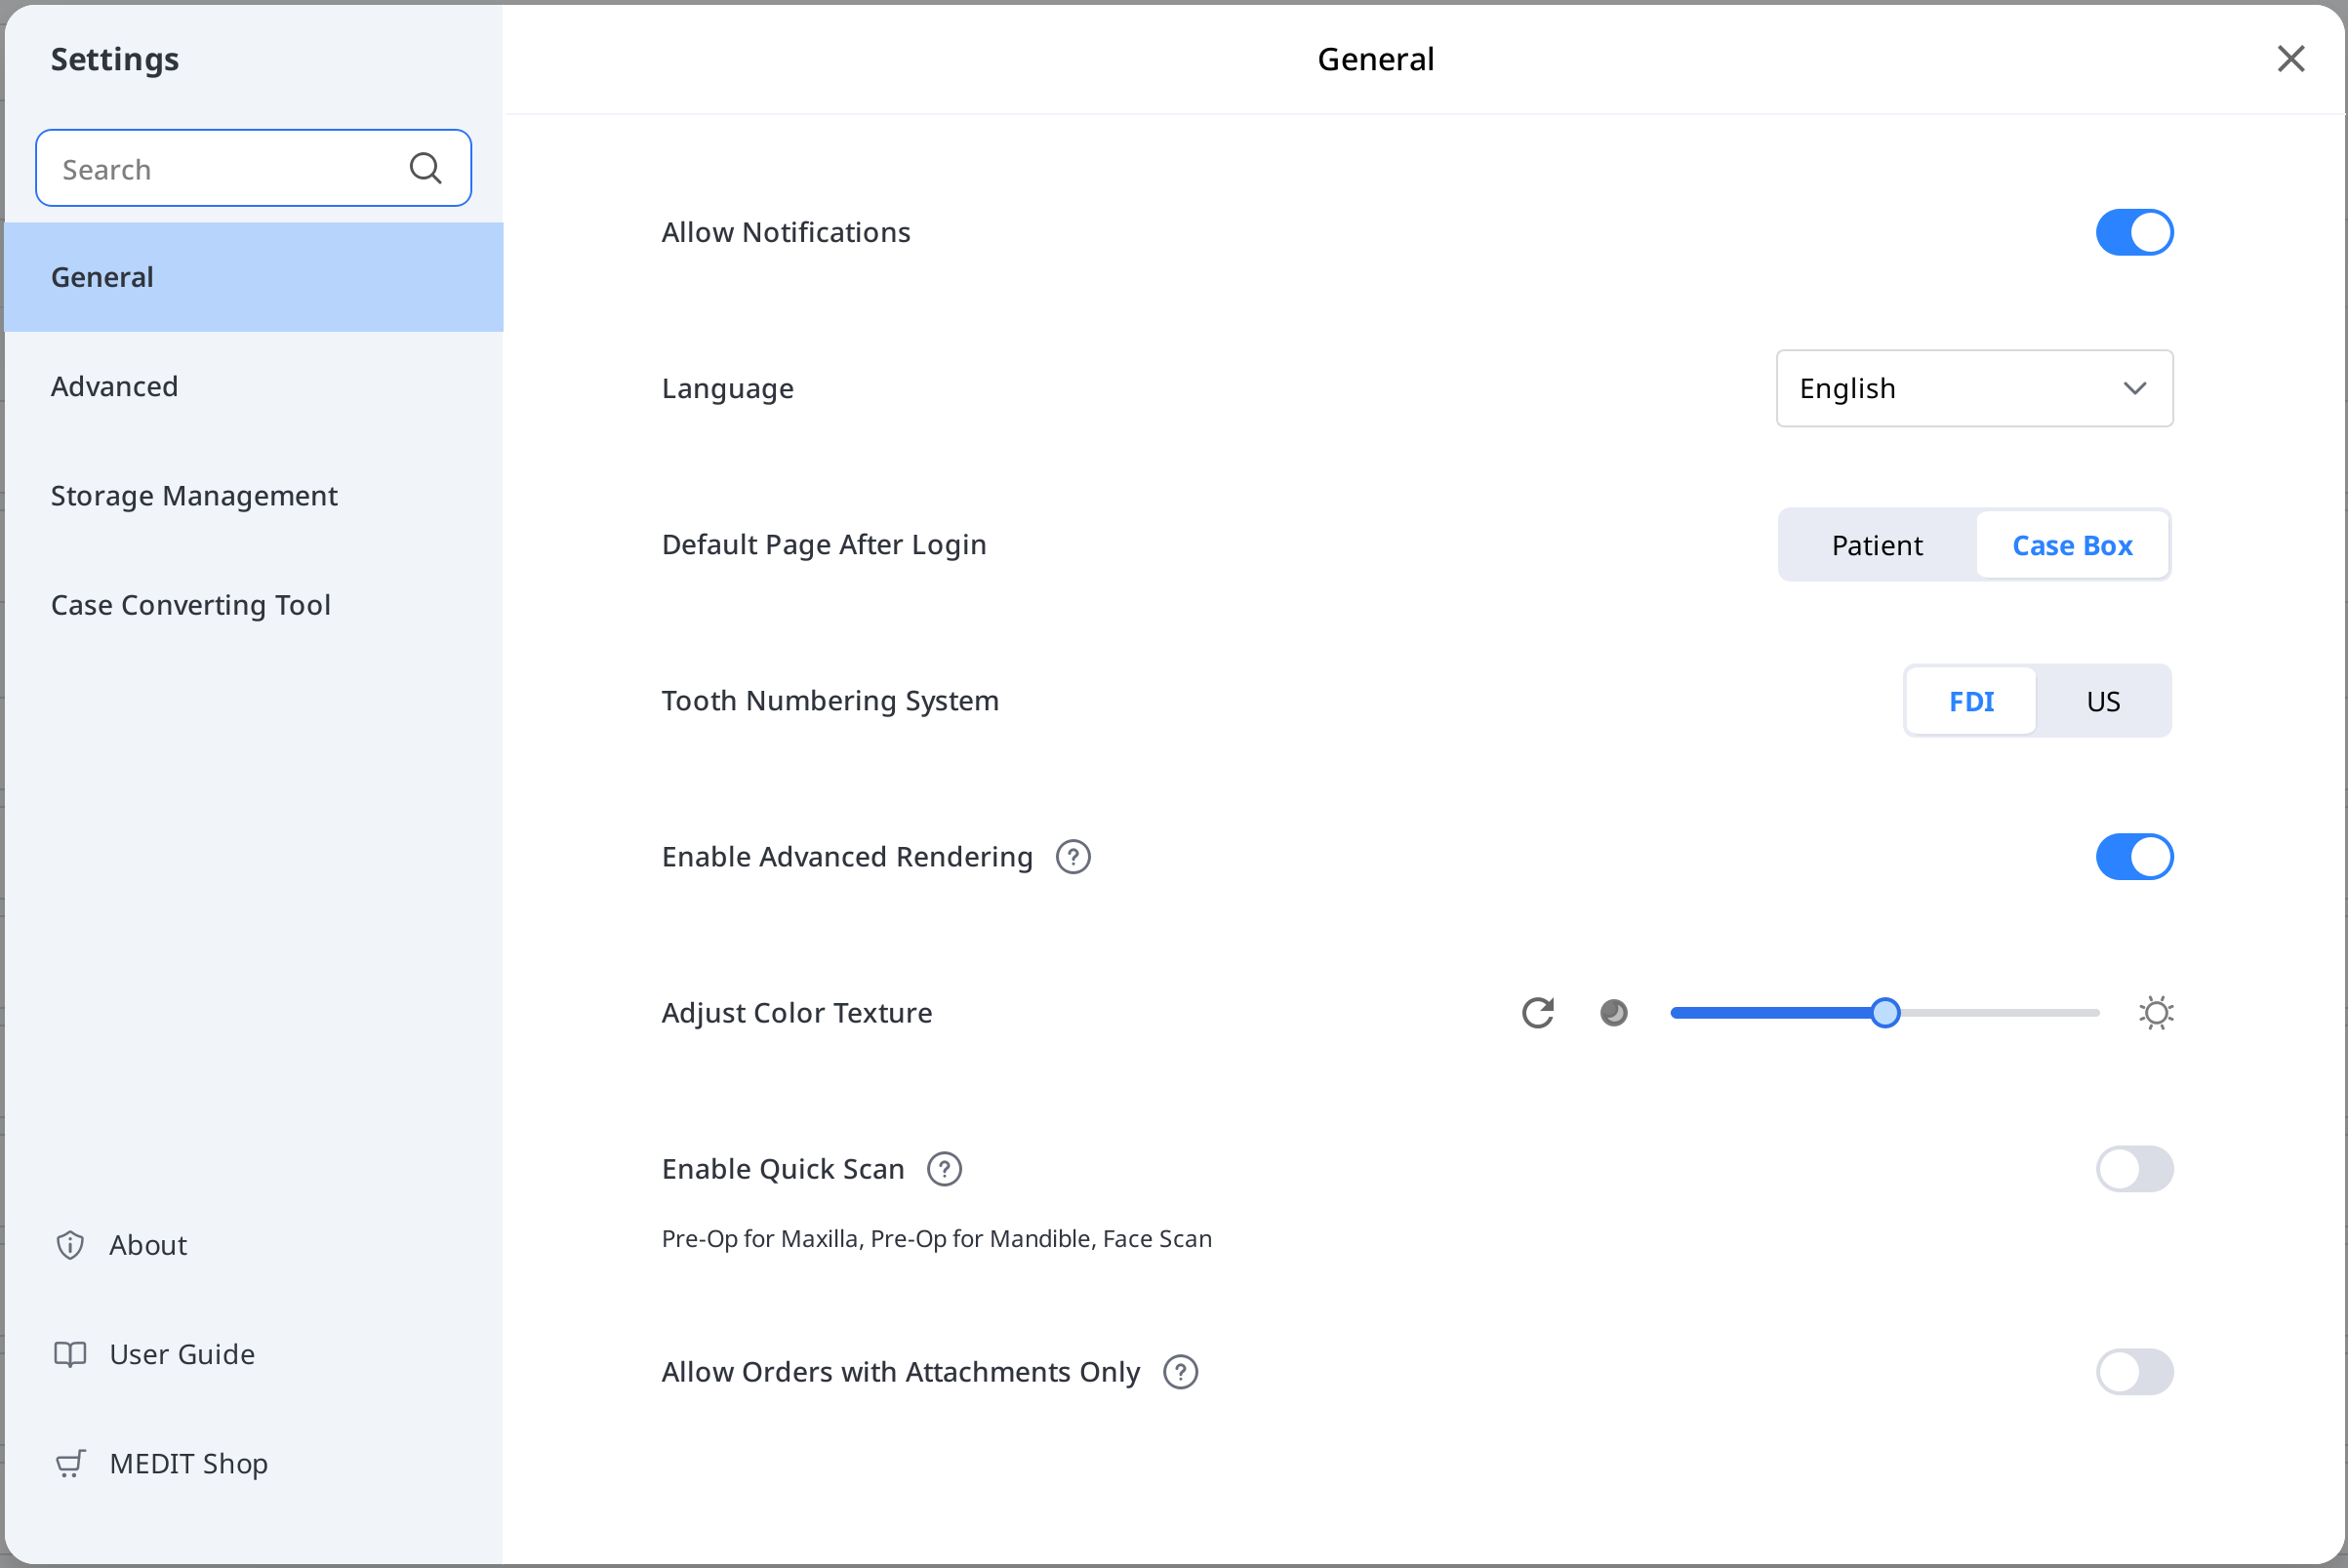
Language | Select the language for the program. | |
Tooth Numbering System | Select a teeth labeling system between FDI and US. | |
Allow Notifications | When checked, you will receive notifications for program updates. | |
Enable Quick Scan | Choose if you want to have the scan stages below automatically appear in Medit Scan for Clinics without having to fill in the form information.
| |
Enable Advanced Rendering | Advanced Rendering | When checked, the 3D model is displayed in a more vivid and realistic rendering. |
Adjust Color Texture | Adjust the brightness of the 3D model. * The resulting colors may slightly differ from Medit Link when you open the same data with other software. | |
Allow Orders with Attachments Only | When disabled, orders with only attachments cannot be placed. This helps prevent unintended submissions. Settings saved in the app are also applied to the web app. | |
Default Page After Login | Select the default menu to display when starting the program.
| |
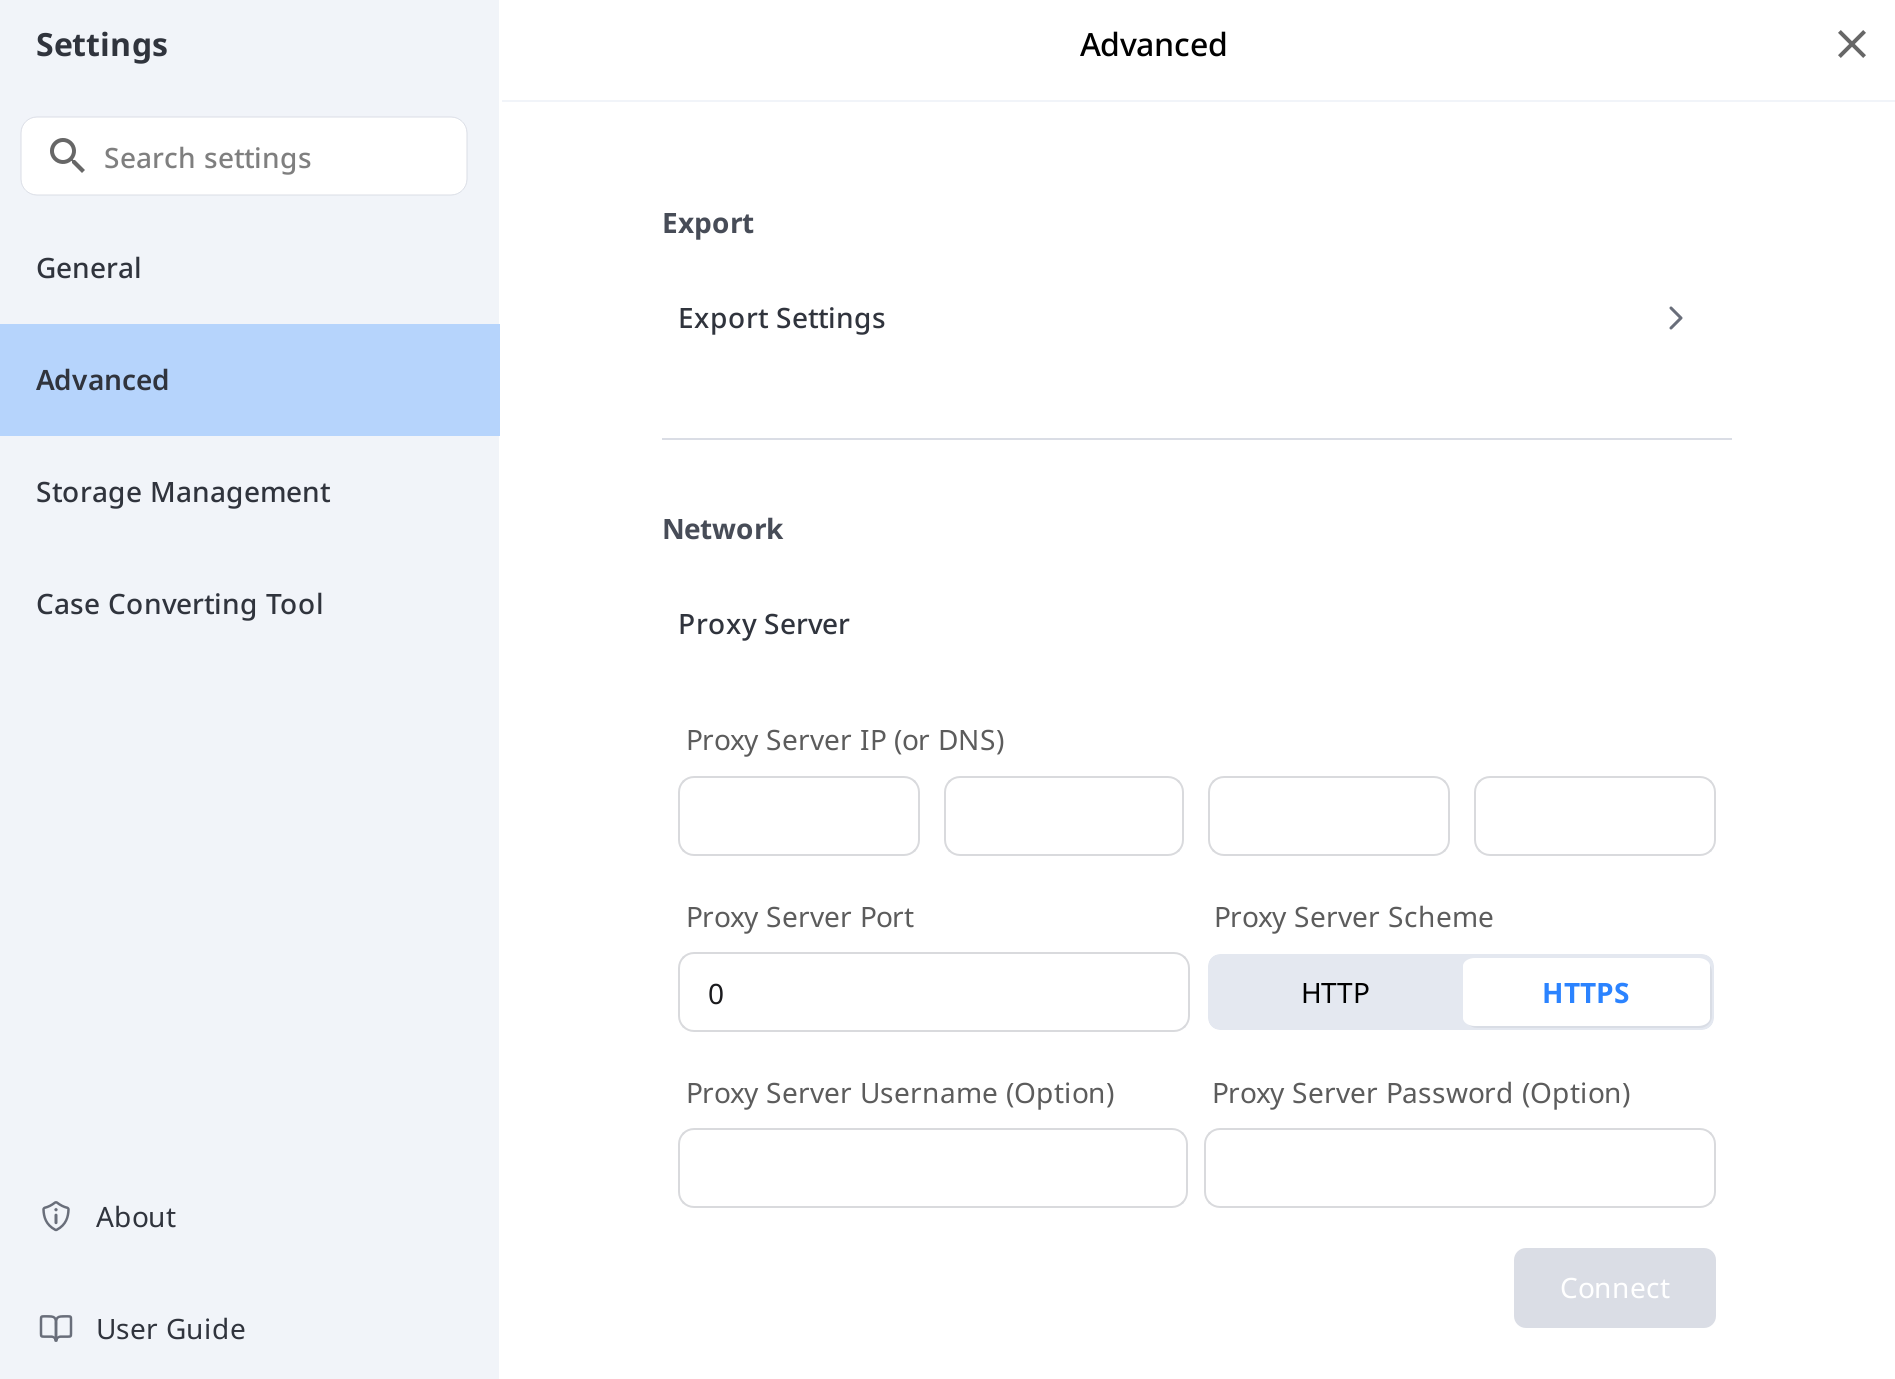
Advanced
Configure advanced options such as network proxy, default app, and experience sharing settings.
Export – Export Settings
Set how to export files from Medit Link.
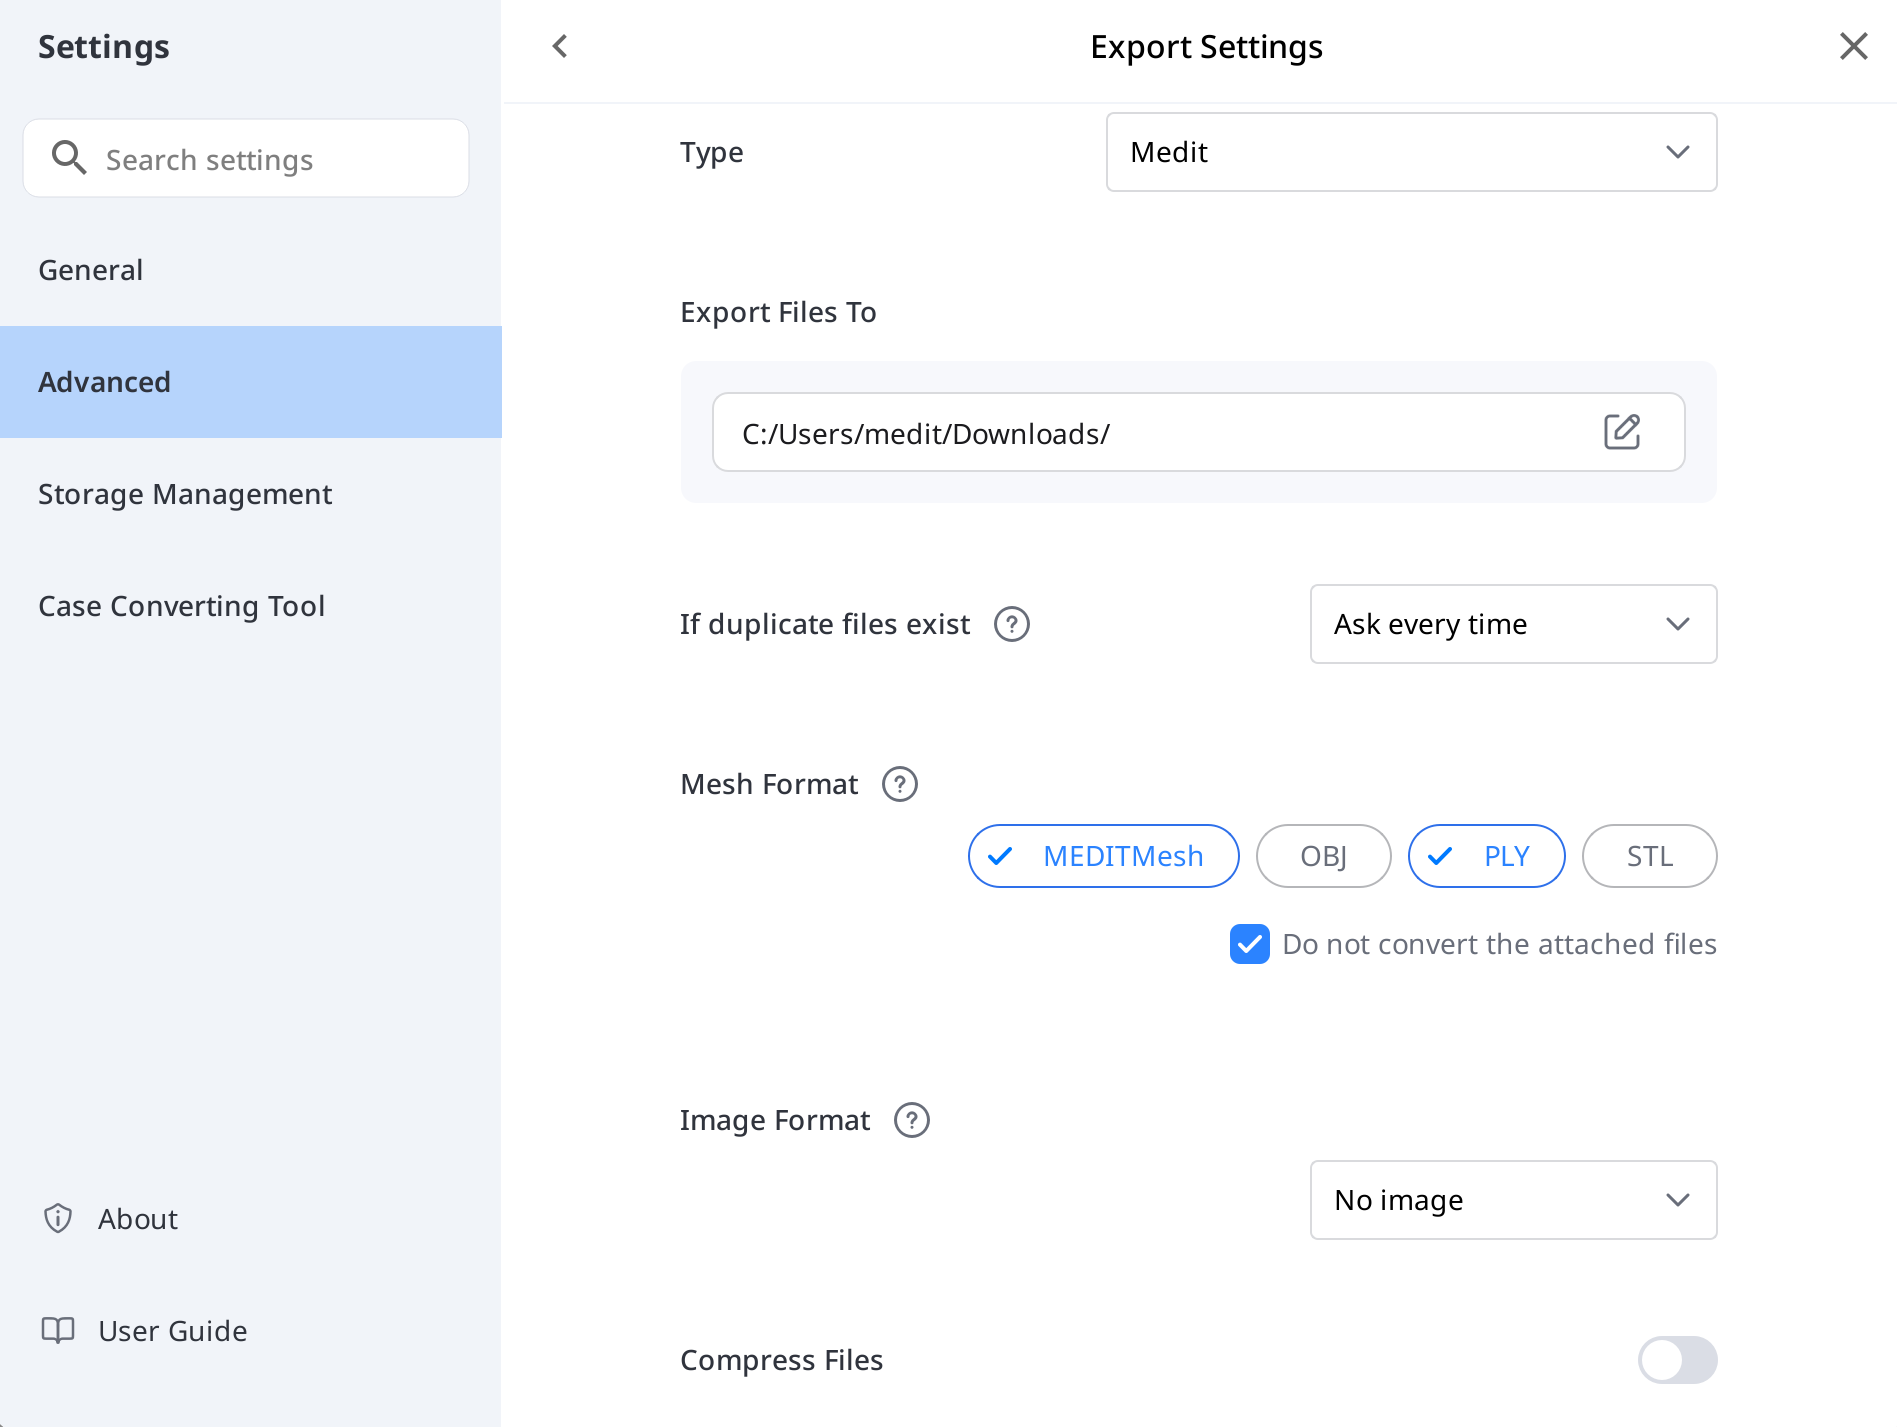

Type | Select the CAD program you want to use for designing. |
Export Files To | Specify the path where you want to store the results. |
If duplicate files exist | Choose the default action for cases when the same folder or file name exists in the target path.
|
Mesh Format | Specify the format of the final mesh file. |
Do not convert the attached files | When enabled, attached files will be exported in their original formats without conversion. |
Image Format | Specify the format of the exported image files. |
Compress & Combine | Compress Files: Compress all results into a single file. Combine Individual Mesh: Combine all results for the maxilla or mandible into one file. When using some programs that can't import and work with multiple files, you can merge them into one to work in those programs. |
Rule for Folder Name | Define rules for creating a folder name when exporting files. The below information can be used to set the rule.
|
Rule for File Name | Define rules for the exported file name. The below information can be used to set the rule.
|
Network – Proxy Server
Set a proxy server for Medit Link using a custom IP address, port number, and optional credentials.
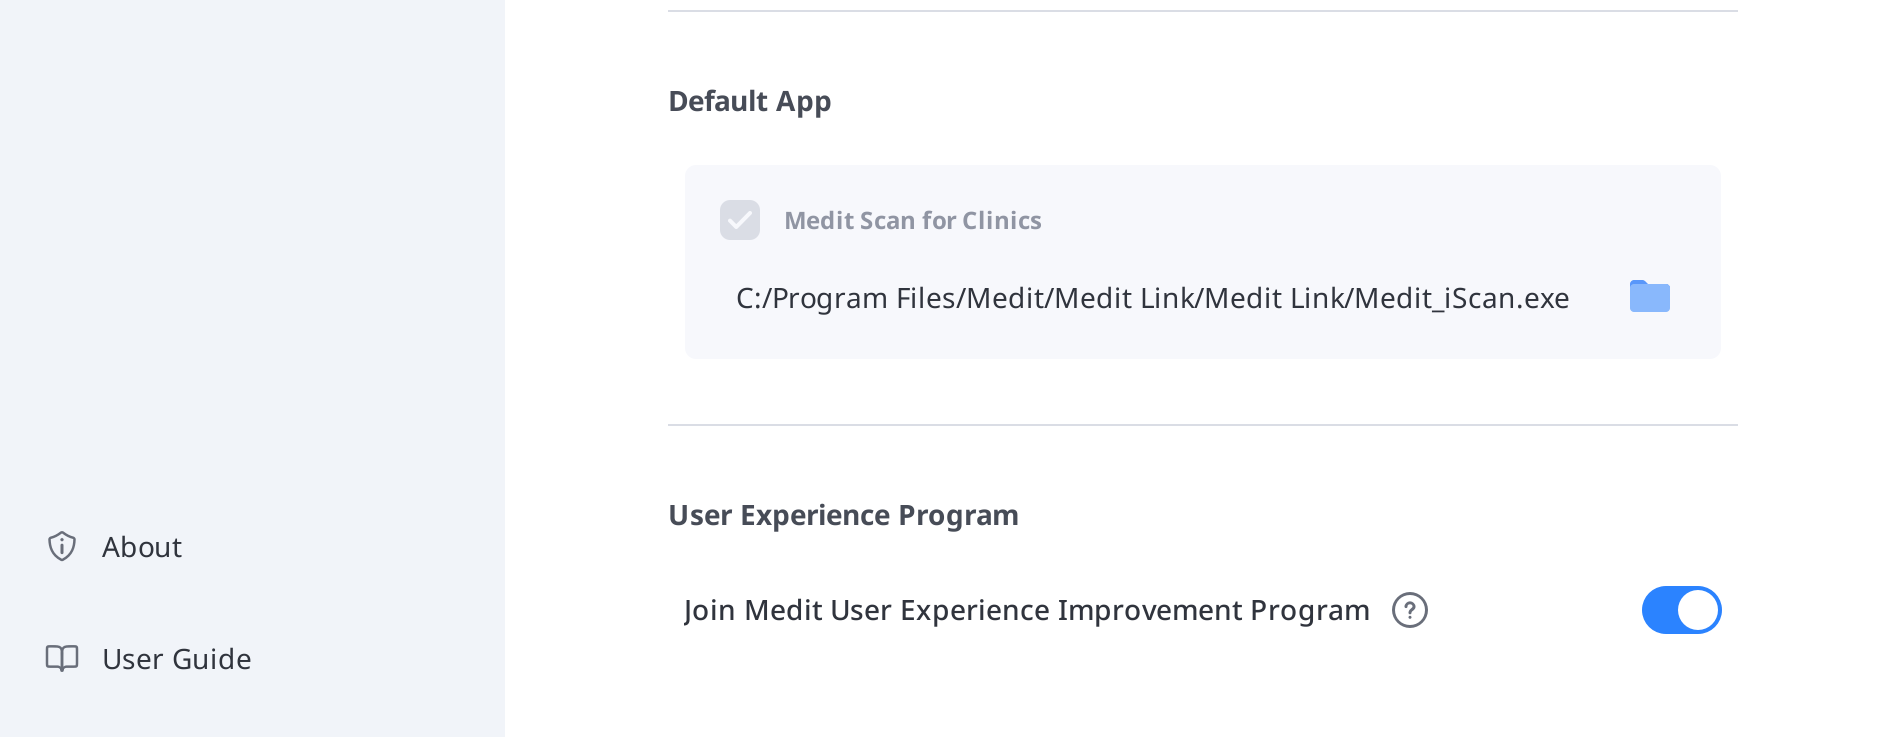
Default App
Manage the programs that support integration in Medit Link.
You can connect the following programs:
Clinic Account | Lab Account | |
|---|---|---|
Scan Program | Medit Scan for Clinics | Medit Scan for Clinics |
🔎Note
Integration of the following services is not available for Medit Link for Mac.
Medit Scan for Labs
User Experience Program
Enable this option to help improve Medit products by sharing anonymous usage data.
Storage Management – Overview & Cleanup
This section provides a visual breakdown of your cloud and local storage usage. It helps you understand how your storage is being used and which file types consume the most space. Click "Free Up Space" to delete unnecessary files from cloud or local storage within the selected date range. 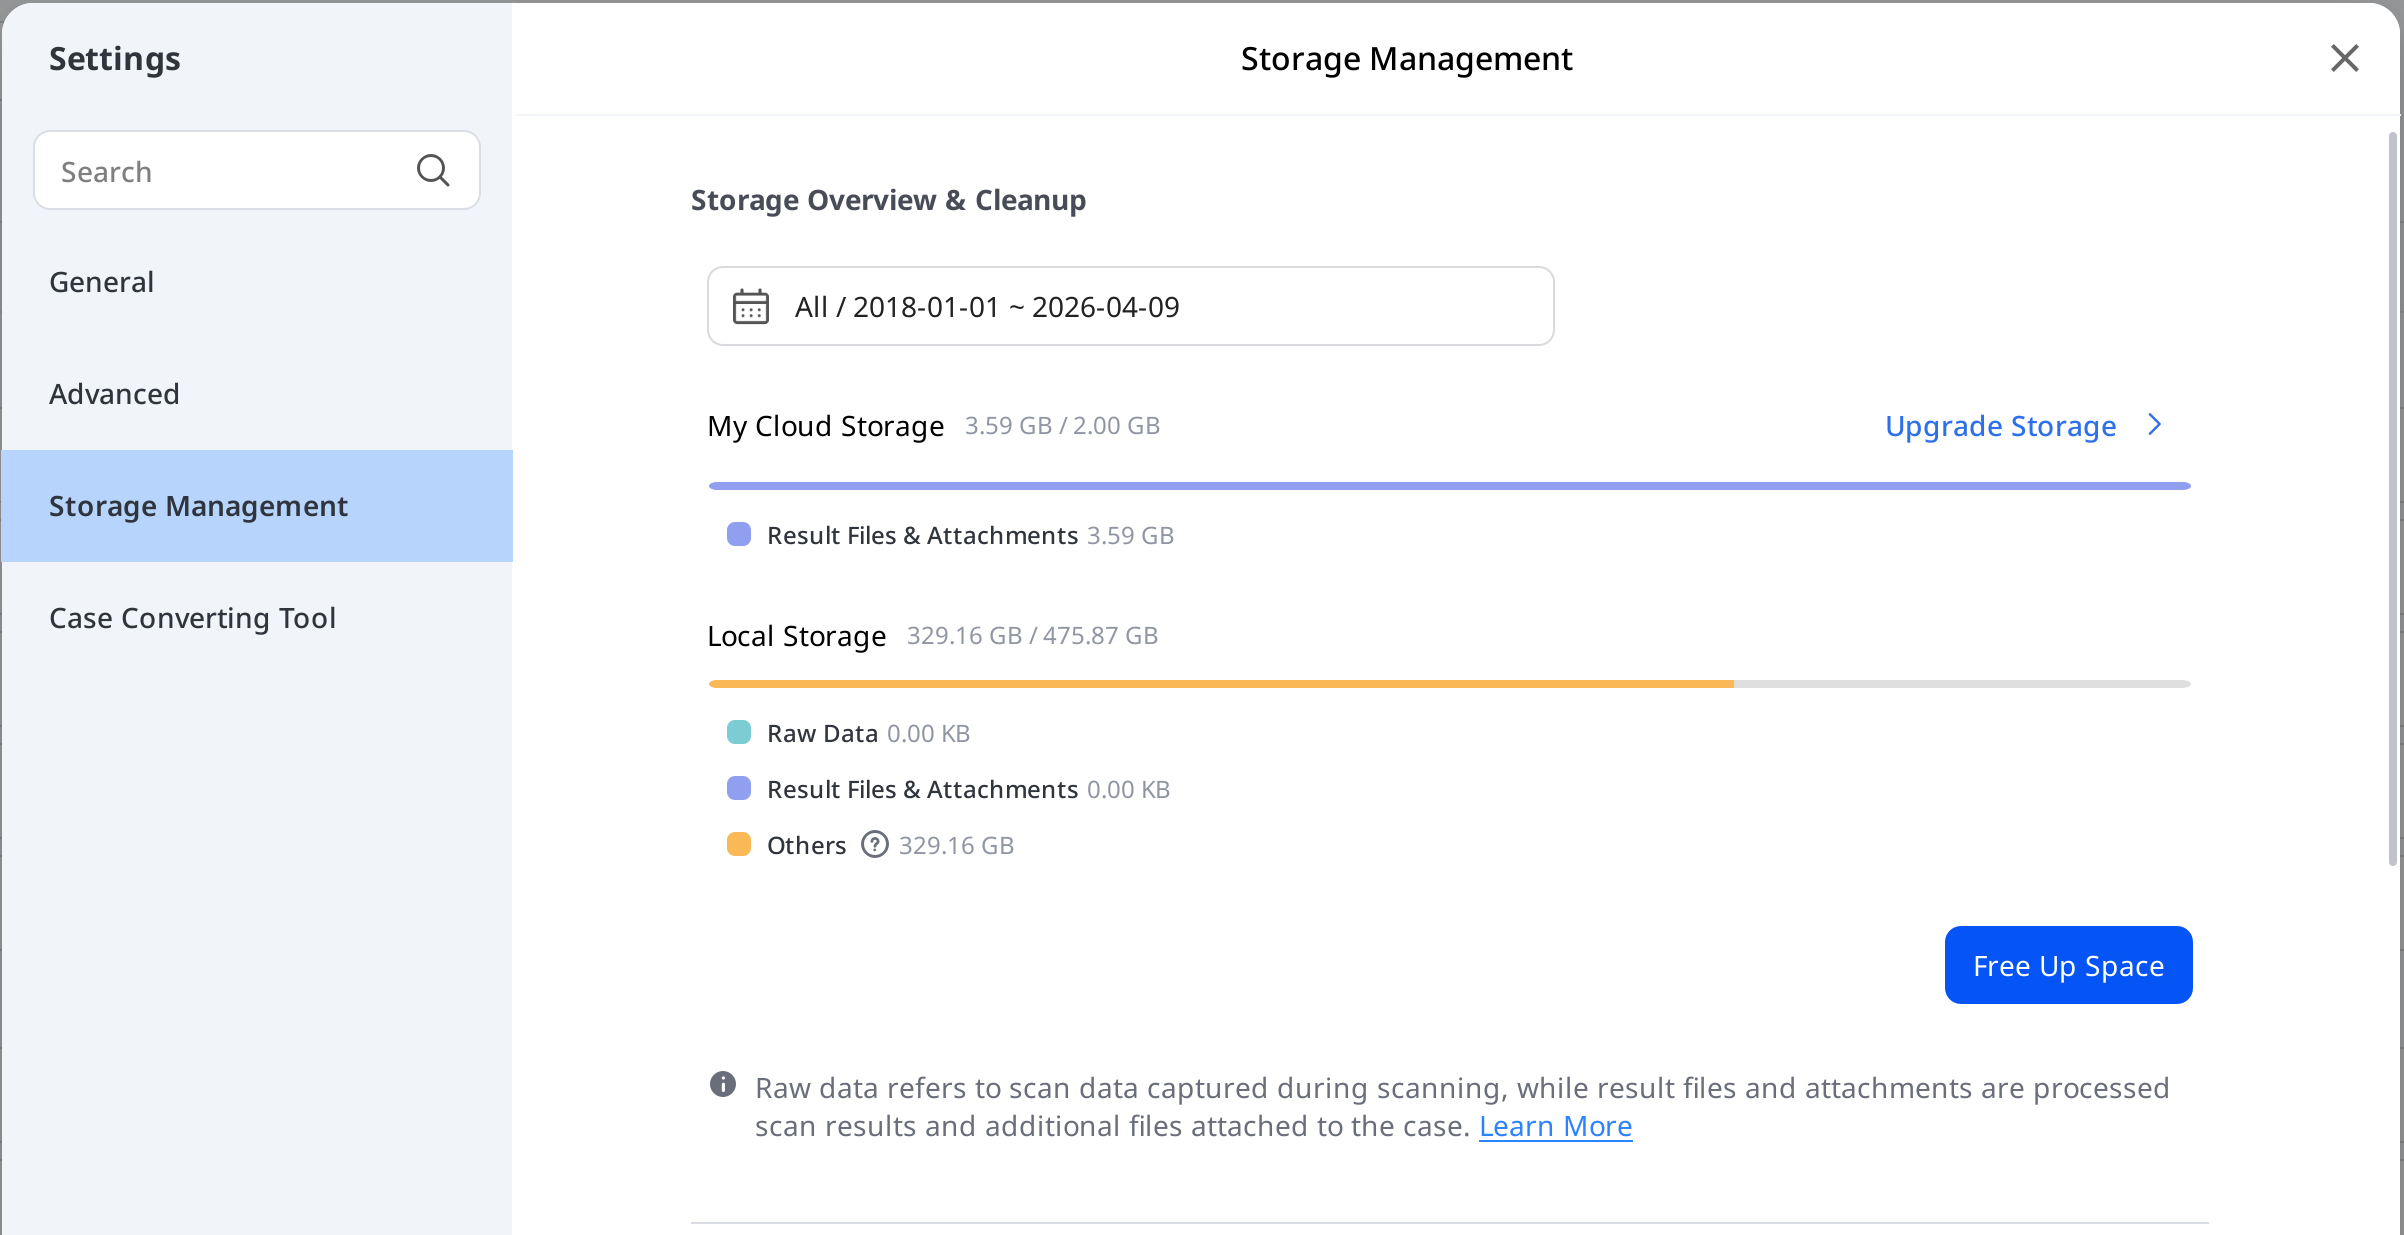
Set Period
Set the specific period to delete data created within the time frame below:
All: Show all files created since January 1, 2018, regardless of the selected date range.
Custom Range: Select a start date (no earlier than Jan 1, 2018) and an end date to filter files.
Today: Files created or modified on the current day only.
Yesterday: Files created or modified one day before today.
Last 7 Days: Files created or modified in the past 7 days, including today.
Last 30 Days: Files created or modified in the past 30 days, including today.
Current Month: Files created or modified within the current calendar month.
Previous Month: Files created or modified within the previous calendar month.
Upgrade Storage
Select Upgrade Storage to subscribe to a paid storage plan. Depending on your available storage, an upgrade message may appear.![]()
Storage Management – Advanced Settings
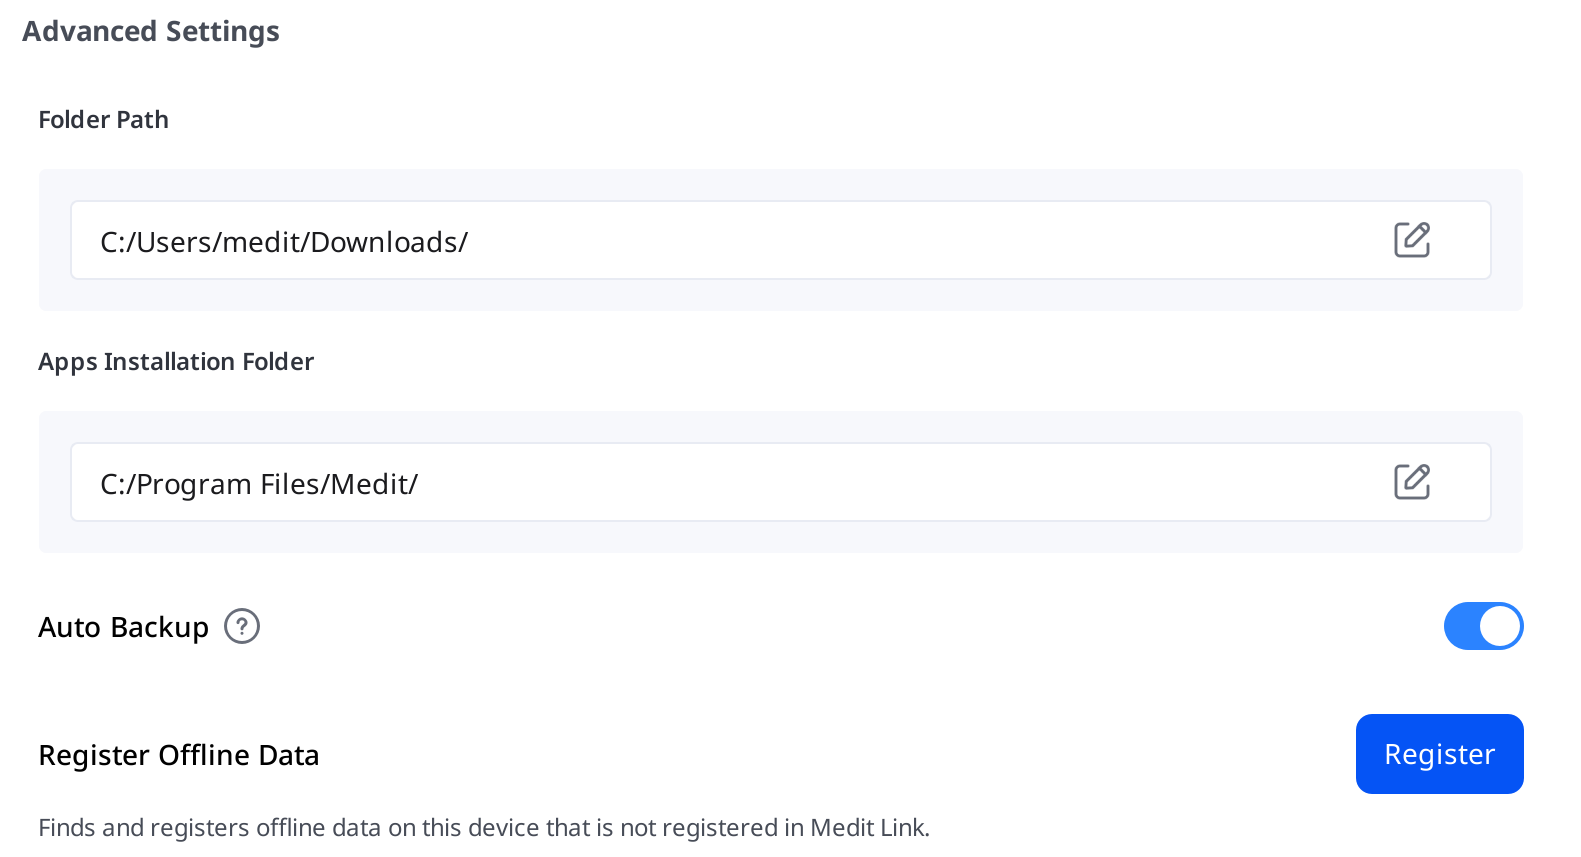
Folder Path | Specify a folder to store the data results generated in Medit Link and connected programs. | |
Apps Installation Folder | Specify an installation path for Medit Apps and partner apps available in the App Box. | |
Auto Backup | Enable this option to automatically back up your scanned data to the cloud without using your cloud storage quota. | |
Register Local Cases | Find and register locally stored cases that are not yet in Medit Link. | |
Case Converting Tool
You can move cases between different accounts by exporting existing cases of the account or importing cases exported from other accounts.
Export Case
Export cases of the currently logged-in account to the local PC.
Open Medit Link and click the Settings icon.
Choose the "Case Converting Tool" section in the left-side menu.
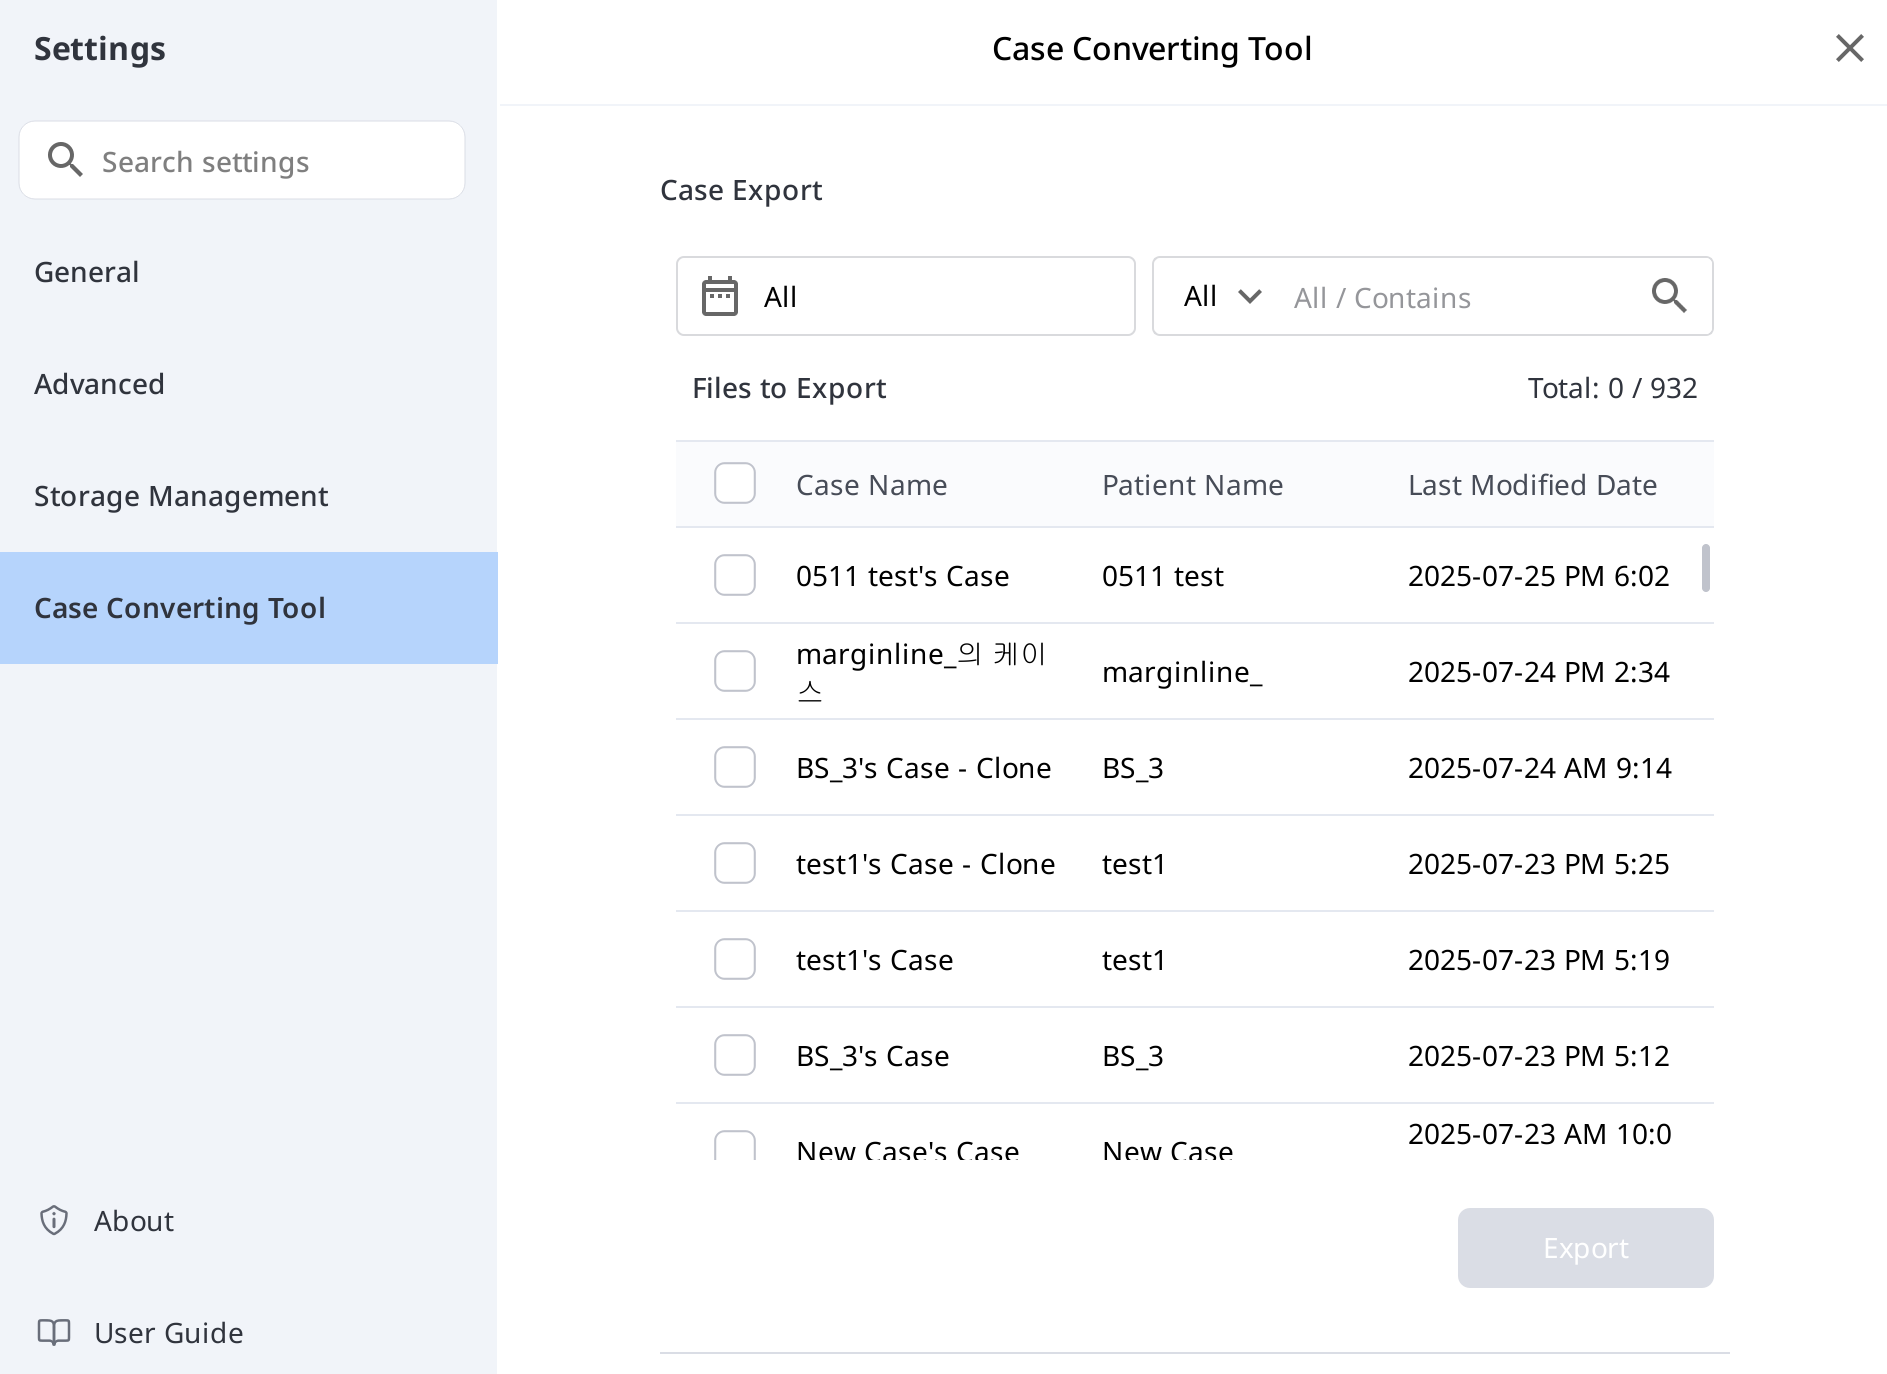
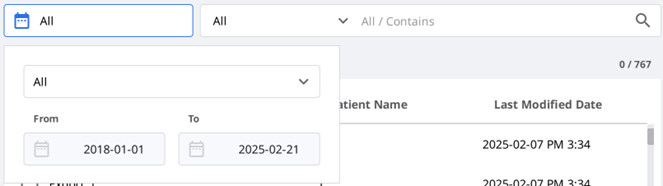
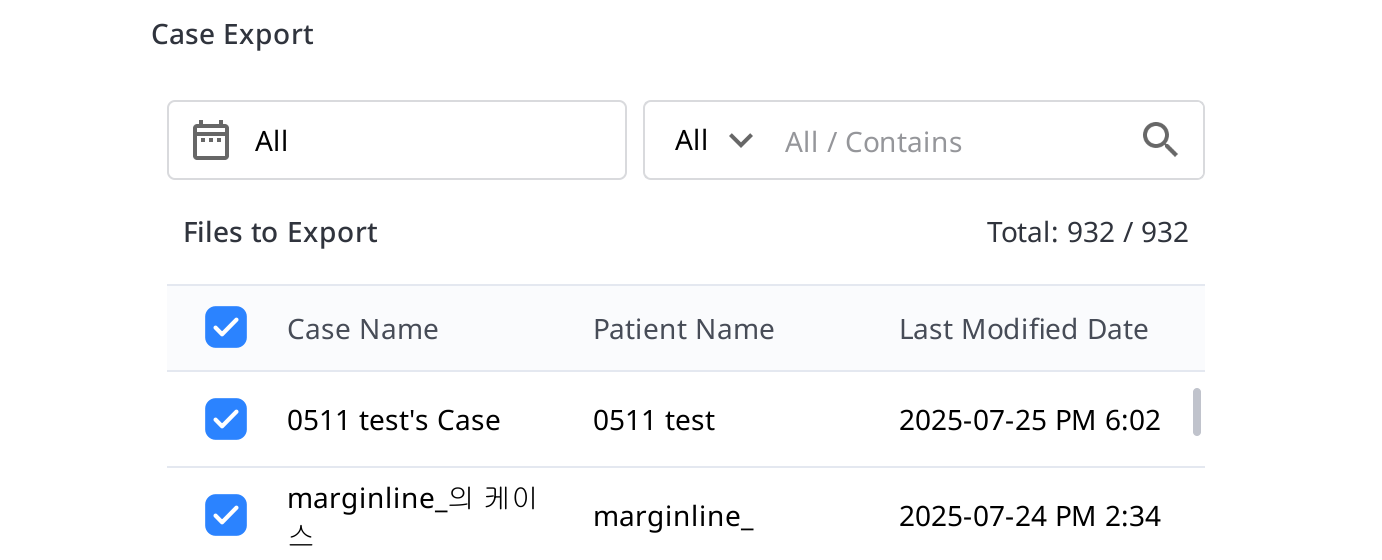
In the Case Export section, set a period or search for cases to export if necessary.
Choose cases you want to export from the list in the "Files to Export" section.
Set the file name by editing the case name in the File Name field.
Set the destination folder to export the selected cases.
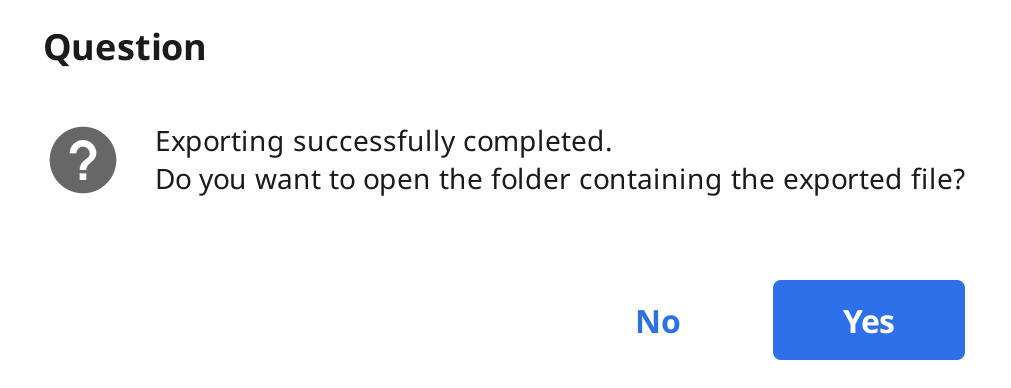
Click "Export."
Click "Yes" to open the folder where the file is exported.
The exported cases are saved in .meditex file format.
Import Case
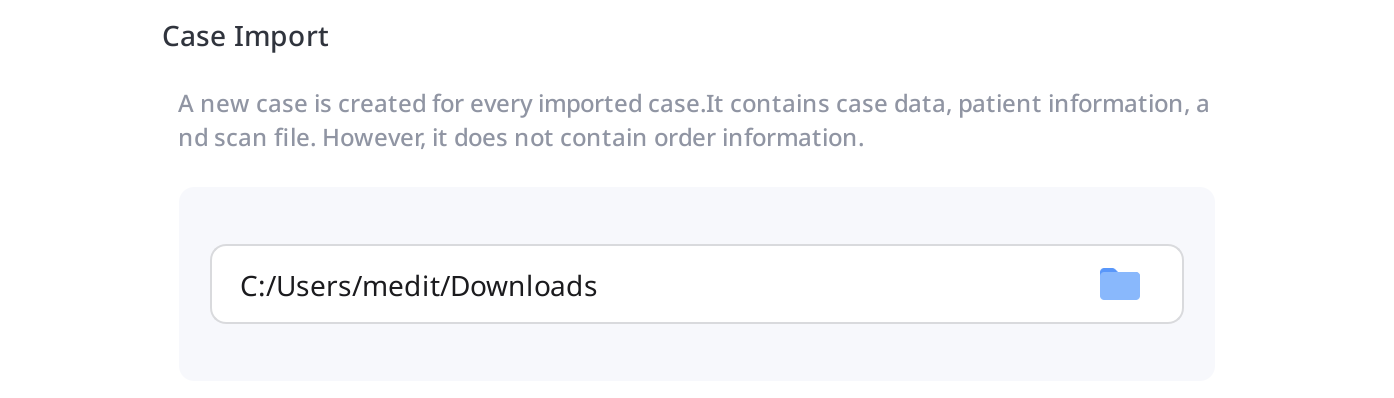
Open Medit Link and click the Settings icon.

Choose the "Case Converting Tool" section in the left-side menu.
In the Case Import section, click the folder icon to browse your PC for the .meditex file you want to import.
Click the “Import” button and check the files to import in the list.
The imported case will also appear in your Case Box (Clinic account) or Work Box (Lab account).
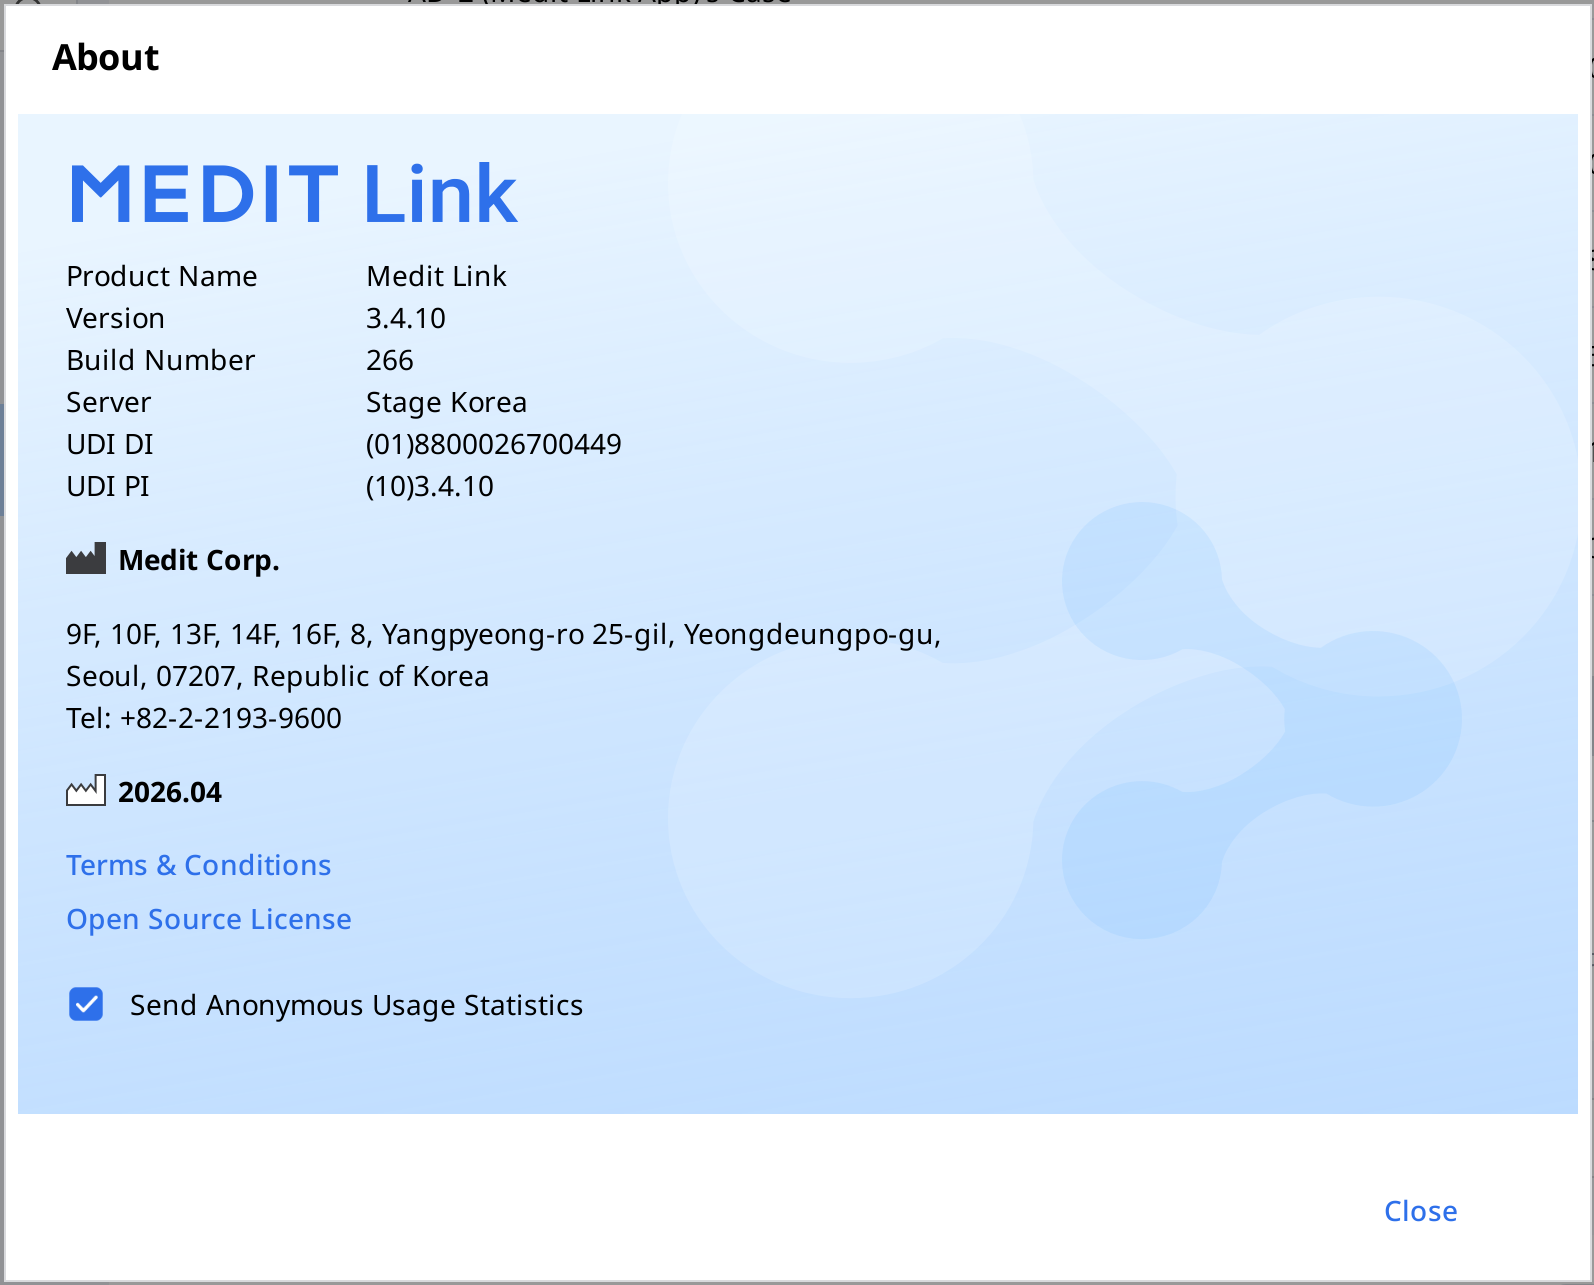
About
Show detailed information about Medit Link.
User Guide
Get the user guide for Medit Link.
Opening the user guide requires an Internet connection.