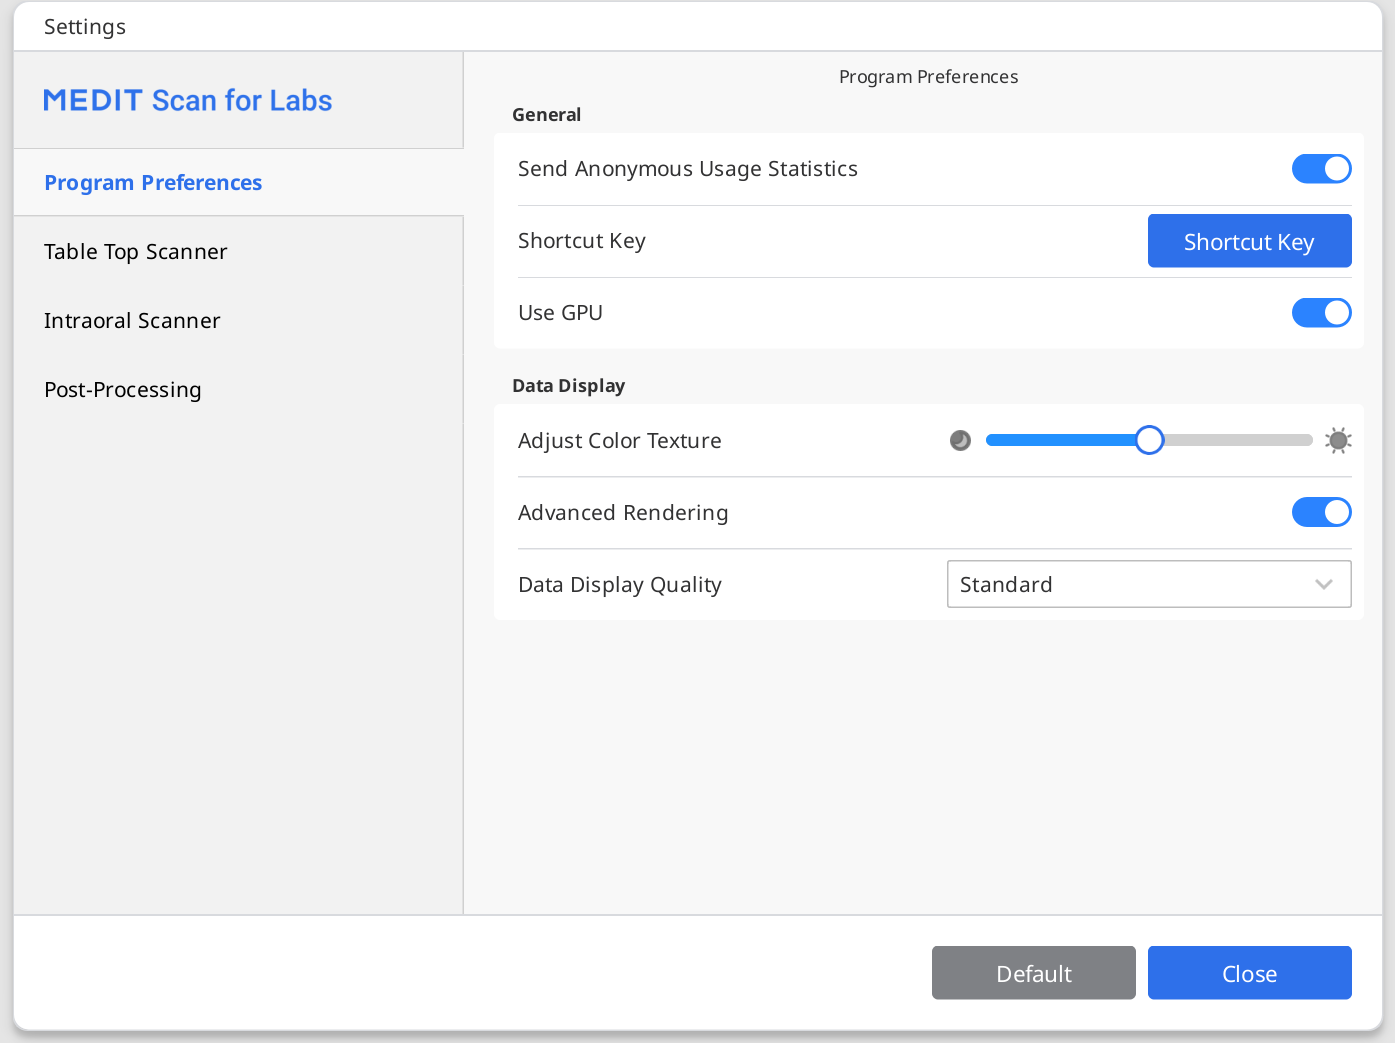
Go to Menu > Settings to open the Settings dialog for Medit Scan for Labs.
🔎Note
When you click the "Default" button, all configured parameters will be reset to their default values.
Program Preferences
General
Send Anonymous Usage Statistics | Set whether to start and stop sending anonymous usage statistics to Medit. Collection Anonymous Statistics Medit is striving to constantly improve the product and user experience by collecting certain information such as:
The usage statistics will help the development team better understand user requirements and make improvements in future releases. We will never collect personal information, such as your name, company name, MAC address, or any other information related to personal identification. We cannot and will not reverse-engineer any collected data to find specific details concerning your projects. |
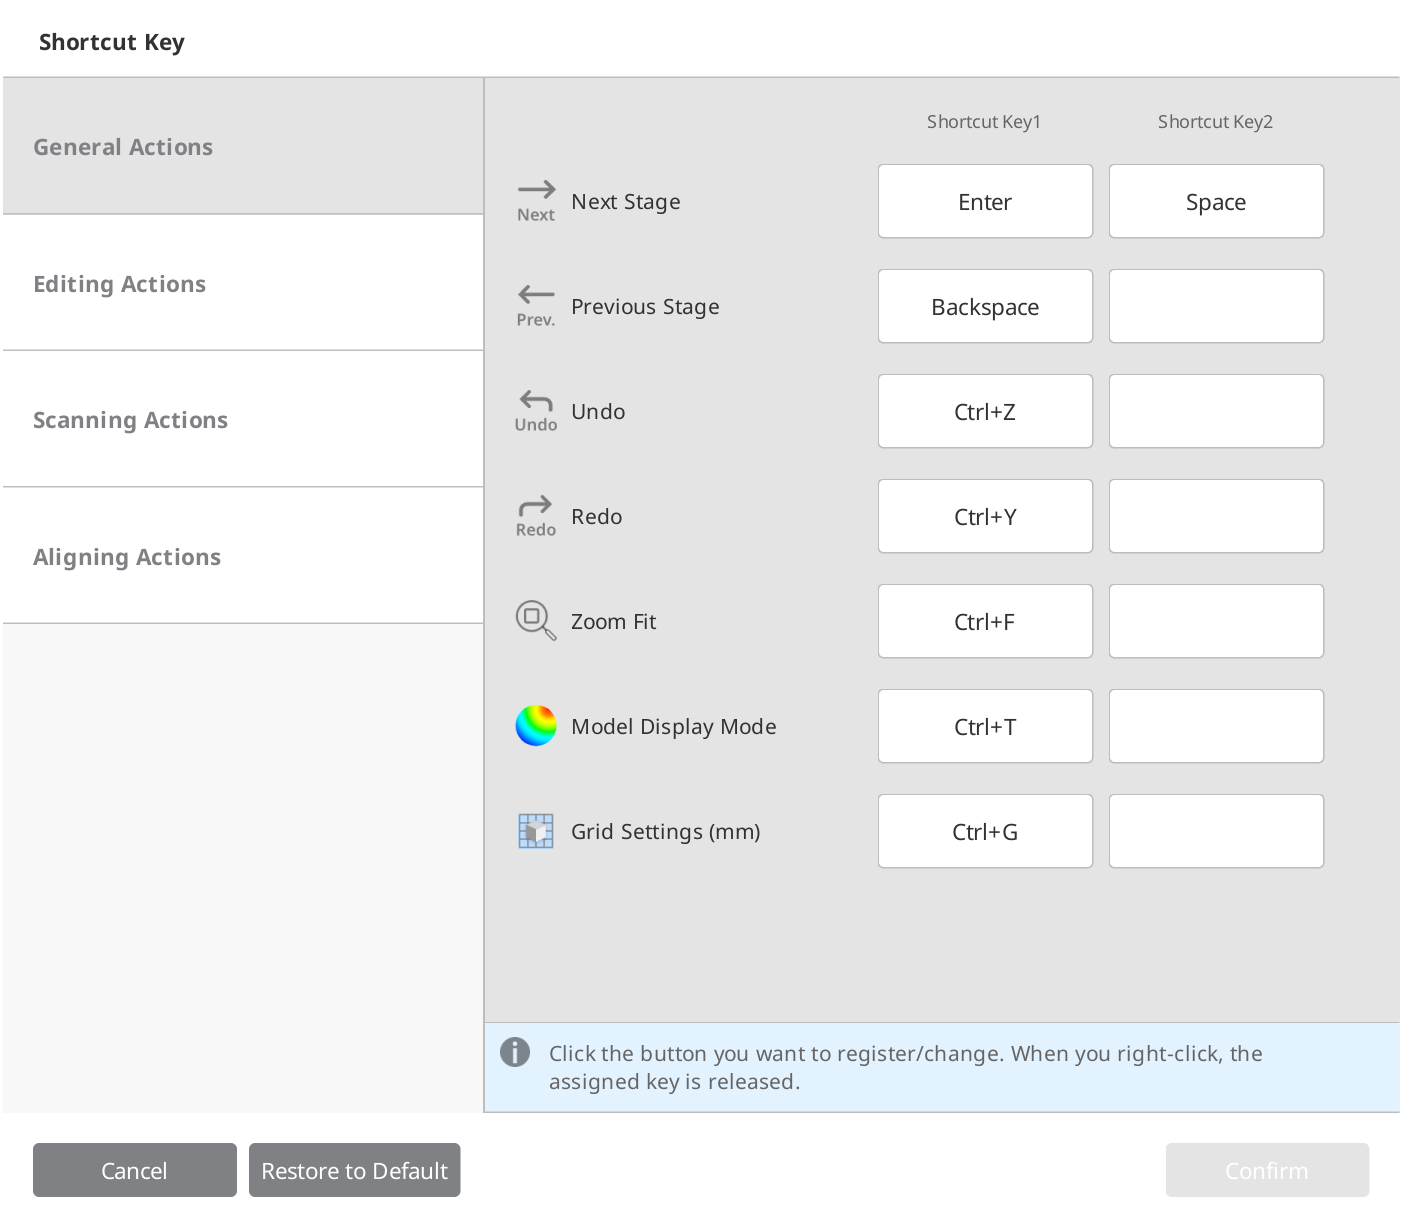
Shortcut Key | Check out the default shortcut keys and configure your own. |
Use GPU | This option is used to improve the overall computing performance using the GPU (graphics processing unit). |
Data Display
Adjust Color Texture | Adjust the brightness of the 3D model. The color of the model shown on the screen is optimized for the scanner, so the acquired results may be displayed in a different color in other programs. |
Advanced Rendering | Displays vivid 3D data with advanced technology applied. |
Visualization Method | Voxel Point: Displays data as voxel points. This view shows the raw, blocky structure of the scan. Useful for checking coverage, density, and areas that may need more scanning. |
Mesh: Displays data more as a connected surface mesh. This view gives a smoother, more realistic representation of the object and helps predict final processed model more accurately. | |
Data Display Quality | This option only affects the quality of the scan data display, not the scan results or data accuracy. Setting this option to "High" can affect overall scan performance. |
Table Top Scanner
General
Calibration Period (Days) | Configure the calibration period of the table top scanner. |
Scan Path | Select whether to use a simple or detailed scan path. Choosing the detailed one will take longer but can minimize the need for additional scanning. |
Sleep Mode | Select the time duration after which the scanner will enter sleep mode. |
Set Minimum Scan Height Automatically | When on, the minimum scan height is automatically set. |
Set Scan Area Automatically | When on, scanning is automatically performed without selecting a scan area. |
Color Filter
Filter Colors After Scanning | When on, data in the registered colors is filtered out while scanning. |
View All Filters | When on, the list of color filters for all data types is displayed. |
Additional Scanning
Perform Additional Scanning Automatically | When on, the program automatically calculates insufficient areas on the scan data and proceeds with further scanning. | |
Start Additional Scanning | Select when to start additional scanning after completing the initial scanning when the "Perform Additional Scanning Automatically" option is on. | |
without asking | The program performs additional scanning when the initial scanning is complete without asking users to confirm. | |
in 3 sec | The program performs additional scanning in 3 seconds if there is no confirmation from the user. If the user confirms, it starts immediately. | |
in 5 sec | The program performs additional scanning in 5 seconds if there is no confirmation from the user. If the user confirms, it starts immediately. | |
in 10 sec | The program performs additional scanning in 10 seconds if there is no confirmation from the user. If the user confirms, it starts immediately. | |
upon user confirmation | The program performs additional scanning only when the user confirms. | |
Intraoral Scanner
Calibration Period (Days) | Set the calibration period for the intraoral scanner – choose any given period (1 day, 3 days, 7 days, 14 days, or 30 days). |
Post-Processing
General
Post-Processing Type | Configure the post-processing type based on the case (orthodontic or prosthetic): The speed-based type will help reduce the waiting time, while the quality-based type might take longer. None of the types affect the accuracy of the scan. |
Export Occlusion Scan Data | Select whether to save the occlusion data as a separate file. |
Use Neighboring Colors for Filled Holes | Turn on this option to fill empty spaces in the scan data with adjacent colors. |
Fill Holes for Abutments | Automatically fill in holes for abutments during data processing. * Note that only abutments scanned in Flexible Multi-Die will be filled. |
Remove Base from Gingiva Scan | Select whether you want to remove duplicated base data from the gingiva scan data. |
File Size
Base | Adjust the file size of the data acquired at the Base scan stages. |
Prep | Adjust the file size of the data acquired at the Prepped Teeth scan stages. |
Align
Align Occlusion Scan Automatically | Select whether to align data acquired at the Occlusion stage automatically or manually. |
Align Prep Data Automatically | Select whether to align prepared teeth data automatically or manually. |