In the second step, the user needs to align the imported CBCT data with the scanned arch data.
.png)
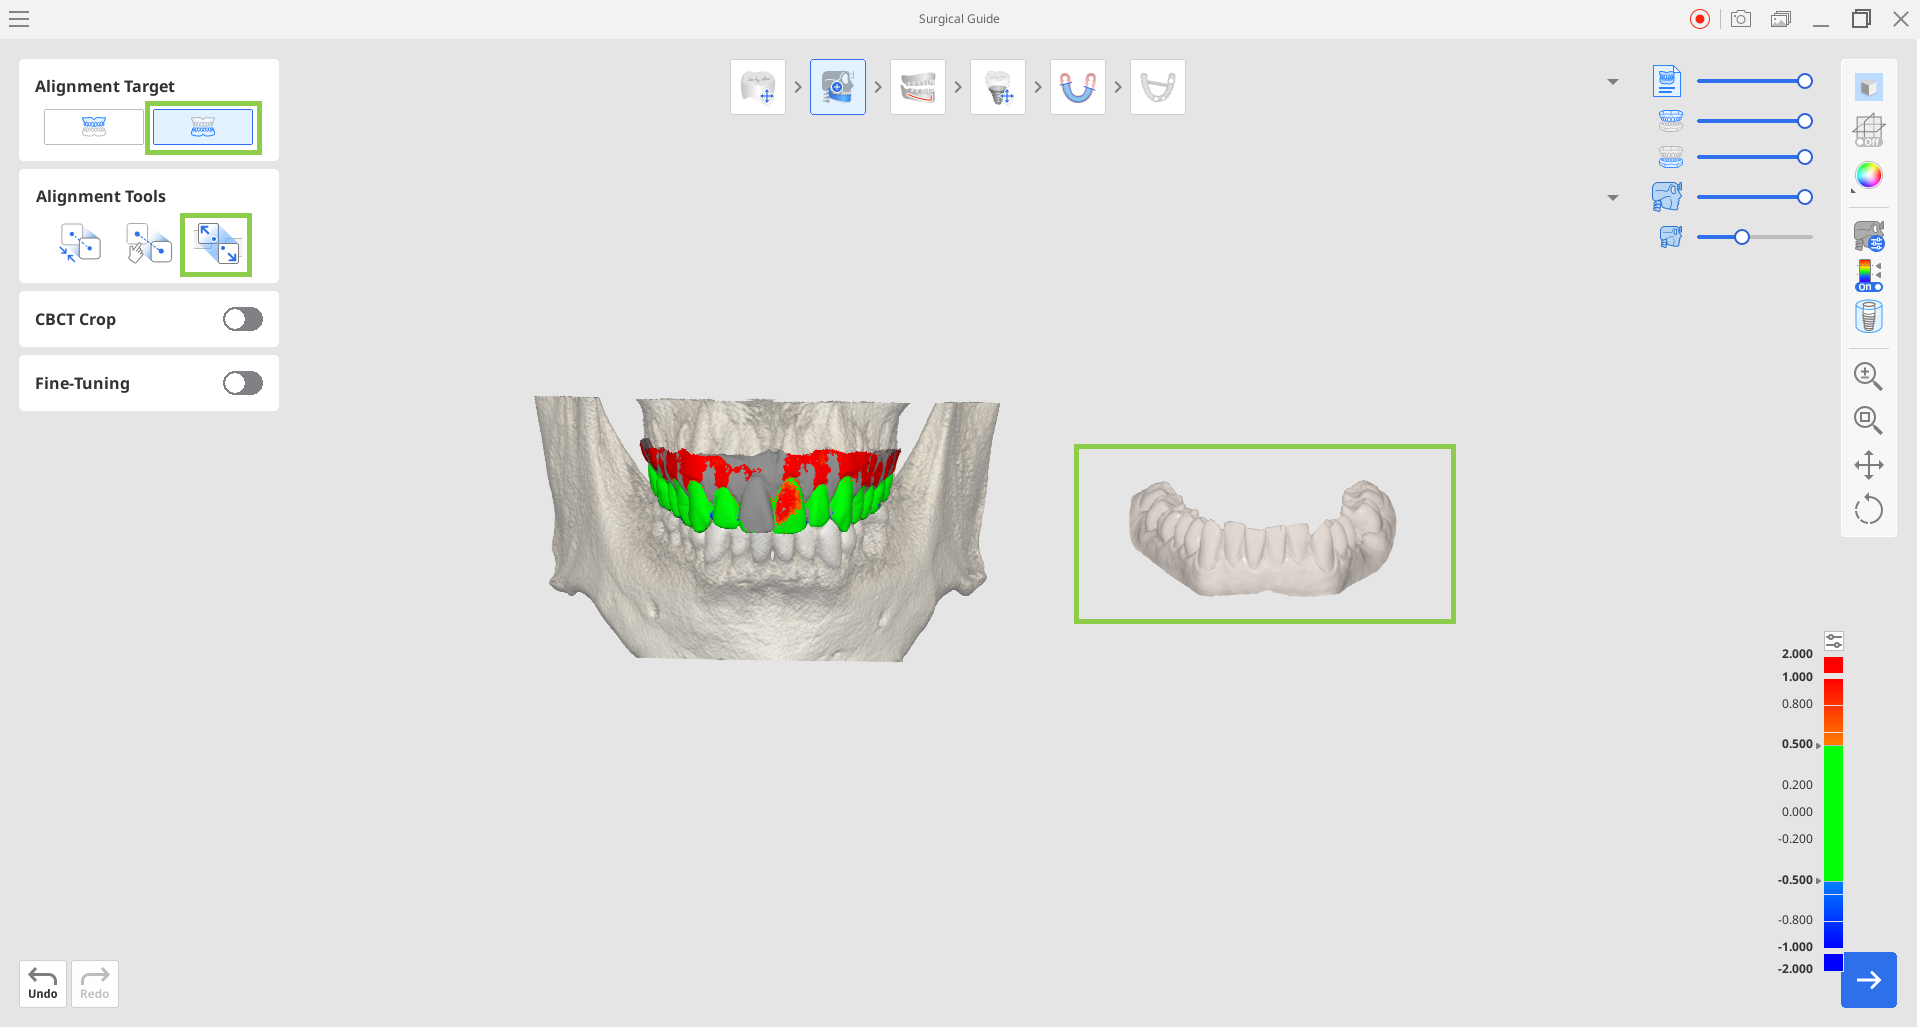
1. Start by checking the automatic data alignment. The aligned data is color-coded to show the level of deviation (i.e., the gap between the CBCT and scan data). Refer to the color map legend in the bottom right corner to understand what gap distance each color represents. Hover over the data with the mouse to view precise measurements for specific areas. If needed, you can disable the color map using the "Hide Color Map" feature in the Side Toolbar.
🔎Note
Gray areas in the aligned data indicate insufficient CBCT data in those regions, making it impossible to calculate the gap between the aligned data.
.png)
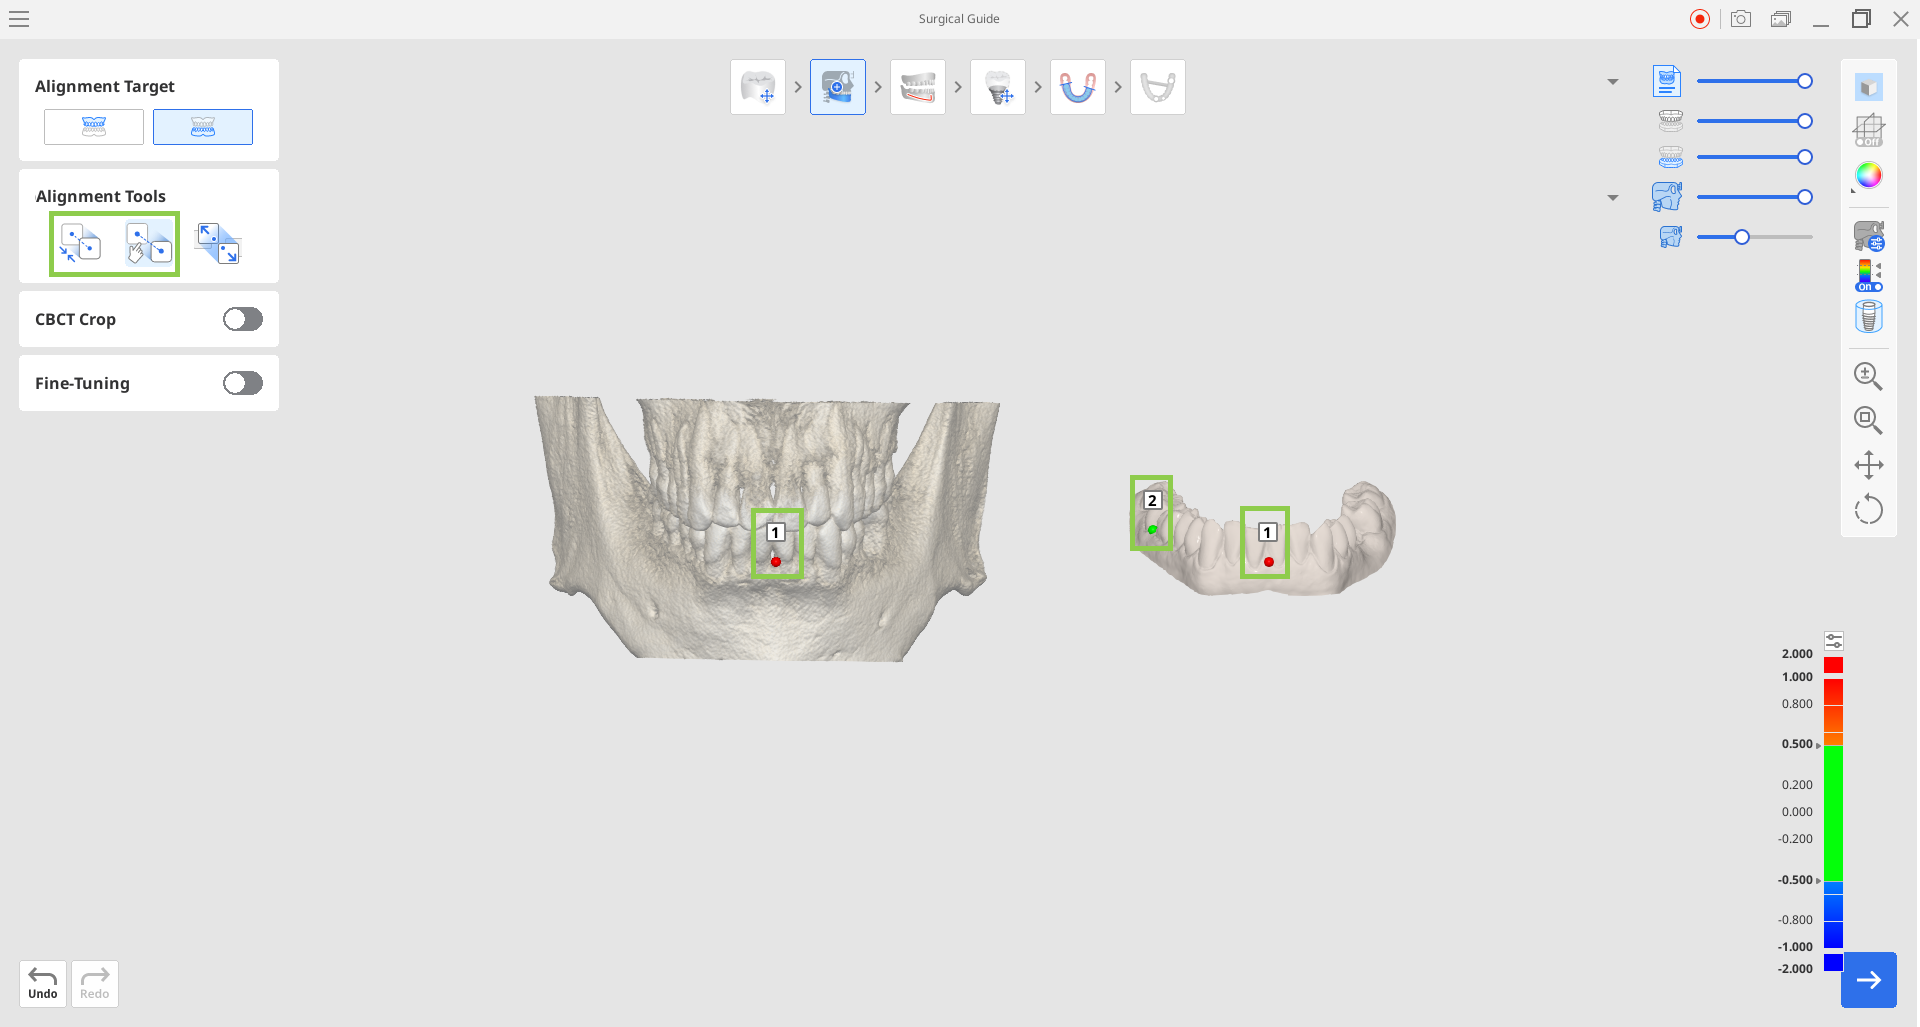
2. If you need to align data again, choose what arch you want to detach and then use "Detach Data."
3. To realign the data, use either "Automatic Alignment" or "Manual Alignment." For manual alignment, you will need to select three corresponding points on both sets of data to align them accurately.
4. Using the cross-sectional planes, you can review and make precise adjustments to the alignment. Enable the "Fine-Tuning" feature to adjust the data based on multi-planar views, including axial, orthogonal, and tangential planes. Move the outlines of the scan data in the view window to make changes.
🔎Tip
You can move the cross-sectional planes by dragging them or rotate them using the control points.

5. If needed, you can adjust the automatic trimming of the full CBCT data using the "CBCT Crop" feature. It allows you to trim the CBCT data to your target area and thus make the data analysis more comfortable and data processing faster. Toggle on the feature and adjust the crop size using mouse.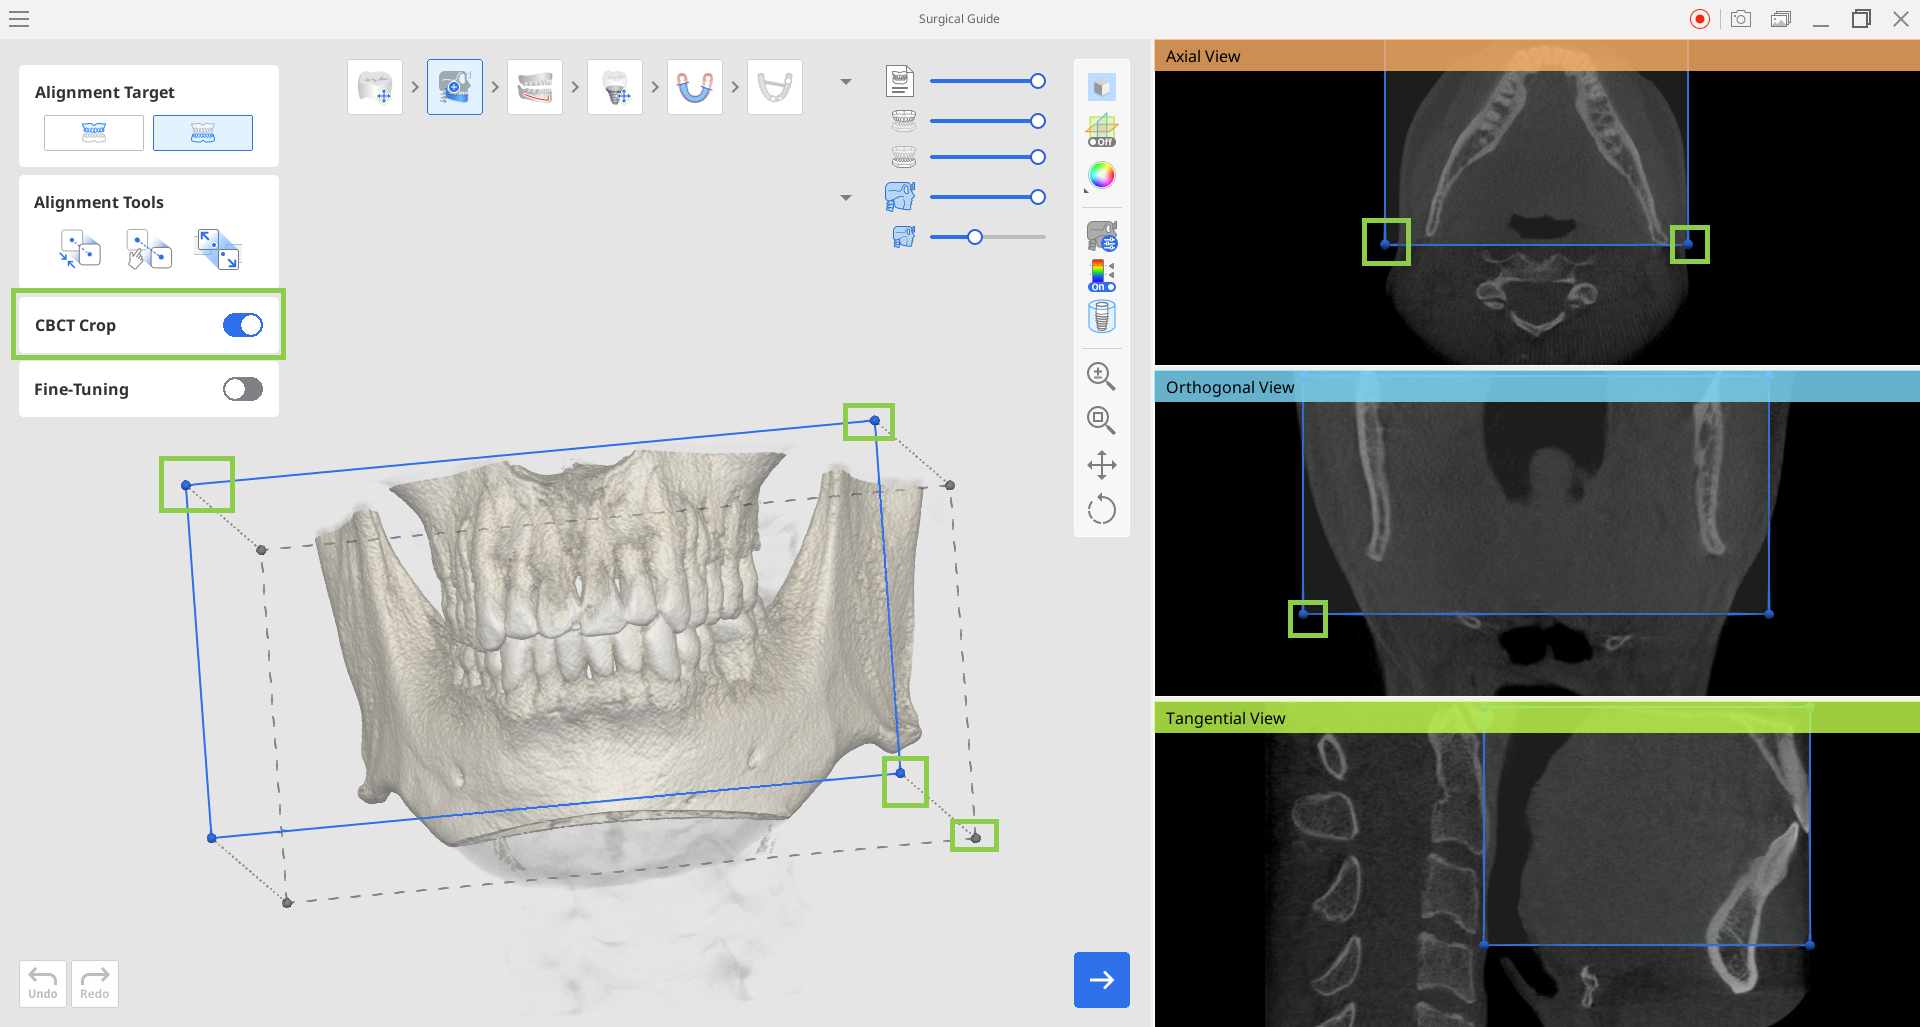
6. When done, click "Next."