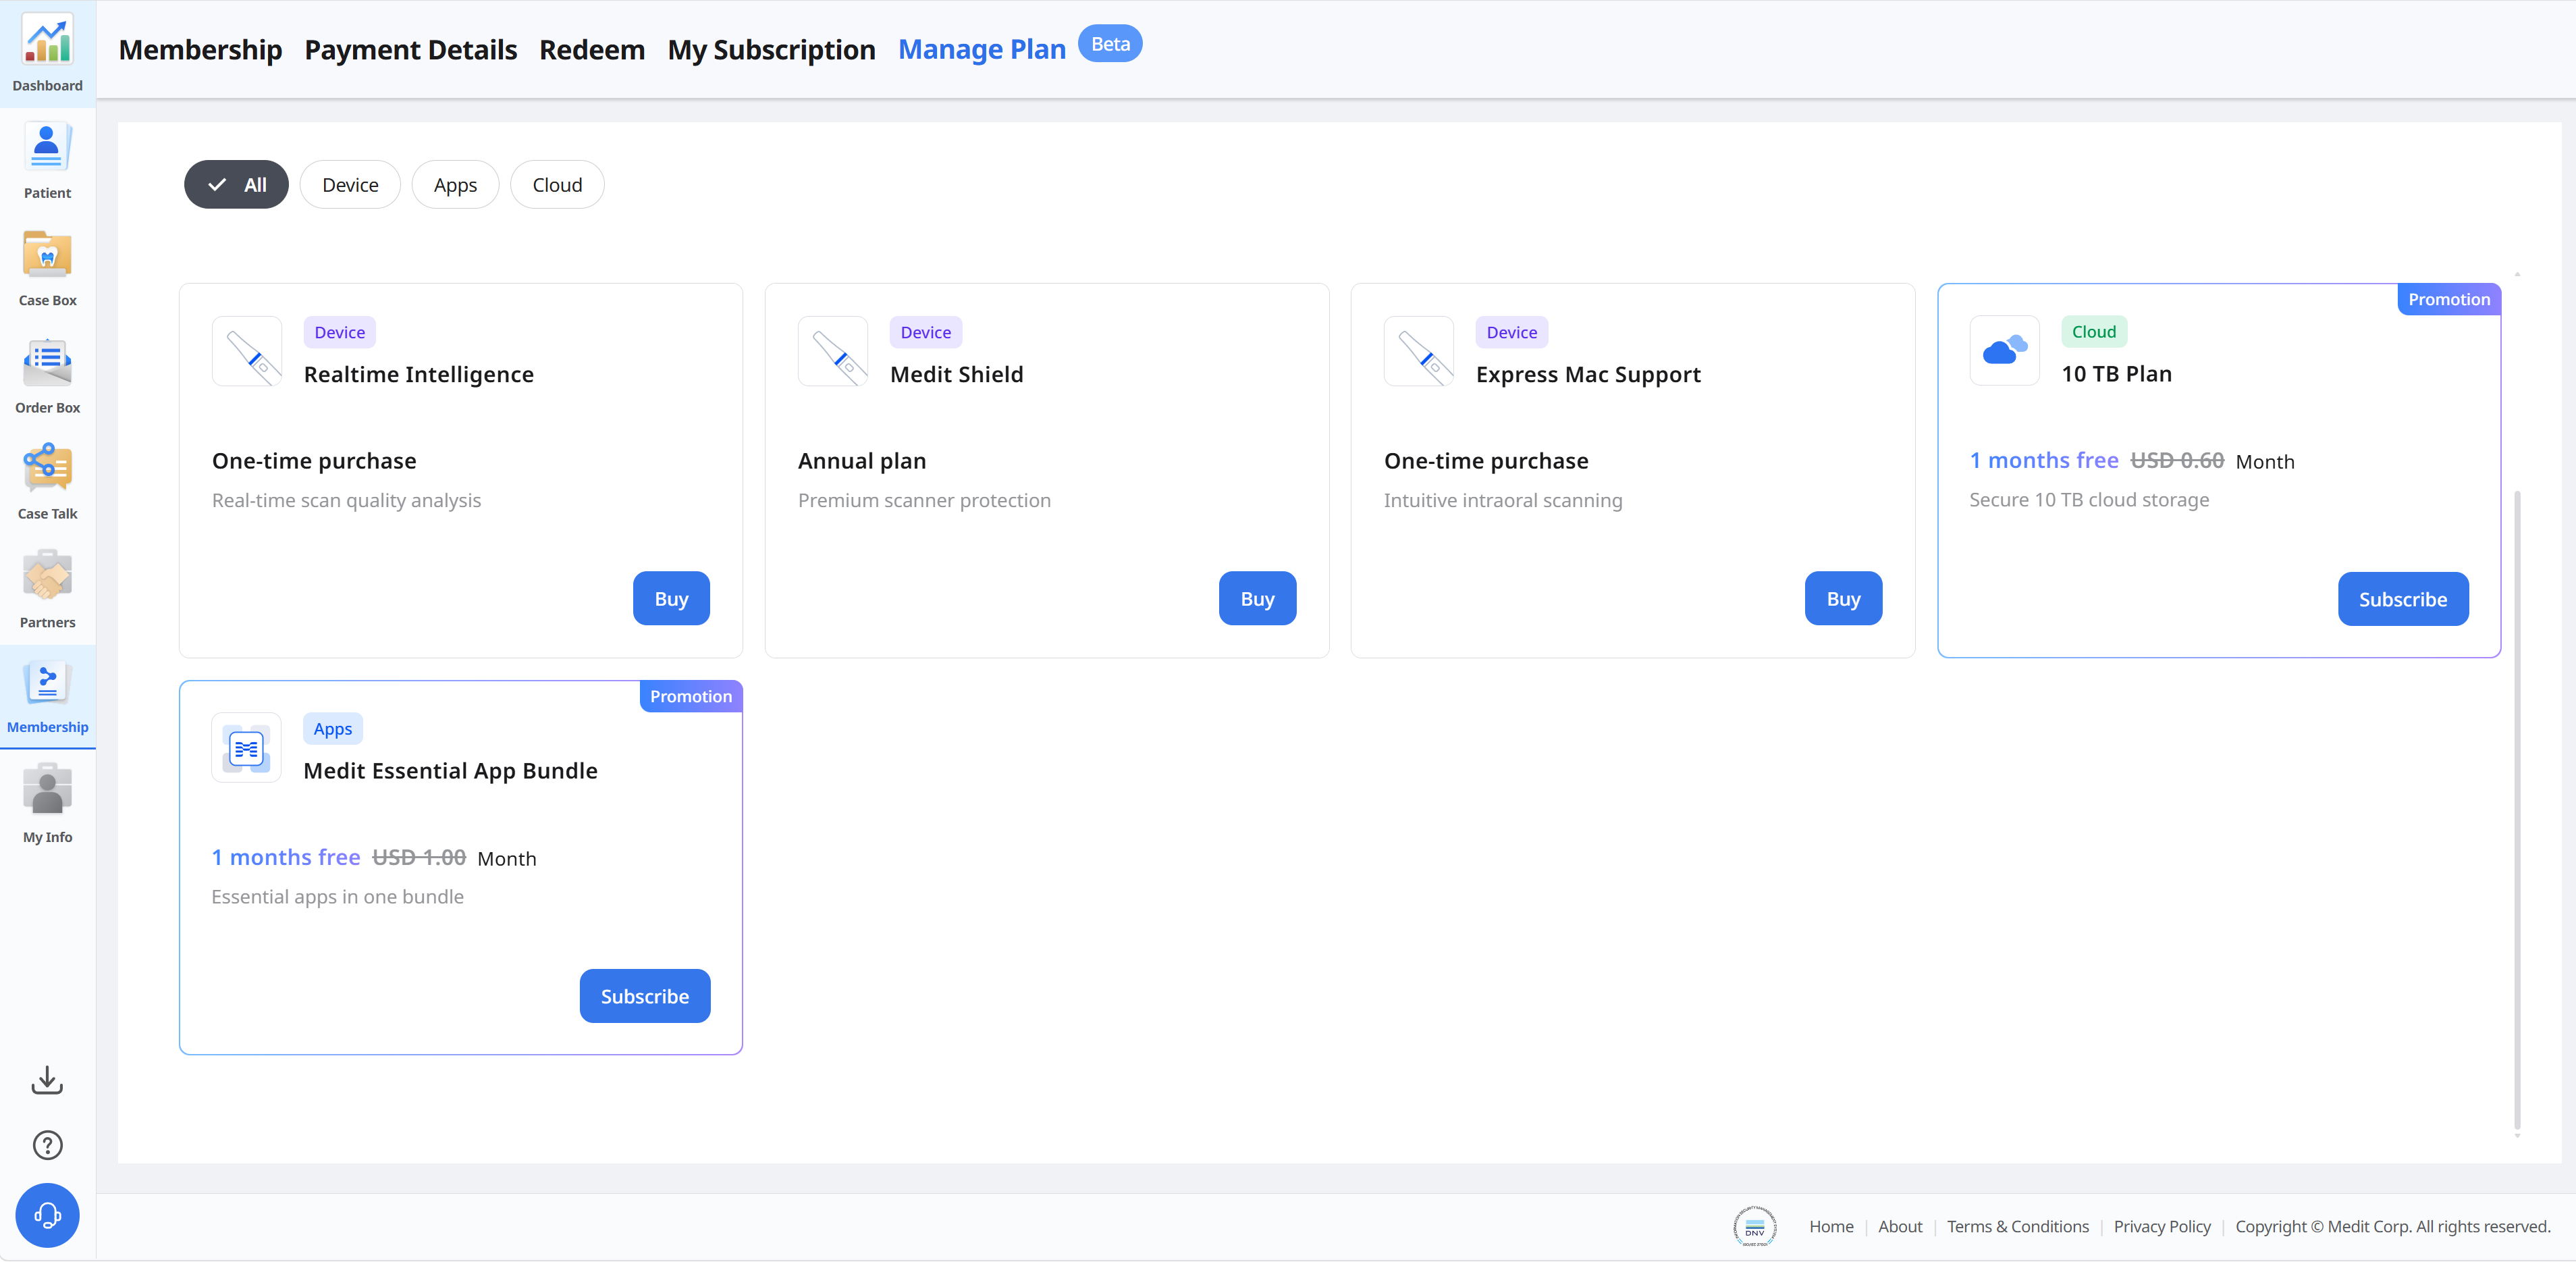
Membership
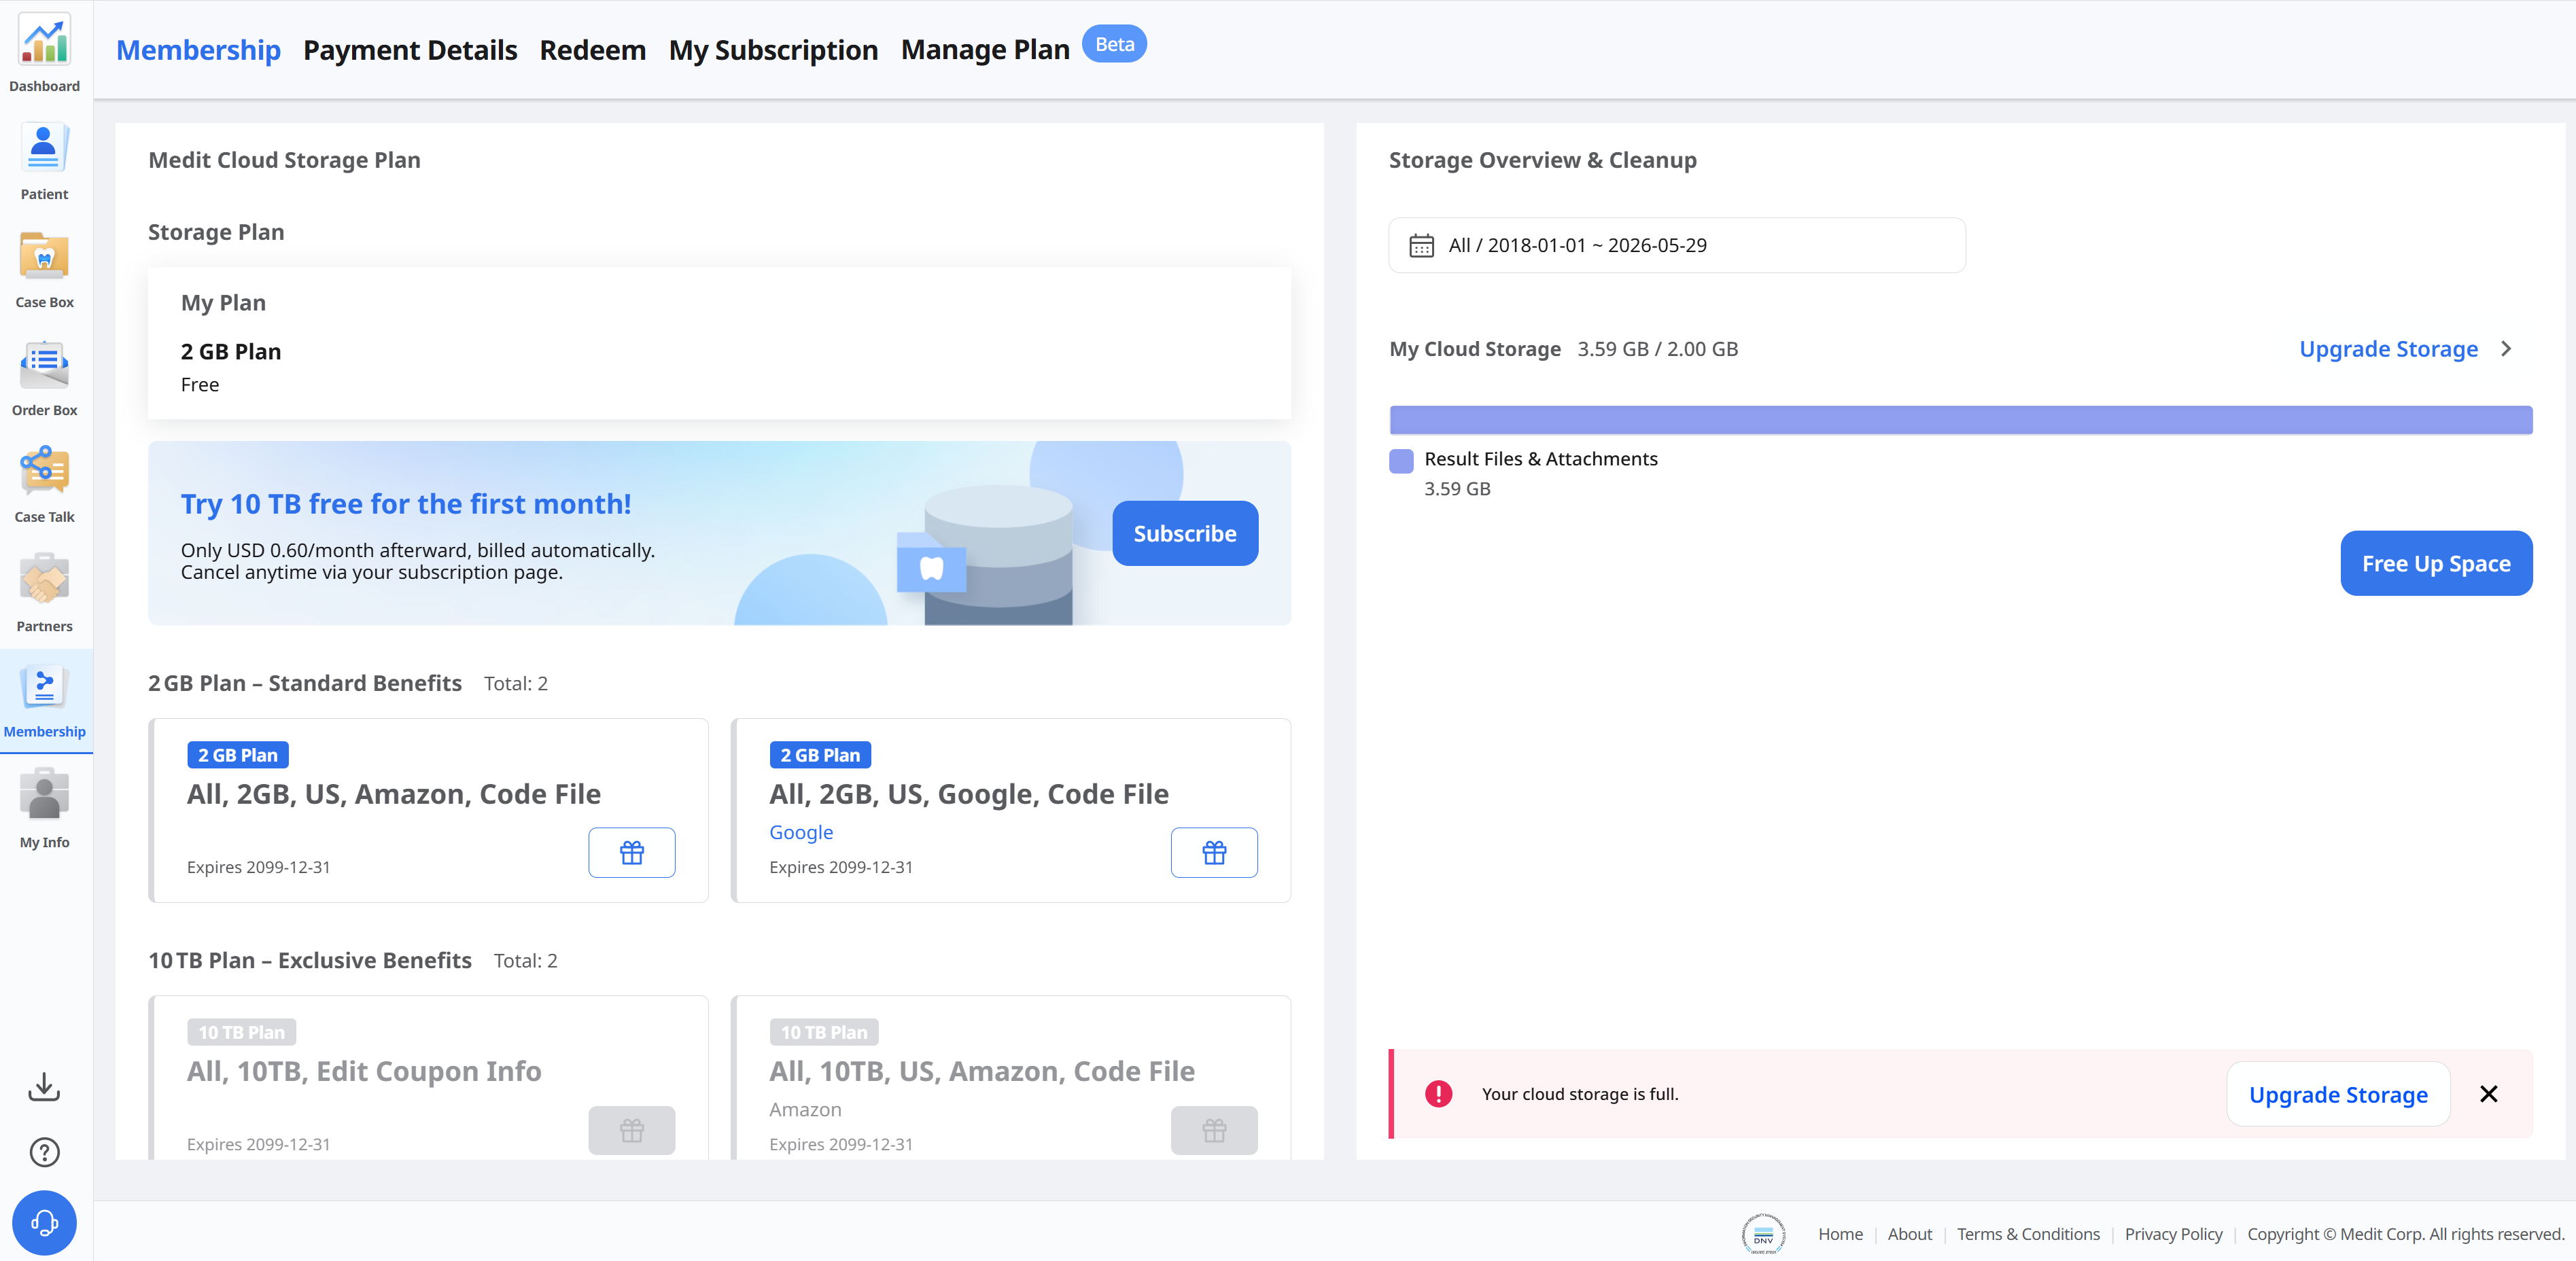
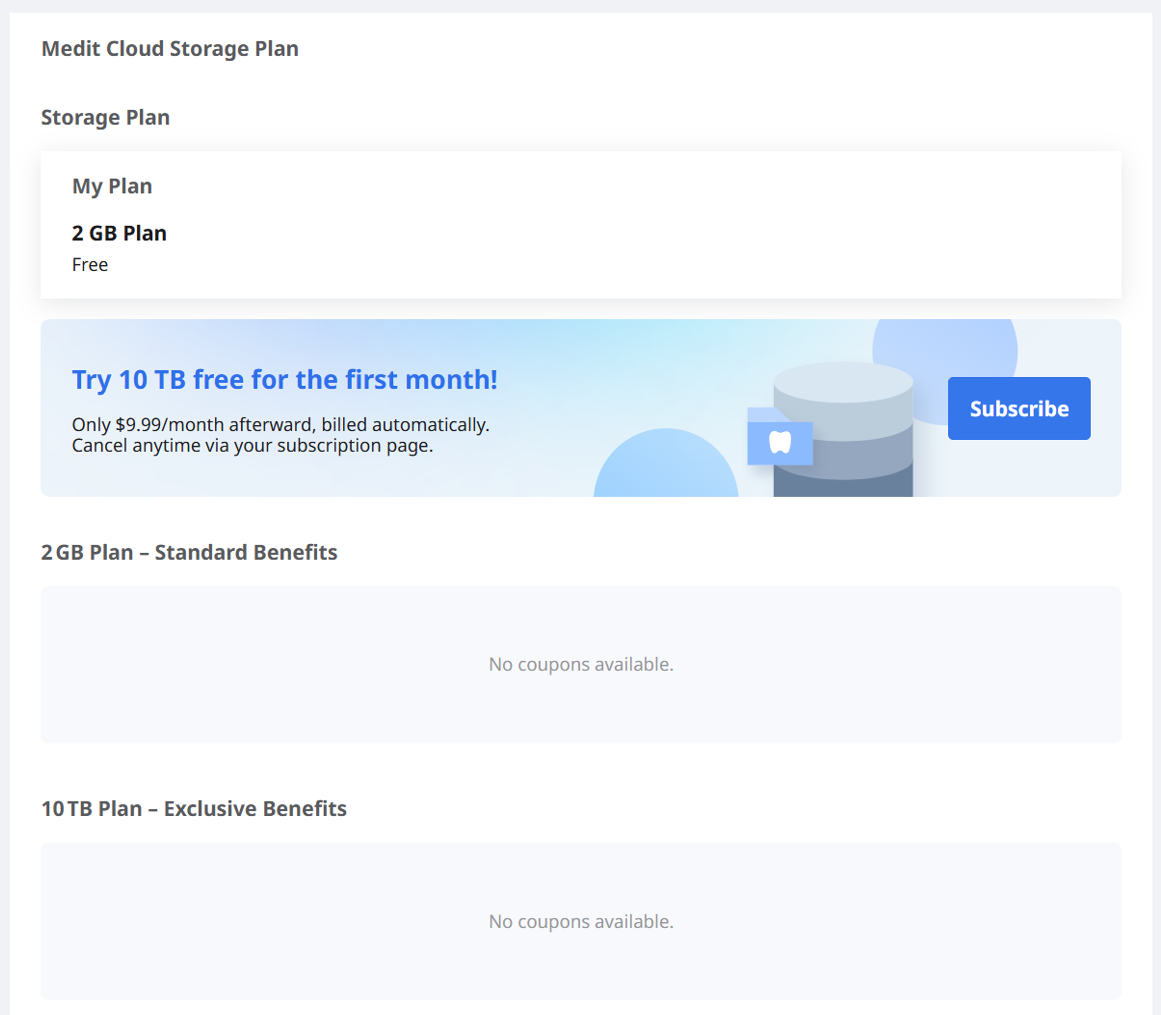
Medit Cloud Storage Plan
You can see what each plan offers, including discount coupons and vouchers, and your current subscription status. You can upgrade your plan or cancel your subscription at any time.
Medit Link provides the following cloud storage plans:
2 GB Plan
Free standard plan for all signed-in users
2 GB cloud storage
For new users
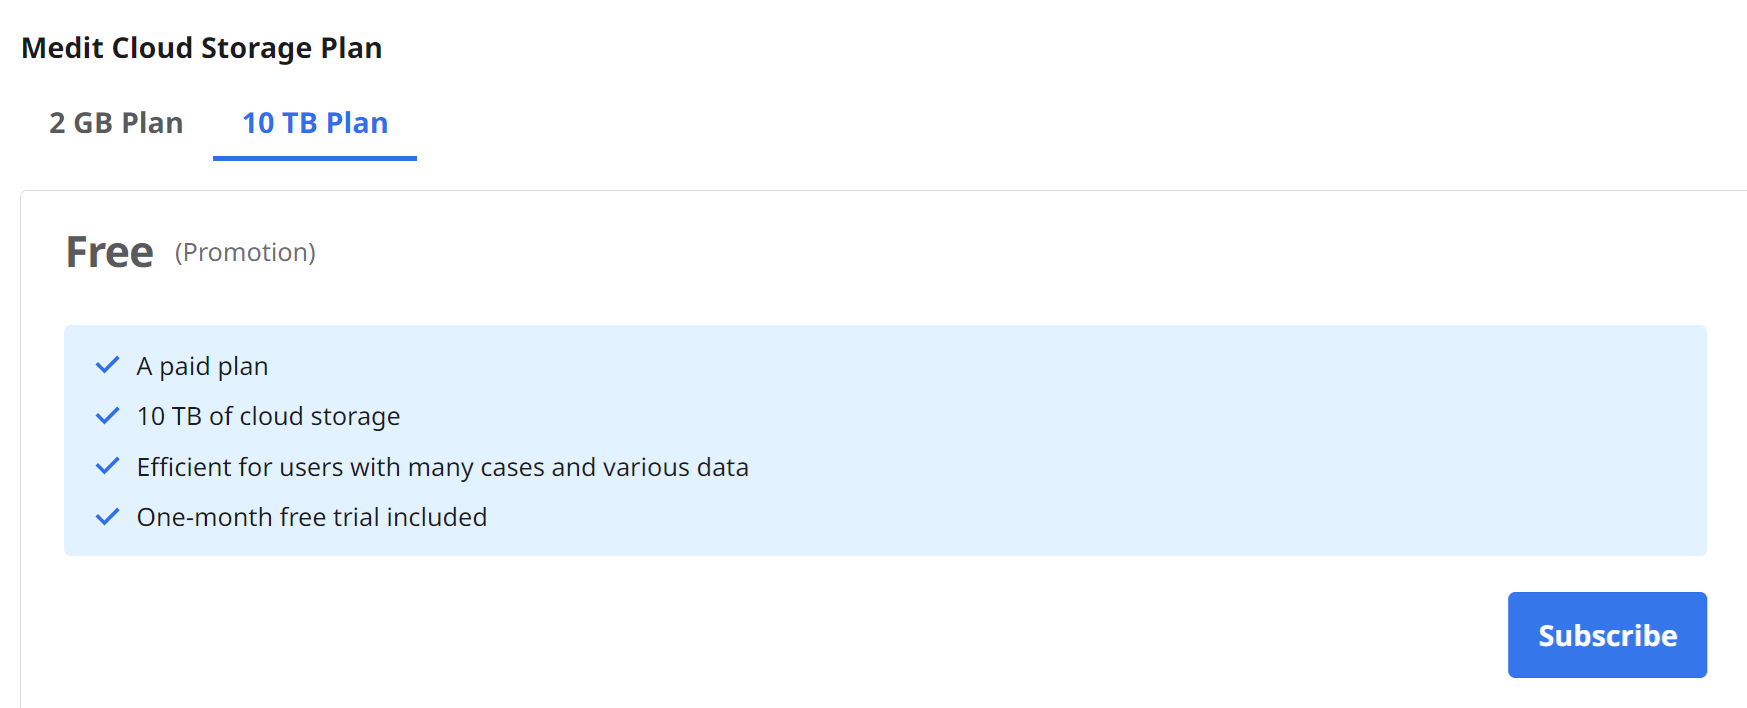
10 TB Plan
Paid plan
10 TB cloud storage
For users with many cases and various data
One-month free trial
2 GB Plan | 10 TB Plan | |
|---|---|---|
Cloud Storage | 2 GB | 10 TB |
Monthly Fee | Free of charge | $9.99/month |
* Cloud storage does not count raw data toward the used space. | ||
🔎Note
The membership plans will be available on Medit Link China. You can enjoy the 10 TB Plan for free until the official release of the feature.
Cloud Storage
In the right-side section, you can manage your cloud storage.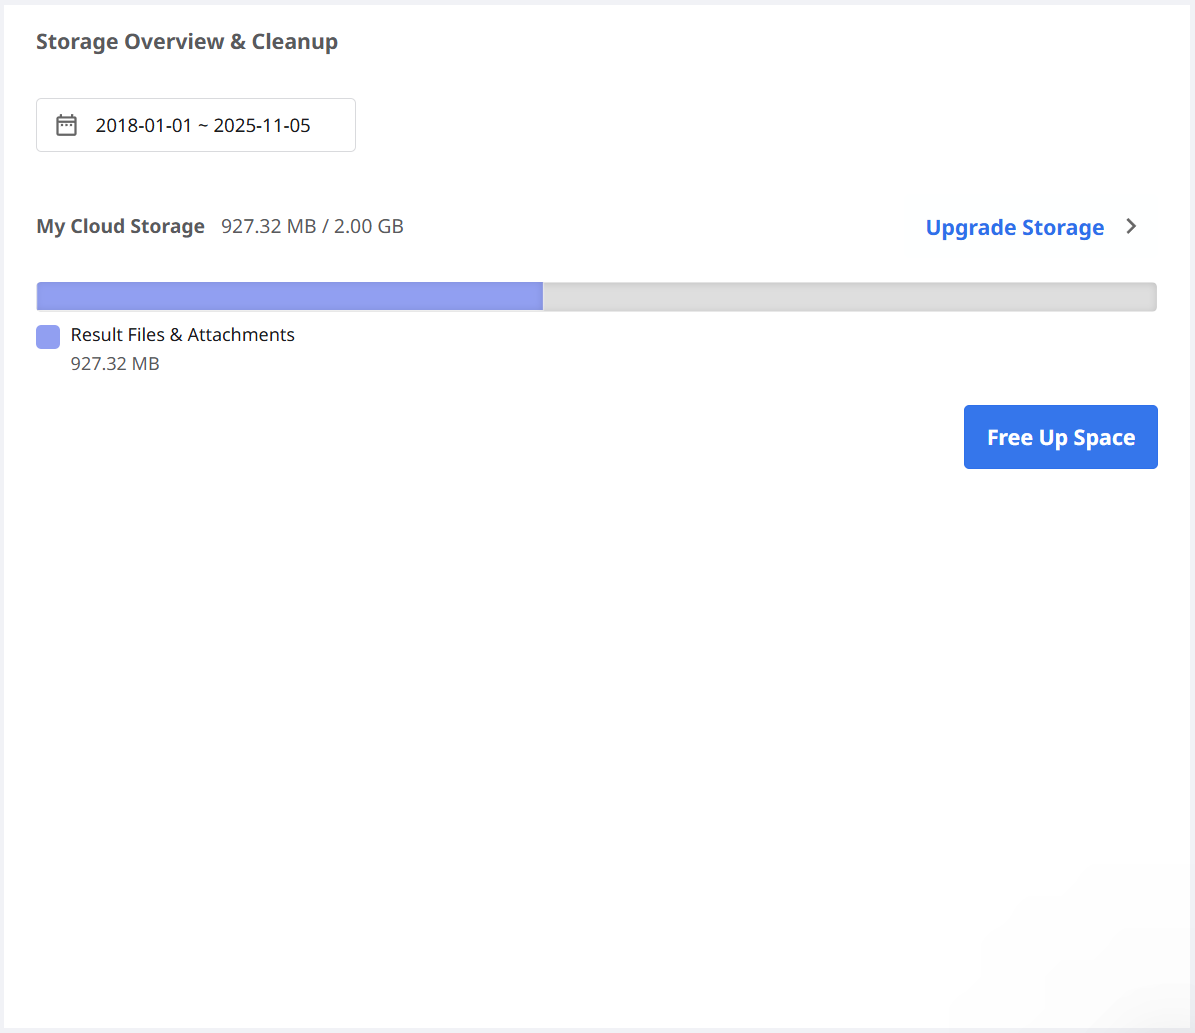
Set Period | Set the specific period to delete data created within that time frame.
|
Upgrade Storage | Click to upgrade to the 10 TB paid plan. |
Result Files & Attachments | The result and attachment files take up space in the cloud. If the cloud is full, you can secure more storage space by removing unnecessary files. |
Free Up Space | Remove selected files from the cloud storage to free up space. |

Subscribe
If you are currently on the 2 GB Plan or the 10 TB Plan with a redeem code, you can subscribe to the 10 TB Plan.
The payment is completed through Stripe service (www.stripe.com).
Go to Membership > Medit Cloud Storage Plan > 10 TB Plan and click the "Subscribe" button.
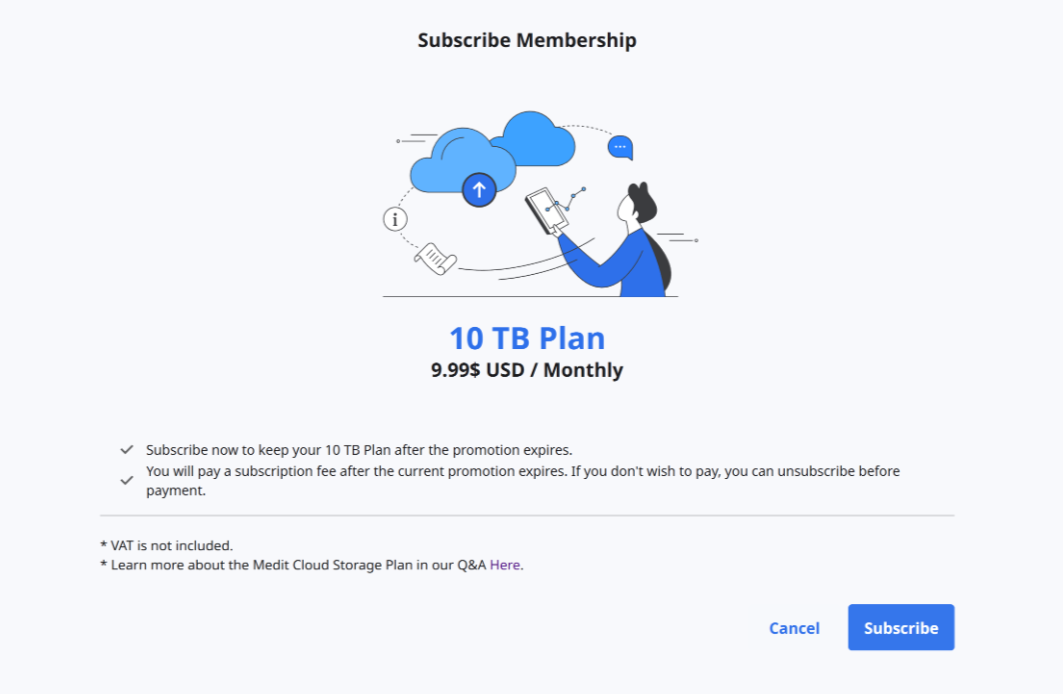
Check the 10 TB Plan description and click "Subscribe" again.
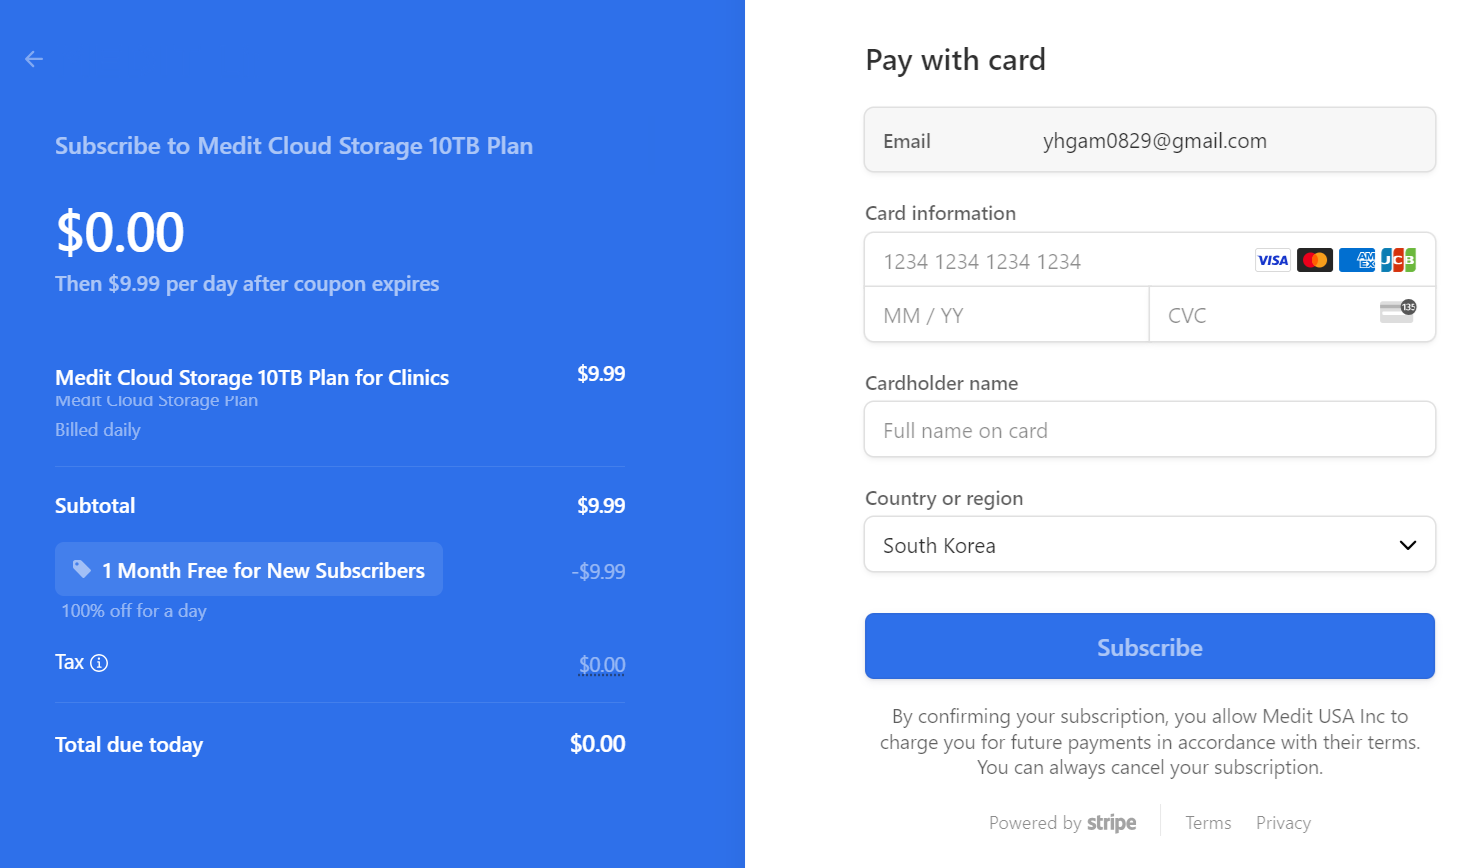
Check the price and conditions and input information necessary for the payment. Then, click “Subscribe.”
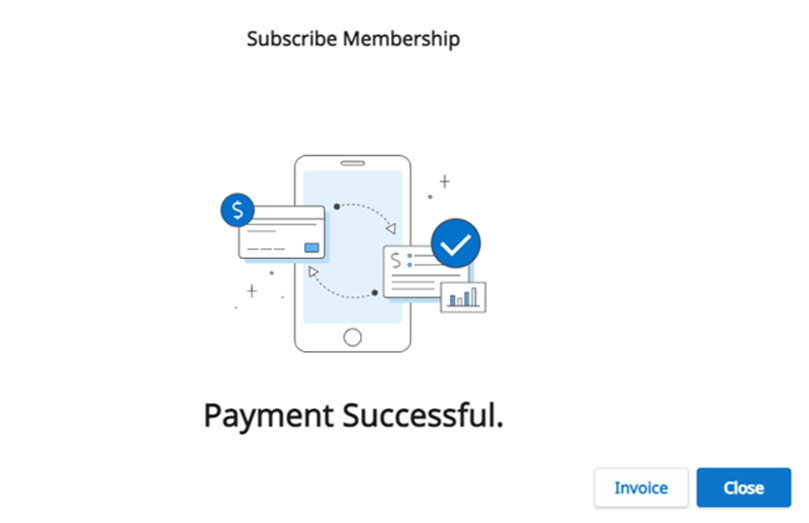
The payment may take several seconds. When done, you will see the confirmation message.
Cancel Subscription
You can cancel your subscription at any moment. After canceling, you can still use the 10 TB Plan for the remaining days of that paid month. Your plan will be changed to the 2 GB Plan from the next payment day, and the cloud storage will be limited to 2 GB. If the cloud storage capacity is exceeded, the files will not be backed up, and the order and share functions will not be available.
Click "Unsubscribe."
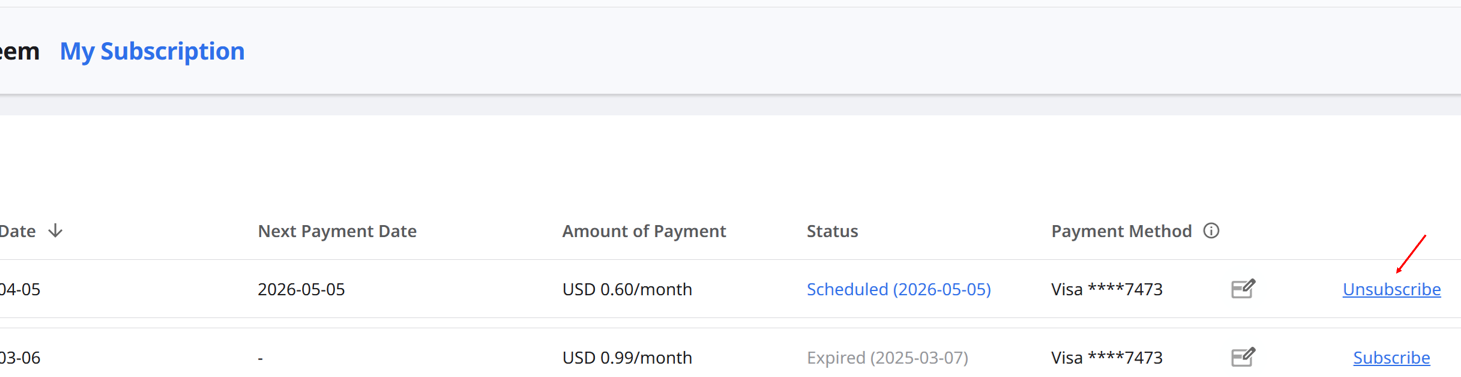
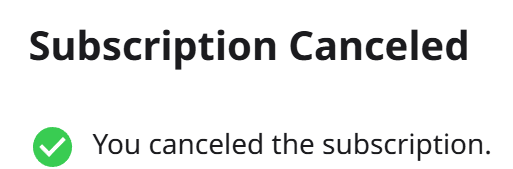
Click "Cancel Anyway."

Your subscription has been canceled.
Your plan will be changed to 2 GB Plan from the next payment day, and the cloud storage will be limited to 2 GB. If the cloud storage capacity is exceeded, the files will not be backed up, and the order and share functions will not be available.
My Subscription
You can view the details of your current subscription, resubscribe, or cancel it from My Subscription. You can also change the payment method, which will be applied starting from the next scheduled payment.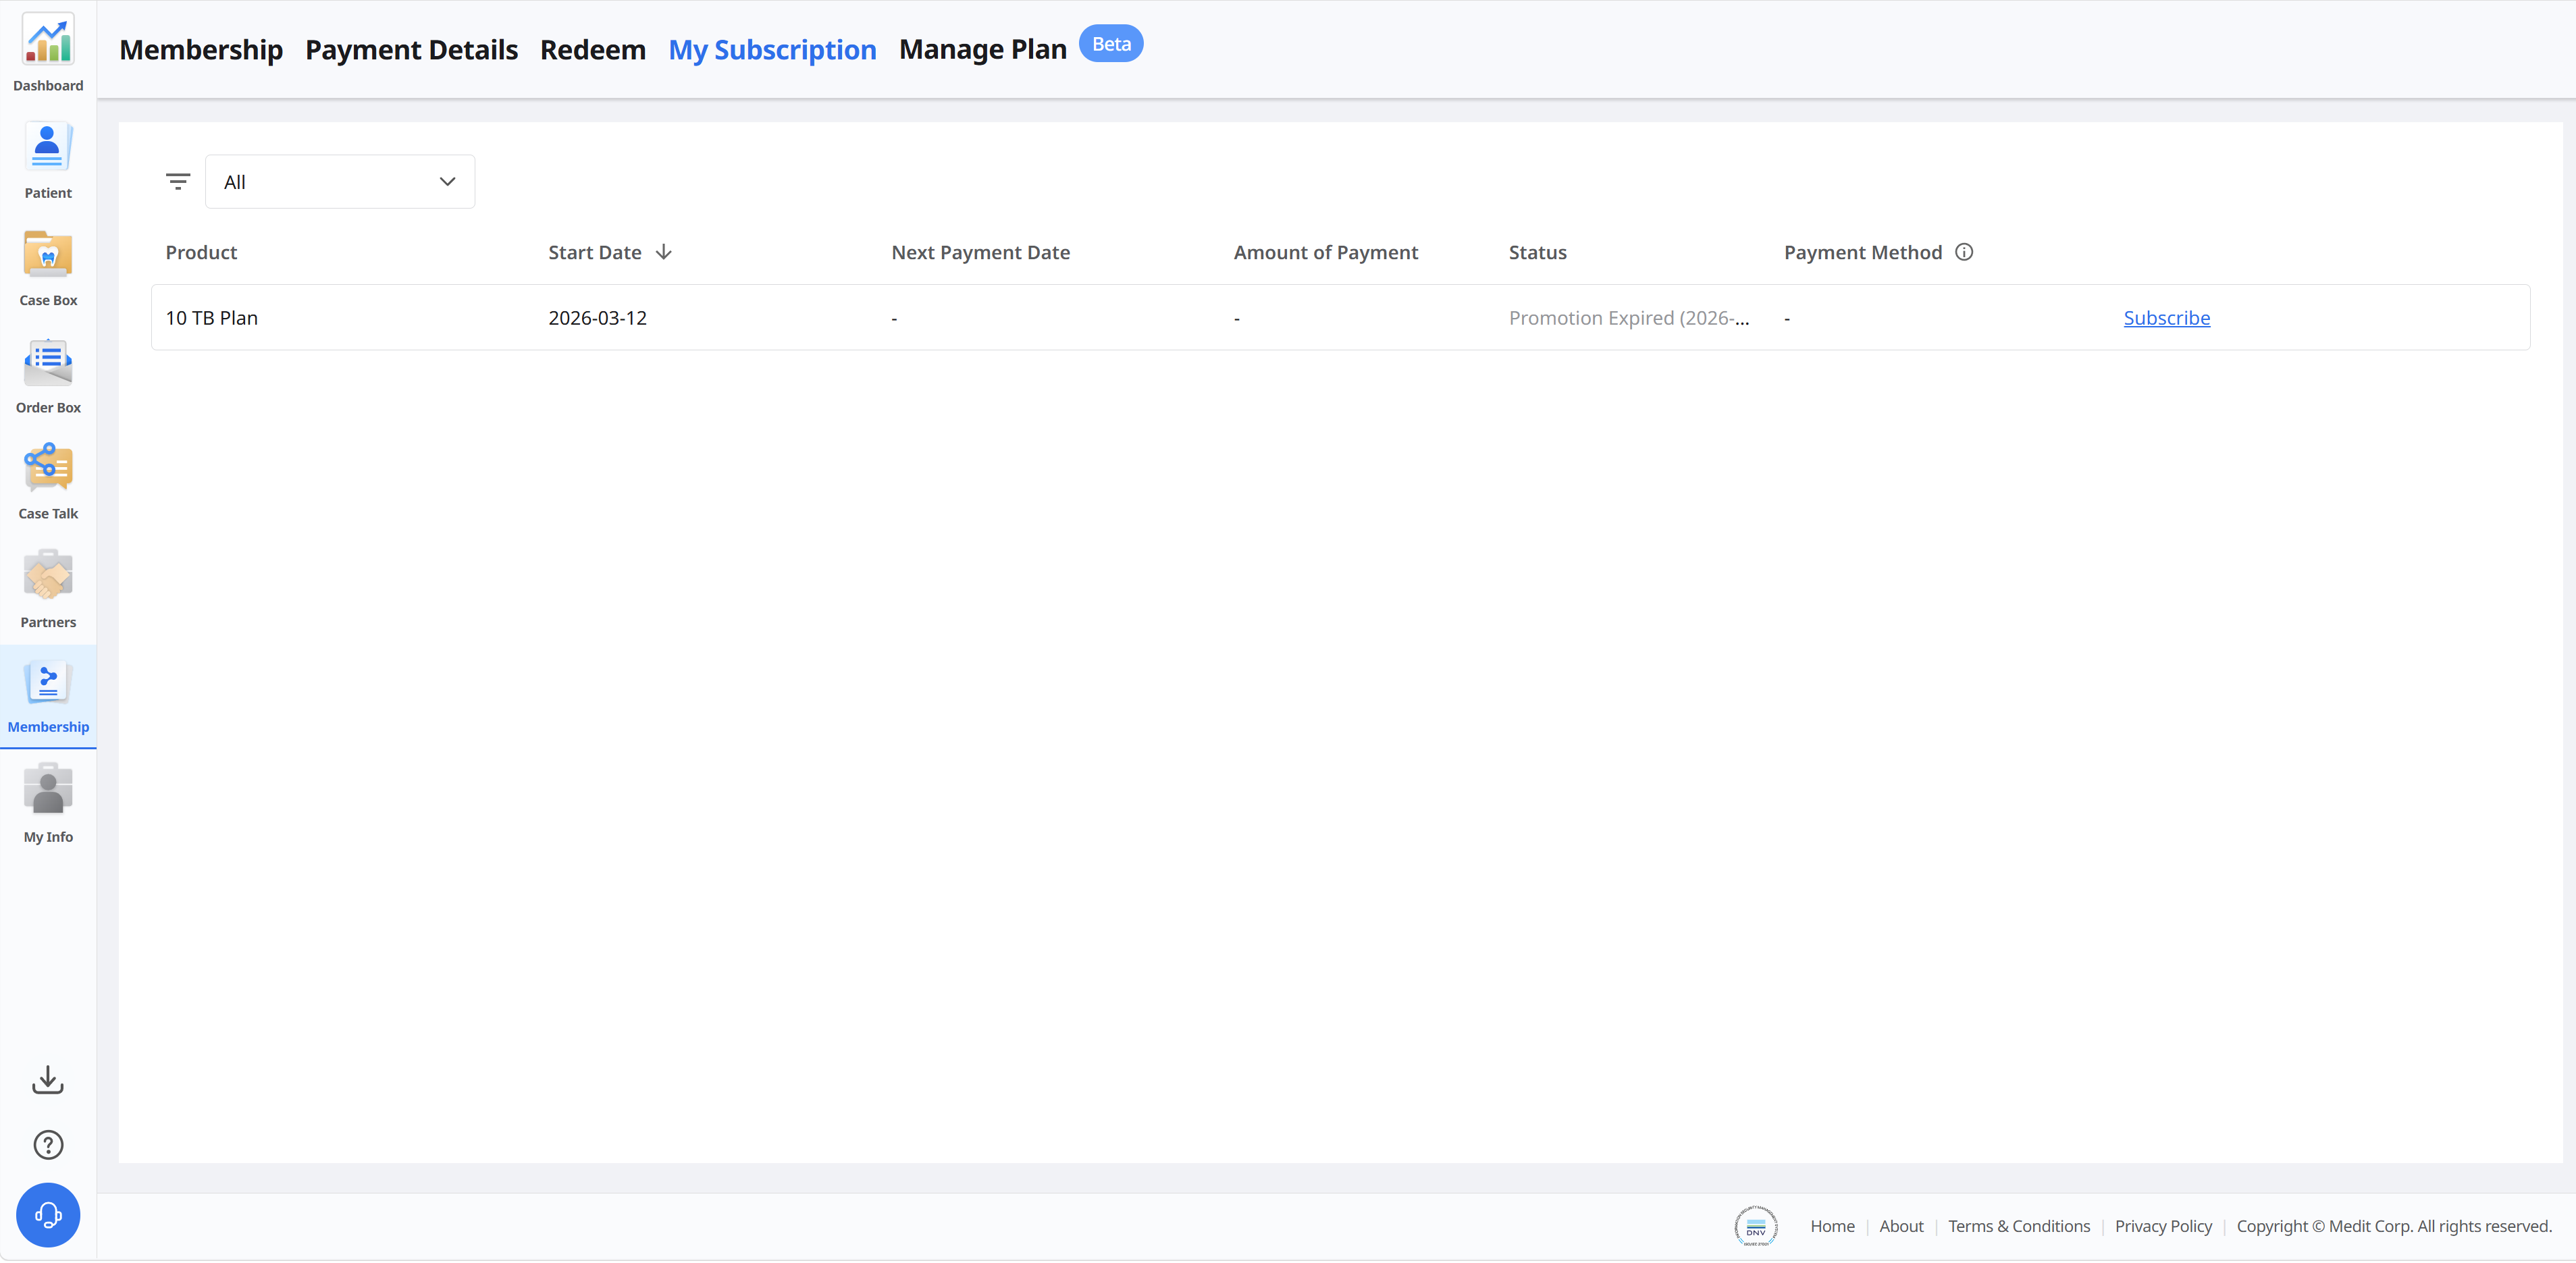
Details
Item | Description |
Product | Displays the type of subscription. |
Start Date | Displays when the subscription or promotion started. |
Next Payment Date | Displays the next payment date. |
Amount of Payment | Displays the payment amount. |
Status | Subscription
Promotion
|
Payment Method | Displays the last four digits of the card used for payment. |
Resubscribe
Item | Description |
Cloud Storage Plan | Click the subscription button to resubscribe to 10 TB Plan. |
App Subscription Plan | Sign in to the app to resubscribe. |
Redeem
You can redeem a promo code to get free access to eligible paid services.
Details

Item | Description |
Product | Displays the plan to which the promotion is applied. |
Promotion | Displays the name of the promotion. |
Code Number | Displays the code number. |
Registration Date | Displays the date the code was registered. |
From | Displays the start date of the promotion. |
To | Displays the expiration date of the promotion. |
Status |
|
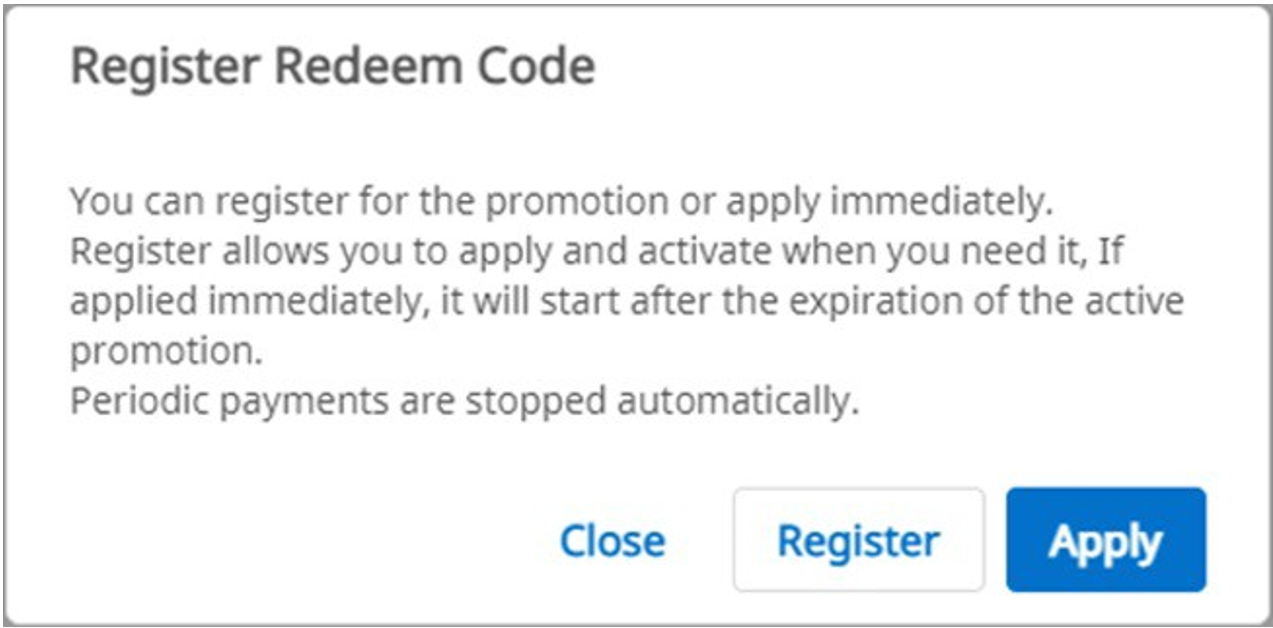
Register Redeem Code
Input the redeem code and click "Register."
Read the notice and choose "Register" or "Apply" in the pop-up dialog.
Register: Register the redeem code. You can activate and use the redemption code later after registration.
Apply: Register and activate the redemption code. The promotion discount applies immediately.
Activate Redeem Code
You can register multiple redeem codes, but you need to activate the one you want to use.
Click the "Activate" button next to the code you want to use.
If there is no code with the "Activated" status, the one you choose will be applied immediately.
If an already activated code exists, the newly selected code changes to the "Waiting" status. When the currently activated redeem code expires, the new redeem code in the "Waiting" status will be automatically activated.
🔎Note
Only one redeem code can be activated, and only one can be in "Waiting" status.
Payment Details
You can view your subscription and payment history in the Payment Details tab.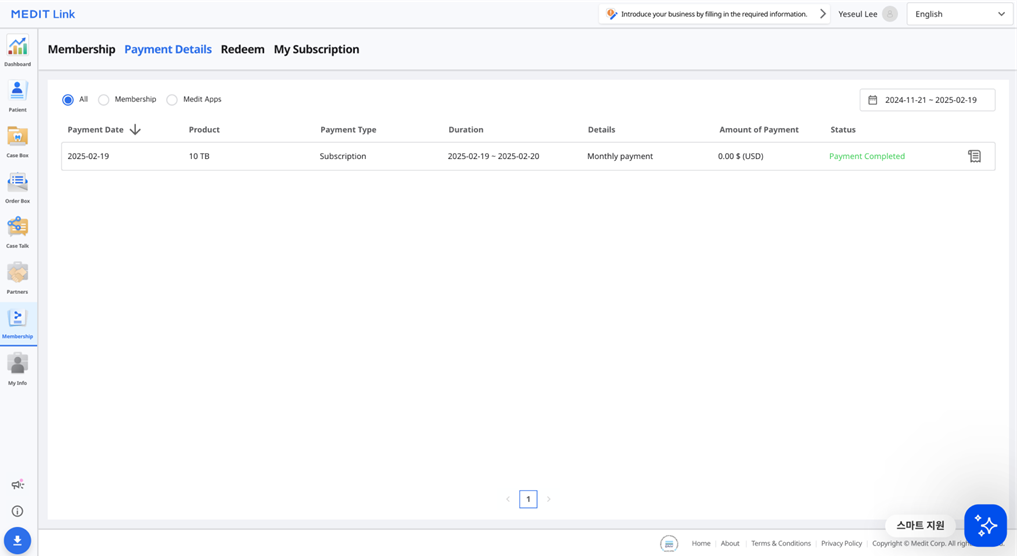
Item | Description |
Payment Date | Displays the date of payment. |
Product | Displays the purchased plan or app. |
Payment Type | Displays the type of payment:
|
Duration | Displays the subscription period. |
Details | Displays the detailed payment information. |
Amount of Payment | Displays the amount for a subscription or one-time purchase. |
Status |
|
View Bill Details
You can view your payment invoices and receipts by clicking the receipt icon on the right.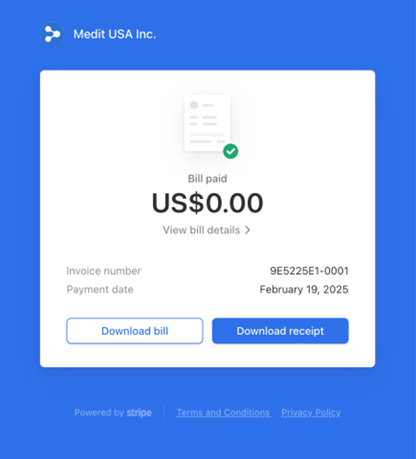
Click "View bill details" for payment details.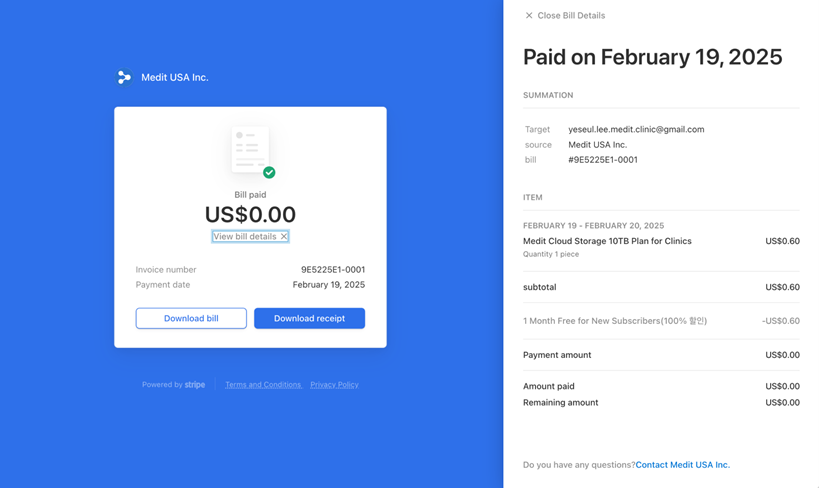
Manage Plan
You can view available products and services.