The guide is generated in the final step of the workflow. Here, the user reviews the generated design of the surgical guide and customizes it using the optional elements like attachments and labels.
.png)
1. Start by checking the generated design of the surgical guide. If needed, you can return to previous steps to make changes and regenerate the results.
⚠️Caution
Once you go back and make changes, your design progress will be reset, and a new guide will be generated.
2. If satisfied with the final results, work on adding additional elements: attachments include a support bar or a window. The support bar is a structural element that will help stabilize the guide during surgery. It can also ensure that the full arch guide maintains its shape and integrity while being printed. The window would create an opening in the guide allowing you to check if the offset gap parameters were set appropriately.
When adding the support bar, click the plus button in the toolbox widget, then designate the starting and ending points of the bar. Adjust the size and positioning of the element using the 3D manipulator (arrows, lines, and cubes on the element). You can also define the dimensions. Afterward, click "Save."
.png)
When adding the window, click the plus button in the toolbox widget, then define the location and dimensions of the window. Adjust the size and positioning of the element using the 3D manipulator (arrows, lines, and cubes on the element). Once you're satisfied with the placement, click "Save."
.png)
⚠️Caution
The "Reset" button in the Attachments toolbox will remove all created attachments. To remove the last one created, use the "Undo" button in the bottom left corner.
3. Label is another useful additional element that can be added in this step. You can add up to 4 labels to a single surgical guide. To begin, toggle “Labeling” on—this will automatically insert the first label.png)
By default, the case name is used as the label text. However, you can customize it by editing the text and font in the input box below. You can also adjust the size and depth of the label.
.png)
The label text can be either embossed (raised) or engraved (recessed) onto the surgical guide—use the options provided to choose your preferred style.
.png)
If necessary, use the “Rotate 180” option to flip the label text.
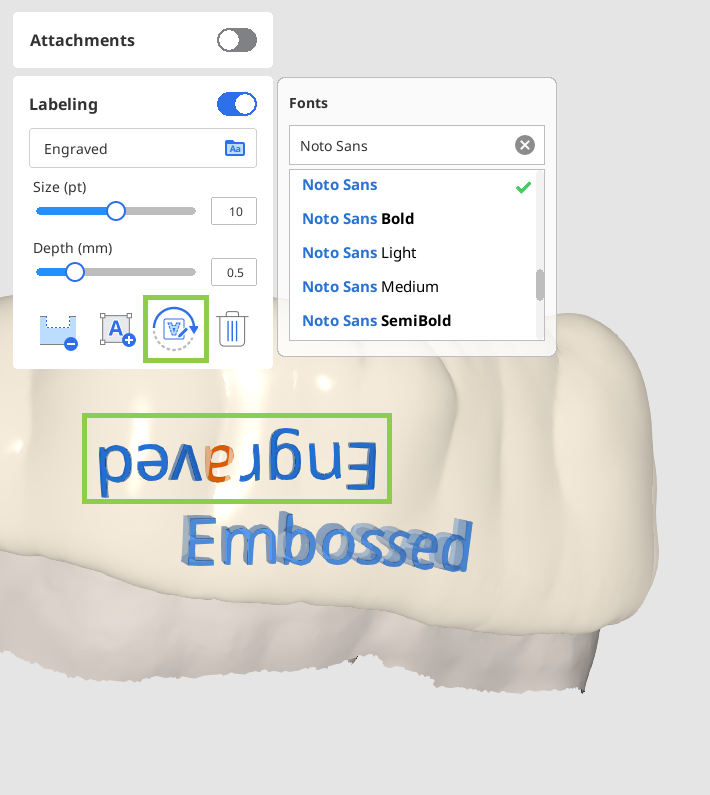
Use “Delete“ to remove unneeded labels.
4. When you're finished, click “Complete” in the bottom right corner to finalize the project. Before proceeding, you'll be asked to review and confirm the user agreement. Your surgical guide design will then be saved to the Medit Link case, along with a report file containing key project details.