🔎Note
To use this feature, turn it on in Settings > Scan Data Analysis > Enable Realtime Intelligence(Beta).
Realtime Intelligence automatically identifies prepared teeth in the scan data and reviews both the full scan and the preparation areas against key requirements for crown cases. It provides immediate, easy-to-understand feedback, allowing users to assess data quality in real time and make on-the-spot adjustments for more accurate design work later.
When scanning stops, the program automatically checks for prepared teeth. If any are detected, preparation review items, scan review items, and auto-captured HD images are displayed on the right. If no prepared teeth are identified, only the scan review items are shown.
The table below outlines the categorization of review items and provides a detailed explanation for each.
Review Item Category | Review Item | Details |
|---|---|---|
Preparation Review | Undercut | Displays undercuts based on the automatic insertion axis. Blue-highlighted areas indicate regions where interference may occur during prosthesis insertion. |
Minimum Distance to Antagonist | Measures the distance to the opposing teeth to verify that sufficient space is available for prosthesis fabrication. | |
Minimum Distance to Adjacent | Checks the distance to adjacent structures to verify that sufficient space has been created for prosthesis fabrication. | |
Minimum Reduction Depth | Compares pre- and post-preparation to determine how much additional reduction is needed based on the ideal thickness of the prosthesis. | |
Surface Roughness | Visually represents the convexity, concavity, and roughness of the entire prepared tooth surface and around the margin line. This helps re-evaluate the margin line and check whether the preparation surface is smooth and uniform overall. Areas closer to red indicate more convex regions, while areas closer to blue indicate more concave regions. | |
Preparation Margin | Areas with abrupt changes or poor continuity are highlighted in red. Use these highlighted areas to review the margin and assess whether it is accurate. | |
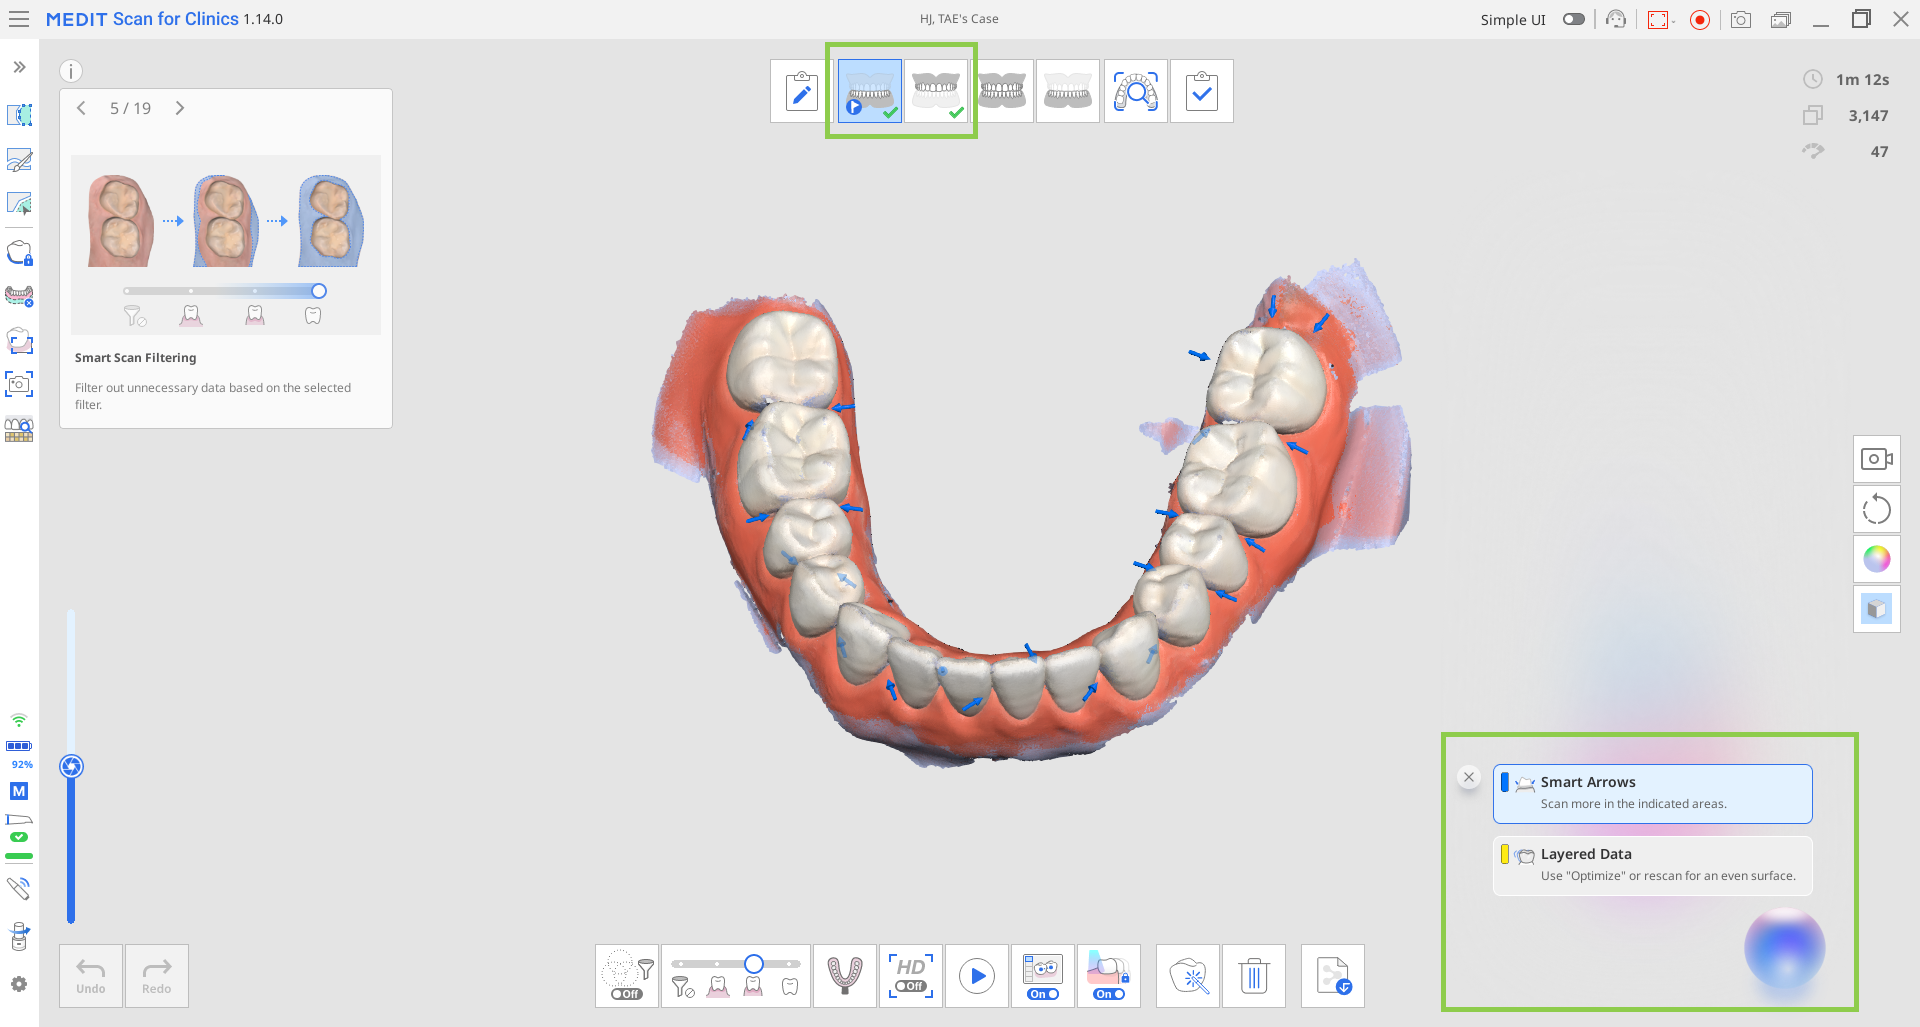
Scan Review | Smart Arrows | Indicates areas of insufficient scan data. In stages without prepared teeth, Smart Arrows evaluate the entire scan for missing data. When prepared teeth are present, they focus on clinically relevant regions, such as the prepared teeth and 1–2 adjacent teeth. Rescan the indicated areas to ensure complete and accurate data. |
Layered Data | Indicates areas with overlapping (multilayered) scan data, which may be caused by blood, saliva, tooth movement, or improper scanning technique. Users can delete affected areas and rescan, or use “Optimize” to realign and review the data. When no prepared teeth are present, Layered Data is displayed across the entire dental arch; when present, it is limited to the prepared teeth and their 1–2 adjacent teeth. | |
HD Images | - | Captures up to 5 images per prepared tooth from multiple directions - occlusal, buccal, lingual, mesial, and distal. |
🔎Notes
Distance-related information (such as Minimum Distance to Antagonist, Minimum Distance to Adjacent, Minimum Reduction Depth) is displayed when values fall below the default threshold of 1.5 mm. This threshold can be adjusted in Settings. Areas below the threshold are highlighted in red; hover over these areas to view the exact distance.
To save HD images, click the “Download” button on the image. Saved images are available in the “HD Camera” feature library or later as attachments in the Medit Link case.
⚠️Caution
The visibility of the Minimum Distance to Antagonist and Minimum Reduction Depth review results may vary depending on the scan stage order. To ensure these results are displayed, follow the recommended workflow setup.
The display of the above review items depends on the availability of pre-operative and occlusion scan data. Therefore, when using this feature, follow the recommended scan stage configuration to obtain more comprehensive results and ensure a smoother workflow.
Recommended Workflow Setup
This workflow setup is recommended to ensure users receive the most comprehensive review results. Note that if you customize the workflow differently, some review items may not be considered by the program, and the feature icon may not appear in certain scan stages.
For cases with pre-op data, place the scan stage with the target prepared tooth (Maxilla/ Mandible) at the end of the workflow.
Examples: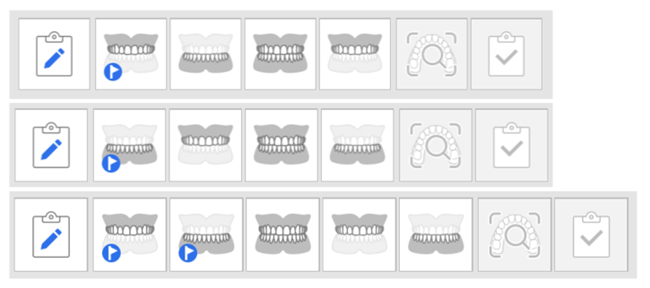
For cases without pre-op data, place the Occlusion Stage at the end of the workflow.
Examples: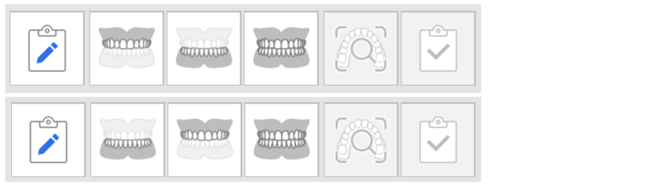
🔎Notes
This feature is also available in the Simple UI mode.
Realtime Intelligence is supported exclusively for crown cases and is not applicable to veneer, inlay/onlay, or bridge cases. Therefore, the feature icon is not displayed in stages other than the Pre-Op Stage, Maxilla/Mandible Stage, and Occlusion Stage.
When Realtime Intelligence is enabled, the Smart Arrows feature is automatically turned on, and its toggle cannot be disabled. To use Smart Arrows independently, turn off Real-Time Intelligence and then enable Smart Arrows.
Data Review Criteria
Whether a data review is performed depends on the number of capture shots collected during scanning.
Scanning can be performed on one or both arches, and the system automatically identifies the scan type.
Data review is triggered only when the minimum required number of shots is met.
Scanner Model | Scanning Experience | Full Arch | Partial Arch |
|---|---|---|---|
i900 Mobility / i900 classic / i900 / i700 wireless / i700 | Fast & Furious | At least 2,500 shots | At least 1,500 shots |
i600/i500 | Smooth & Steady | At least 1,500 shots | At least 800 shots |
⚠️Caution
The minimum number of required data capture shots is subject to change without prior notice.
How to Use Realtime Intelligence
Once enabled, the feature’s main icon appears in the bottom-right corner. Click it to show or hide the review content and guide messages.
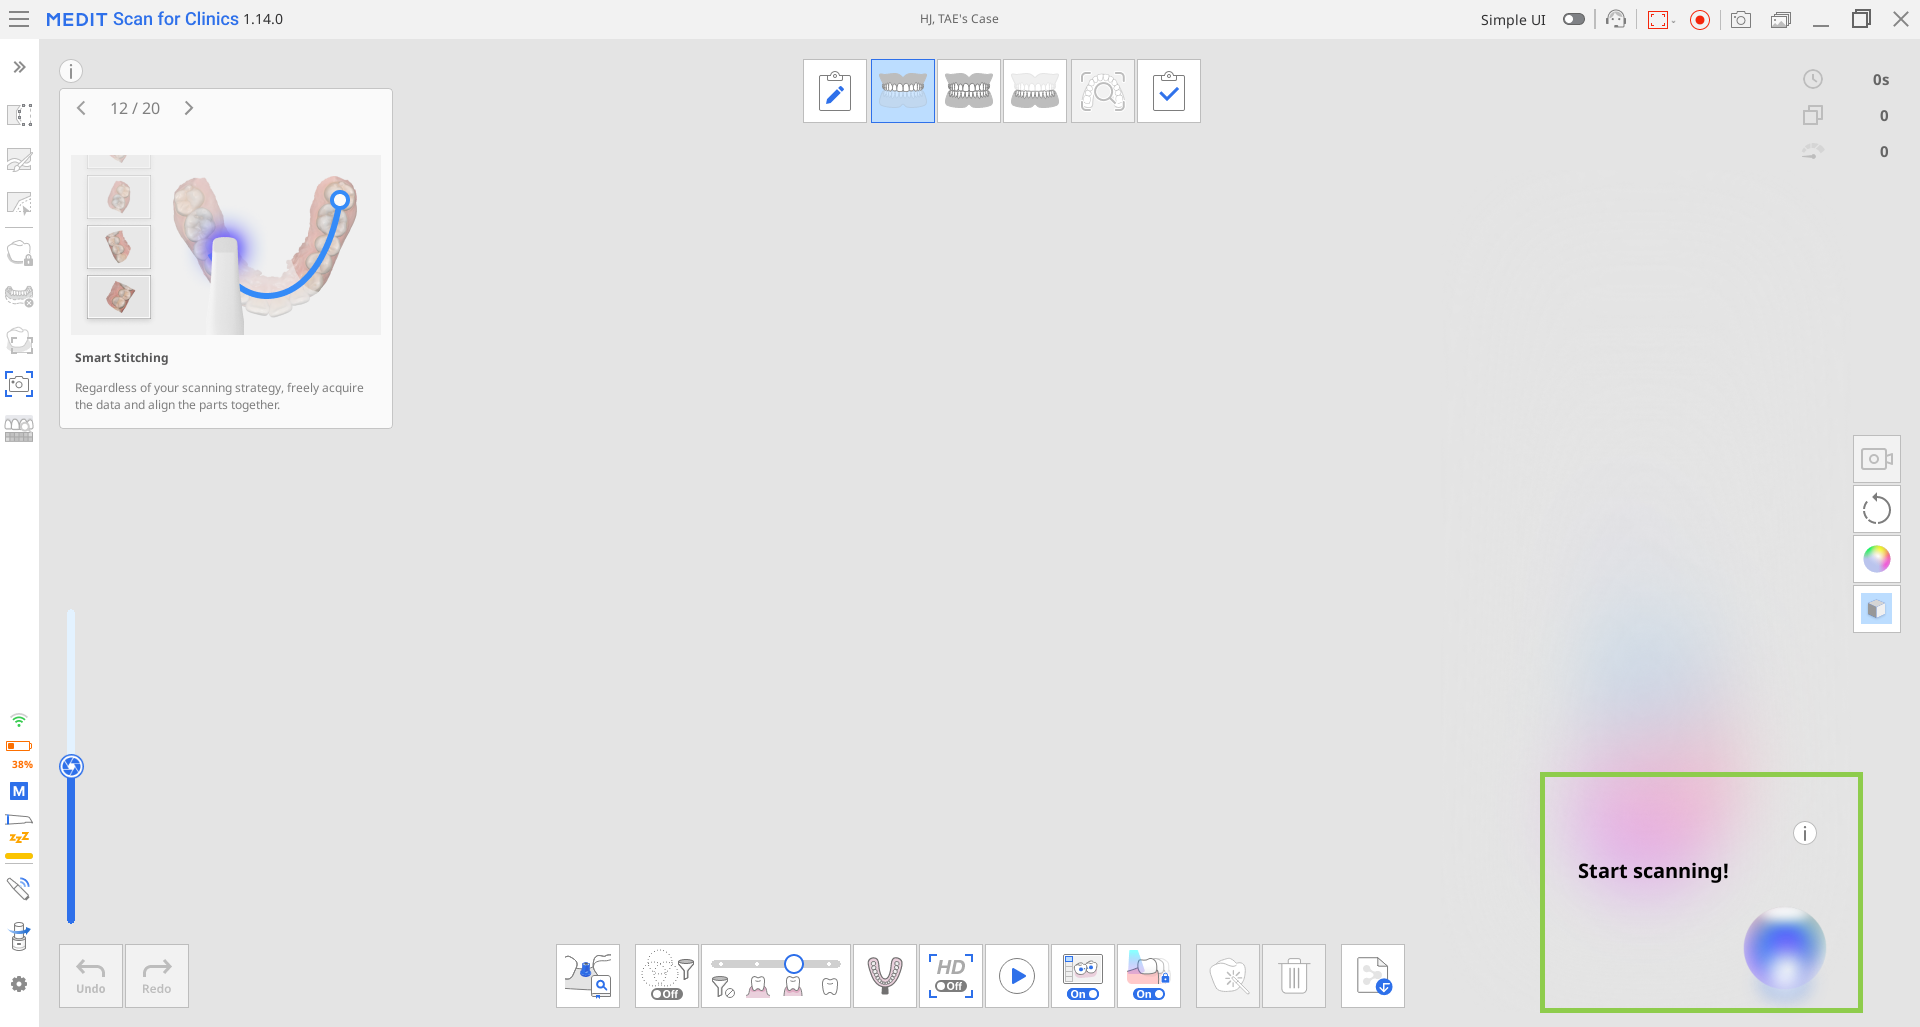
Realtime Intelligence operates on the same core principles regardless of the chosen workflow setup. To illustrate the process, this guide uses the example of a mandibular crown case where pre-operative dental data is available for scanning.
In this scenario, the scan stages are performed in the following order as suggested by recommendations given above: Pre-Op for Mandible → Maxilla → Occlusion → Mandible

Example Workflow Sequence
Acquiring the pre-operational and antagonist data
Once scanning stops, the scan data review begins automatically. During this step, only scan review items are displayed in the bottom-right corner. Review the results and feedback, and adjust the scan data as needed.
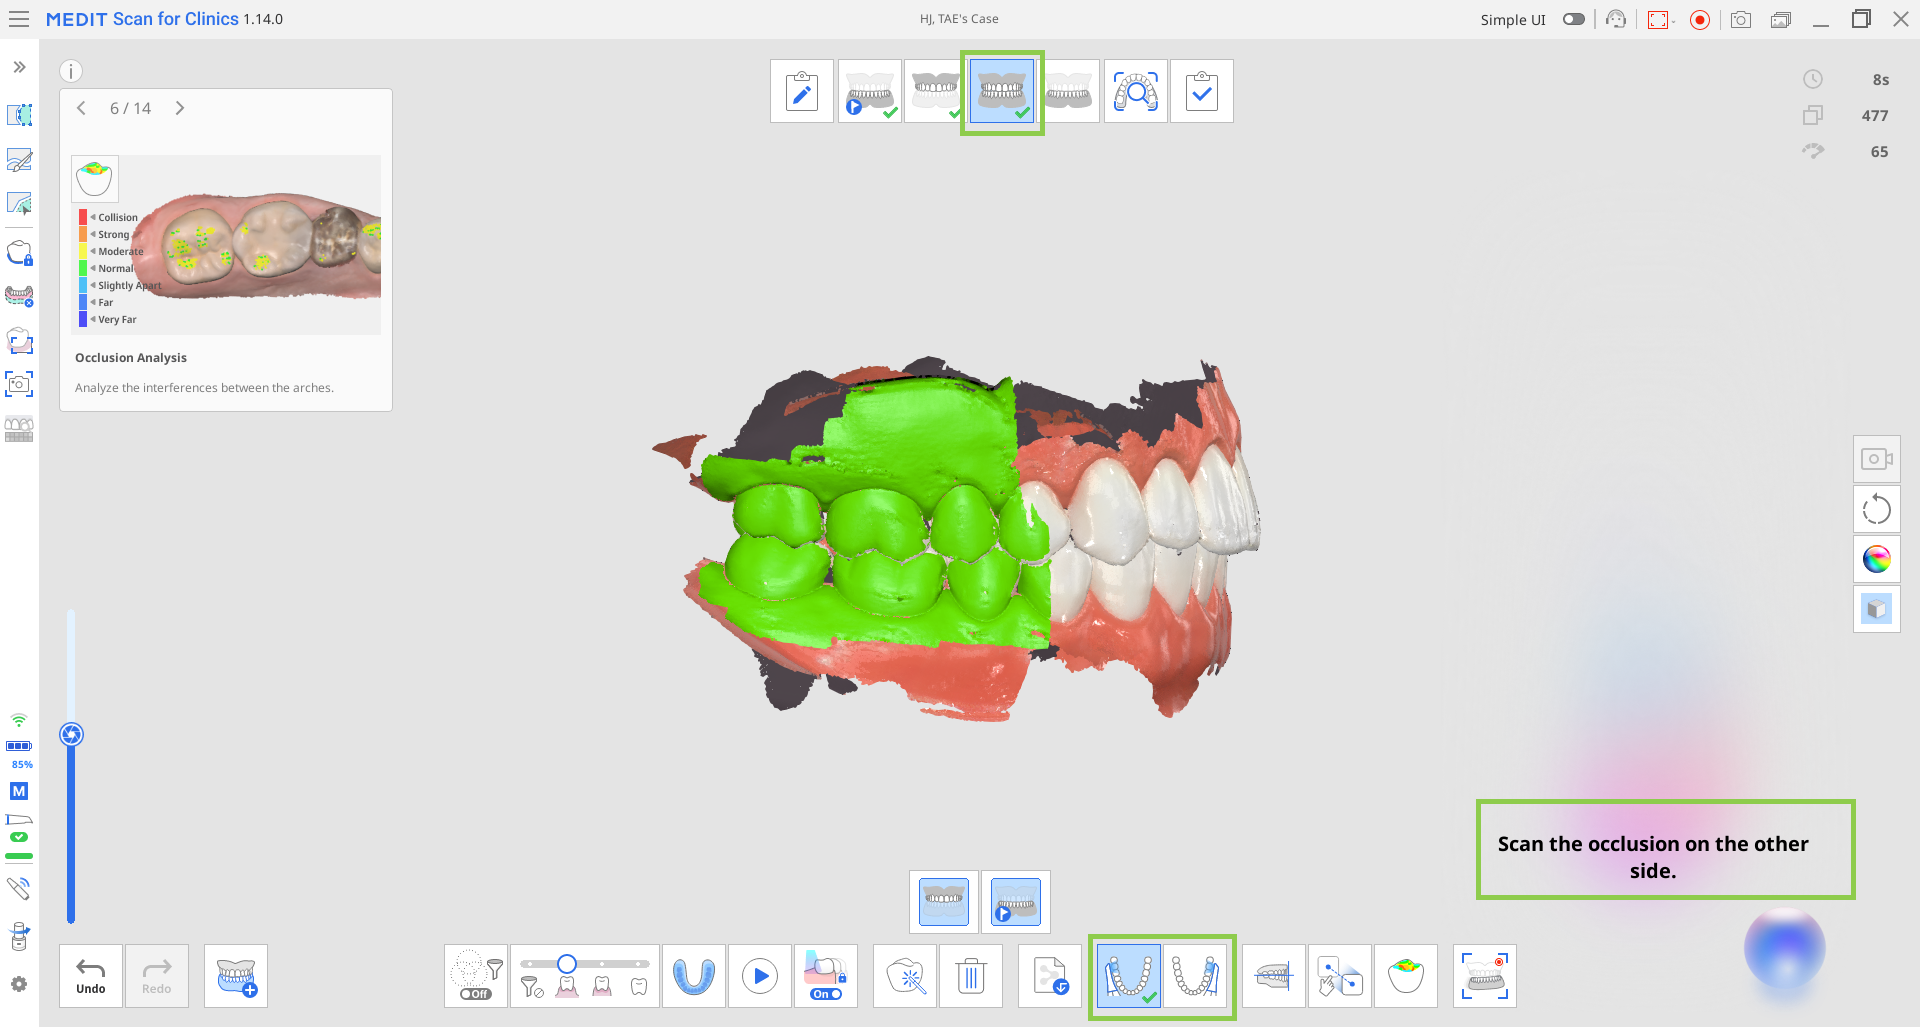
Acquiring the occlusion data
For single-arch cases, capturing only “First Occlusion” is sufficient. For dual-arch cases, both “First Occlusion” and “Second Occlusion” data must be acquired to begin the review process.
Depending on the type of arch data being aligned, either one preparation review item (Minimum Distance to Antagonist) will be displayed or none at all. If prepared teeth data is not captured before occlusion data, this prep review will not be shown during the Occlusion stage. It will only be calculated and displayed in the following stage once prepared teeth data is included. If the value displayed during the Occlusion stage, it will also carry over to that stage where prepared teeth data exists, allowing users to view the Minimum Distance to Antagonist in that stage as well.
🔎Note
Depending on the “Multi Occlusion Group,” occlusal alignment varies, and the Minimum Distance to Antagonist is displayed for each group accordingly.
Acquiring the prepared teeth data
When pre-operational data is available, it is automatically copied into the current scan stage. Here, users can either trim and rescan only the prepared teeth area or scan over the existing data. In both cases, preparation review items will be shown once prepared data is available.

When scanning stops, the prepared areas are evaluated against the target criteria. The results, along with the captured HD images, are displayed in the bottom-right corner of the screen. Users can review the results for each tooth individually or view them collectively for all prepared teeth.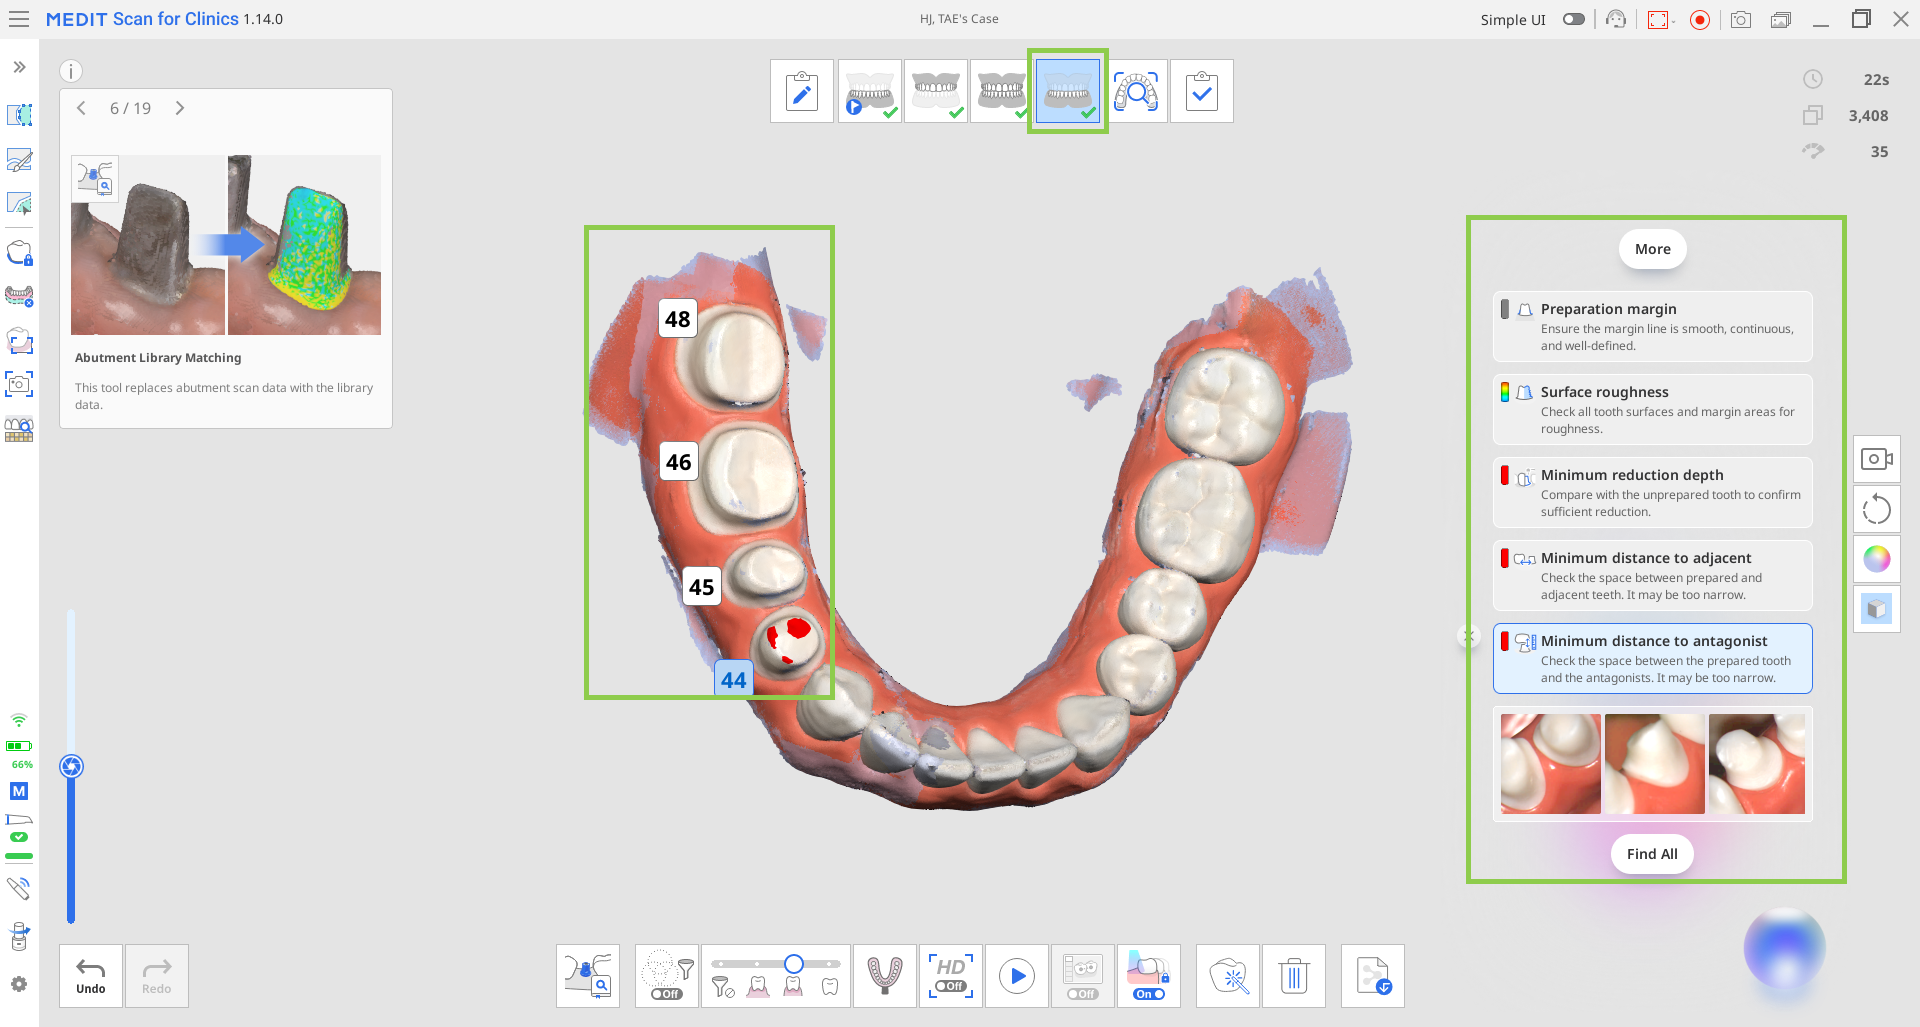
Click “Find All” to select all prepared teeth and review their results at once. Alternatively, click a specific tooth number to view results for that tooth only.
After reviewing the data, you can remove items from the list by clicking the close icon next to each result.
🔎Note
The scan review items displayed at this stage do not cover the entire scan but focus on prepared teeth. For "Smart Arrows and Layered Data information, the results are shown in the area covering the prepared tooth plus 1 or 2 adjacent teeth.
Updating Review Results and Settings
By default, scan data is automatically reviewed when scanning starts and stops, once the minimum number of capture shots (100) is reached. Review results are also updated whenever the scan data is modified (e.g., data added, trimmed, or optimized), when entering a scan stage, or when transferring data between scan stages.
⚠️Caution
If the user manually selects the tooth or modifies the margin line using the Margin Line feature, the result may affect the work of the Realtime Intelligence.
Display Conditions and Limitations for Review Items Based on Settings
When adjusting distance values in Settings > Scan Data Analysis, the review results for Minimum Distance to Antagonists, Minimum Distance to Adjacents, and Minimum Reduction Depth are updated according to the new criteria. All related review items are refreshed accordingly.
When the Use GPU option is turned off in Settings, the Realtime Intelligence feature is automatically disabled and cannot be used.