My Account
In My Info, you can review and edit the information you provided during registration and check your membership status.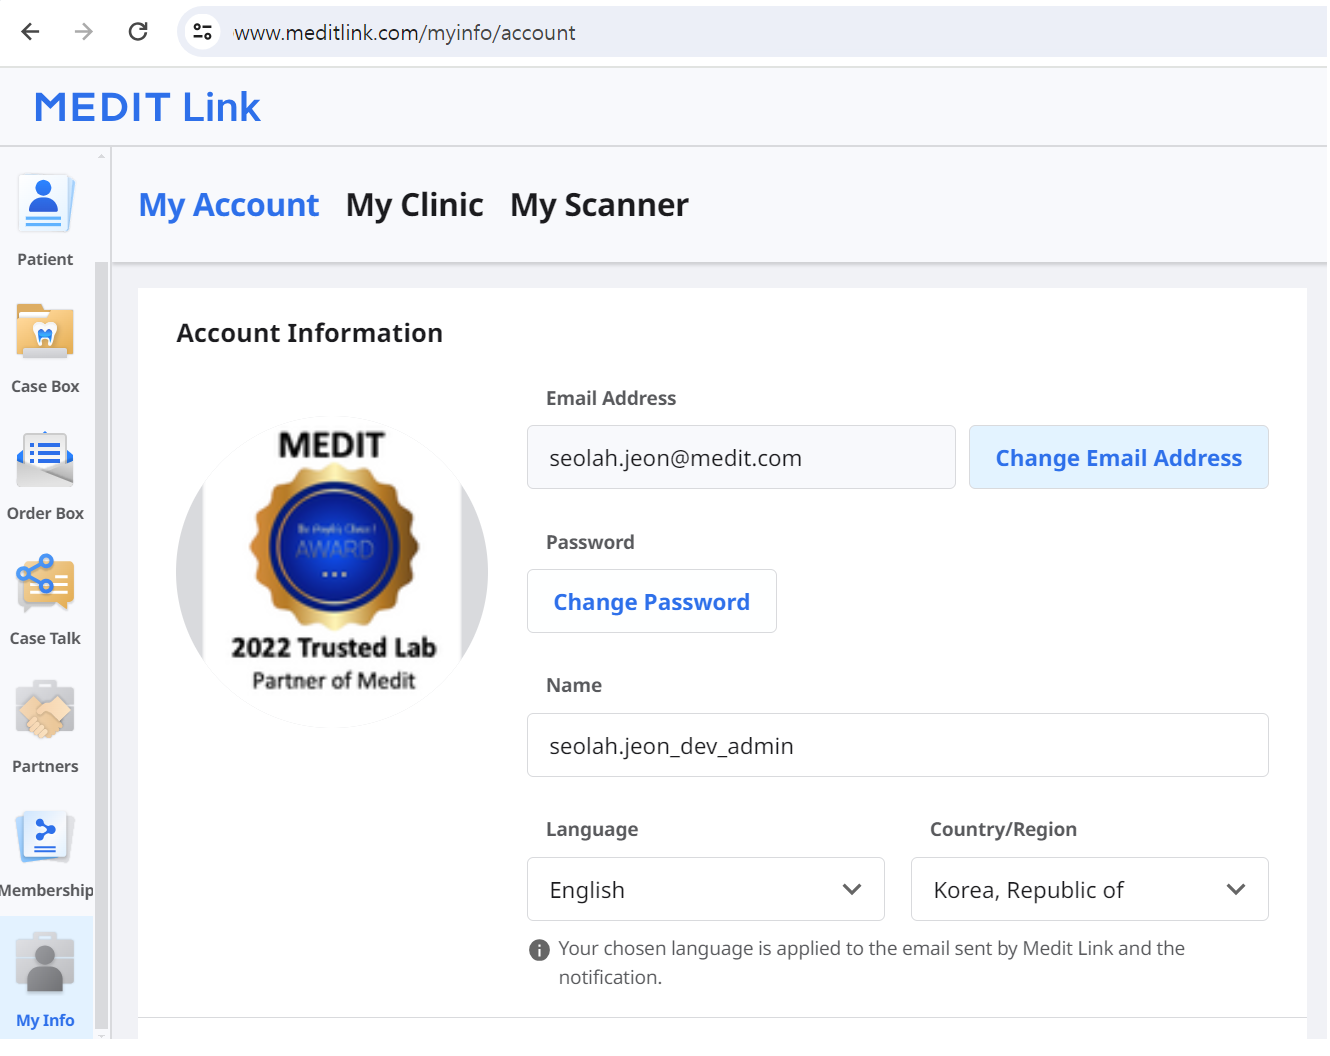
My Clinic/My Lab (Admin Account Only)
You can review and edit the information about your clinic or lab. This section is only available to admin accounts.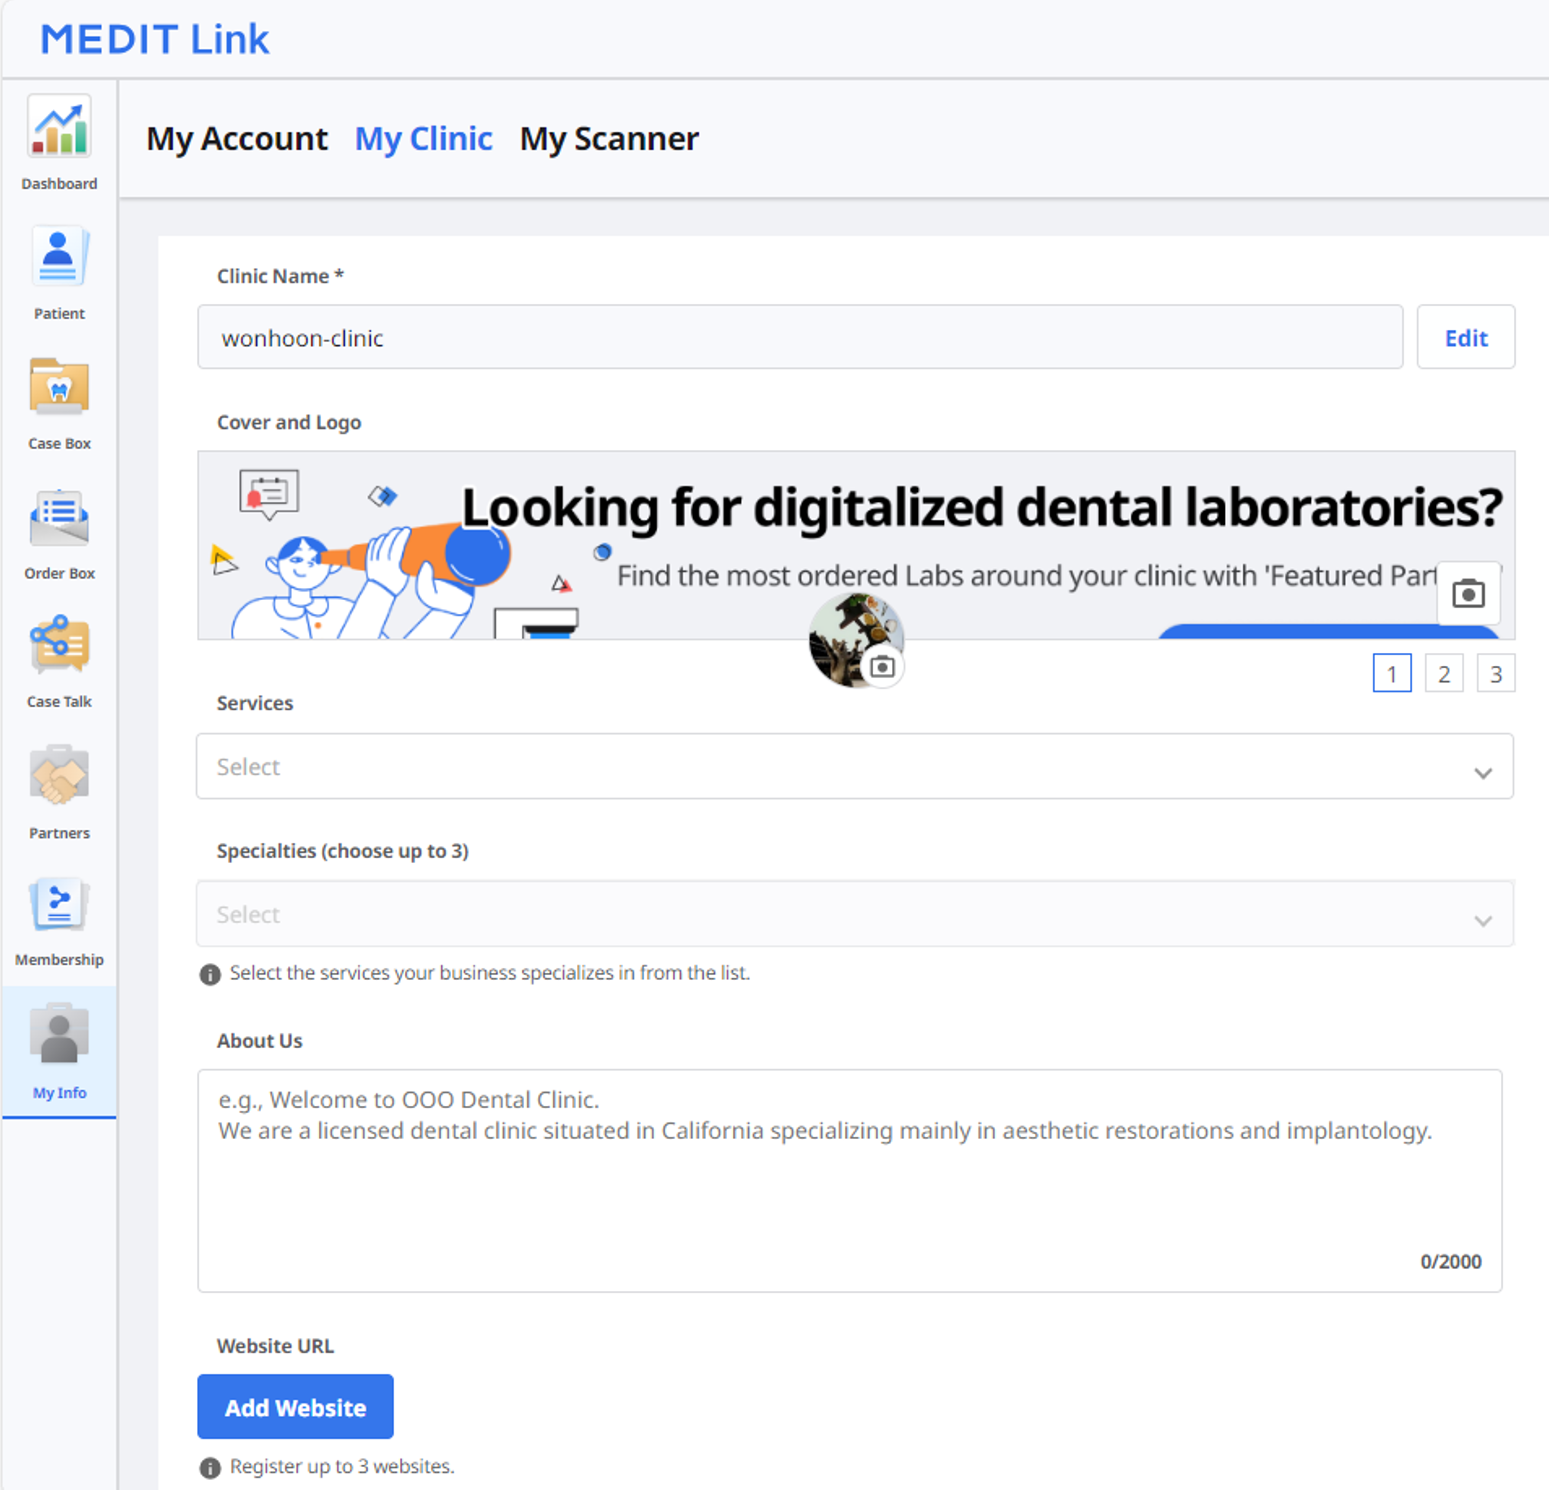
My Scanner
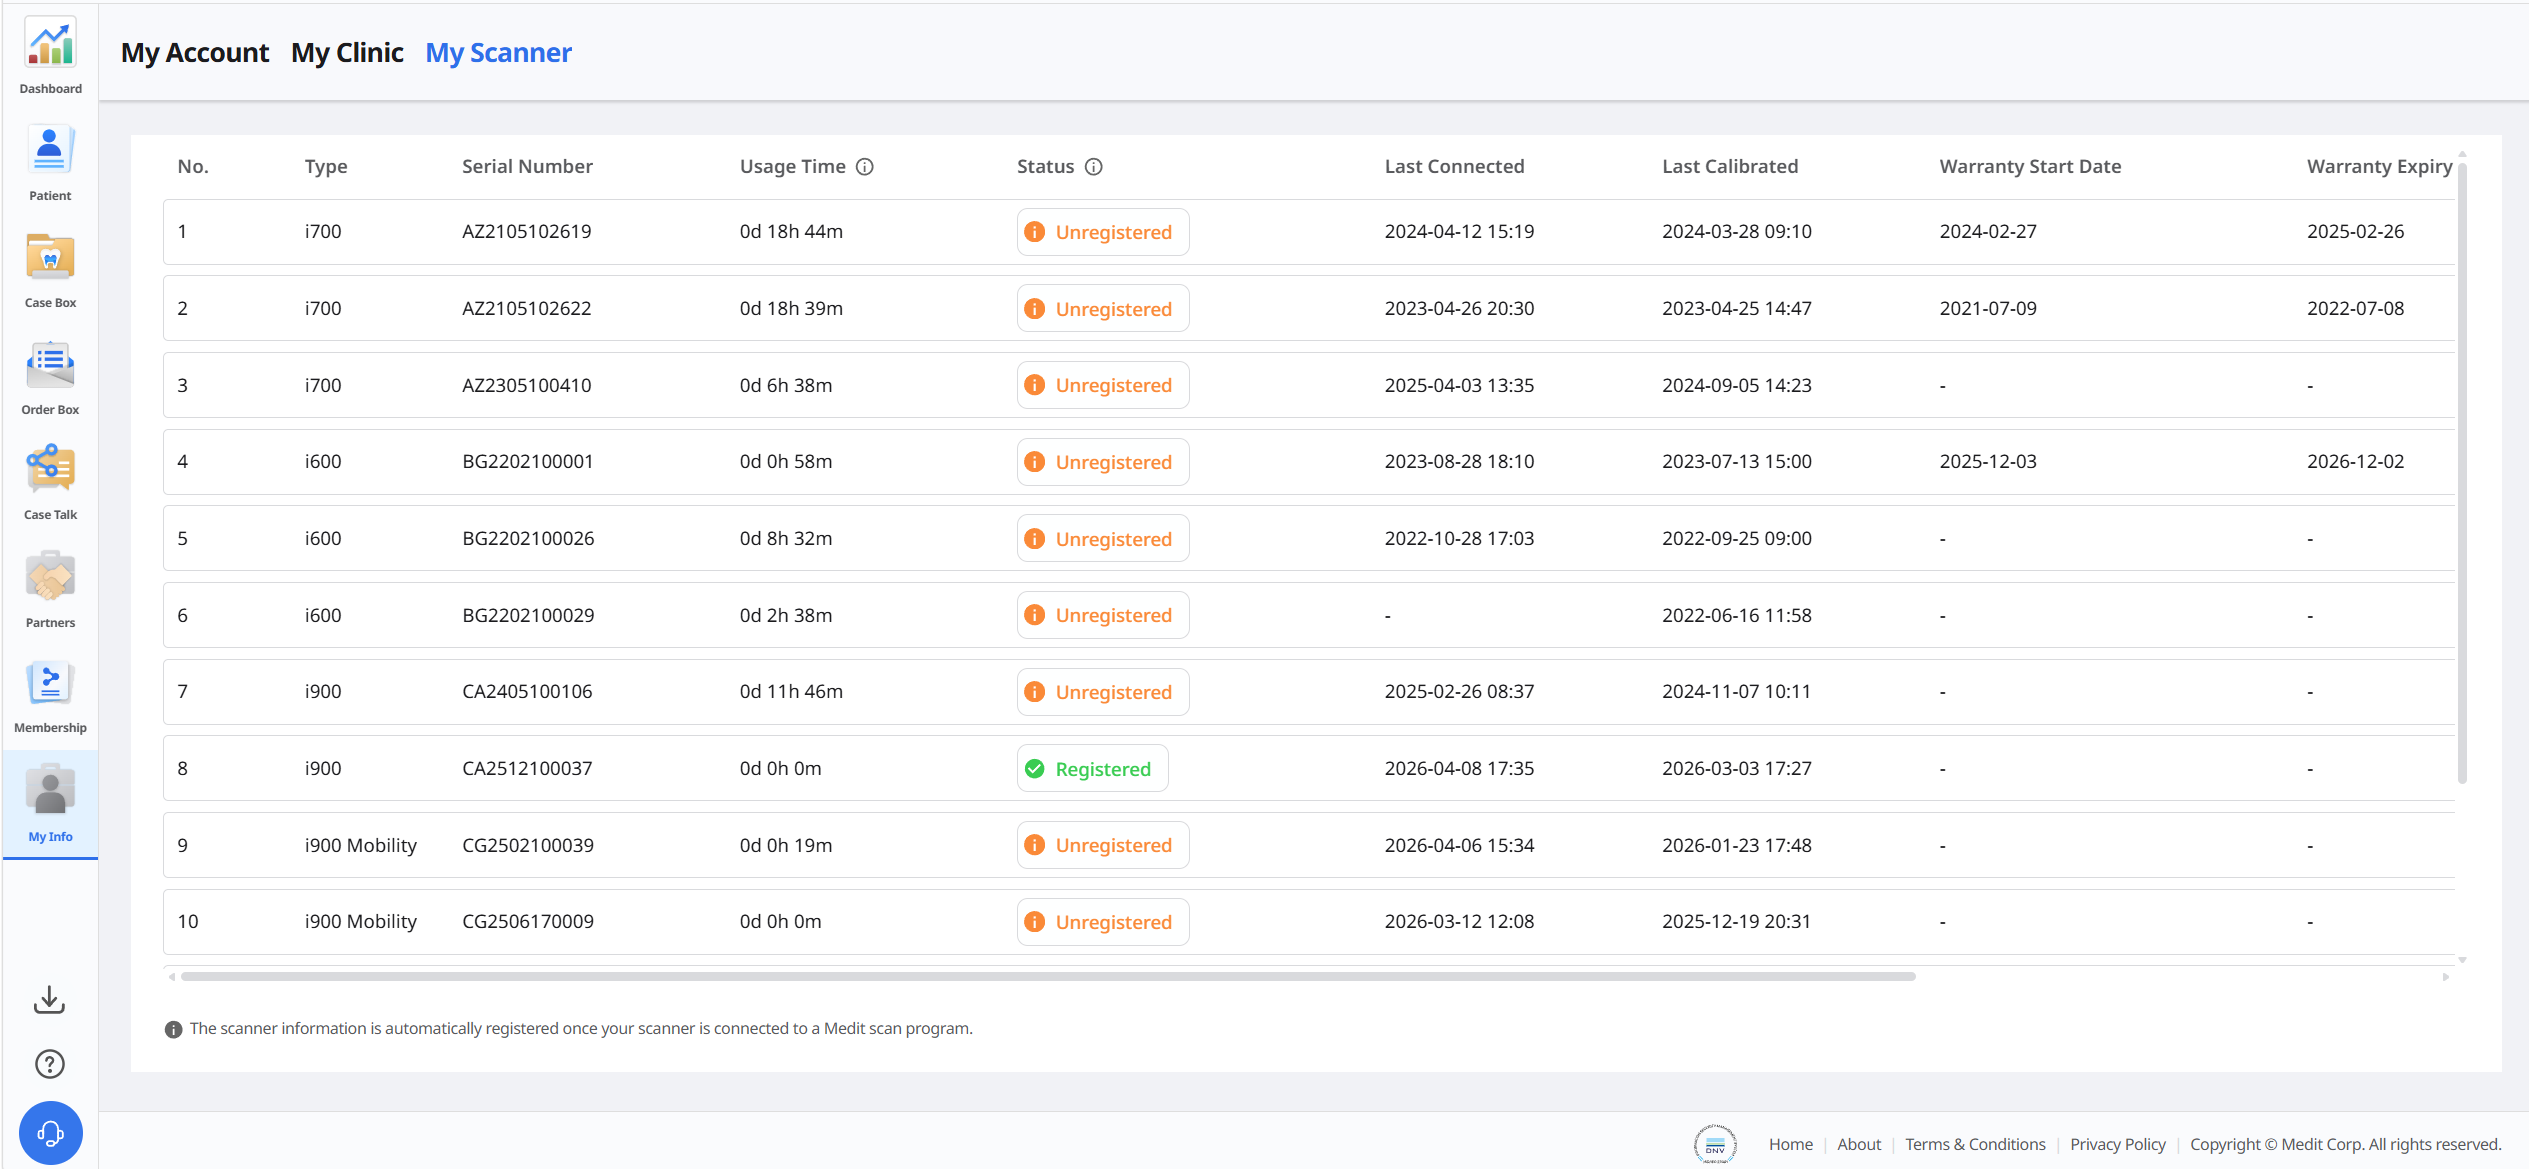
You can check the connected device information for the account.
Item | Description |
Type | Displays the model name. |
Serial Number | Displays the device's serial number. |
Usage Time | Indicates how long the device has been used. |
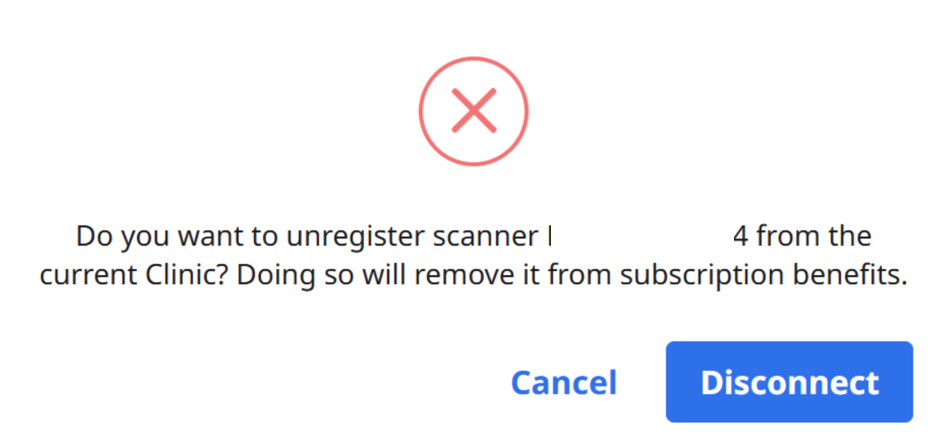
Status | Displays the device's registration status:
🔎Note To unregister your scanner:
|
Last Connected | Displays the date of the last connection. |
Last Calibrated | Displays the date of the last calibration. |
Warranty Start Date | Displays the date when the warranty was activated. |
Warranty Expiry Date | Displays the date when the warranty expires. |
Days Left | Displays the number of days remaining before the warranty expires. |
Buy | Allows the user to purchase and extend the warranty. |
Delete icon | Allows the user to remove the scanner from the list. |
Order Forms (Lab Admin Account Only)
You can create and manage lab-defined order forms with the types, methods, materials, and shade systems your lab uses. Clinics can use your order form when your lab is assigned as the partner for a case.
In Medit Link Web, go to My Info > Order Forms.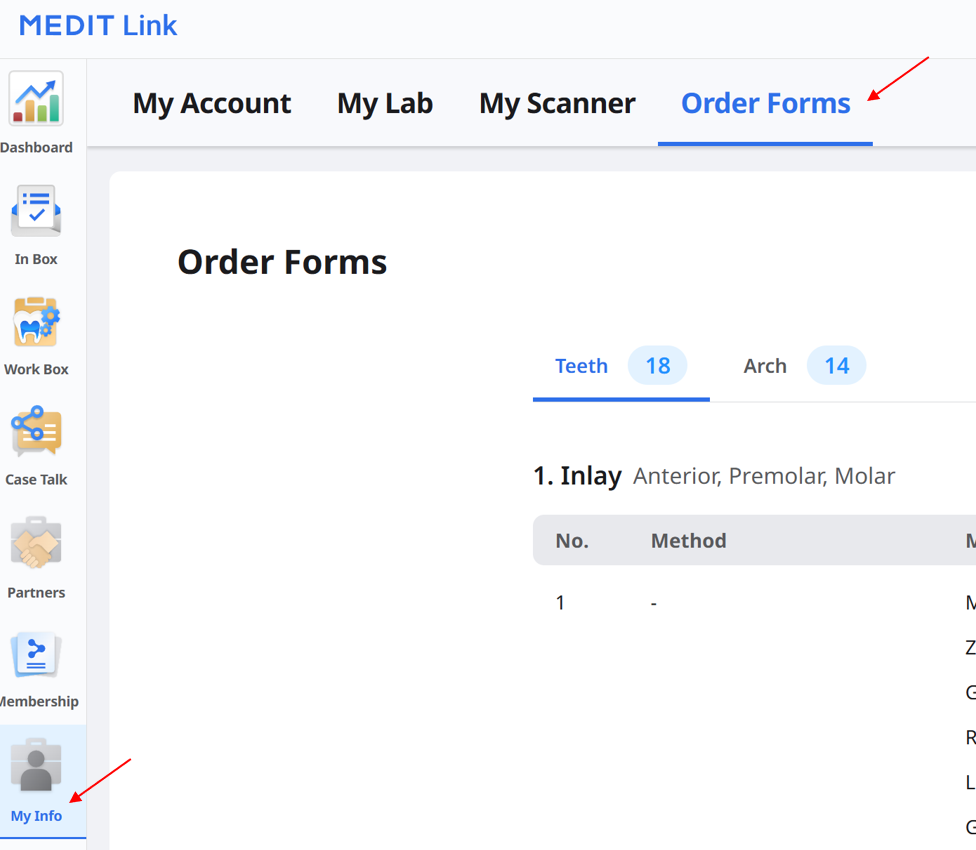
Viewing Order Forms
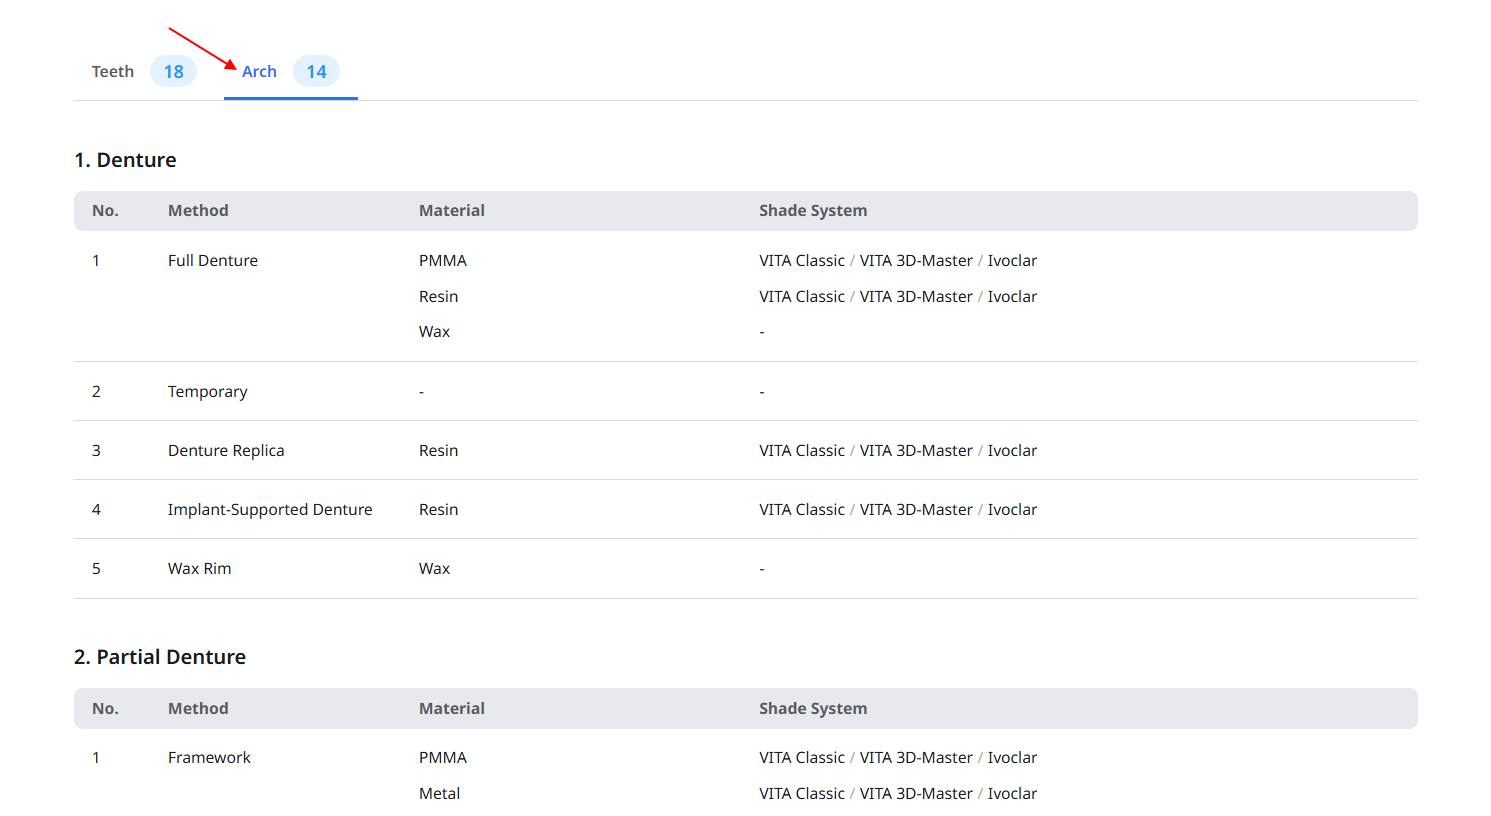
Select Teeth or Arch to view the current order form for each category. Each type lists its available methods, materials, and shade systems. For teeth-based types, the allowed tooth groups are also shown.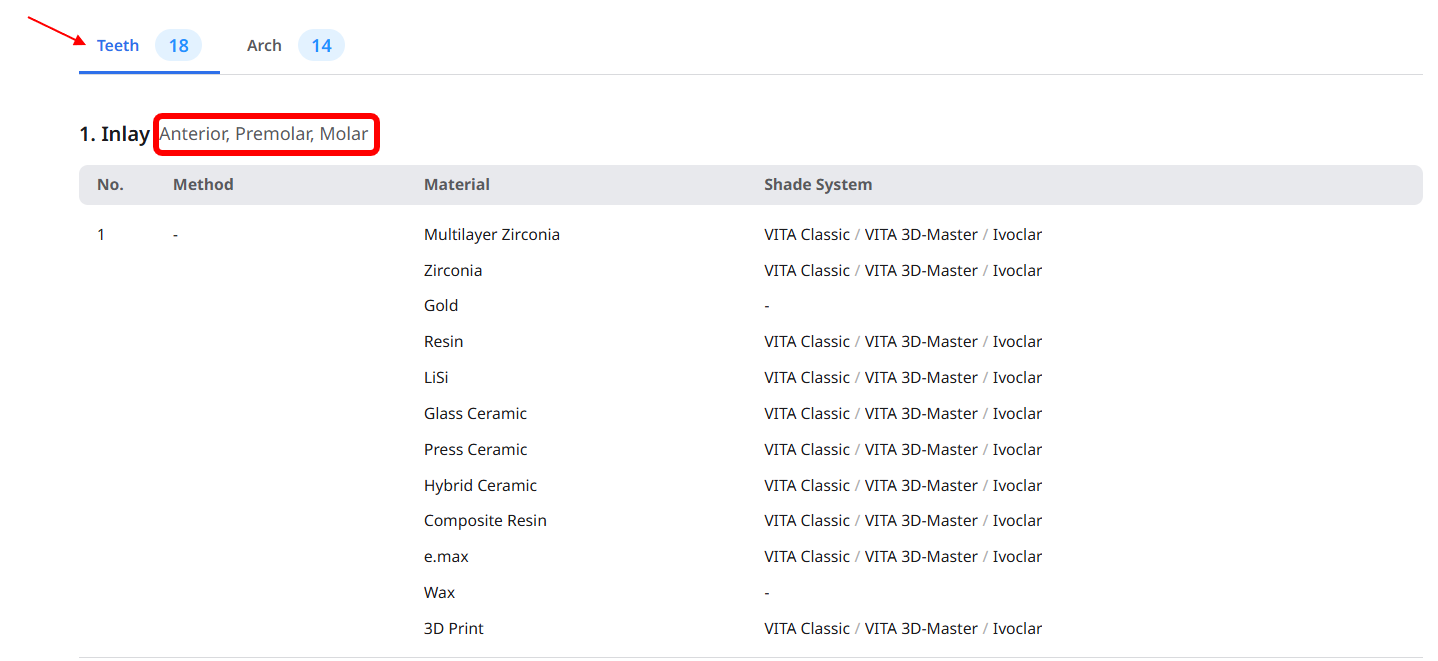
Editing Order Forms
Click Edit in the upper-right corner of the screen.
Select Teeth or Arch, then select a type from the list.
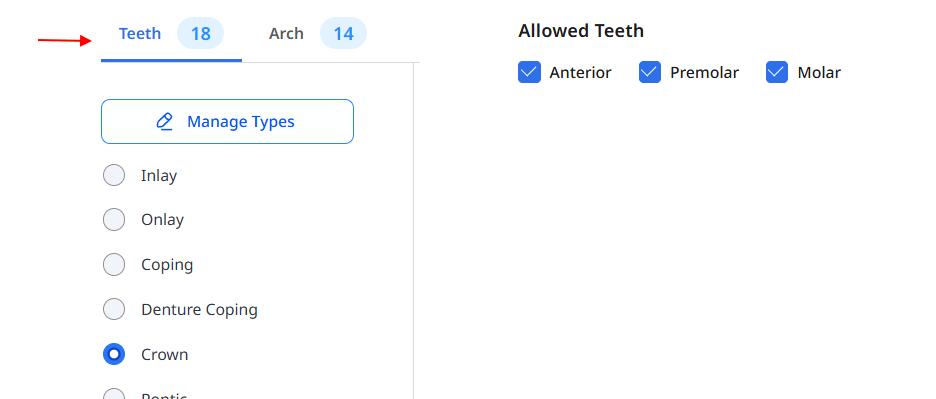
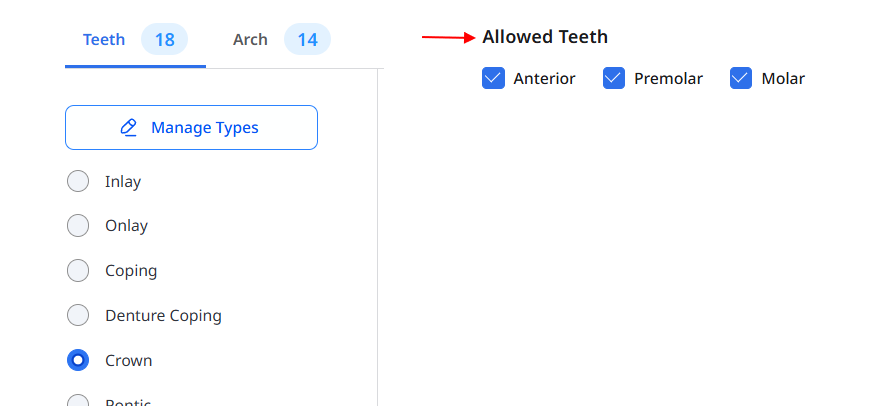
For teeth-based types, select the applicable groups under Allowed Teeth.
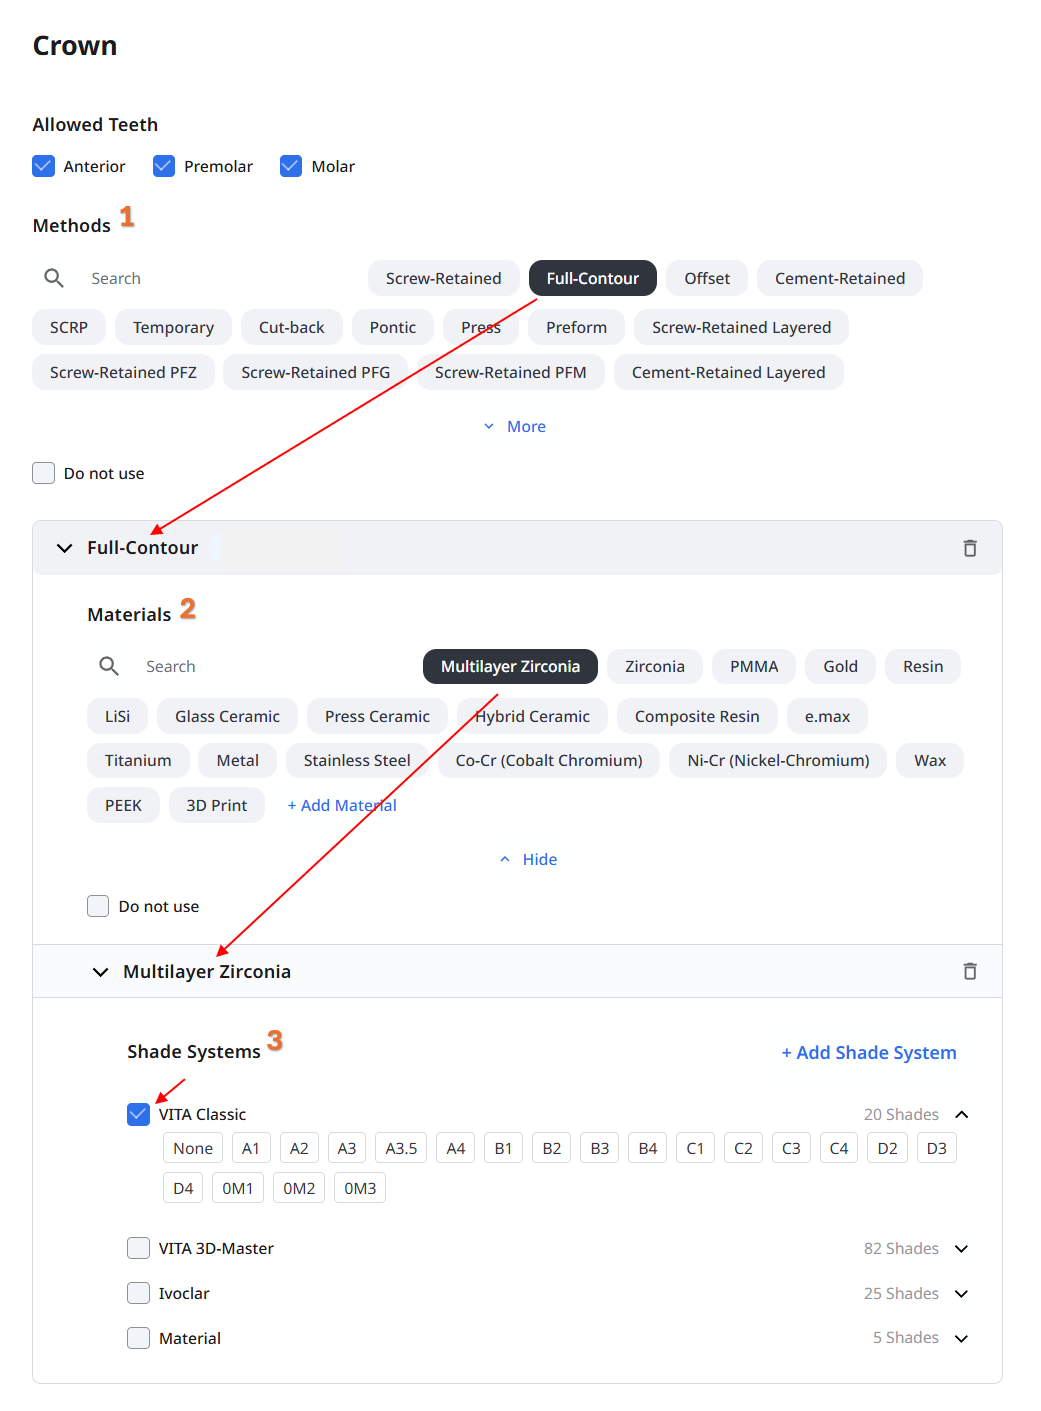
Select the methods, materials, and shade systems to include.
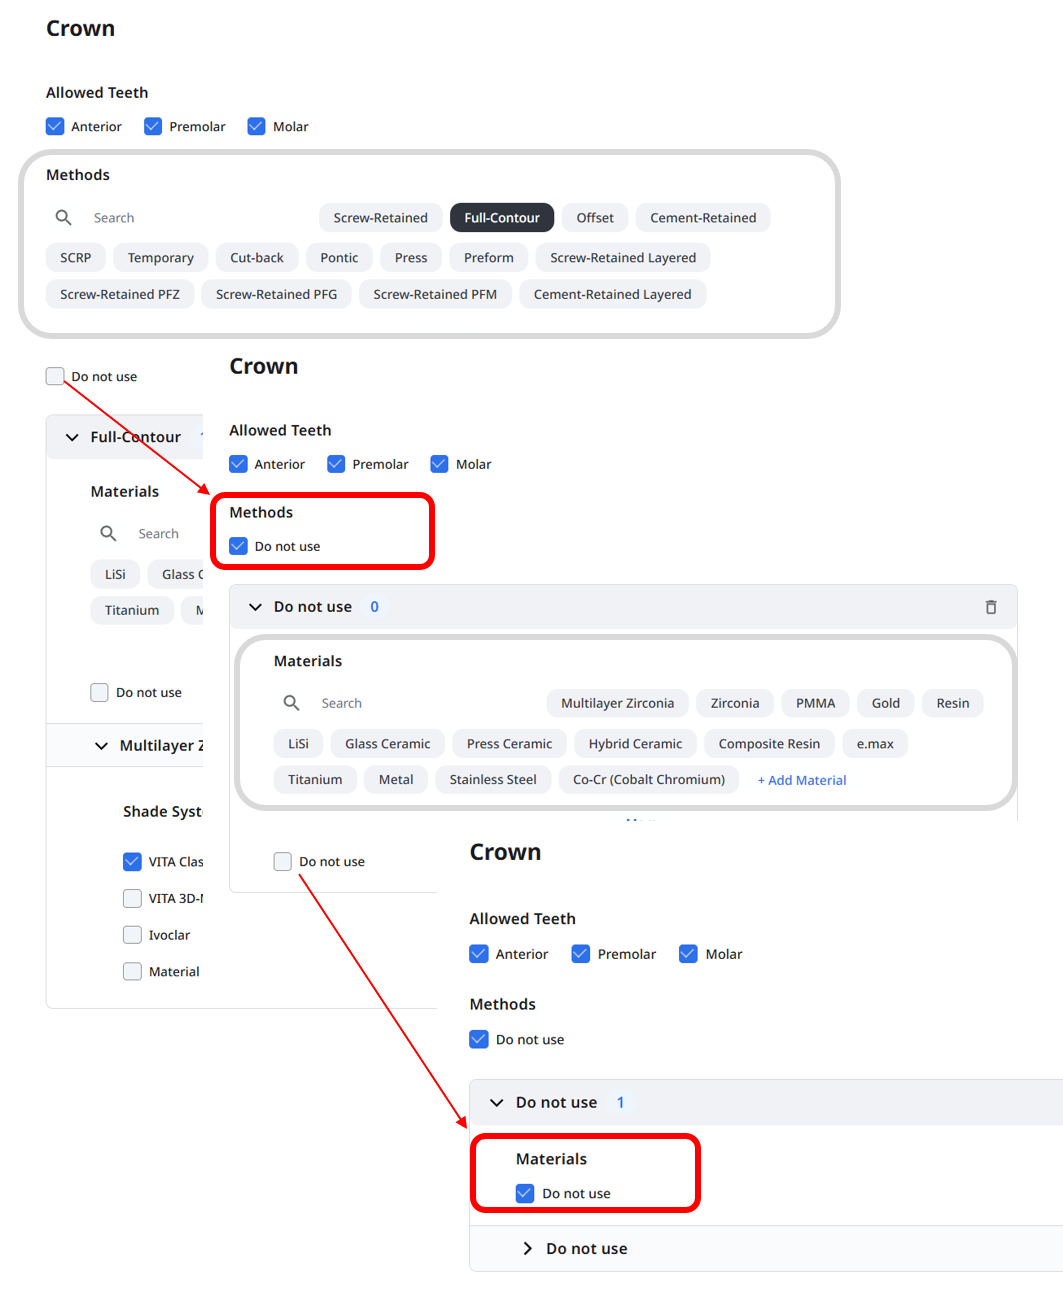
If a method or material is not required, select Do not use in the corresponding section. You can set this separately for methods and materials.
Repeat these steps for other types as needed.
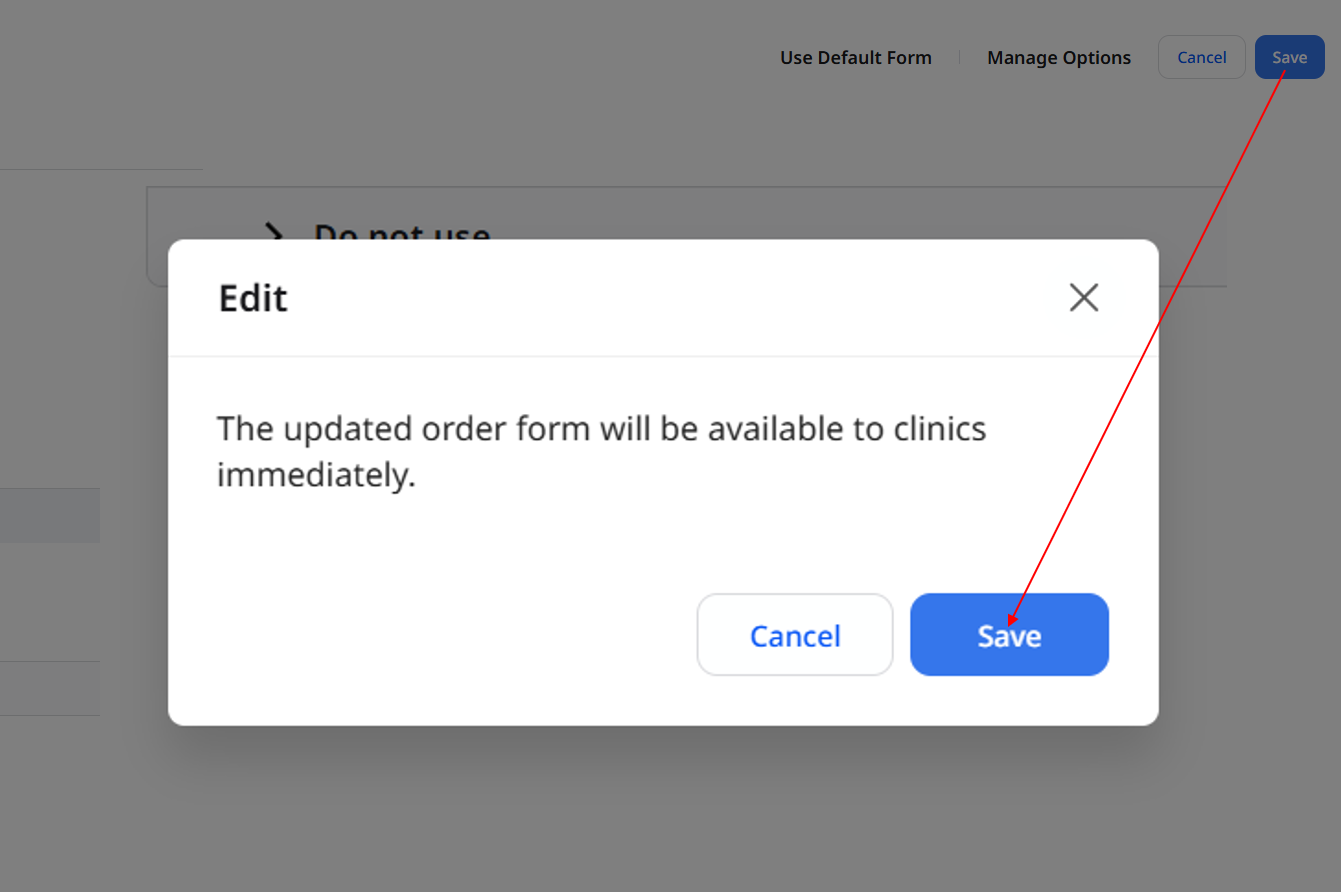
Click Save in the upper-right corner, then click Save again in the confirmation dialog.
🔎Note
For a combined type (a combination of two individual types), methods, materials, and shade systems follow the settings of its constituent types. Edit those types to change the options.
Allowed tooth groups can be set separately for the combined type.
Using the Default Form
On the order form editing screen, click Use Default Form.
Review the information in the dialog and click Continue.
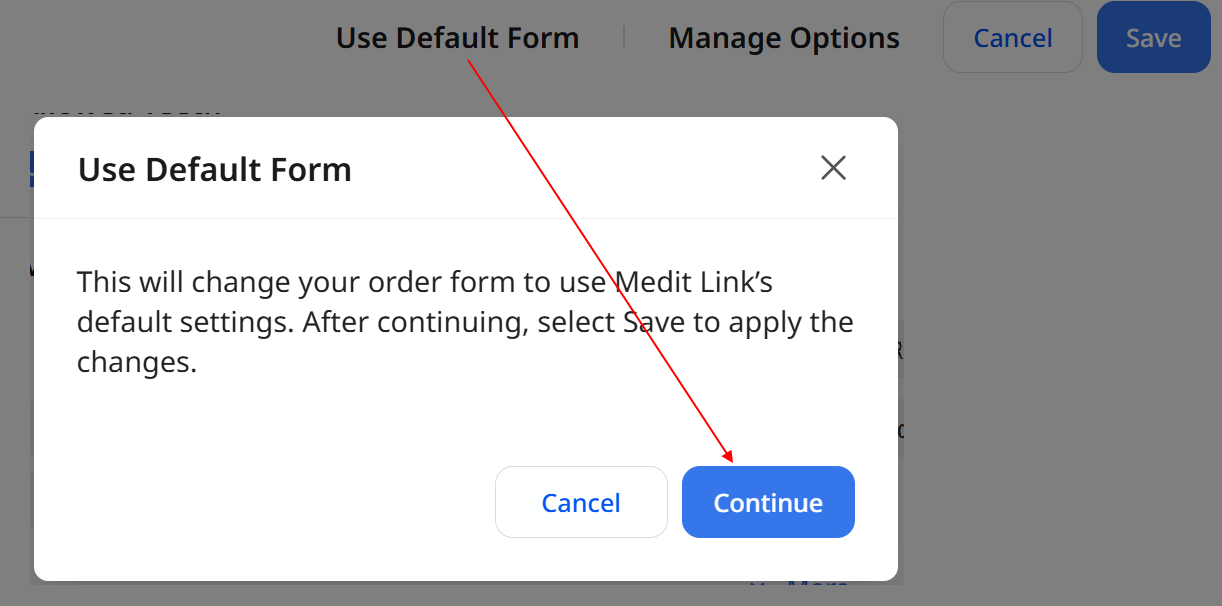
Click Save in the upper-right corner to apply the changes.

Managing Options
Enabling or Disabling Options
On the order form editing screen, click Manage Options.
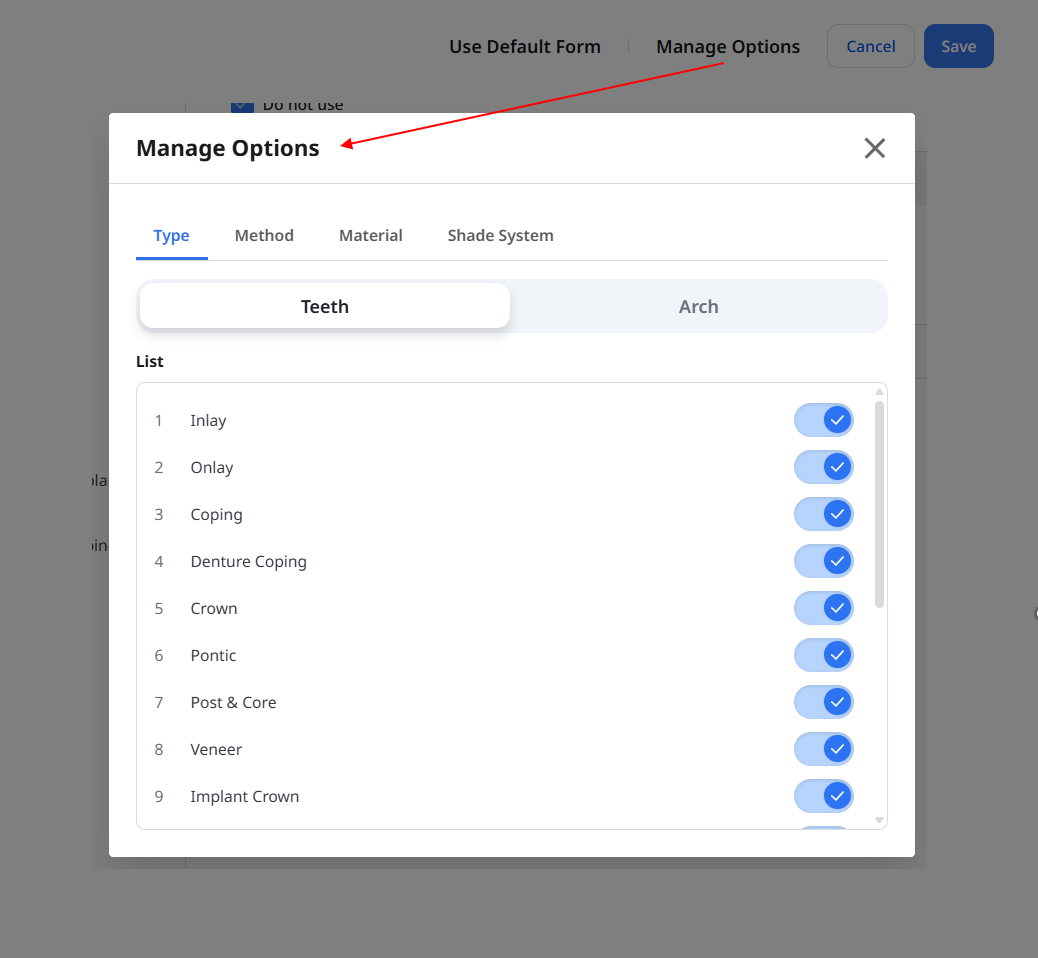
Select the Type, Method, Material, or Shade System tab.
On the Type tab, select Teeth or Arch.
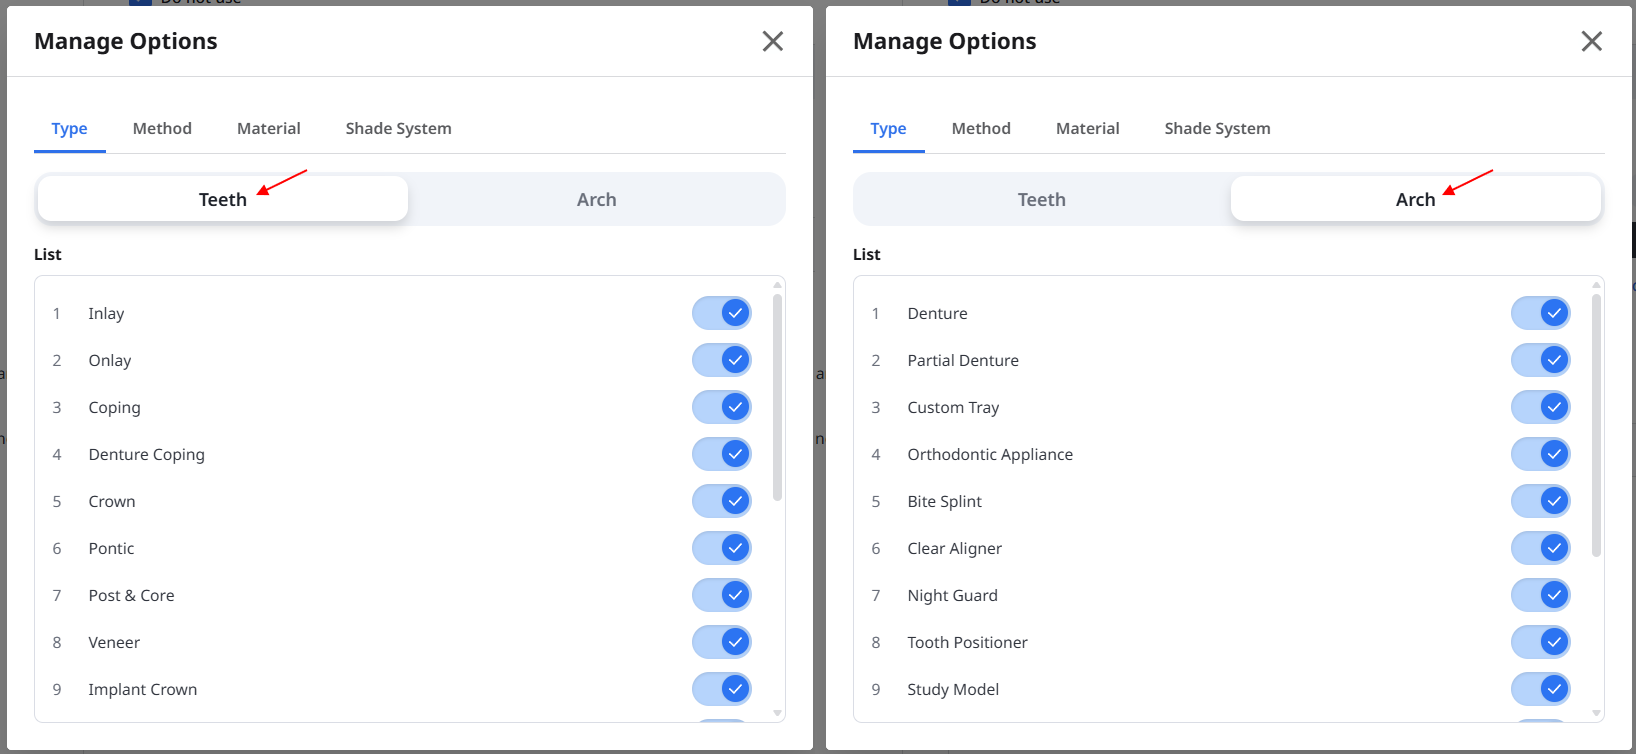
Turn the switch next to an option on or off.

Close Manage Options and review your form.
Click Save in the upper-right corner, then click Save again in the confirmation dialog.
🔎Note
At least one type must remain enabled across the Teeth and Arch tabs.
Disabling a type also disables any combined types that include it. To re-enable a combined type, first enable the two types that make it up, then enable the combined type itself.
Adding Materials
On the order form editing screen, click Manage Options and select the Material tab.
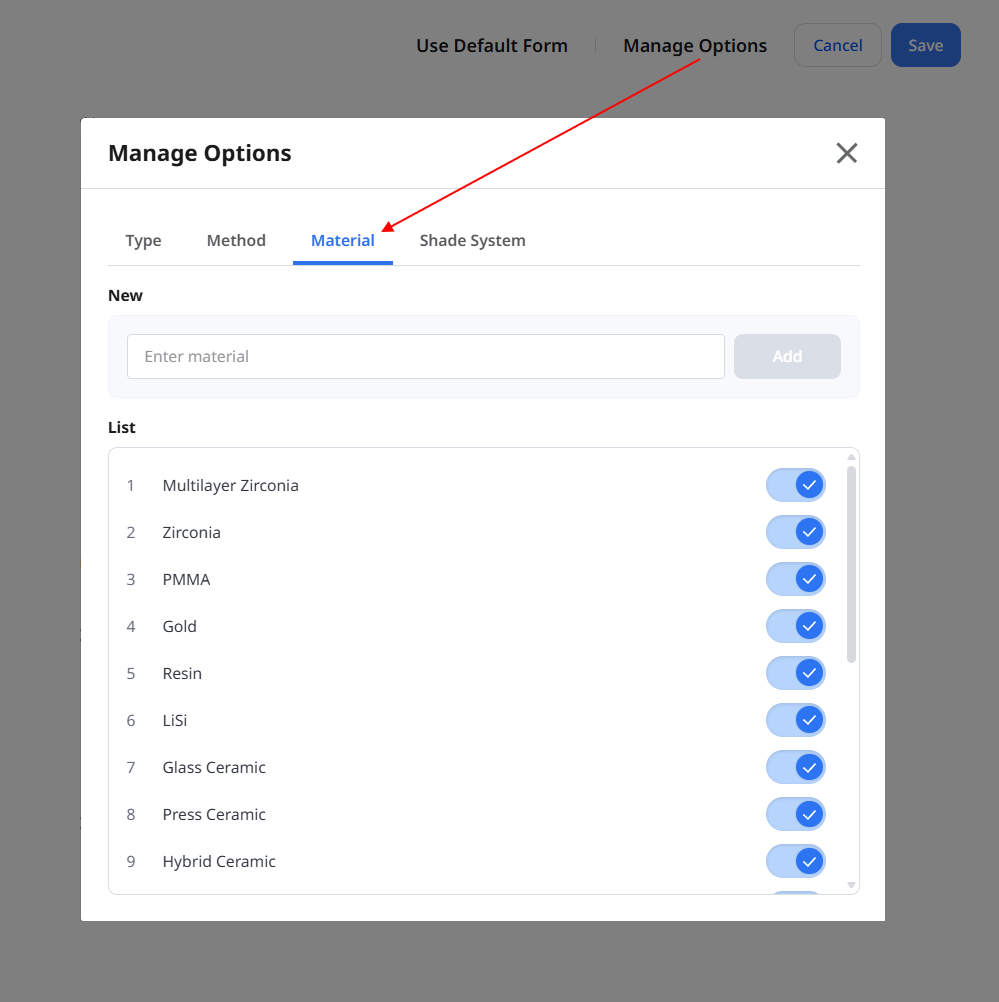
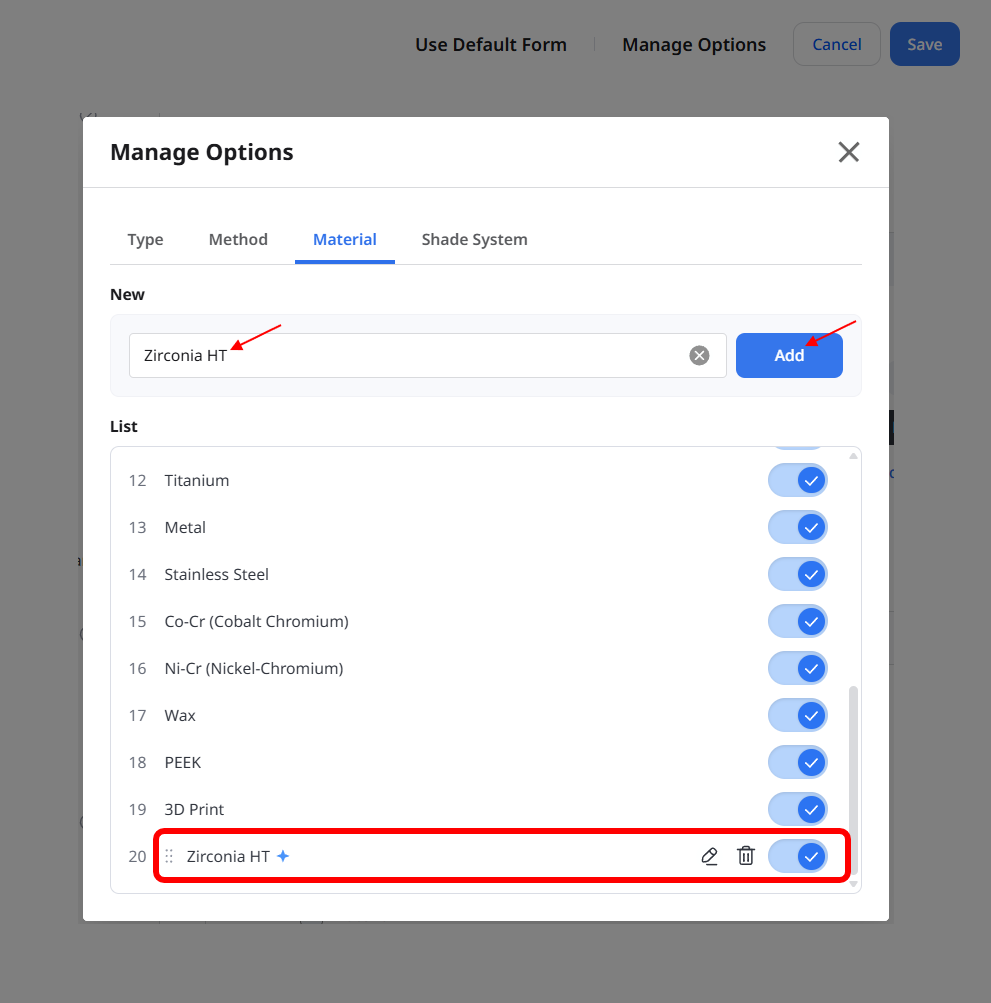
Under New, enter a material name and click Add. The new material appears in the list below.
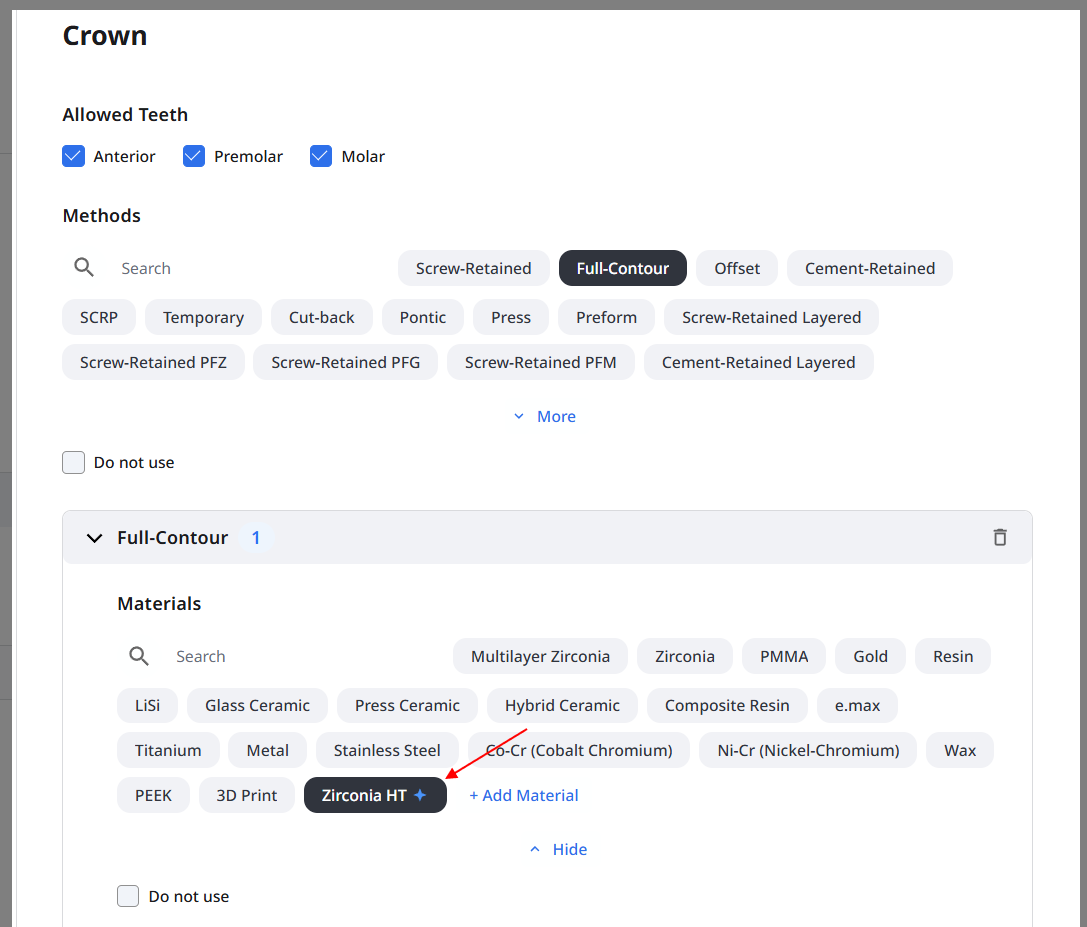
Close Manage Options and select the new material for the types where you want to use it.
Click Save in the upper-right corner, then click Save again in the confirmation dialog.
Adding Shade Systems
On the order form editing screen, click Manage Options and select the Shade System tab.
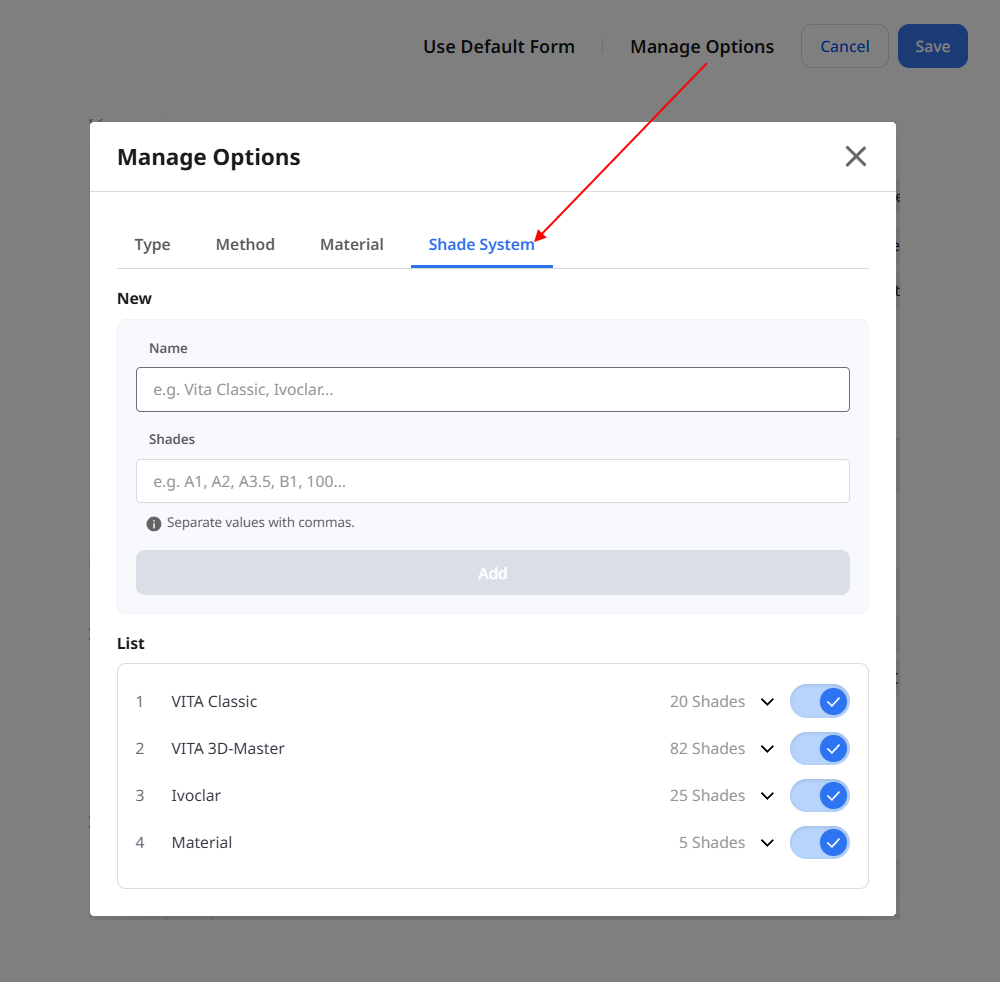
Enter the shade system name in the Name field. In the Shades field, enter the shade values separated by commas.
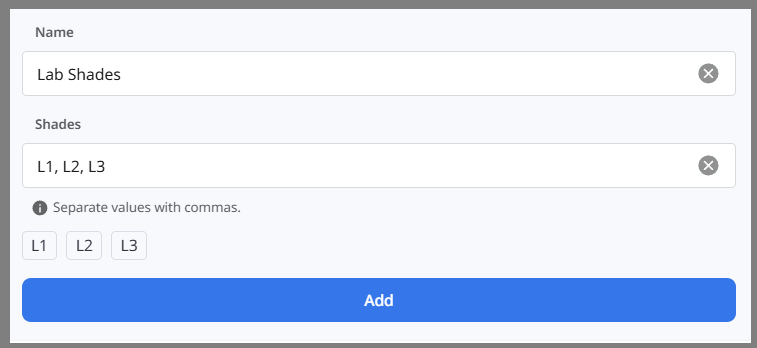
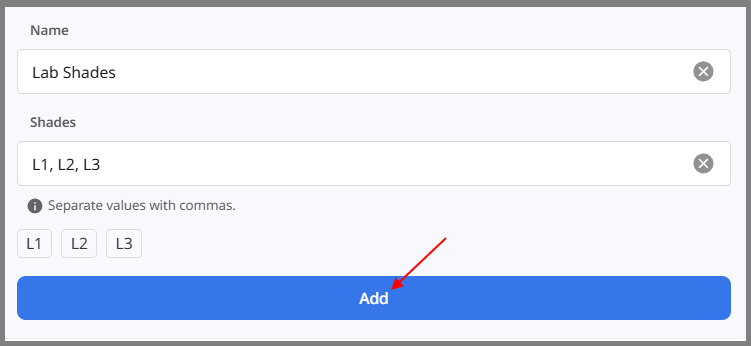
Review the values and click Add.
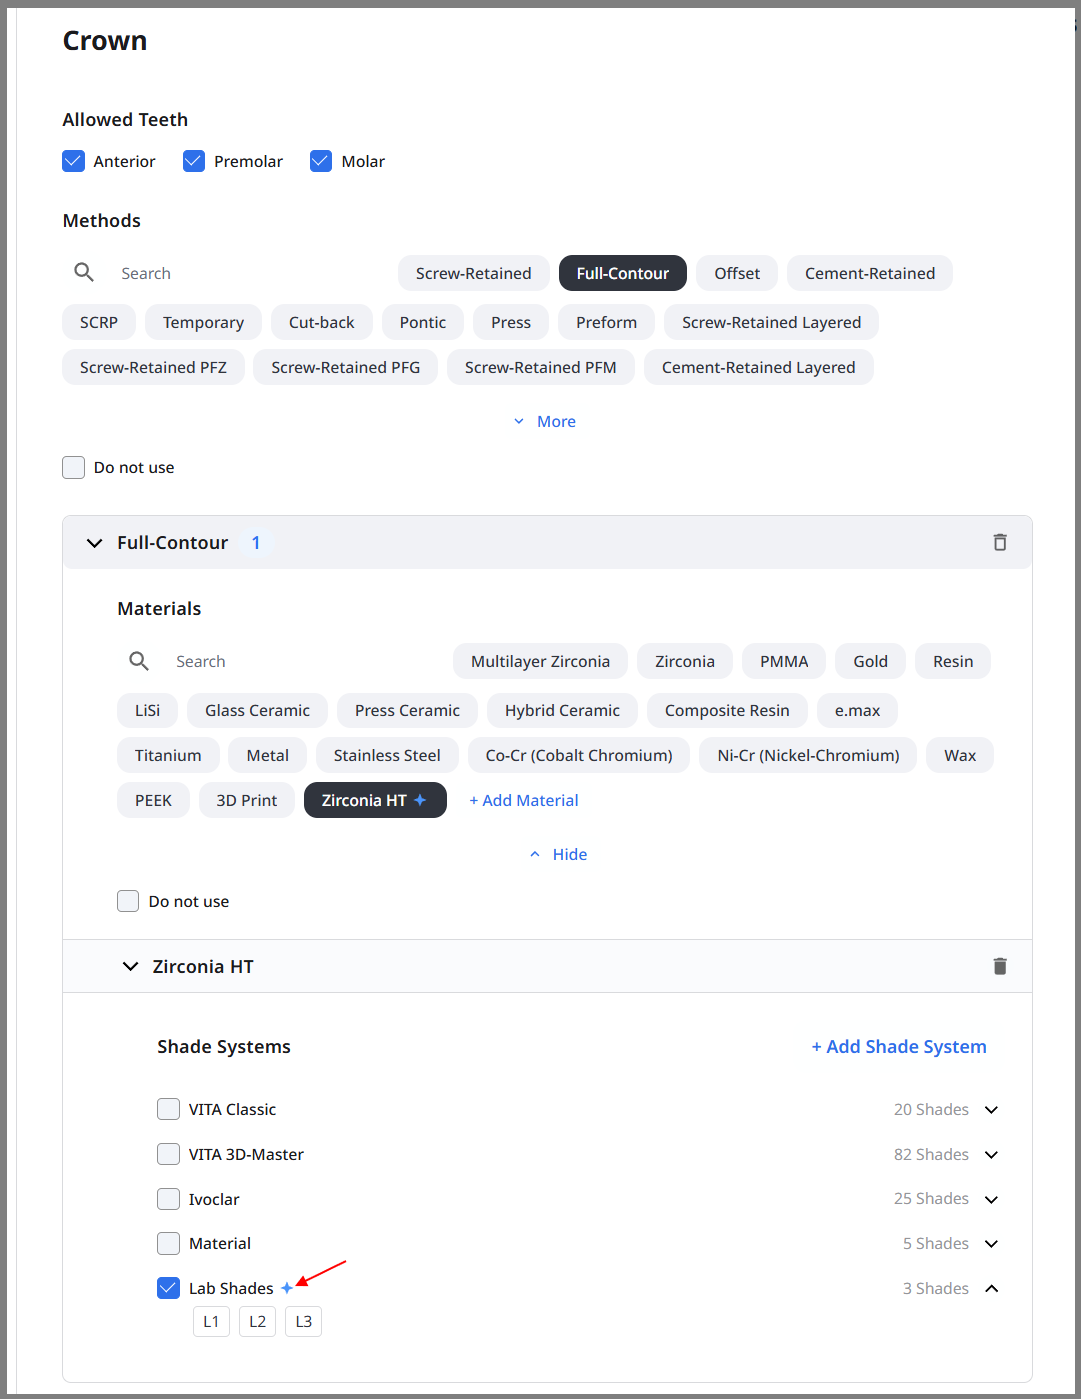
Close Manage Options and select the new shade system for the materials where you want to use it.
Click Save in the upper-right corner, then click Save again in the confirmation dialog.
🔎Note
New materials and shade systems are saved when you click Add. Canceling your order form edits does not remove these options.
Viewing Change History
On the Order Forms page, click Change History to review saved changes, with the most recent changes shown first.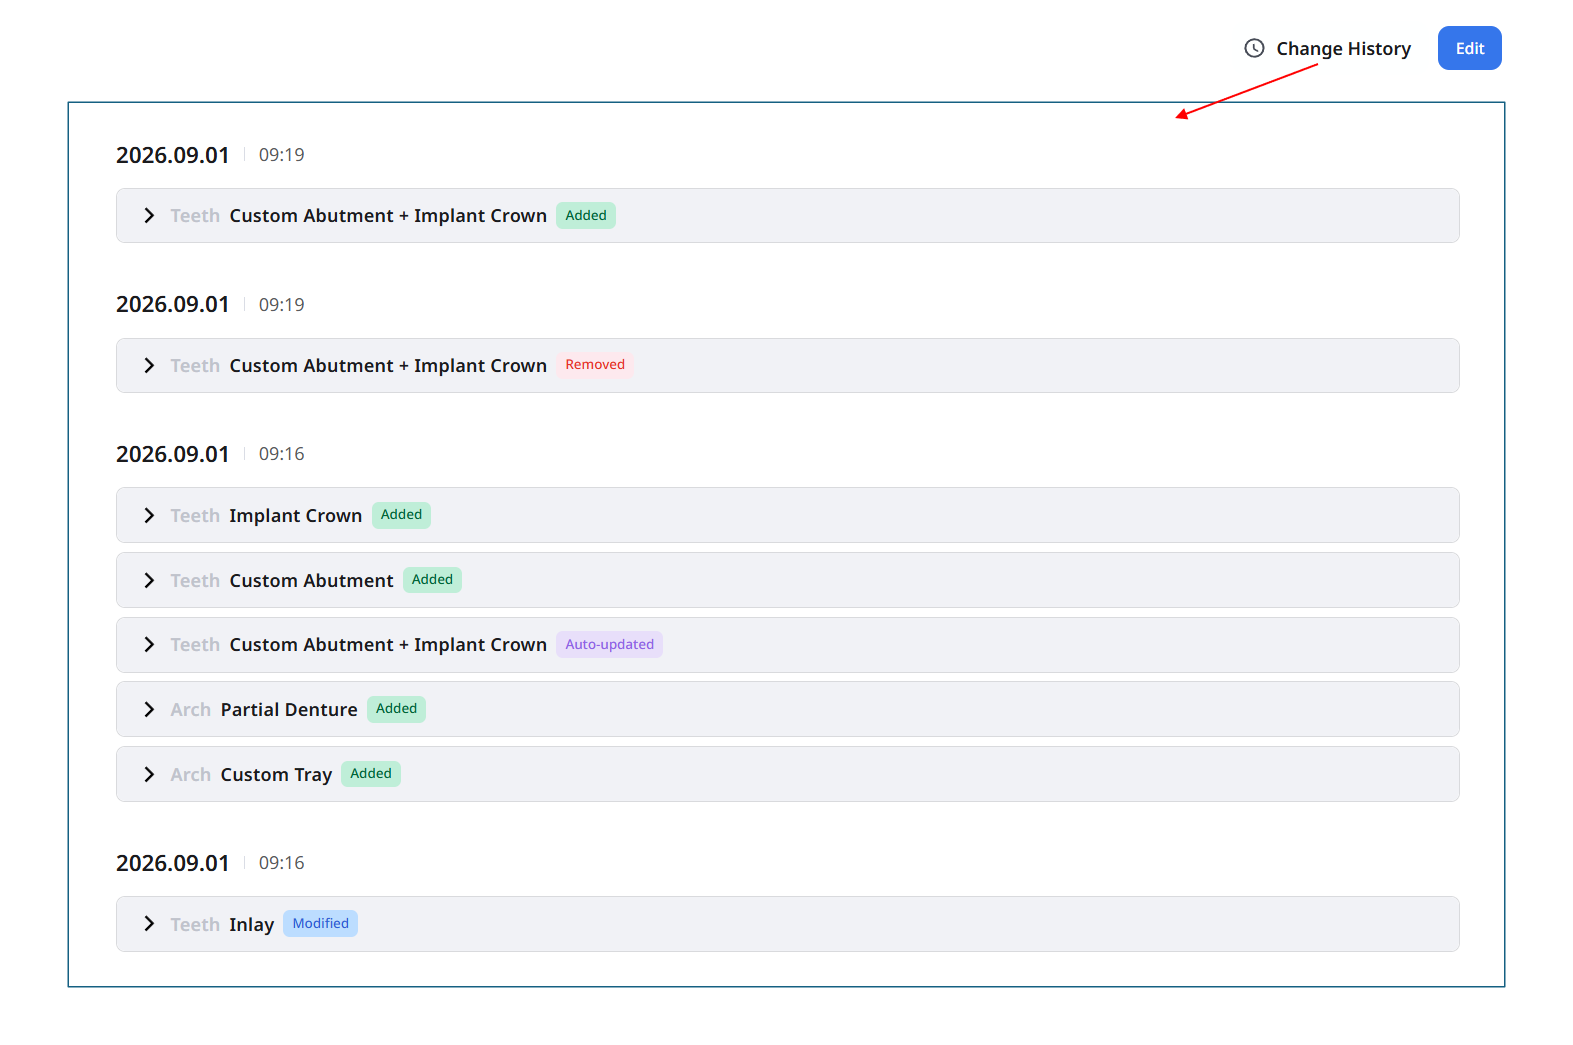
Expand a type to view its details.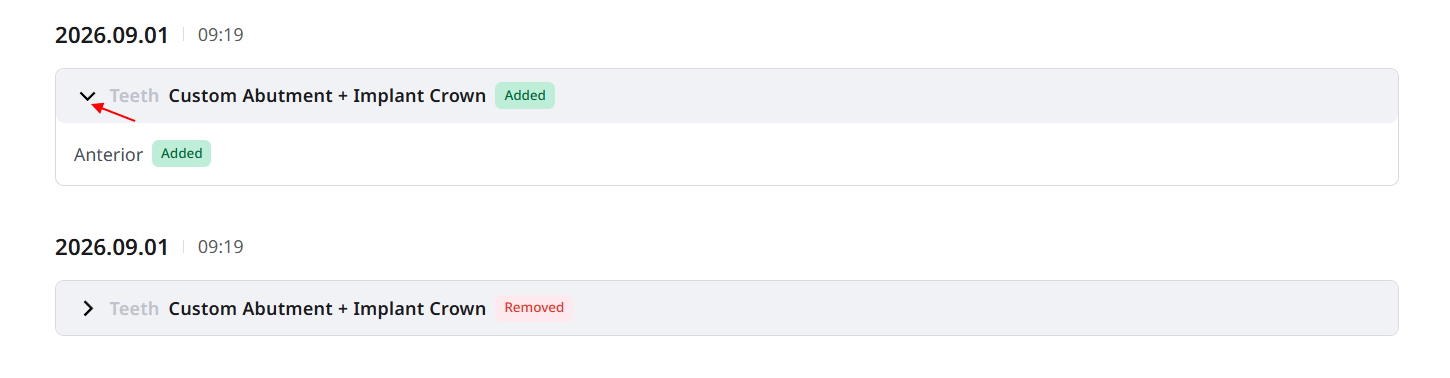
Added and Removed identify options added to or removed from the form.
Modified identifies changes that include both additions and removals.
Auto-updated identifies changes to a combined type resulting from changes to its constituent types.
🔎Note
Only changes applied to the order form appear in Change History. Previous versions cannot be restored from this page.