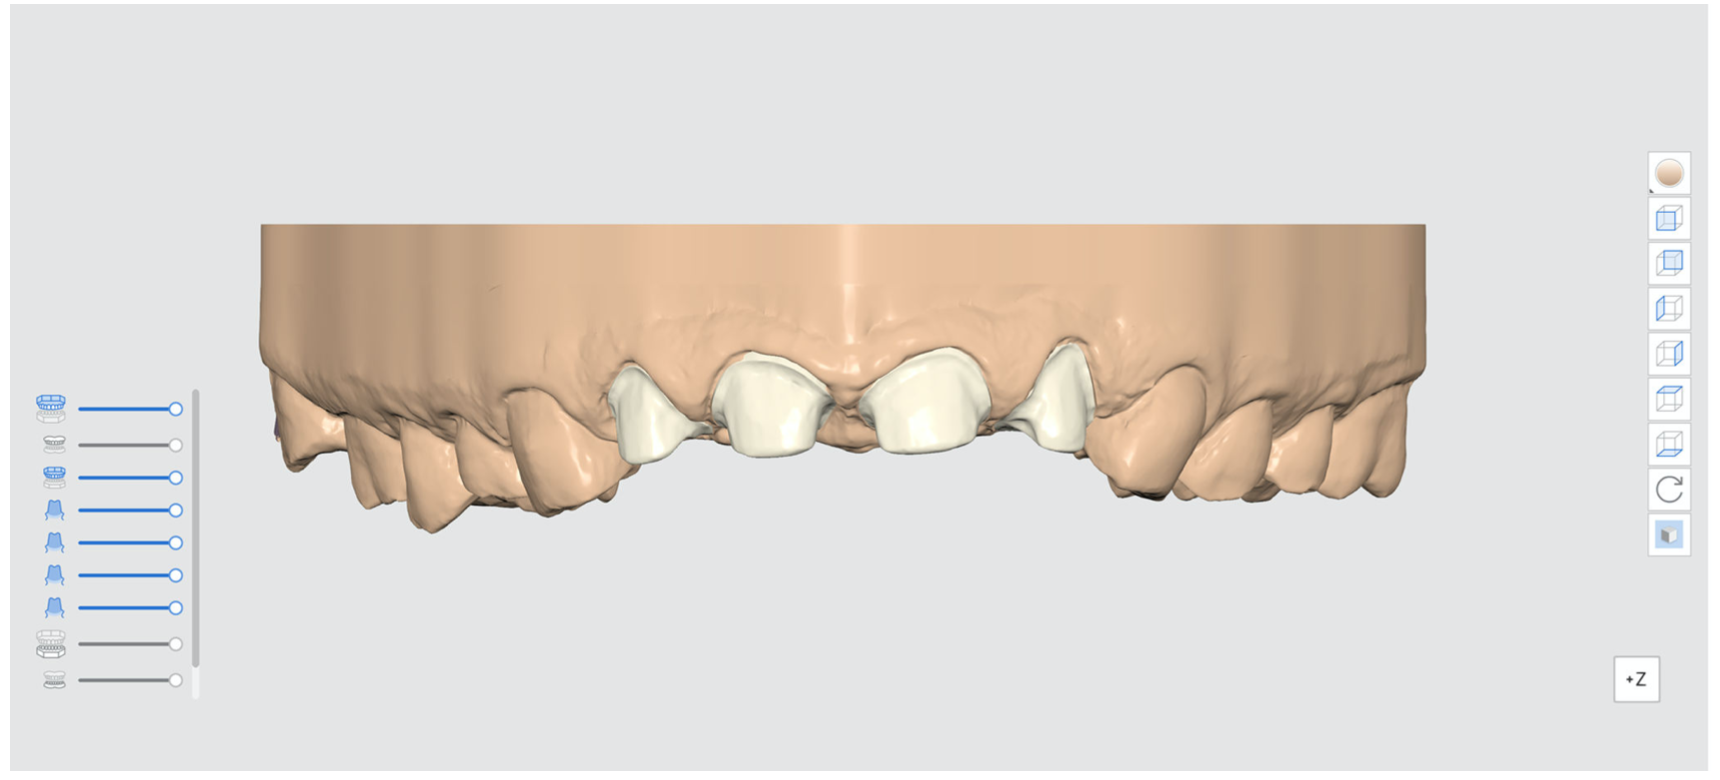
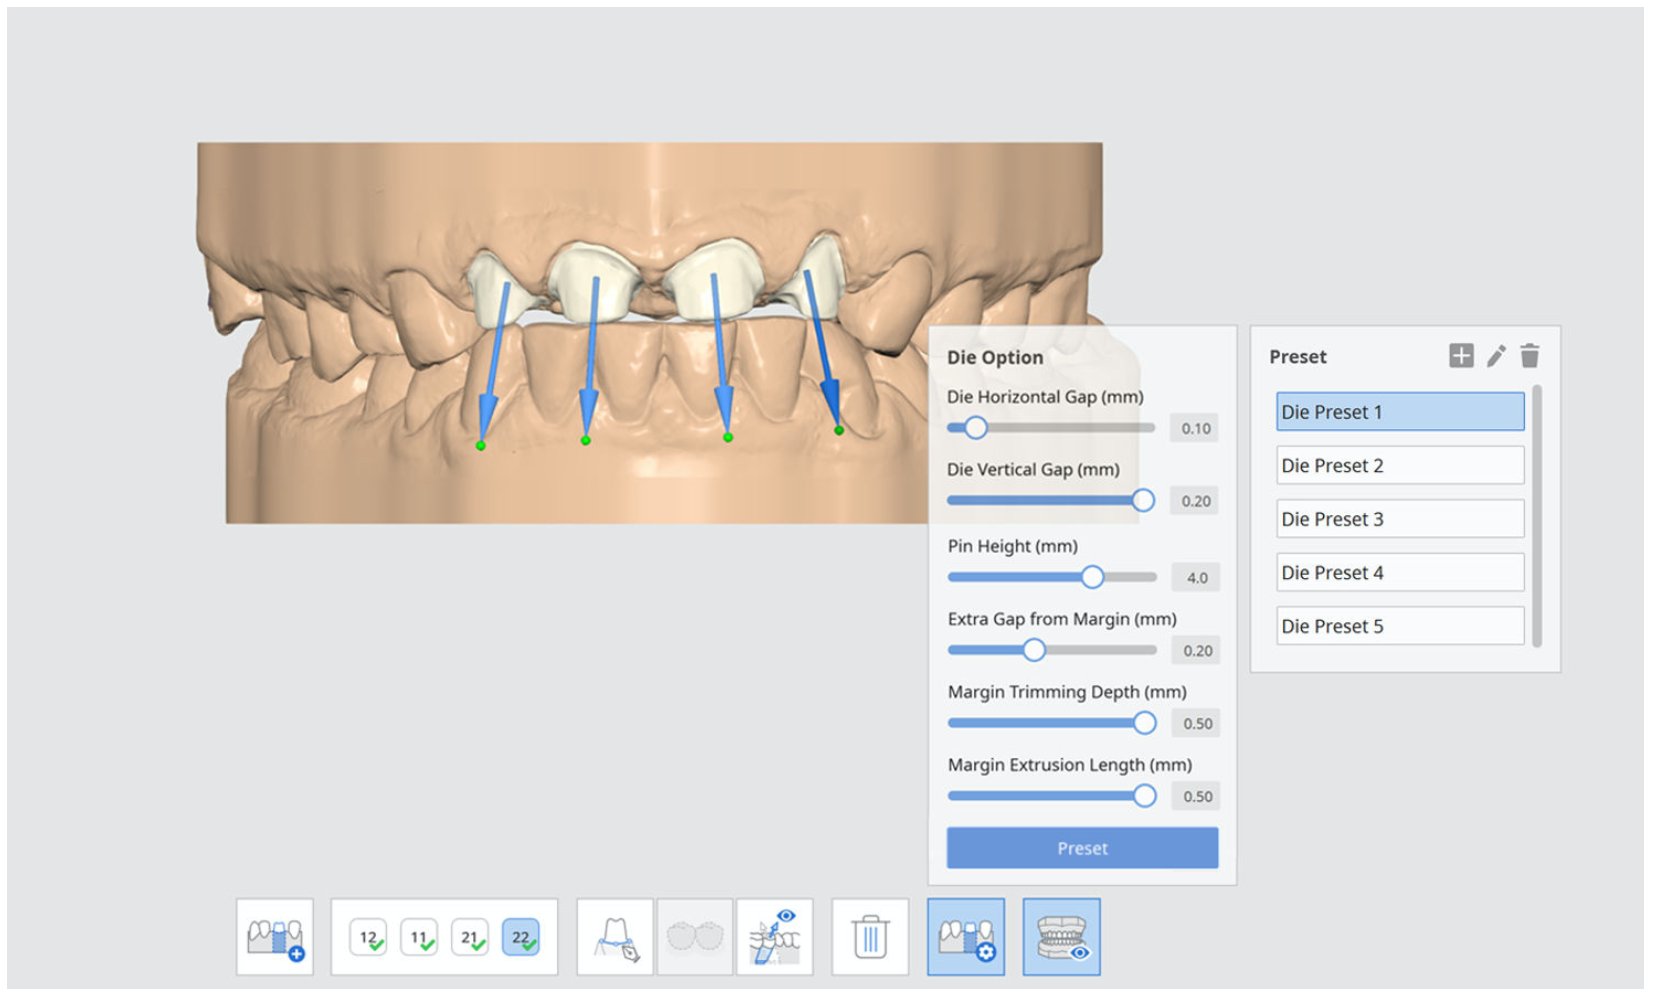
In Die Creation, you can create individual dies that are detachable from the base model. Customize your dies easily using the numerous options provided, such as die gap, pin height, extra gap from margin, etc.
There are also additional ways to create dies, such as “Cutout Dies” and “Extra Dies.”
If needed, adjust the area by moving the “Expand Selection” slider at the bottom of the screen.
🔎Note
Note that working in this step is optional.
🔎Note
If you turn on the “Bevel” and “Create Drain Holes” options in the Base Creation step, they will be automatically applied to dies in this step. Your created dies will be beveled and have drain holes near the bottom of the slots.
Toolbox
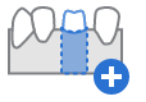
| Add Die | Add die to the base. |
| Margin Line | Draw the margin line on a prepped tooth. |
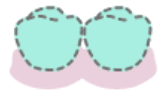
| Adjacent Teeth Selection | Select the adjacent teeth instead of using margin lines to create the die. |
| Set Die Insertion Path from View Point | Adjust and set the die insertion path from your view direction. |
| Delete | Delete current die. |
| Die Numbering | Add teeth numbers on the dies. |
| Cutout Dies | Create dies that are detachable from the base. |
| Extra Dies | Create additional dies along with a base with trimmed margin line. |
| Die Option | Customize the die.
|
| Preview | Preview the die before moving to the next step. |


Form information will be available immediately if you have imported the case from Medit Link. If you want to create individual dies for adjacent teeth, click "Add Die" to open Form Information.

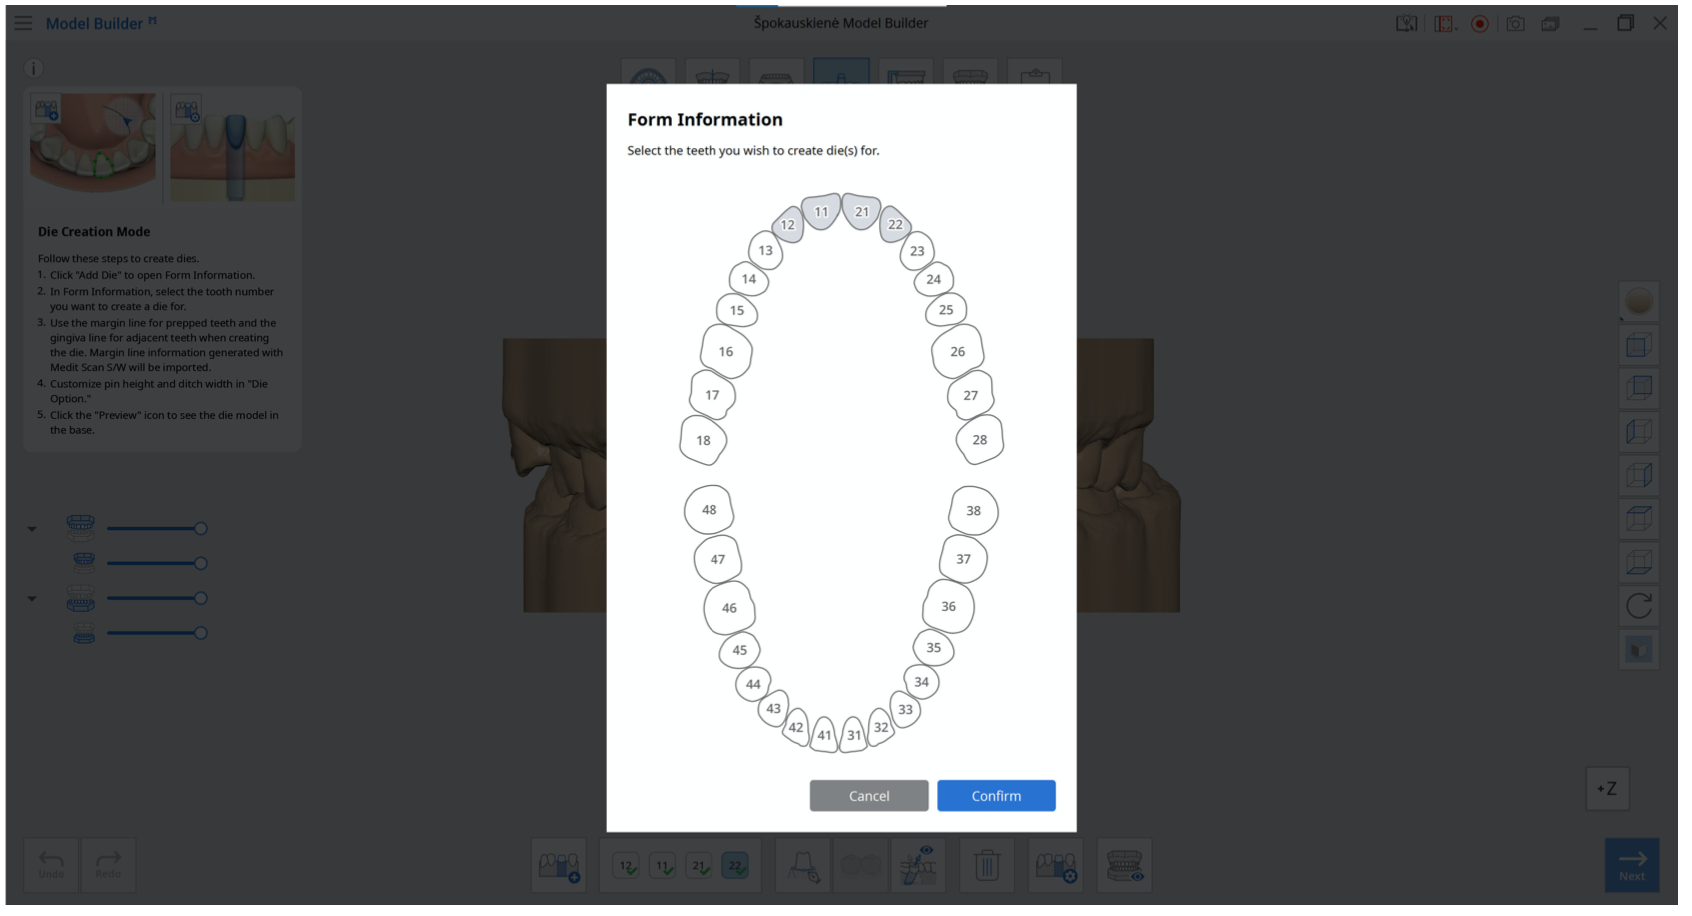
In Form Information, select the tooth number you want to create a die for.
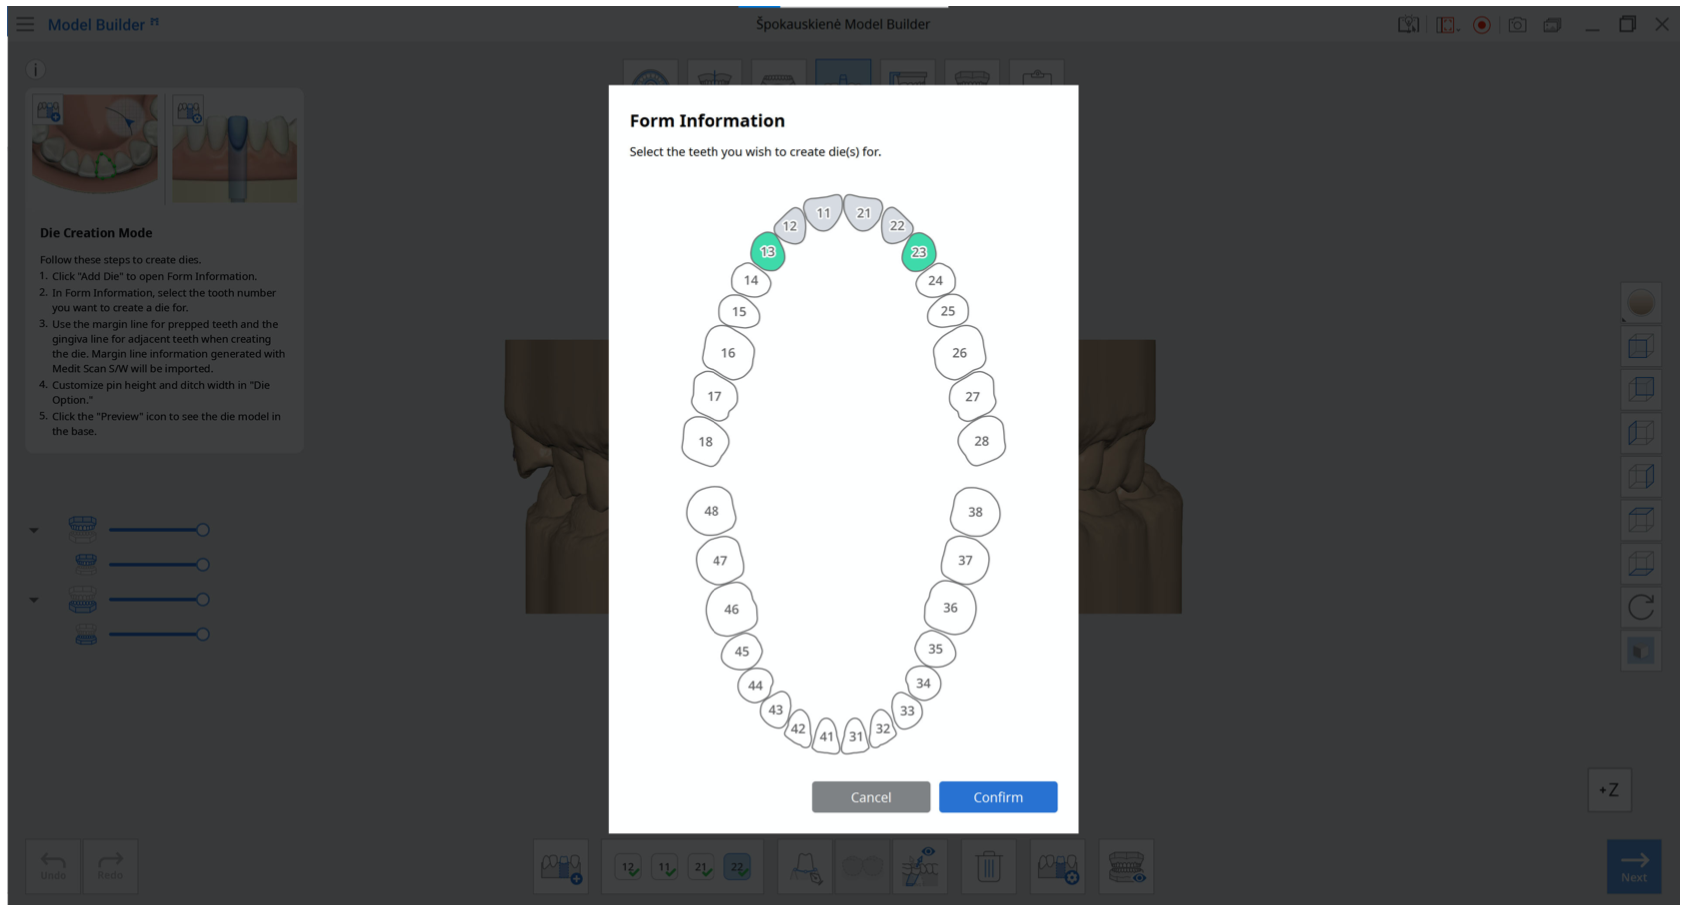
Use the margin line for prepped teeth and the gingiva line for adjacent teeth when creating the die. Margin line information generated with Medit Scan for Clinics/Labs will be imported.
Toolbox
| Curvature Display Mode | You can use the toggle to turn the Curvature Display Mode on and off based on your preferences. |
| Section View | You can use the toggle to turn the Section View on and off based on your preferences. |
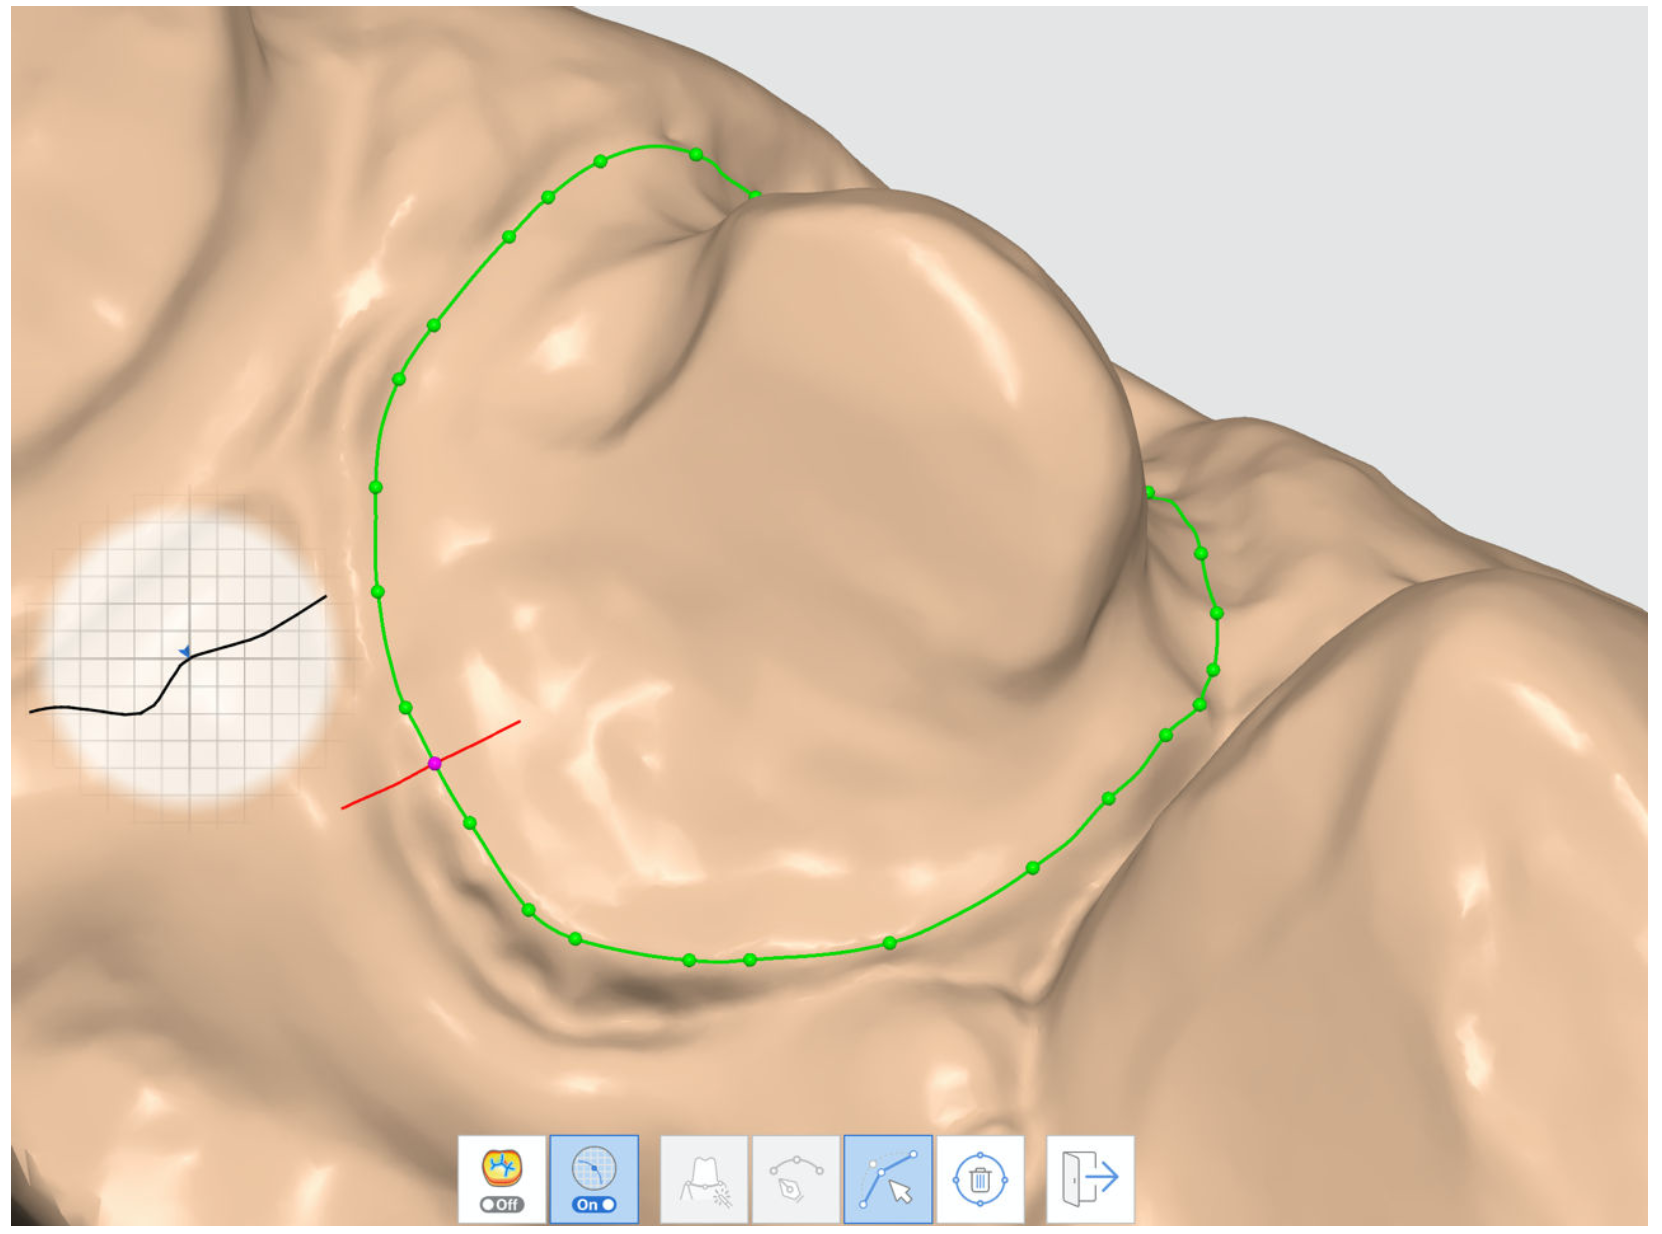
| Auto Creation | Create a margin line automatically based on the multiple points selected. |
| Manual Creation | Draw your own line using the left mouse button to drag and select the points. |
| Edit | Edit the points on the margin line using your mouse. Left click to add points, right click to delete points. |
| Delete | Delete the margin line. |
| Exit | Exit and return to the Die Creation step. |


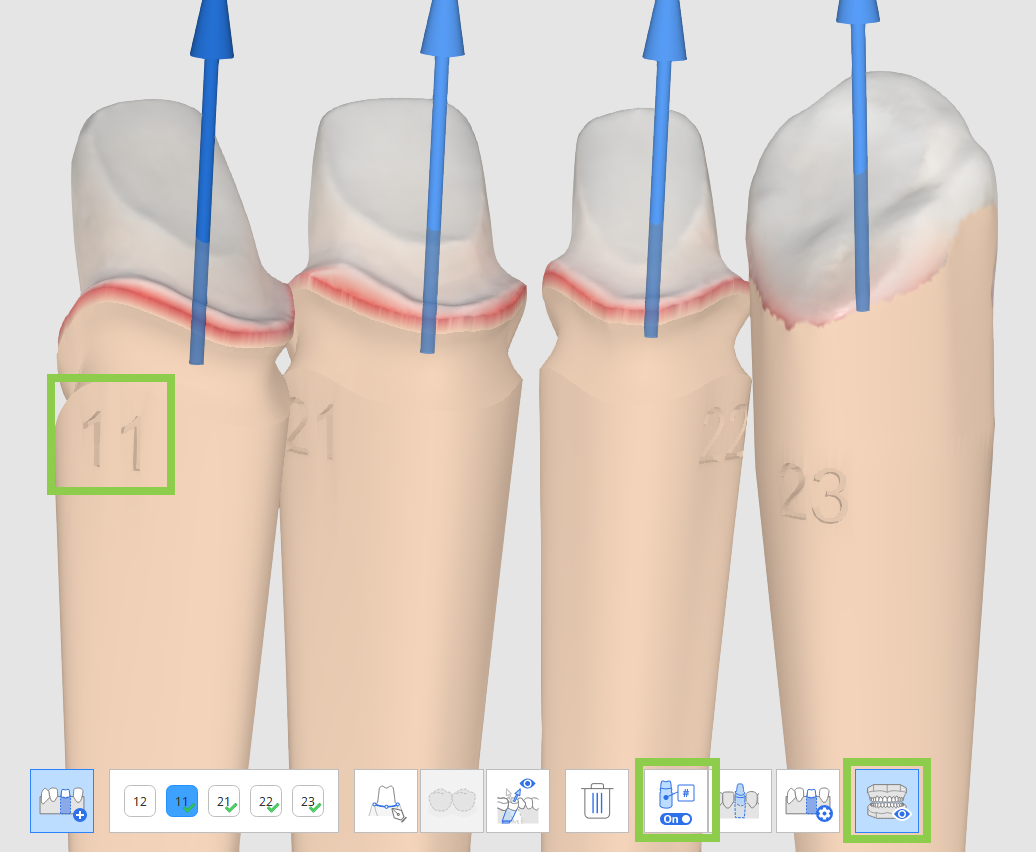
Engrave teeth numbers on your dies when creating multiple ones. Click “Die Numbering” to automatically itemize the dies with their corresponding tooth number and check results through the preview option.
Customize the die in “Die Option” using the various parameters provided.
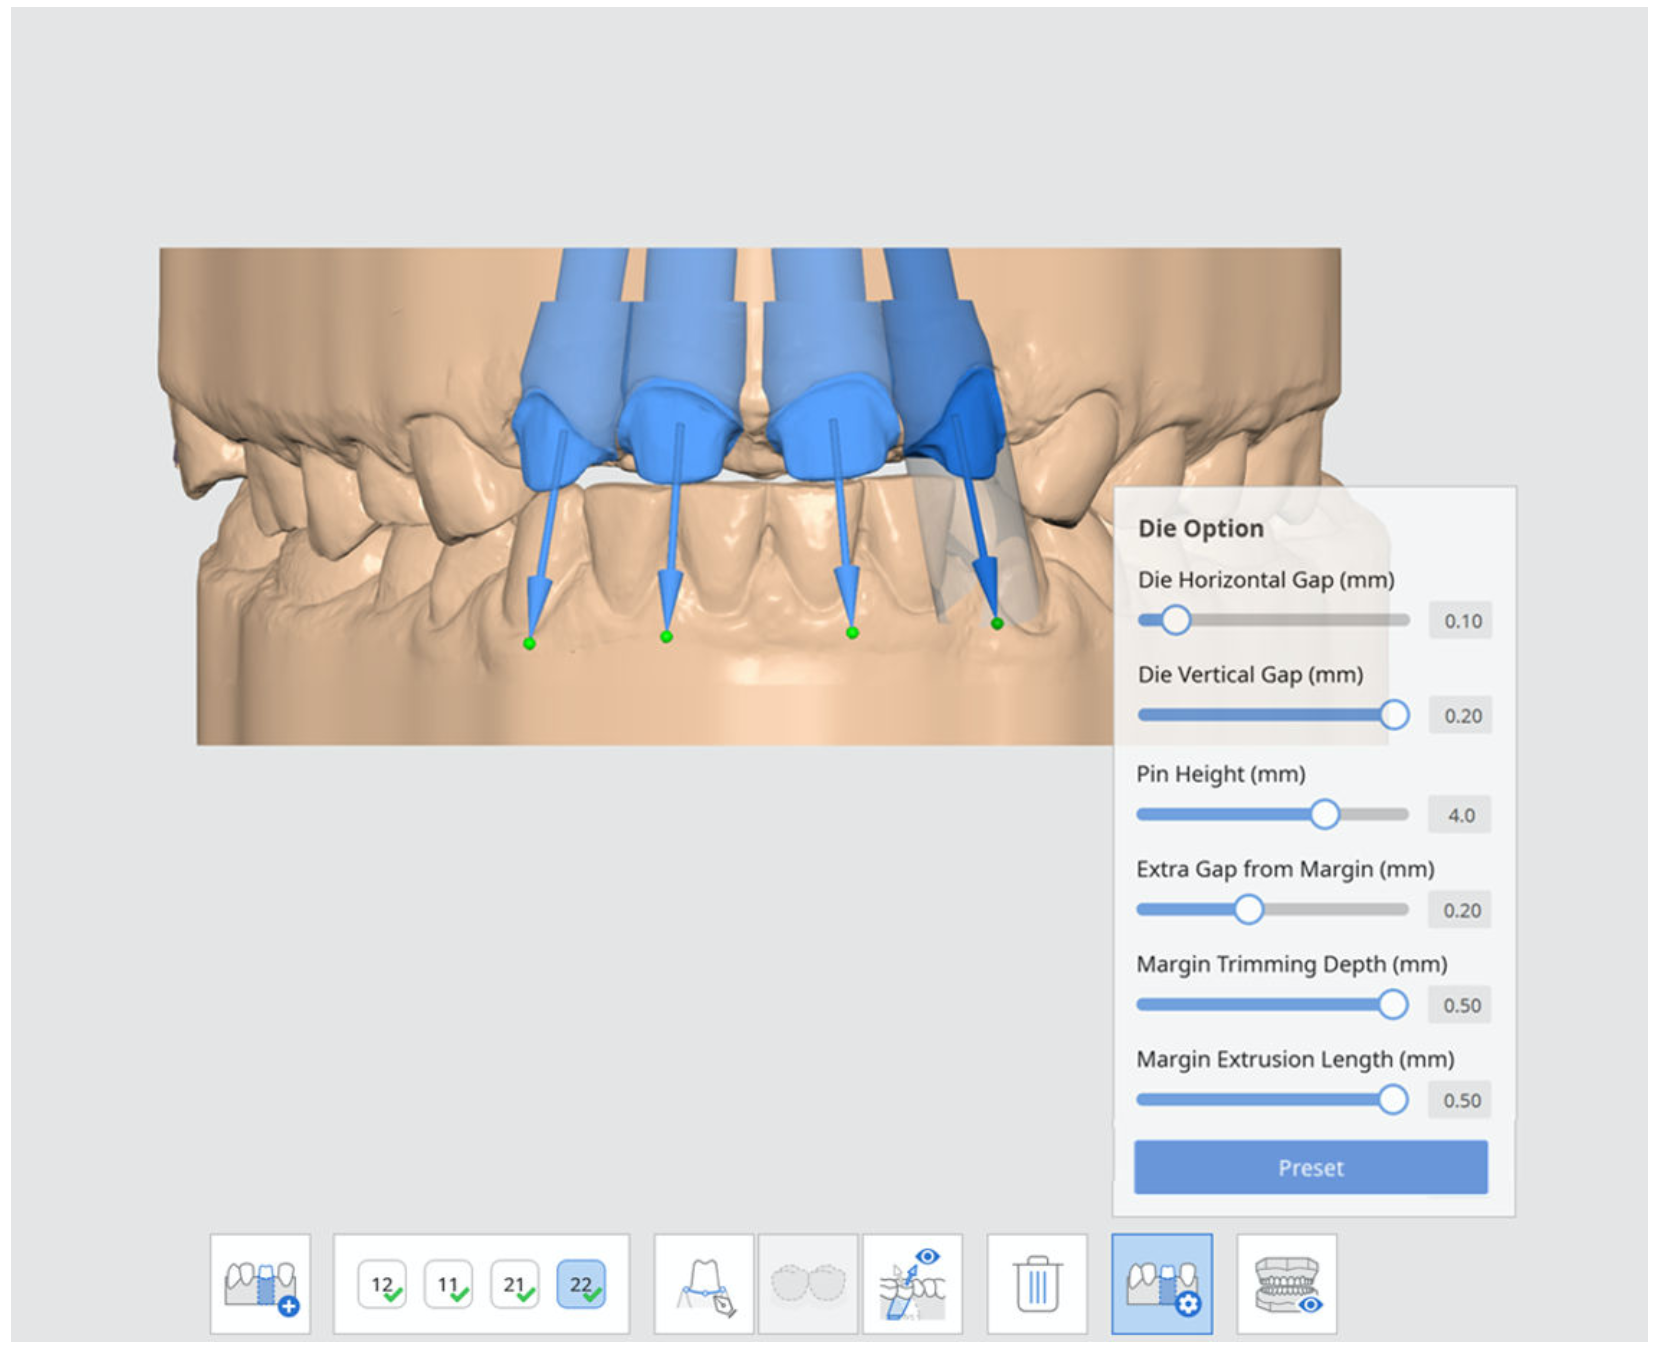
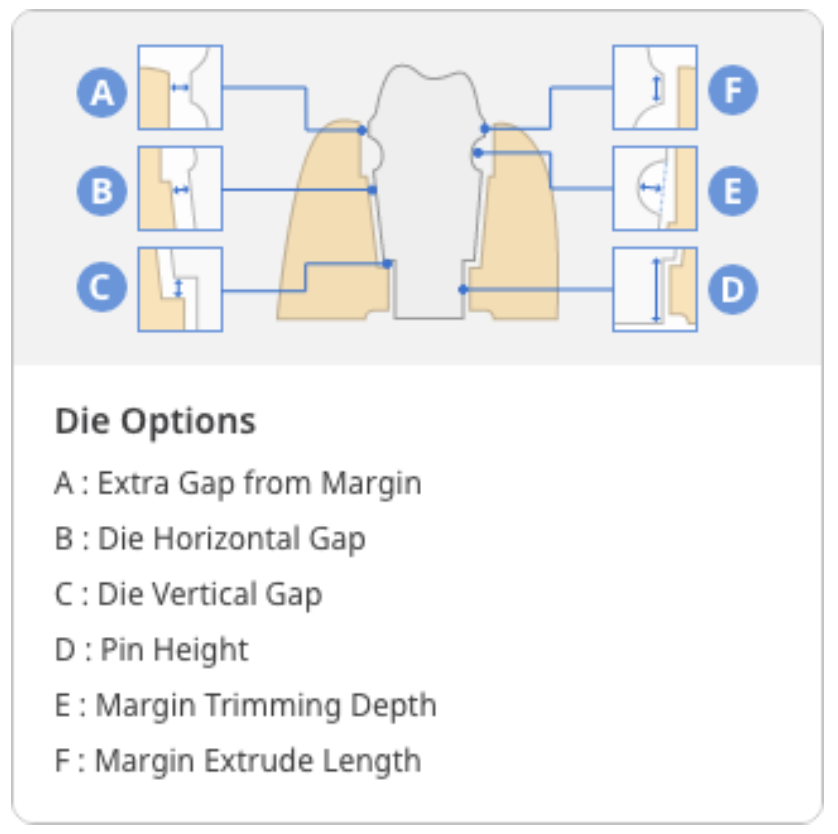
Die Options
Parameter | Explanation |
|---|---|
Extra Gap from Margin | Adjust the extra gap space between margin line and the base. |
Die Horizontal Gap | Adjust the horizontal gap between the die and the base. |
Die Vertical Gap | Adjust the vertical gap between the die and the base. |
Pin Height | Adjust the height of the pin. |
Margin Trimming Depth | Specify the additional depth that needs trimming from the margin line. |
Margin Extrusion Length | Specify the length of the margin that is extruding. |
🔎Note
Each of the dies will be saved separately when saving the output files to Medit Link.
Click the “Preview” icon to see the die model in the base.
Die Creation: Margin Line
Use the Margin Line Imported from Medit Scan for Clinics
Once you are in “Die Creation,” dies will be created automatically if you already have a margin line for the prepared teeth in Medit Scan for Clinics. The margin line will be displayed on the scan data straightaway.
Examine the margin line.
Add or delete points using your mouse. Left-click to add points, right-click to delete points.

When completed, click "Next." You will see the restoration ready.
Create a Margin Line in Medit Model Builder
If you have not created a margin line for the prepared tooth in Medit Scan for Clinics, you can draw it manually in Medit Model Builder.

In the Die Creation step, click “Margin Line” at the bottom of the screen.
You can then choose between “Auto Creation” or “Manual Creation.”
You can edit or delete the margin line.
View Curvature
Select the area to specify the margin line. Then check the curvature by turning on the function at the bottom of the screen. The surface curvature of the scan data is displayed in various colors.

If the color is redder, it is more embossed and if the color is bluer, it is more engraved. You can use the color expression interval slider to adjust the color radius.
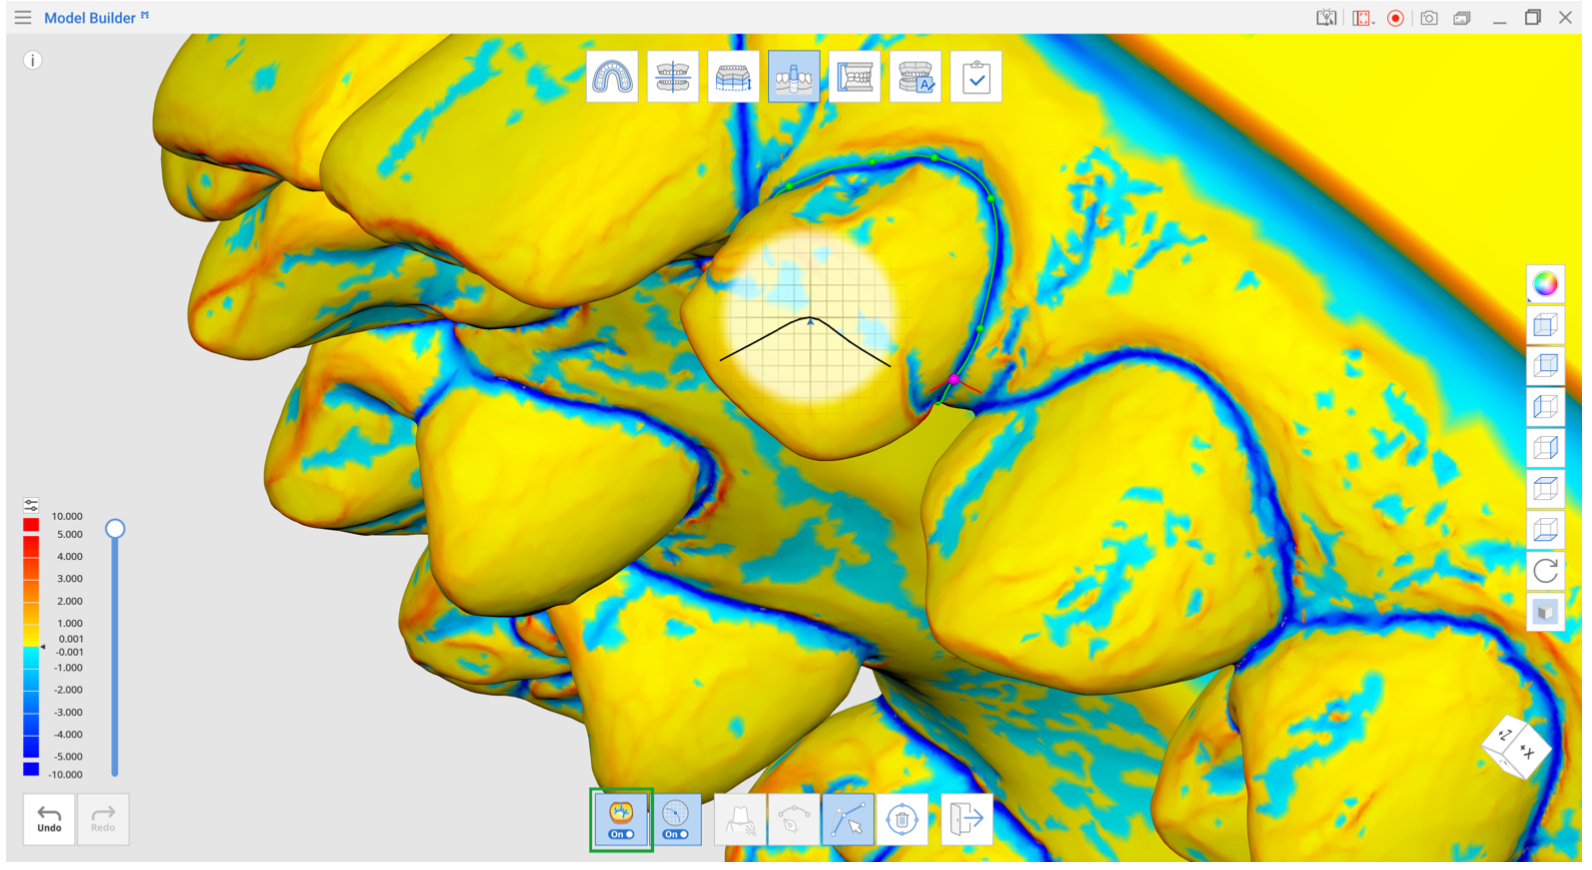
View Cross Section
When creating or editing the margin line, this feature shows you the cross-sectional display based on your mouse location; this feature can be turned on and off. It prevents any areas from being hidden when zoomed in closely and allows you to check the magnified margin more carefully.
