3D Data Control
Medit Scan for Clinics supports three data control modes: Rotate, Pan, and Zoom.
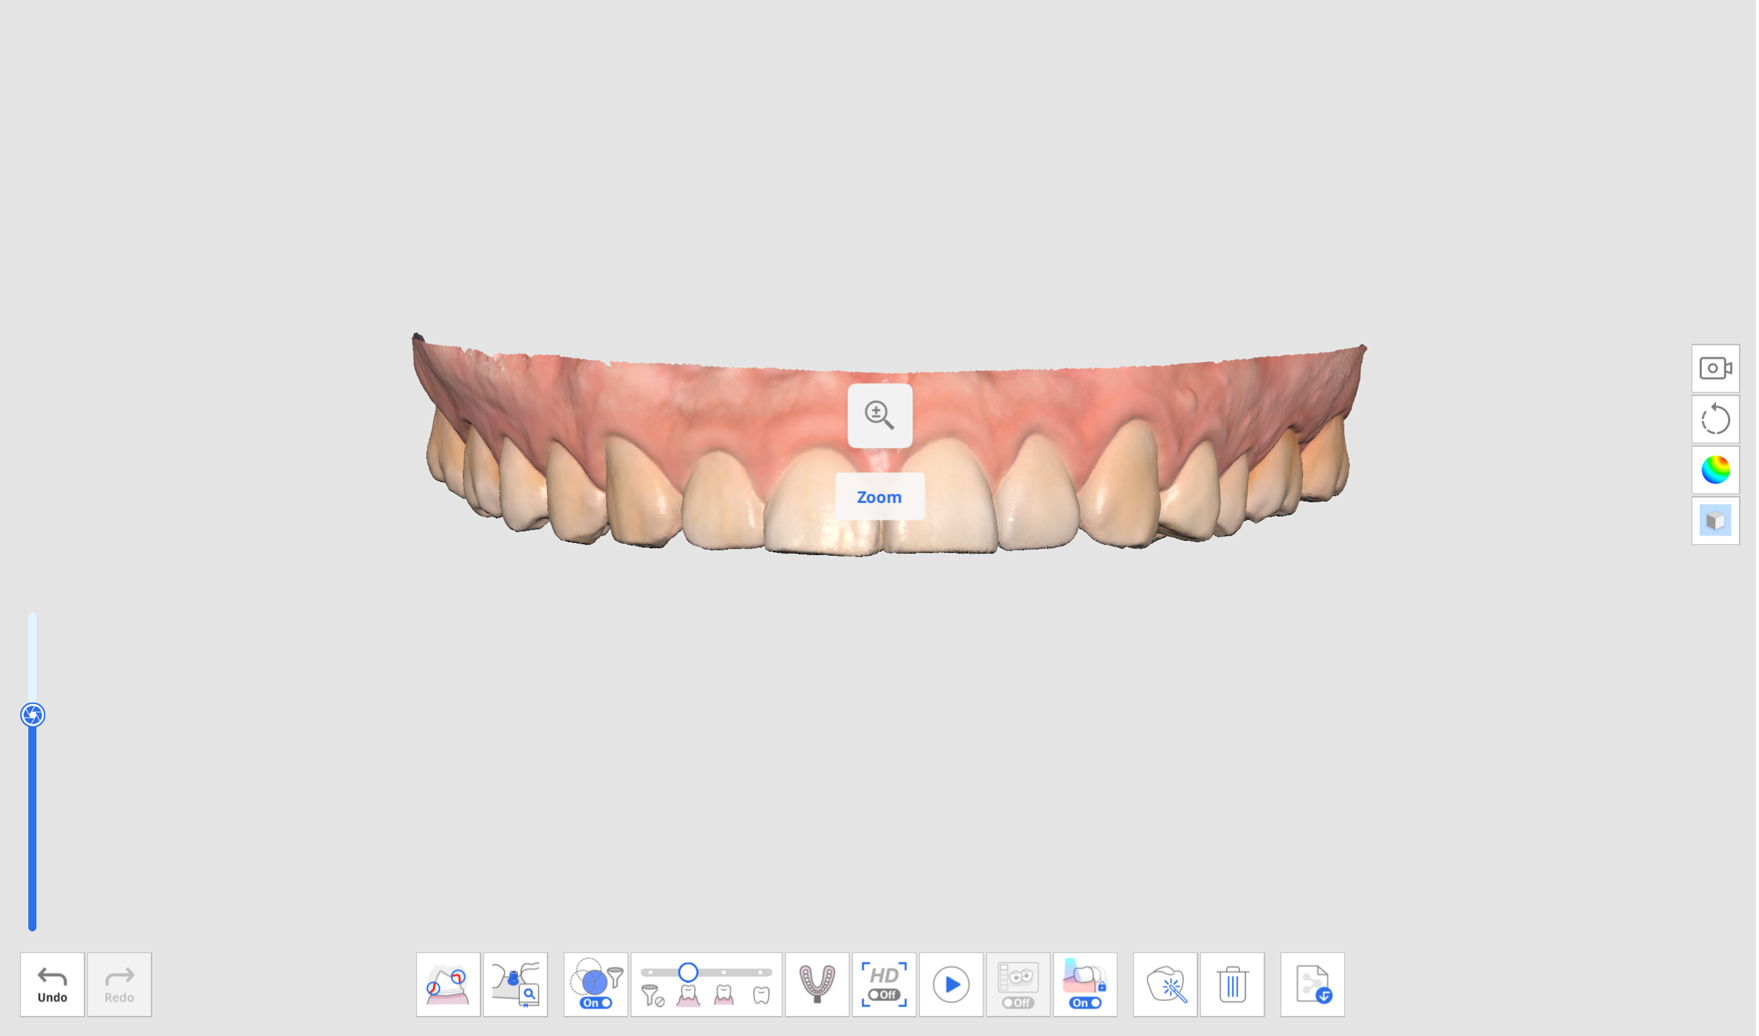
Zoom
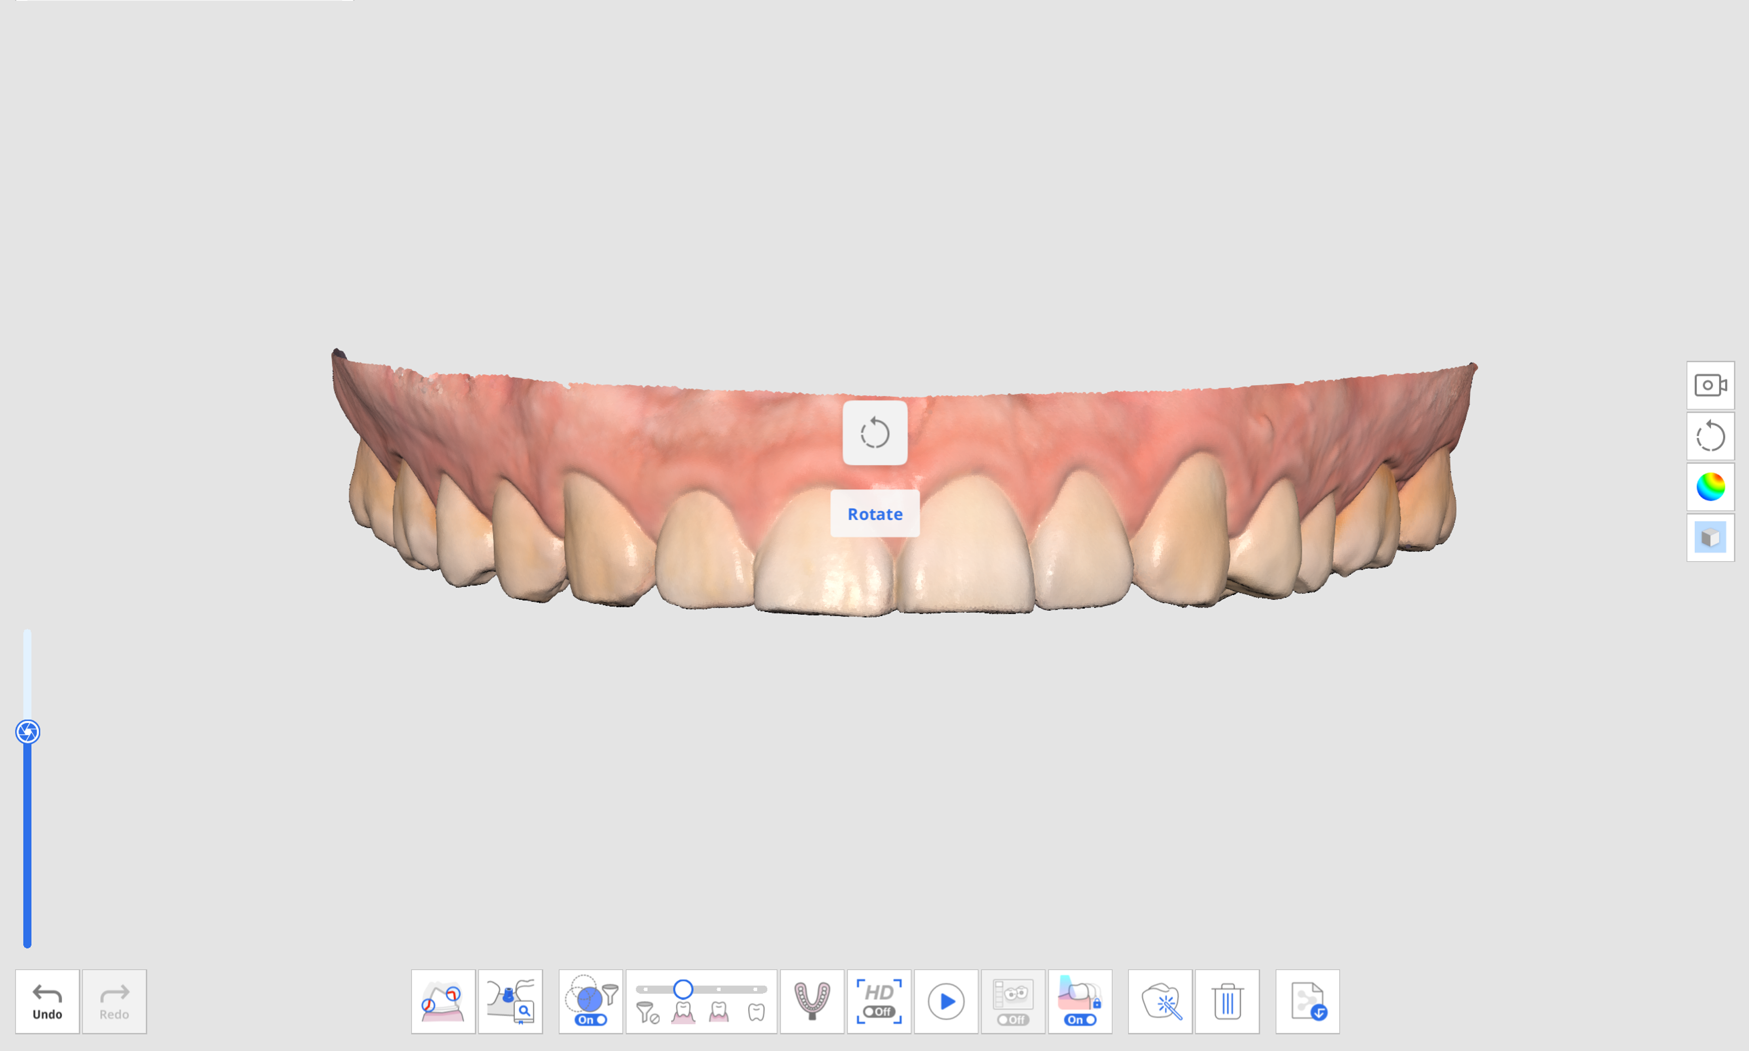
Rotate
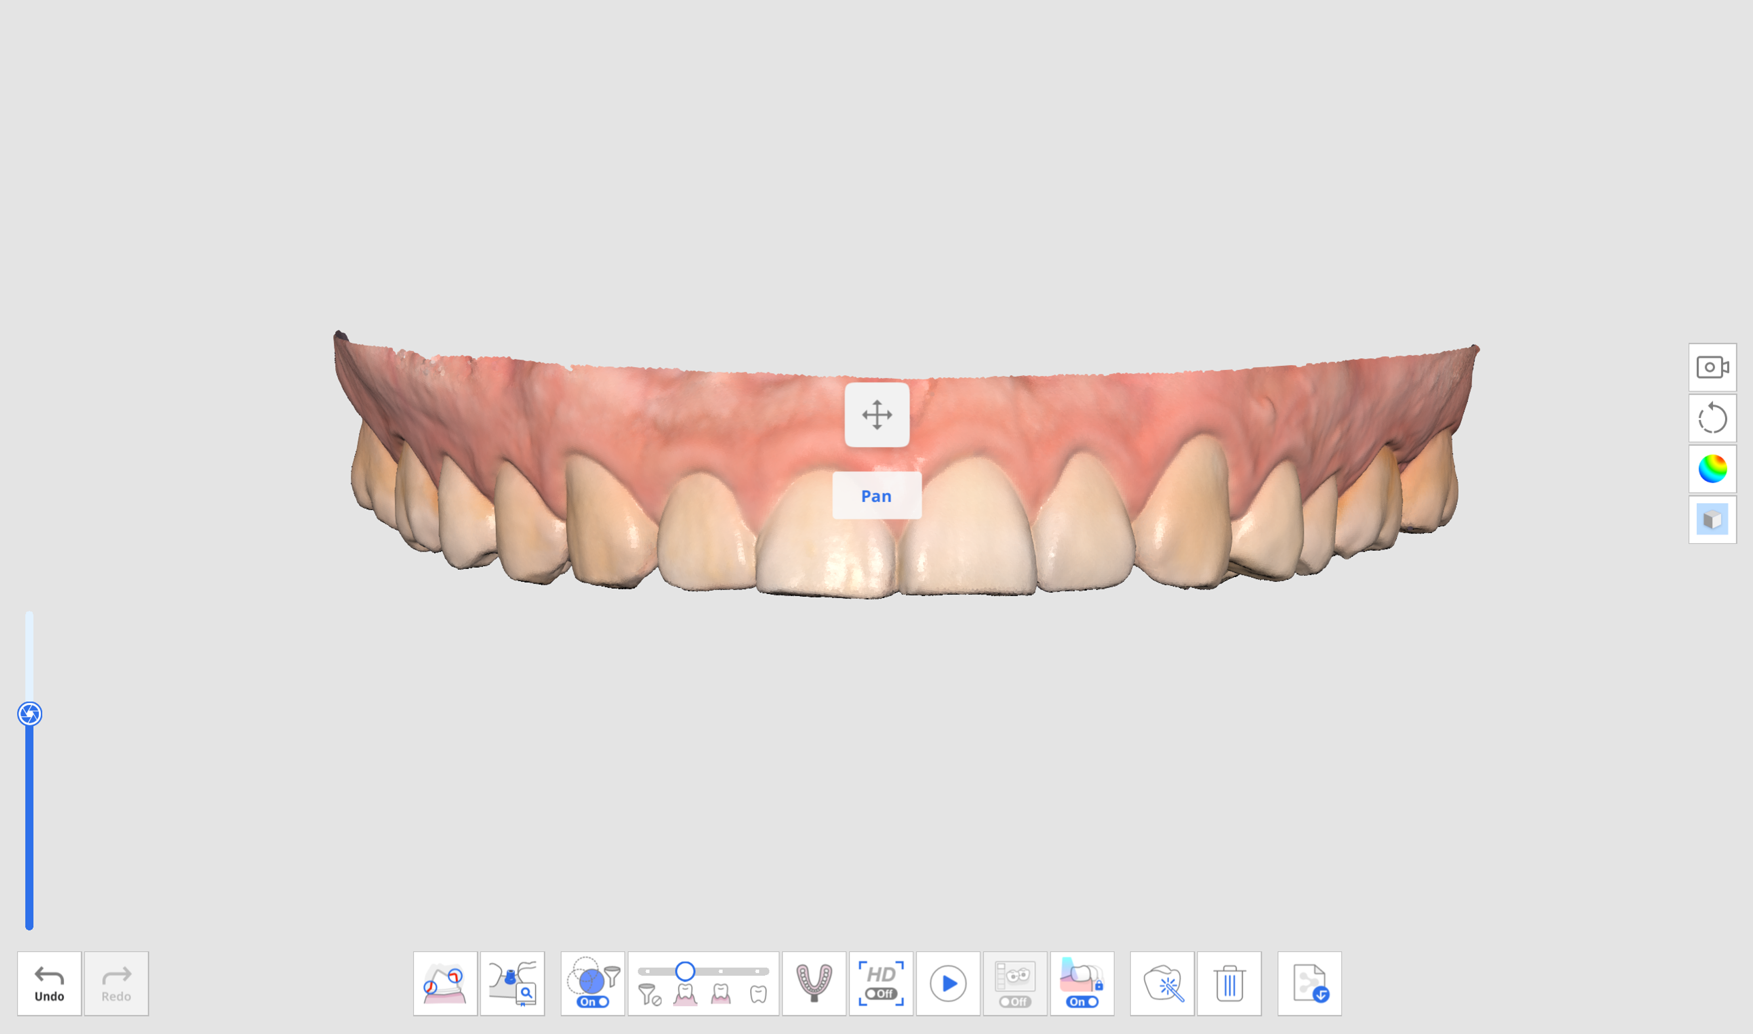
Pan
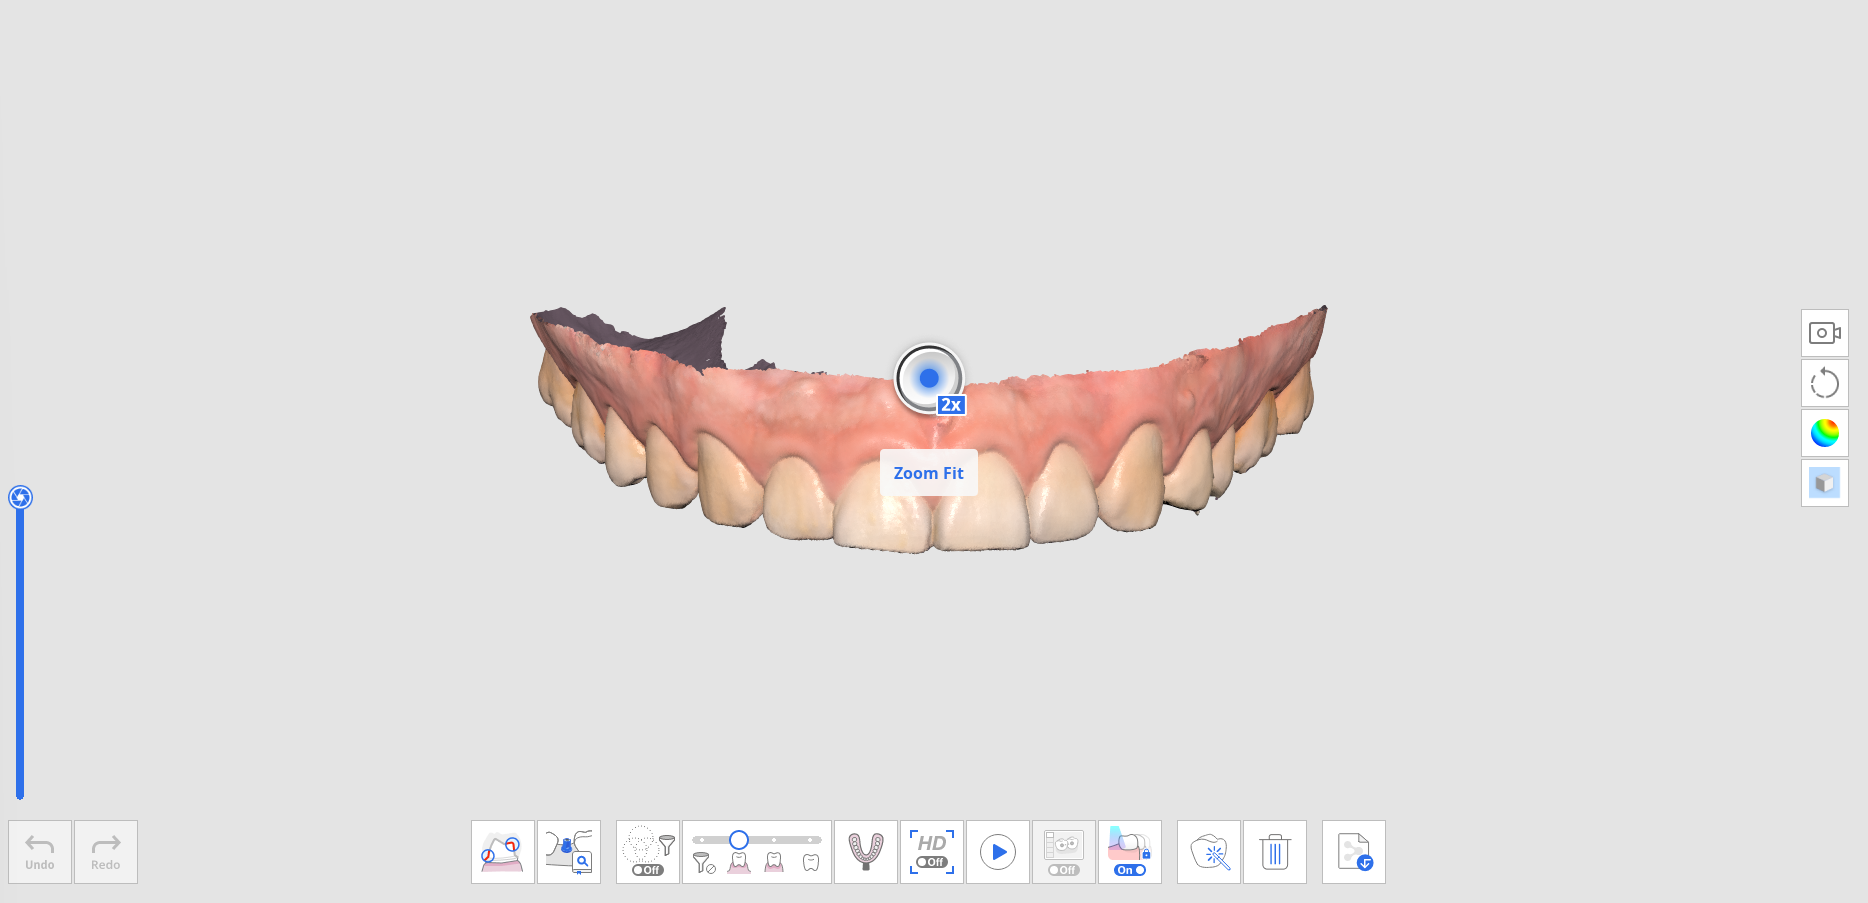
Zoom Fit: Double-click the Control button to align the data at the center of the screen.
3D Data Control Using a Mouse
Image | Description | |
|---|---|---|
Zoom |
| Scroll the mouse wheel. |
Zoom Focus |
| Double-click on the data. |
Zoom Fit |
| Double-click on the background. |
Rotate |
| Drag the right button. |
Pan |
| Drag the mouse wheel. |


3D Data Control Using Mouse and Keyboard
Windows | macOS | |||
|---|---|---|---|---|
Zoom |
|
|
|
|
Rotate |
|
|
|
|
Pan |
|
|
|
|


3D Data Control Using Scanner Buttons (i700/i700 wireless/i900 Mobility)
Image | Description | |
|---|---|---|
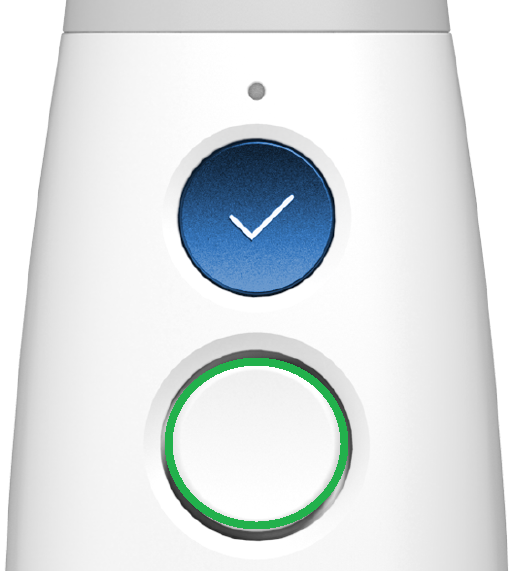
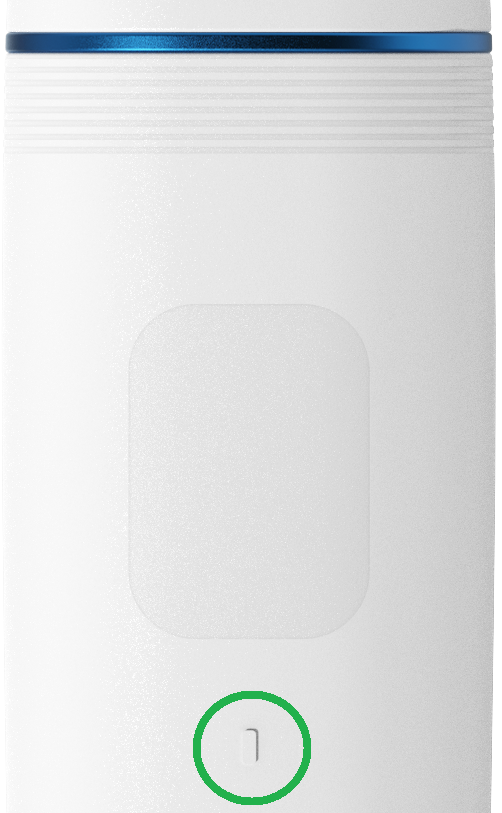
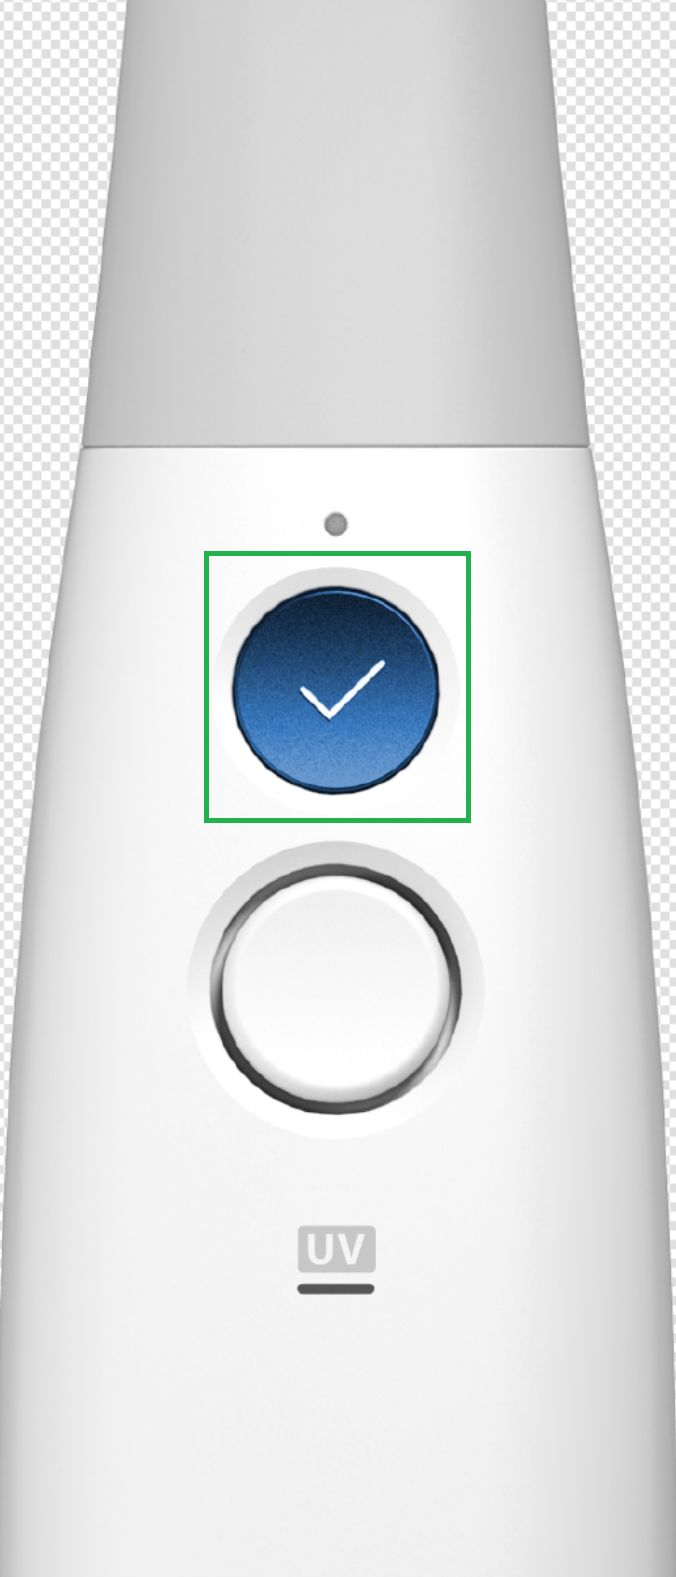
Switch Data Control Mode |
| Single-click on the Control button. |
Zoom Fit | Double-click on the Control button. | |
Zoom |
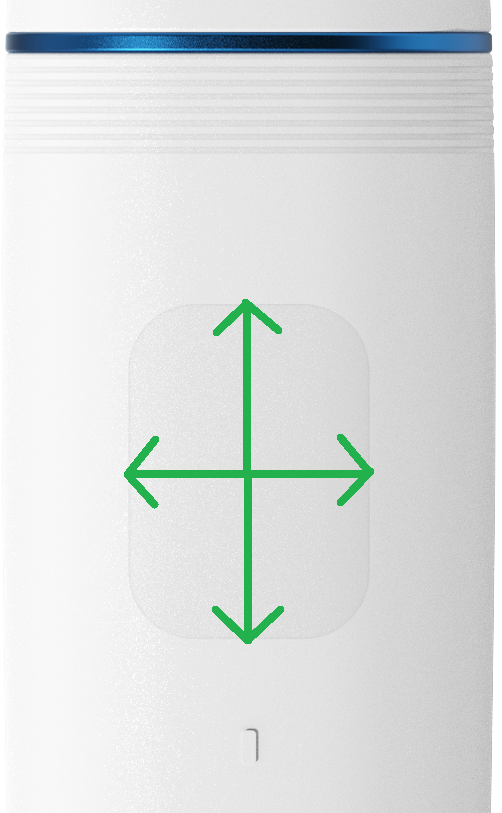
| Press up/down on the Control button. |
Rotate | Press up/down/left/right on the Control button. | |
Pan | Press up/down/left/right on the Control button. |

3D Data Control Using Touch Interfaces (i900)
Image | Description | |
|---|---|---|
Switch Data Control Mode |
| Short-tap on the Menu Button. |
Zoom Fit | Double-tap on the Menu Button. | |
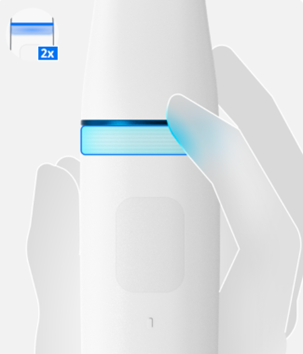
Zoom |
| Tap and drag up/down on the Touch Band. |
Rotate | Tap and drag up/down/left/right on the Touch Band. | |
Pan | Tap and drag up/down/left/right on the Touch Band. |
3D Mouse Support
Medit Scan for Clinics supports using a 3Dconnexion 3D mouse.
3D input device development tools and related technology are provided under license from 3Dconnexion. © 3Dconnexion 1992 - 2013. All rights reserved.
Scanning Operation
Start/Stop with Scan Button (unavailable with i900)
You can start or stop the scan by pressing the Scan button on the scanner.
Start/Stop with Touch Band (i900 only)
You can start or stop the scan by double-tapping the touch band on the scanner.
Start/Stop by Lifting/Putting Scanner (i900 only)
You can get ready to scan by just lifting your scanner or stop scanning by putting it on the cradle.
🔎Note
This feature is only available when the “Start Automatic Scan” option is enabled on Settings > Scanner.
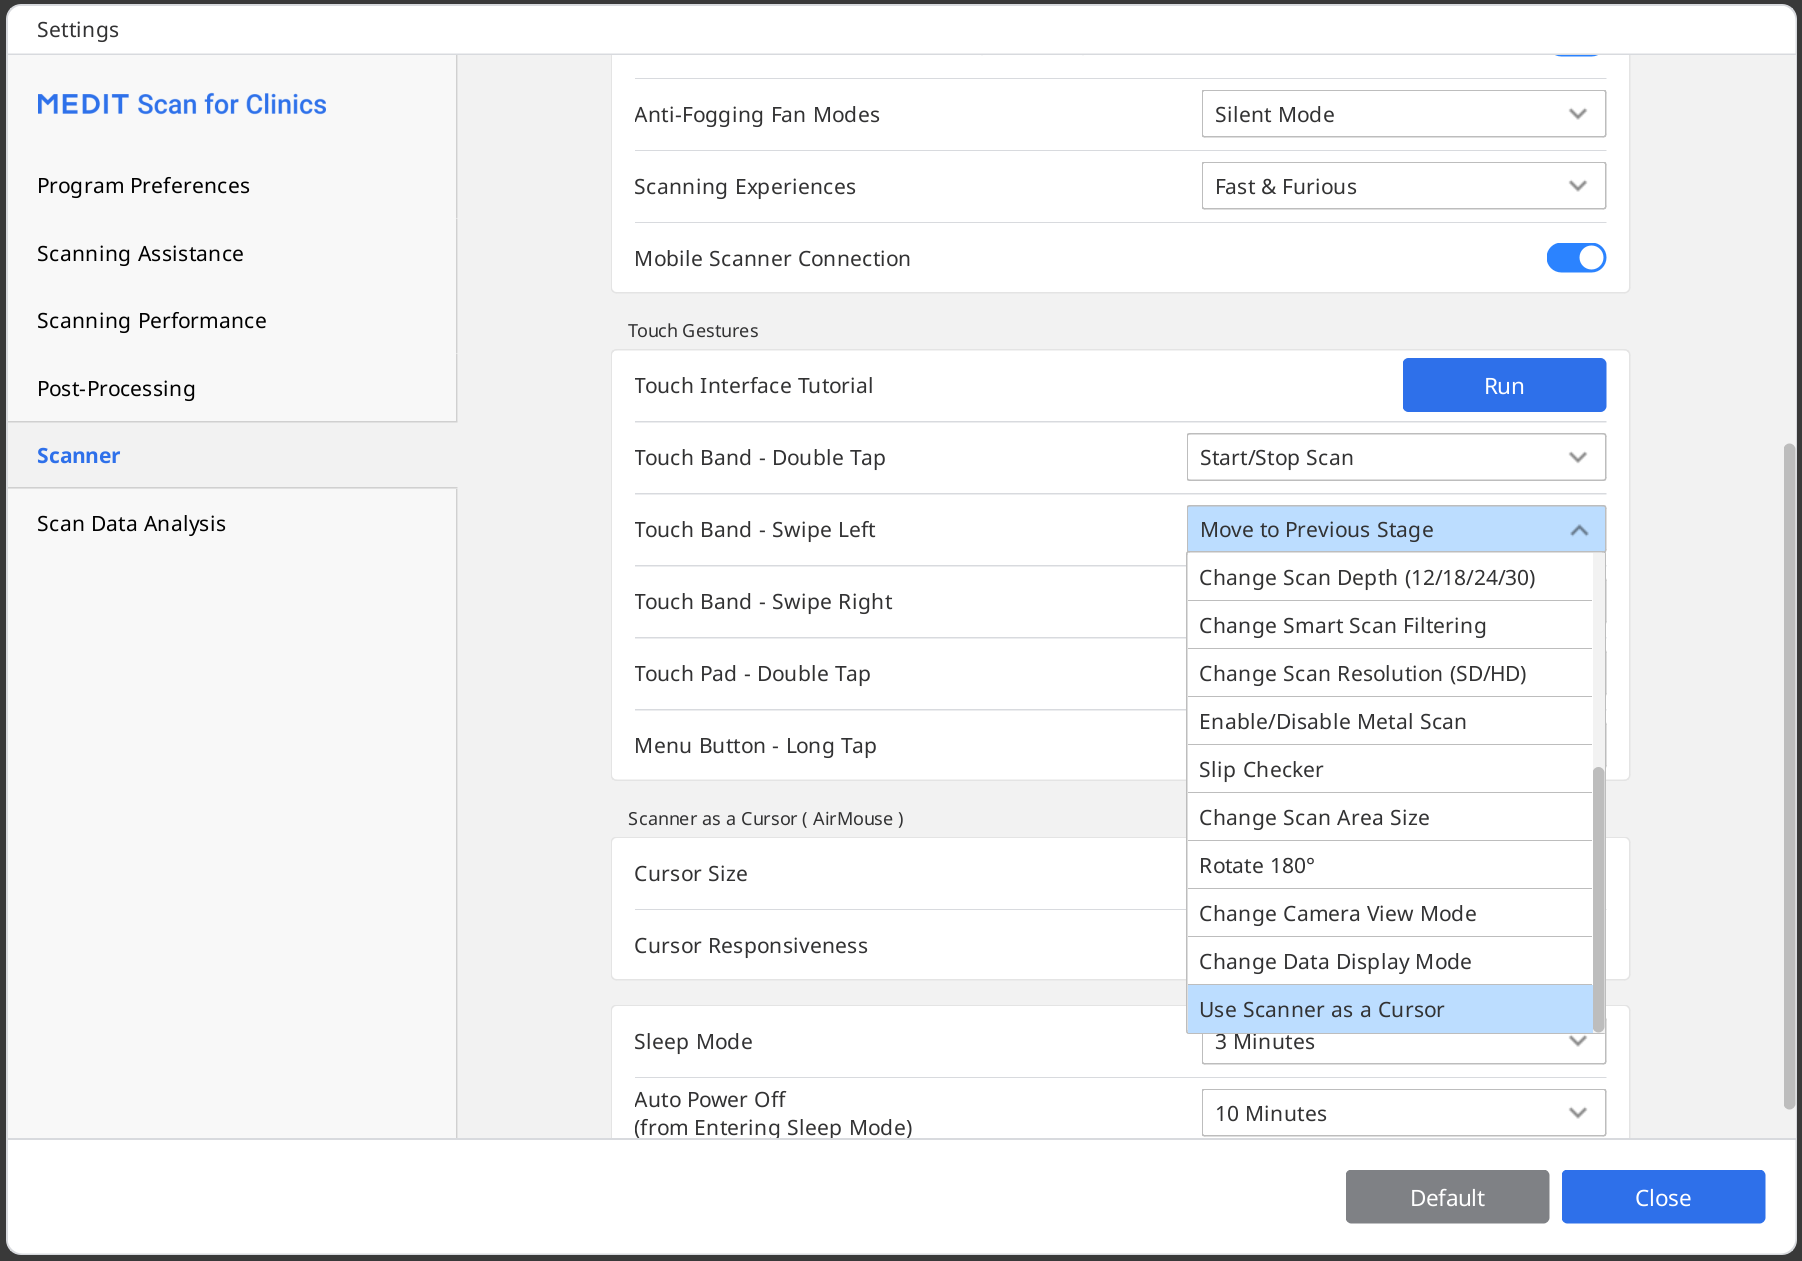
Scanner as a Cursor (AirMouse)
This feature allows the handpiece to function as a mouse, enabling users to control the on-screen cursor and perform basic mouse actions such as clicking. By using the scanner as an AirMouse, users can avoid using physical mouse or touchpad and reduce the risk of cross-contamination. This functionality is supported on the following scanner models:
i900
i900 classic
To use this feature, go to Settings > Scanner and select “Use Scanner as a Cursor“ in the appropriate section for your scanner model (see details below). Once enabled, you can use the handpiece as a mouse to control the cursor and perform clicking using the selected action. You can also adjust the cursor size and responsiveness.
i900/i900 classic
In the Touch Gestures section, open the action drop-down menu for the desired gesture and select “Use Scanner as a Cursor.”