The Simulations Preview step involves generating simulations of teeth movement based on the information provided in previous steps. The main goal here is to assess potential treatment scenarios and determine the best course of treatment. Additionally, these simulations can be employed during patient consultations to visually illustrate the treatment process and expected outcomes, thereby increasing the patient’s understanding of future procedures.
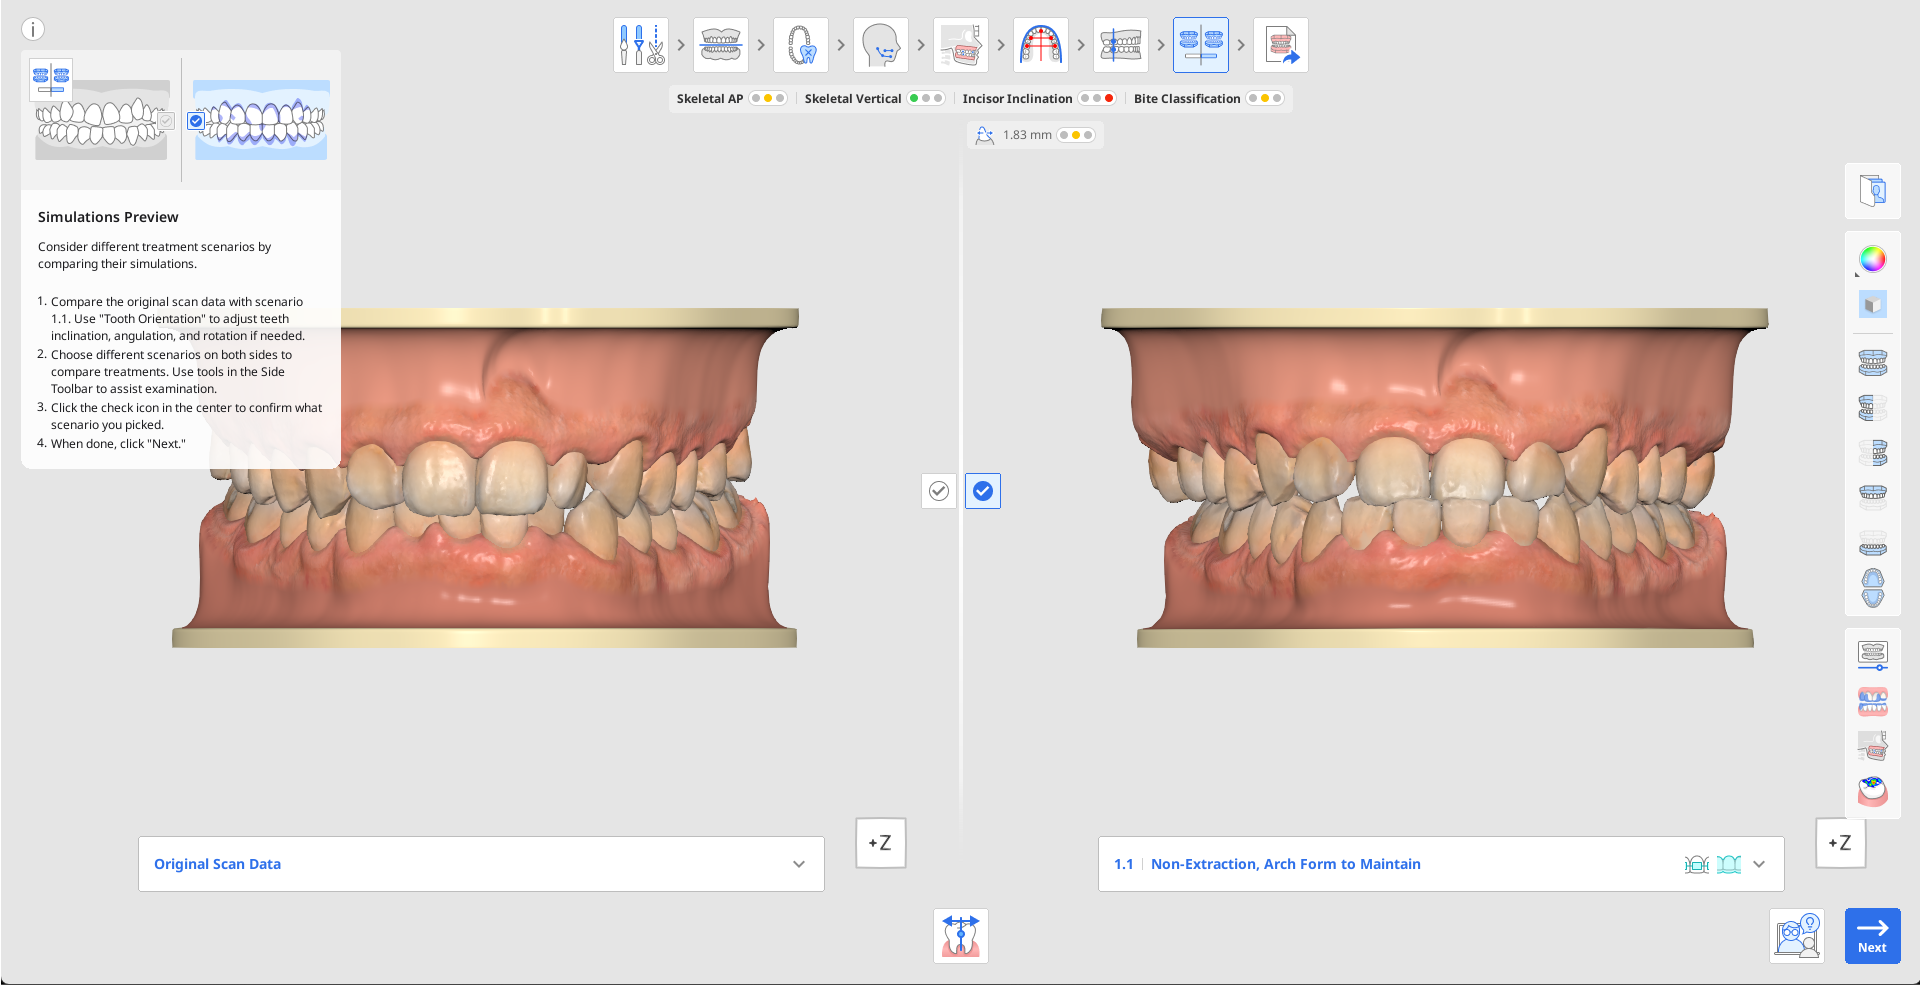
First, compare the original scan data and the simulation for scenario 1.1. Click the Info Box to hide it and use the View Cube or viewing tools in the Side Toolbar to help with the visual examination.
Check for any poor teeth alignment in this simulation. If any is present, adjust it using the “Tooth Orientation” tool, where each tooth can be individually reoriented. Read more on how to use this tool at the end of the current chapter.

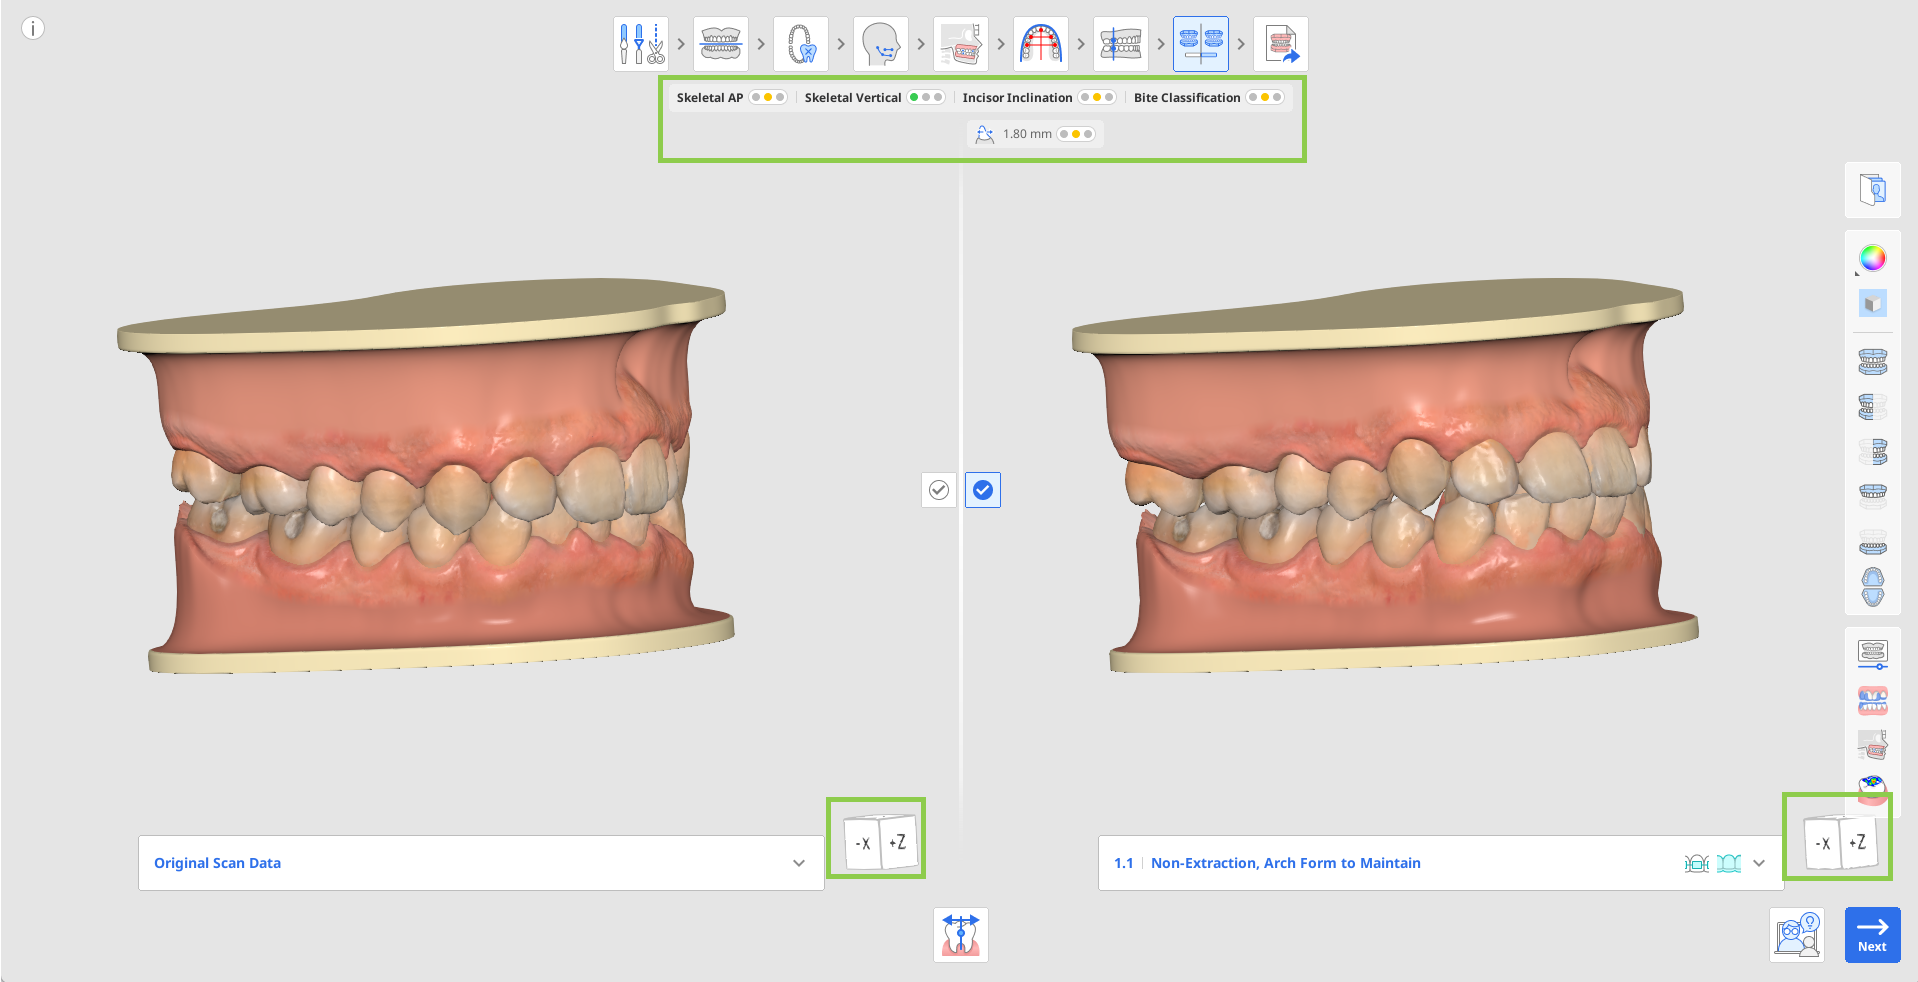
When comparing between scenarios, check the general summary for the case below the workflow steps. It presents overview of the treatment difficulty through traffic light colors. This summary provides a quick diagnostic summary of skeletal and dental relationships, showing categories like Skeletal AP, Vertical, Incisor Inclination, and Bite Classification.

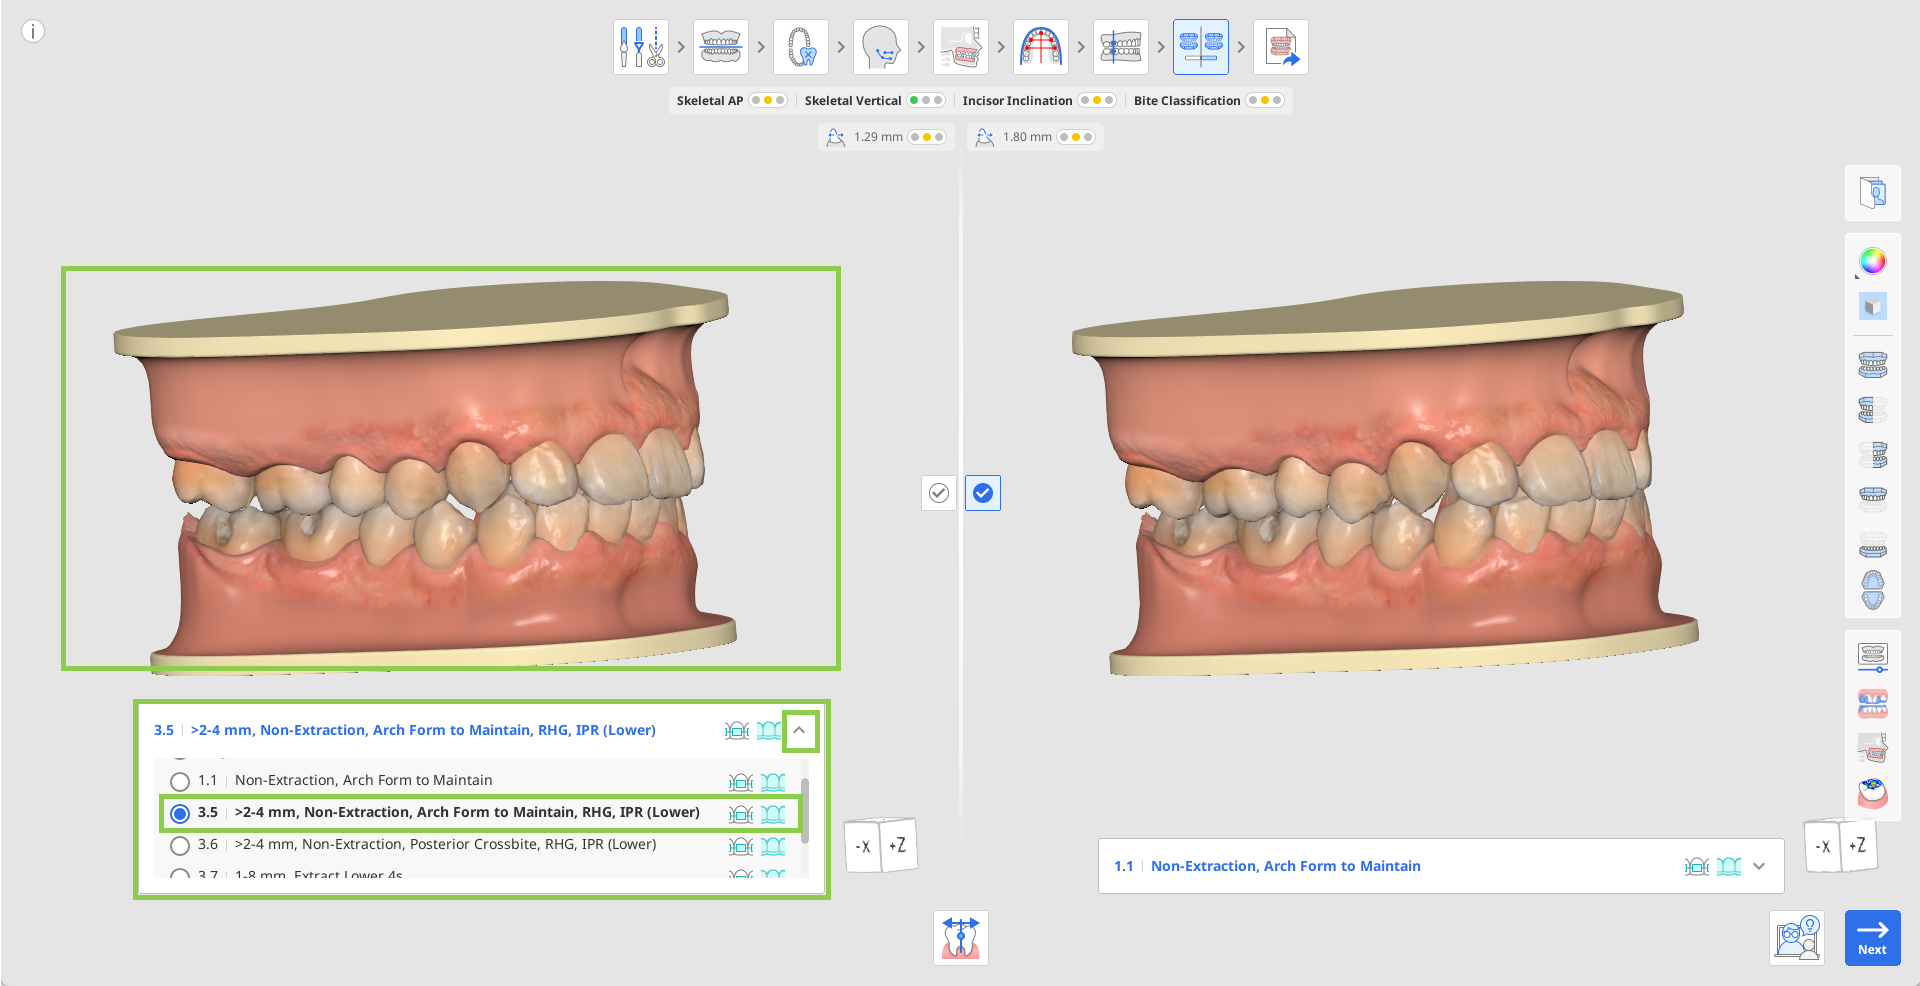
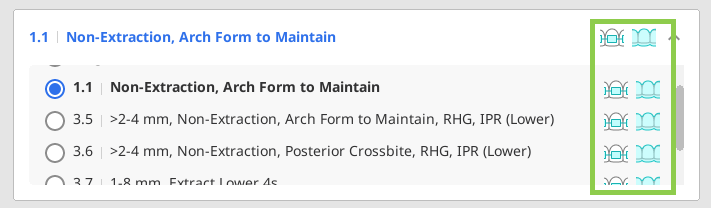
To explore additional treatment options for the current case, open the scenario list under the original scan data or simulation 1.1. Click on any of the available scenarios to preview its simulation. Each scenario in the list also indicates what type of appliance options are possible for treatment.
🔎Tip
Use “Orthodontic Photos” in the Side Toolbar to check if the suggested protrusion is plausible in the current patient by referring to other imported imaging (X-rays, intraoral and facial photos).
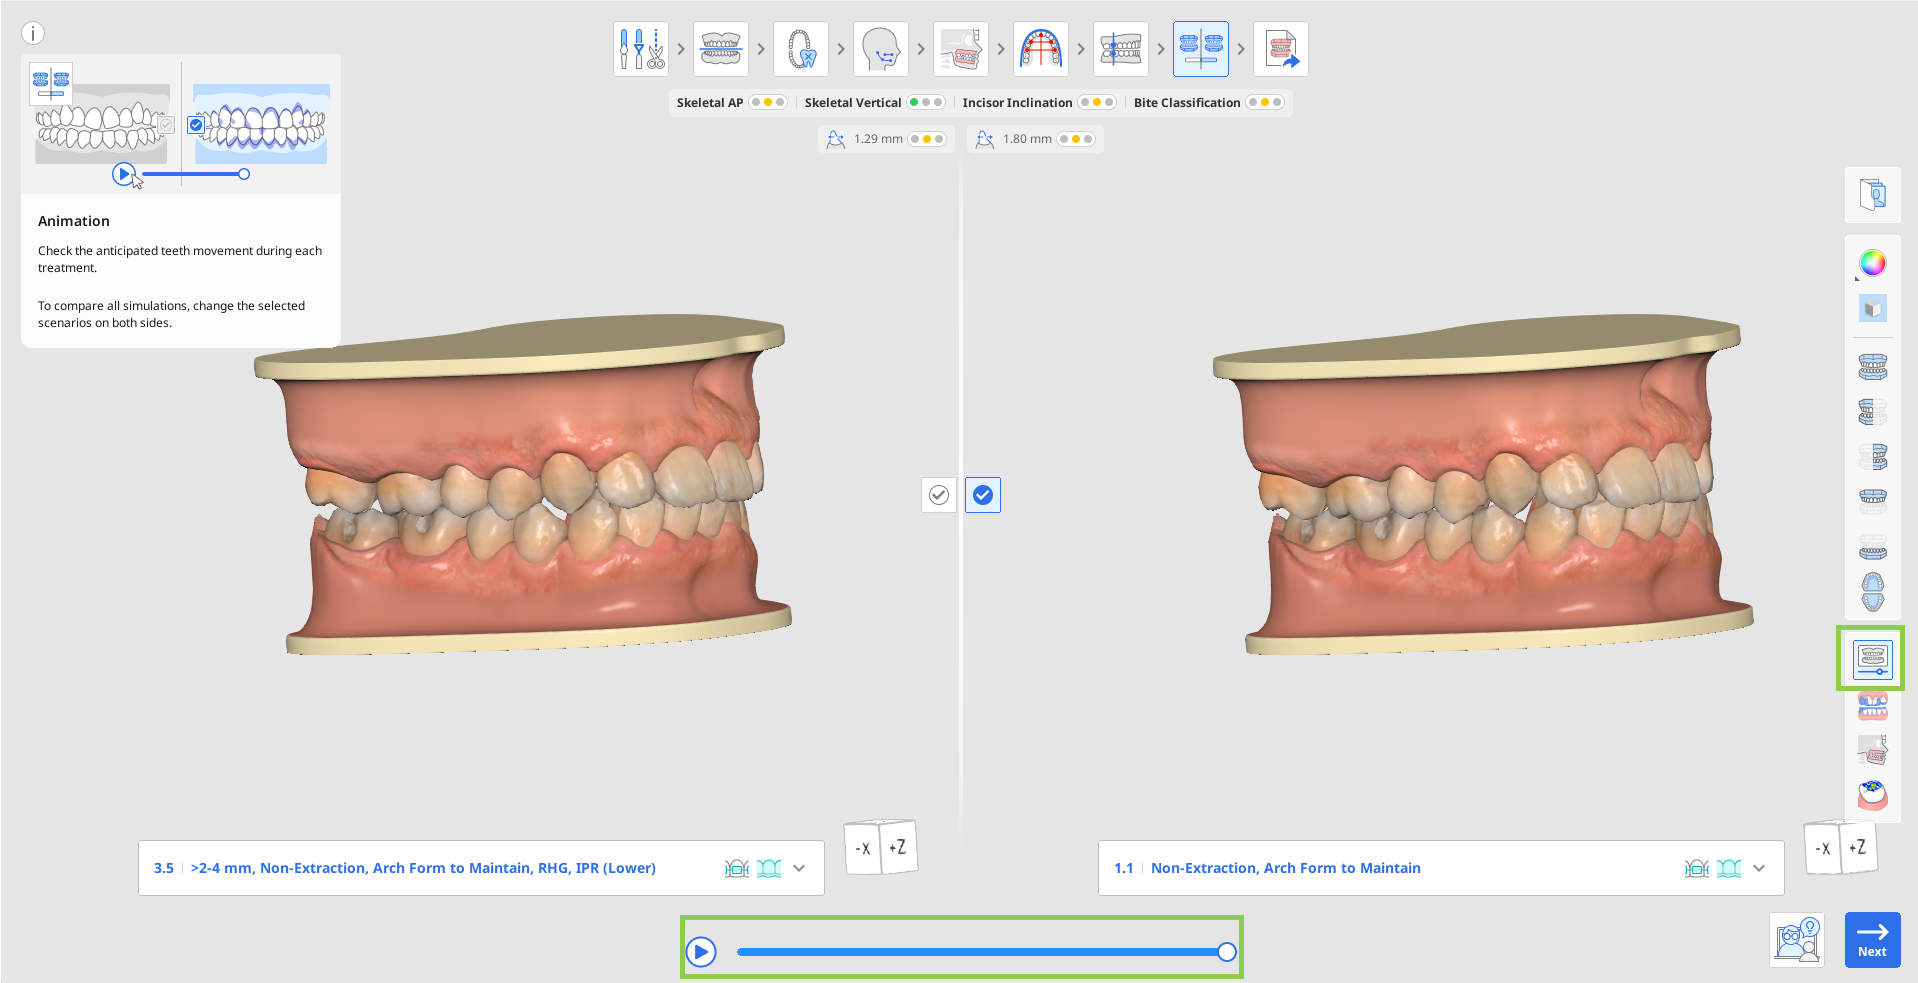
Change between scenarios on both sides of the screen to compare different treatment simulations side-by-side. Utilize the following tools in the Side Toolbar to assist you: Animation, Superimposition, Ceph Overlay Comparison, and Occlusal Relationship.

Use "Animation" to visualize the movement of teeth for the selected scenario.
Use "Superimposition" to assess the anticipated movement of each tooth from start to end, with the start point depicted in purple. Superimposed data is animated for your convenience.

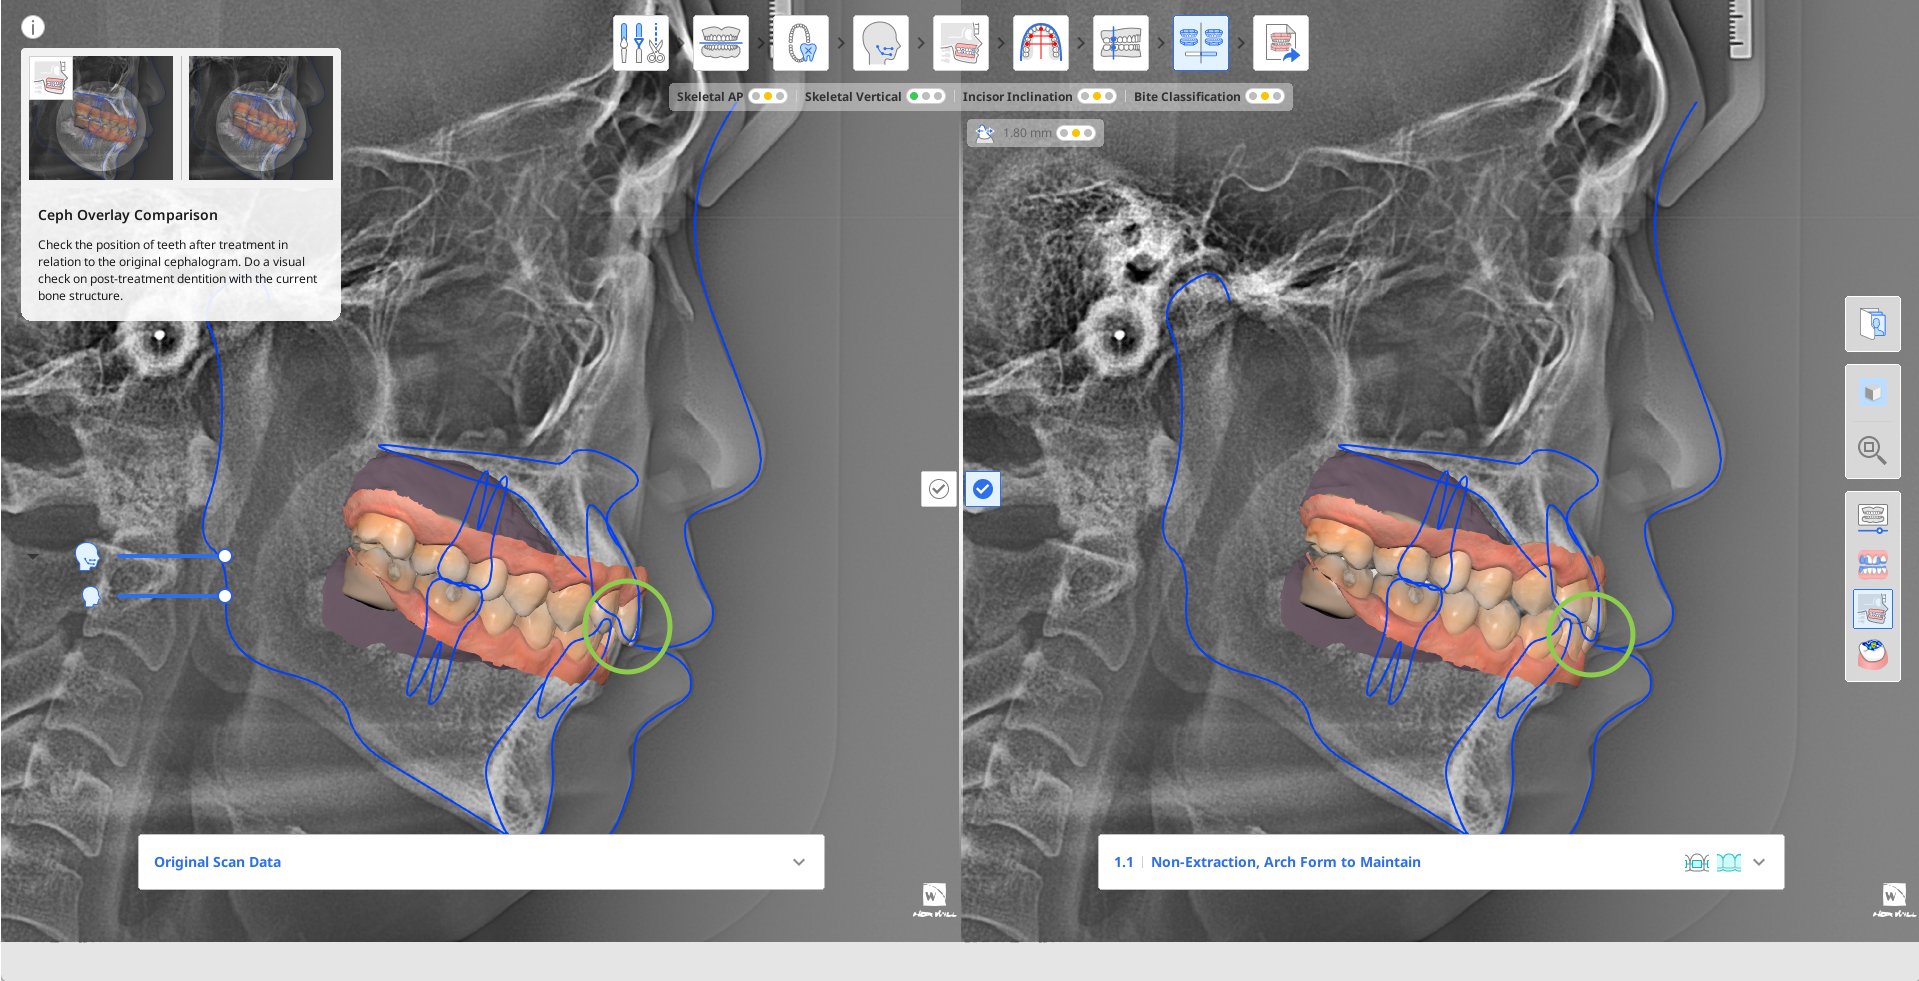
Use “Ceph Overlay Comparison” to see the post-treatment dentition in relation to the bone structure. For example, by examining the area highlighted in the green circle in the image on the right and comparing it to the image on the left, you can easily see the movement of the teeth.
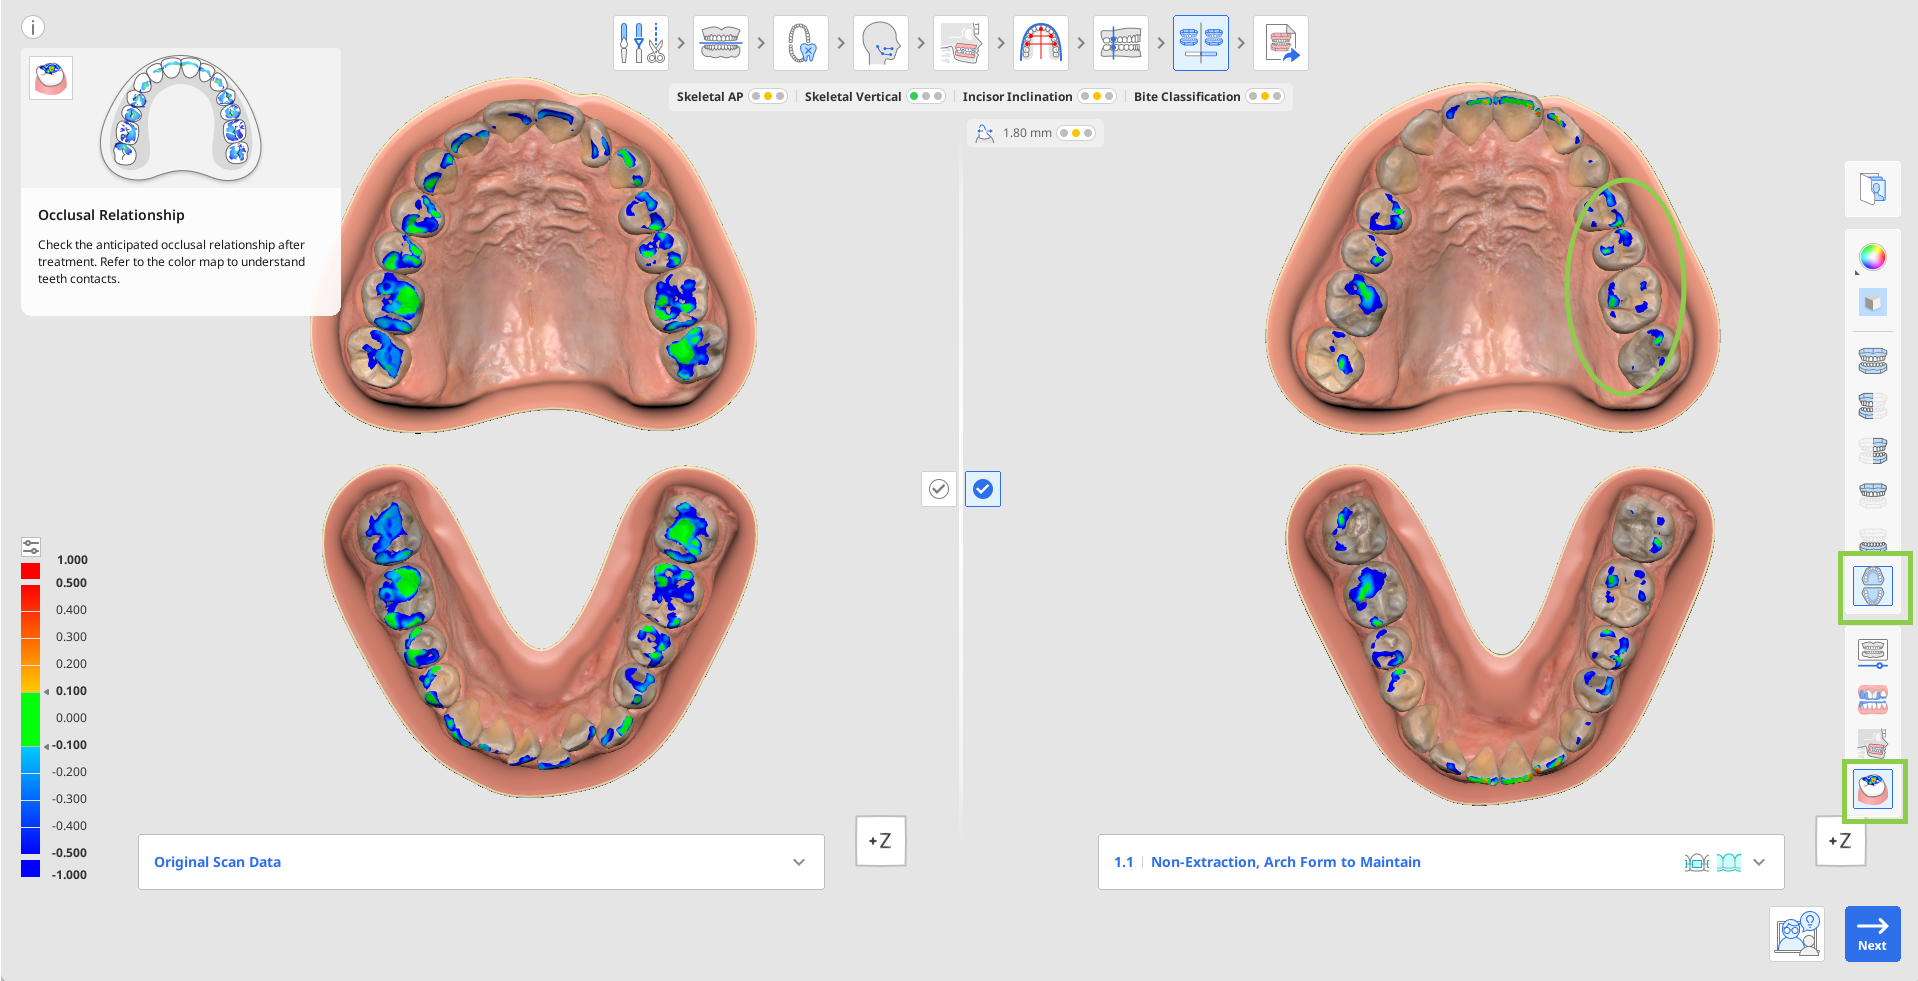
Use “Occlusal Relationship” to analyze the occlusal contact for the post-treatment dentition, referring to the color bar on the left for color interpretations.
Once you have made a decision on the final treatment, confirm choosing your preferred treatment scenario by clicking its check
 located in the center of the screen.
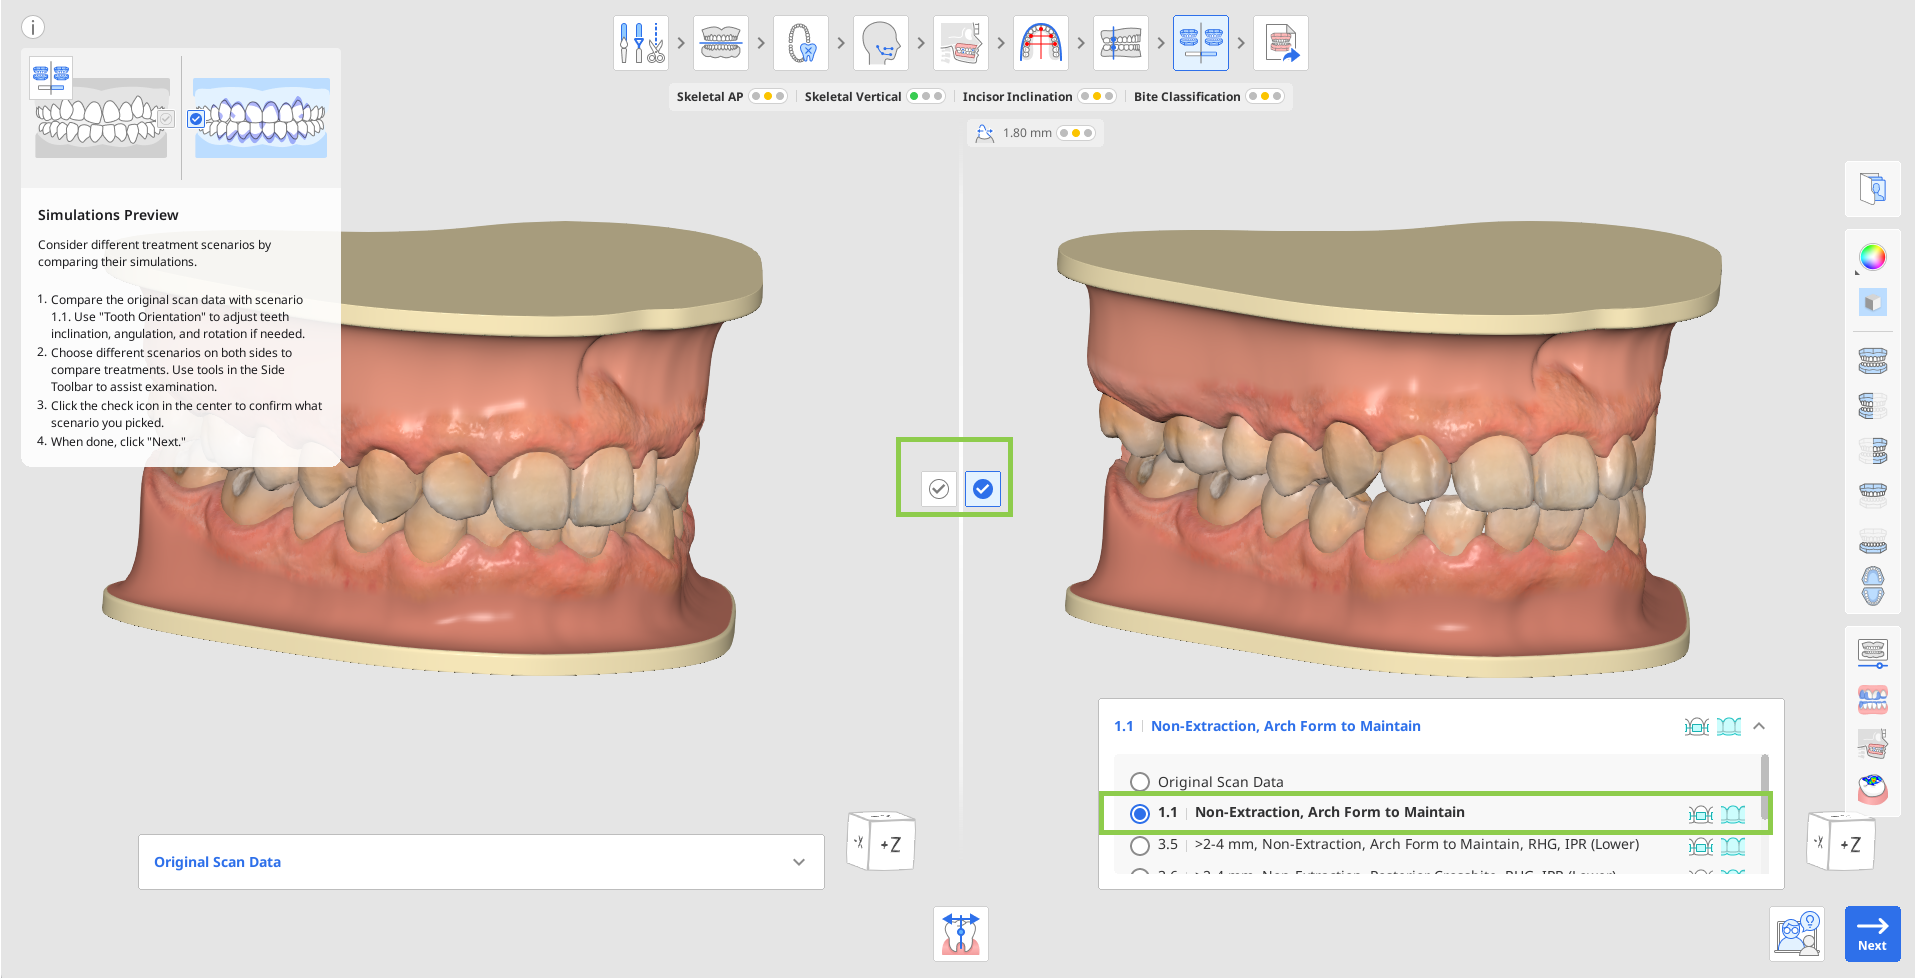
Applicable treatment types (aligner, bracket) for each scenario are shown next to the scenario title in the list.
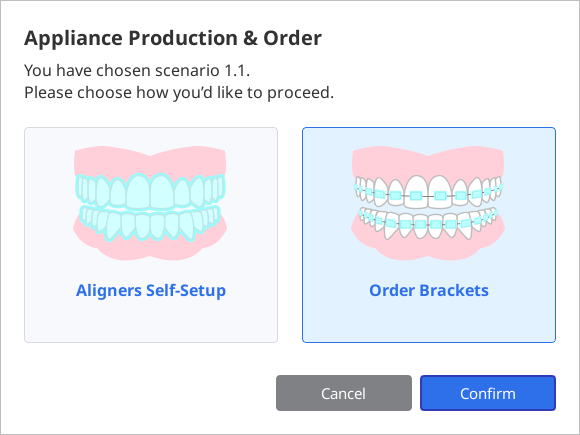
Click “Next” to go to the final step. If your chosen scenario can be treated using both aligners and brackets, you will be asked to choose one before proceeding to the final step. Note that you will not be able to move to the next step if the original scan data is marked as chosen.
How to Use Tooth Orientation
Tooth Orientation is used to ensure that the software is accurately identifying the orientation of each tooth in the following planes:
Amount and direction of rotation relative to the chosen arch form to be maintained.
Degree of angulation or tip from the occlusal table.
Degree of inclination or torque from the occlusal table.
Errors in tooth orientation detection can be caused by misshapen teeth, teeth with worn or uneven edges, blocked-out or crowded teeth, poor scan quality, or other complications. These errors can be detected when reviewing simulation 1.1 in comparison to the original scan data by viewing any tooth that appears to not have been leveled, aligned, or out of position in some direction. This tool displays the orientation using simulation 1.1, which is after all teeth have been leveled and aligned to the chosen arch form.
Changes made to orientation are applied to how the software identifies the current position of each tooth, and thus, changes will be applied to all scenarios automatically.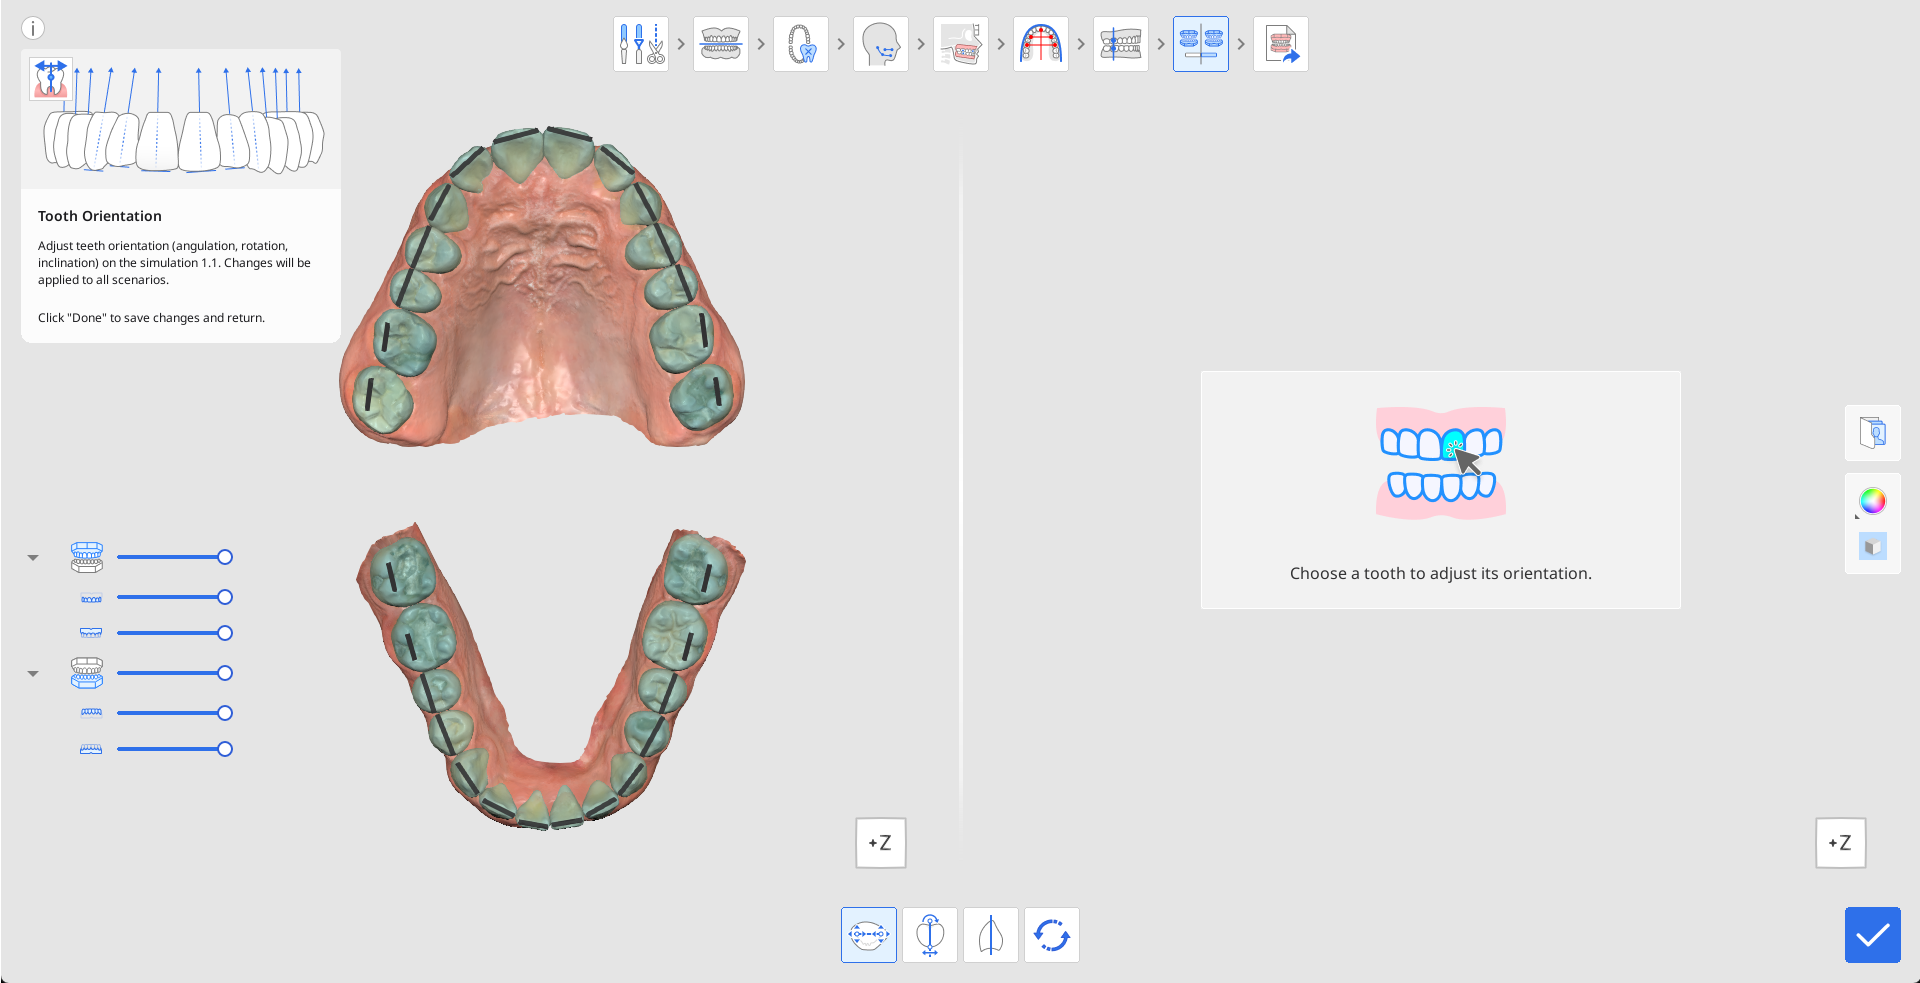
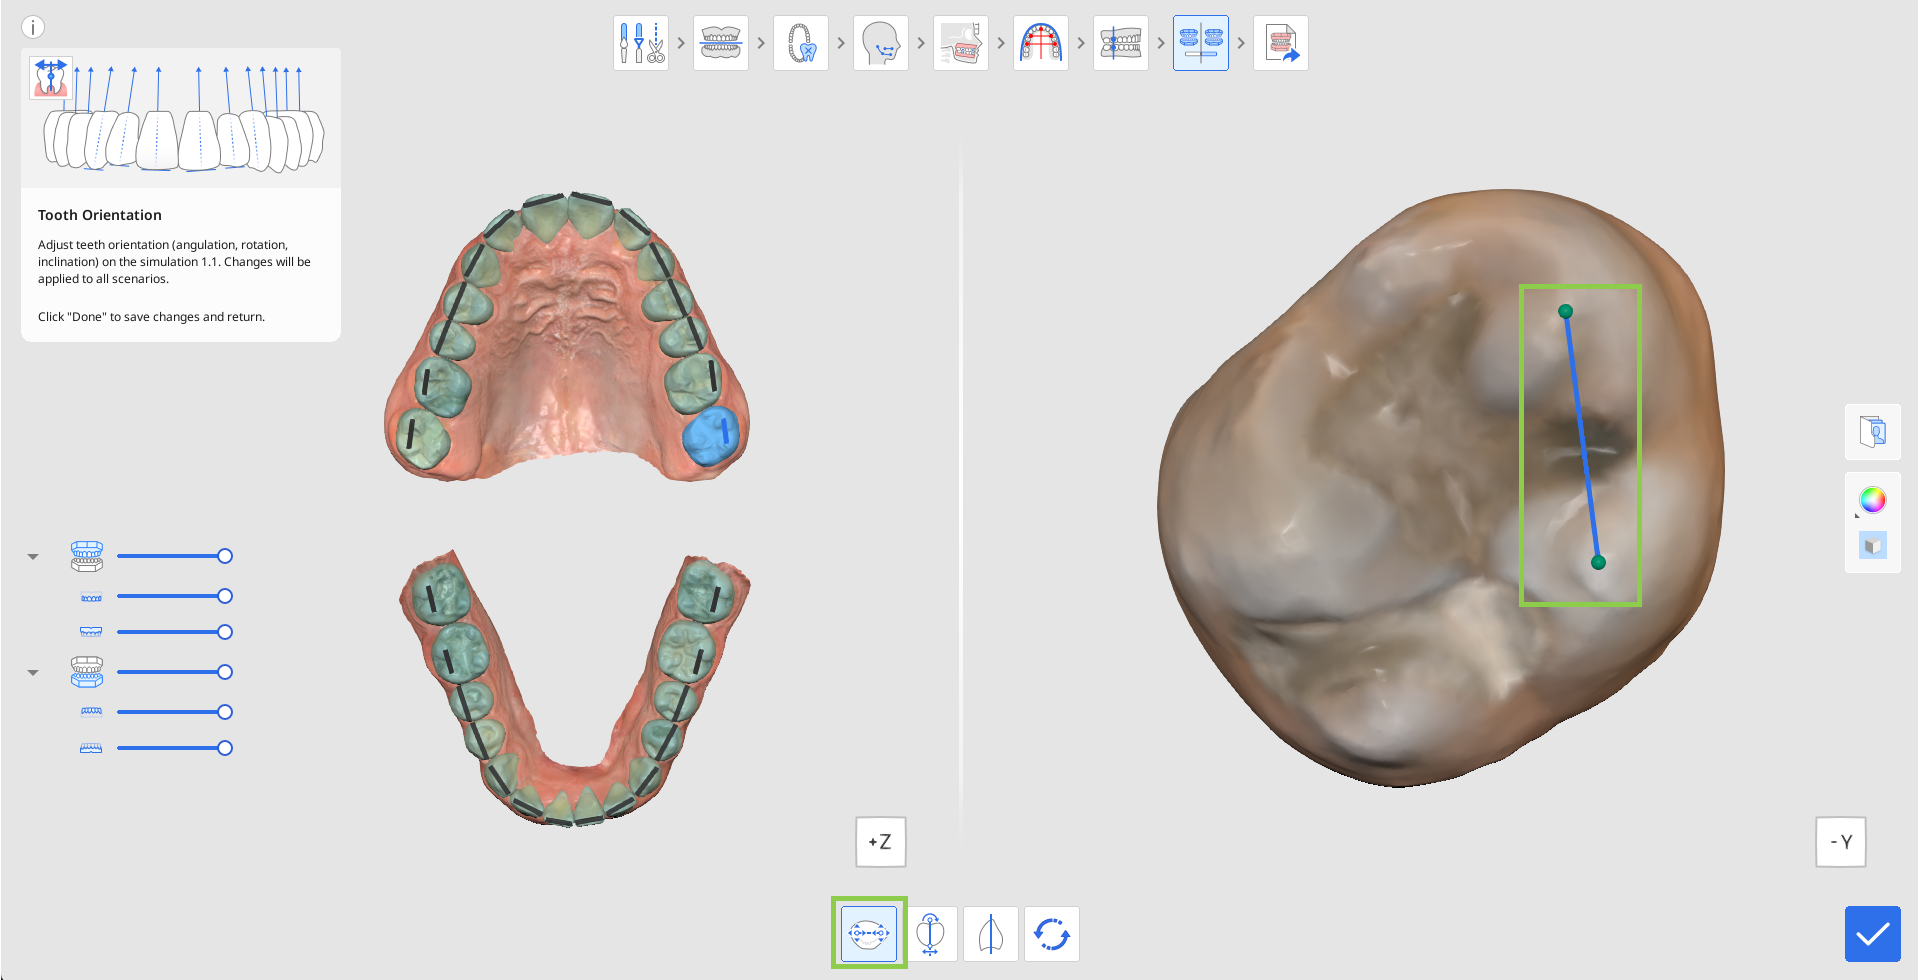
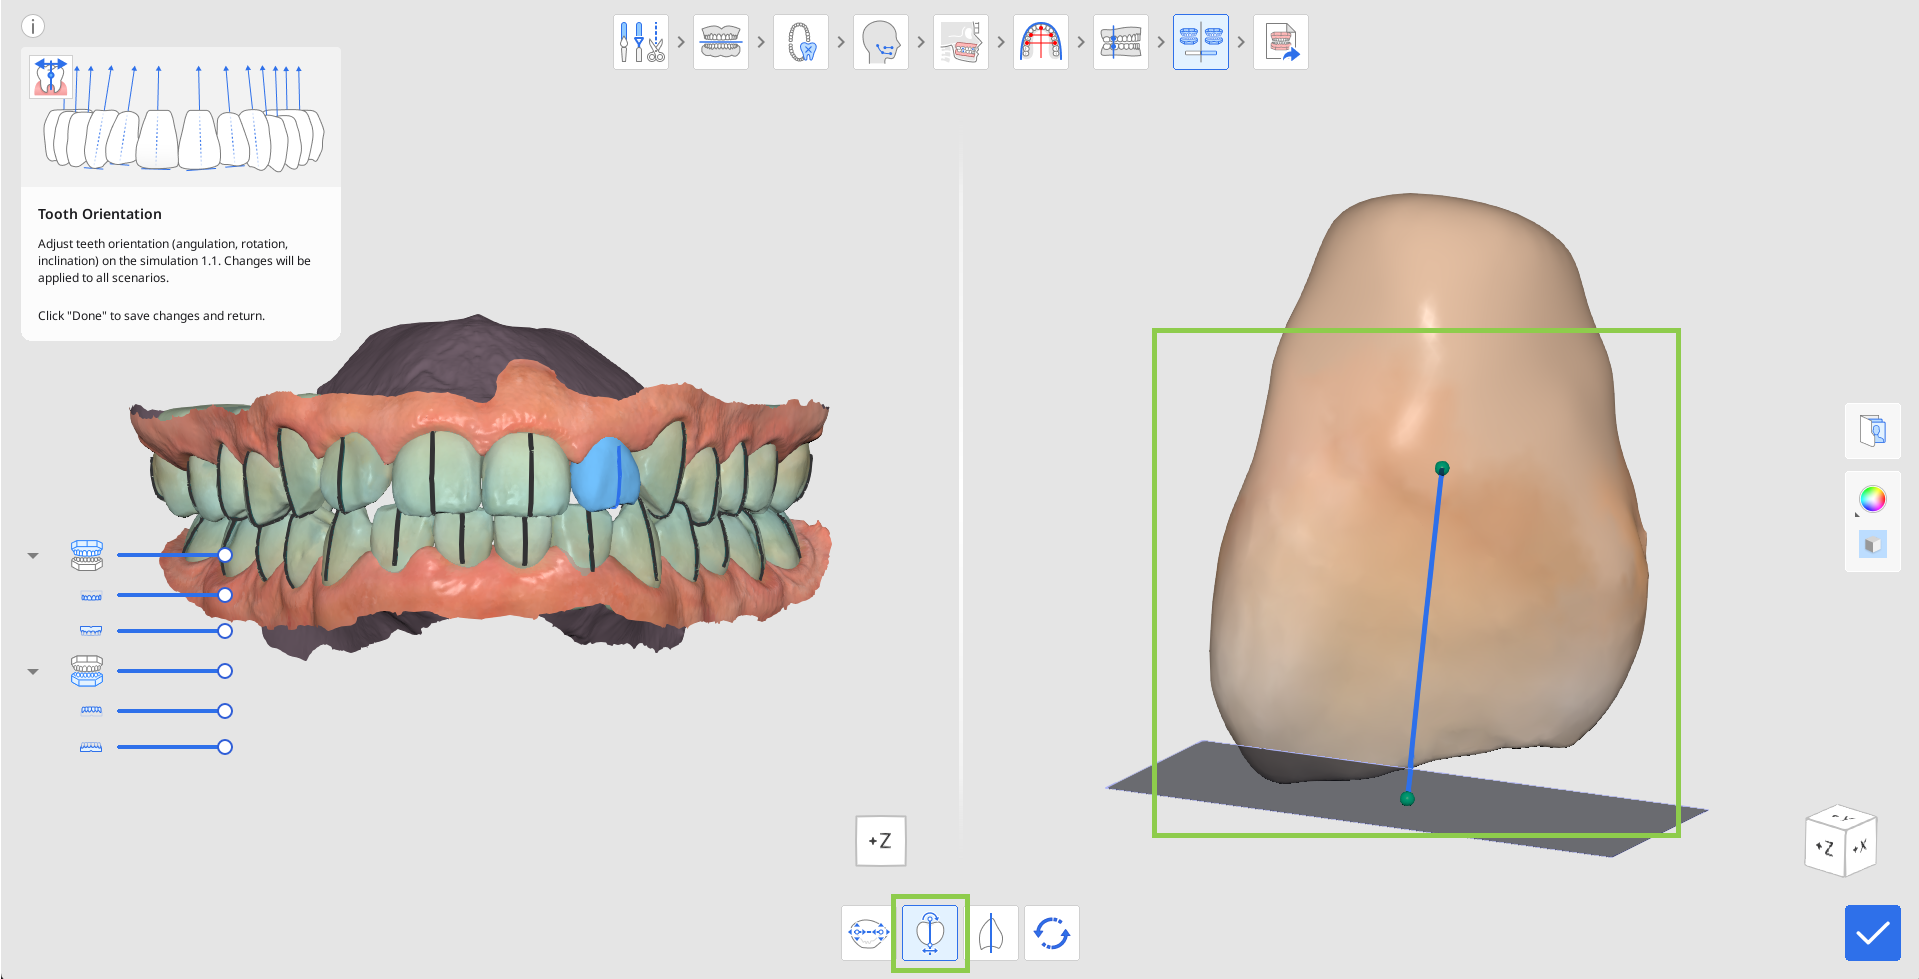
Click on any desired tooth to start adjusting its orientation; by default, the “Rotation” tool is activated first. The chosen tooth will be shown on the right, with the rotation defined by the blue line with green control points on each end. To adjust the rotation, drag by one of the points so that the blue line accurately identifies your perceived rotation of each tooth.
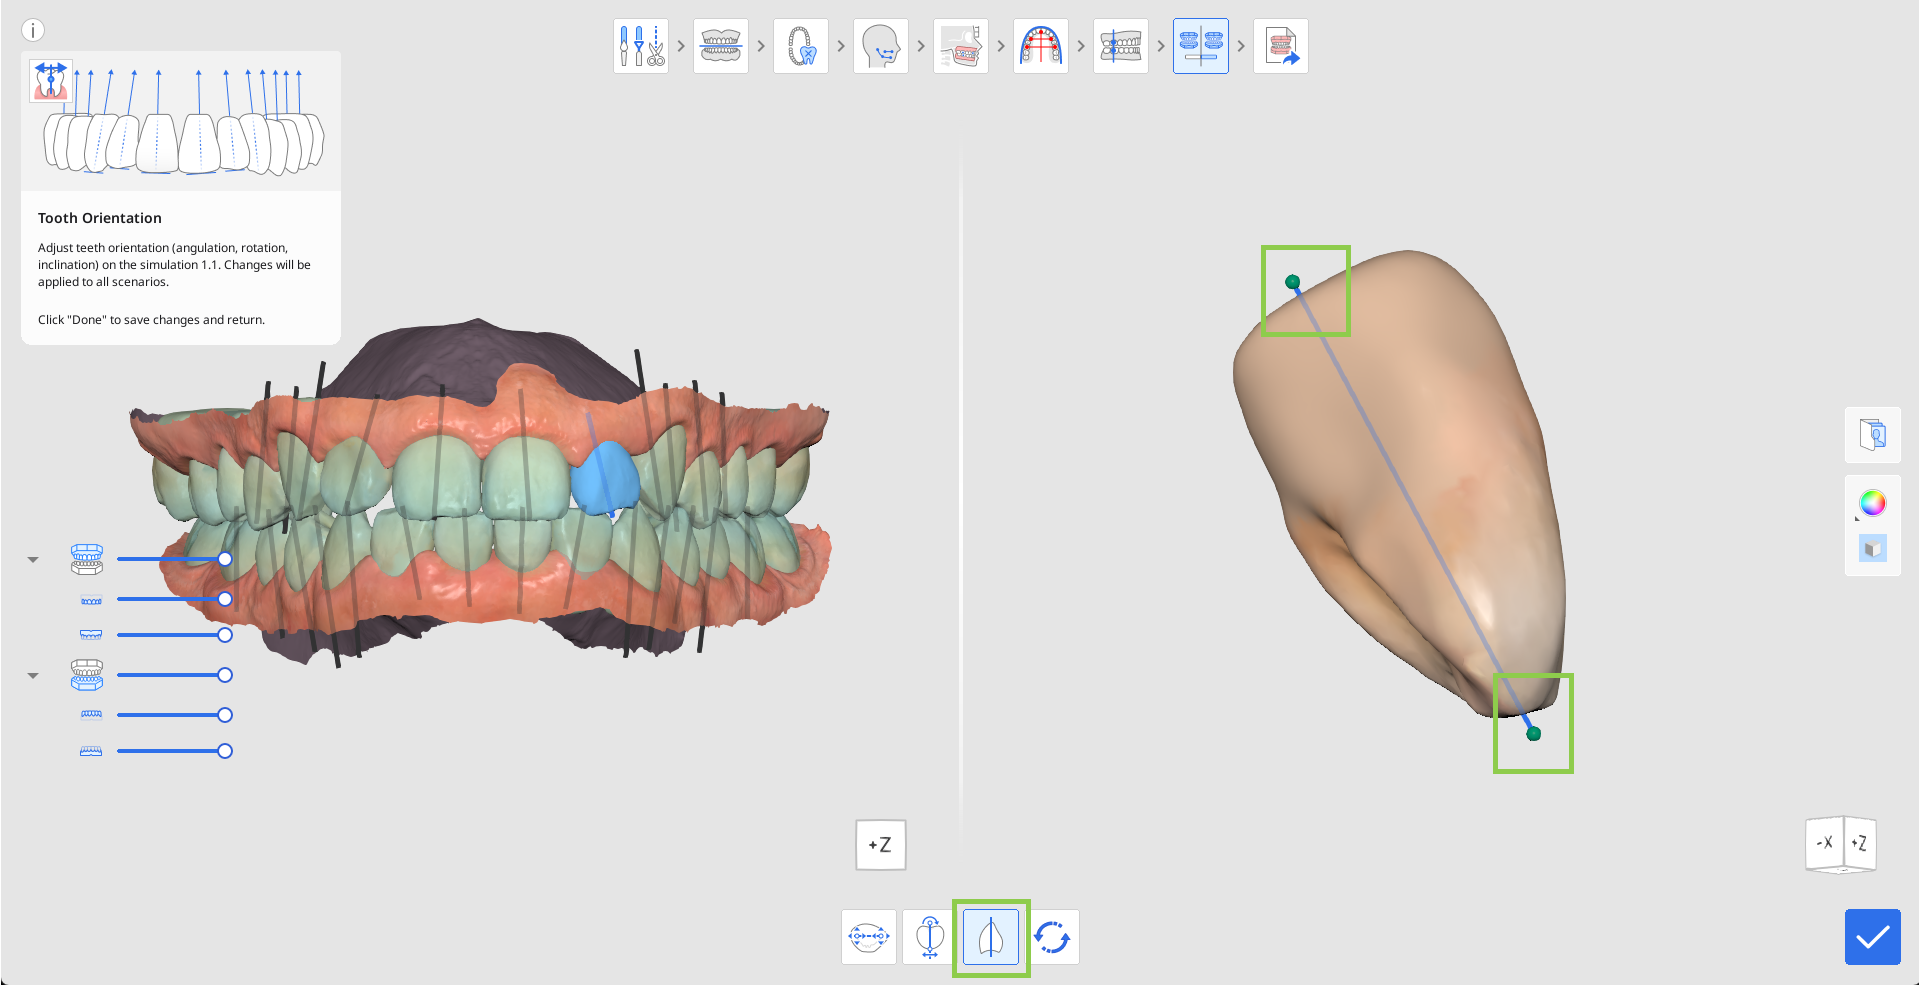
To edit the degree of angulation or tip from the occlusal table, click "Angulation (Tip)." Then, choose a tooth and start adjusting by dragging the control points to change positioning. The occlusal plane is displayed at the incisal edge of the blue line for your reference.
To edit the degree of inclination or torque from the occlusal table, click "Inclination (Torque)." Then, choose a tooth and start adjusting by dragging the control points.
If you want to reset back to the initially identified tooth orientation, click “Reset” in the toolbox below.

Click “Done” in the bottom right corner to return to the simulations preview and comparison.
