Overview of Case Reports
After running the application from Medit Link, the user is presented with an overview window of all reports associated with the current case - both finalized (or DONE) and not.
🔎Note
It may take a few minutes for the program to load, as the scan data is being converted into a web-compatible format.
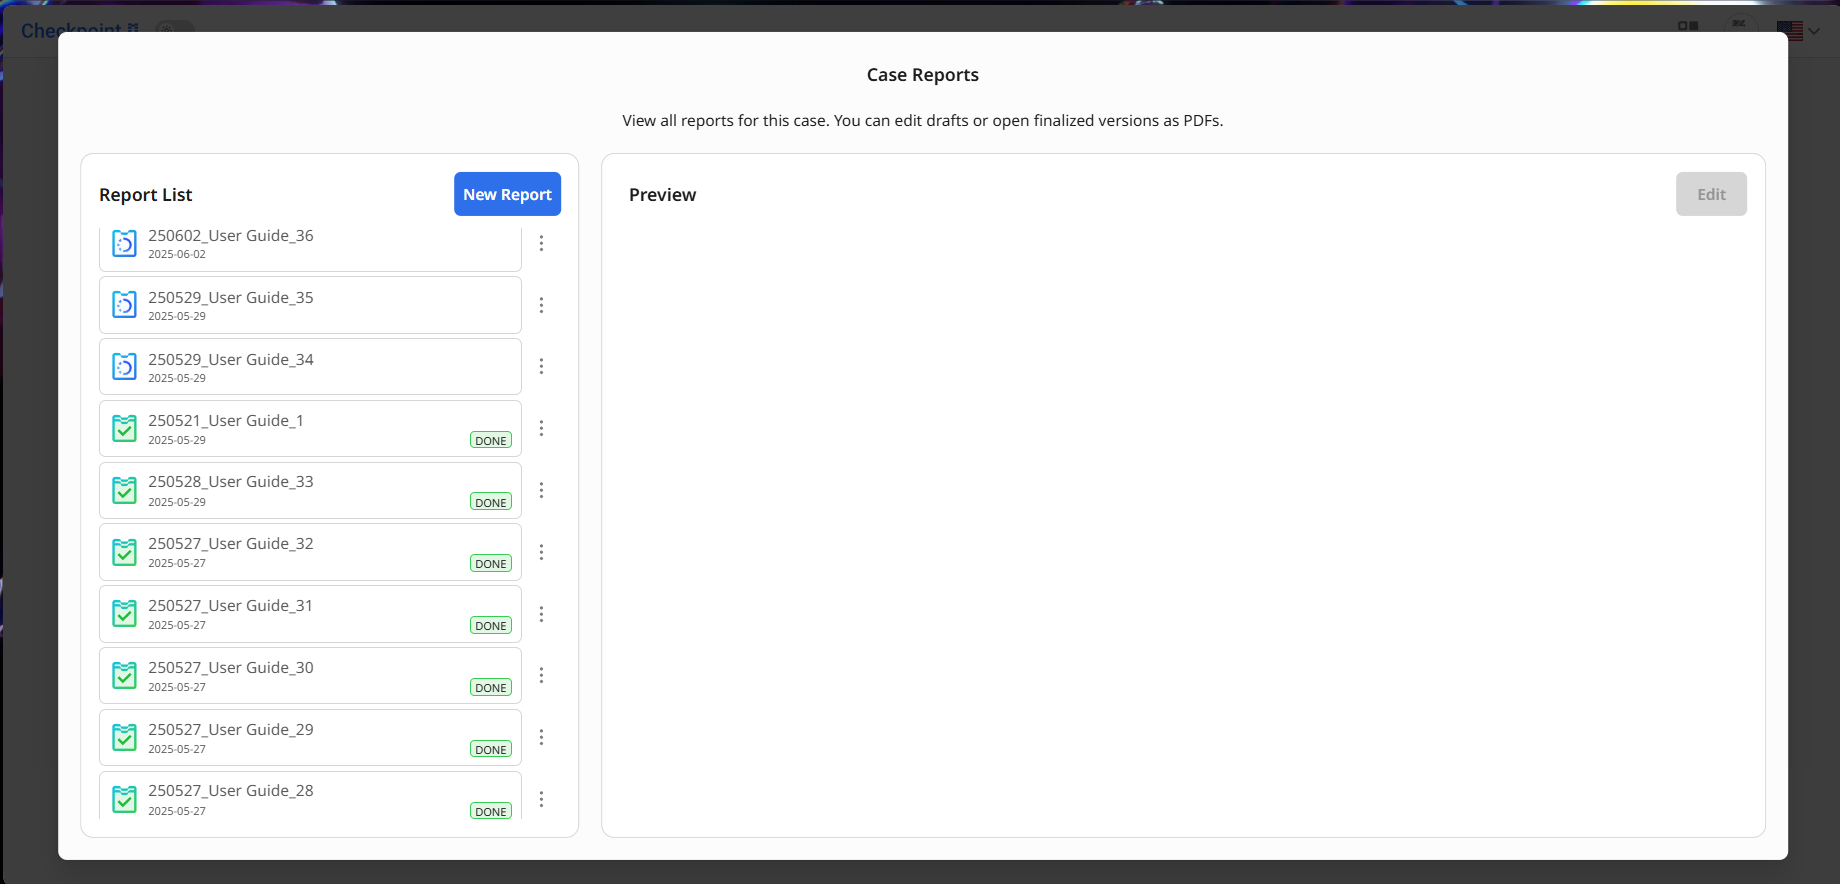
The report names in the list are automatically generated based on their creation date, case name, and a consecutive number. You can preview and manage your case reports from this window.
To delete a report: Click the menu button next to the report in the list.
To preview a report: Select it from the list. The content of a draft report will appear on the right side. You can continue editing it by clicking the “Edit” button.
If the report has been finalized, it will open as a completed PDF file, which you can share with the patient or print. Finalized reports are not editable.
To create a new report: Click the “New Report” button.
Creating or Editing Reports
A report is created by listing captures of areas of concern in the Report Panel on the left side of the screen. Up to 50 captures can be added to a single report.
Start by reviewing your scan data for any areas that may require treatment. You can use the data control buttons in the Toolbox at the bottom of the screen, or navigate using the mouse (read on latter in Data Management chapter). For added convenience, you can also manage data visibility in the Data Tree panel on the right. The Report Panel on the right is also collapsable if needed.
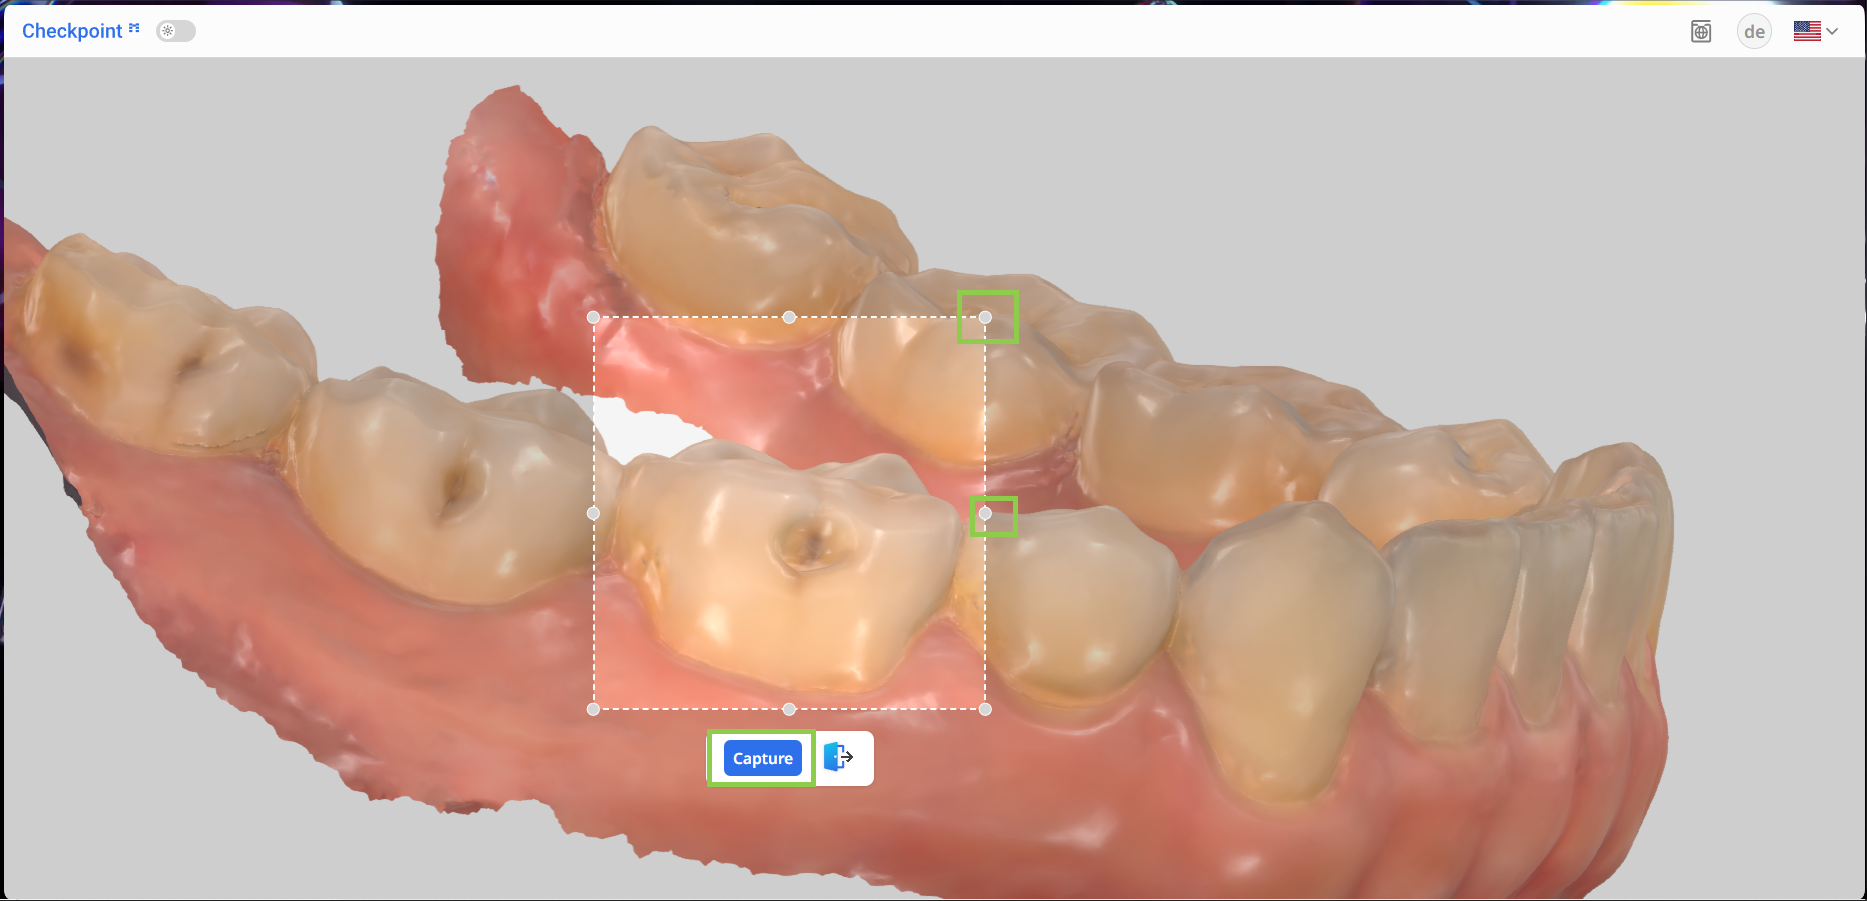
Once you've identified an area that should be included in the report, select the “Capture” tool..png)
Click and drag the control points along the border to adjust the size of the capture area. When you're satisfied, click the “Capture” button to confirm it.
The captured image will appear in the Report Panel on the left. Next, you’ll need to fill out the associated form. Several fields are obligatory, including the tooth number (on the right), diagnosis, and treatment. If you select ‘Other’ for either diagnosis or treatment, a custom entry will be required.
.png)
The form also includes optional fields where you can enter the estimated cost of treatment, the treatment date, and any additional memos.
.png)
Note that if any capture is missing required information, the “Finalize” button will be disabled. Be sure to scroll through the Report Panel to confirm that all forms have been completed; look for captures requiring editing.
.png)
Use the “Show Visual Cues” button to highlight areas (mark them in blue) of the scan data that may need closer review.
.png)
To review which parts of the scan data are included in the report, use the “Show Reported Areas” button. It visually highlights all reported areas on the scan, making it easier to perform a final check before finalizing the report.
.png)
When done, click “Finalize.“
.png)
Finalizing Reports
Once the “Finalize” button is clicked, a preview window appears, allowing the user to verify the report content and finalize its creation before sharing or exporting it.
Scroll over the imaging to check the report content.

Provide all mandatory details for the report, including the report name, date, doctor’s name, and signature. The system generates a default report name, but you may modify it.
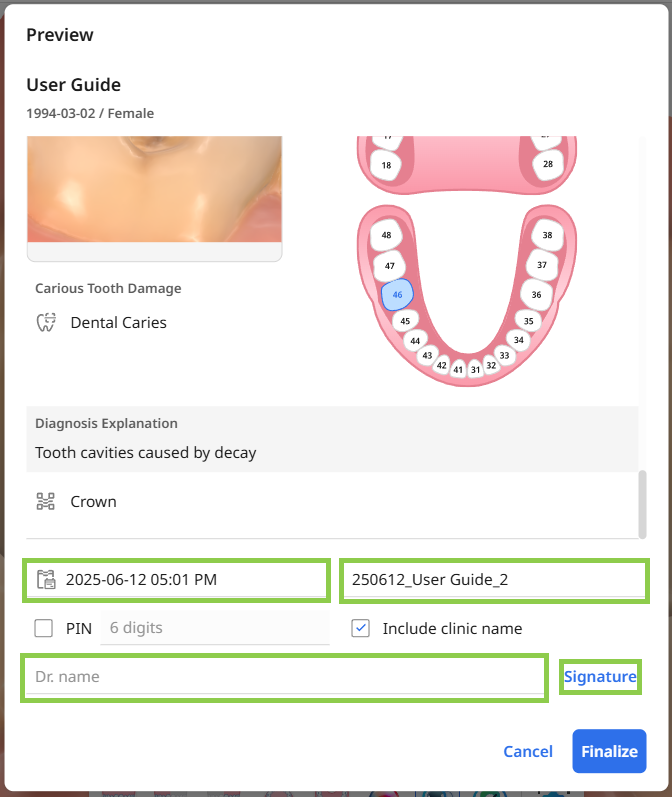
Optionally, you may secure the report with a PIN, which the patient must enter to view its contents. The clinic name is automatically included in the finalized report.
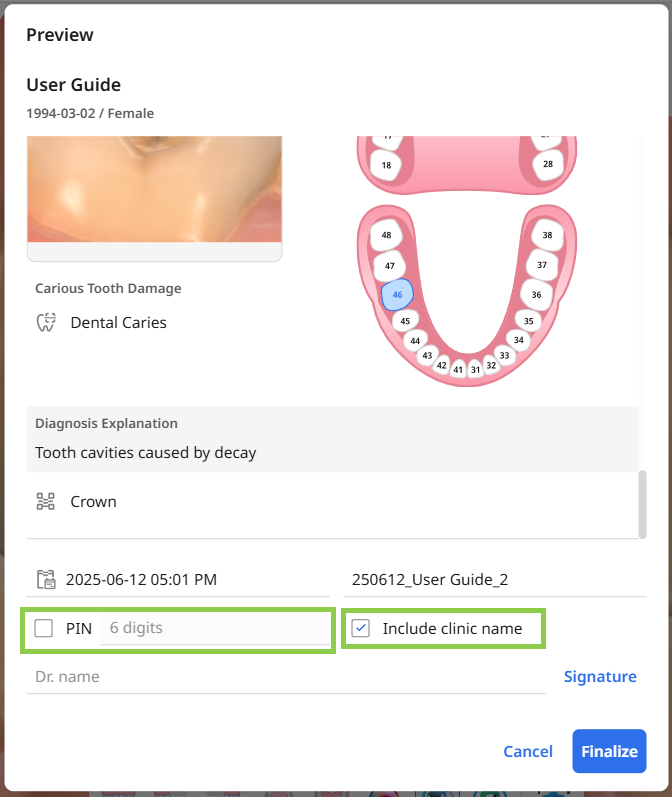
When all sections are ready, confirm finalizing the report by clicking “Finalize.“
⚠️Caution
The final PDF may take several minutes to generate. Make sure to keep the webpage open until the file has been successfully created.
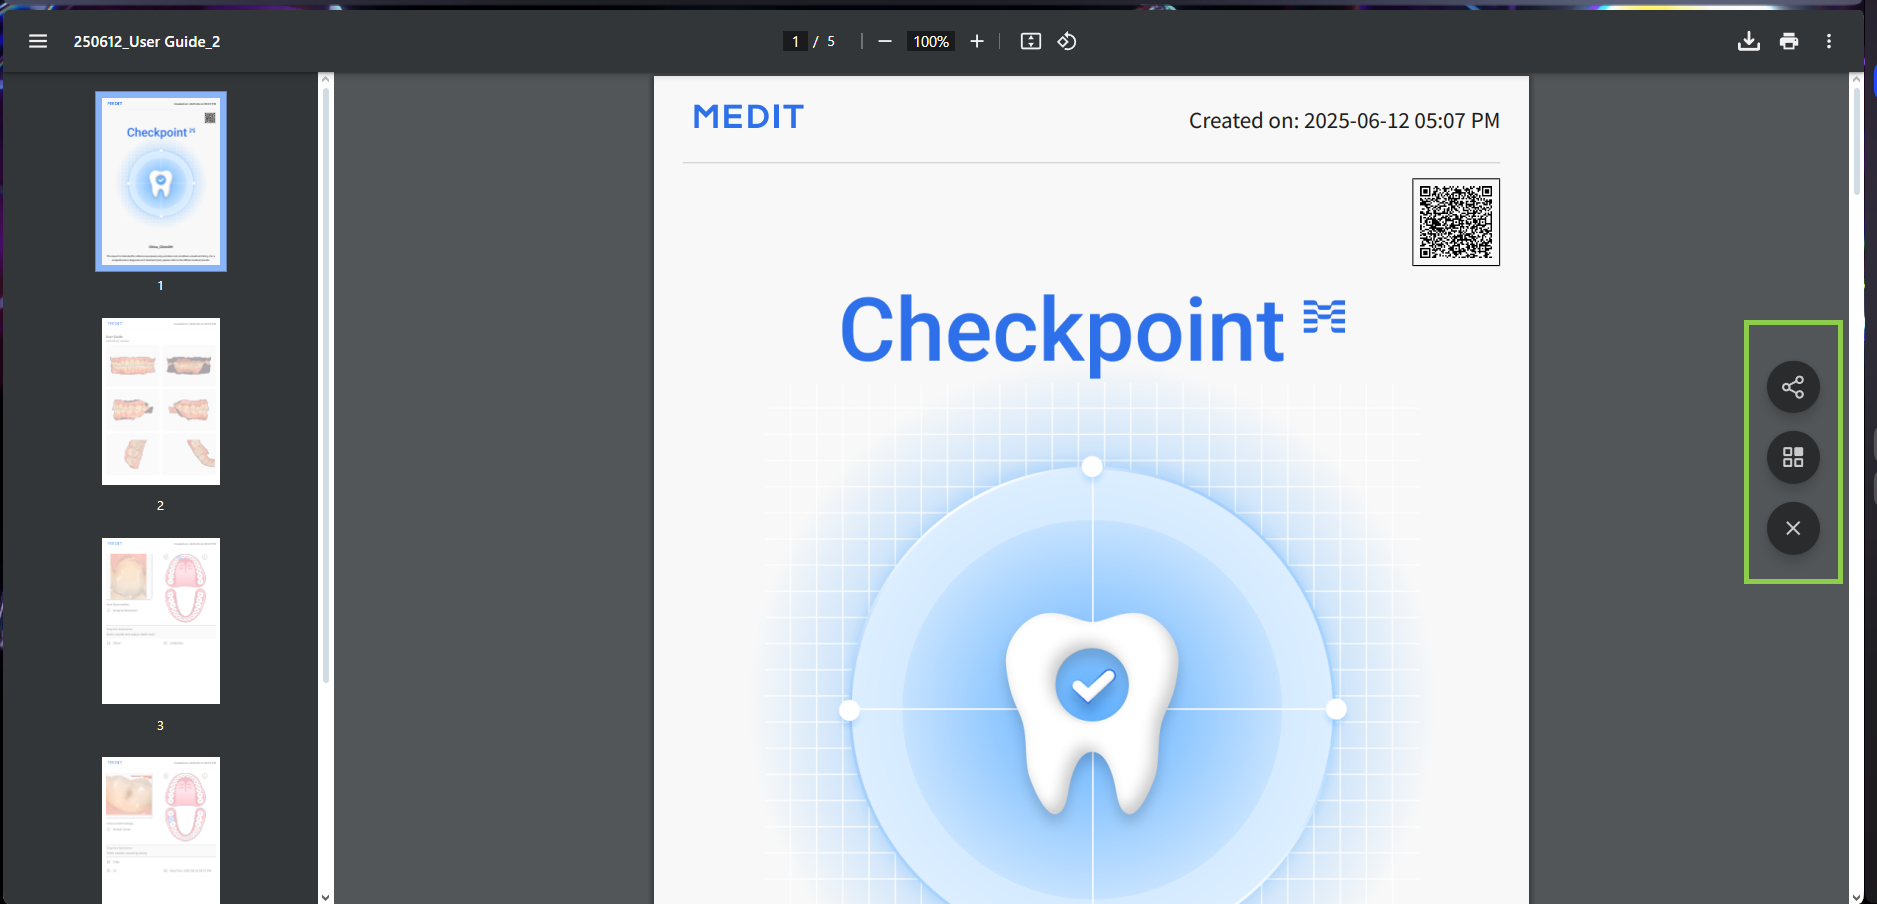
Sharing Finalized Reports
The finalized report will open automatically as a PDF in your browser. You can share it with the patient using a QR code or email. Once you're done, feel free to close the browser or application tab— the PDF is automatically saved to the case.
⚠️Caution
The final report is intended for reference purposes only and does not constitute a medical history. For a comprehensive diagnosis and treatment plan, please refer to the official medical records.