You can use Medit Margin Lines to create new margins automatically or manually and to edit the existing ones. The app can also generate a margin for the prepared tooth registered in the Medit Link form automatically upon entering the app.
🔎Note
You can't add or change margin lines for cases that have already been ordered (cases with an order ID). To use that case in the app, clone it.
Auto Creation
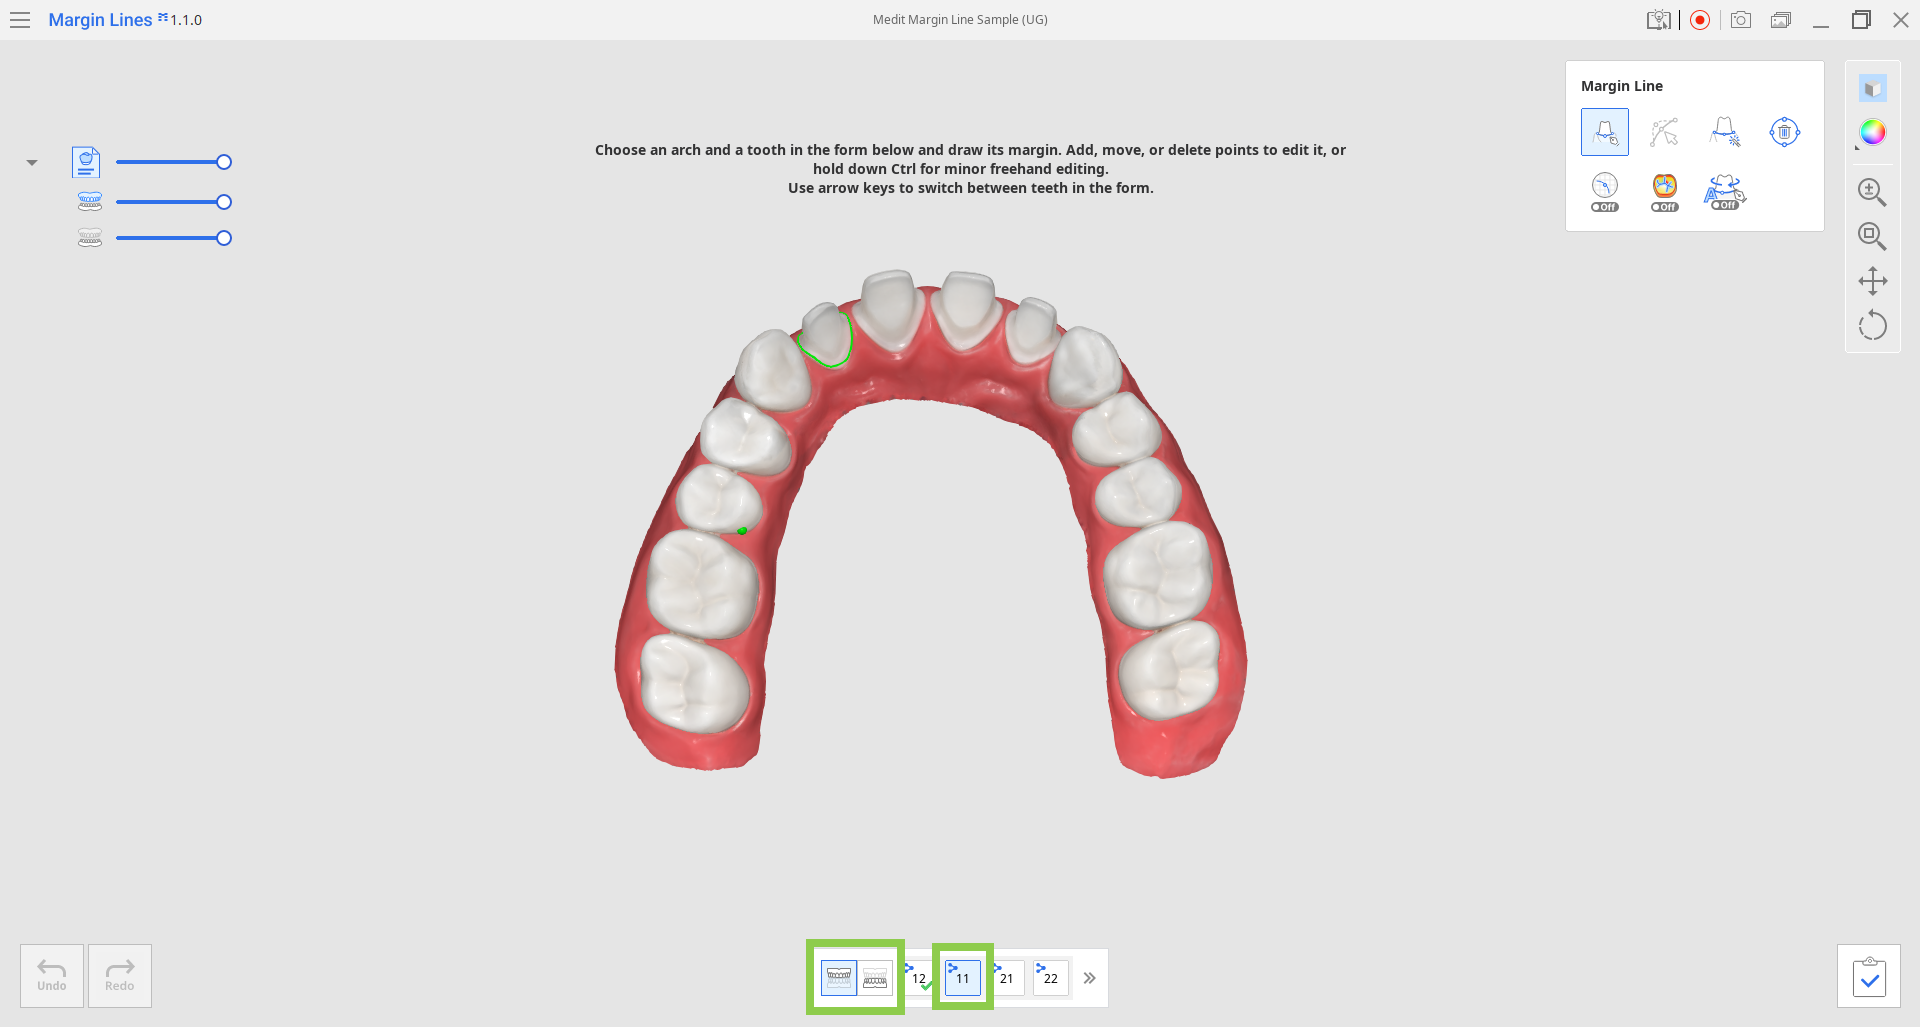
- After opening the app, select your target arch in the Teeth Form below the data.
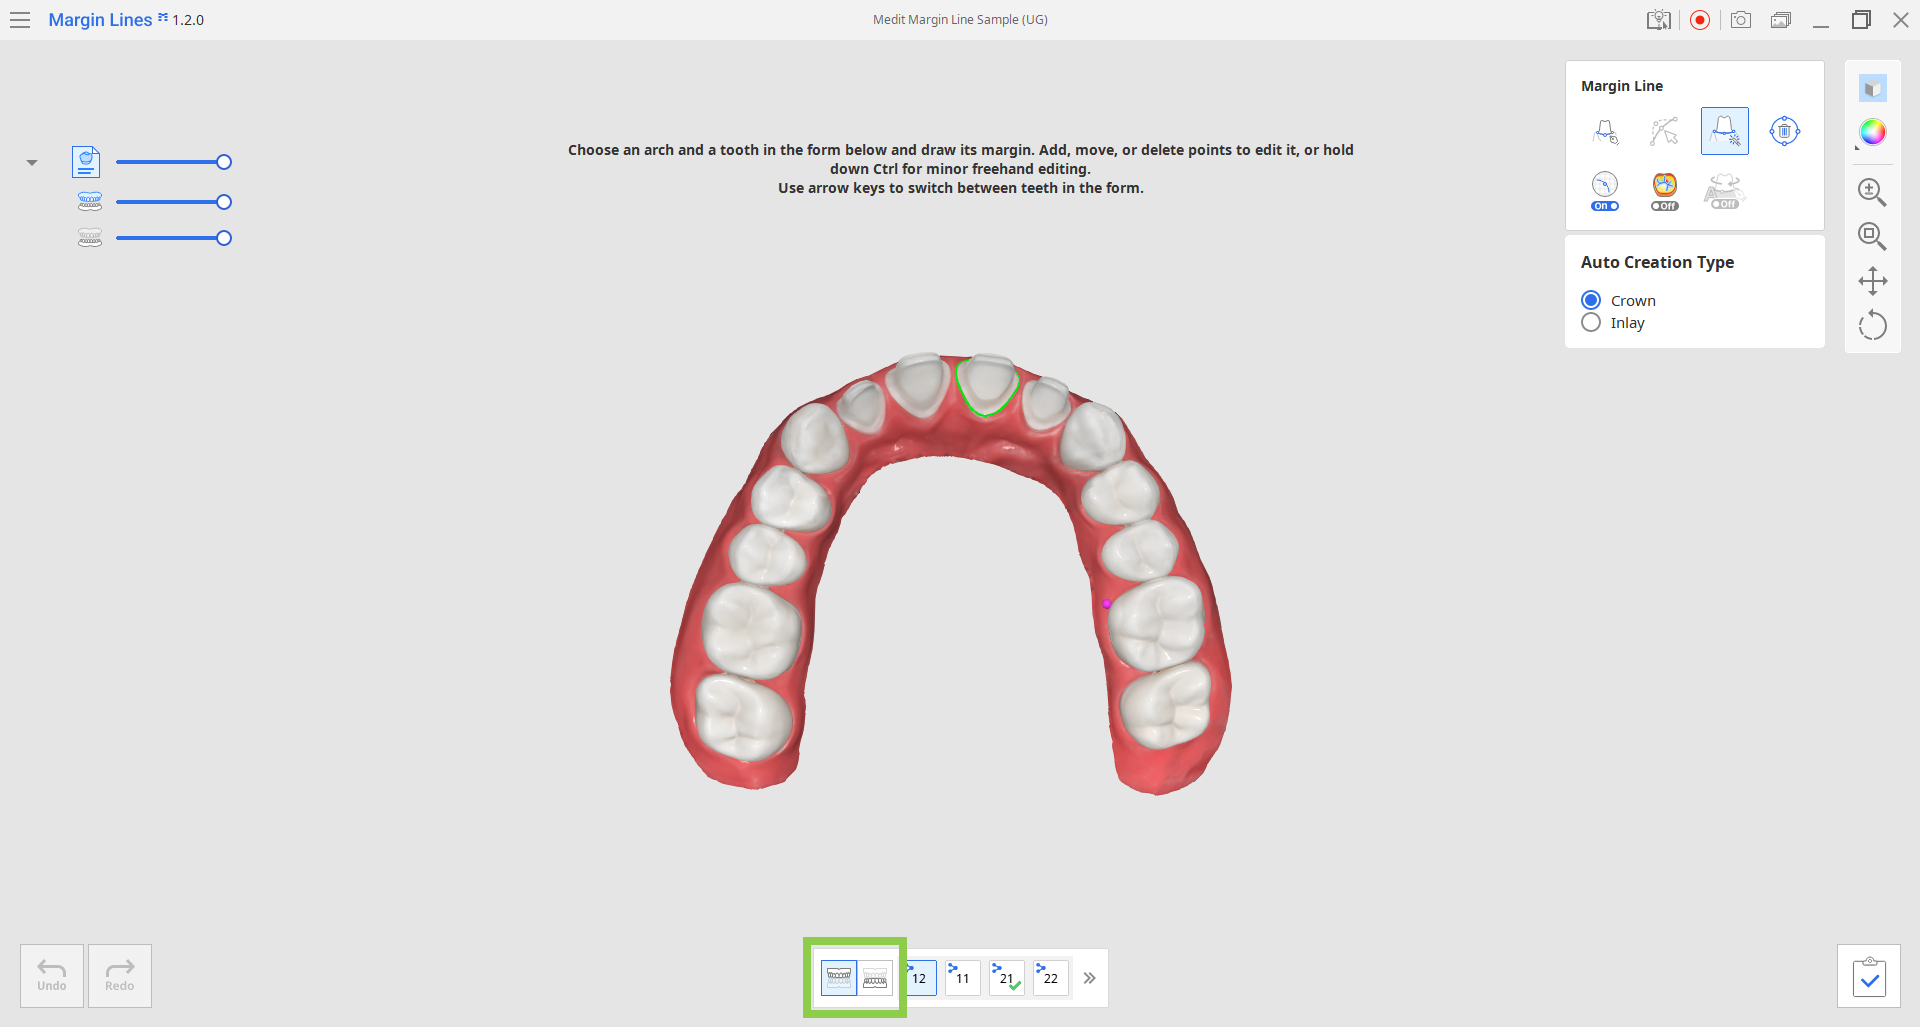
- Choose a tooth number for which you want to draw the margin. The selected number will be displayed in blue.
 🔎NoteTeeth that are registered in the form will have the Medit Link logo.
If you want to draw margins for teeth not registered in the form, expand the teeth list.
All created margins will be saved to the case after clicking “Complete.”.png)
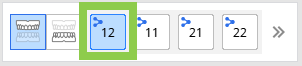
- Select "Auto Creation" from the toolkit on the right and choose what type of margin you want to create - inlay or crown. Then, zoom in on the target tooth, and create a complete margin line with one click.
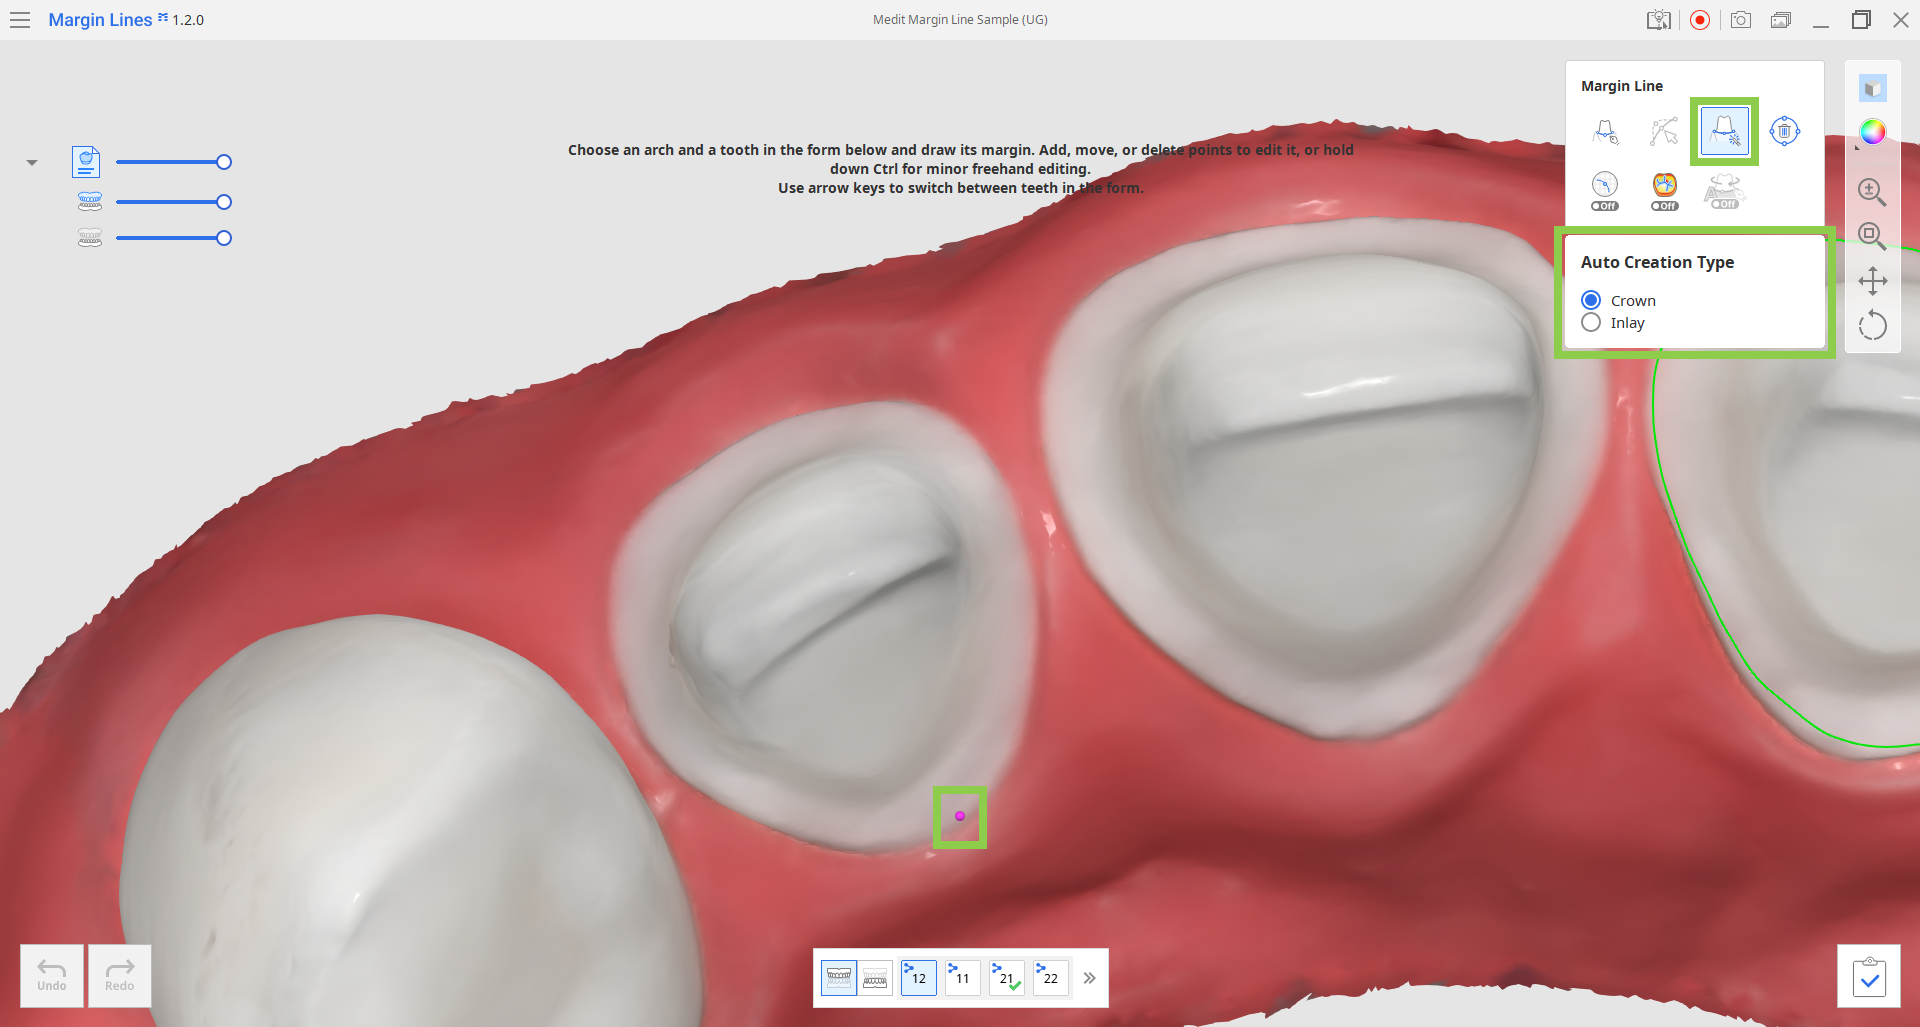
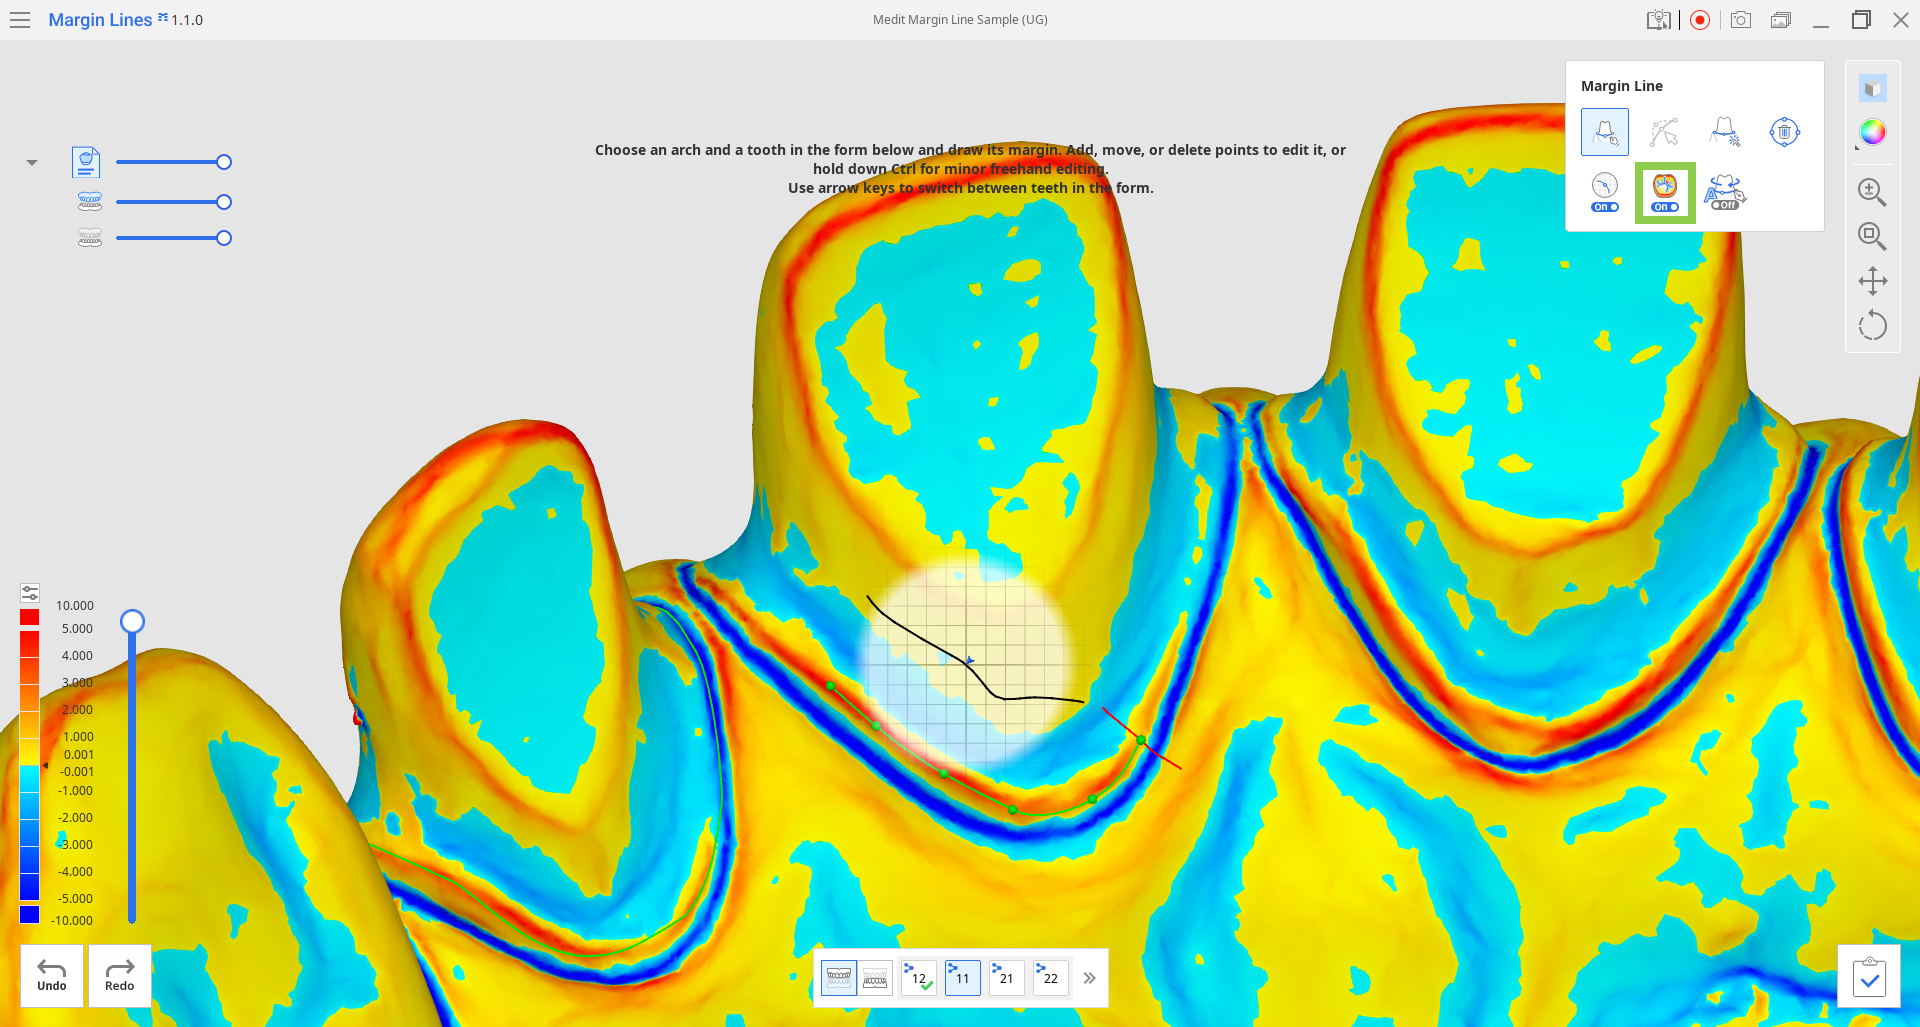
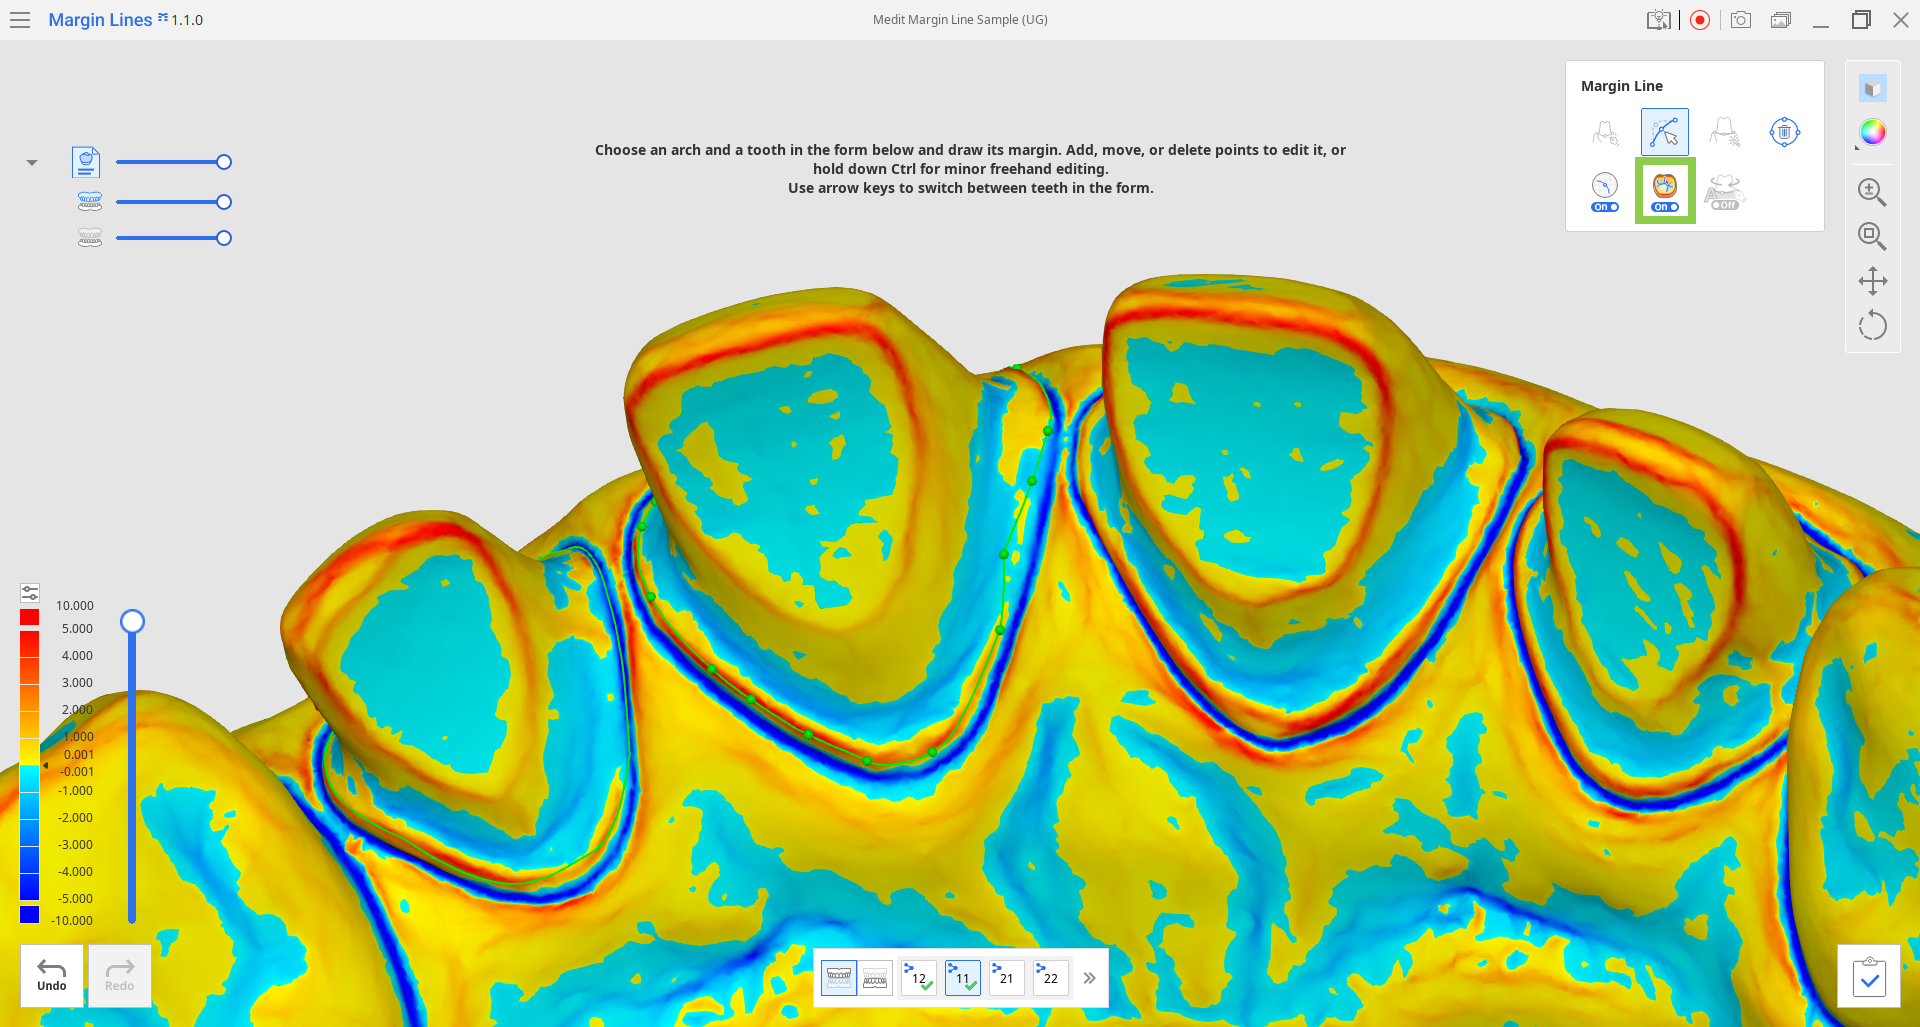
- You can also turn on "Curvature Display Mode" to help you analyze the prepared data and draw a more precise margin line.
- If you want to work on the other tooth, select it in the form at the bottom or use the arrow keys.
- If you are ready to save created margins, click “Complete.”
Manual Creation
- After opening the app, select your target arch in the Teeth Form below the data.
- Choose a tooth number for which you want to draw the margin. The selected number will be displayed in blue.
.png) 🔎NoteTeeth that are registered in the form will have the Medit Link logo.
🔎NoteTeeth that are registered in the form will have the Medit Link logo.
If you want to draw margins for teeth not registered in the form, expand the teeth list.
All created margins will be saved to the case after clicking “Complete.”.png)
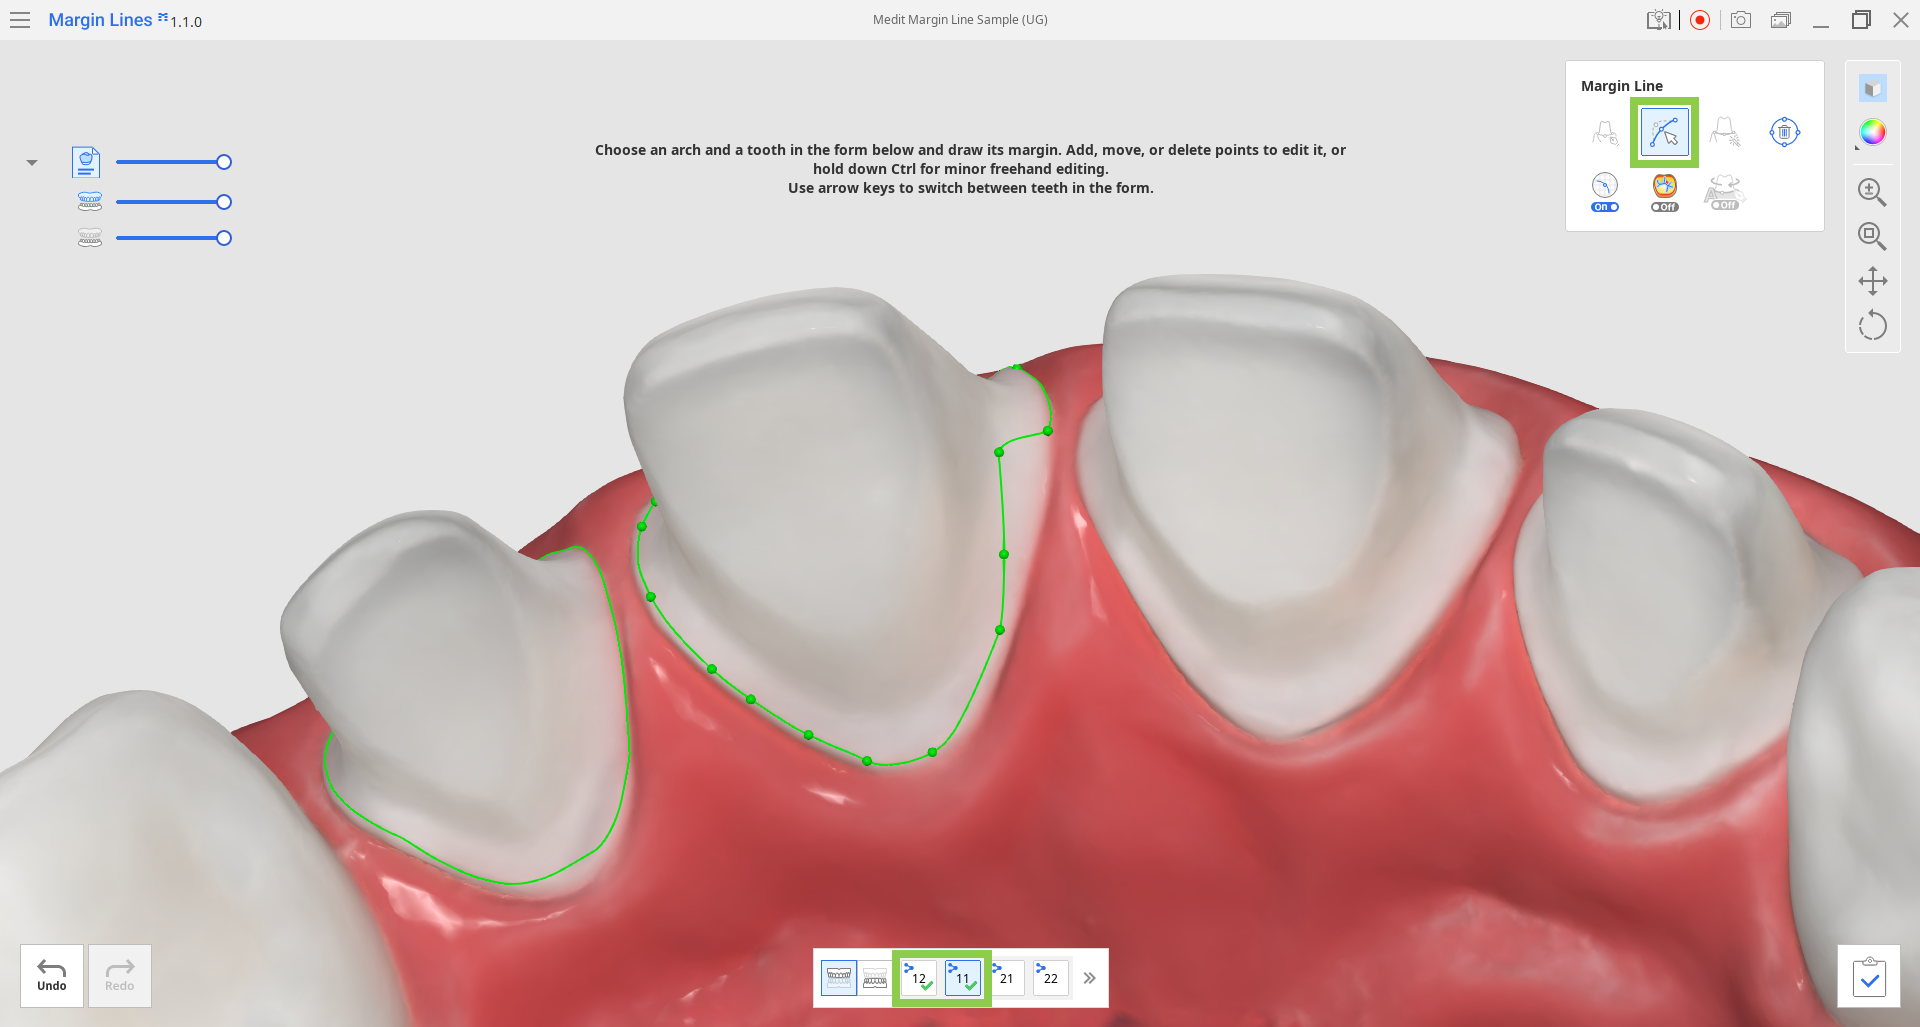
- Select "Manual Creation" from the toolkit on the right, zoom in on the target tooth, and start drawing the margin by adding control points.
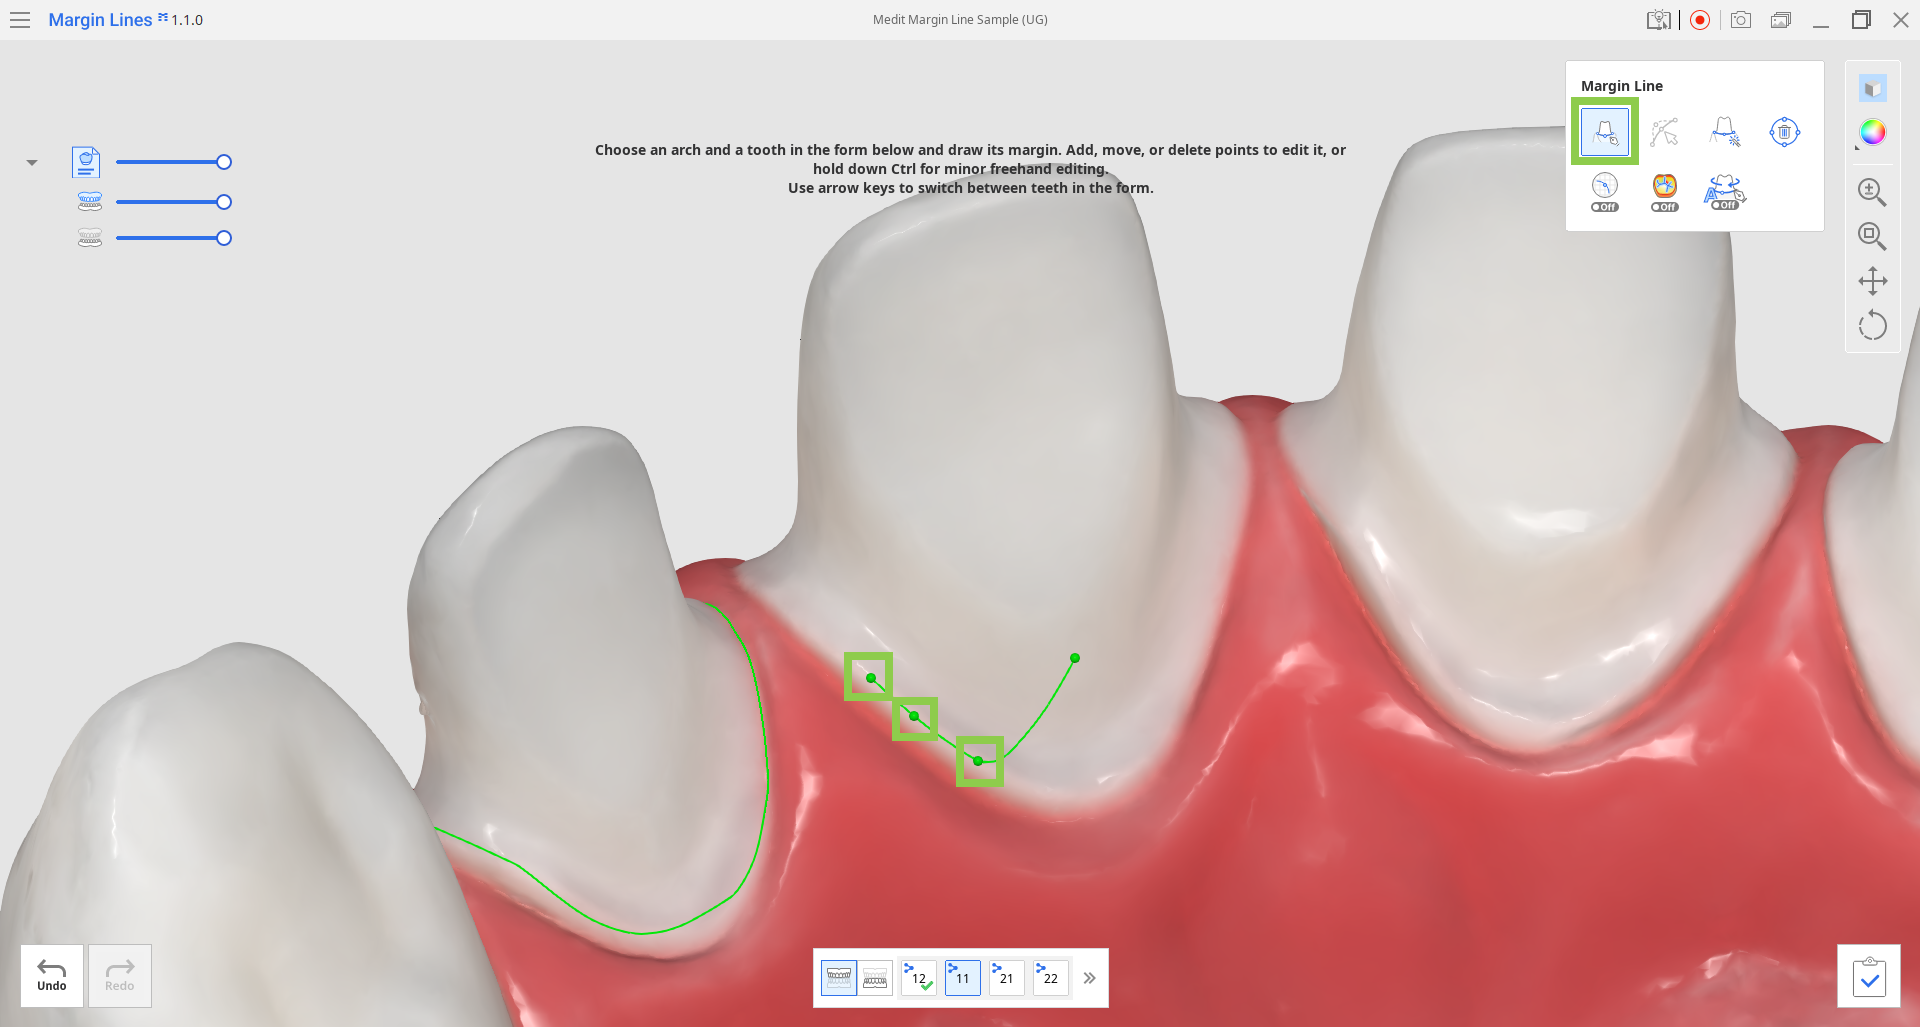 🔎TipIf you accidentally add a control point in the wrong place, use Ctrl+Z/Cmd+Z to delete the last added control point.
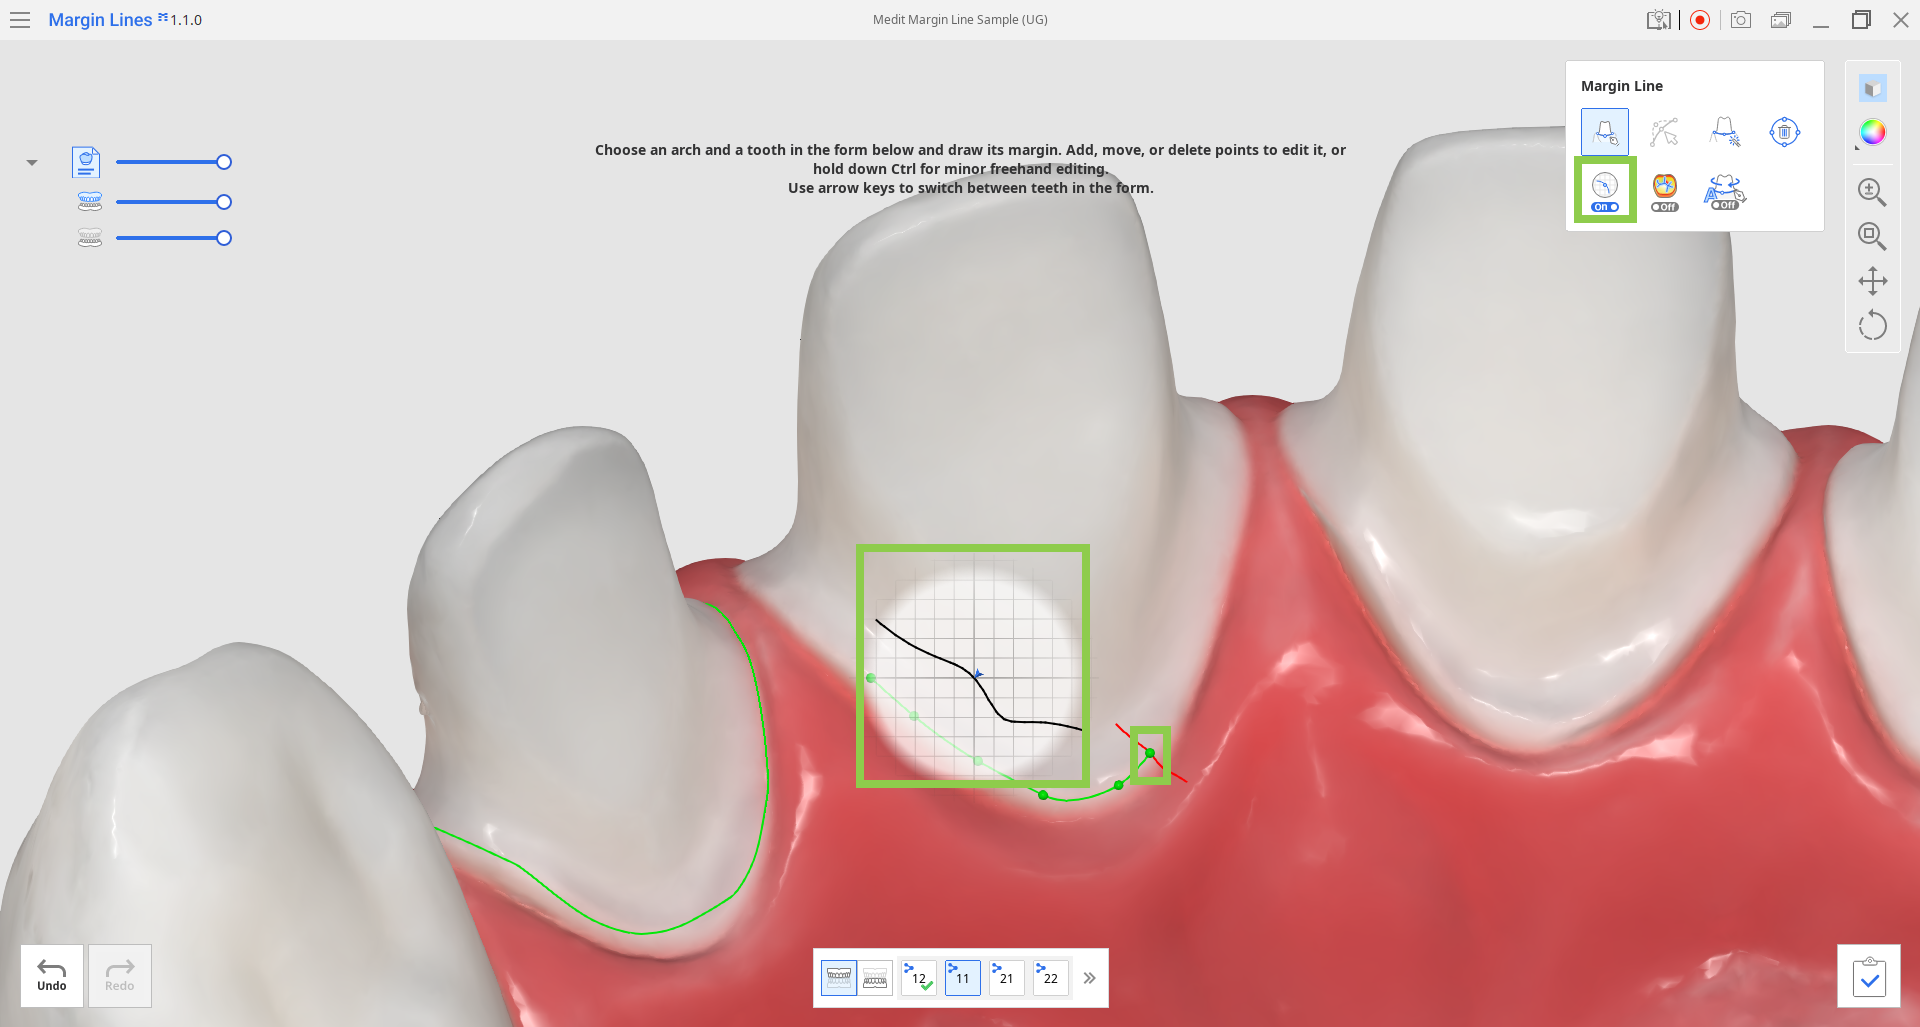
.png) 🔎TipTurn on "Dynamic View Change," and the data will automatically rotate to your view while adding control points.
🔎TipTurn on "Dynamic View Change," and the data will automatically rotate to your view while adding control points. - When "Section View" is on, you can adjust the control point along the section line with a long-click and drag.
- You can also turn on "Curvature Display Mode" to help you analyze the prepared data and create a more precise margin line.
- If you want to work on the other tooth, select it in the form at the bottom or use the arrow keys.
- If you want to save created margins, click “Complete.”
Editing
- When you open the app from a case with margin lines or click a tooth number that has it, the "Edit" tool is automatically activated.
- Use the control points on the line to edit it. Click to add a new point, click and drag to move the point, and right-click to delete the point.
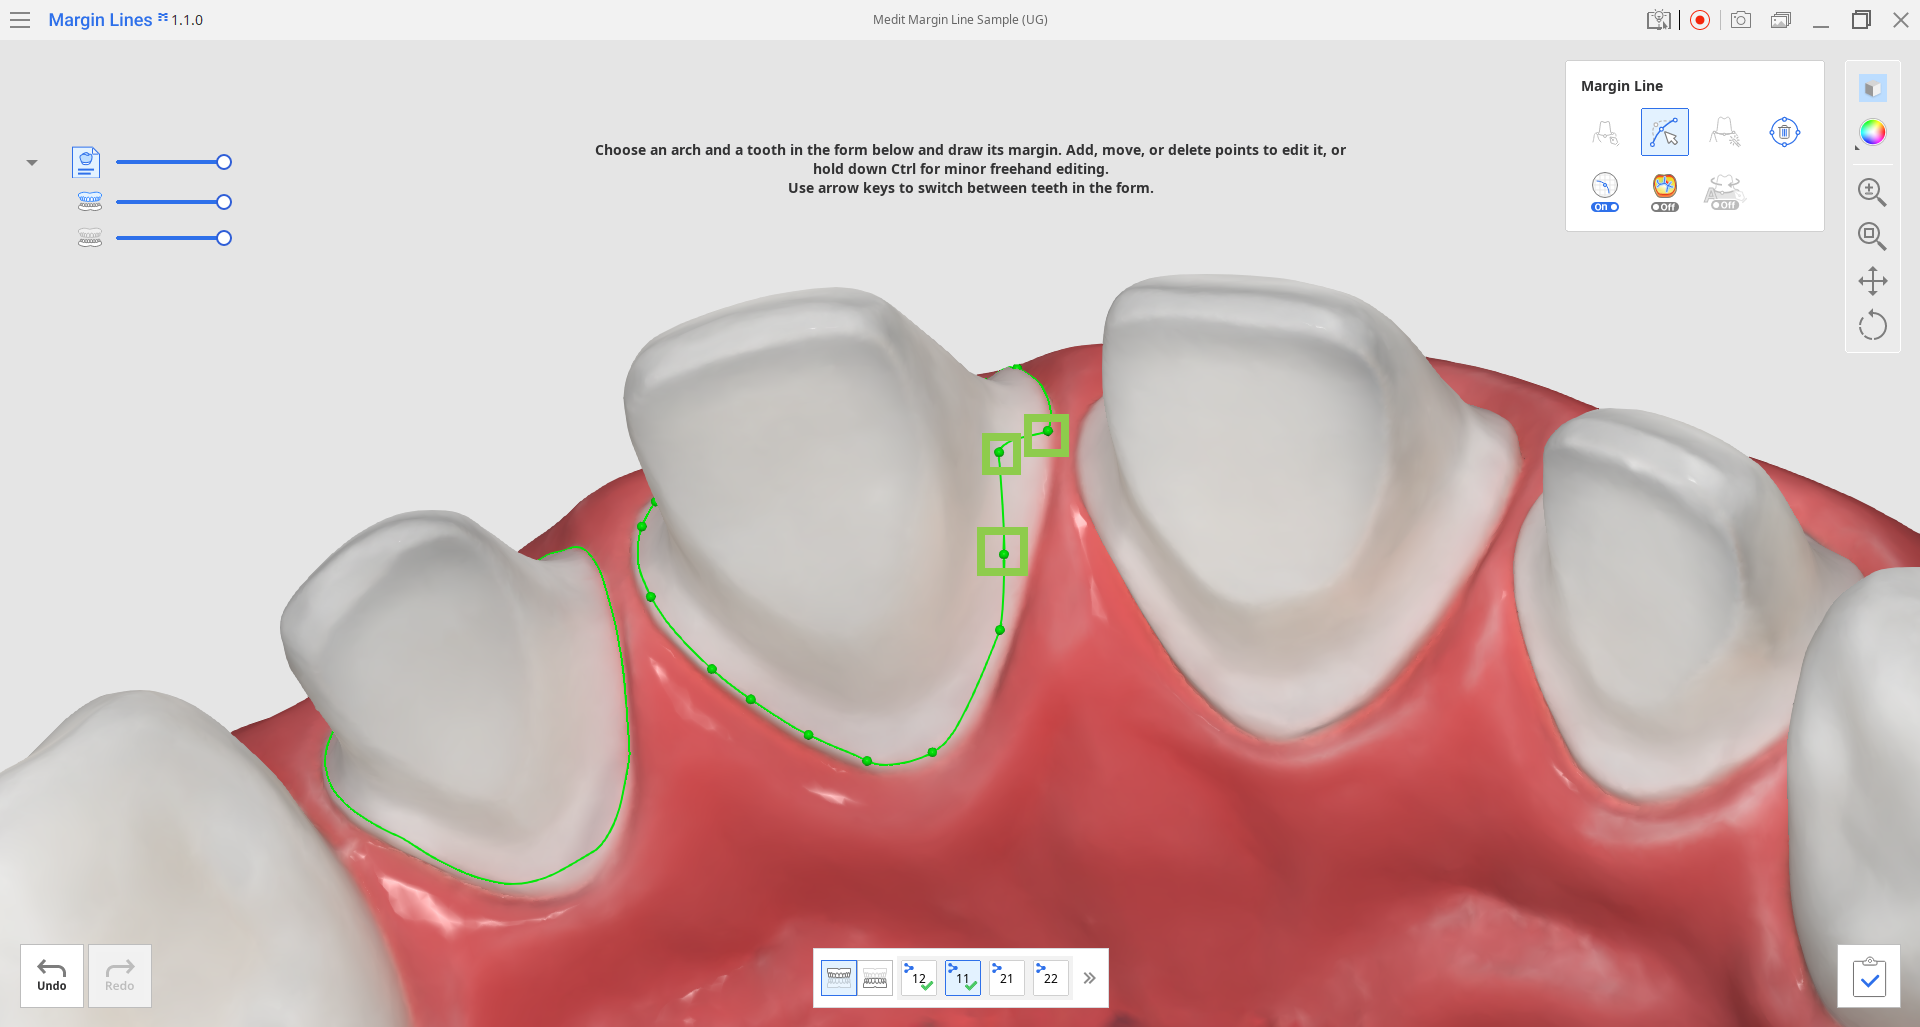
When the tool is on, you can hold down the Ctrl/Command key and drag the mouse to make minor freehand corrections quickly.(2).png) 🔎NoteTo delete the existing margin entirely and start all over, click “Delete.”
🔎NoteTo delete the existing margin entirely and start all over, click “Delete.”(2).png)
- When "Section View" is active, you can adjust the control point along the section line with a long-click and drag.
(1).png)
- You can also turn on "Curvature Display Mode" to help you analyze data and create a more precise margin line.
- If you want to work on the other tooth, select it in the form at the bottom or use the arrow keys.
- If you want to save edited margins, click “Complete,” and margins in the case will be overwritten.