Scanning Basics
- 02 May 2024
- 4 Minutes to read
- Print
- DarkLight
- PDF
Scanning Basics
- Updated on 02 May 2024
- 4 Minutes to read
- Print
- DarkLight
- PDF
Article summary
Did you find this summary helpful?
Thank you for your feedback
Scanning Checklist
If no scan data has been acquired yet, the main screen displays the scanning checklist.
 Before initiating the scan, carefully review the following precautions:
- Avoid using any strong external light source.
- Ensure the mirror is clean and free of stains.
- Maintain dryness in the scan area, minimizing saliva and blood presence as much as possible.
- Always maintain an appropriate distance between the scanner tip and the teeth.
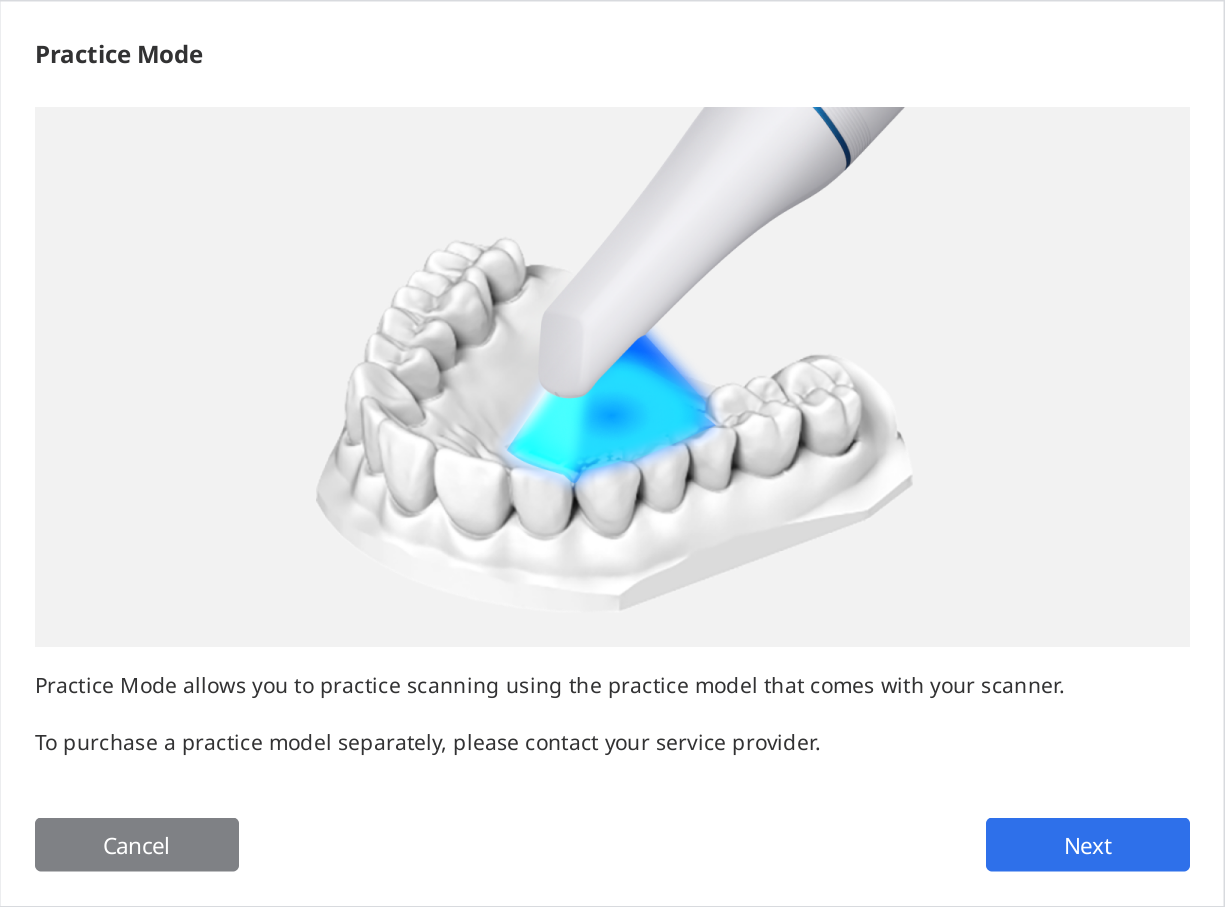
Practice Mode
Practice mode is intended to help users to learn how to perform correct scans using a practice model.
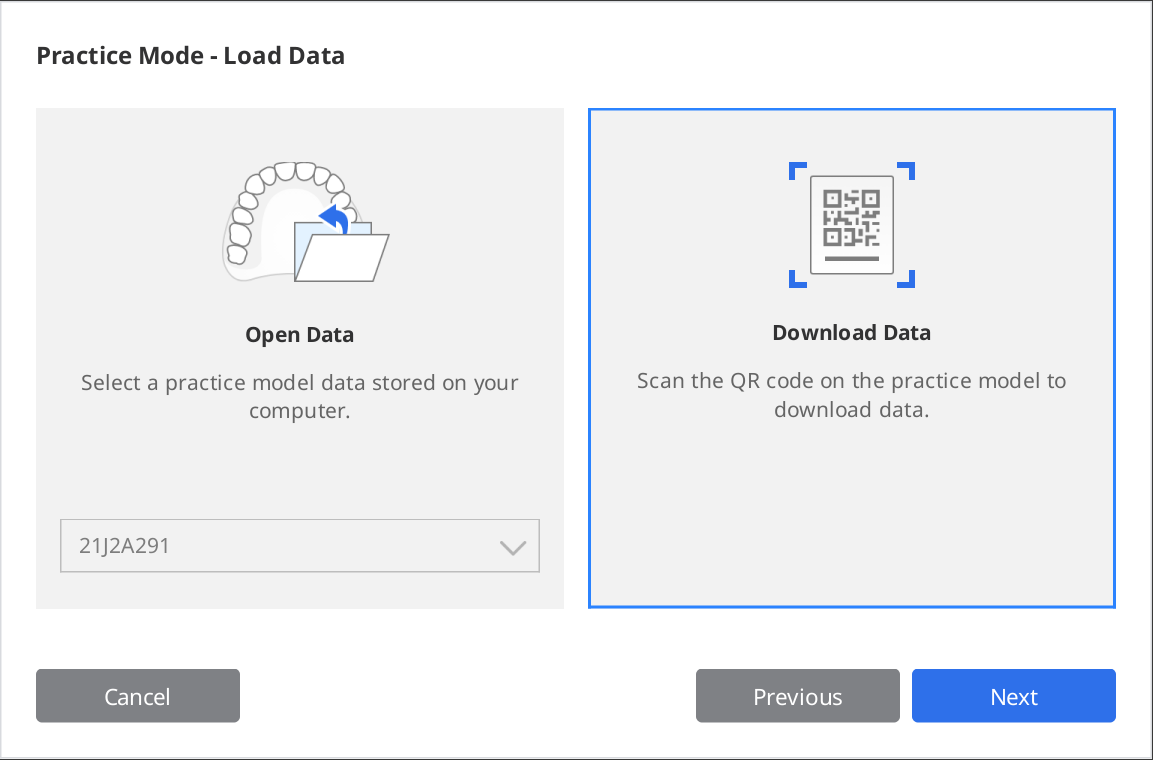
You can scan the QR code attached to the practice model to download sample data, or if you've already downloaded it, you can retrieve and use the saved sample data.
Data acquired in practice mode is not saved when you exit the mode.
🔎Note
- Go to Settings > Program Preferences > General and enable the "Practice Mode" option to display the practice mode banner.
- The Practice Mode banner only appears on full screen when there is no scan data acquired.
- The Practice Mode is not available with the i500.

The Practice Mode provides three training levels, each with different score criteria.
- Beginner: A level for novice users of an intraoral scanner
- Intermediate: A level for intermediate users who are familiar with using an intraoral scanner
- Advanced: A level for experienced users who want to reach the highest level beyond the intermediate level.
The acquired scan data will be deleted if the difficulty level is changed during scanning.
Entering Practice Mode
- Prepare the practice model that is included in the scanner package. Please contact your local service provider for additional purchases.
- Run Scan for Clinics and click the "Practice Mode" banner on the bottom right side of the screen.

- Follow the instructions presented on the screen.
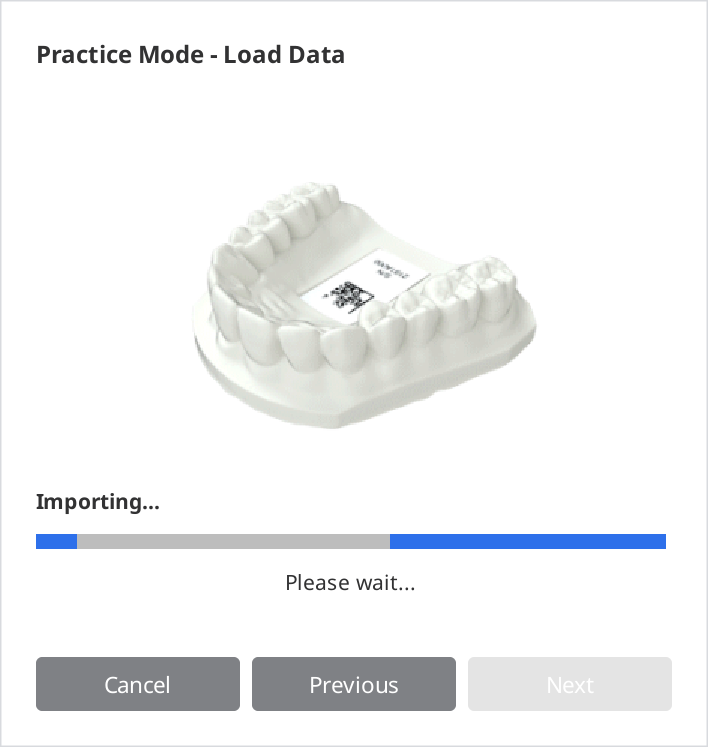
- Click "Download Data" to download sample data of your practice model from the server.🔎NoteYou can also use the practice model data stored on your computer if you have already downloaded it. In this case, select the serial number that matches the one on your practice model.
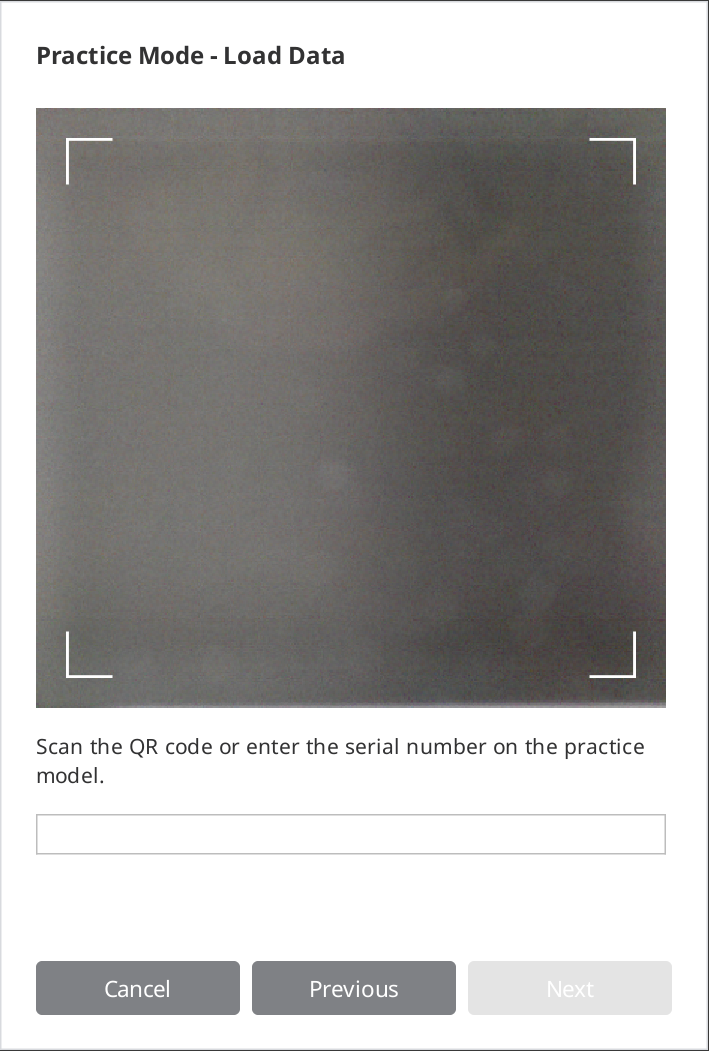
- Scan the QR code with your scanner.
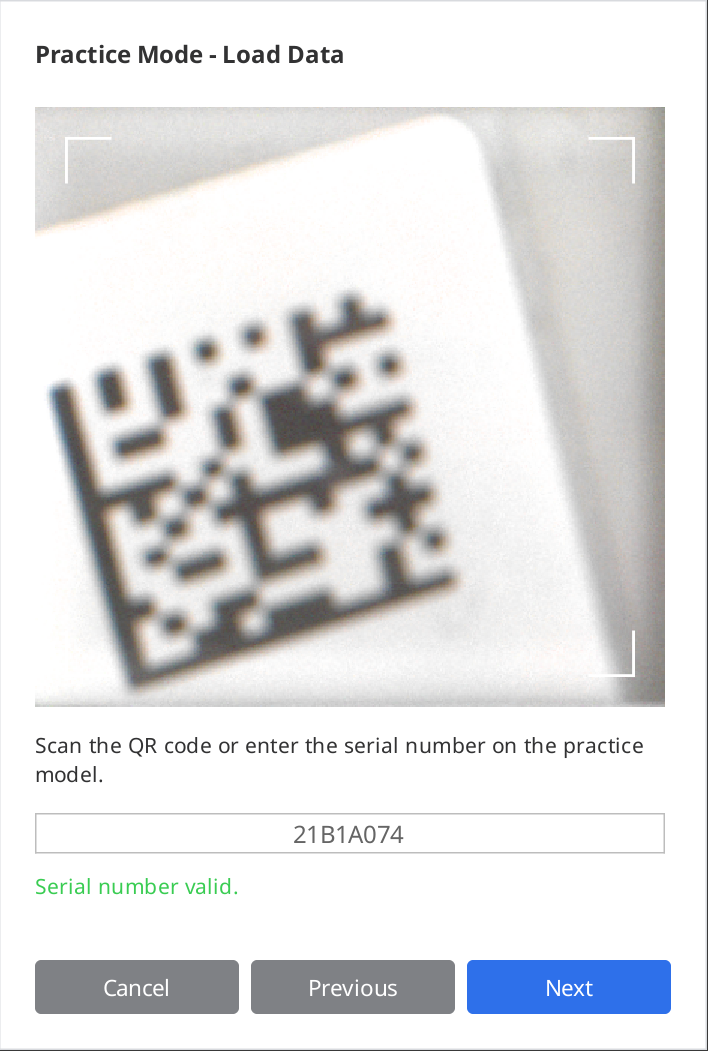
- When the camera turns on, it will recognize the QR code. You can enter the serial number on the sticker if the QR code has been damaged.
- Click "Next" once the serial number is validated.
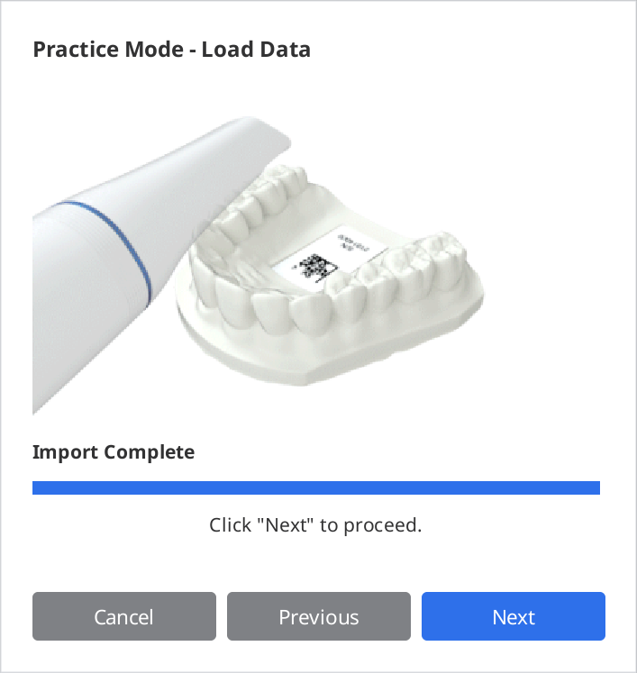
- An information video on how to scan the practice model will be displayed during the download.
- When the download is complete, click "Next" to select a level.
- Select a difficulty level between the "Beginner," "Intermediate," and "Advanced," and click "Next."

- Check the goals you need to achieve for the selected difficulty level and click "Next" to start your scanning practice. You can click "Previous" to go back and change the difficulty level.


Scanning Practice
- Click the "Scan" button to start once the downloaded sample data is displayed on the screen.
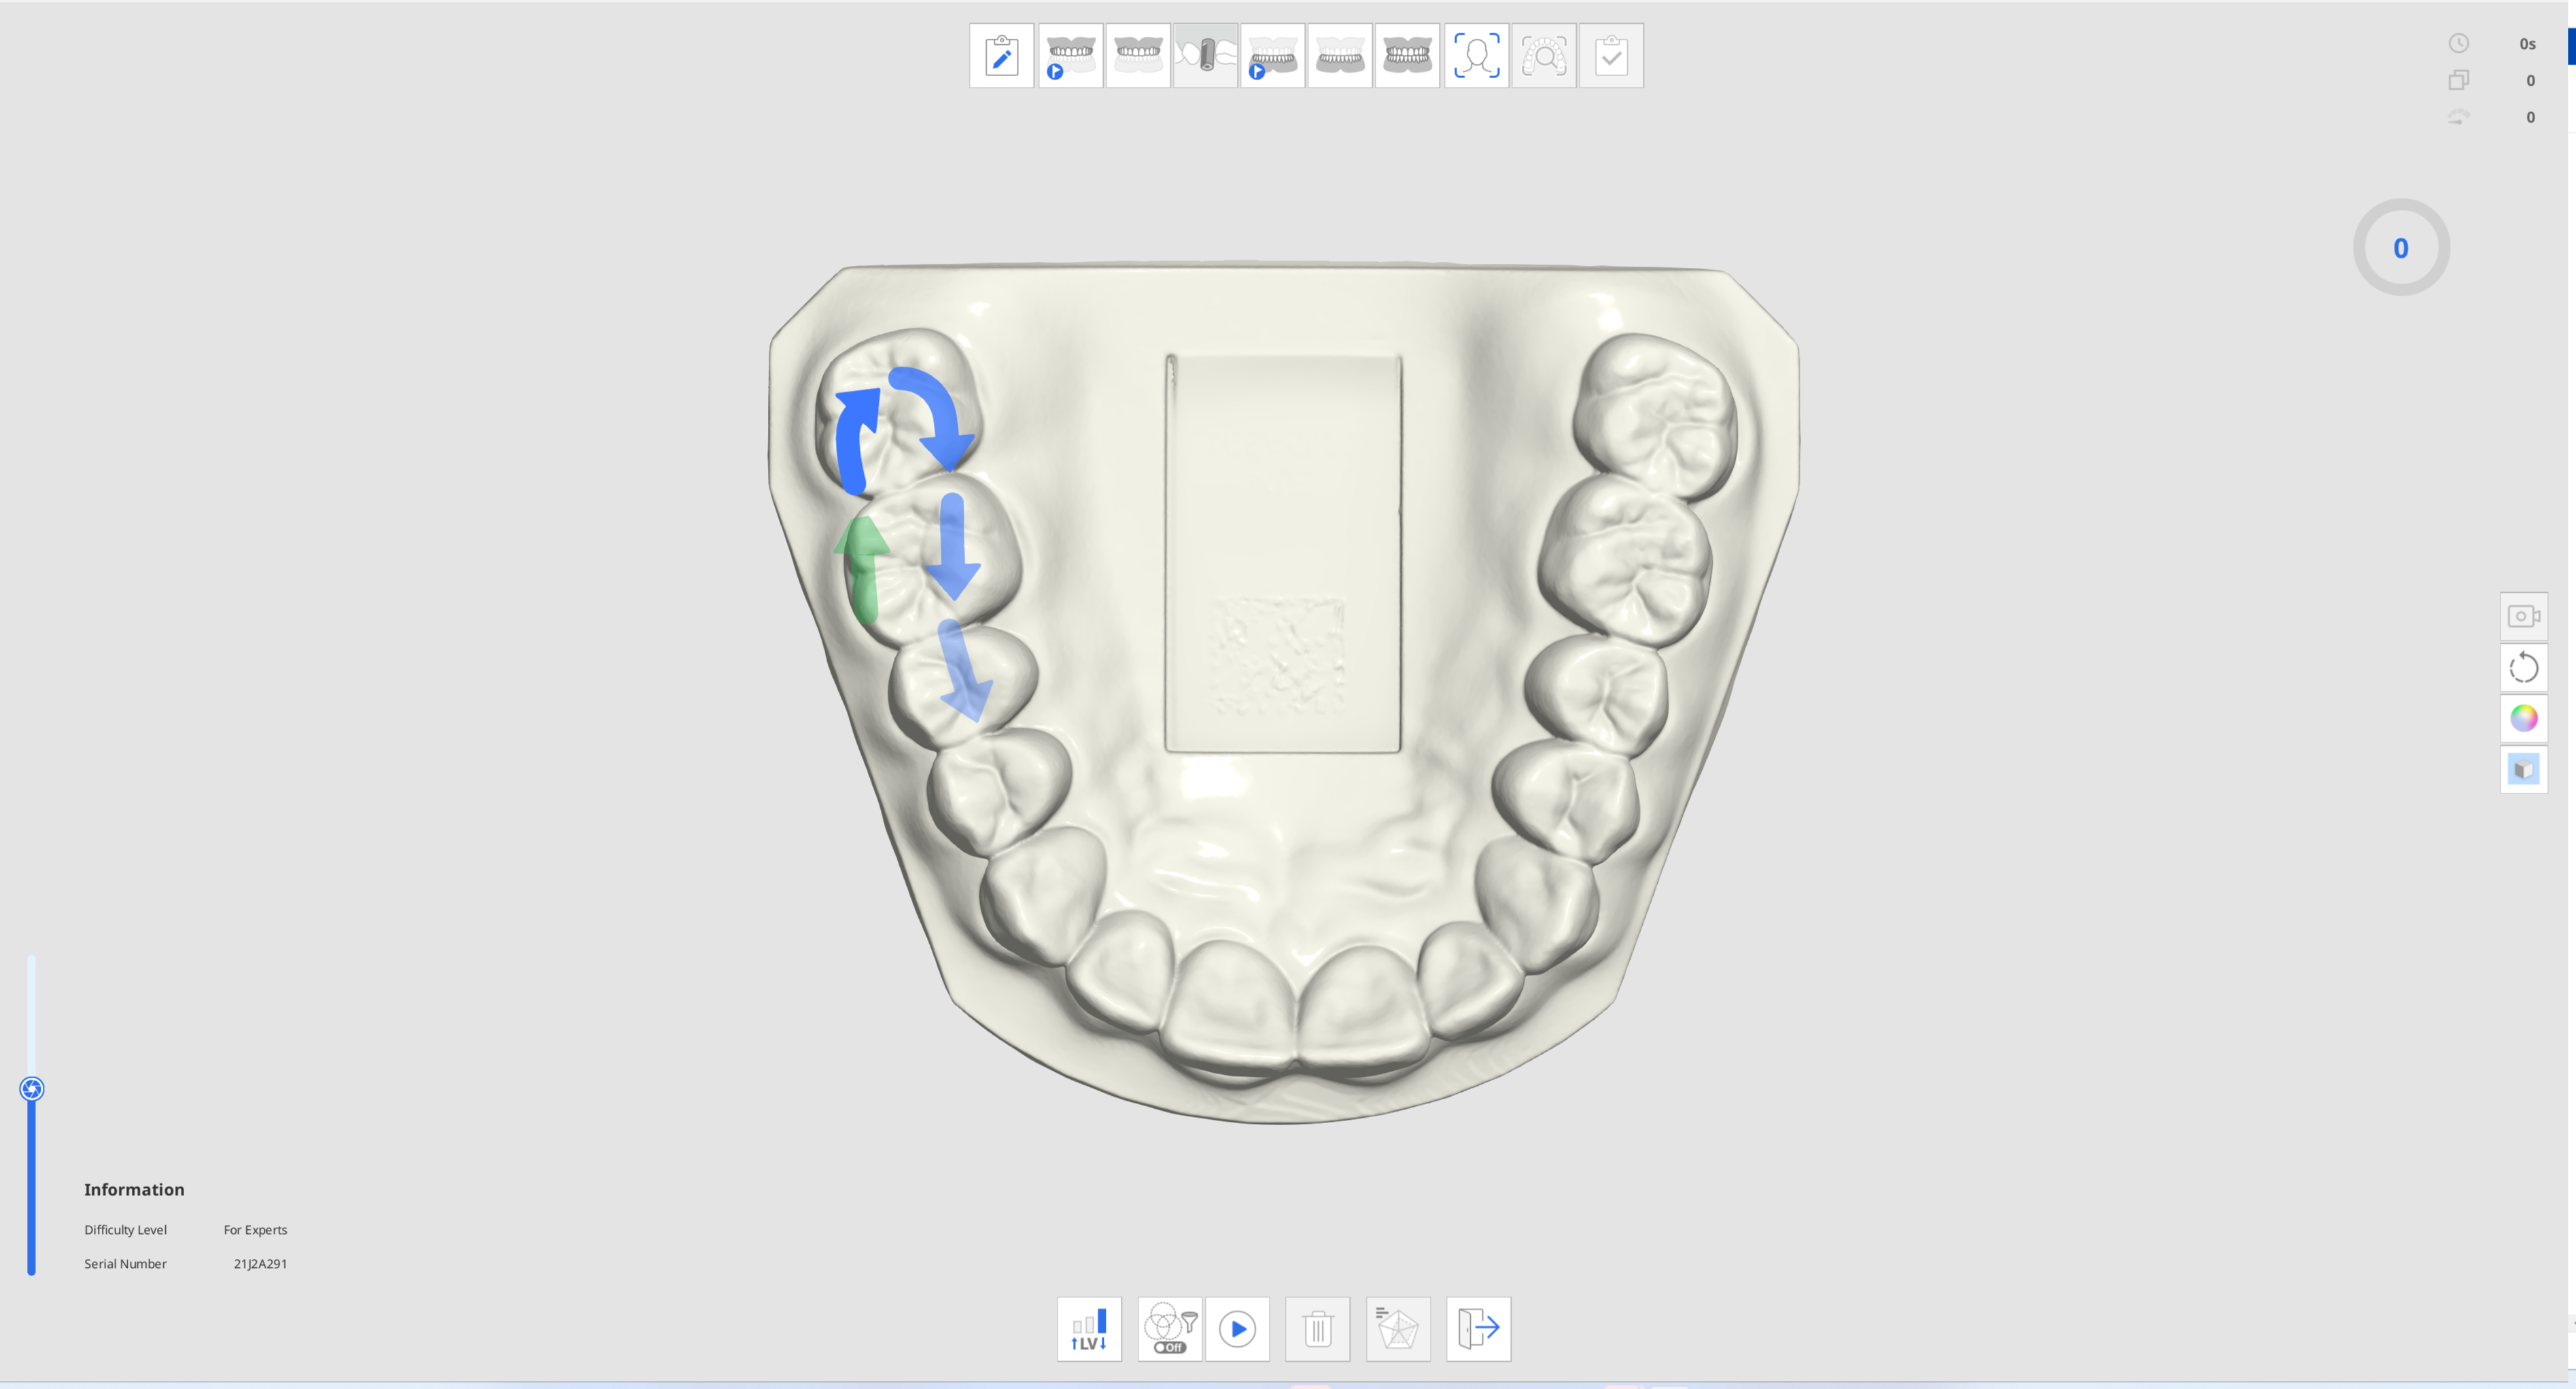
- Follow the instructions and directions of the arrows to scan the practice model.
- Check the scan information and progress while acquiring data for your effective scanning practice.
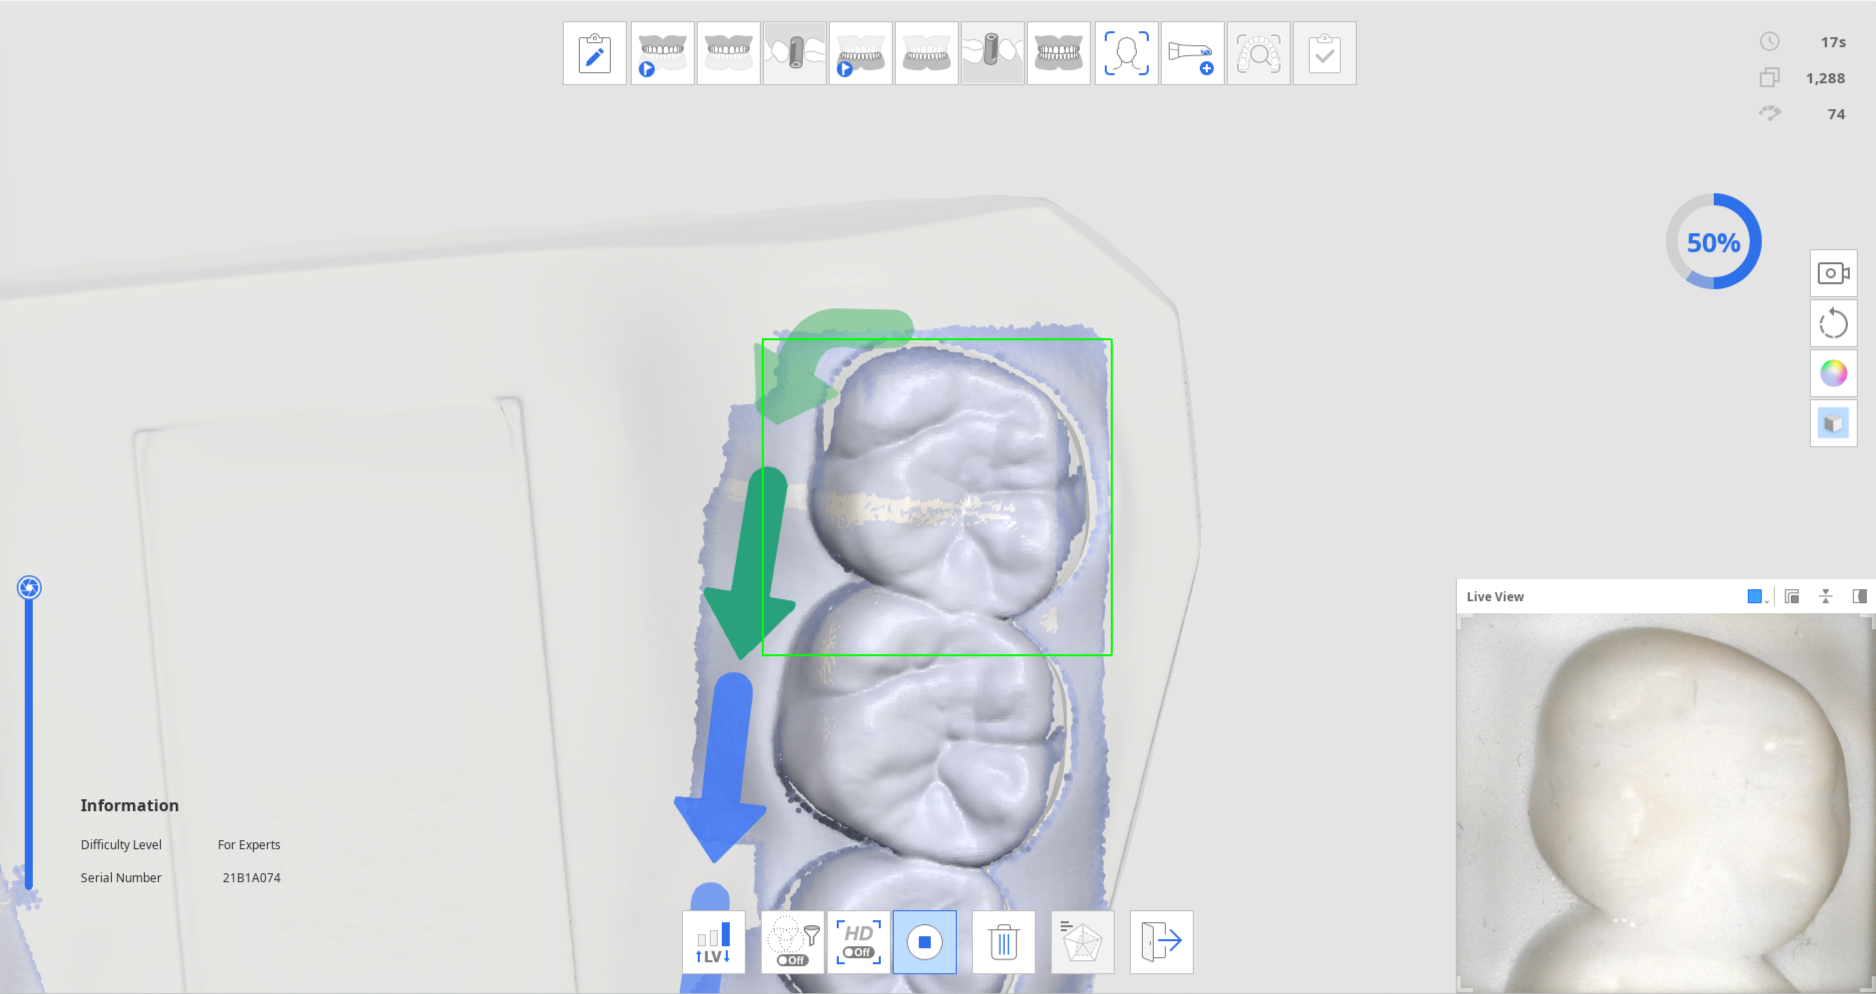
- When a certain amount of scan data is acquired, the progress turns into a check mark, and the "Check Practice Mode Results" icon at the bottom is enabled.
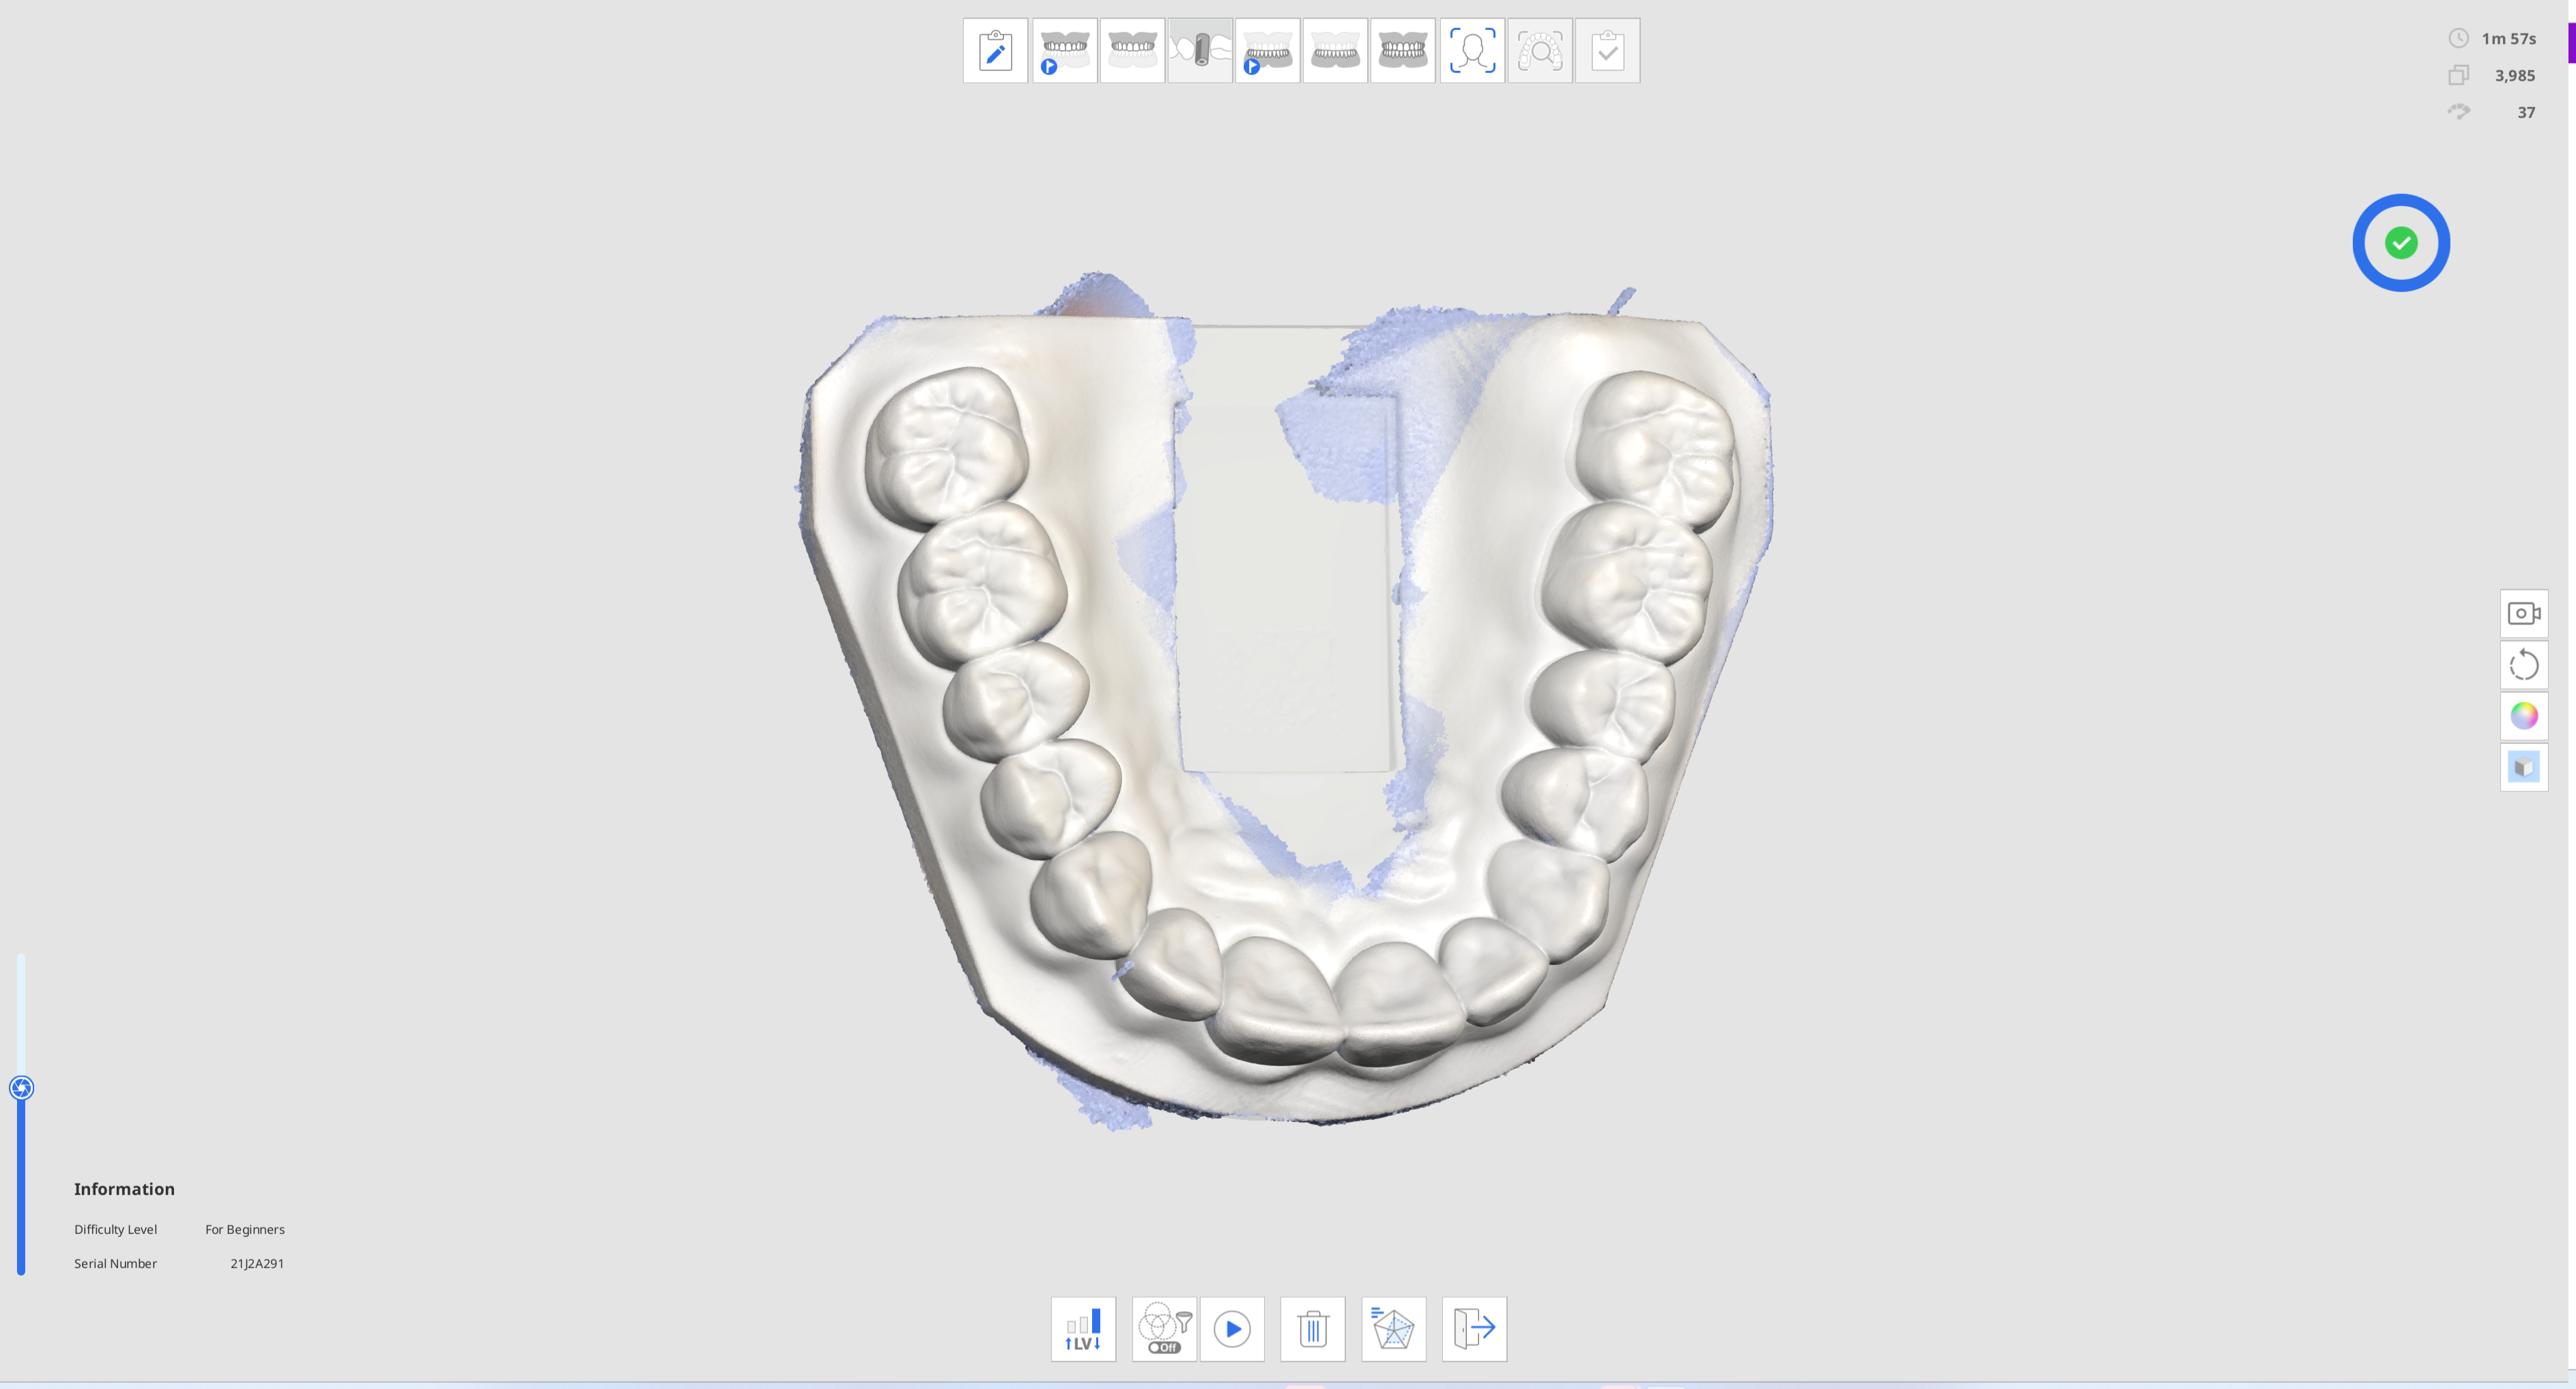
- Click the "Check Practice Mode Results" icon to check the score.

- The score will be based on the selected difficulty level, scan time, progress rate, data reliability ratio, etc.
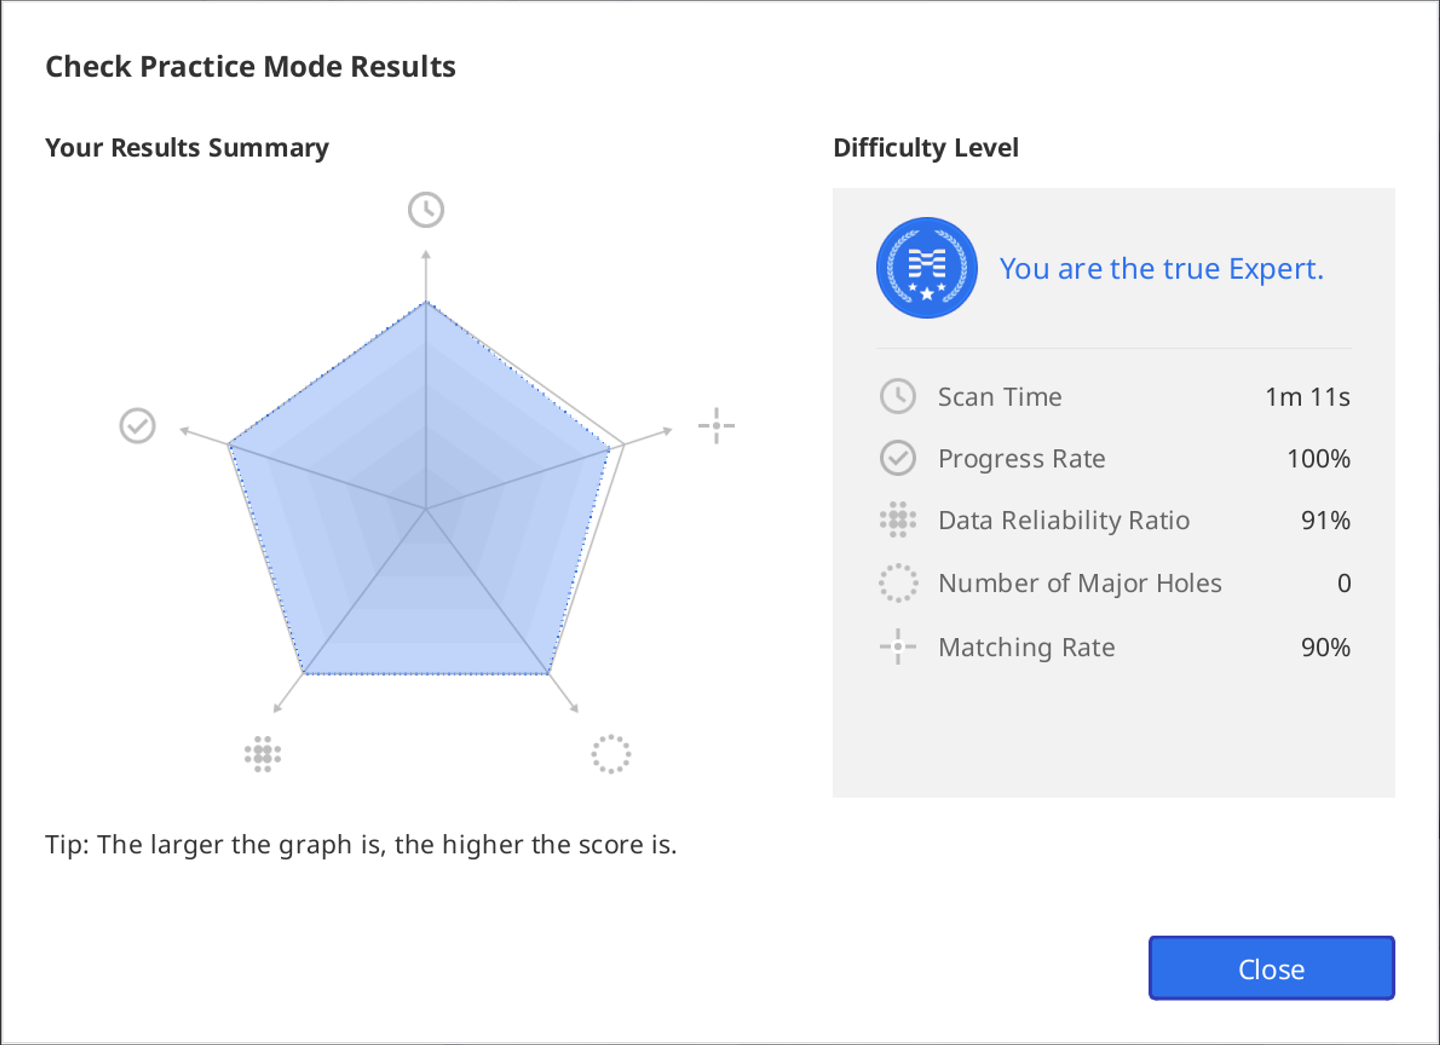
- You can conduct additional scans after viewing the results and check the results again based on the data after additional scanning.


Touch Interface Tutorial
The following Touch Interface Tutorial dialog appears when the program connects with the i900 scanner for the first time.

Follow the instructions in the dialog to learn how to utilize the touch interface so that you can scan with minimal mouse and keyboard interaction.

🔎Note
To rerun the tutorial, go to Settings > Scanner and click the "Run" button next to the "Touch Interface Tutorial" option.
Indication During Scanning
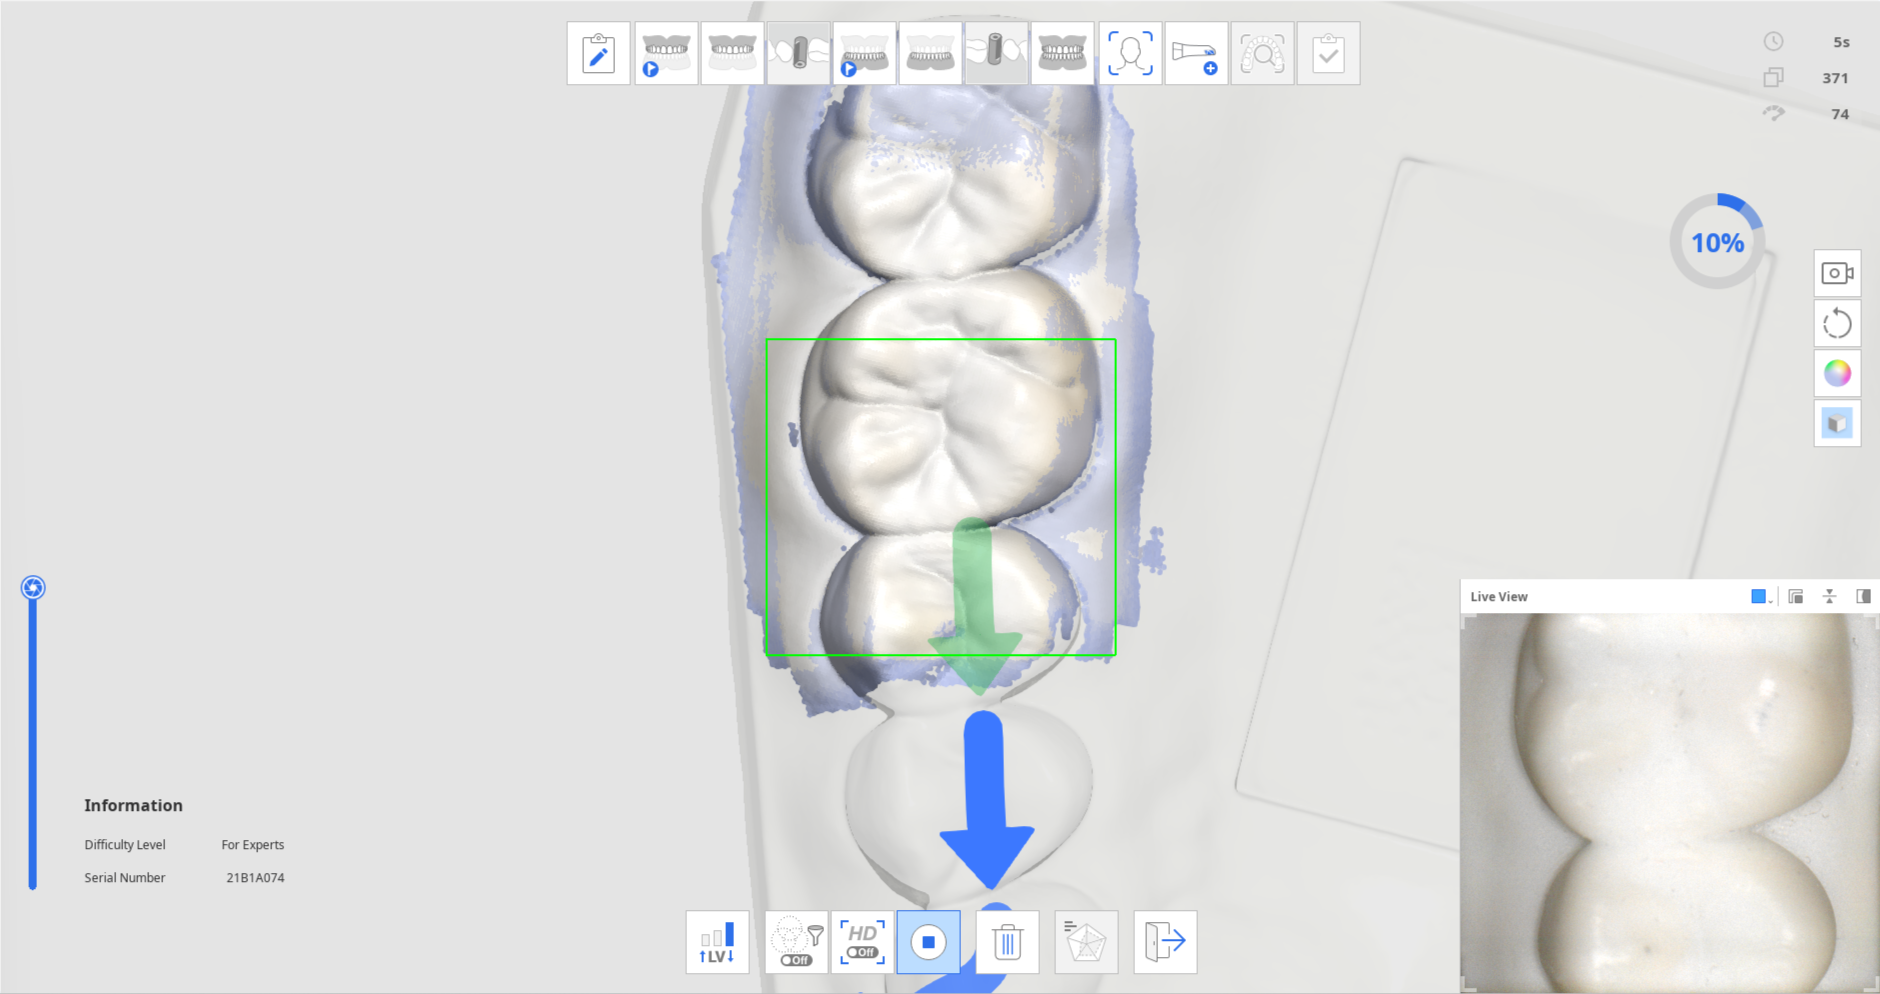
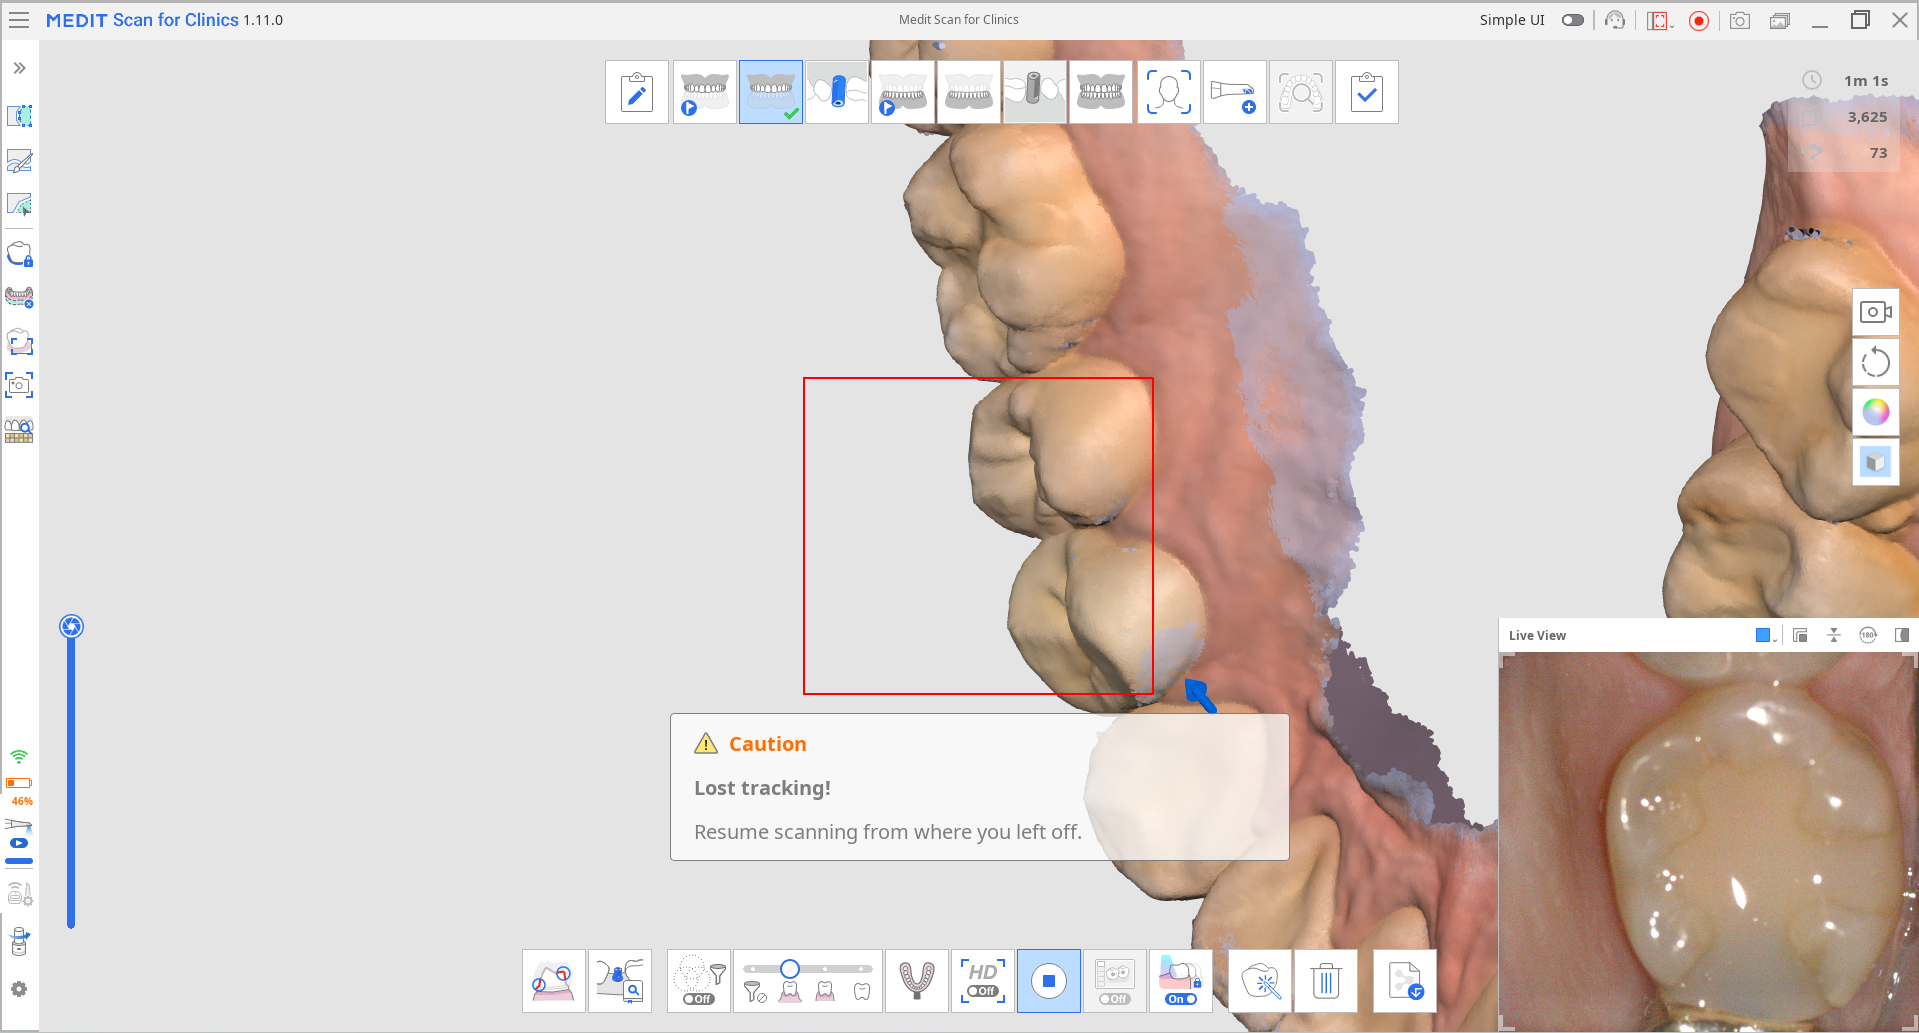
The color of the rectangular box that appears during scanning indicates the scan status.
 |  |
| Scanning and tracking are proceeding normally. | Lost tracking while scanning. You need to reposition the scanner tip to scan continuously from where you left off. |
Smart Arrow
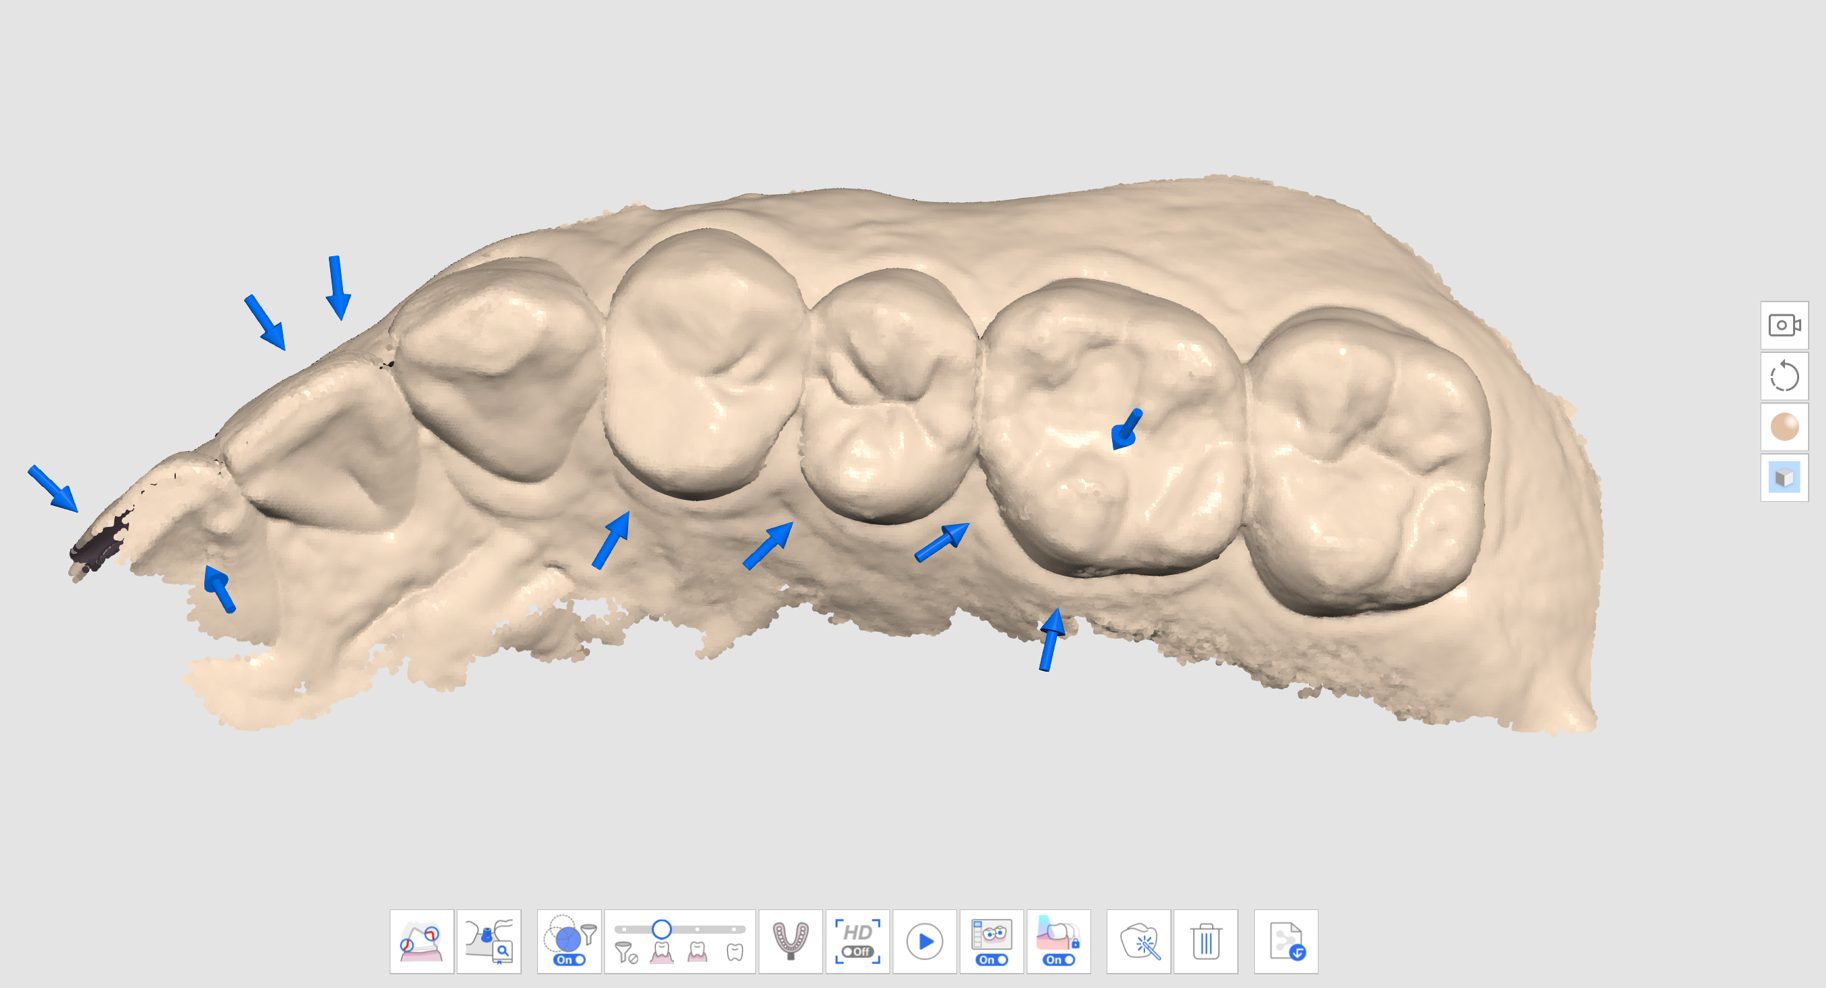
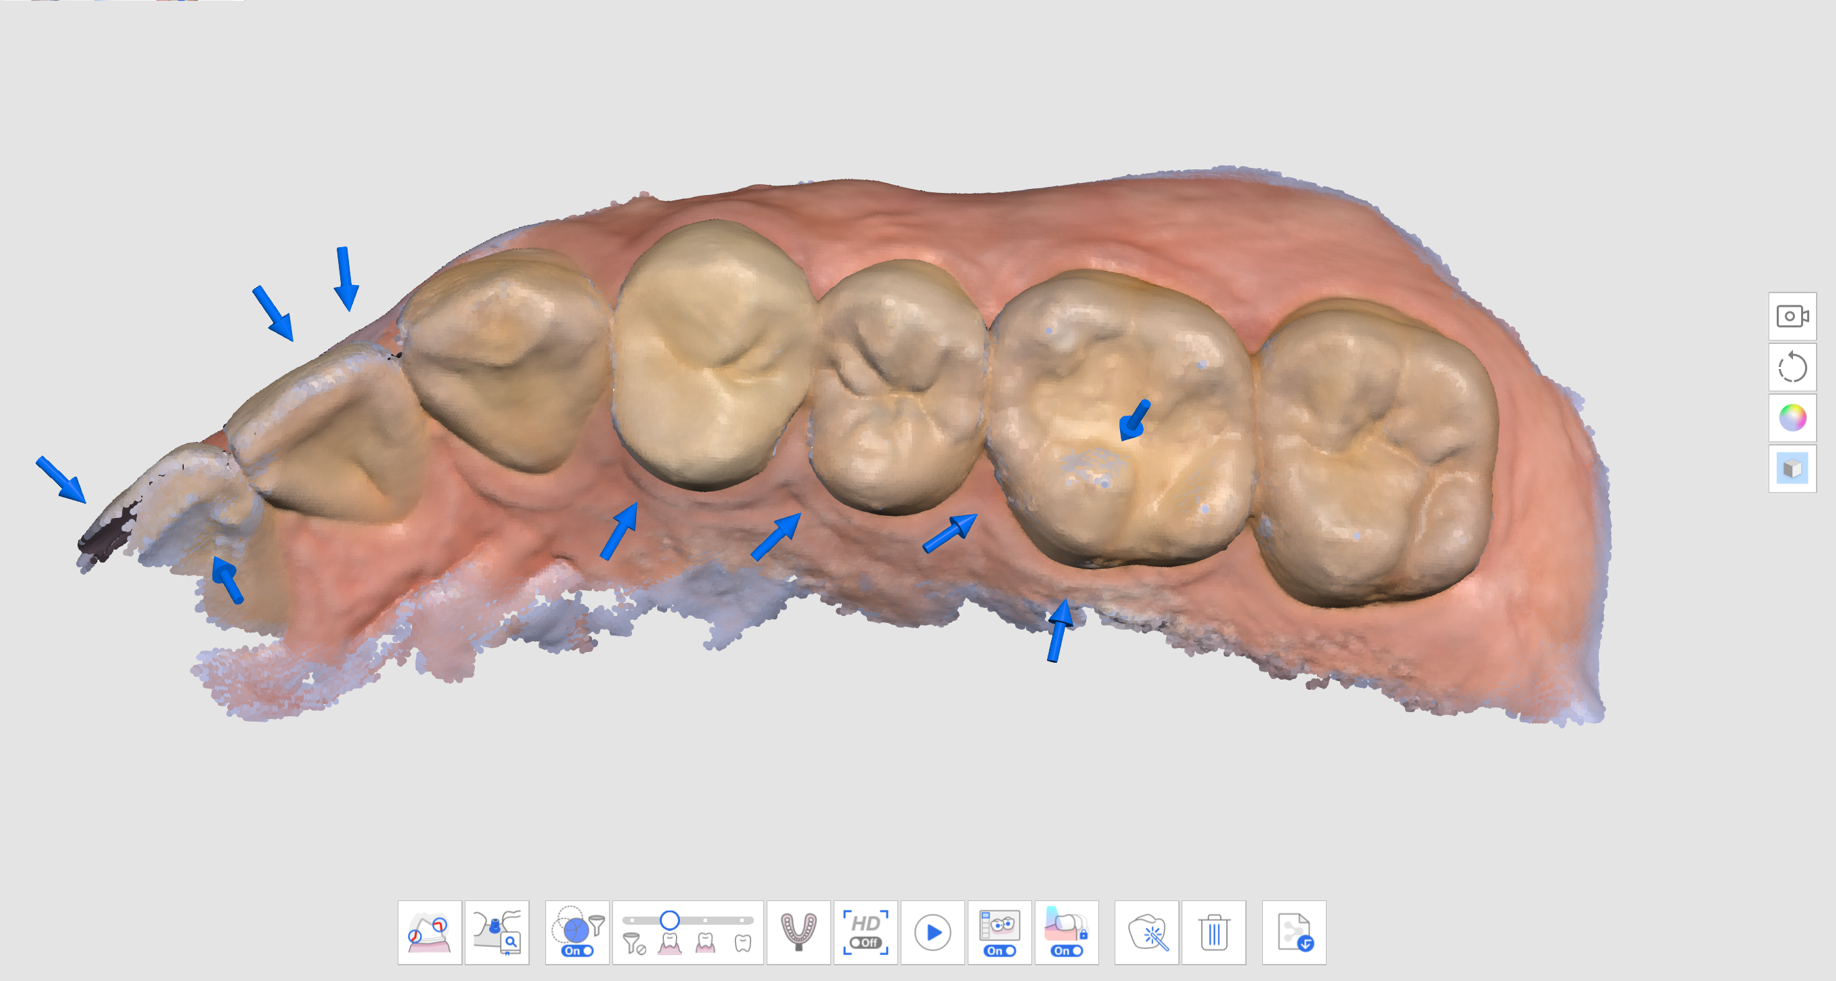
The Smart Arrow indicates areas of low reliability on the acquired scan data.
When you stop scanning, a blue arrow points to the area with insufficient reliability. The arrows disappear when data reliability improves with additional scanning.
This function is only supported in the scan stages:
- Pre-Op for Maxilla
- Pre-Op for Mandible
- Maxilla
- Mandible
- Smart Scan Review
- Scan data in one of the supported scan stages.
- When the scan stops, blue arrows will appear to indicate areas with low data reliability.
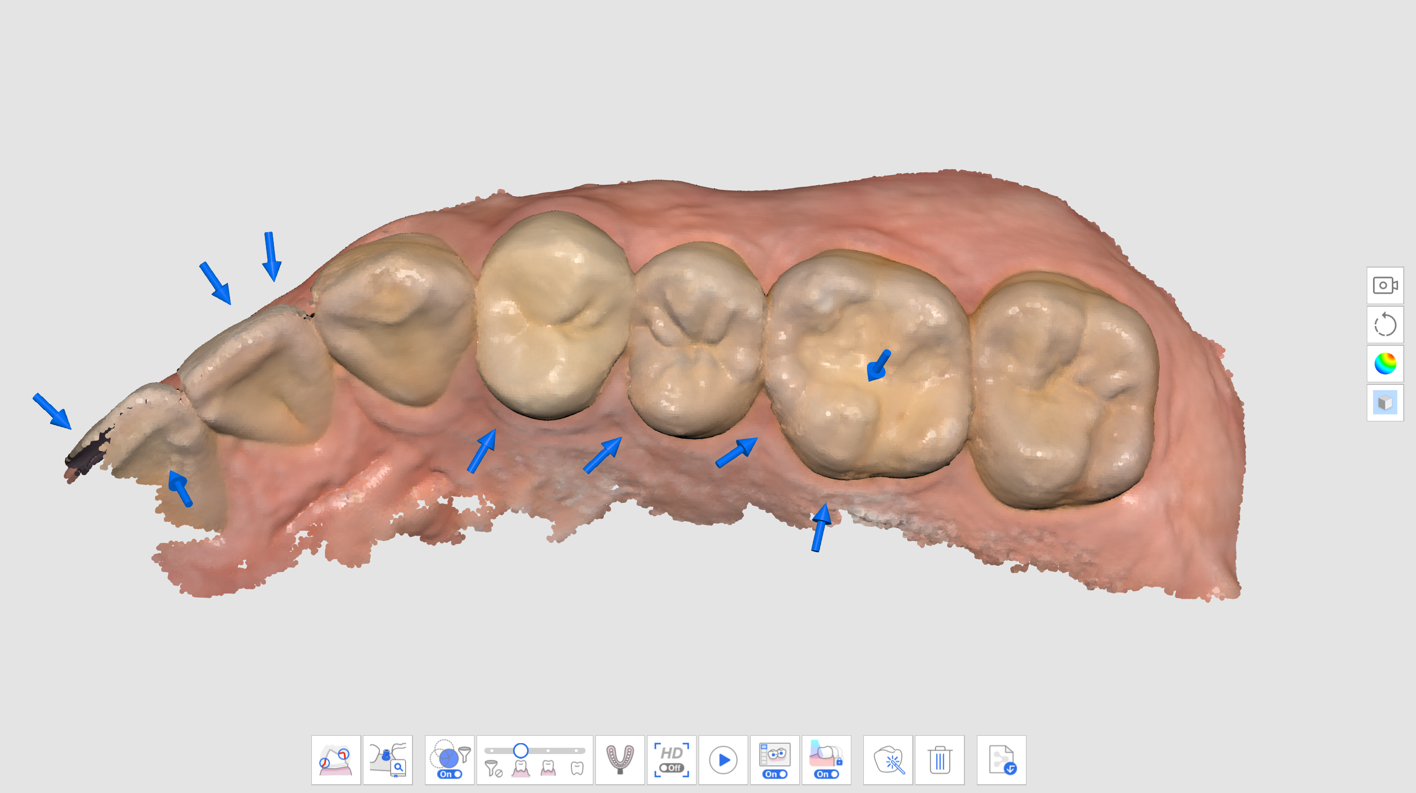
- Check the scan data by reviewing the marked areas. You can inspect the area in closer detail by selecting the "Reliability Map" or "Texture On + Reliability Map" for Model Display Mode.
- Texture On

- Texture Off
- Reliability Map

- Texture On + Reliability Map
- Texture On
- Scan additional data to fulfill the lacking areas. Move the scanner in multiple directions and scan data from various angles to improve data reliability.
- The arrow disappears when enough reliable data is acquired.
- Scan thoroughly to remove all arrows around your areas of interest (for example, if creating a restoration, focusing on margins and adjacent teeth) and move on to the next scan stage.


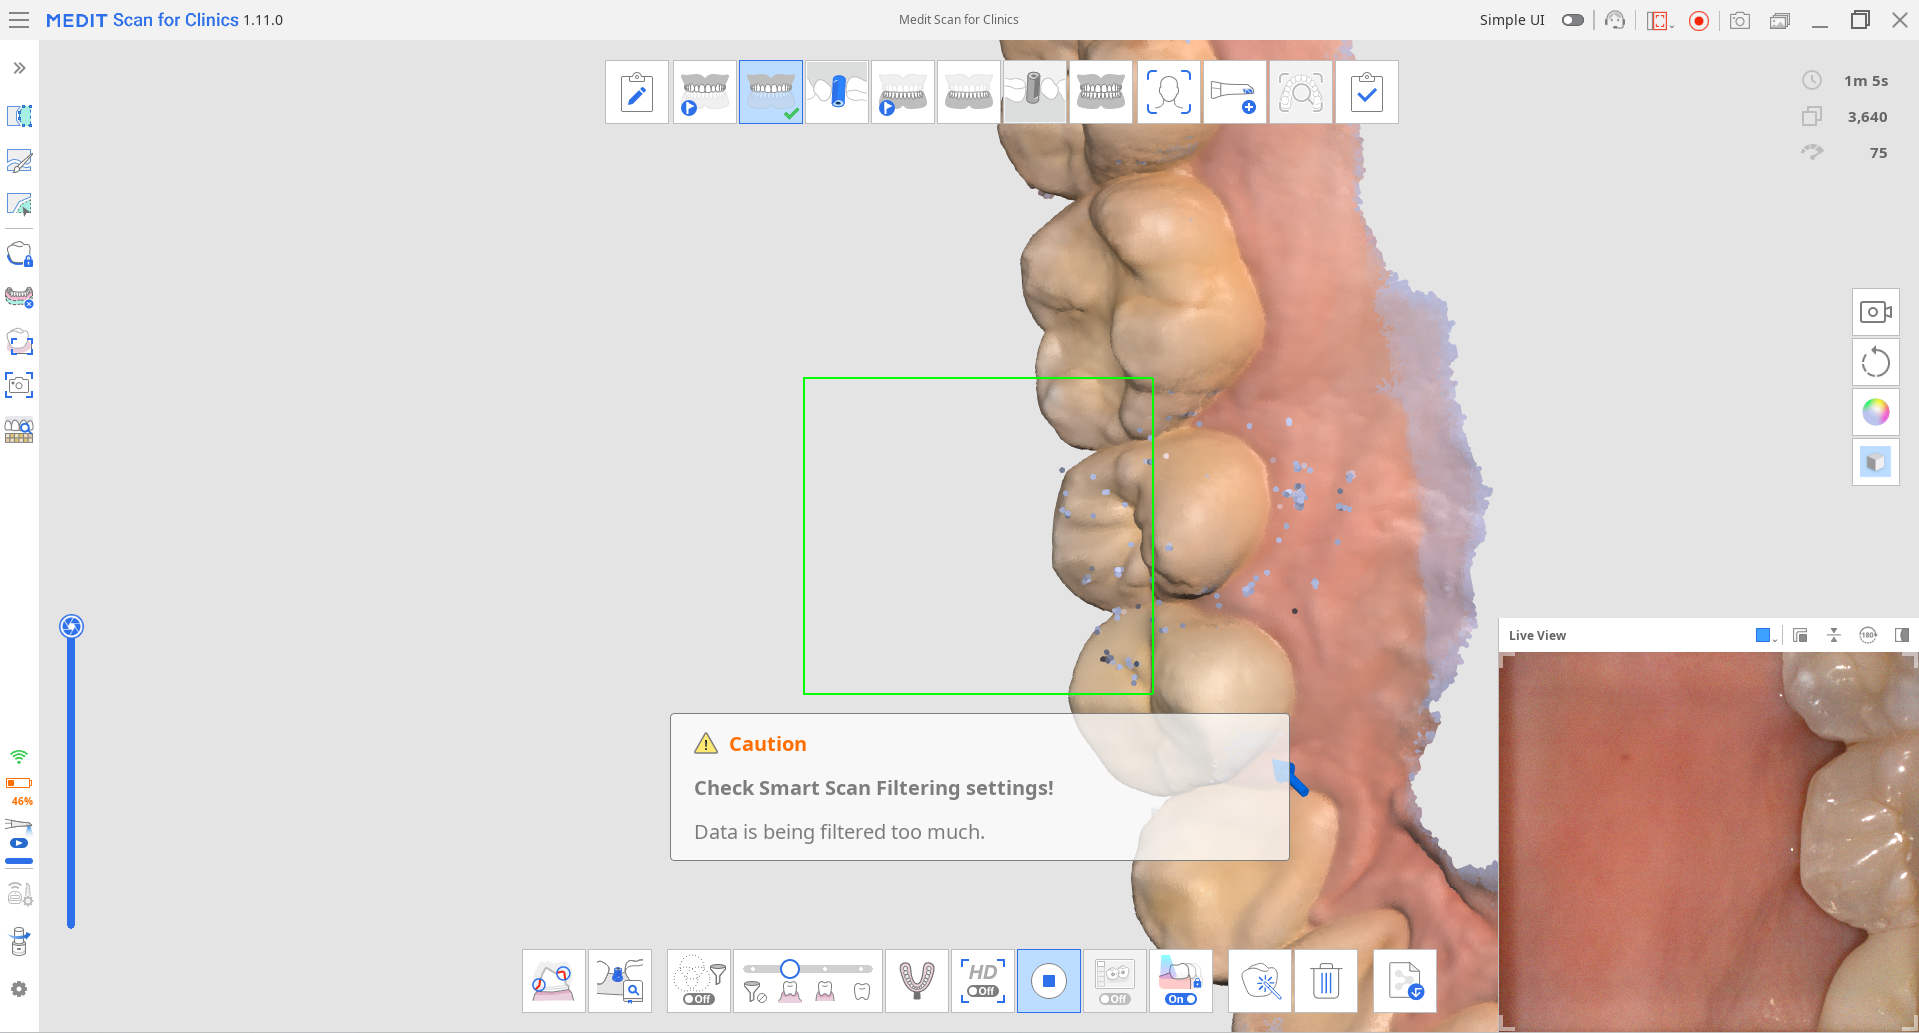
Smart Scan Guide
The Smart Scan Guide identifies any unusual actions during the scanning and provides appropriate guidance. The message automatically disappears after a period of time or if the situation is resolved.
- When there is too much data filtered out while scanning using Smart Scan Filtering
- When the scan is inconsistent, and the scan continues from a new place (when Smart Stitching is turned off)
- When the scanner is not close enough to the teeth
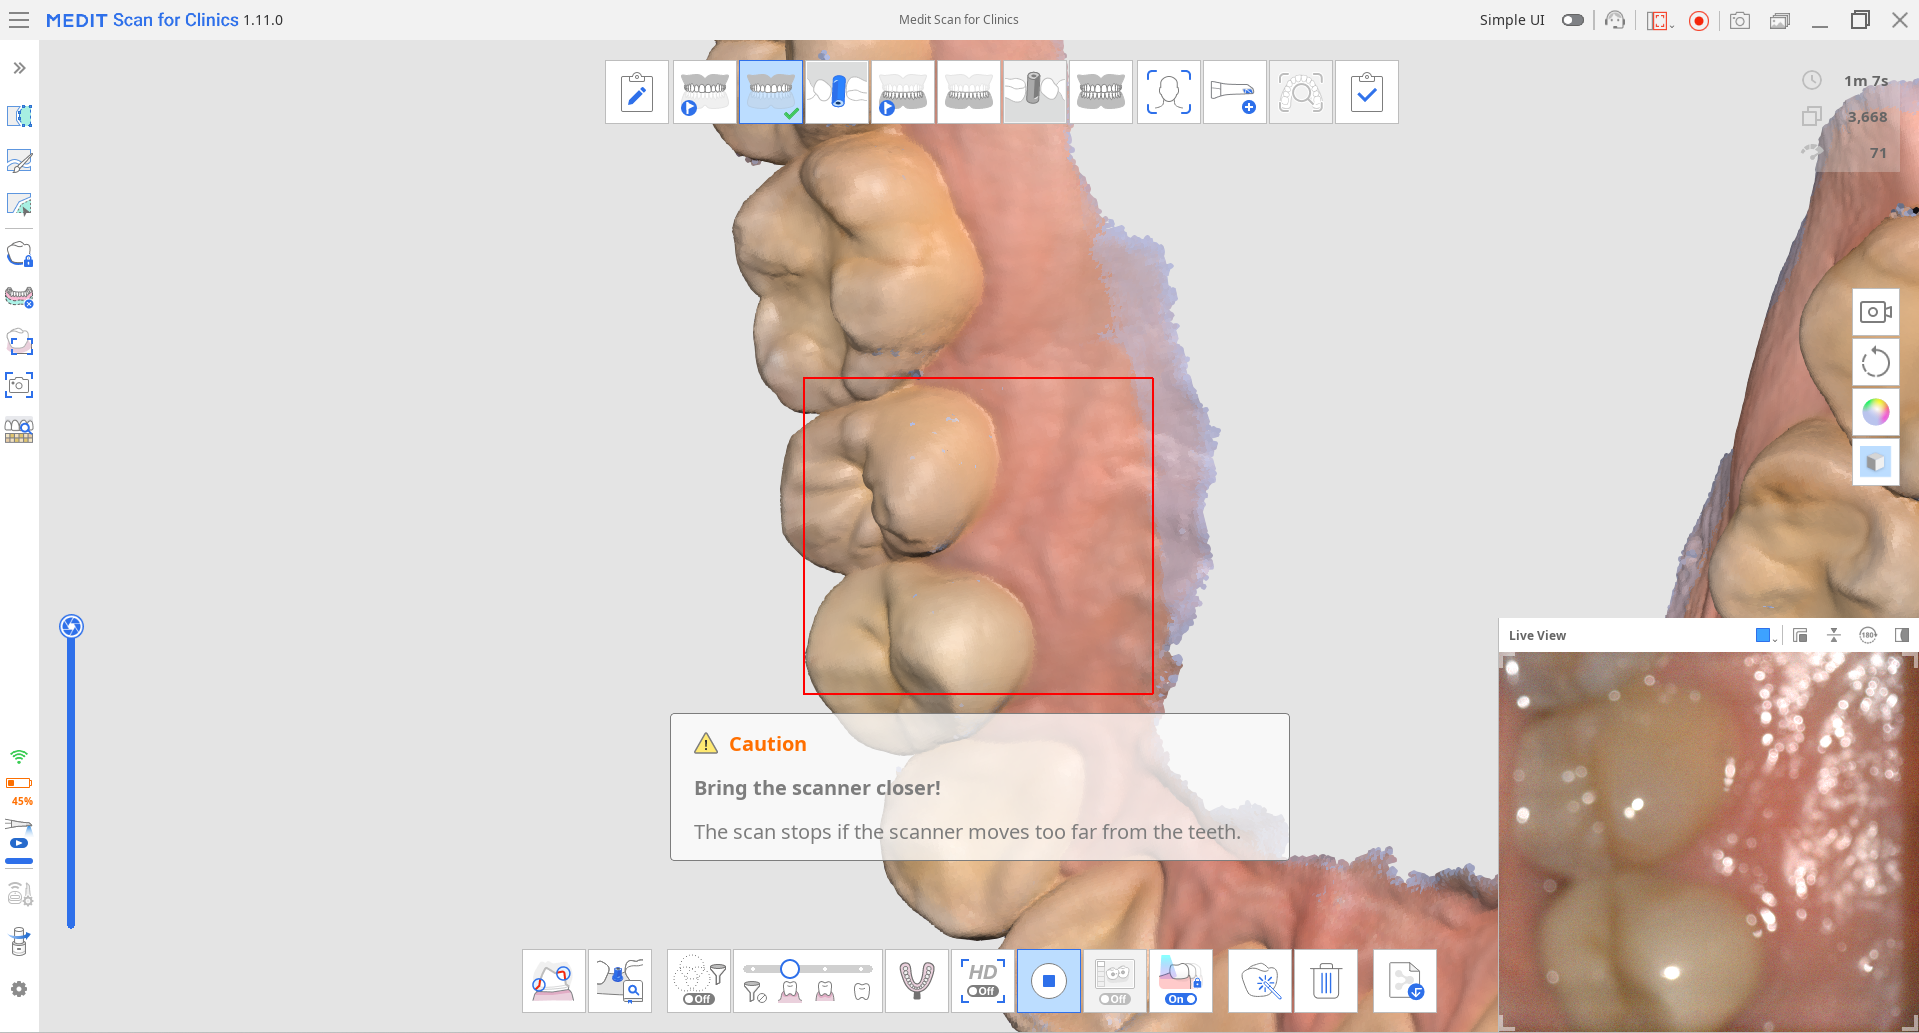


When the scan stops, additional guides are provided in the Info Box in the top left corner.
Was this article helpful?
