Scan Stage
- 22 Jul 2024
- 7 Minutes to read
- Print
- DarkLight
- PDF
Scan Stage
- Updated on 22 Jul 2024
- 7 Minutes to read
- Print
- DarkLight
- PDF
Article summary
Did you find this summary helpful?
Thank you for your feedback
Scanning
Once you establish the scanning strategy for the case, you will automatically move on to the Scan stage.
The Scan stage consists of sub-stages such as Maxillary Base, Mandibular Base, Flexible Multi-Die, Prepared Tooth (Maxilla), Prepared Tooth (Mandible), etc.
- The order of each sub-stage can be changed. The changed order is saved and can be applied when you scan next time.
New Scan

Scan the items corresponding to each sub-stage of the Scan stage in the order of the stage icons.
- Before scanning, ensure that the model faces the cameras and that the same articulator type is set for all linked programs such as Medit Link, design programs, etc.
- Place the model in the scanner.
- Select a scan path for the scanning process. You can skip this step if you want to use the default scan path or when the "Perform Additional Scanning Automatically" option is enabled on Settings > Table Top Scanner > Additional Scanning.

- Click the "Scan" icon at the bottom.

The Space key is set to Scan by default. You can configure the shortcut keys for Medit Scan for Labs in Settings. - Before the scan starts, you will be asked to adjust the scan area.
- Drag to move the blue line to set the appropriate height and click the "Confirm" button.
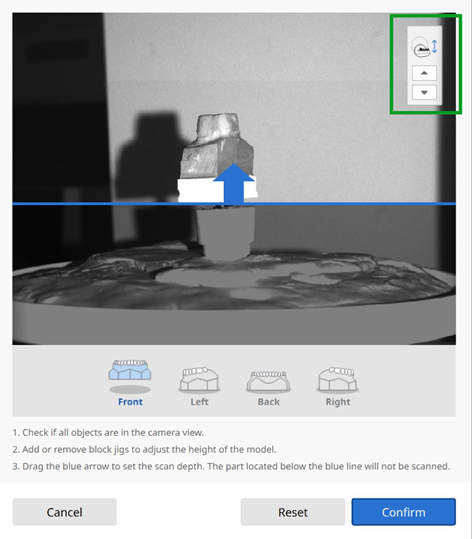 Please make sure that the model fits the camera view in all directions.
You can adjust the axes of the scanner by clicking the up/down buttons at the window's top right corner.
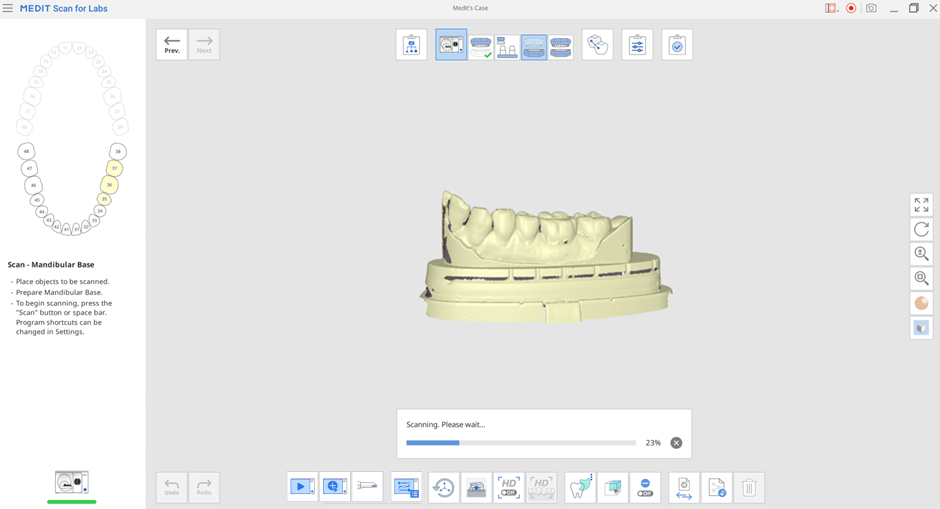
- The scan starts according to the specified scan path. Do not touch the scanner while the scan is in progress. It will take a few seconds to complete.
- Click the "Next" button at the top left corner of the data display area to move to the next scan stage.


Re-Scan
- Click the "Scan" icon at the bottom after your scan is complete.
- The following dialog appears.
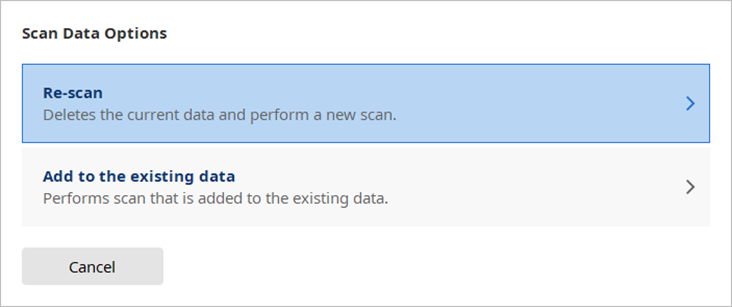
- Click "Re-Scan" to delete the existing scan data and perform a new scan or "Add to the existing data" to acquire additional data without deleting the previous scan data.

Additional Scanning
Automatic Additional Scan
The program can automatically identify areas needing additional scans based on the acquired data.
🔎Note
You can turn on or off the "Perform Additional Scanning Automatically" option on Settings > Table Top Scanner > Additional Scanning and set when to start automatic additional scanning.
- Once the initial scanning is completed, the program will ask the user to confirm to start additional scanning.

- Click "Start Now" to start automatic additional scanning. Even if you do not click the button, additional scanning will start after the set time elapses.

- In some stages, the process of 1-3 above is repeated several times.
- After the automatic additional scan is completed, the user can check the scan data and perform "Add Scan" if the scan data is still insufficient.


Manual Additional Scan
With the "Additional Scan" icon at the bottom of the screen, you can get additional data on the specific area of the model without replacing the existing scan data.
- Rotate the model to bring the missing spot to the front. You can double-click on the missing spot to turn the cameras to face the empty spot.
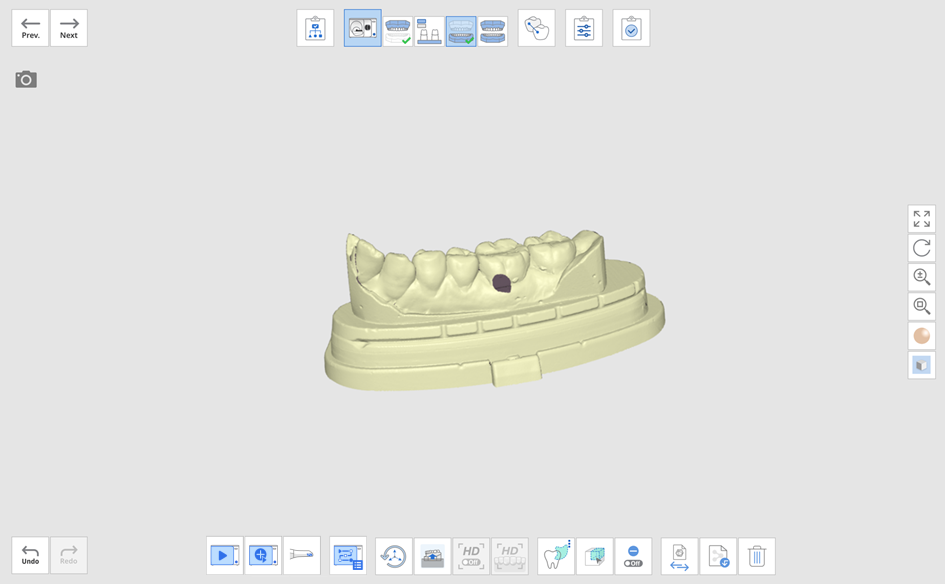
- Click the "Additional Scan" icon at the bottom.

- The empty spot will be filled after the table top scanner acquires additional scans.
- If you rotate the model and click "Additional Scan" during an additional scan, it will be scheduled for the next additional scan so you can scan continuously.


Scan Using Intraoral Scanner
You can also use an intraoral scanner to get additional scan data.
- Connect the intraoral scanner to the computer.
- Check the scanner status to see if the scanner is calibrated.
- Click the "Scan Using the Intraoral Scanner" option at the bottom.

- Place the scanner tip on the empty spot and scan the model.
- The empty spot will be filled after you acquire additional scans with the intraoral scanner.

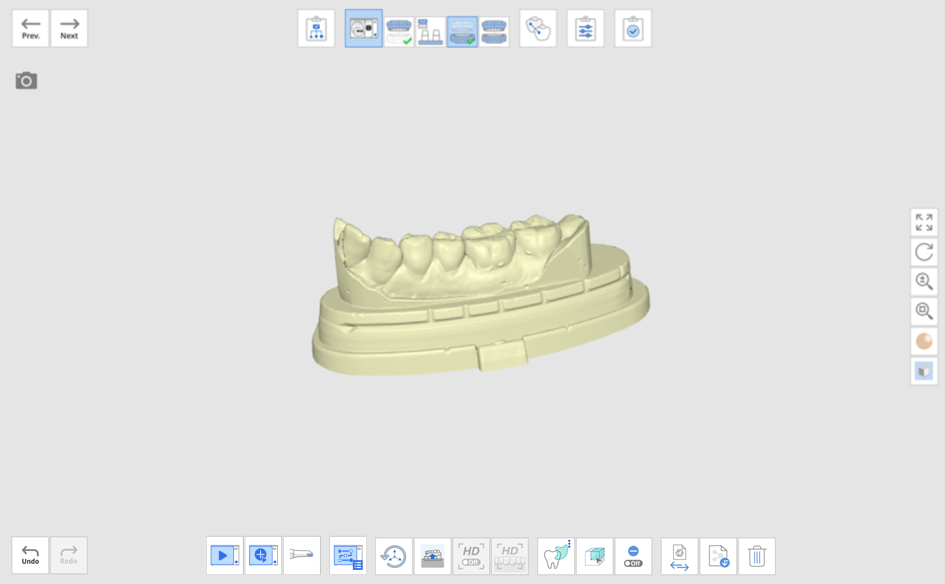
Add Another Scan Body
You can perform an additional scan body scan after placing scan bodies on the different teeth. This function is useful when you do not have enough scan bodies.
For example, here we have a case that requires four scan bodies, but you only have only two scan bodies available.
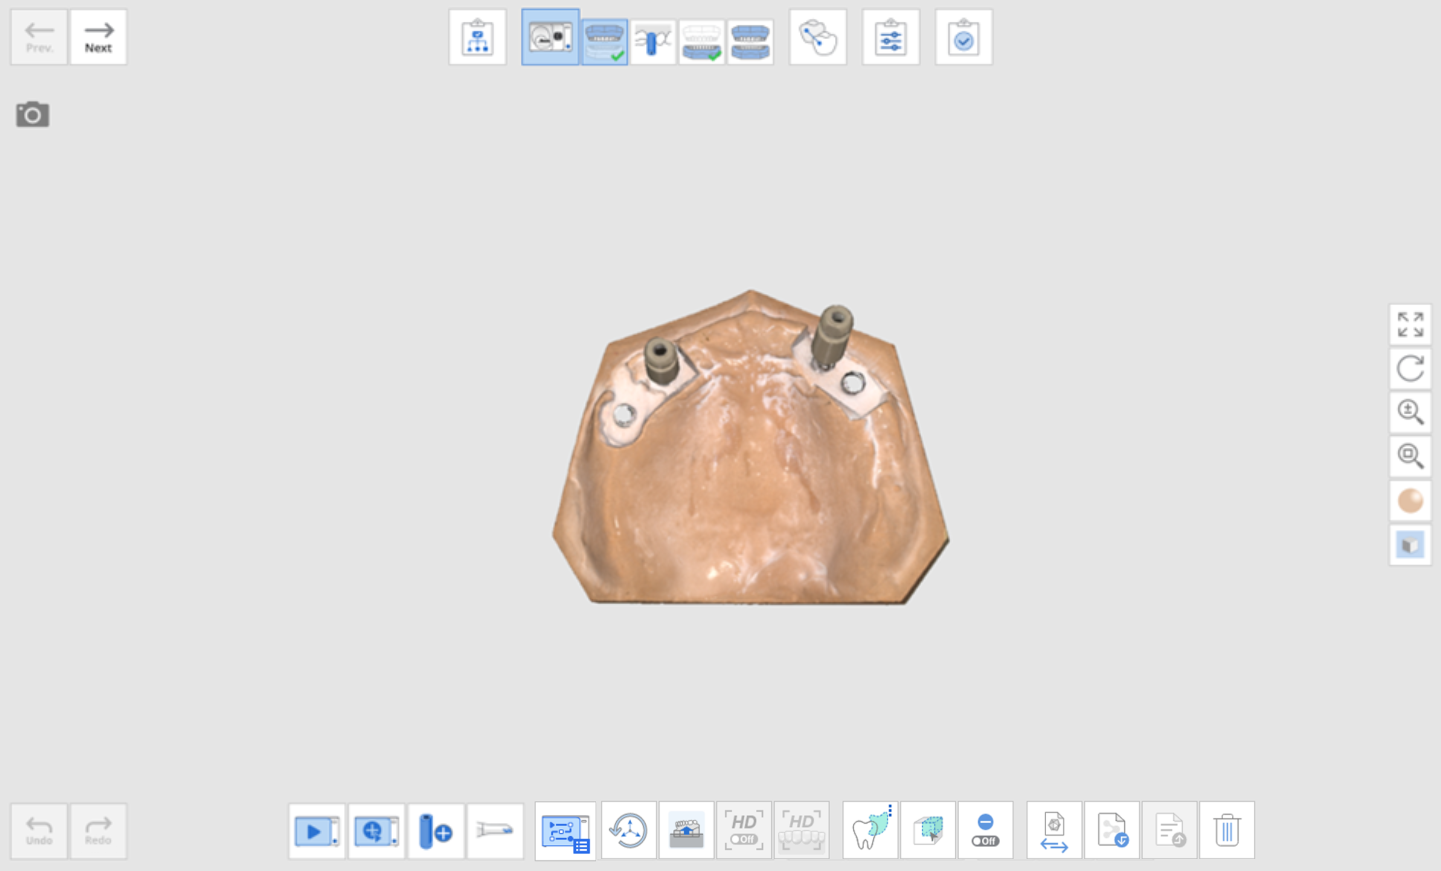
- Place the two scan bodies on the model, and click the "Scan" icon.
- You will get the scan data with two scan bodies on.
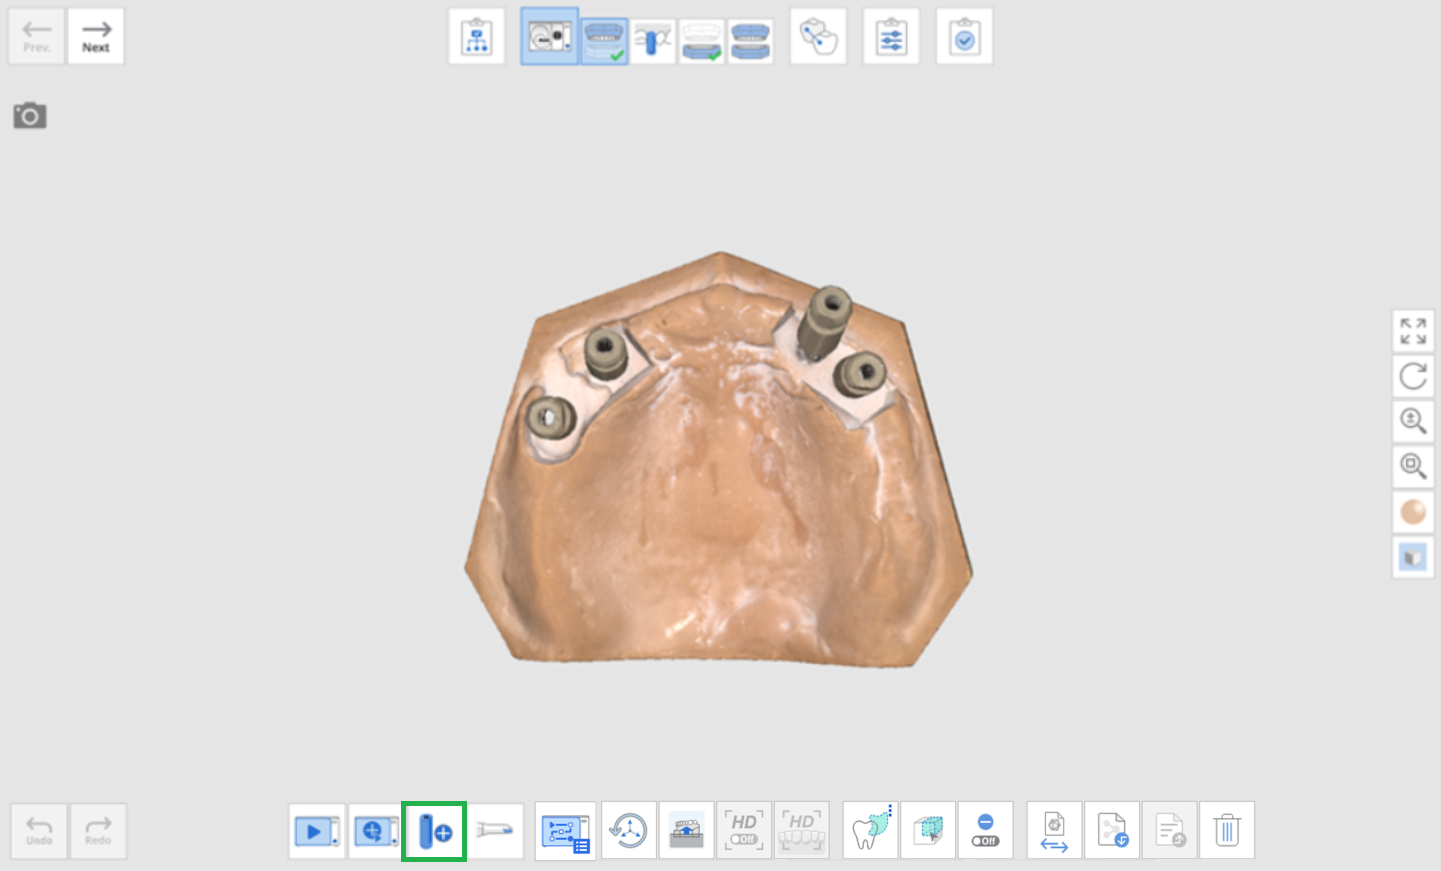
- Move the two scan bodies to the other two positions on the model, and click the "Add Another Scan Body" button.

- The program will perform additional scans to complement the existing data.


Scan Stage Tools
 | Scan | Start the scanning process. |
 | Additional Scan | Perform additional scanning on specific areas of the model without replacing the existing one. |
 | Add Another Scan Body | Perform an additional scan body scan after switching the position of the scan body in the base. |
 | Scan with Intraoral Scanner | Perform an additional scan using an intraoral scanner. |
 | Manage Scan Path | Select a scan path for the scanning process. You can register a new scan path by adding shots to an existing one. (Available with T710/T510/T310) |
 | Initialize Axes | Reset the axes of the scanner to the default position. |
 | Adjust Scan Area | Adjust the scan depth. |
 | HD Mode | Switch to HD scan mode. (*Available with T710/T510/T310) |
 | HD for Shiny Models | Switch to HD scan mode for shiny models made of resin or wax. (*Available with T710/T510/T310) |
 | Freehand Selection | Select a freely drawn area on the data. |
 | Box Selection | Select a rectangular region on the data. |
 | Island Selection | Select data detached from the rest of the data by clicking on it. |
 | Color Selection | Select all areas of the same or similar color as the mouse click location on the scan data. |
 | Switch Selection Mode | Switch selection mode between surface selection and volume selection. |
 | Deselection Mode | When on, deselect the selected area using the area selection tools. |
 | Swap Data | Swap current stage data with data at another stage. |
 | Import 3D Data | Import 3D data files from the Medit Link or local PC. You can import several 3D data files at once for flexible multi-dies. |
 | Export 3D Data | Export 3D data files to the local PC. You can select the file format between .stl, .obj, and .ply. |
 | Delete | Delete all data on the screen. |
 | Undo | Undo the previous action. |
 | Redo | Redo the action. |
Scan Path Management
Select Scan Path
- Click the "Select Scan Path" icon at the bottom.

- Select a scan path from the list on the Scan Path Management dialog.
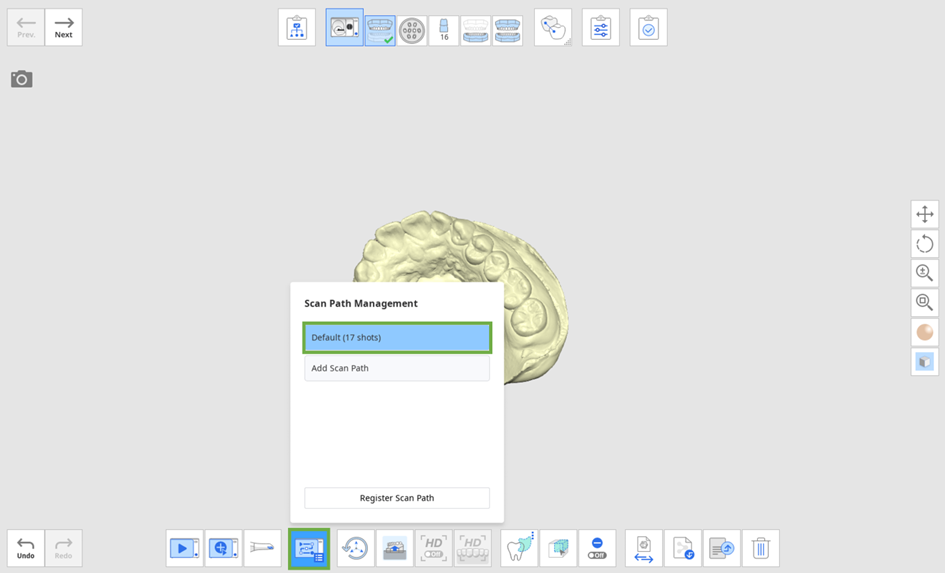
- The selected scan path is applied to the scan group and will be used to scan the group.

Register Scan Path
If you want to register a new scan path by modifying an existing one, follow the steps below.
- Click the "Additional Scan" icon to fill out the empty spots on the data after the first scanning.
- "Click the "Select Scan Path" icon.
- Click the "Register Scan Path" button on the Scan Path Management dialog.
- The additional shots from additional scanning are displayed in the left section.
- Click the desired shots from the "Select Shots" section, then select a scan path from the drop-down list on the top right.
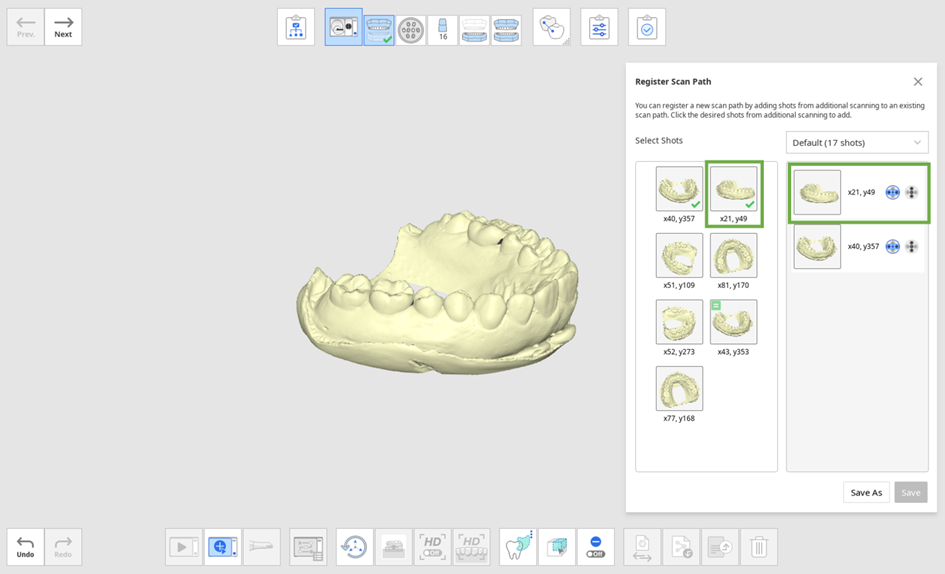
- The selected shots are added to the scan path on the right.
- You can select the camera mode if you use a T710 scanner.
 Horizontal Camera: Default camera mode for scanning
 Vertical Camera: Camera mode for clear scan data between teeth
 - After selecting shots and adding them to a scan path, click "Save As" to save the new scan path.
For example, the case in the picture below shows that three additional shots are added to the "Default(17 shots)" scan path.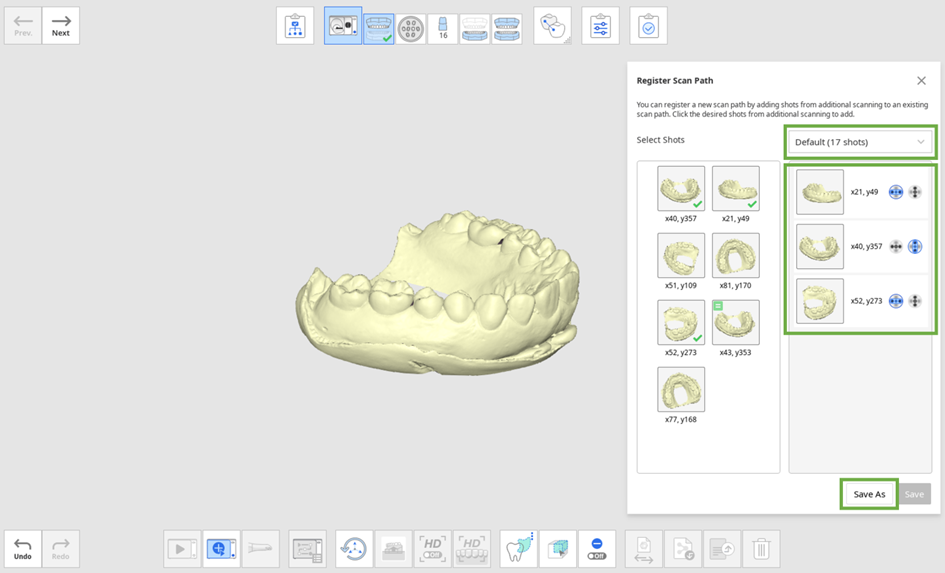
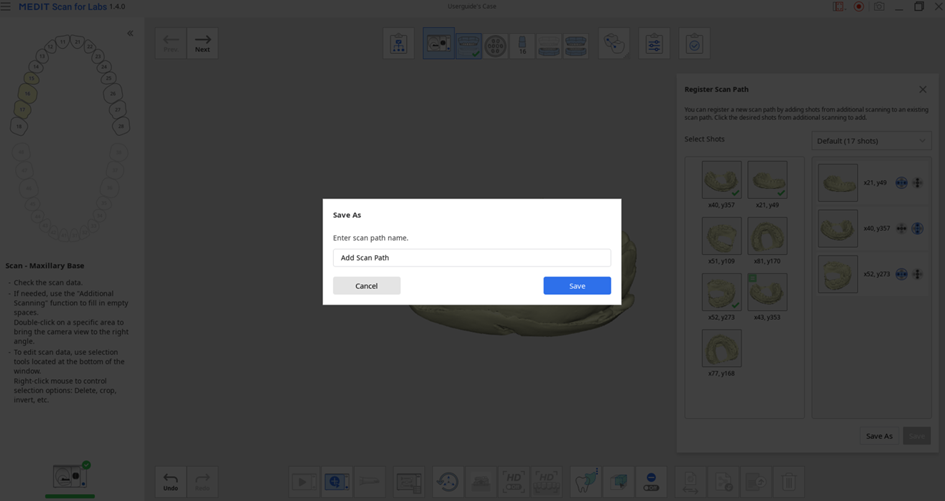
- Edit the name of the new scan path and click "Save."
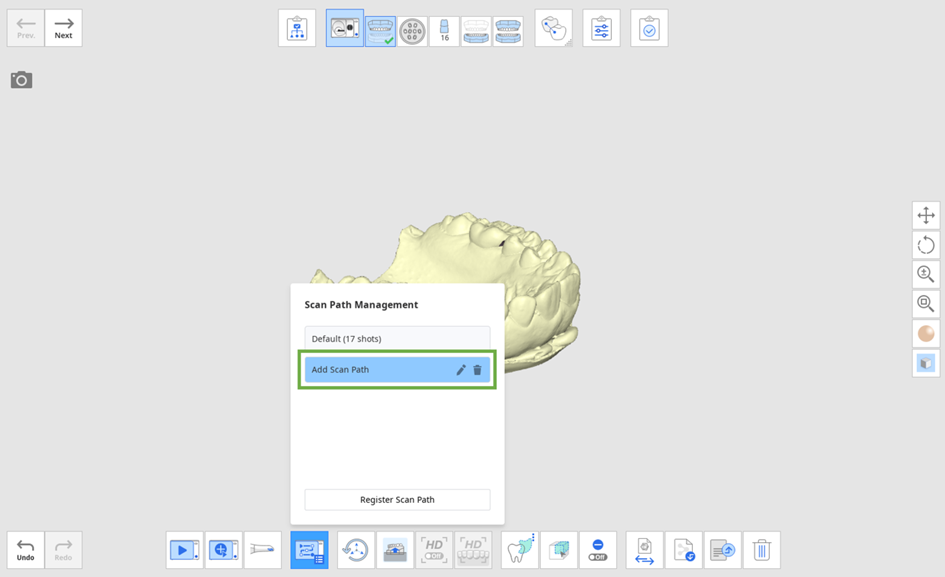
- The new scan path is added to the list on the "Scan Path Management" dialog.


Area Selection Tools
Medit Scan for Labs provides three types of selection tools.
| Freehand Selection | Box Selection | Island Selection |
|---|---|---|
 |  |  |
- Select an area with the area selection tools.
- Right-click on the selected area to see the options to control the data.
- Select one of the following options.
- Select All: Select all data on the screen.
- Deselect All: Cancel selection of data.
- Invert: Select all areas not currently selected while deselecting the previously selected area.
- Crop: Crop everything out except for the selected area.
- Delete: Delete the selected data.
Color Selection Tools
You can select the areas of the same color in the scan data for quick and easy editing.
🔎Note
The tool is only available when the "Texture" option is selected on the Sacn Strategy dialog.
- After acquiring data at the Scan Stage, click the "Area Selection" tool at the bottom and select the "Color Selection" tool.
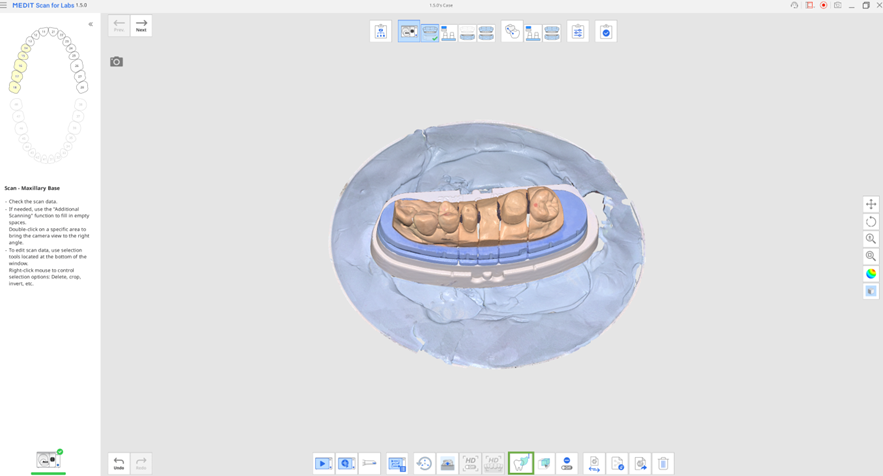
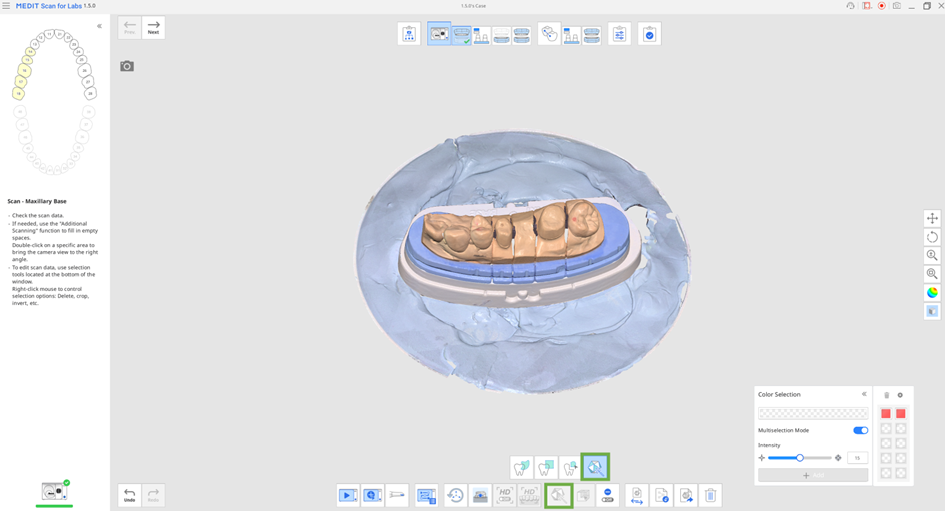
- Click the spot in the scan data with the color you want to pick.
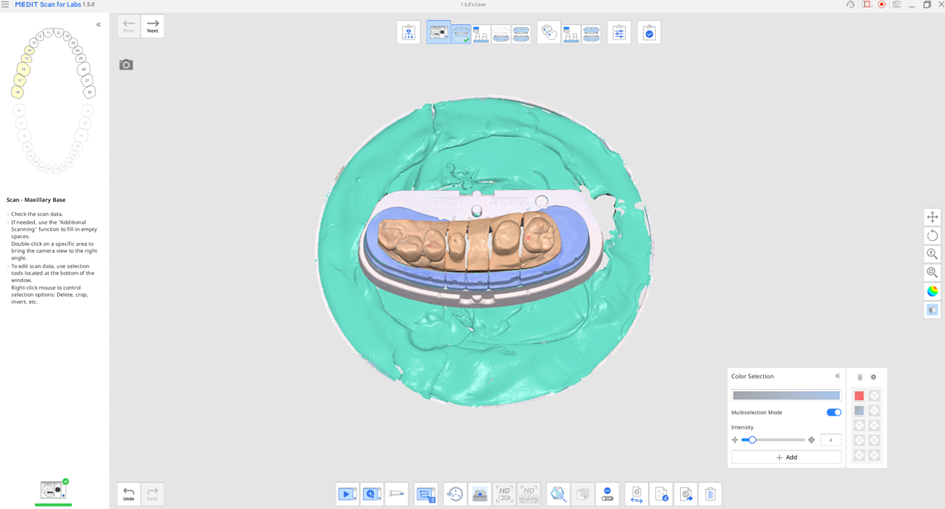
- All areas with the same color in the data are automatically selected.
- You can crop or delete the selected areas.
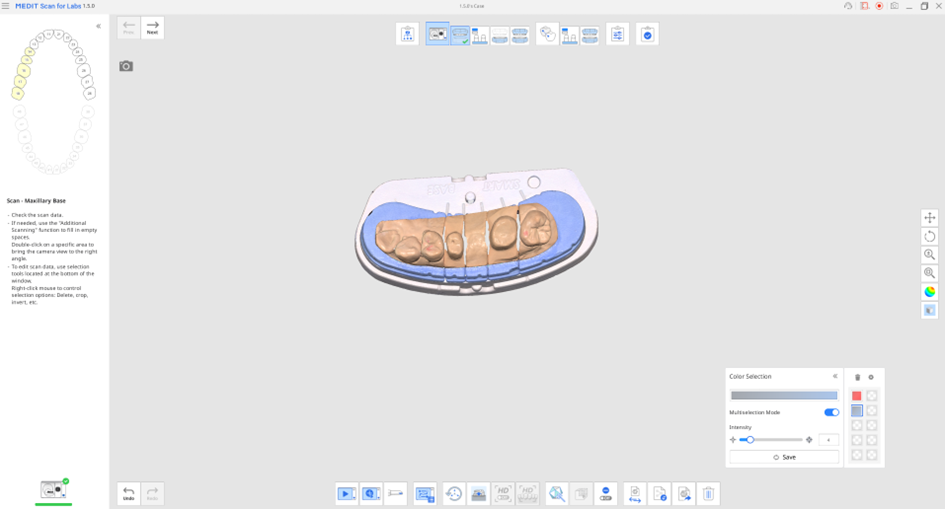
- You can enable the "Color Filter" option in Settings to remove the registered colors automatically when scanning is done.
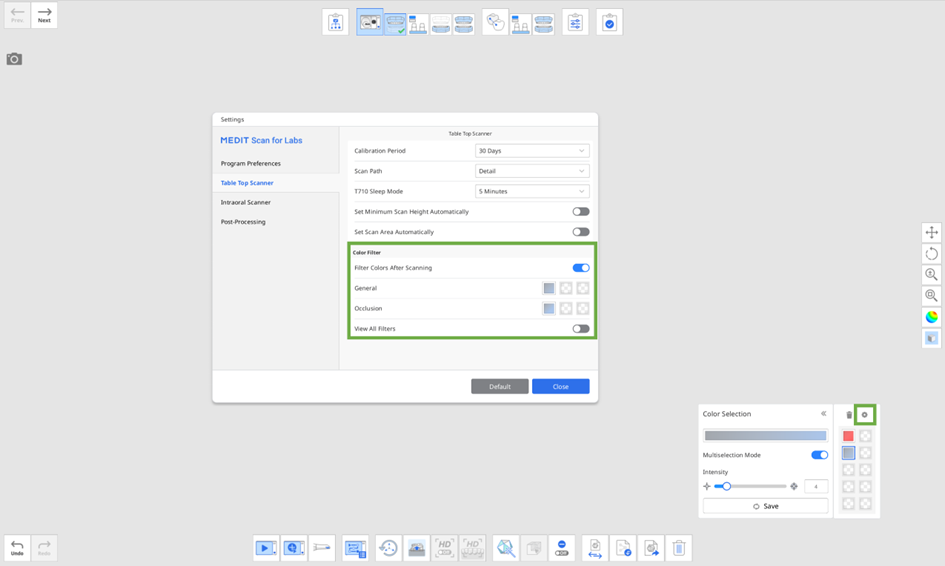 🔎NoteYou can designate different colors for each scan stage to filter out.


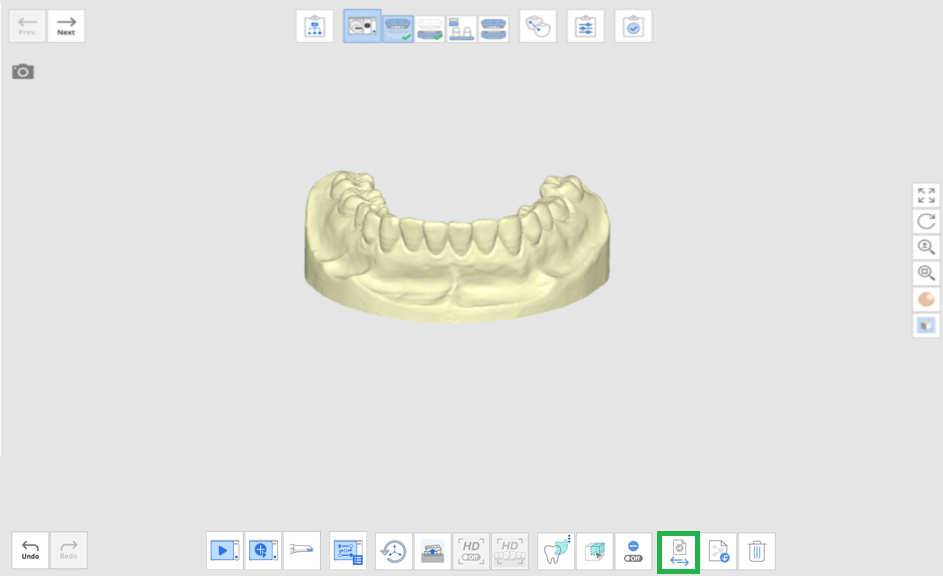
Swap Data
- The following is an example of the maxillary and mandibular bases being switched and scanned. For an easy fix, click the "Data Swap button in the maxilla base scan stage.
- Select the scan stage you want to swap data with.
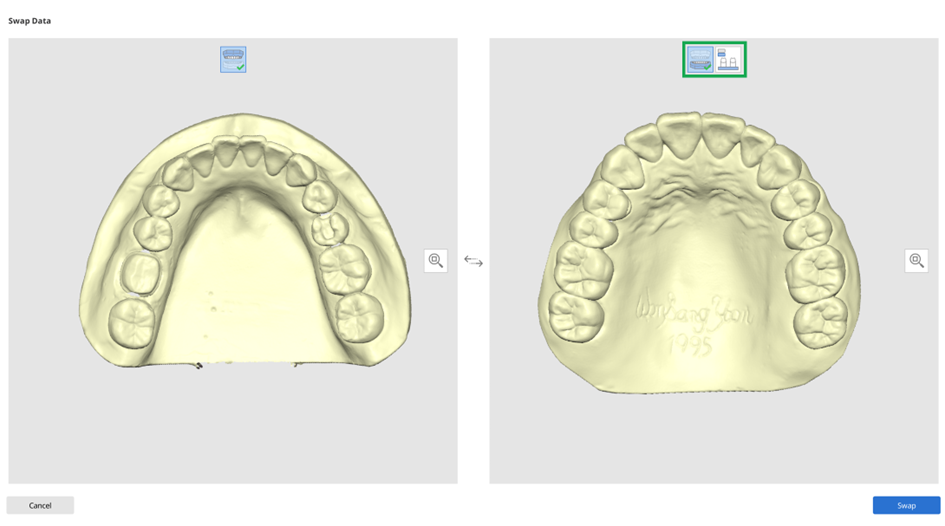
- Click "Swap" to exchange data.
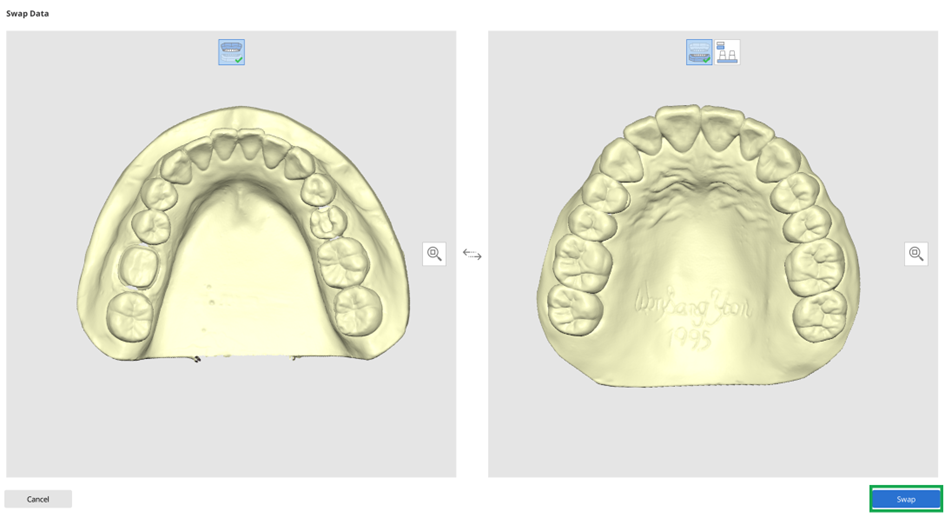
- You can see that the maxillary and mandibular base data have been successfully swapped.
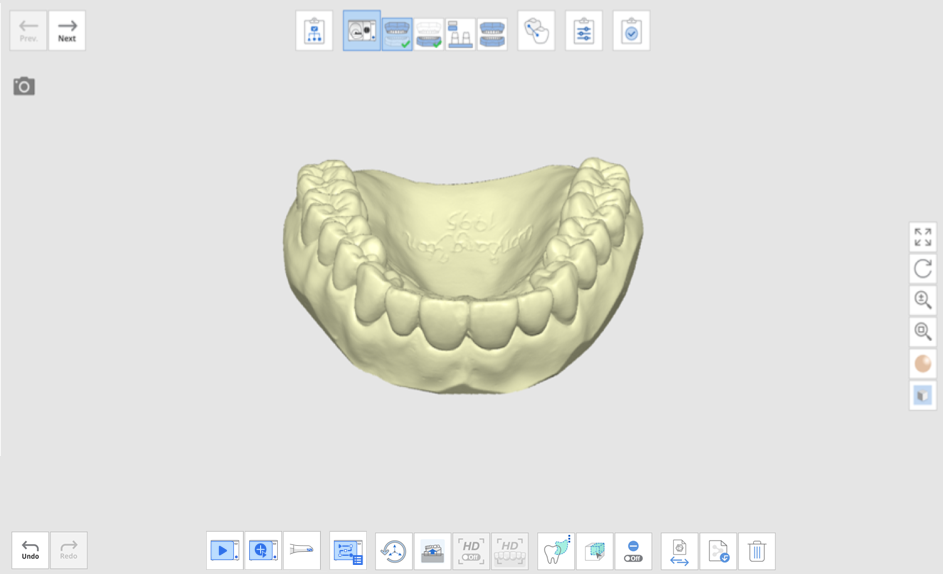


Import 3D Data
- Click on the "Import 3D Data" icon.
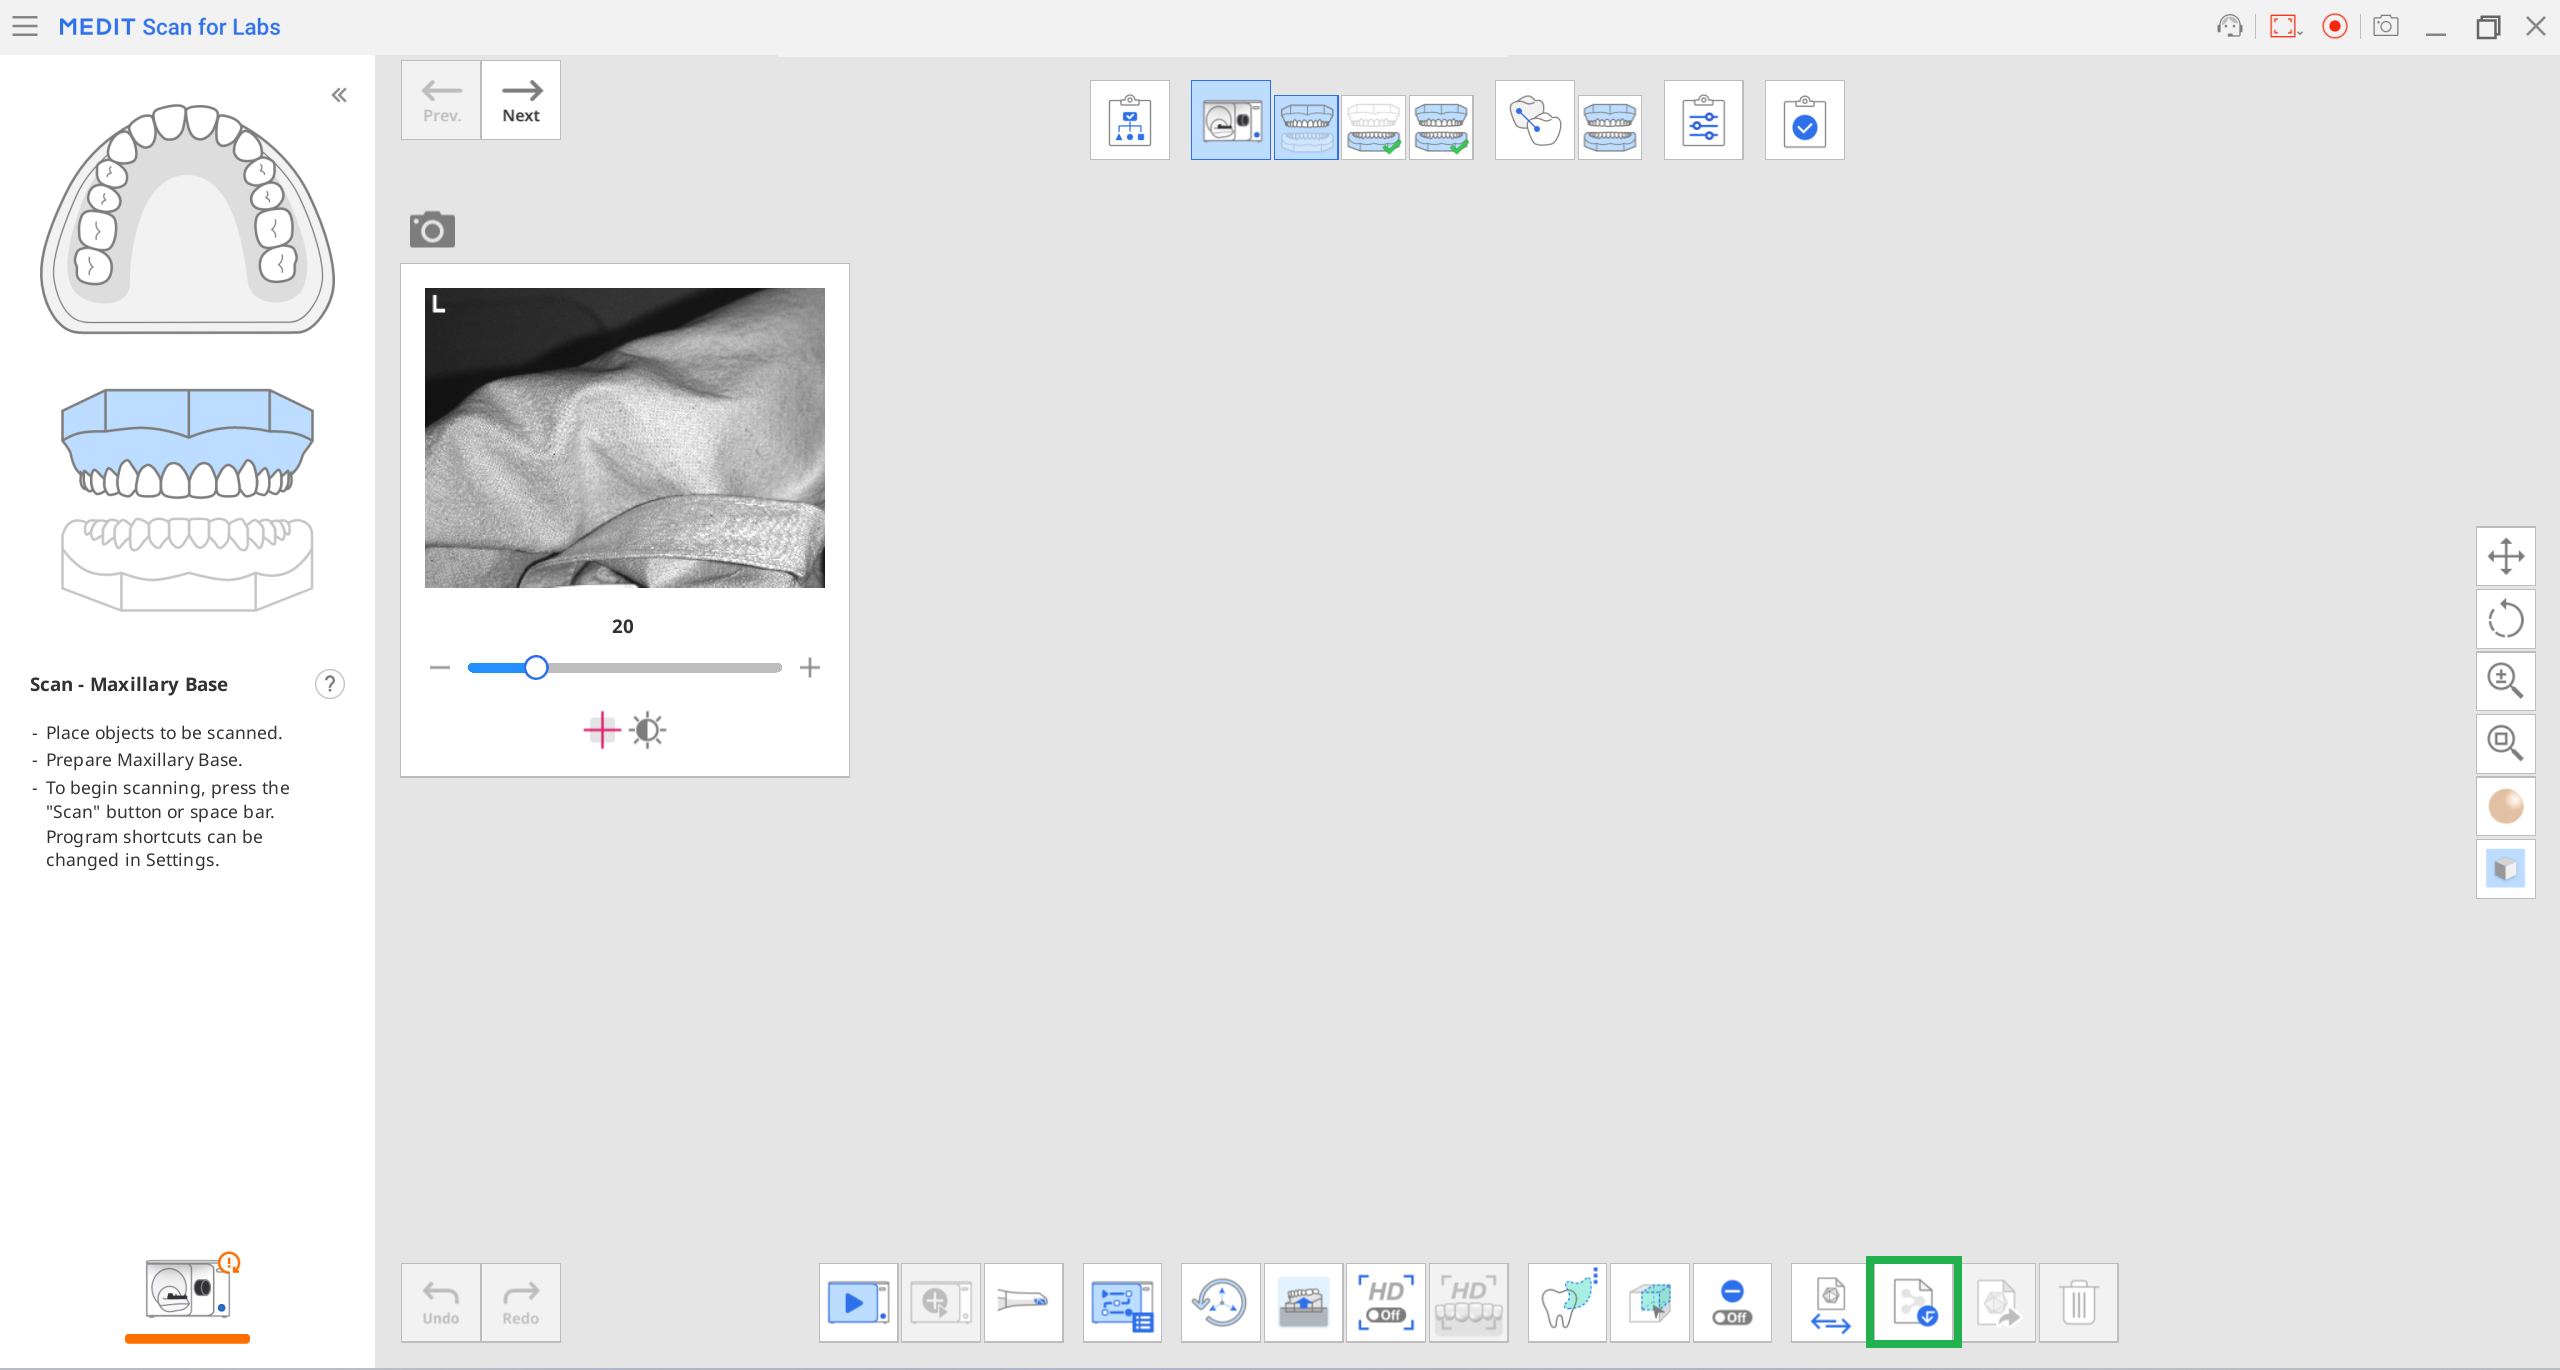
- Select whether to import files from Medit Link or your local PC.
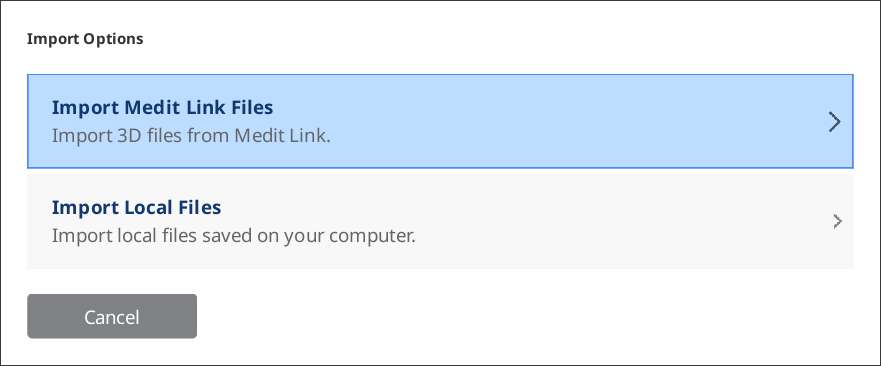
- Select the file to import. You can import multiple 3D data files at once for flexible multi-dies cases.
- The 3D data is imported into the scan stage.


Export 3D Data
- Click the "Export 3D Data" icon.
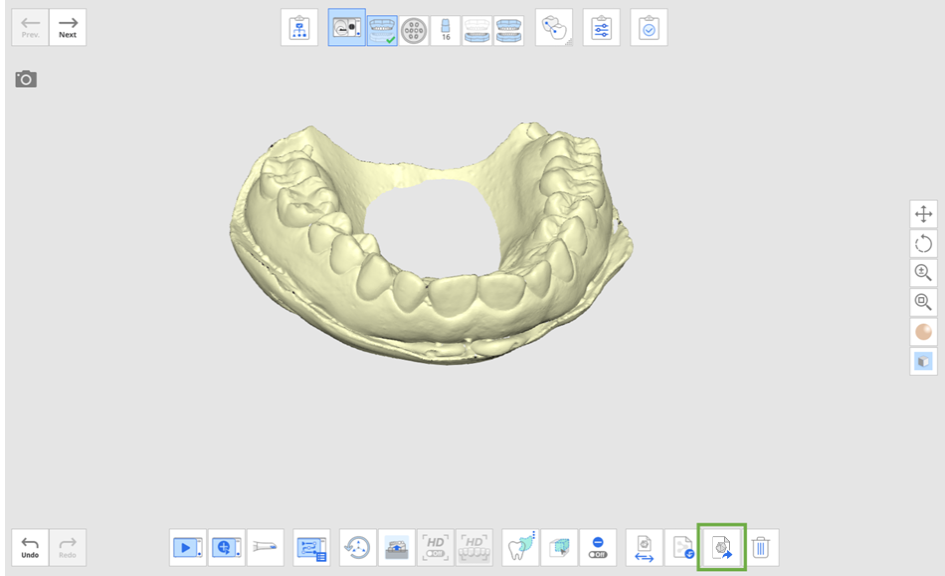
- Select a folder location to save the file on the local PC.
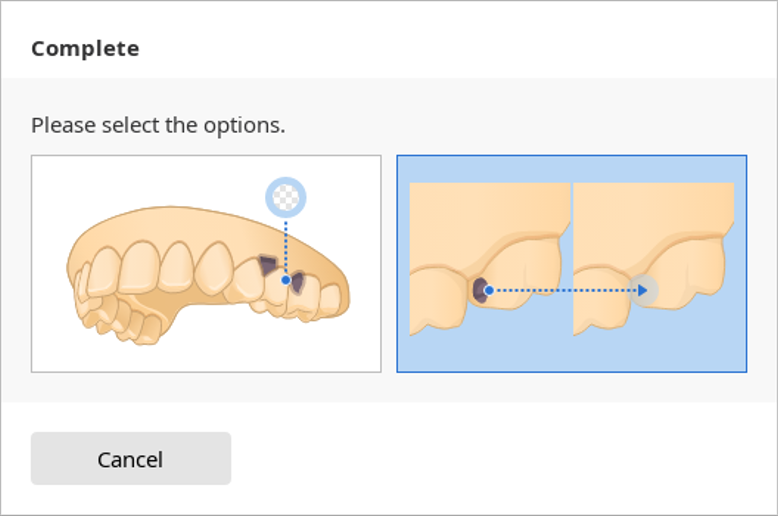
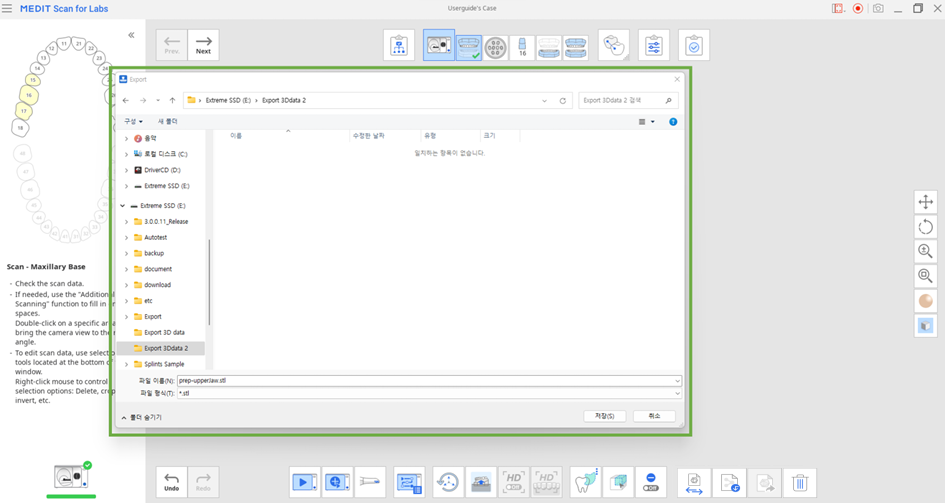 You can export files in the .stl, .obj, and .ply formats.
 - Select an option in the Complete dialog.
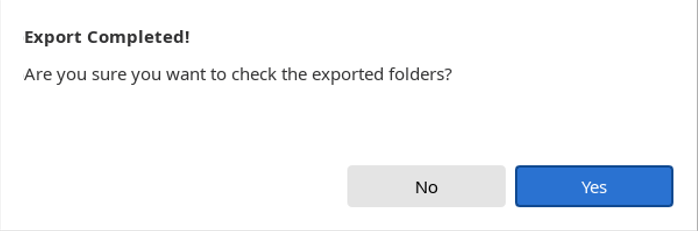
- The data is exported to the selected location after processing.
- Select "Open" to go directly to the folder directory.


Was this article helpful?
