Occlusion
- 10 Jan 2025
- 6 Minutes to read
- Print
- DarkLight
- PDF
Occlusion
- Updated on 10 Jan 2025
- 6 Minutes to read
- Print
- DarkLight
- PDF
Article summary
Did you find this summary helpful?
Thank you for your feedback
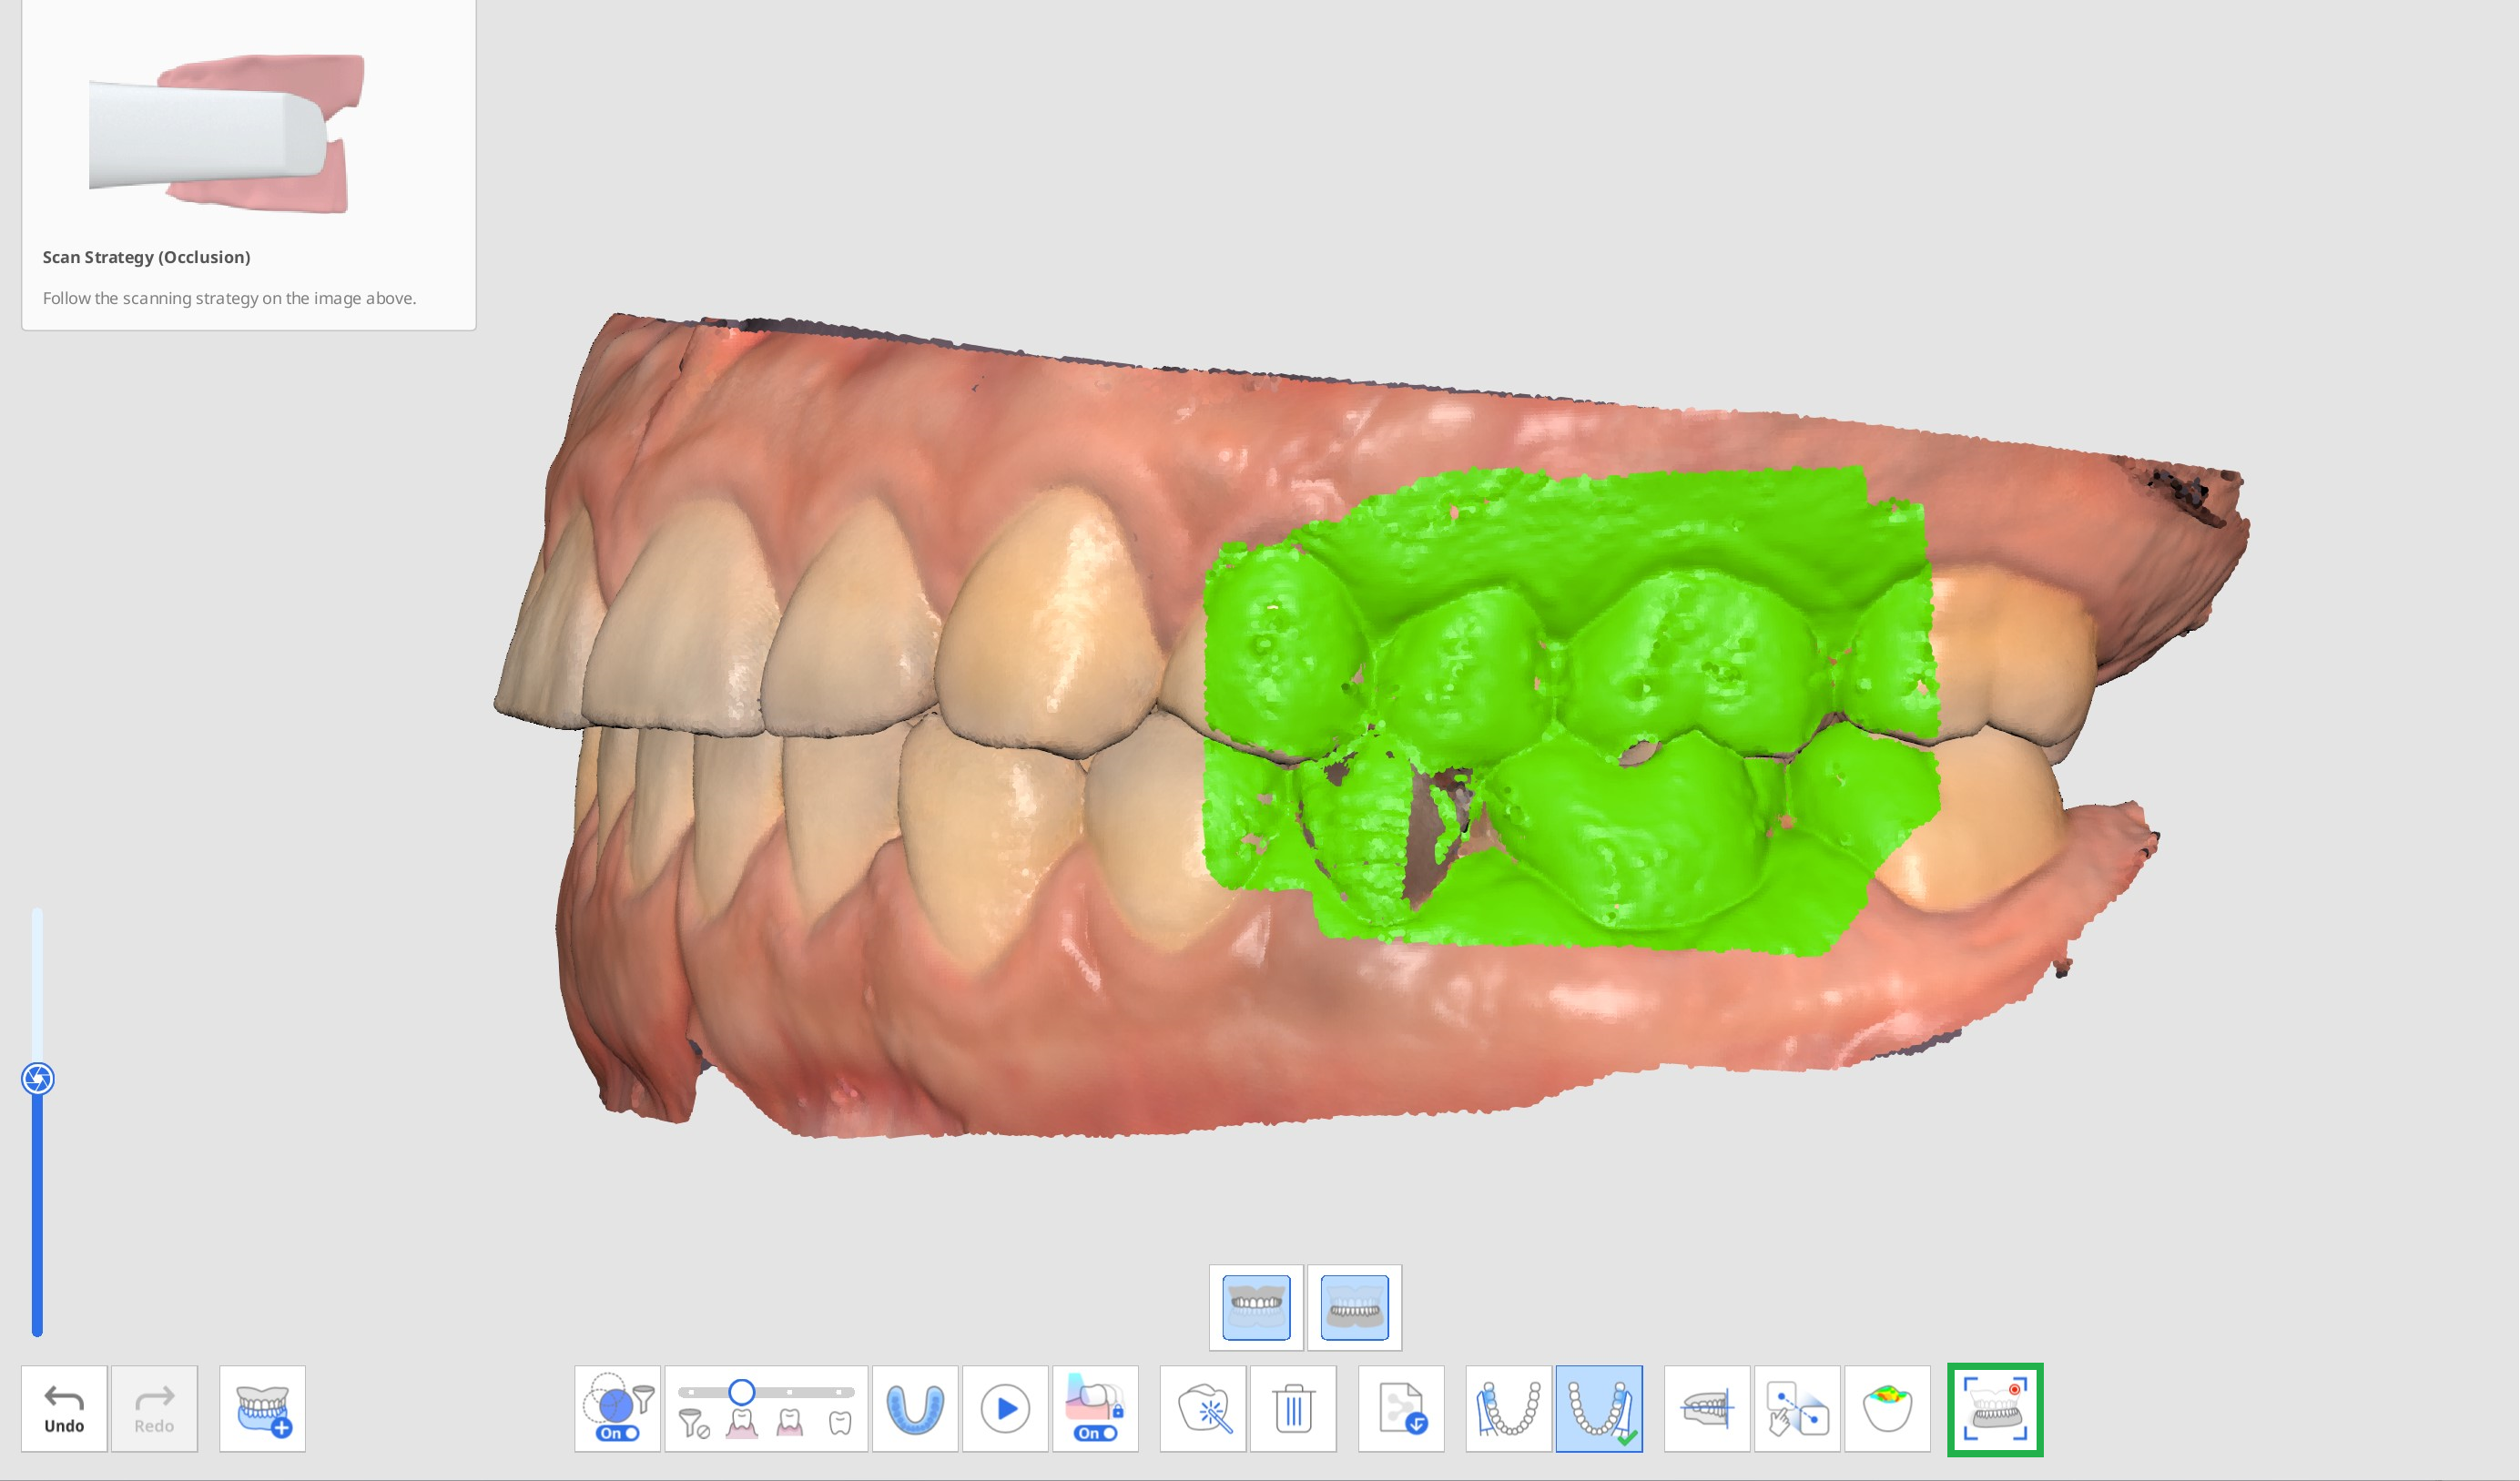
Occlusion Stage
 | Acquire the 3D image of the occlusion. |

Additional Tools for Occlusion Stage
Please refer to Scan Stage Tools for more information about how to use tools that appear at the bottom of the screen for each stage.
 | Multi Occlusion | Reproduce various types of occlusion scan data and alignment. Only available on Occlusion scan stage. |
 | Bite Impression Scan | Acquire 3D images of the bite impression. Then, align the maxilla and the mandible. |
 | Occlusion Target for Maxilla | Choose between the pre-operation maxilla and maxilla data for occlusion alignment. |
 | Occlusion Target for Mandible | Choose between the pre-operation mandible and mandible data for occlusion alignment. |
 | First Occlusion | Acquire a first scan data for occlusion alignment. |
 | Second Occlusion | Acquire a second scan data for occlusion alignment. The second occlusion is often acquired on the opposite side of the first occlusion. |
 | Align with Occlusal Plane | Move the data location to the occlusal plane that is compatible with exocad. |
 | Manual Alignment | Align the scan data manually using user-defined points. |
 | Detach Maxilla | Detach the maxilla and move it back to the pre-alignment position. |
 | Detach Mandible | Detach the mandible and move it back to the pre-alignment position. |
 | Detach Occlusion Data | Detach first and second occlusion data and move them back to the pre-alignment position. |
 | Detach All | Detach all data and move it back to the pre-alignment position. |
 | Mandibular Movement | Record and simulate patients' actual mandibular movement when occlusion is aligned. |
Multi Occlusion
The Multi Occlusion Group function in the occlusion scan stage can reproduce various occlusion scan data and alignments. Multiple occlusion patterns can be acquired in patients with large or irregular tooth movements. Various occlusions can be created and managed in the case, such as centric relation for the edentulous patient, open bite for the production of a mouthpiece, protrusive occlusion for the production of snoring prevention appliance, and centric occlusion for patient treatment in clinics.
The "Multi Occlusion Management" dialog enables you to conduct the following functions:
- Add Occlusion Group
- Delete Occlusion Group
- Change Name
You can create up to 5 occlusion groups, and the scanned data for the selected occlusion group is displayed on the screen. You can freely select the target for occlusion in each group.

🔎Note
Since scan data of the same maxilla and mandible is reproduced according to the alignment of each occlusion group, this function is not available if scan data of different maxilla and mandible is required.
- Acquire maxillary and mandibular data in the Maxila and Mandible stages.
- Move to the Occlusion stage.
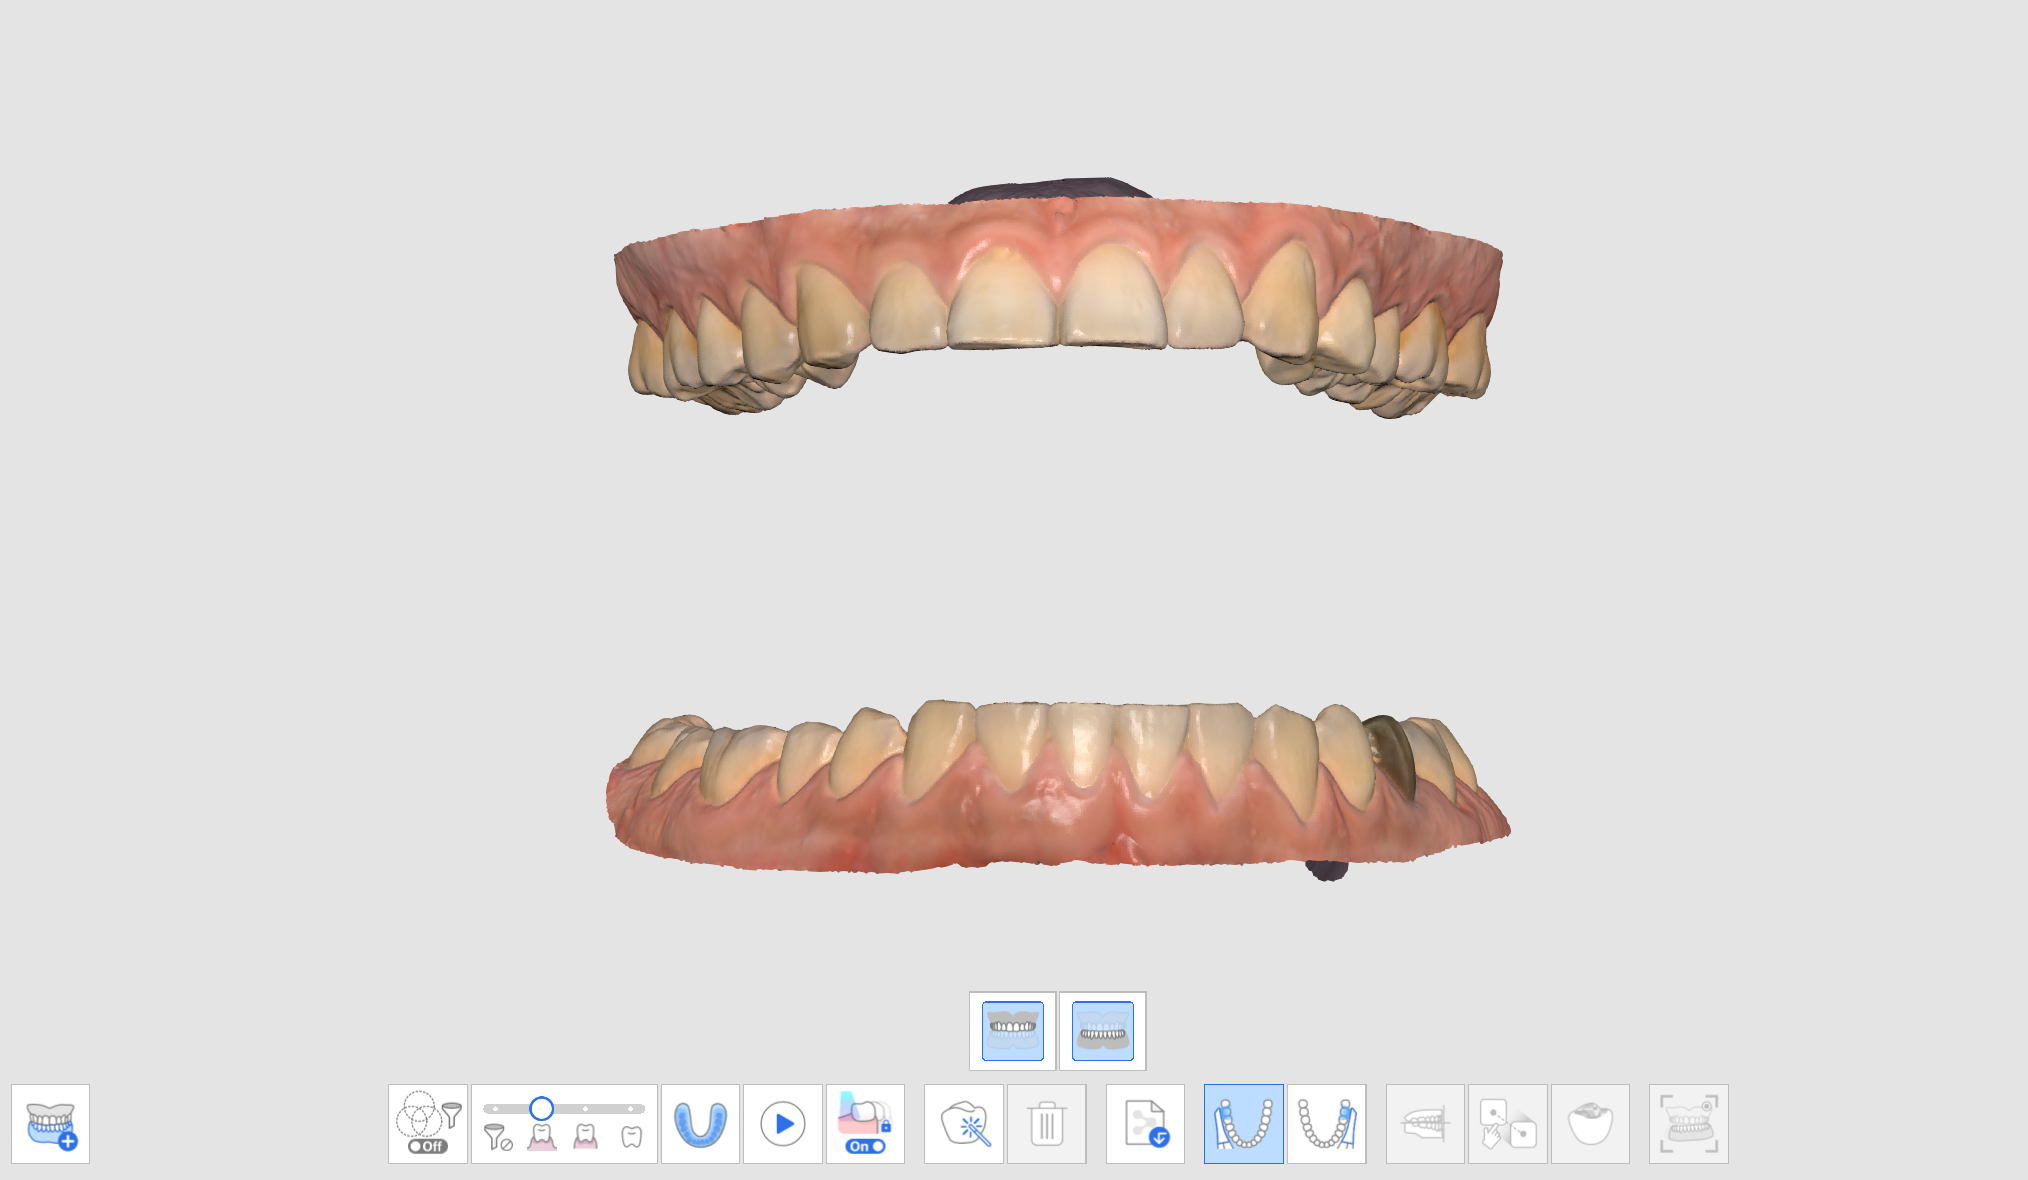
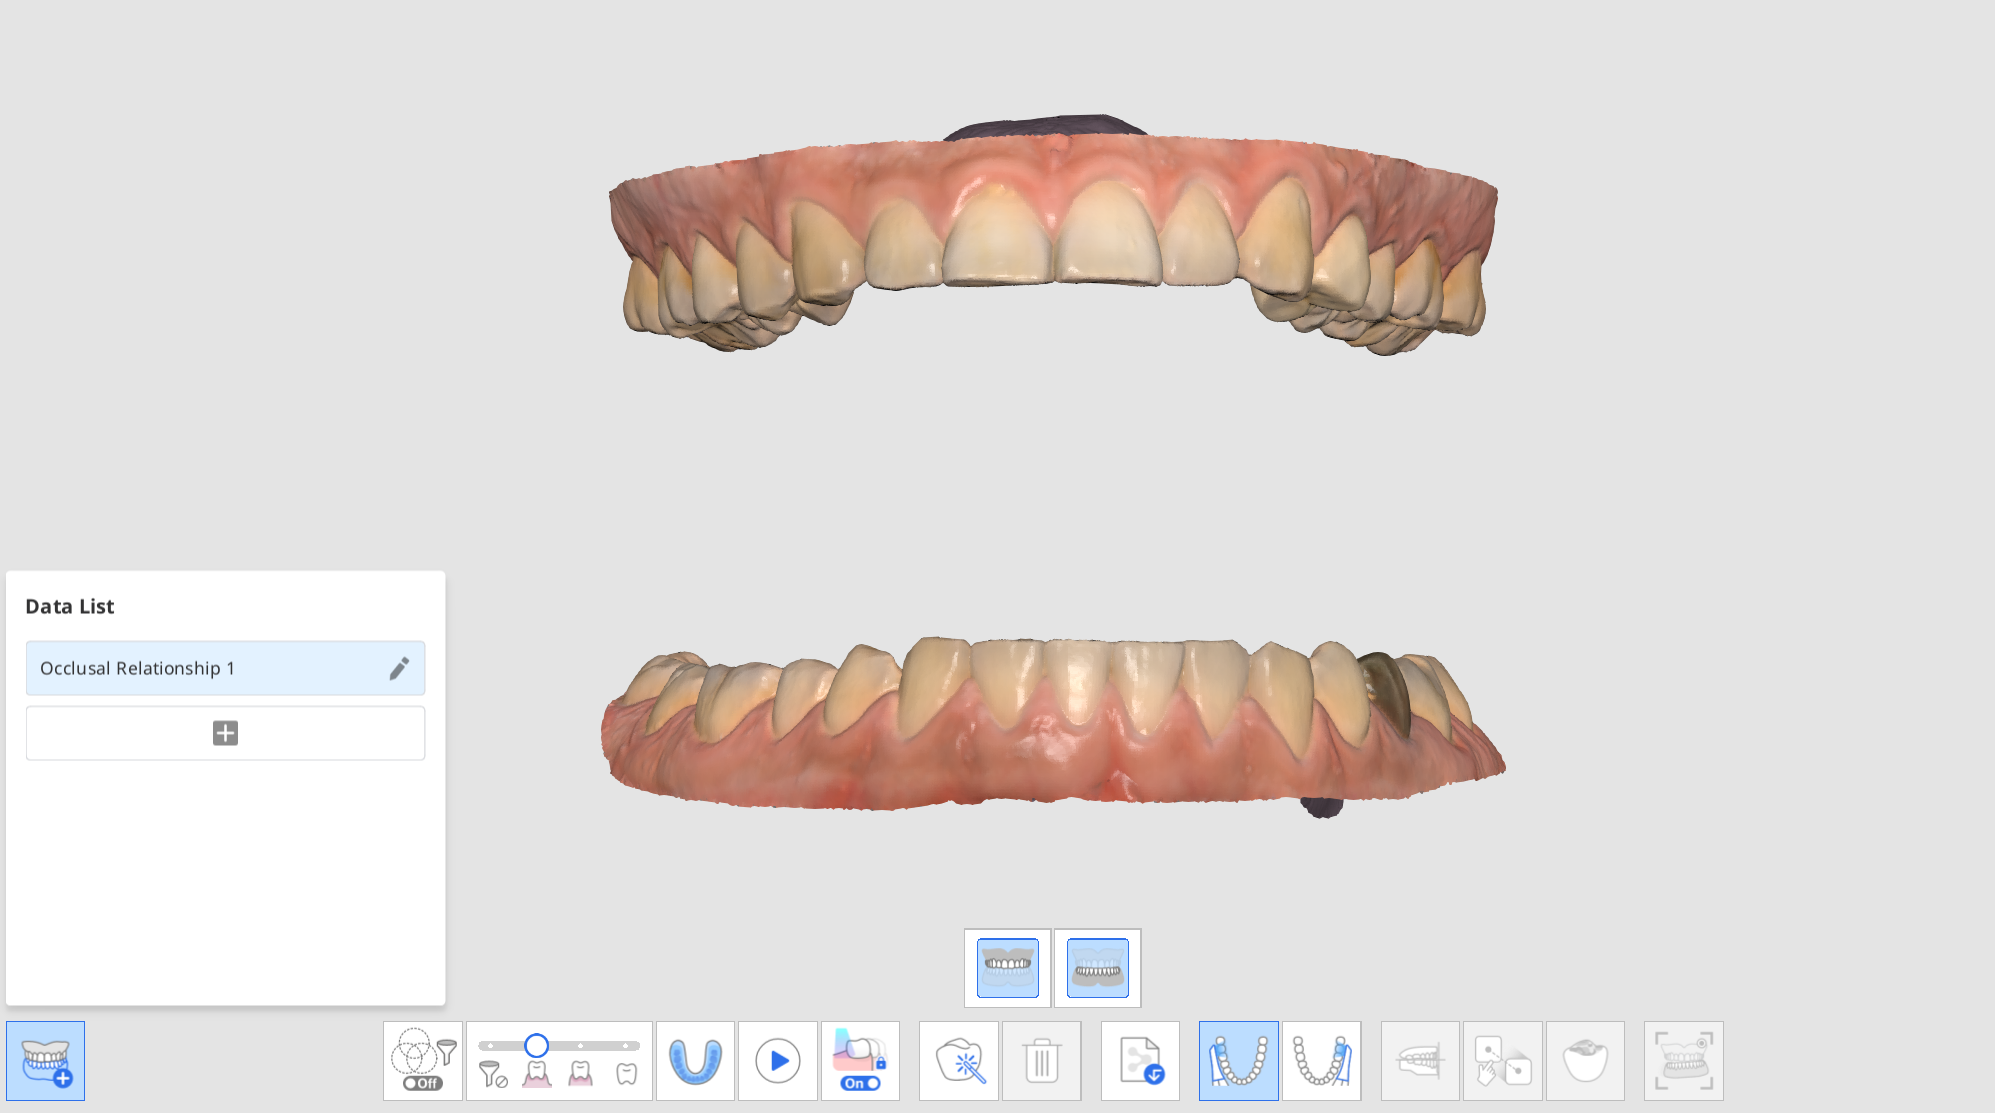
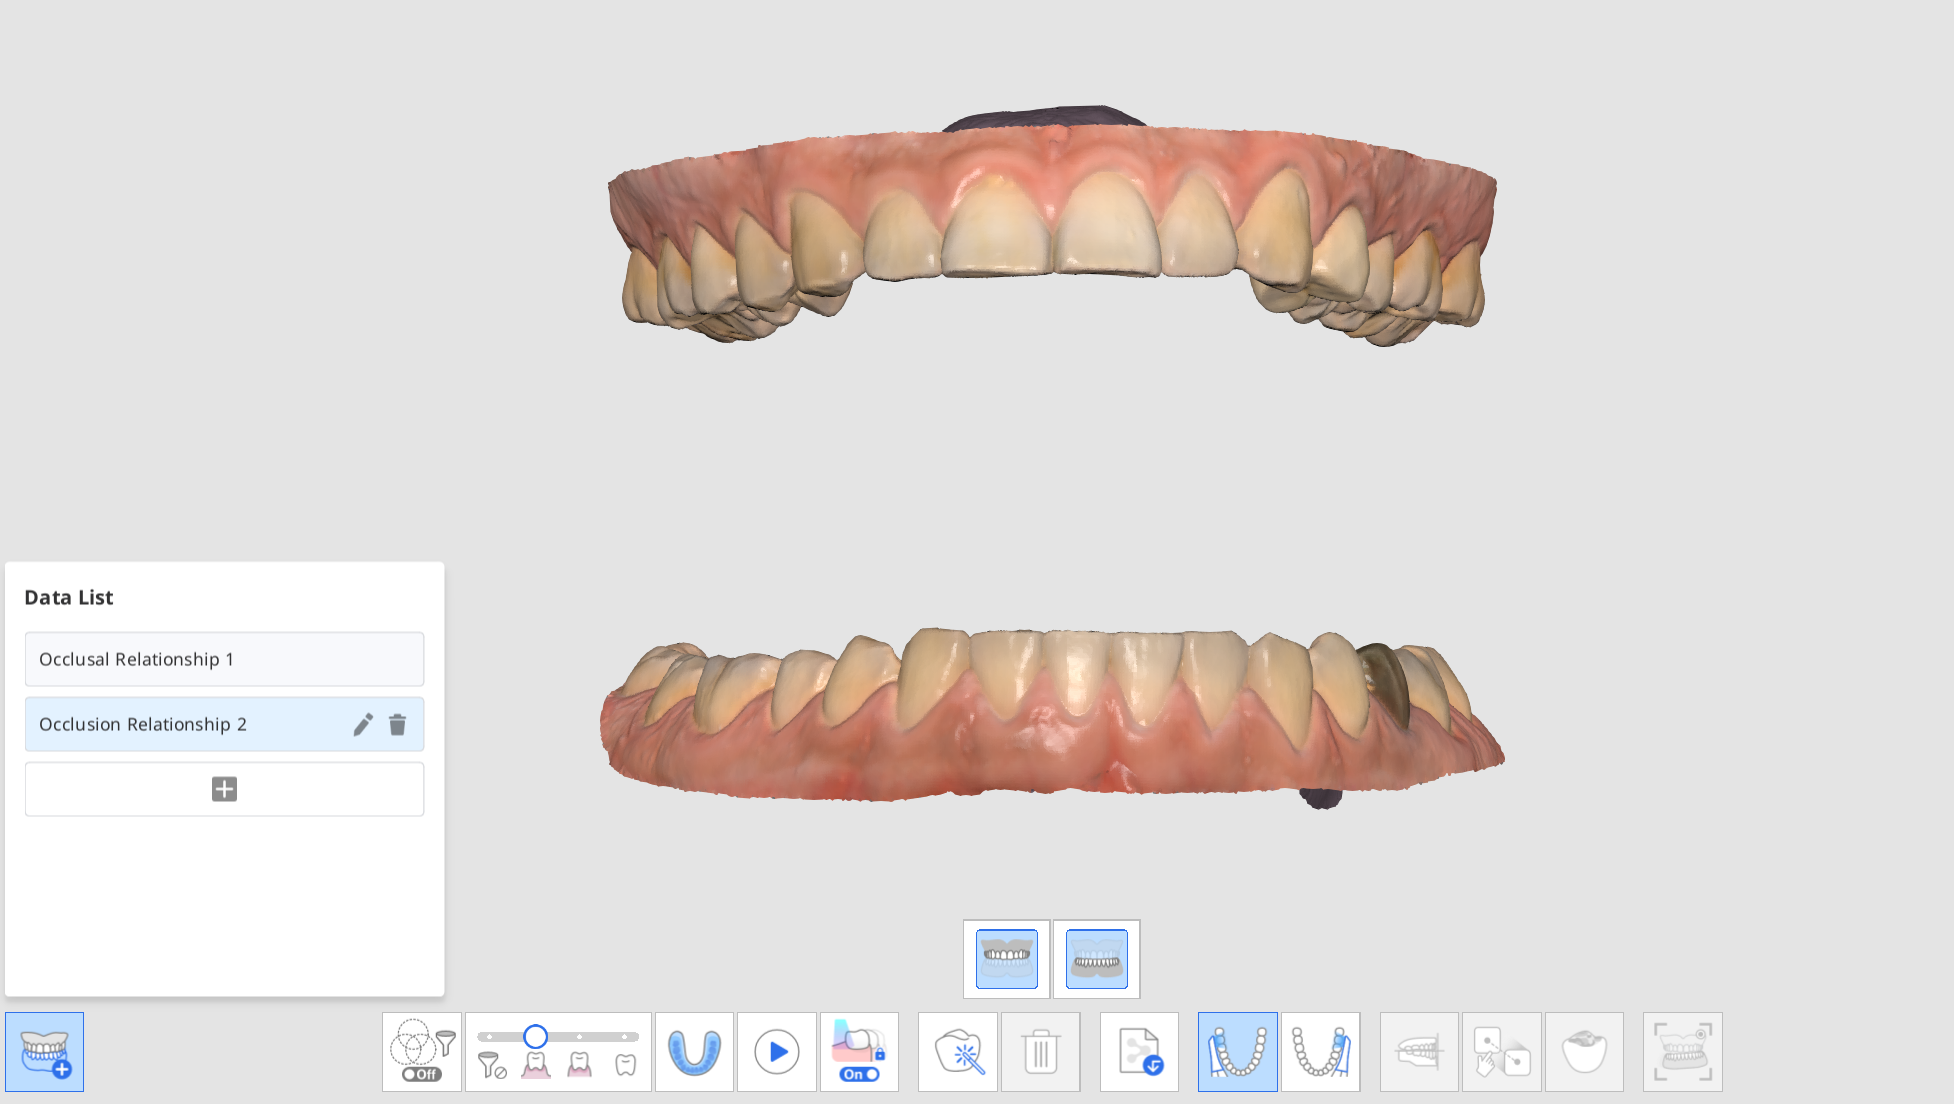
- Click the "Multi Occlusion Group" icon at the bottom to open the Data List.

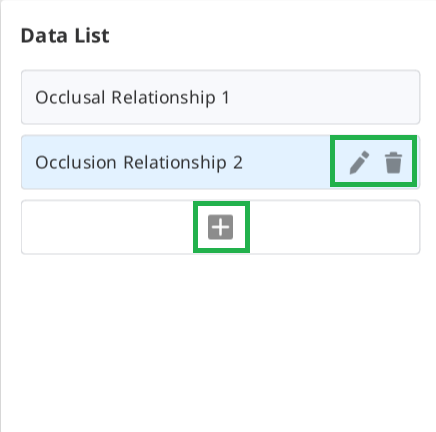
- The existing occlusion scan data will be assigned as Occlusal Relationship 1. You can add, delete, or rename the occlusion groups in the Data List.
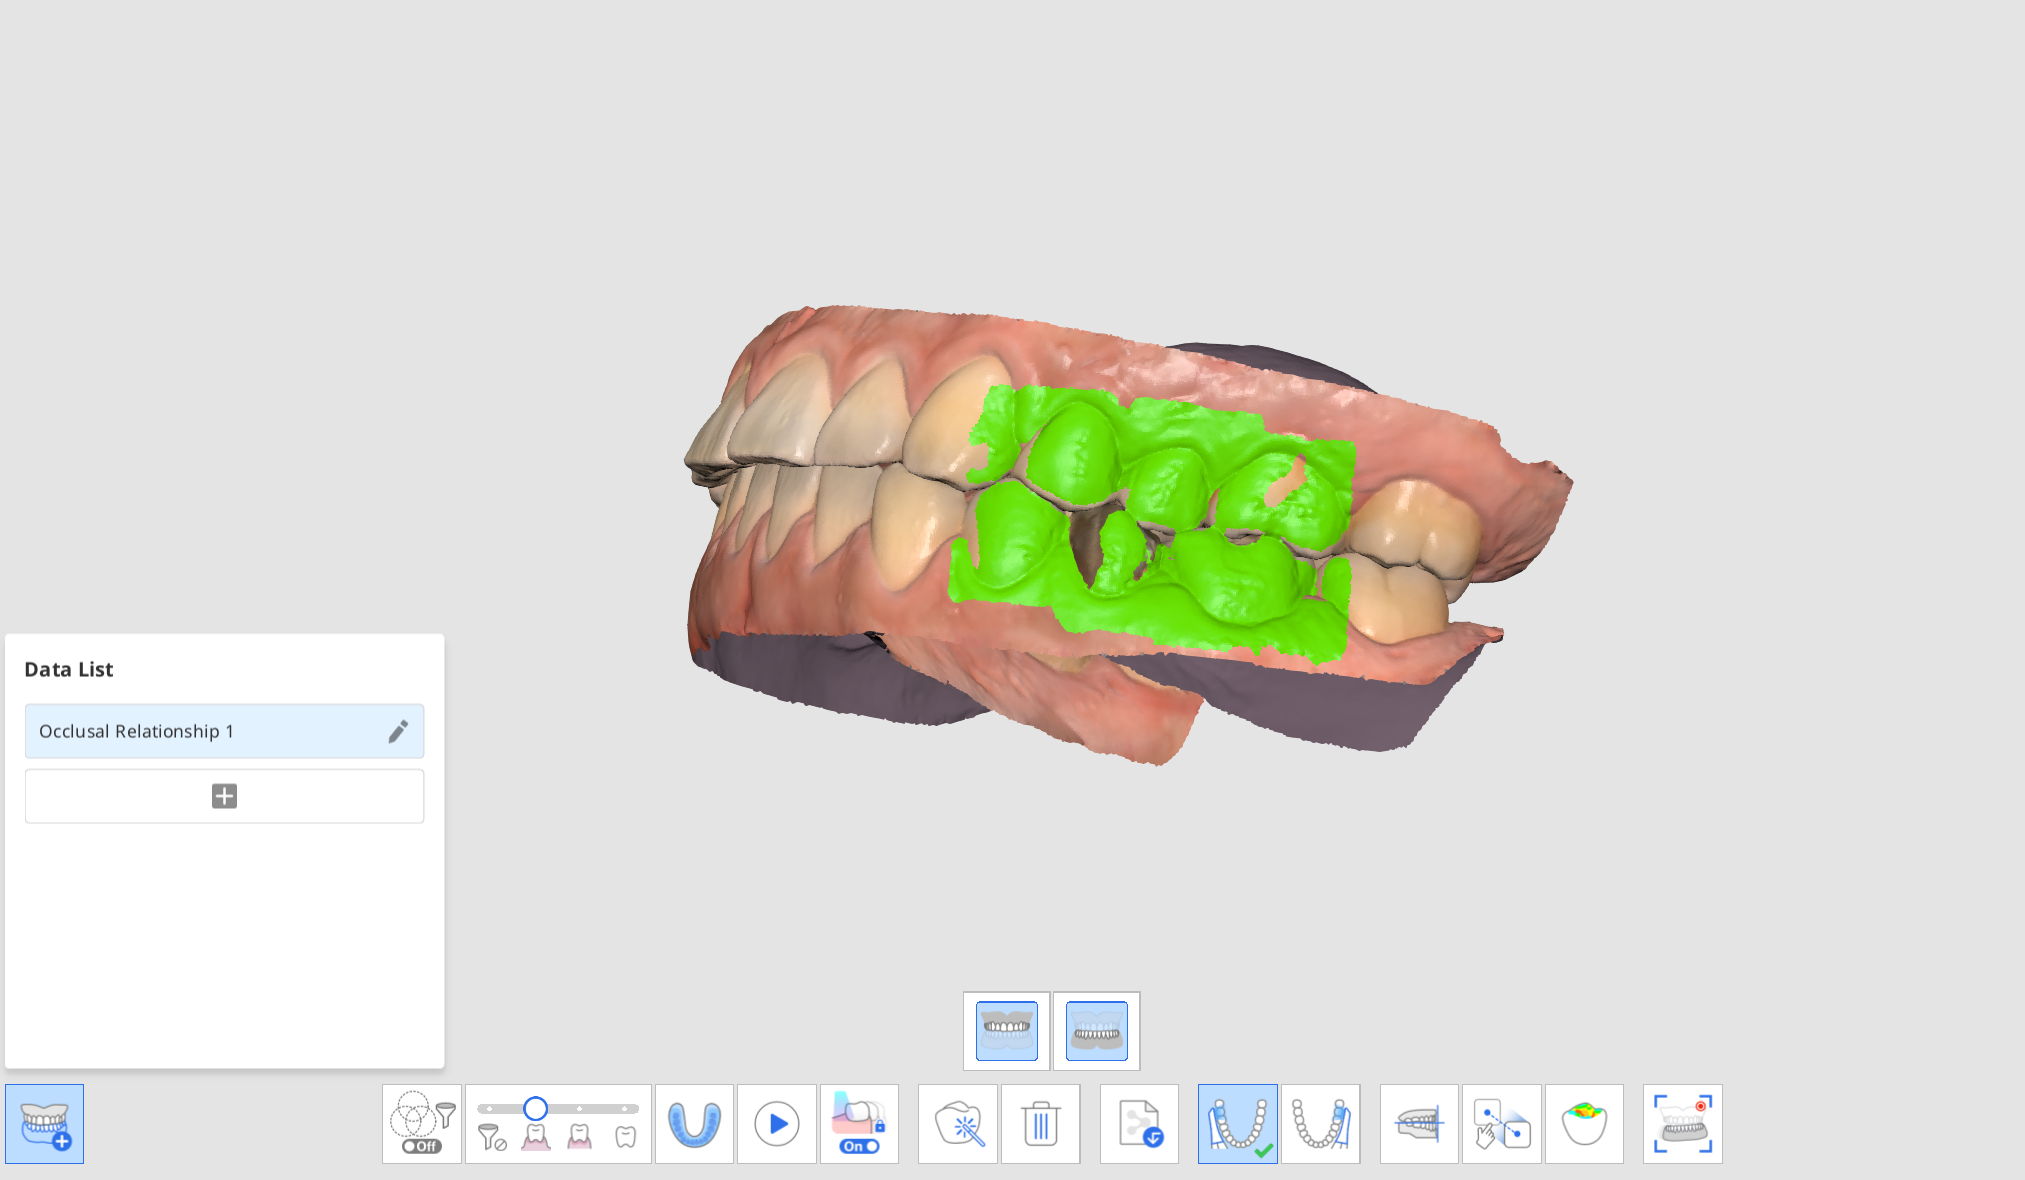
- Perform the first and second occlusion scans, and align the scan data of the maxilla, mandible, and occlusion.
- Click "Add" to create a new occlusion group.
- Enter the first occlusion scan after the new occlusion group is created.
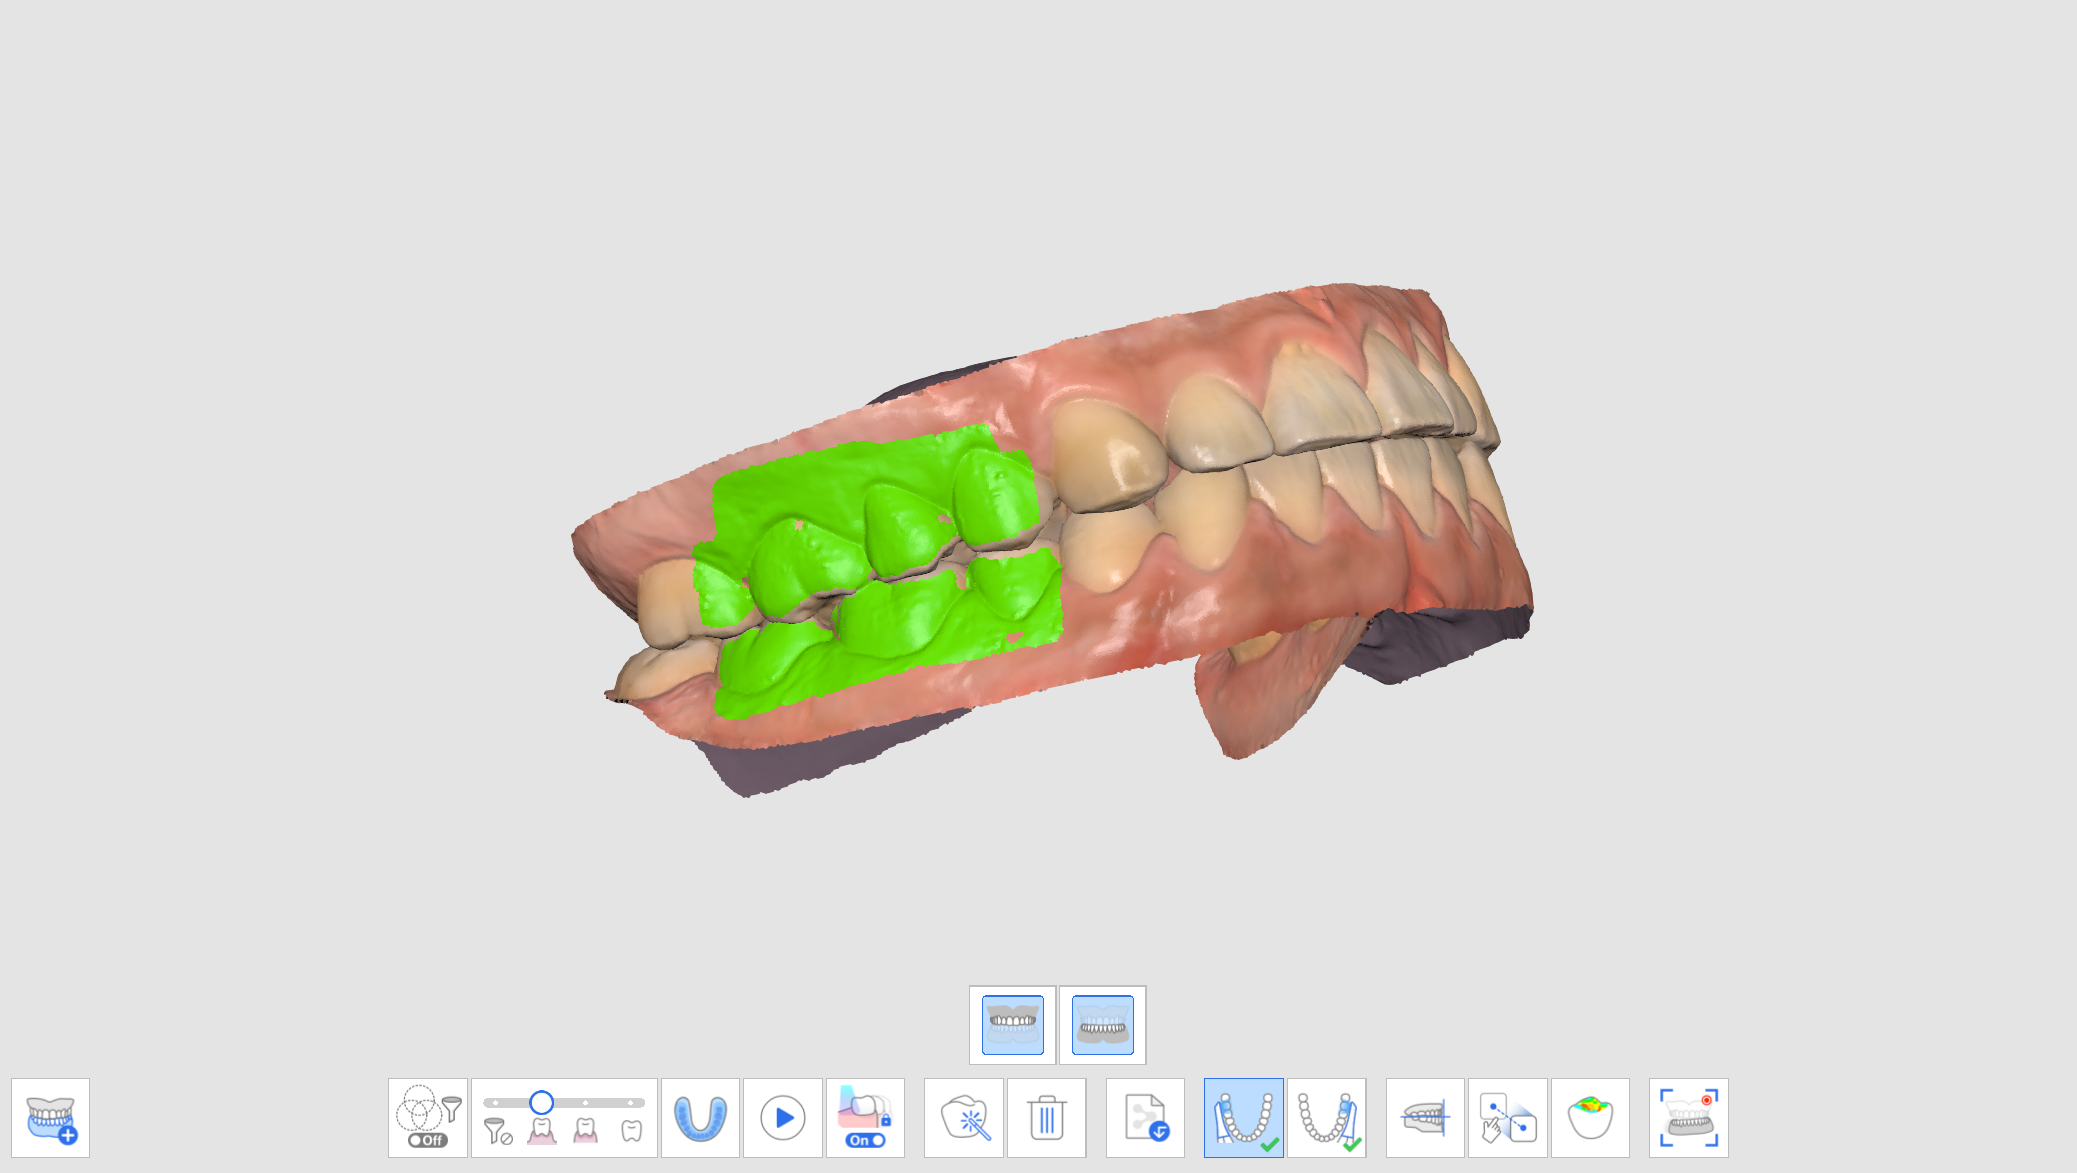
- Perform the new occlusion scans, and align the scan data of the maxilla, mandible, and occlusion.
- You can create up to 5 occlusion groups.
- In the Data List dialog, you can create a new group, change the names of the created groups, and delete groups.
- Scan data of various occlusion groups and alignment can be checked by using the "Multi Occlusion Group" function in Overview.


Occlusion Target for Maxilla/Mandible
You can select an occlusion target between pre-op data and prepared data for both the maxilla and mandible.
- Acquire maxillary/mandibular pre-op and maxillary/mandibular data in the Pre-Op for Maxilla/Mandible and Maxilar/Mandible stages.
- Move to the Occlusion stage. You will see the four icons to select the occlusion target for the maxilla and mandible.
- Choose one of the four pairs for occlusion alignment.
Pre-Op for Maxilla / Pre-Op for Mandible 
Pre-Op for Maxilla / Mandible 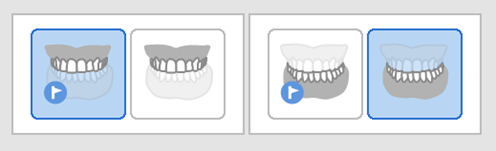
Maxilla / Pre-Op for Mandible 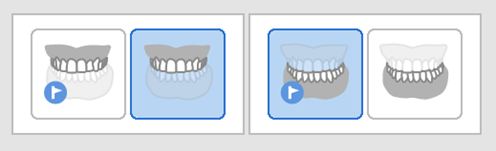
Maxilla / Mandible 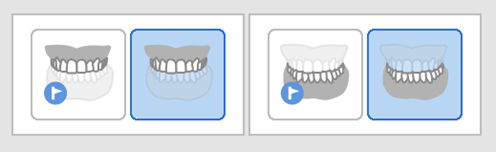


Align with Occlusal Plane
You can adjust the position of scanned data on the occlusal plane in Medit Scan for Clinics and make it compatible with the virtual articulator in exocad.
The following tools are provided for the Align with Occlusion Plane feature.
 | Half Arch Alignment | Align the half arch with the occlusal plane by setting three matching points on the data and the plane. |
 | Align With Occlusal Plane By Three Points | Select three points on the maxilla or mandible to align with the occlusal plane. |
 | Align With Occlusal Plane By Four Points | Select four points on the maxilla or mandible to align with the occlusal plane. It is beneficial when there are no anterior teeth. |
 | Delete Marker Point | Remove points that were selected for alignment. |
 | Detach Data | Separate the aligned data and move it to the original position. |
 | Multi-View | 3D scan data can be viewed from four sides. |
 | Exit | Return to the previous step. |
- Click "Align with Occlusal Plane" after the occlusion alignment is complete.

- Select three or four points on the maxilla or mandible. If there are no anterior teeth, select four points on the corresponding teeth on both sides.
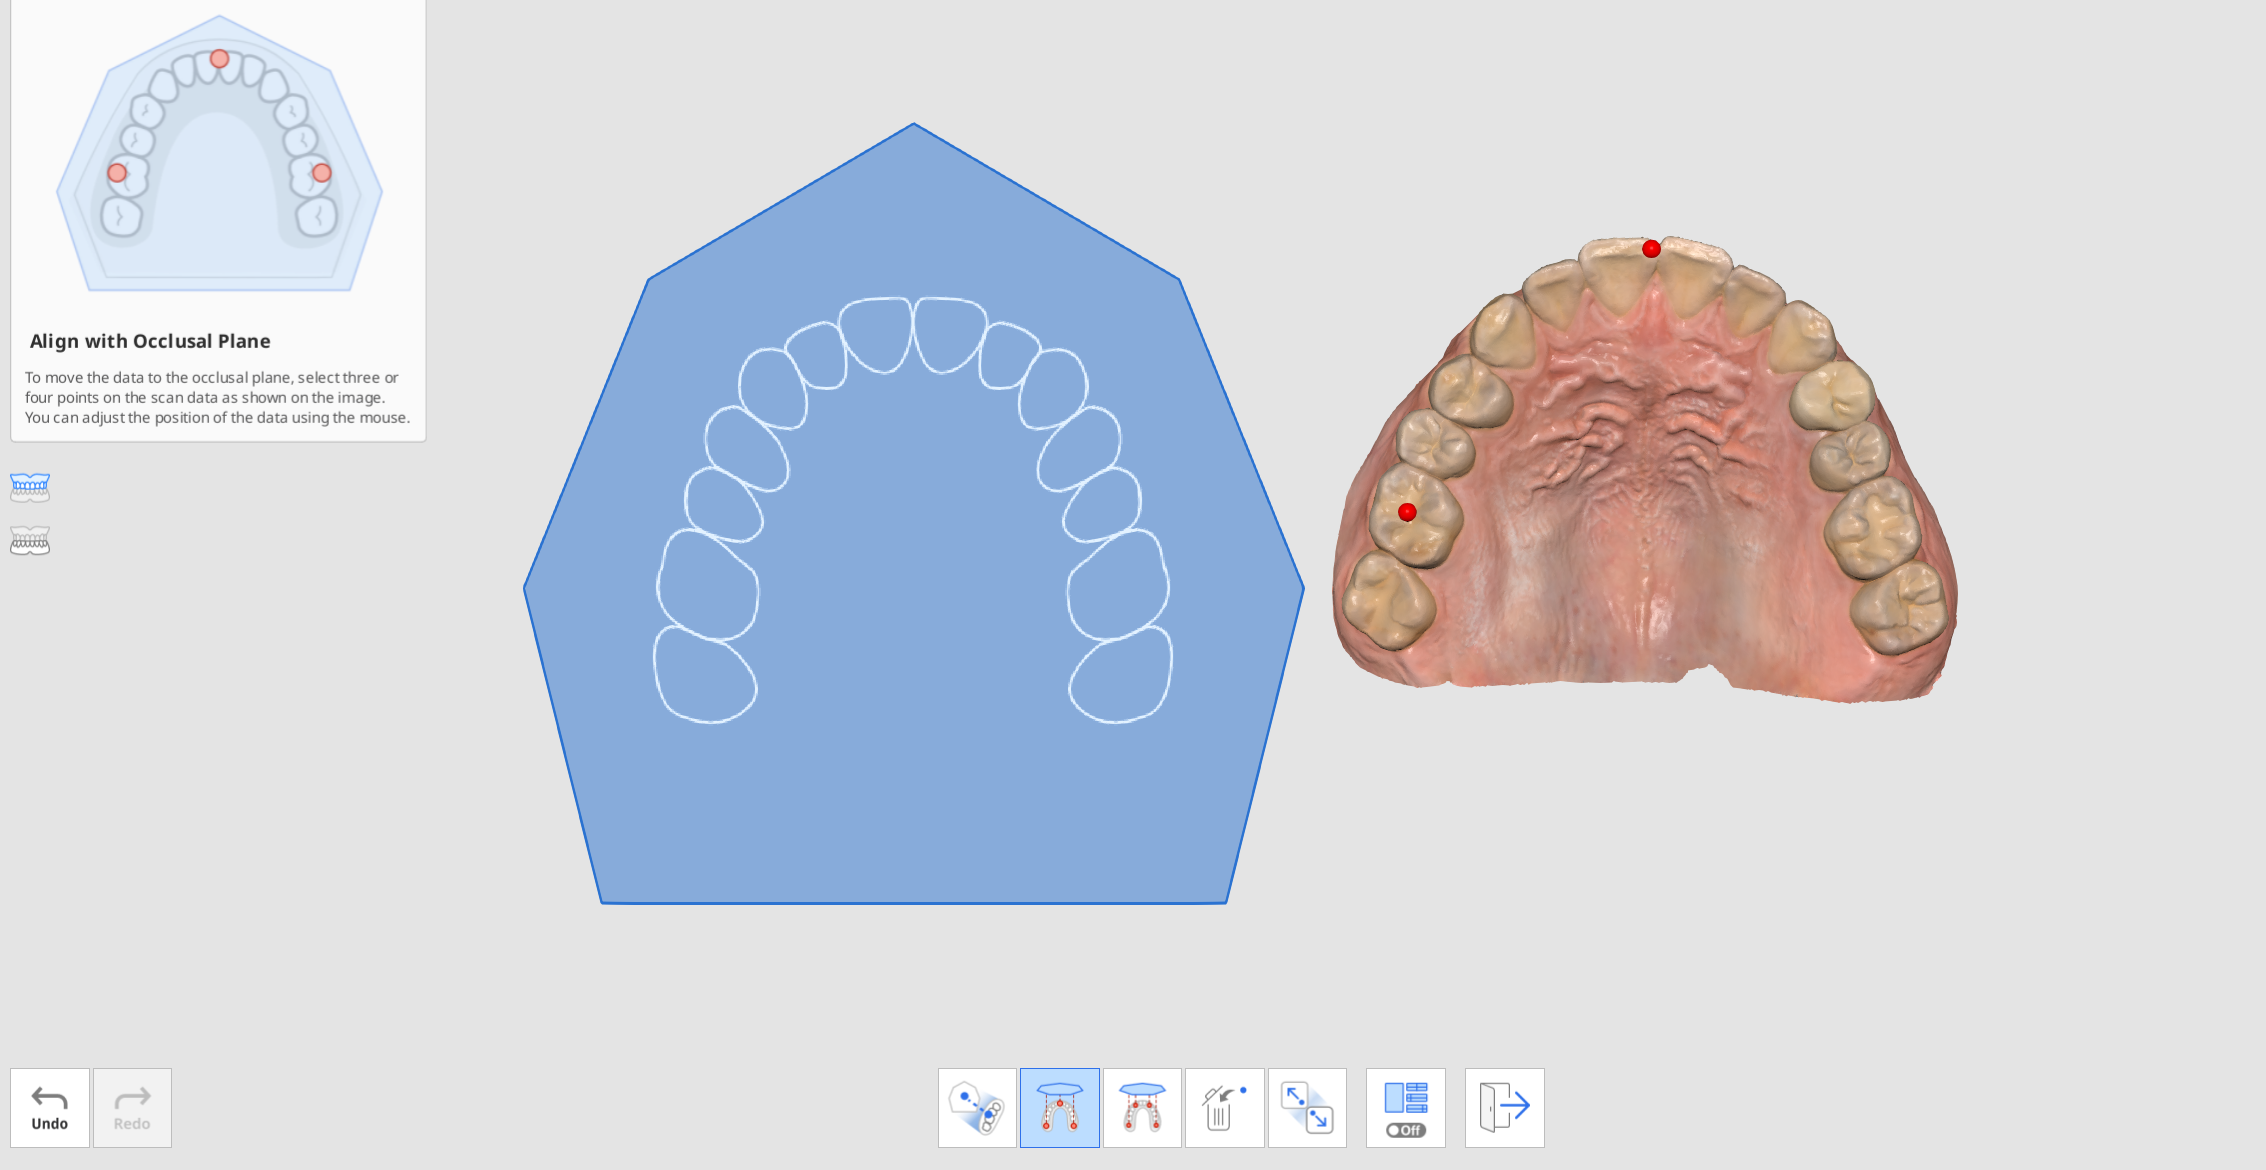
- Move the arch data on the right side to adjust the position on the occlusal plane. The user can adjust it from different angles.
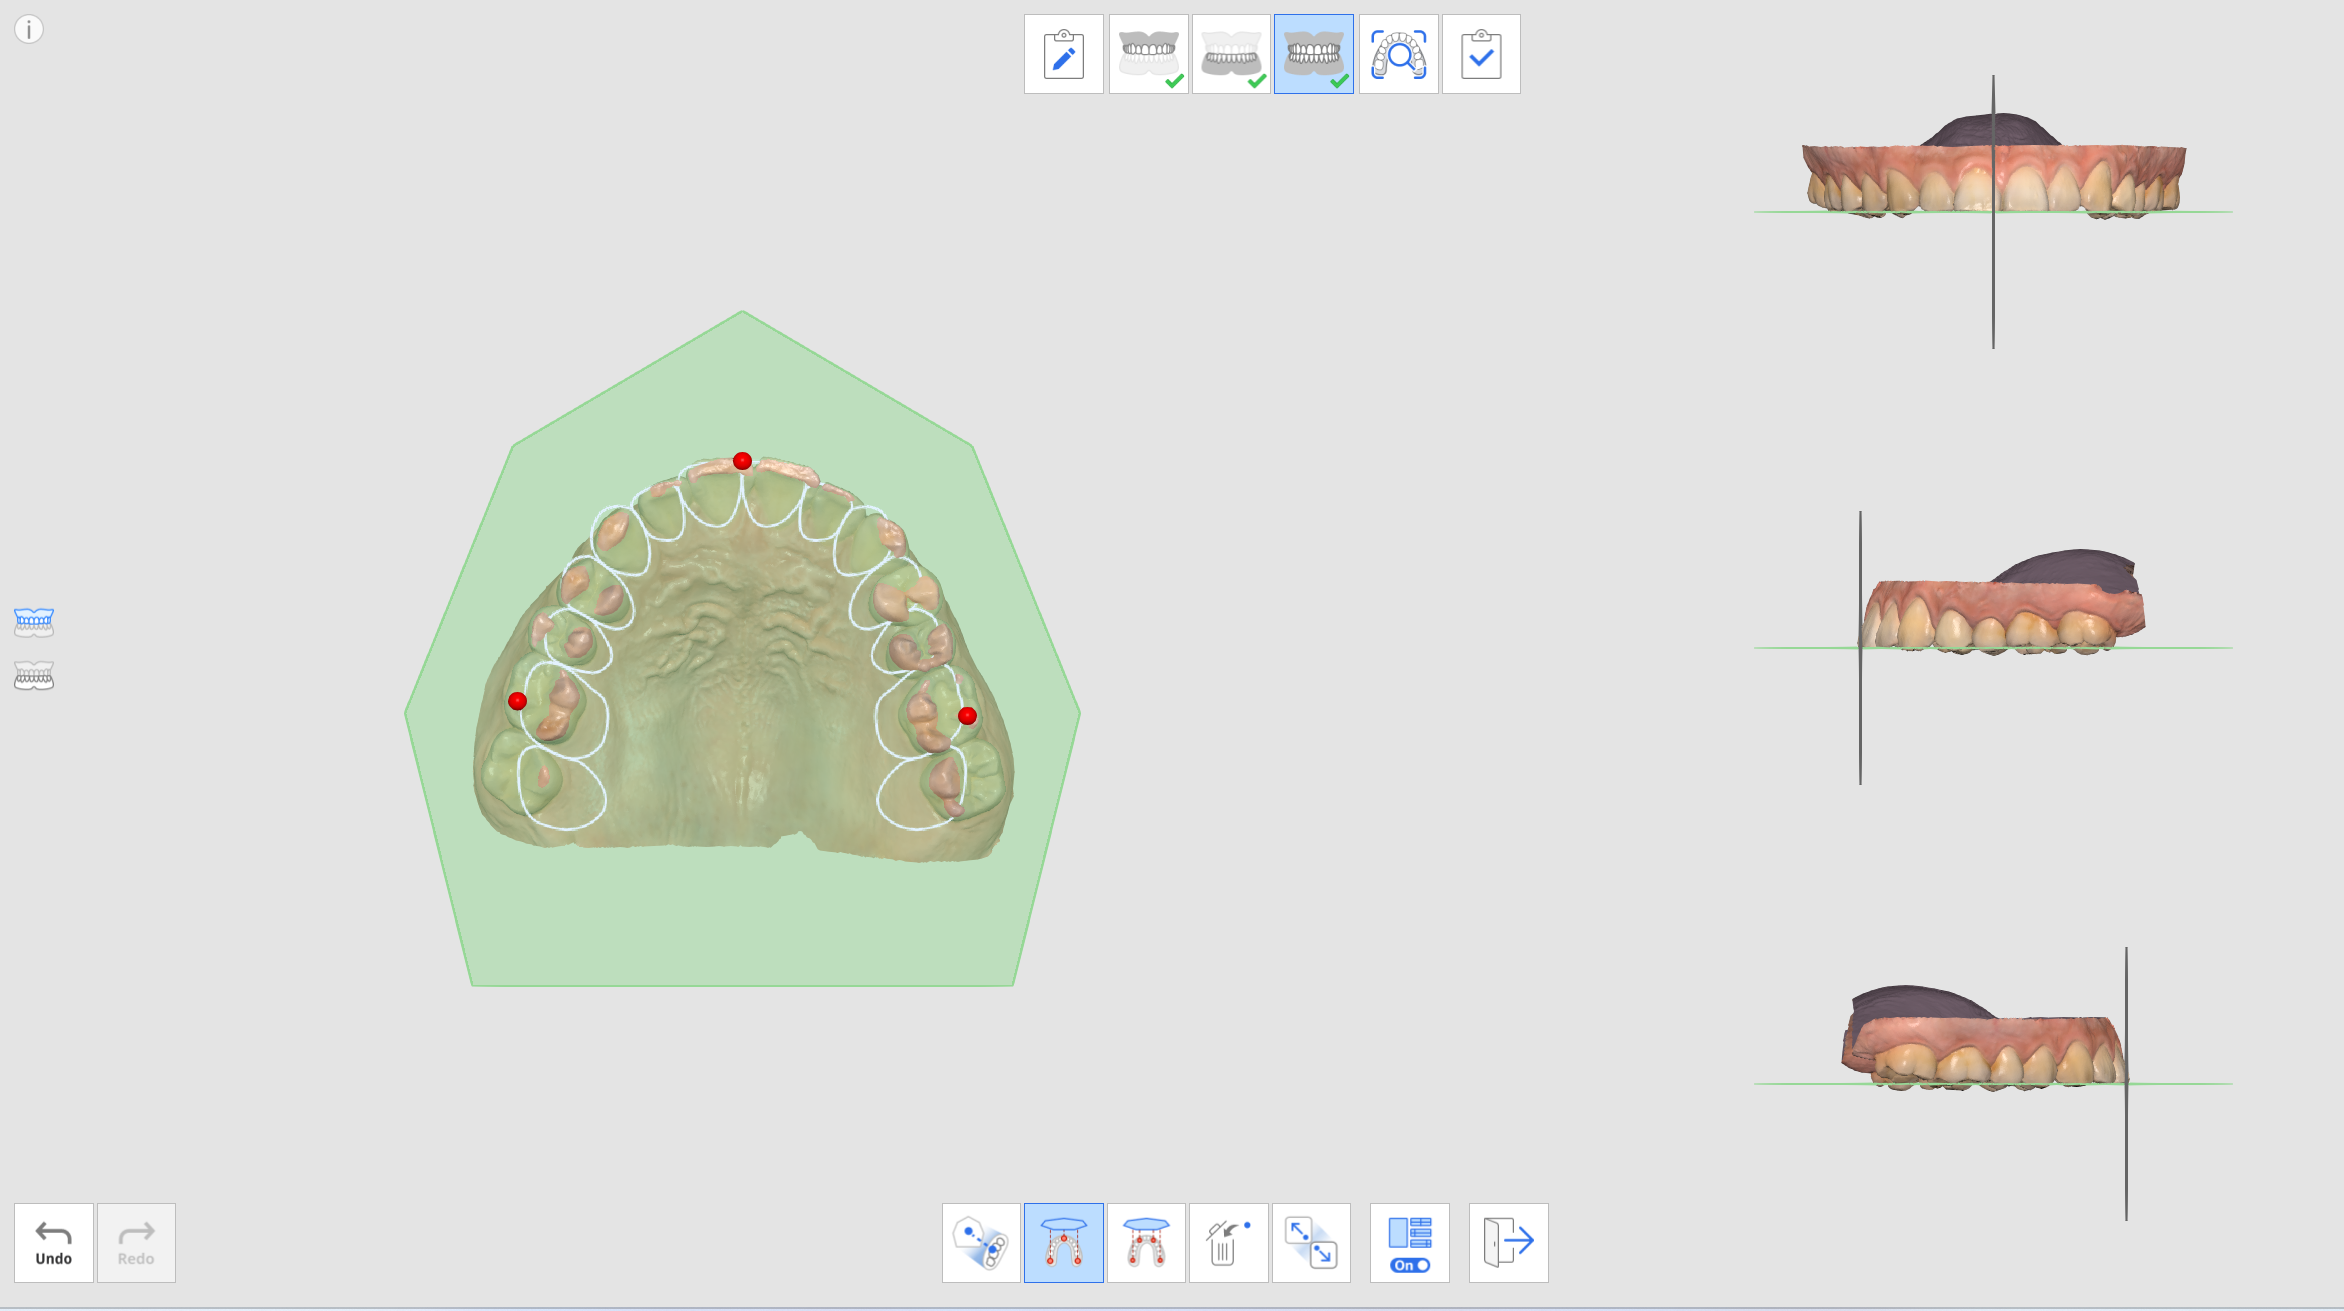
- Select the maxilla, mandible, or both by using the buttons on the left. This allows the user to see the maxilla and mandible scan data individually or together.

- You can turn on or off the Multi-View feature.
- When the data is loaded from exocad after completion, the scan data will be positioned at the same location as the virtual articulator.


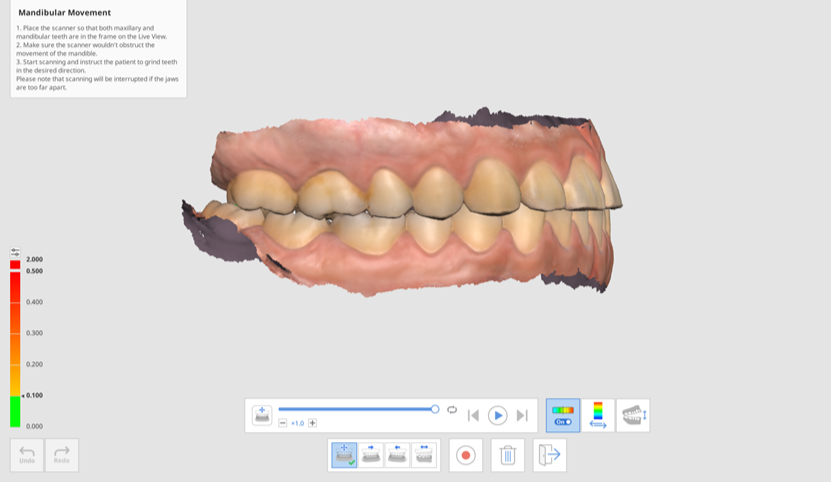
Mandibular Movement
To diagnose patients with acquired scan data, establish treatment plans, and make dental prostheses and devices, the mandible and the maxilla need to be aligned with each other. We have supported our users in aligning the mandibular and maxillary occlusion targets based on the first and the second occlusion data to show the positional relationships. However, it only presents the position of the maxilla and the mandible when they stay still without any motion.
We need to consider not only the center occlusion but also the mandibular movement of the patient caused by the TMJ motions to manufacture more accurate prostheses and devices. With this Mandibular Movement feature, you can record the actual movements of the mandible based on the maxillary data and use the simulation data for prosthetic manufacturing.
 You can make a record of the following movements:
- Free Movement
- Left Lateral Movement
- Right Lateral Movement
- Protrusive Movement
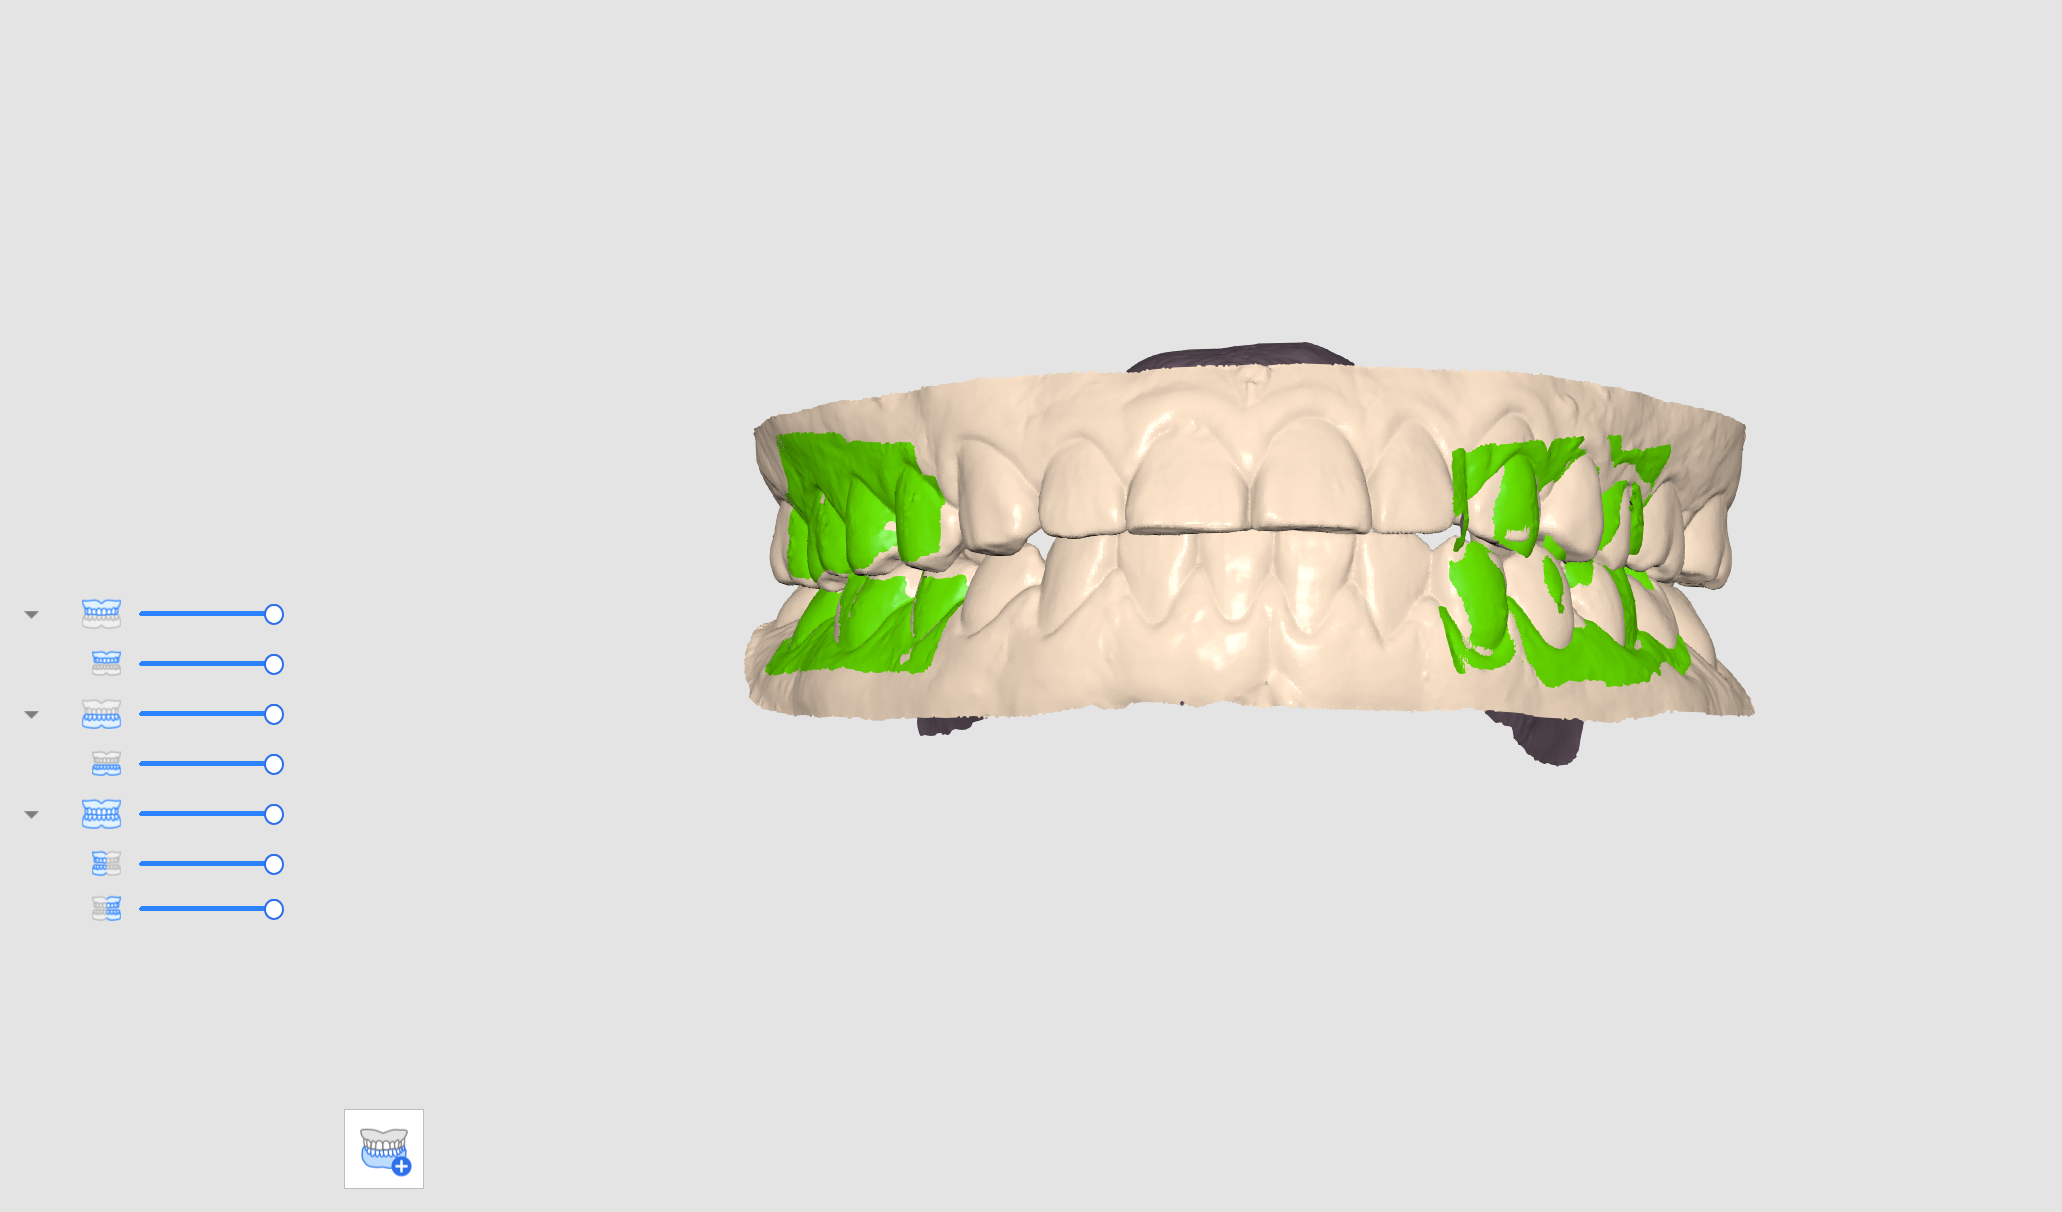
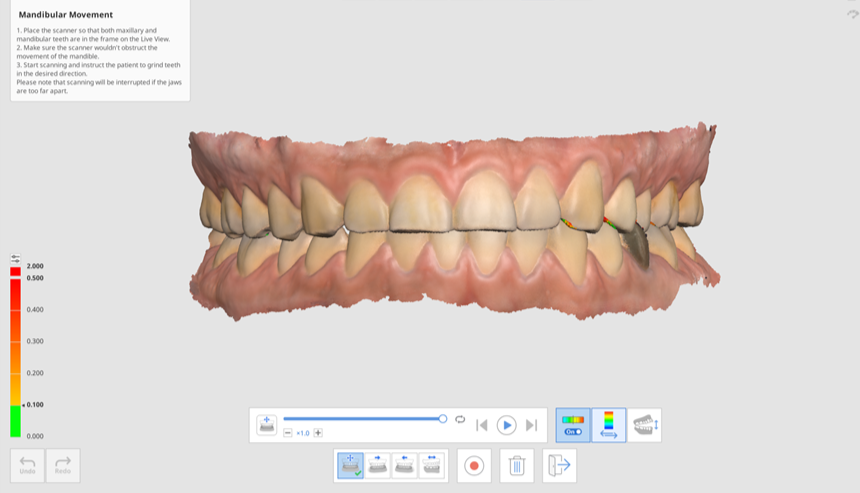
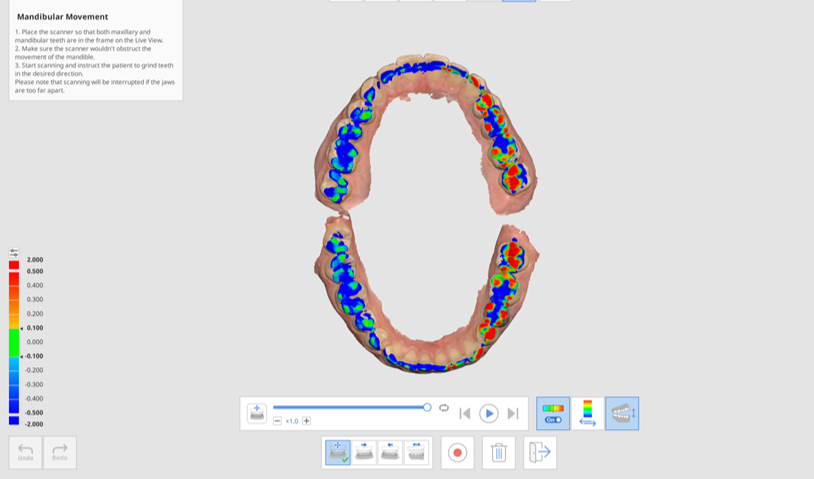
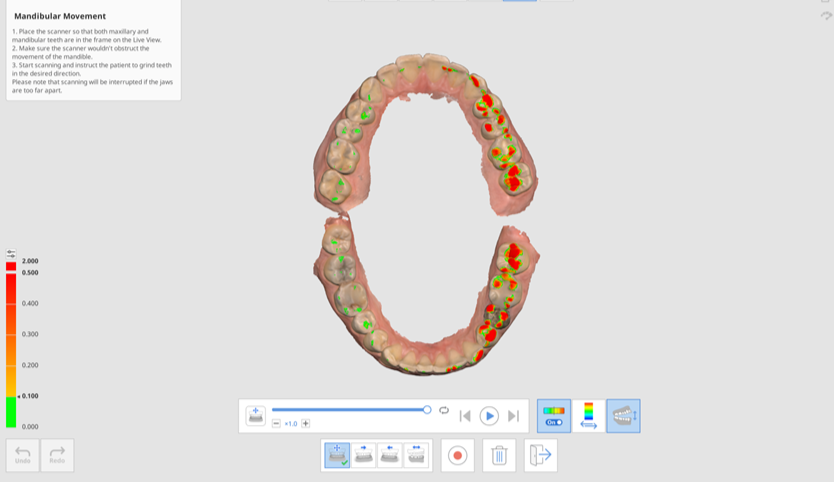
After recording each movement, the mandibular movement can be reproduced by simulation. The color map makes it easy to recognize the interference area of the mandible and maxilla.
- Acquire maxillary and mandibular data in the Maxila and Mandible stages.
- Acquire the first (and the second) occlusion scan data in the Occlusion stage and proceed with alignment.
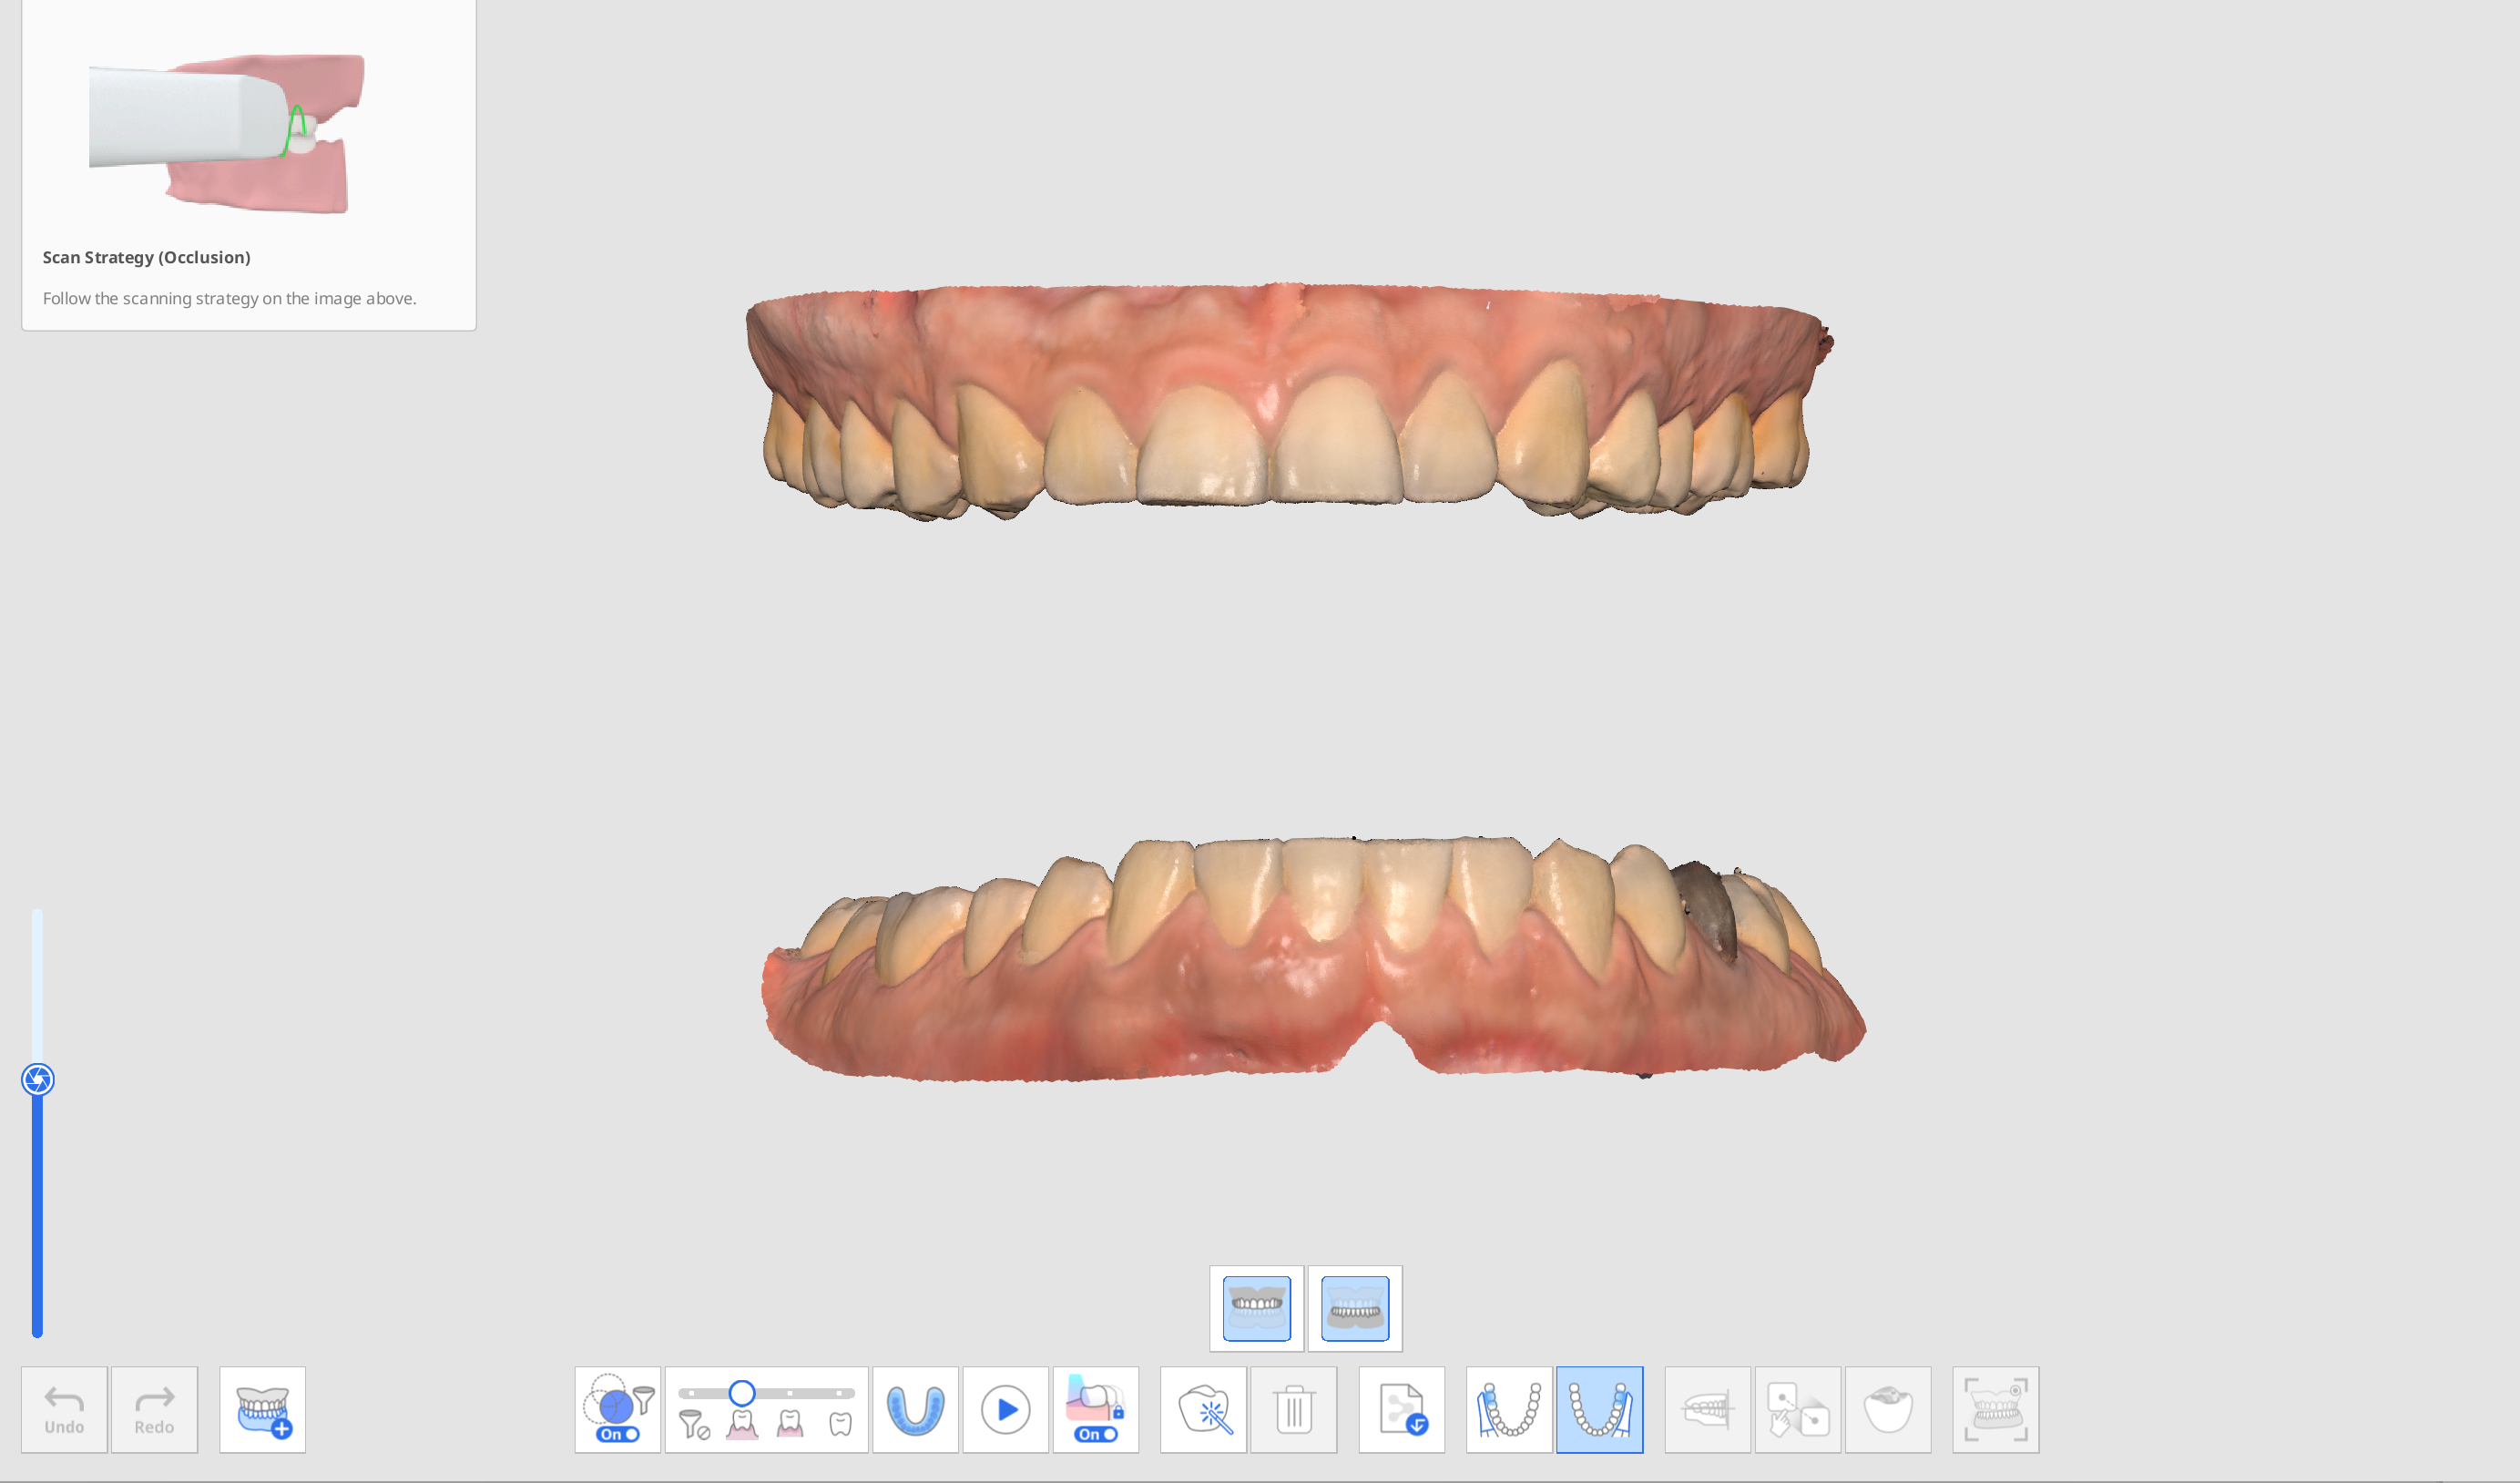
- Click the "Mandibular Movement" icon at the bottom when activated.
- Select an icon of desired movement direction at the bottom from Free, Right Lateral, Left Lateral, and Protrusive.
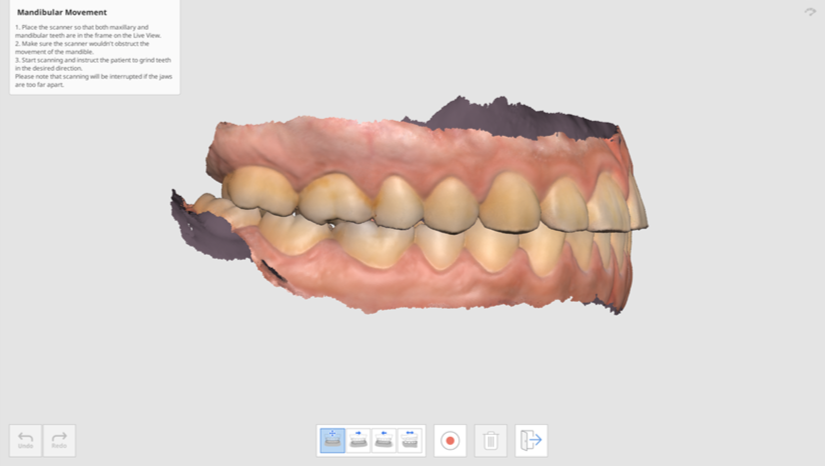
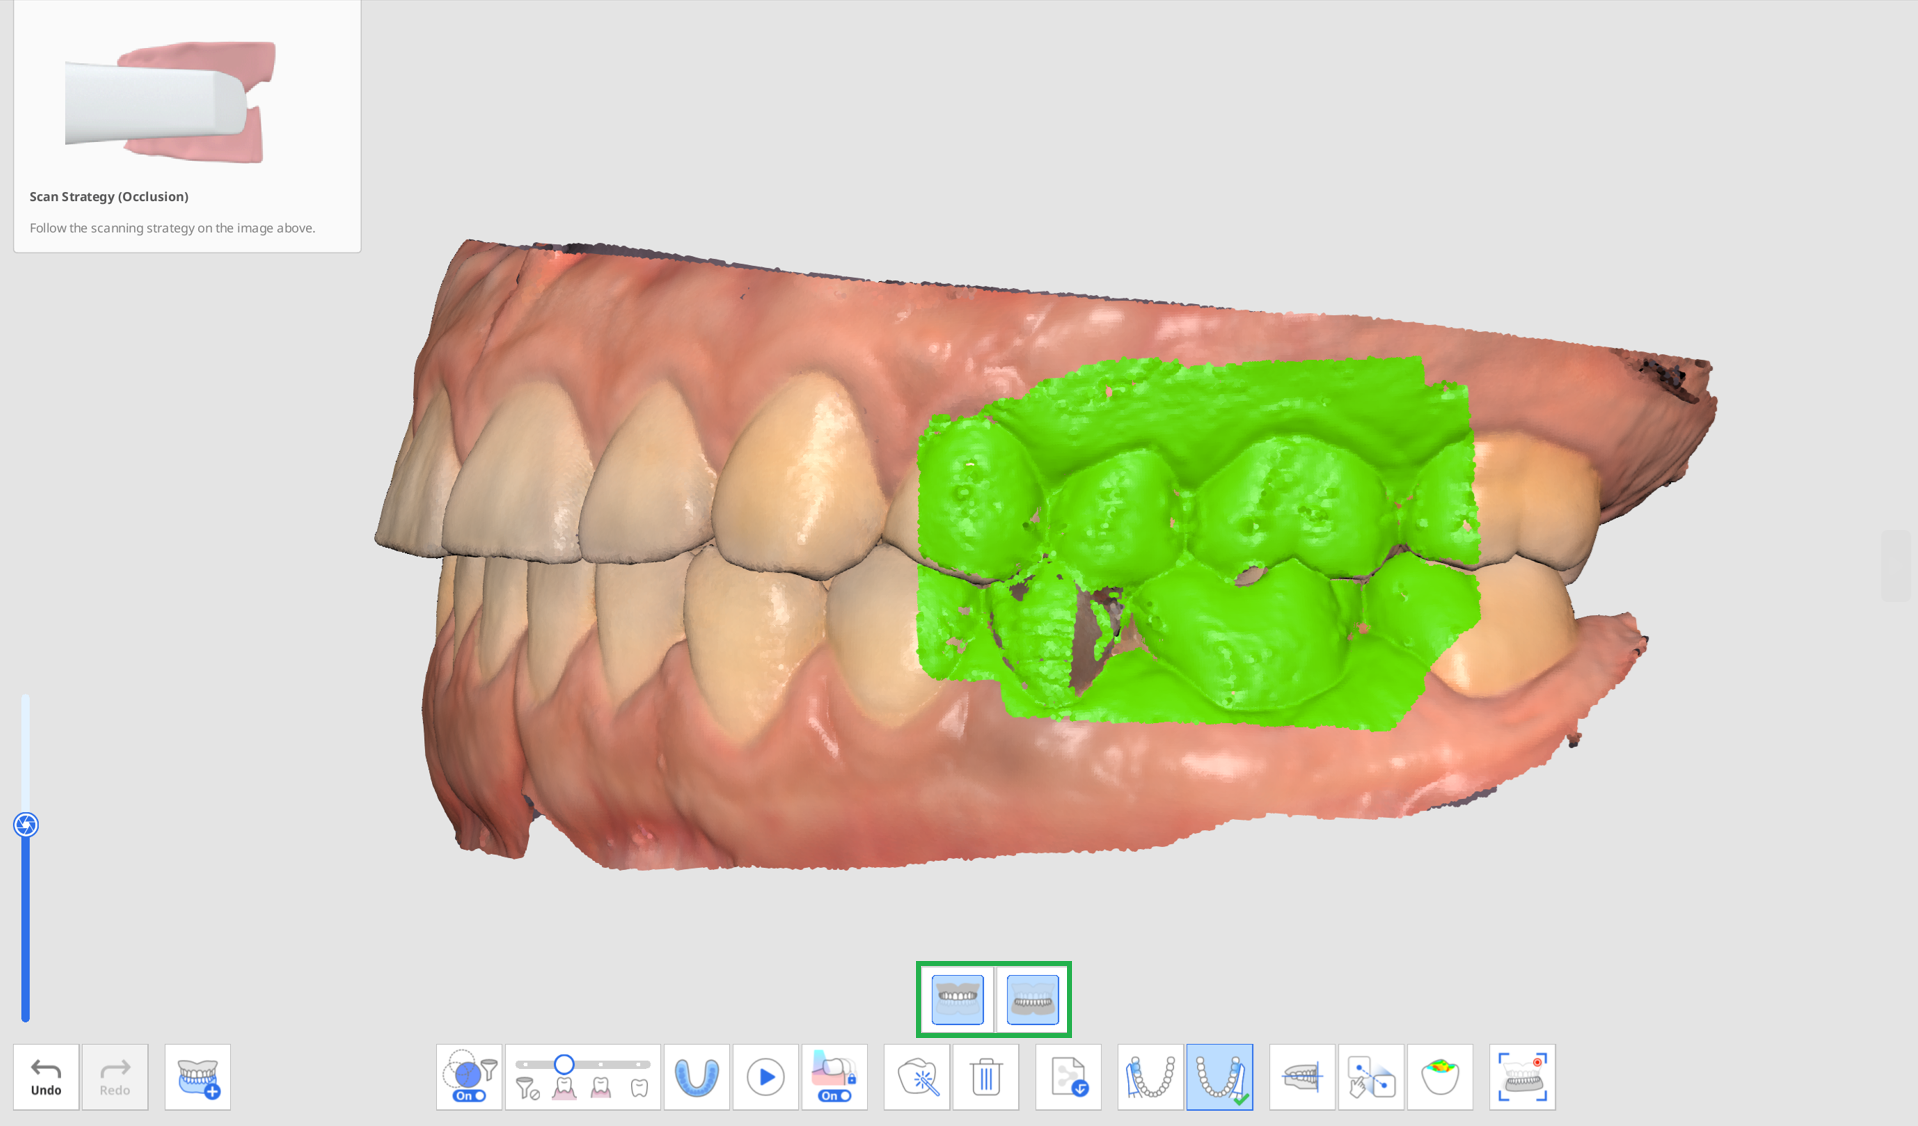
- Place the scanner tip where the maxillary and mandibular meet while the patient keeps contact between the jaw.
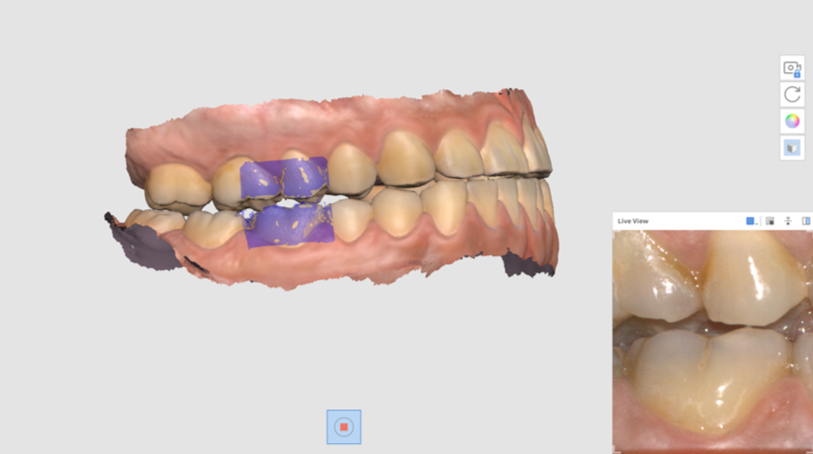
- The Live View window appears on the screen when the scanner starts recording. Then, instruct the patient to move the mandible according to the selected movement direction. Make sure both the mandibular and maxillary teeth appear on the Live View. Scanning will be interrupted if the jaws are too far apart and the movement is no longer reflected on the screen.
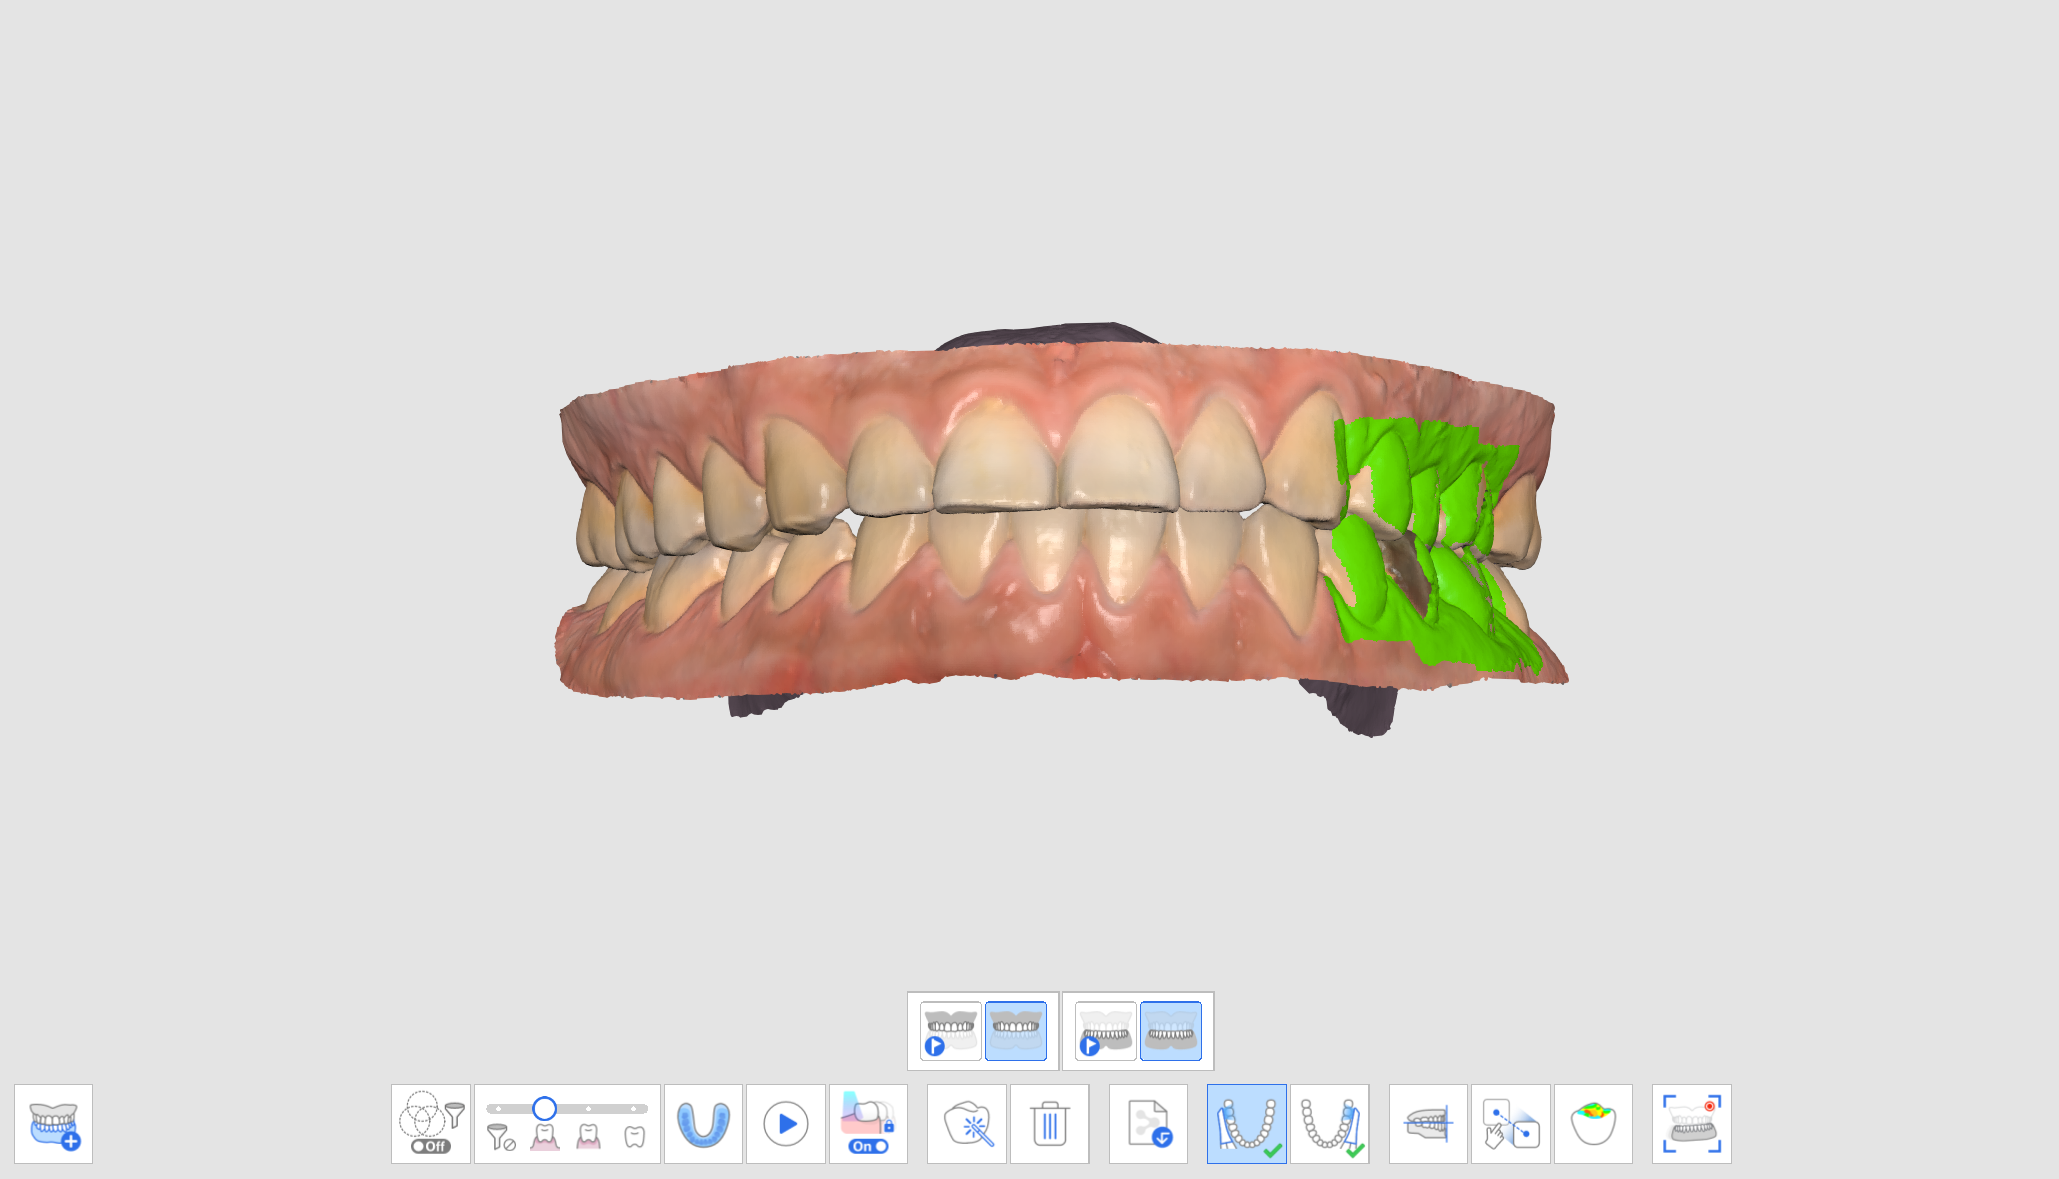
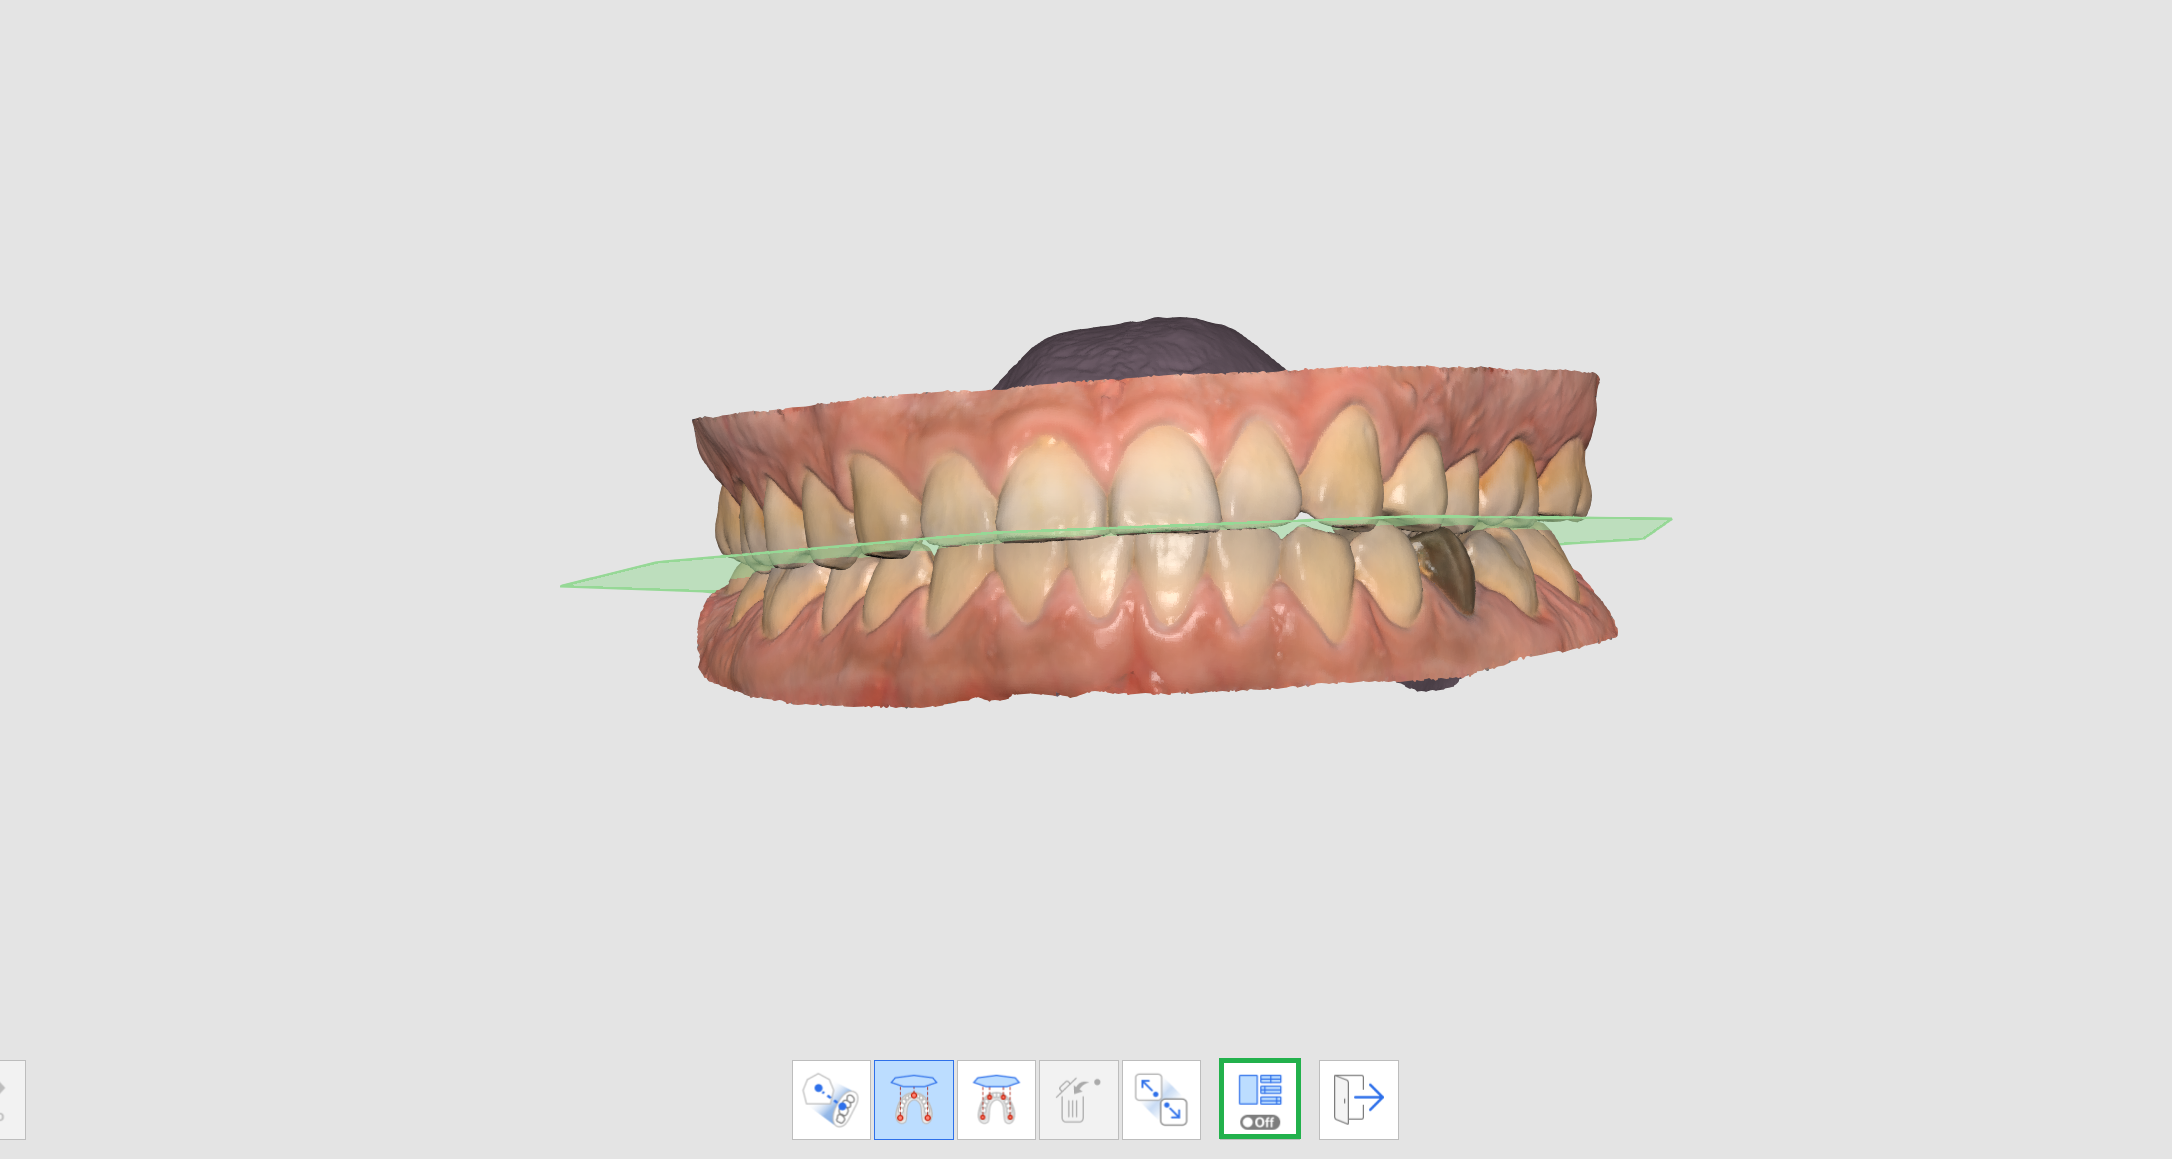
- The play bar and icons for mandibular movement simulation appear on the screen once you finish recording. You can play the movement recording by clicking the "Start" button. You can also adjust the speed of movement or turn on repeat.
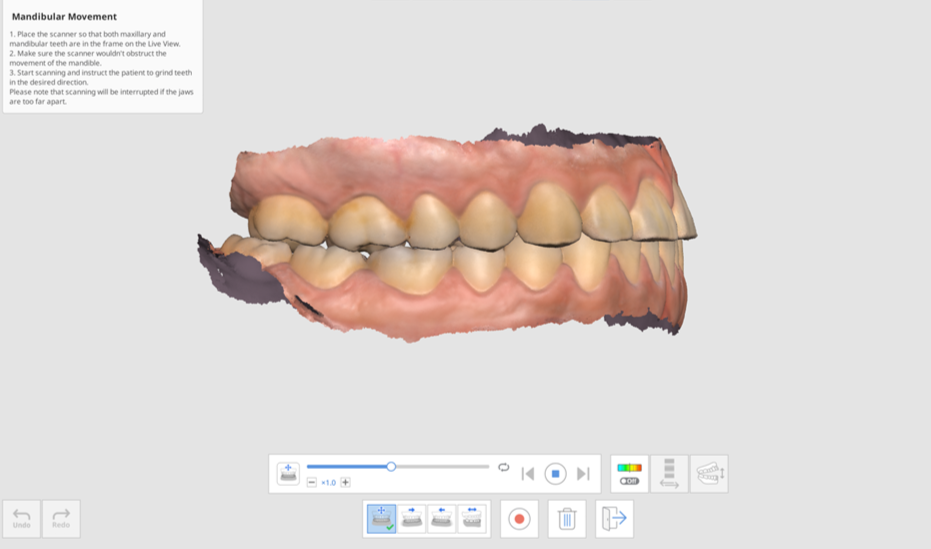
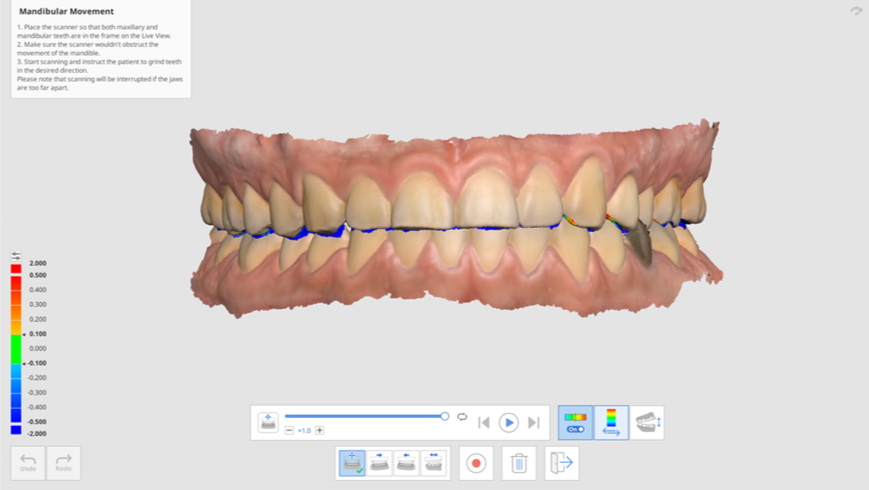
- Click the "Deviation On/Off" icon to show or hide the interference areas while the mandible moves. Analysis to represent colors may take some time.
- Click the "Switch Deviation Display Area" icon to display the scale for all data or contact areas only.
- Click "Switch View" to change the view style between opened and closed jaws.
- Click "Exit" to return to the Occlusion stage, and the mandibular movement recording will be added to the data tree in Medit Link.


Was this article helpful?
