Get Result Files
- 15 Feb 2024
- 4 Minutes to read
- Print
- DarkLight
- PDF
Get Result Files
- Updated on 15 Feb 2024
- 4 Minutes to read
- Print
- DarkLight
- PDF
Article summary
Did you find this summary helpful?
Thank you for your feedback
Export Scan Result Files
In addition to sharing results with partners through orders, Medit Link allows you to store your result files in the desired file format using the export function.

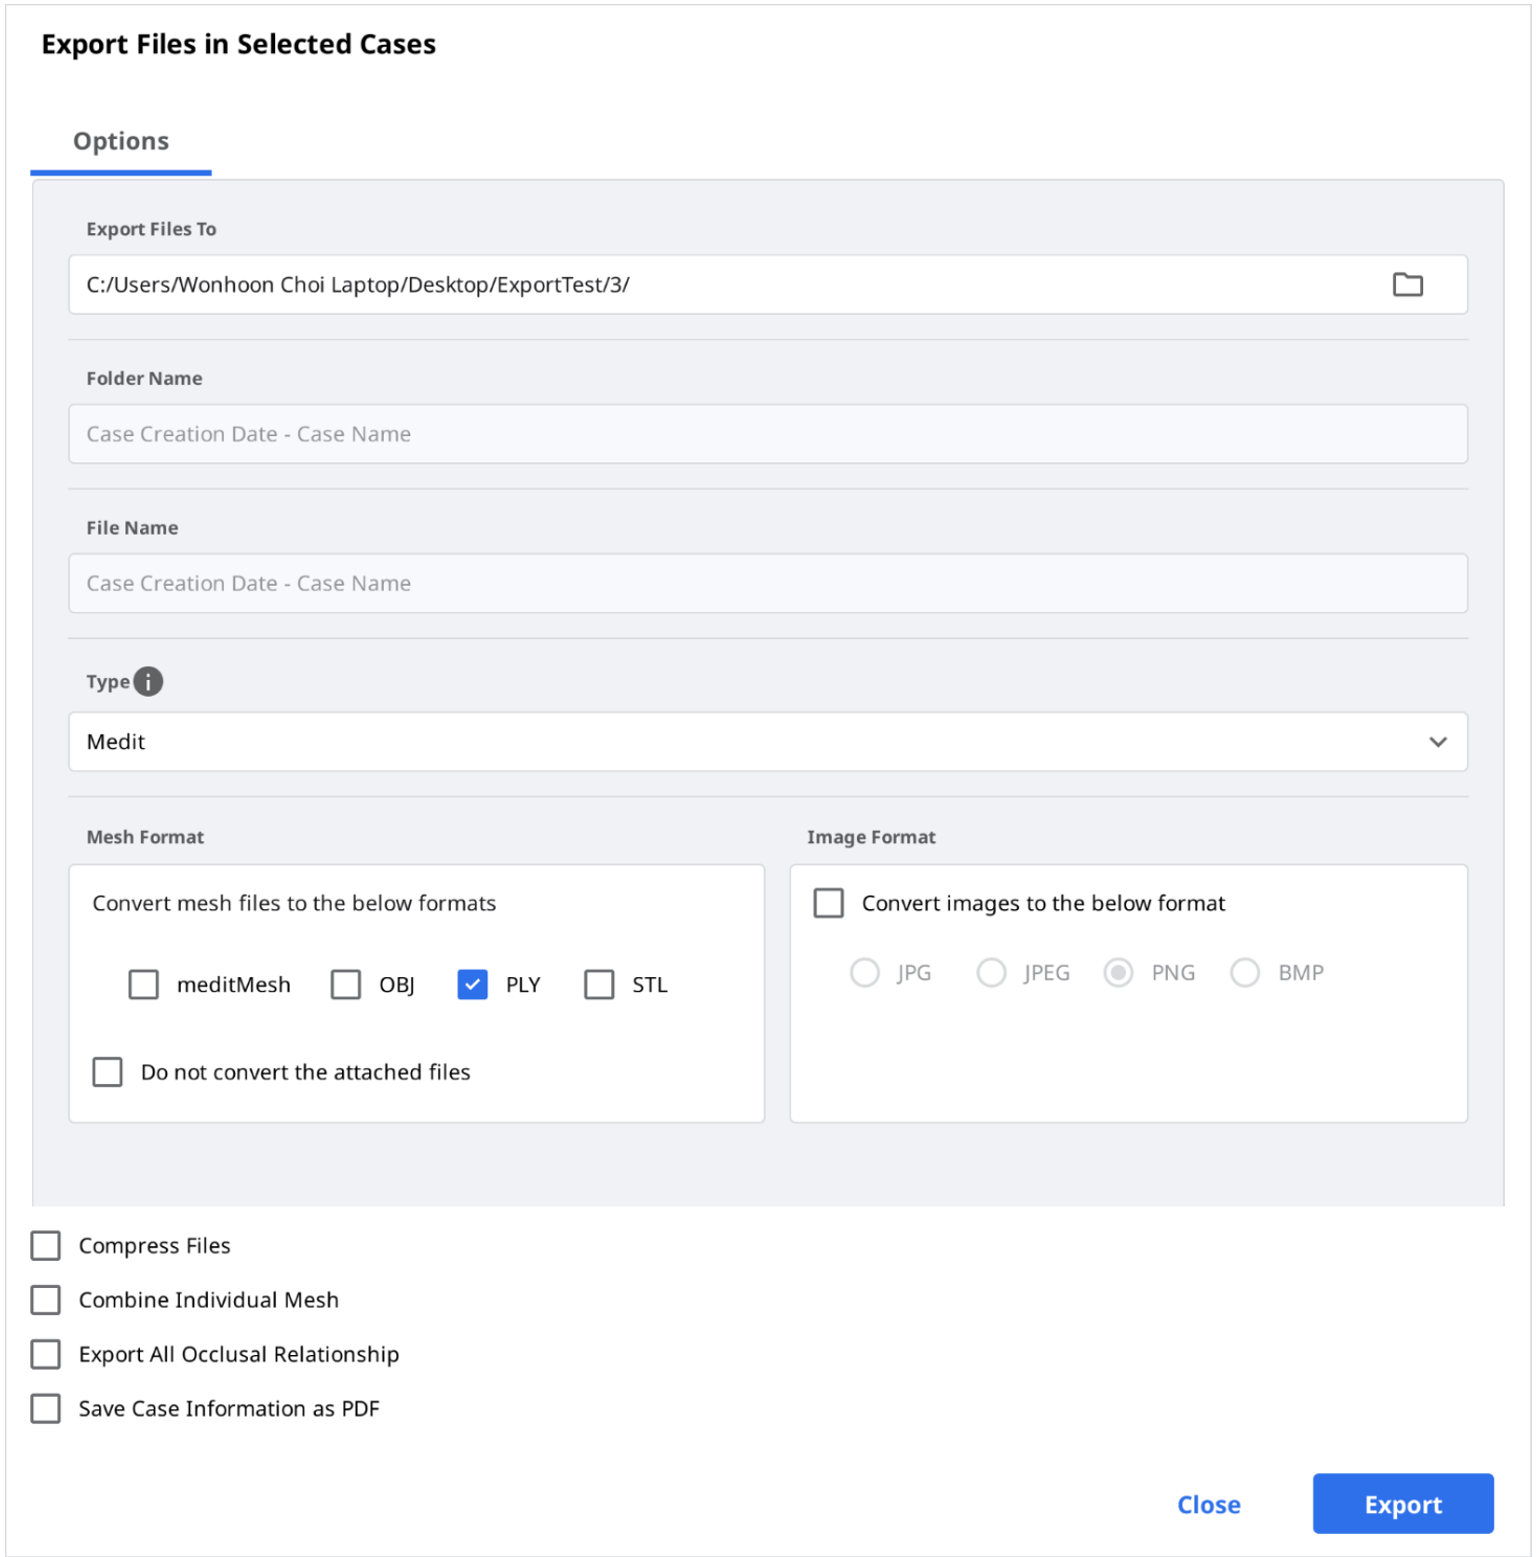
| Export Files To | Specify the path where you want to store the result files. |
| Folder Name | The system creates a new folder and stores all result files in it. The default folder name is set by the naming rule. But you can change the folder name directly. You can define the naming rule on Settings > Export Options > Rules for Folder Name. |
| File Name | Set the file name for the result. The naming rule sets the default file name. But you can change the file name directly. You can define the naming rule through Settings > Export Options > Rules for File Name |
| Type | Choose the design program you want to use. Medit Link will automatically adjust the files according to your selection, enabling you to proceed with the design without the need for additional axis alignment. |
| Mesh Format | Specify the format of the mesh file. |
| Image Format | Specify the format of the exported image files. |
| Compress Files | Compress all results into a single file. |
| Combine Individual Mesh | Combine the result of the maxilla or mandible with the individual tooth. It is useful when importing several files into a program is not possible. |
| Export All Occlusal Relationship | When multiple occlusal results are generated from the scan app, you can export all occlusal results at once. |
| Save Case Information as PDF | Save the case information as a PDF with the result. |
Export Result Files from Case List
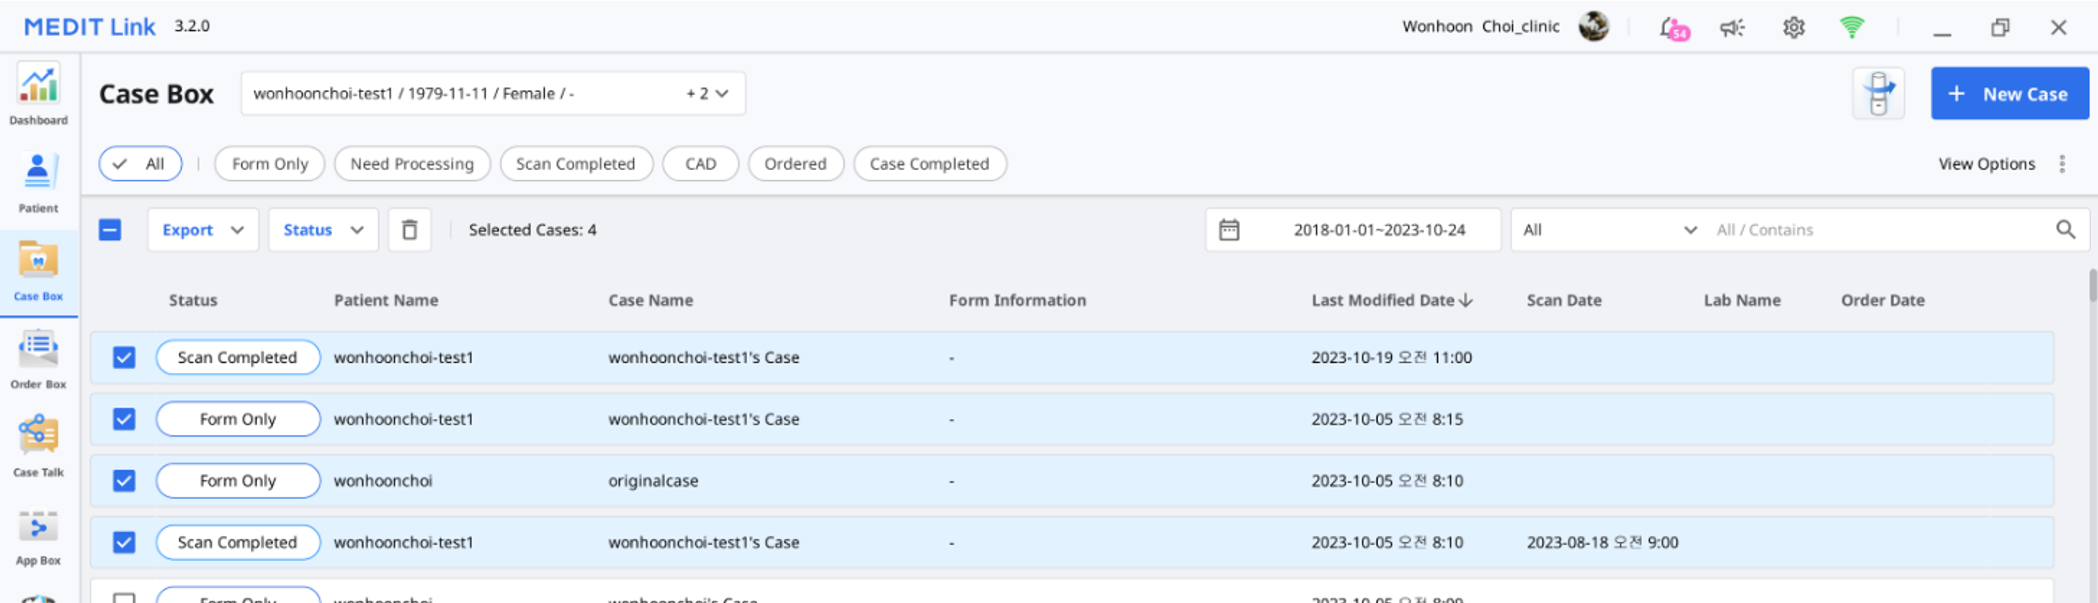
You can export result files of a case or multiple cases simultaneously with the "Export" option above the case list in Case Box and Work Box.

- Go to Case Box or Work Box.
- Select all cases you want to export result files from the list.
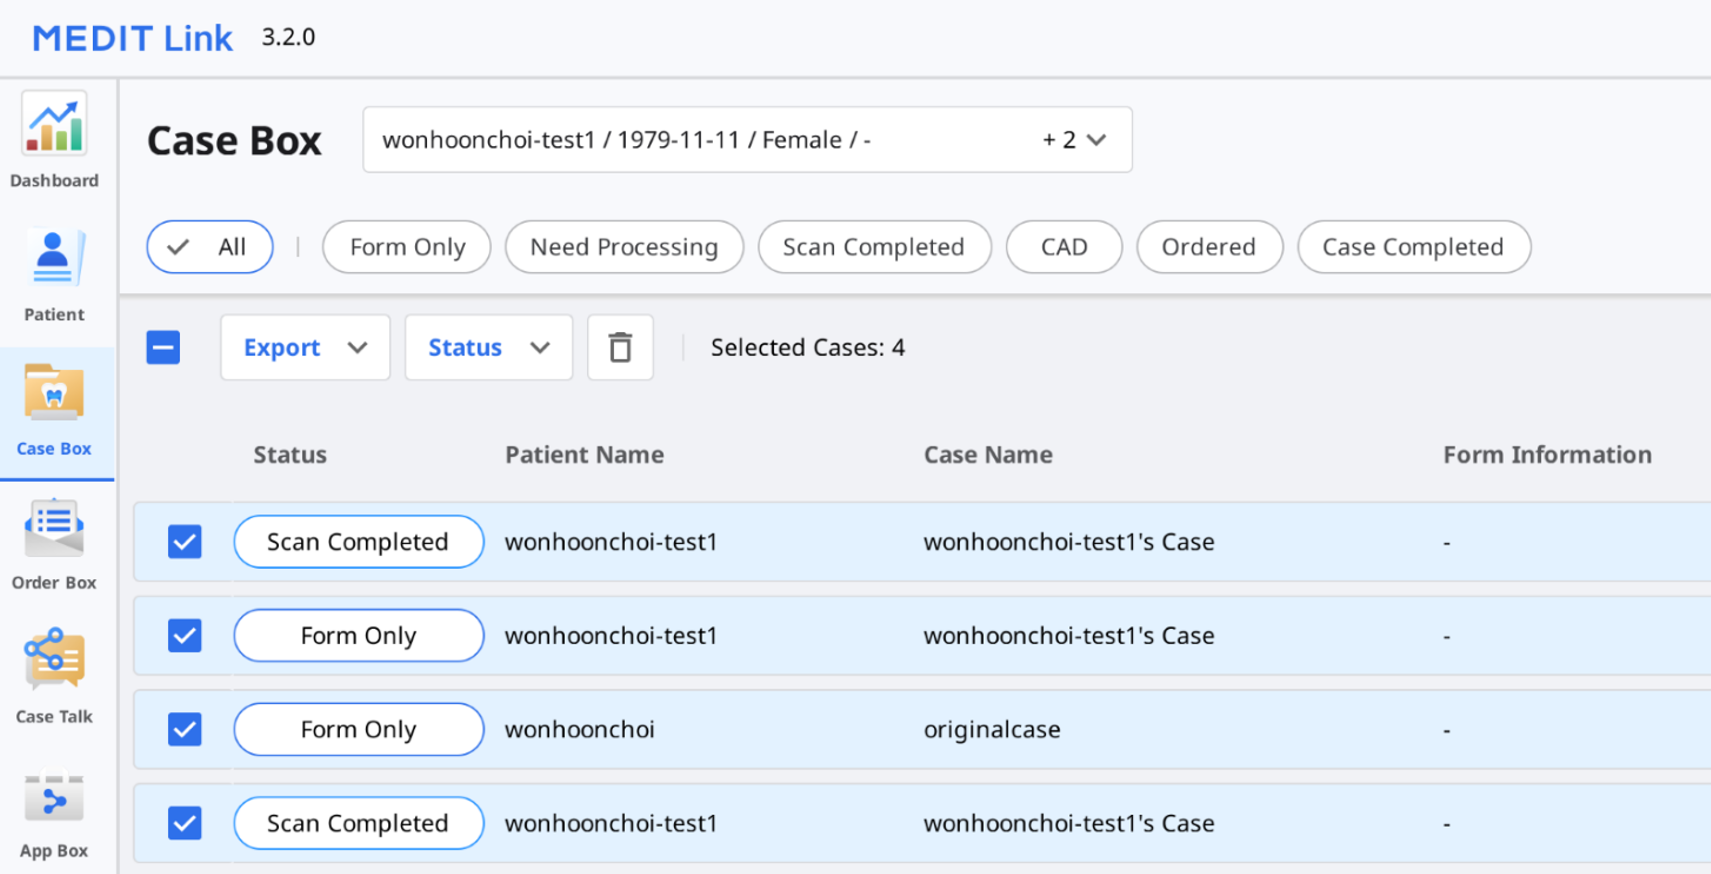
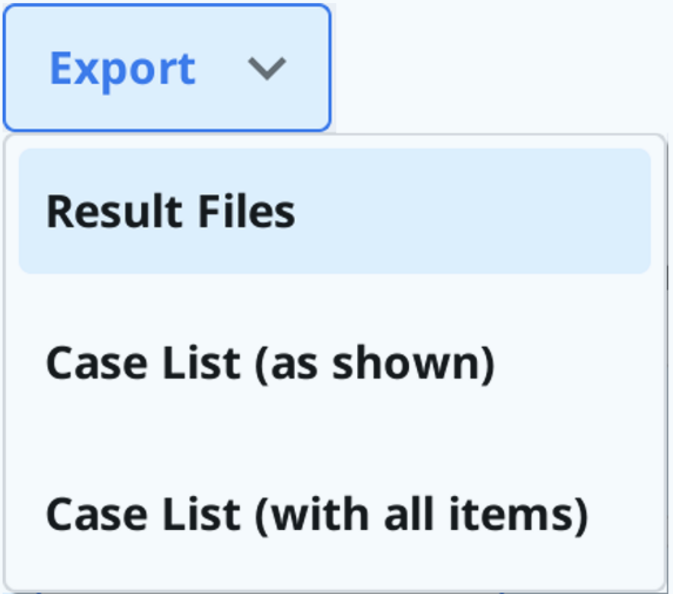
- Click "Export" and select "Result Files."
- Set the destination folder, file type, mesh format, and image format, and select export options on the "Options" tab.
 🔎NoteThe "Folder Name" and "File Name" fields are not editable when exporting files for multiple cases.
The folder name and file name are automatically created according to the rules you set for the "Rule for Folder Name" and "Rule for File Name" options in Settings > Export Options. - Click "Export."
- Click "Yes" to open the folder where the files are saved.


Export Result Files from File Viewer
You can export scan result files for a case with the "Export" icon on the top right corner of the File Viewer tab.
- Go to Case Box or Work Box.
- Click to open a case from the list.
- Click the "Export" icon on the top right corner of the File Viewer tab.

- Set the destination folder, folder name, file name, file type, mesh format, and image format, and select export options on the "Options" tab.
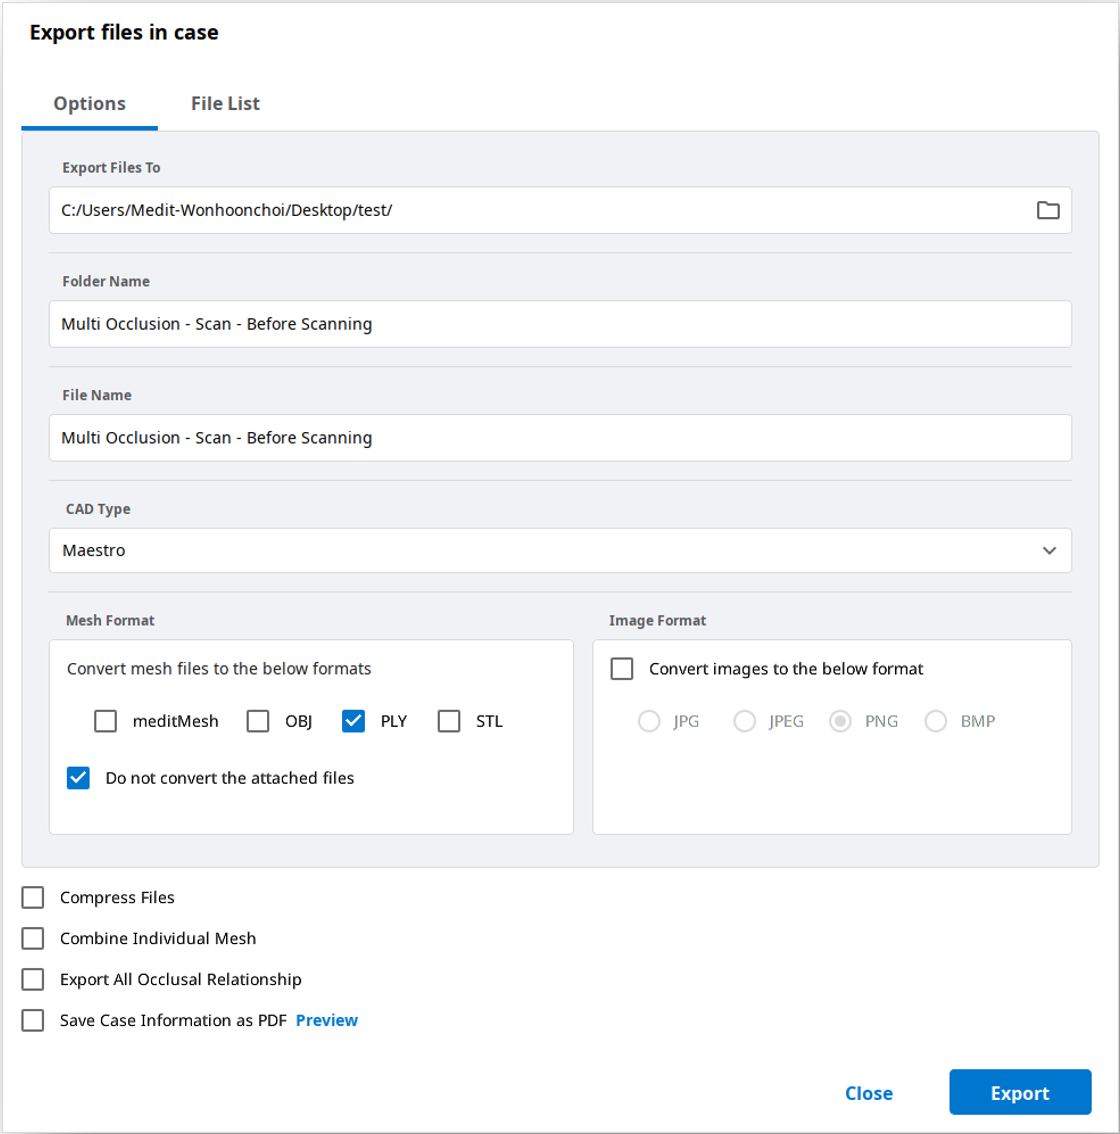
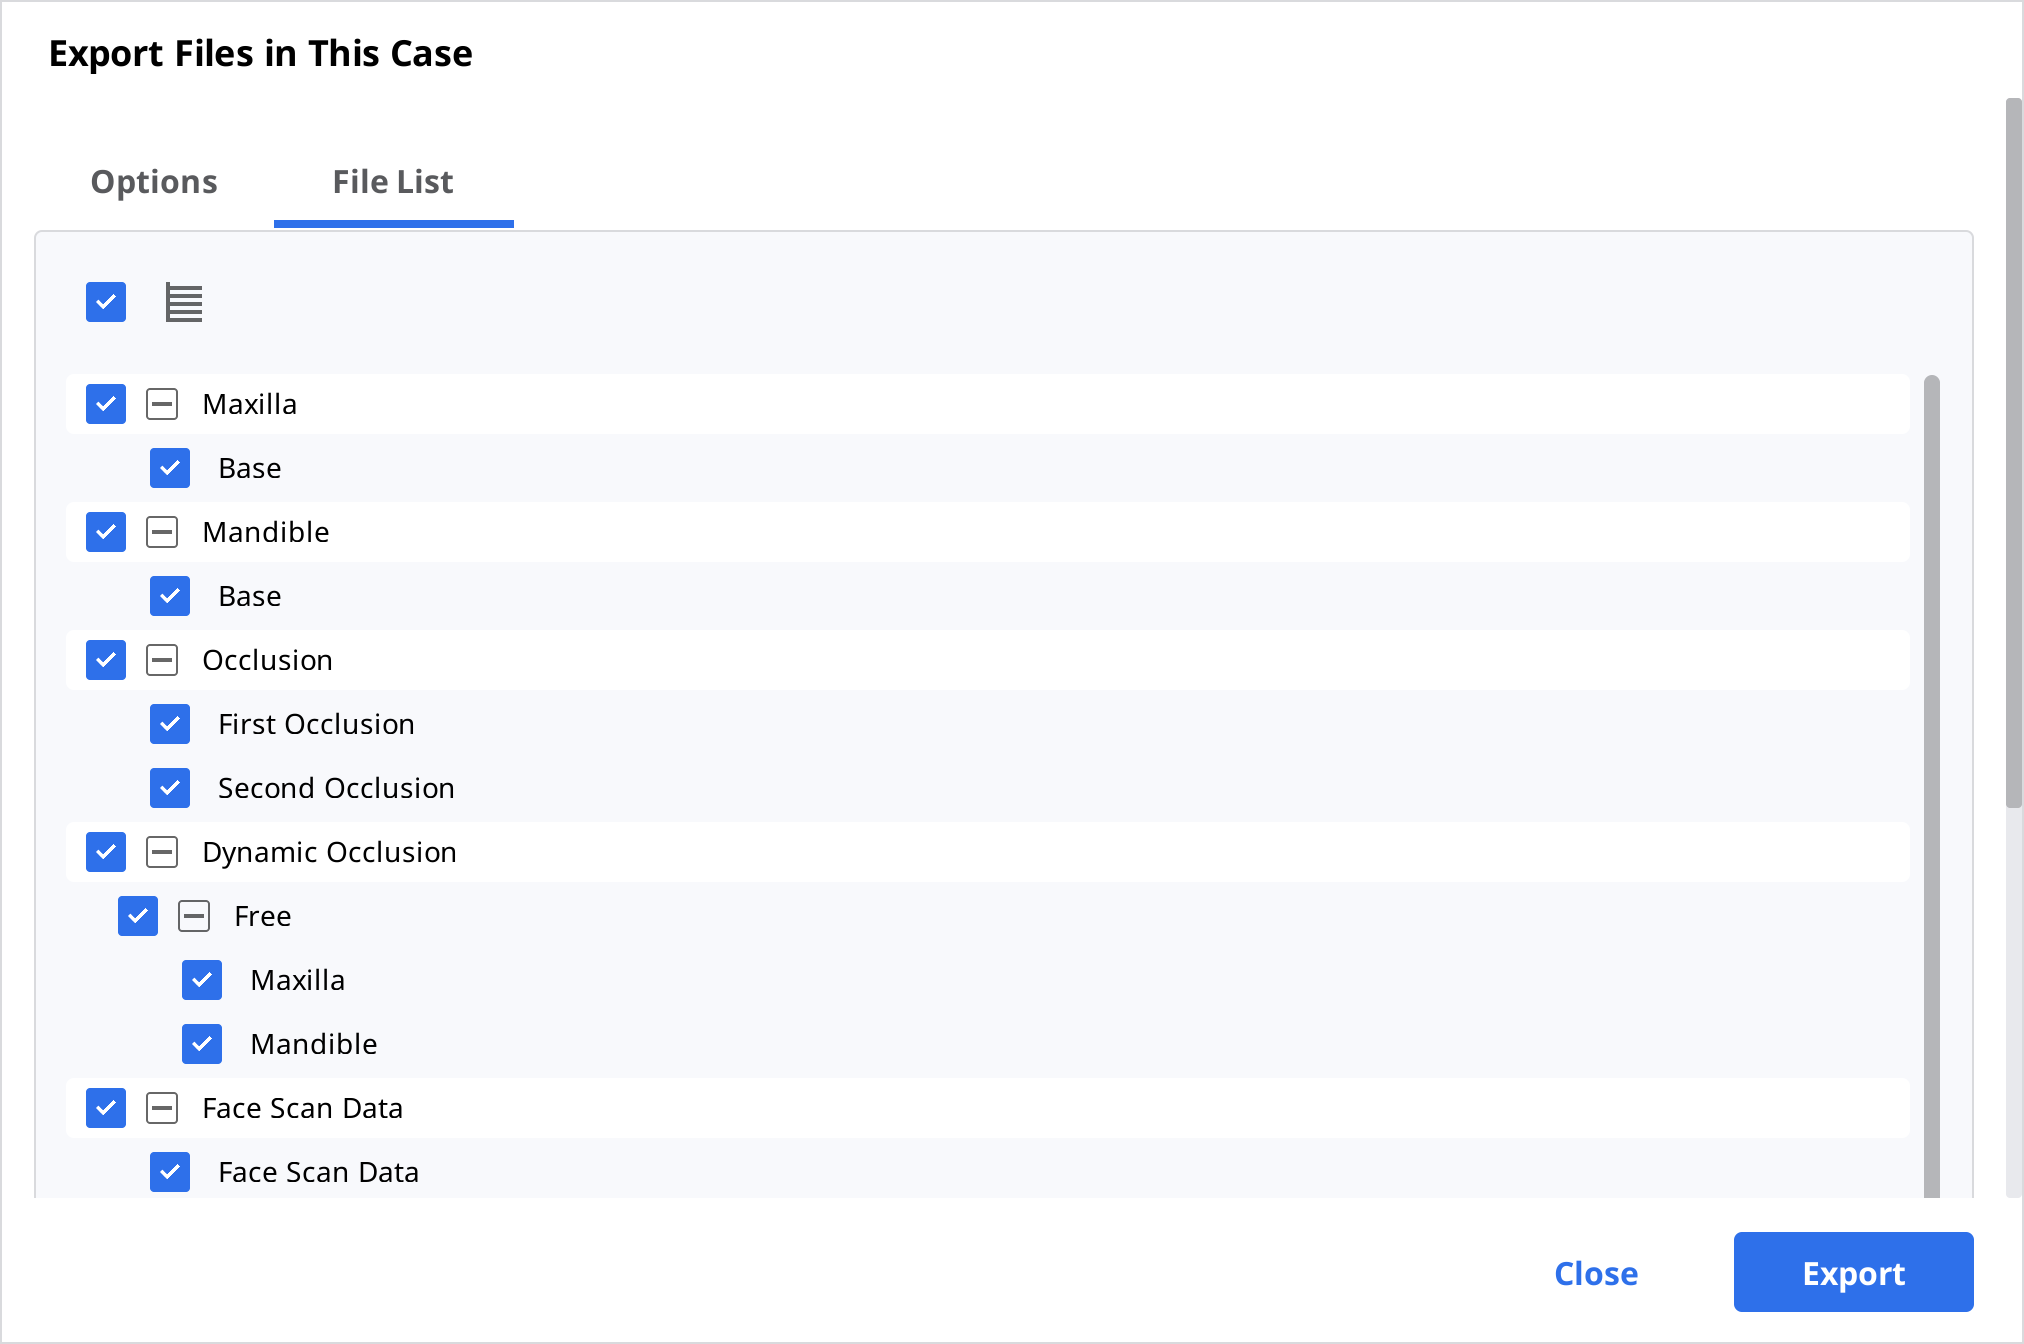
- In the "File List" tab, you can select the required files for the case by deselecting unnecessary ones.
- Click "Export."
- Click "Yes" to open the folder where the files are saved.


Export Result Files from Data Tree
You can export a file or files in a specific data group from the expanded menu in the file viewer.

- Go to Case Box or Work Box.
- Click to open a case from the list.
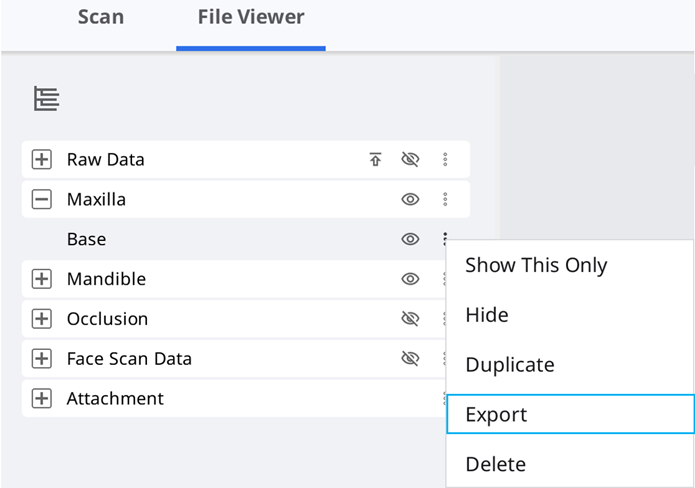
- Click the three dots icon next to the data group or an entity in the data tree in the File Viewer tab.

- Then click "Export."
- Set the destination folder, folder name, file name, file type, mesh format, and image format, and select export options on the "Options" tab.
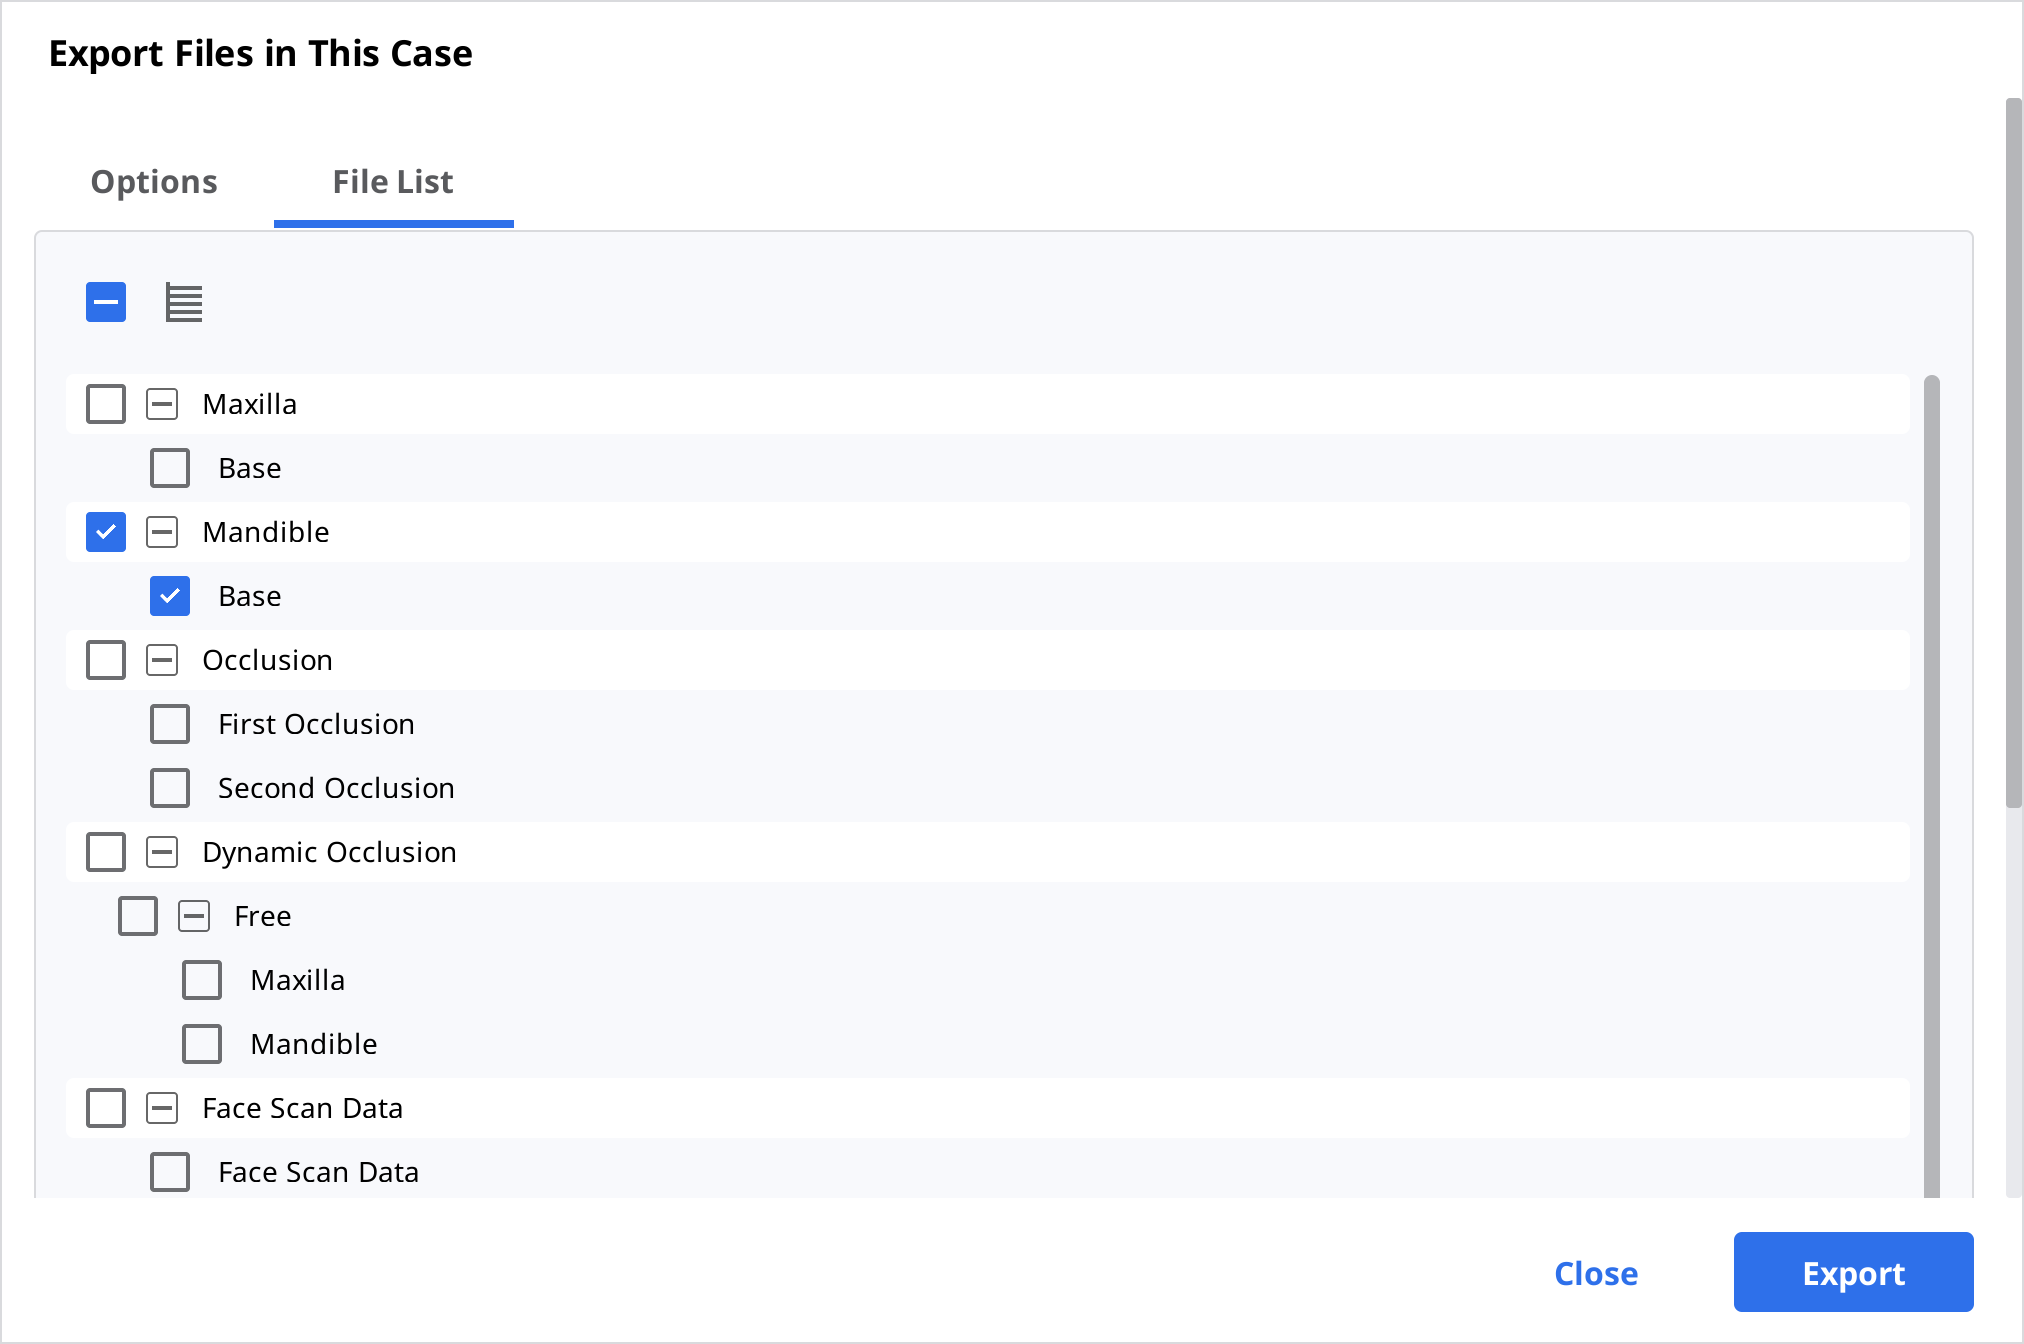
- You can see only the files you chose in the data tree are selected in the File List.
- Click "Export."
- Click "Yes" to open the folder where the files are saved.


Export Case List as CSV
Medit Link provides the function to export the case list in CSV format.
You can export the case list with basic information and manage cases easily.
- Go to Case Box, Order Box, In Box, or Work Box.
- Select the cases that you want to export.
- Click "Export" and select "Case List (as shown)" or "Case List (with all items)."
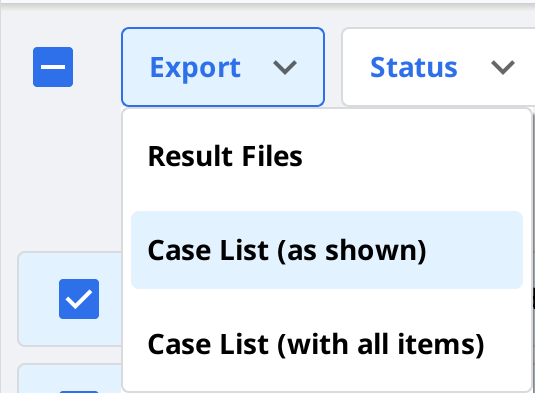 🔎NoteCase List (as shown): Export the case list with the currently displayed items on the screen. Go to View Options > Table Items to show or hide the items as you desire.
Case List (with all items): Export the case list with all items, including Status, Case Name, Date of Birth, Form Information, Last Modified date, Scanned Date, Order Date, and Lab Name. - Define the path and file name, then save the list.
- The case list is saved as a CSV file.


Export Margin Line
Medit Scan for Clinics provides a function to create the margin line, and Medit Link can transfer the margin line to the CAD program.
Export Margin Line as a Color
In general, Medit Link converts the margin line as color and exports the result with maxilla or mandible together. You can create the margin line in their cad referencing the color information.
Example:
| Maxilla |
|---|
 Result with the margin lines as color information Result with the margin lines as color information |
🔎Note
This feature is available for formats that include color information, such as meditMesh, OBJ, and PLY. The margin line does not convert into STL.
🔎Note
Type > 3Shape does not support this feature.
Export Margin Line as a File
In the case of Exocad, Medit Link export the margin line to "~margin.xyz" which can be imported into exocad directly.
You can use this file in exocad without additional work.
Example:
| Maxilla | Margin Line |
|---|---|
 Result with the margin lines as color information Result with the margin lines as color information |  Margin line exported as individual files Margin line exported as individual files |
Download Files from Medit Link Web
Medit Link provides a download function.
If you want to get the result files without installing the Medit Link application, you can download the files from the Medit Link web service.
🔎Note
The data should be uploaded on the Medit Cloud to download the files from the web.
The download function is available in the following menu of the Medit Link web service.
- Case Box
- Work Box
- Web Viewer
Case Box/Work Box
You can find the "Download" button at the top right.
Web Viewer
When you share the case using Case Talk, you can set whether to allow downloading or not.
If you check “Grant Download Permission” and share the case, all users who connect to the shared link can download the files.
In the Web Viewer, you can find the "Download" icon at the top right.
- Click "Download."

- Select the mesh format from the download dialog.
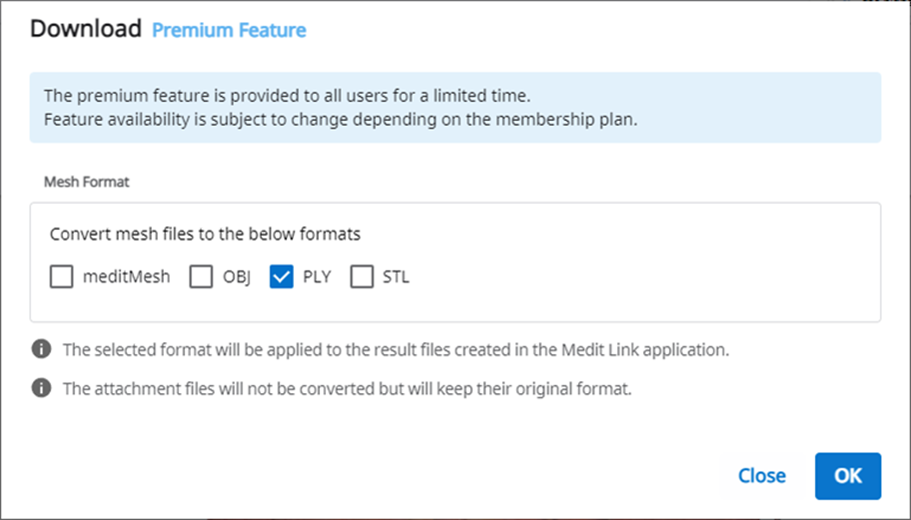
- Then click "OK."


Was this article helpful?
