Input Data
Upon launching the application, the user must import the following data via the "Assign Data" dialog:
3D intraoral scan data (STL, OBJ, PLY, meditMesh)
2D facial and intraoral photos (BMP, JPG, JPEG, PNG)
cephalometric and panoramic X-ray (BMP, JPG, JPEG, PNG)
Output Data
Upon completing work in the application, the user gets treatment simulation results that can be saved in STL, OBJ, PLY, meditMesh formats.
Preparing Case Data
Users must have the following data to utilize the program: maxilla scan, mandible scan, and cephalometric X-ray. The app can also be used without the cephalometric X-ray, but only if the simulations are generated as a visual aid for patient consultation, not for making treatment decisions. For reference purposes, users can also include other patient records, such as panoramic X-rays, facial photos, and intraoral photos.
Warning
Make sure to check the system requirements and install CUDA to be able to use the cephalometric X-ray and the related features.
Caution
Note that without ceph data, the following limitations will apply:
Wits are automatically set to a range of -3 to +3.
The patient's growth is not factored in.
The Ceph Overlay feature is not available, so you can not visualize the final teeth position over the bone structure.
All available data must be collected in the same Medit Link case to be automatically imported into the program upon opening. Follow these steps to prepare your case for work:
Scan the maxilla and mandible in Medit Scan software.
Import other records (X-rays and orthodontic photos) from local files into the Medit Link case. Use the “Attach” feature in the Case Detail window.
.png)
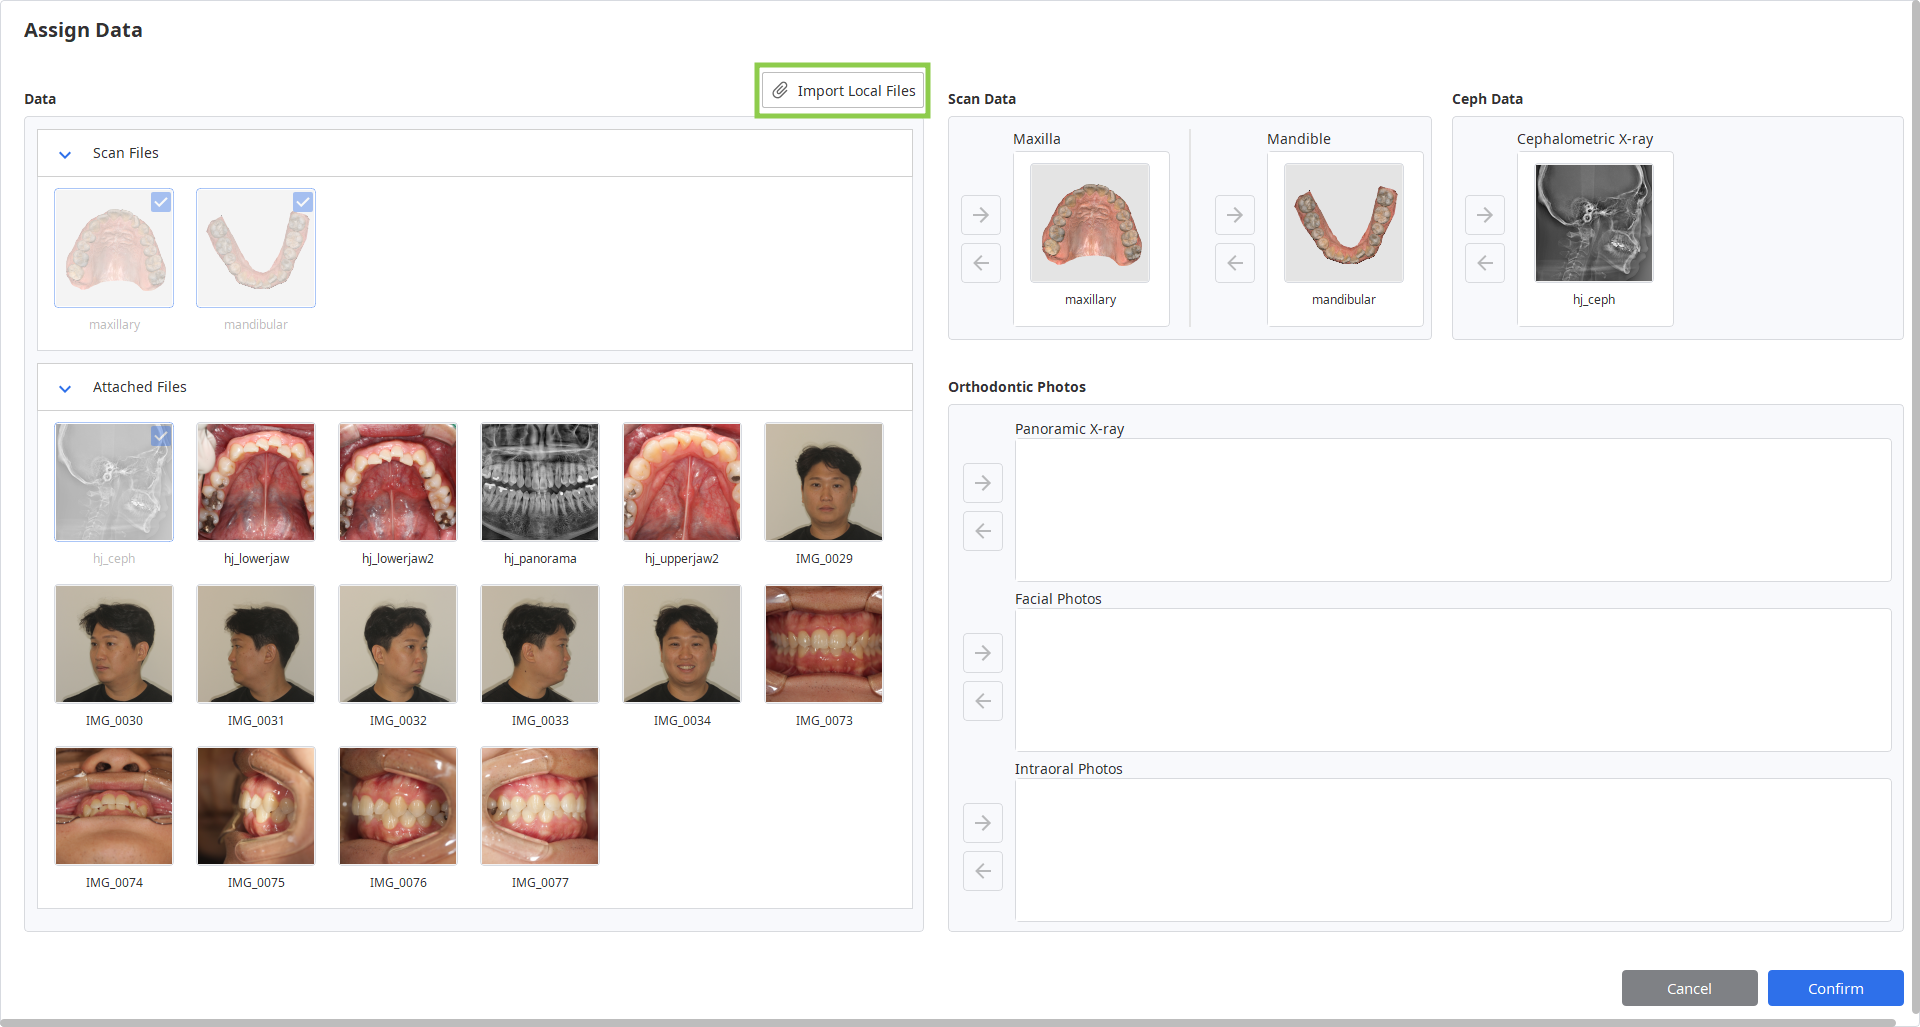
Run the app and assign the data you will be using for this project. Locally stored data can also be imported at this step via the “Import Local Files” feature.
3D Data Control
You can control the 3D data using a mouse alone or both mouse and keyboard.
3D data control using a mouse
Zoom | Scroll the mouse wheel. |
|
Zoom Focus | Double-click on the data. |
|
Zoom Fit | Double-click on the background. |
|
Rotate | Right-click and drag. |
|
Pan | Hold both buttons (or wheel) and drag. |
|


3D data control using mouse and keyboard
Windows | macOS | |
|---|---|---|
Zoom |
|
|
Rotate |
|
|
Pan |
|
|
.png)
.png)
.png)
.png)
.png)
.png)
Saving Case
There are two ways to save your case project: Complete and Save As.
Complete
The “Complete” button is provided in the bottom right corner of the final workflow step. Click it to save your finished project to the current case in Medit Link and close the program.
Save As
This option allows you to save the unfinished project at any moment without losing your progress. Use it when you want to pause working on the case and resume later. To use it, go to the Menu in the Title Bar and choose “Save As.” The next time you run the program from the same case, you will be asked if you want to continue with the saved project.
🔎Note
You can still save your work even if you click “Exit.“
.png)